I like to mark stitching lines on a lot of the projects I make, particularly garments. You really can’t beat the accuracy of a stitching line, but you do need to pin and stitch carefully to insure your projects fit together well. It’s not too difficult, and it will become even easier with some practice.
Locate the pieces you are going to sew and place them right sides (pretty sides) together. Where your stitching lines join another stitching line (we’ll call this a corner even though sometimes the exact look can vary) place a straight pin straight through the stitching line on the top piece and bottom piece. Look at the bottom piece of fabric. Is the pin going directly through the corner of that piece as well? It most likely is a bit off, so you will want to pull the bottom fabric off the pin and reposition it to have the pin come precisely through the corner. Push the pin straight through the fabric and all the way down. At this point don’t try to push the pin back through the top. Repeat this process at the other end of the seam and anyplace you have notches to match up.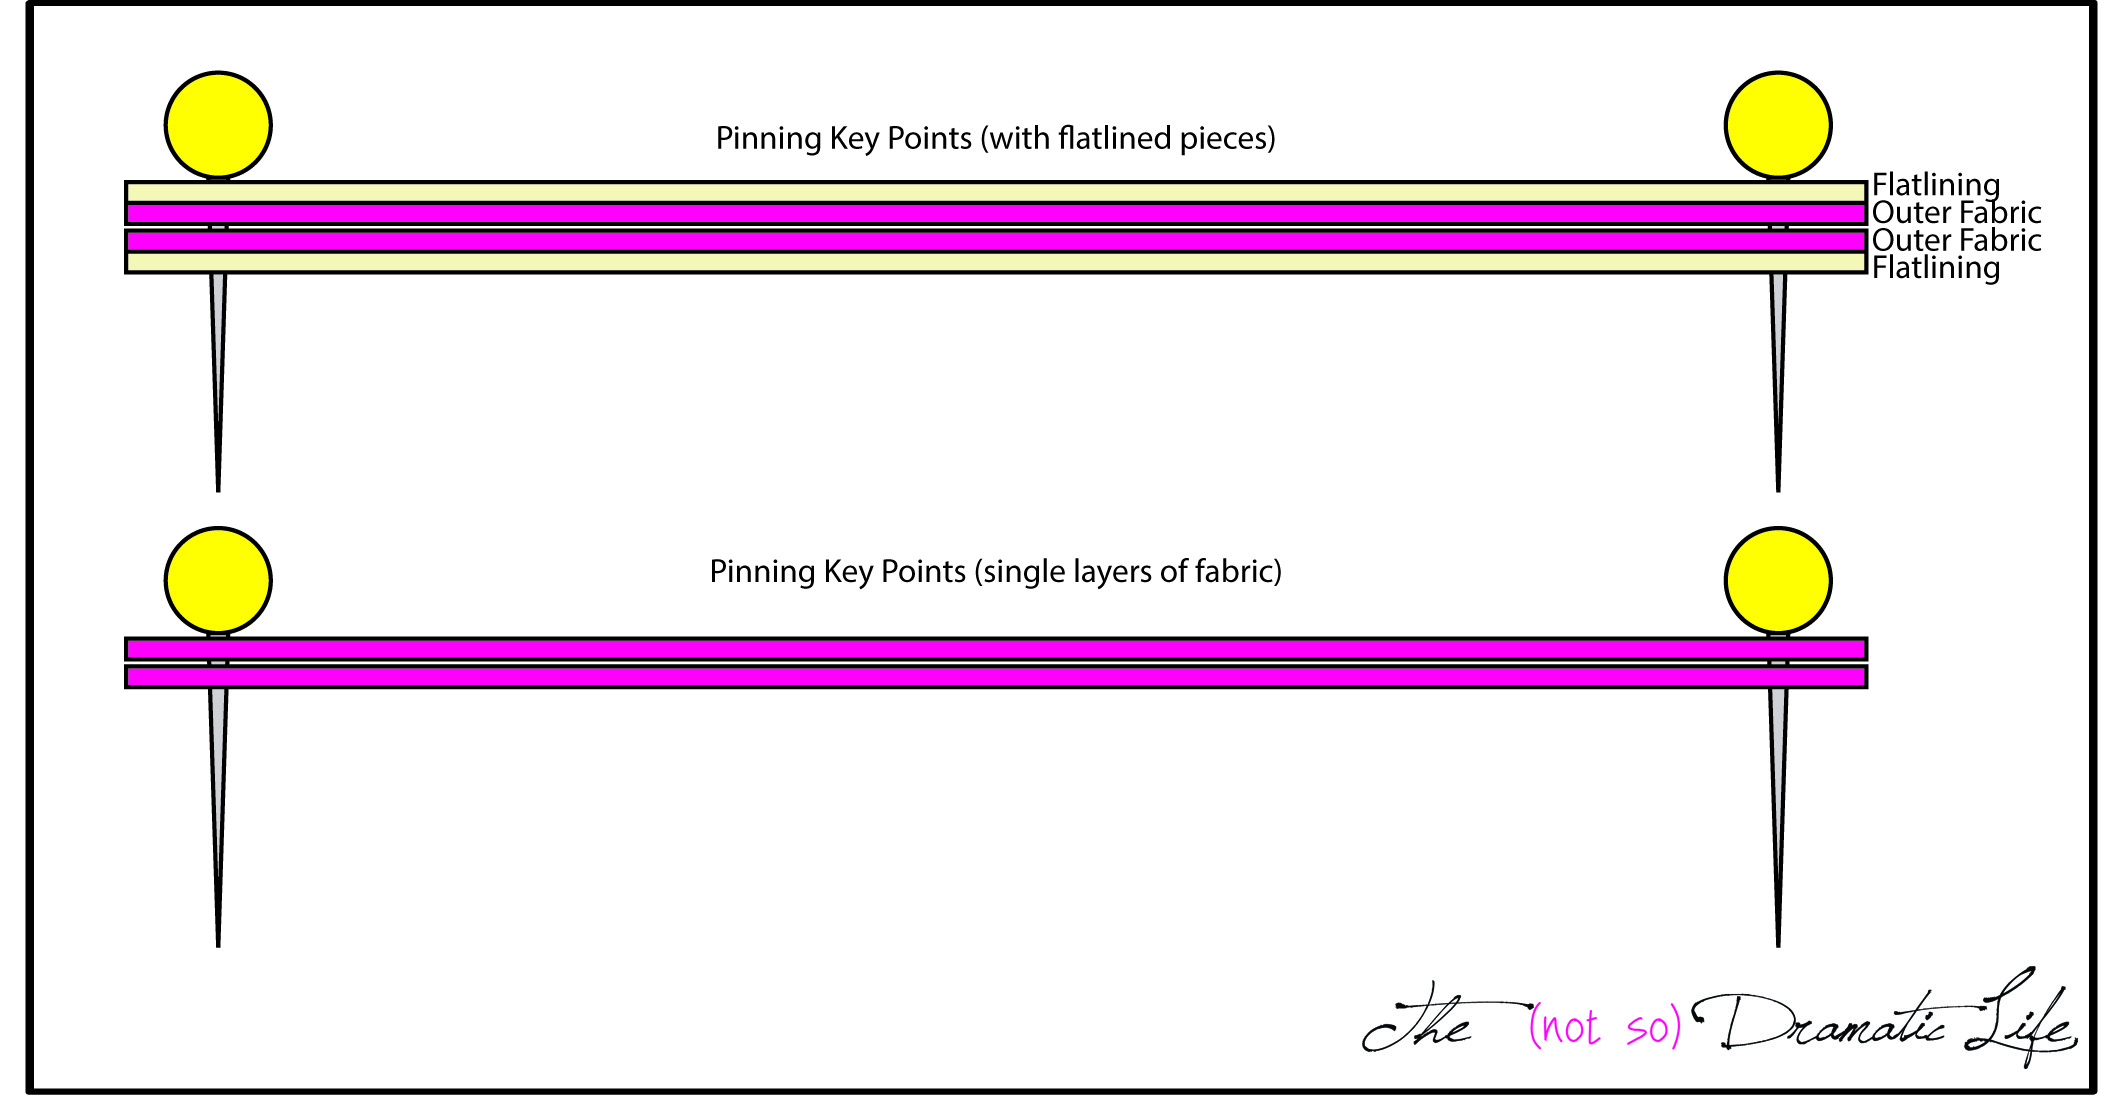
Now that we have the key points of the seam matched up, we are going to secure the pinning line. Starting about halfway between the pins you have placed, put a straight pin in the line, making sure it runs through both the top and bottom pieces of fabric. Bring the tip of the pin back up through the layers of fabric, making sure it moves through the line on both pieces. Continue the pinning process by placing pins about halfway between the already placed pins until the entire seam is pinned. Pinning at halfway points helps keep both layers of the fabric equally distributed. If you start at one end and move toward the other, you greatly increase the likelihood of having a “bubble” appear in one of the layers. (Please note: When you are sewing the seam you will want the tip of the pin to be toward the machine and the head of the pin toward you. This makes it easy to pull pins as you sew.) When this is done, go back to those pins that marked the key points of the seam. Push the end of those pins up through the fabric so the pin is perpendicular to the edge of the fabric.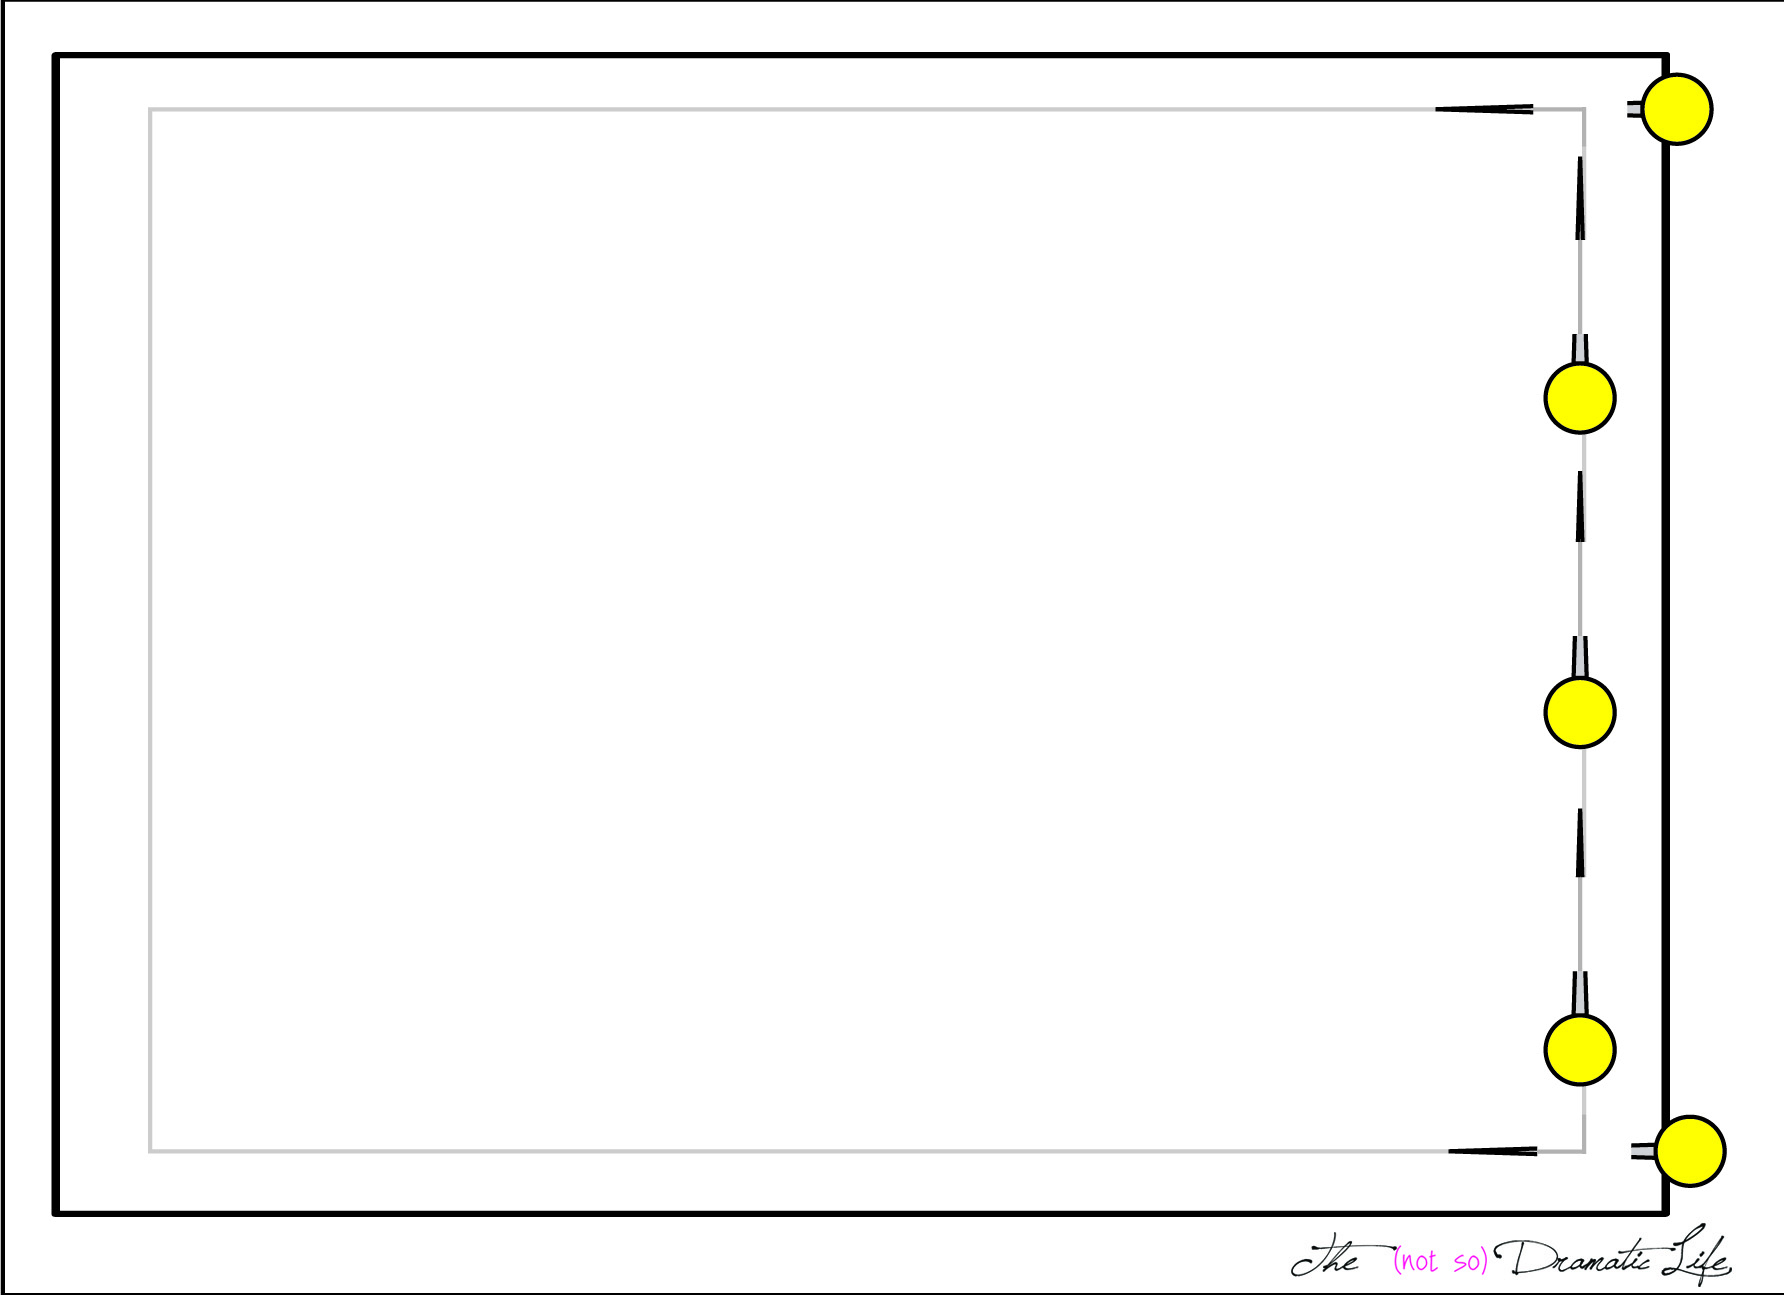
You are ready to sew! NEVER SEW OVER A PIN! (Full disclosure: My mom proofread this page and told me I had to include this statement and put it in all caps. Making it bold was all me!) So please remember to remove pins as they approach the needle. It’s all fun and games until you break a needle!
Straight stitch starting at the edge of the fabric (not the start of the line). When you arrive at the first “corner,” pull the pin and take 3-4 backstitches to lock your seam in place. Continue forward, pulling pins as you approach them. The easiest way to do this is to wait for the pin to approach the presser foot, and then grab hold of the head of the pin. Hold your hand still and as the machine moves the fabric forward, the pin will pull out naturally. This technique allows you to keep the layers pinned as long as possible, without the risk of the machine running over a pin. Taking pins out too soon can cause the fabrics to shift so the lines no longer match up. When you reach the end of the seam backstitch at the corner before stitching to the edge of the fabric.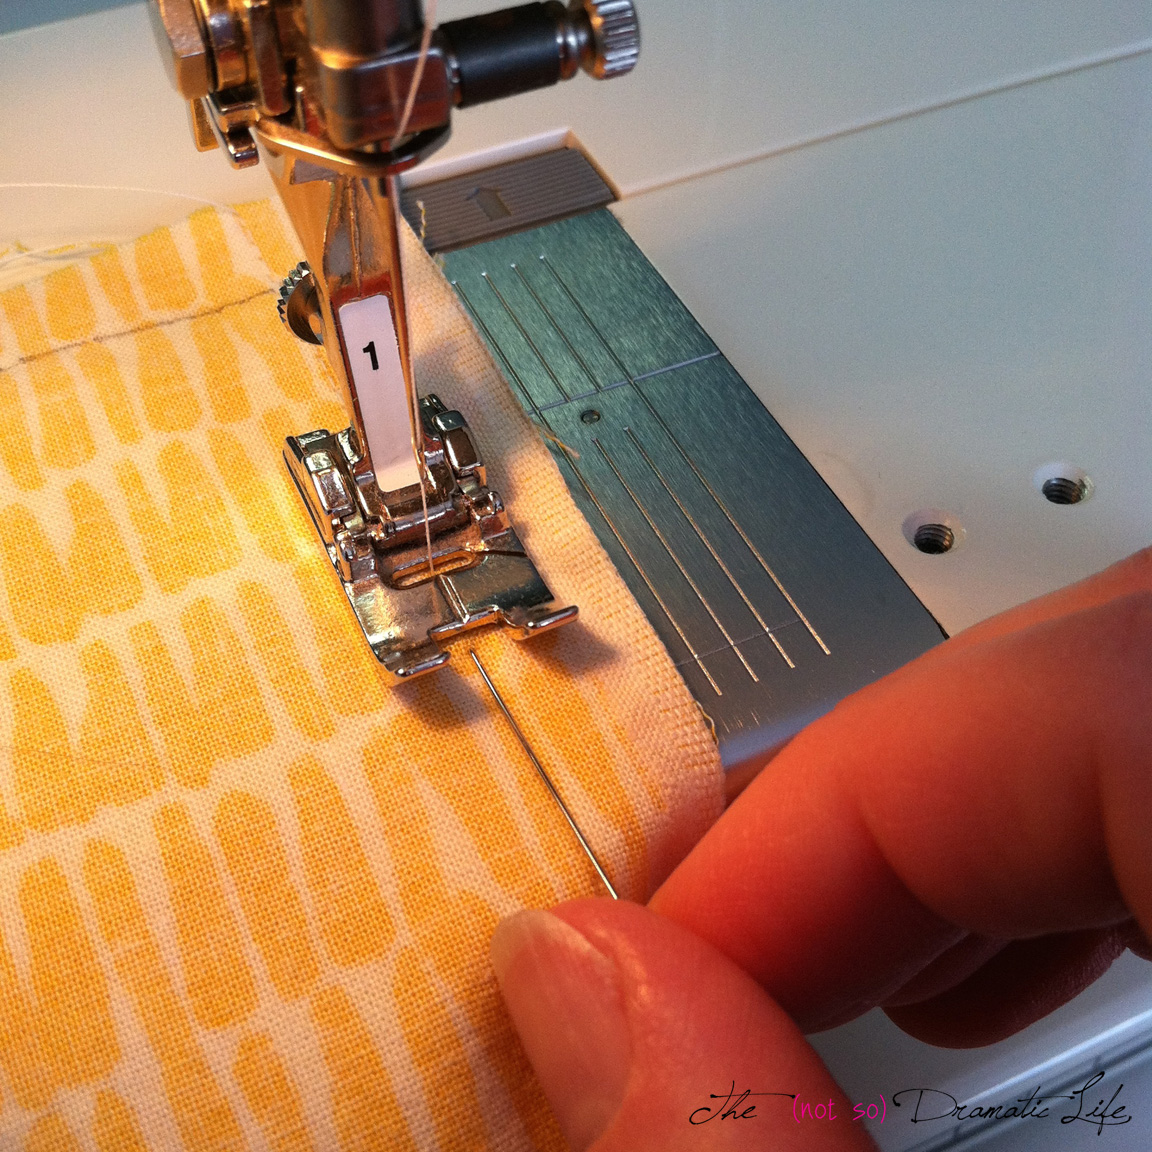
Here is the moment of truth! Check the bottom layer of fabric. Is your stitching on the line on both sides? If so, do your happy dance! If it is off in spots, you may need to take out part of the line to redo. In making that determination, think about the overall project. If you are sewing a seam of a very full gathered skirt, being a tiny bit off the line is probably not a big deal. If you are constructing a fitted bodice with a dozen seams fitting it to the body, stitching even slightly off the line can cause significant fitting issues. The more you sew, the better idea you will have as to when you can fudge things a bit.
1 Comment
Tote Bag Tutorial Part 4: Assembling the Bag | The (not so) Dramatic Life
February 11, 2015 at 10:01 pm[…] Pinning (and Stitching) on a line […]