What is your favorite way to finish the edges of your quilt?
Bias binding is my favorite method for most designs. It hugs the edges of the quilt, allowing you to easily finish both straight and curved edges. When binding a quilt with a single fabric, you can create your binding in a continuous strip, which reduces the number of individual seams and streamlines the process.
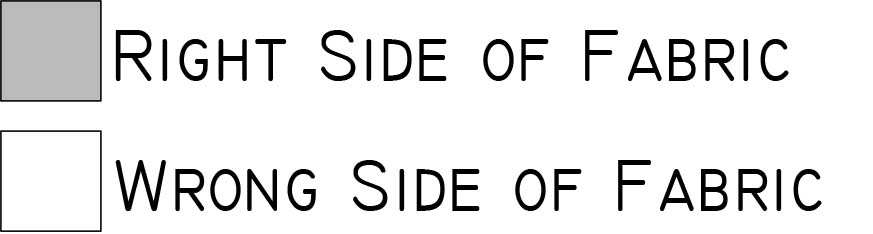
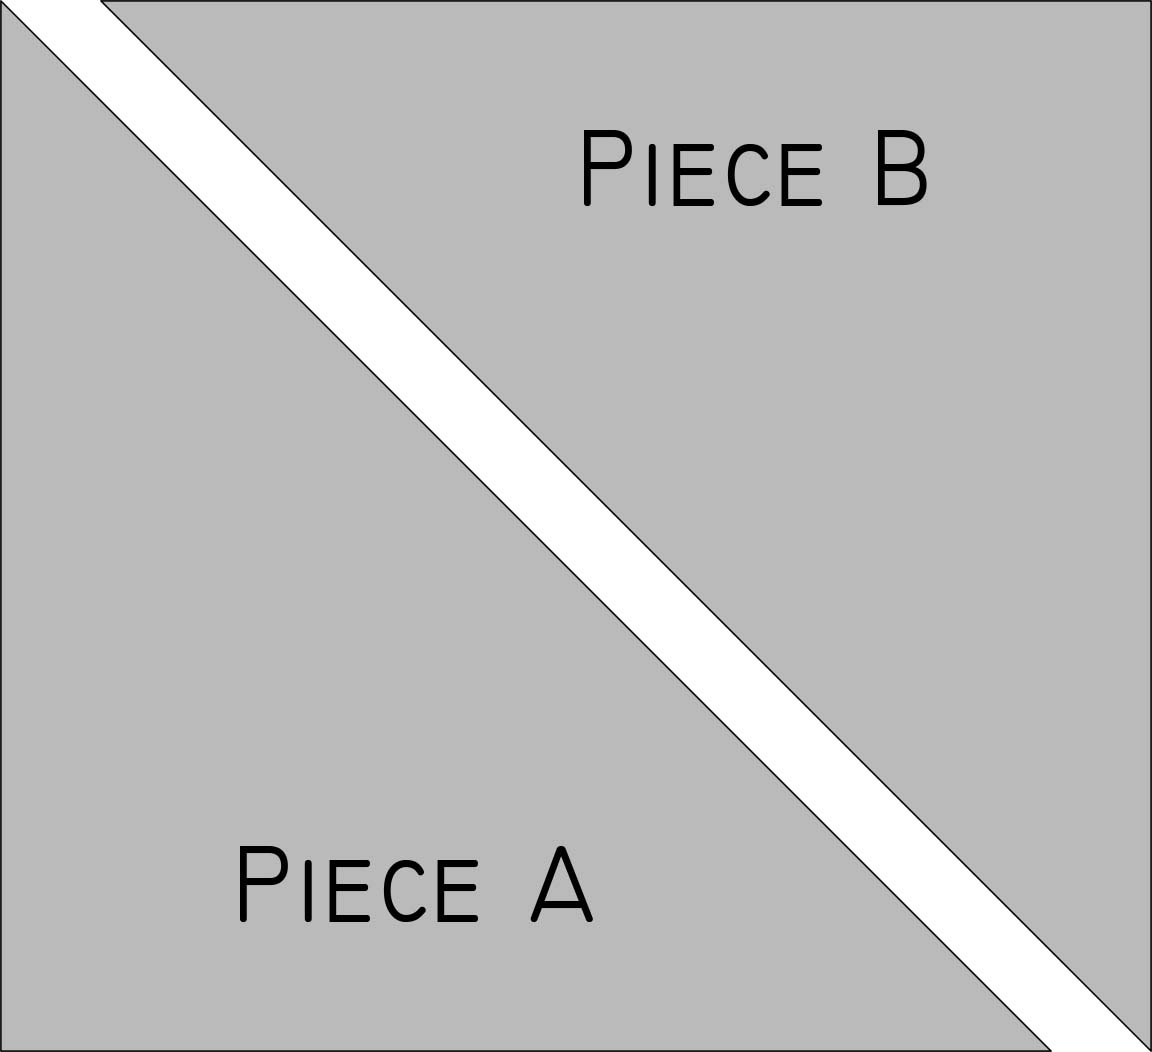
For this tutorial, the front, or right side, of the fabric is shown in grey. The back, or wrong side, of the fabric is shown in white. (Figure 1)
What is the Bias of the Fabric?
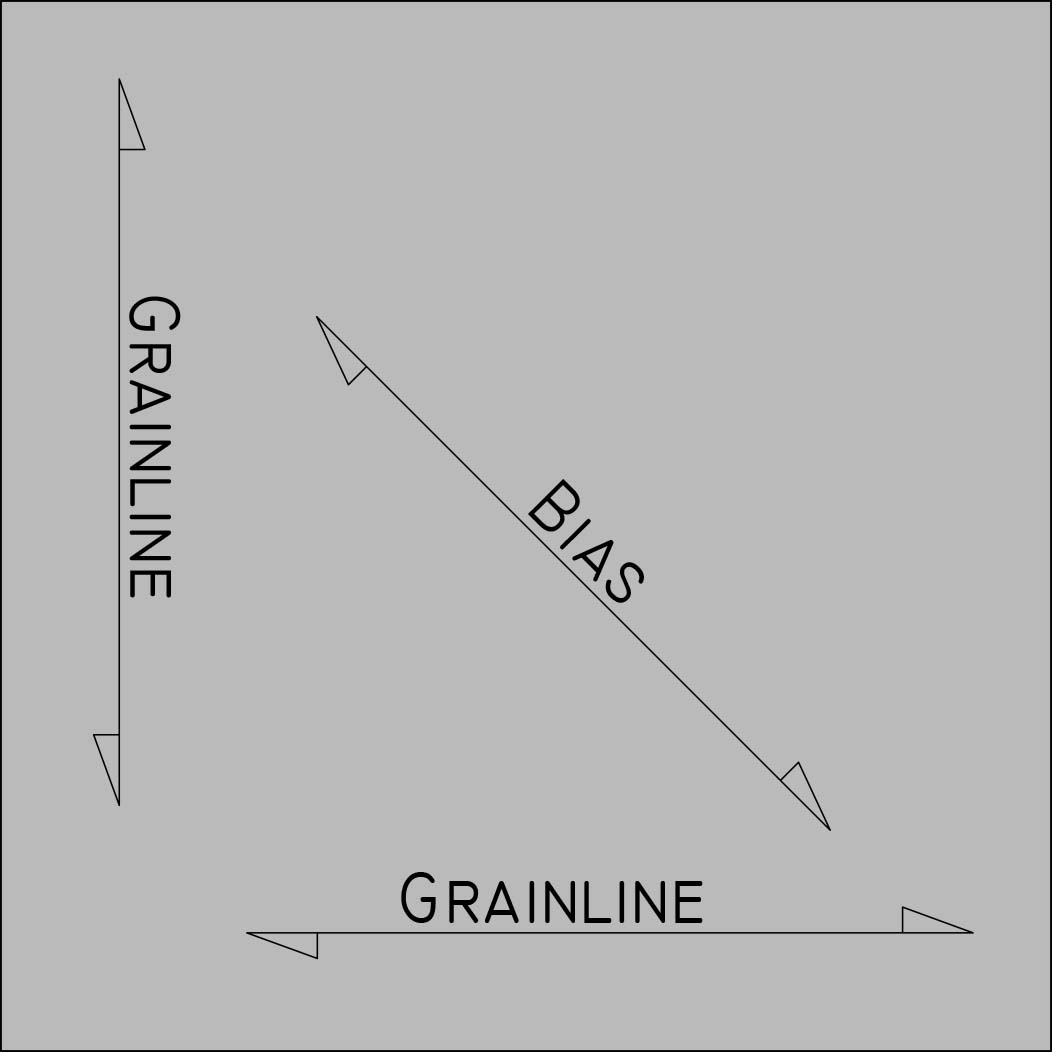
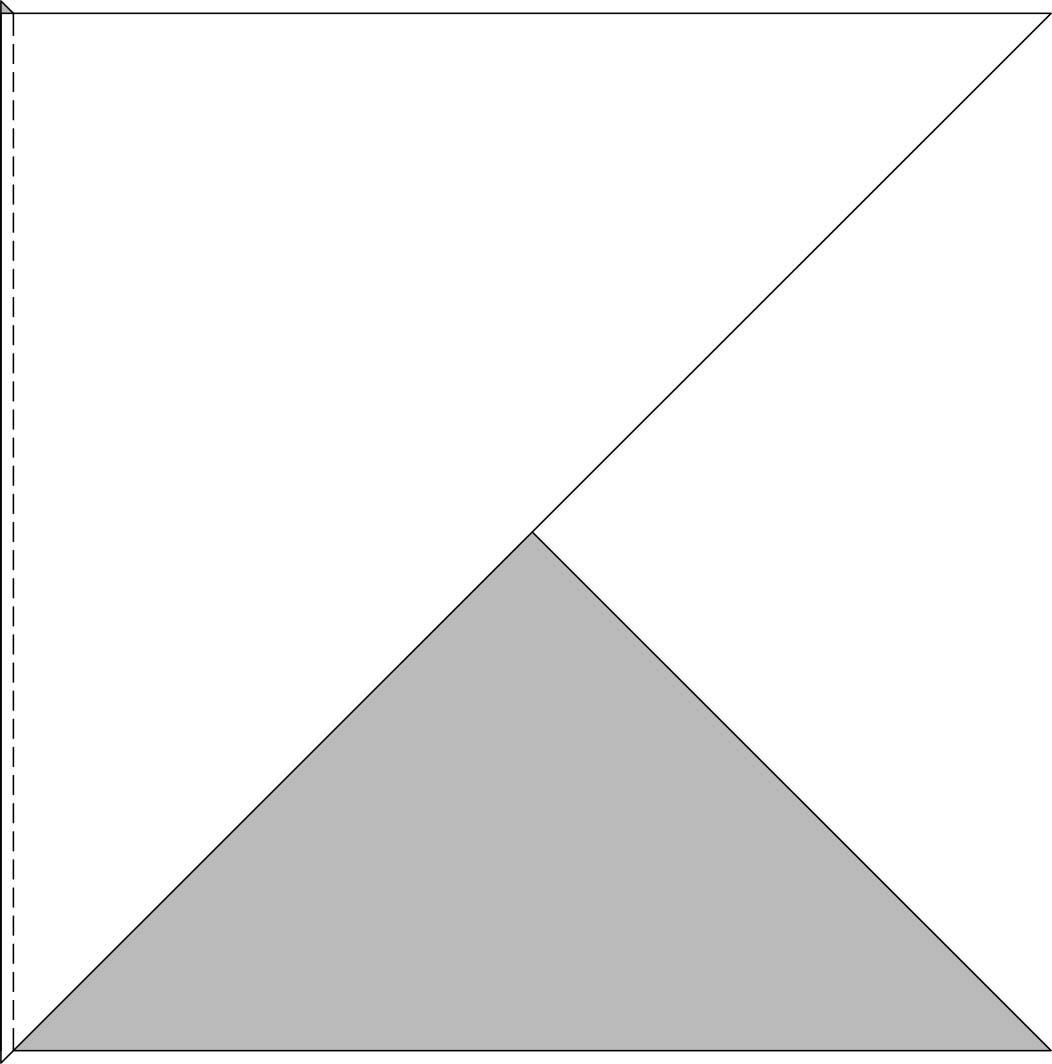
The grainline for your fabric runs parallel to the selvage (straight grain) and perpendicular to the selvage (cross grain). The true bias of the fabric is at a 45-degree angle to the straight grain. This method of making bias starts with a square cut on the straight of grain. (Figure 2)
How Much Fabric do I Need?
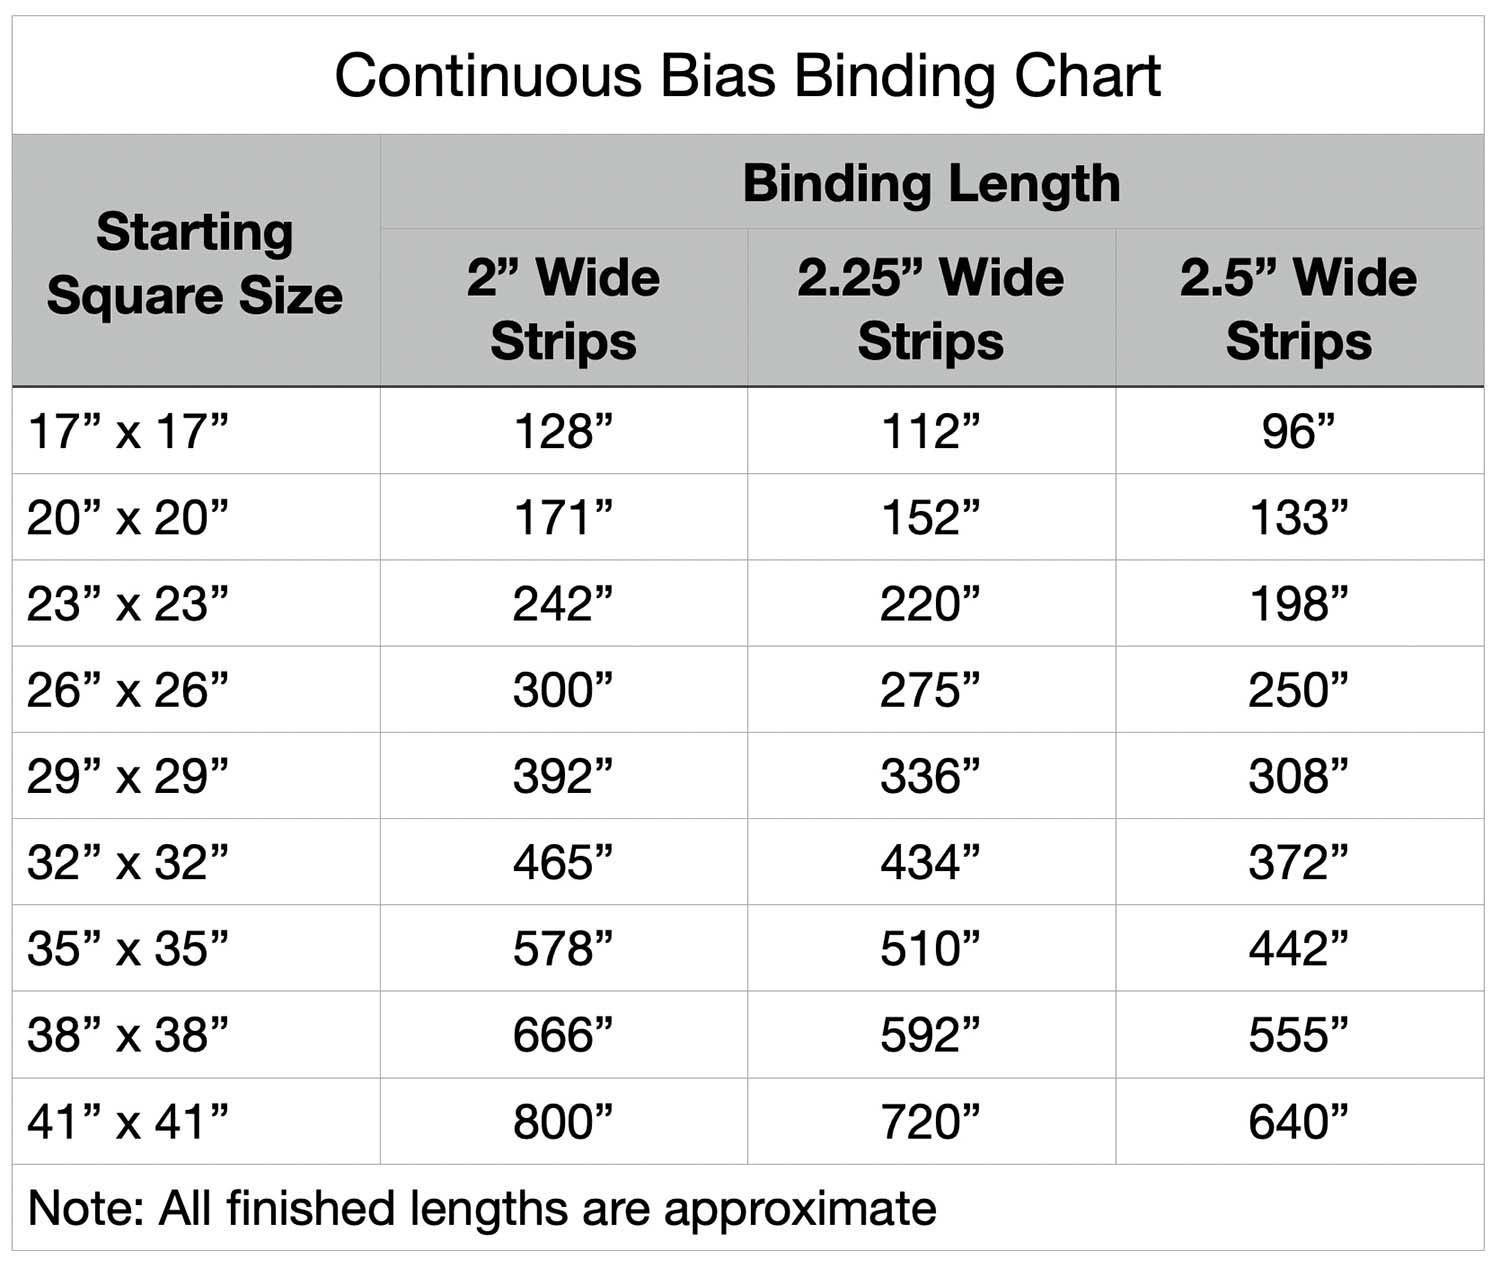
Refer to the charts below for approximate dimensions and the amount of bias required for your project. The actual amount you end up with may vary depending on the accuracy of the line drawing. Even the thickness of your pencil or marker lines may alter how much binding you get, so I tend to round up when determining the size of the initial square. I typically cut my binding 2” wide, resulting in a snug, narrow finished binding.
Making Continuous Bias Binding
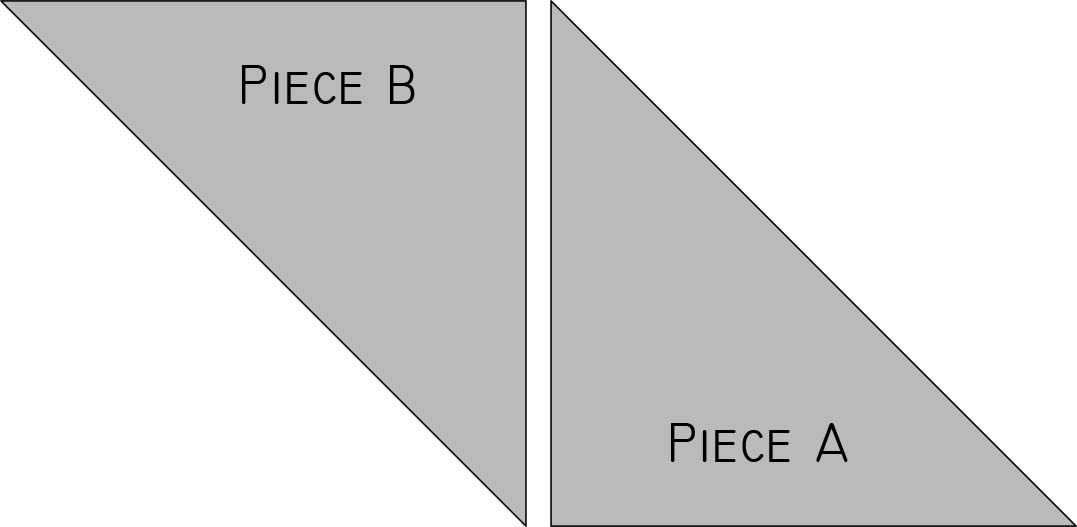
Cut the square diagonally from corner to corner. (Figure 3) With the right side of the fabric facing up, piece A is on the left and piece B is on the right.
Move piece B to the left of piece A without rotating the orientation of the pieces in any way. (Figure 4)
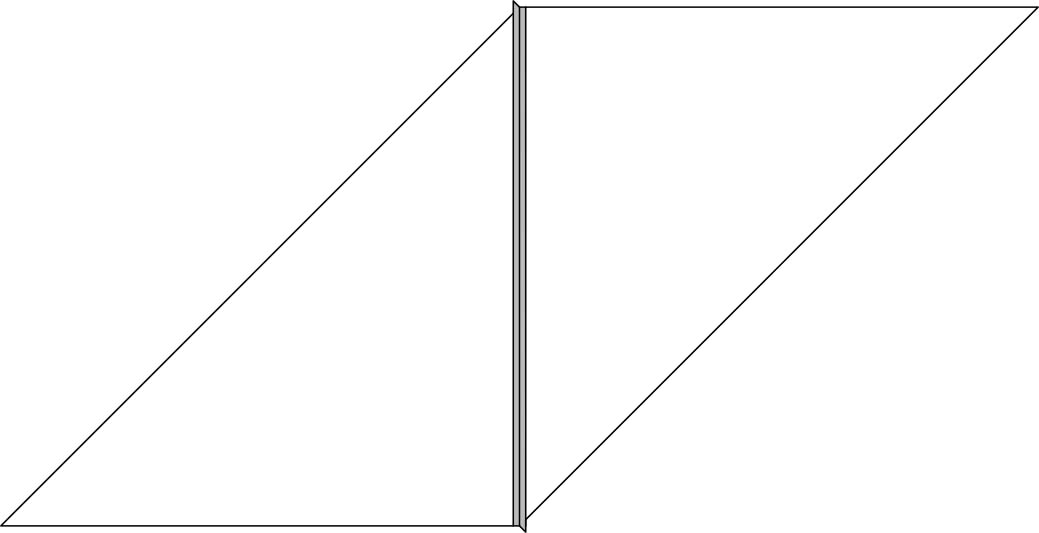
Flip piece B over piece A at the seam adjoining edge. (Figure 5) Offset the pieces 1/4” at the top and bottom to accommodate the seam allowance. Machine stitch using a 1/4” seam allowance.
Press the seam allowance open. (Figure 6)
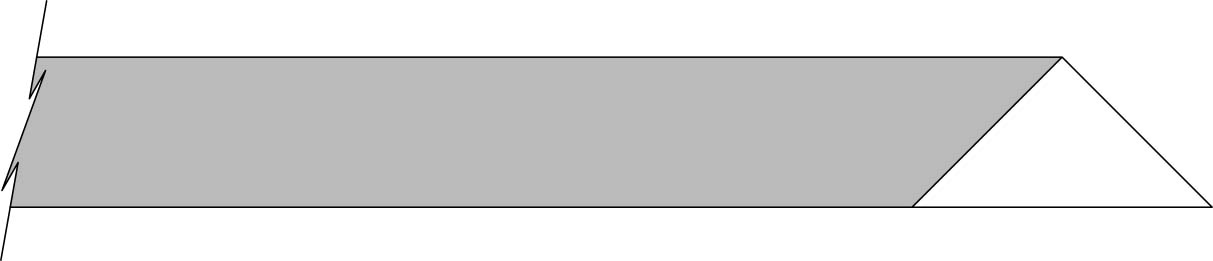
Rotate the parallelogram you have created so that the bias edges of the fabric are at the bottom and top. Starting at the bottom, on the wrong side of the fabric, draw parallel lines 2” (or your desired width) apart. (Figure 7) It is acceptable if there is a slight excess of fabric at the top.
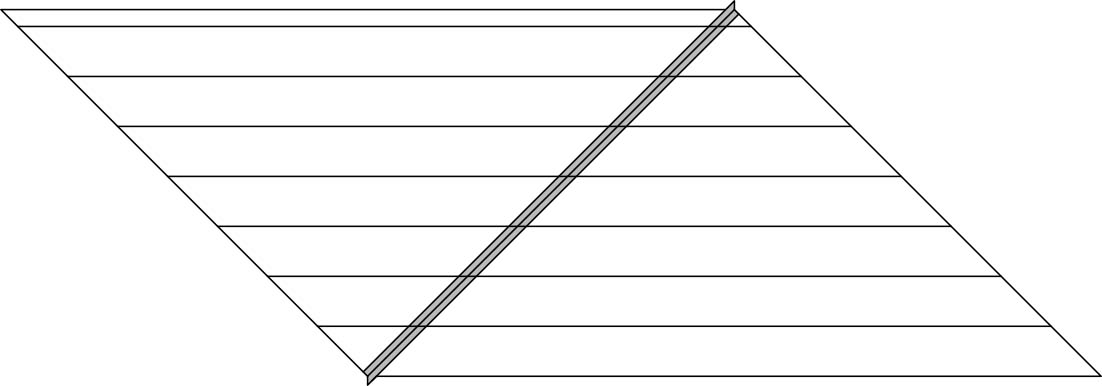
Trim off any extra fabric at the top of the parallelogram. (Figure 8)

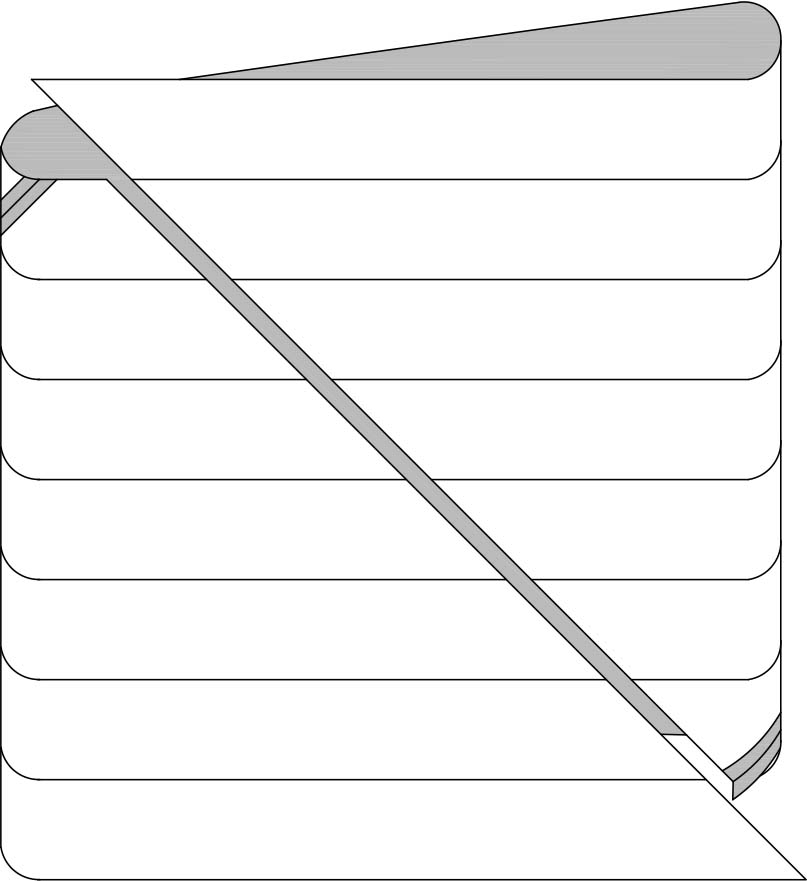
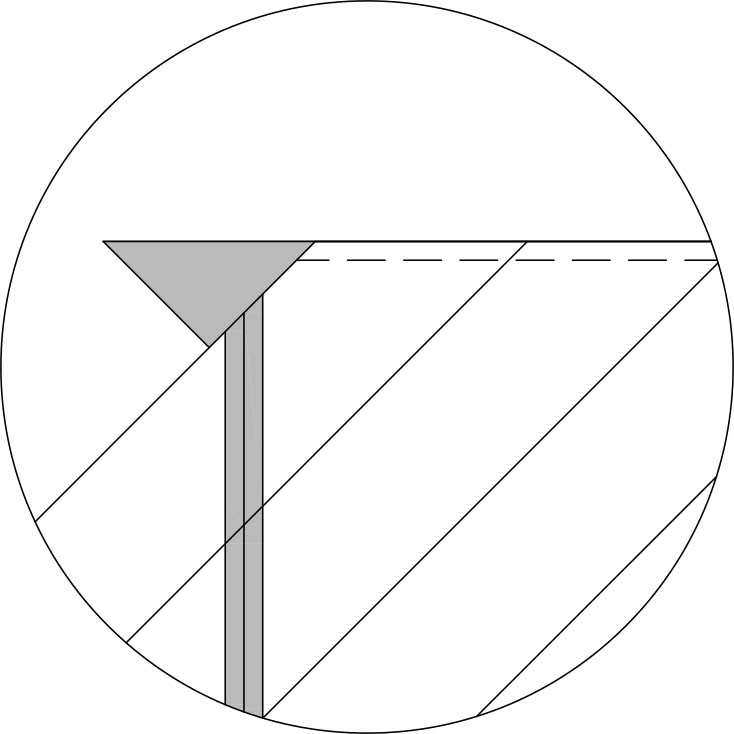
With the wrong side of the fabric facing out, create a tube with the fabric. The drawn lines should match up, with the lines being offset by one. (Figure 9) This will leave a “tail” at either end of the seam. With the right sides of the fabric together, stitch the tube together using 1/4” seam allowance as shown in Figure 10 detail.
Using sewing shears, cut a few inches of the drawn line on the top and bottom of the tube. Press the seam allowance open. (Figure 11)
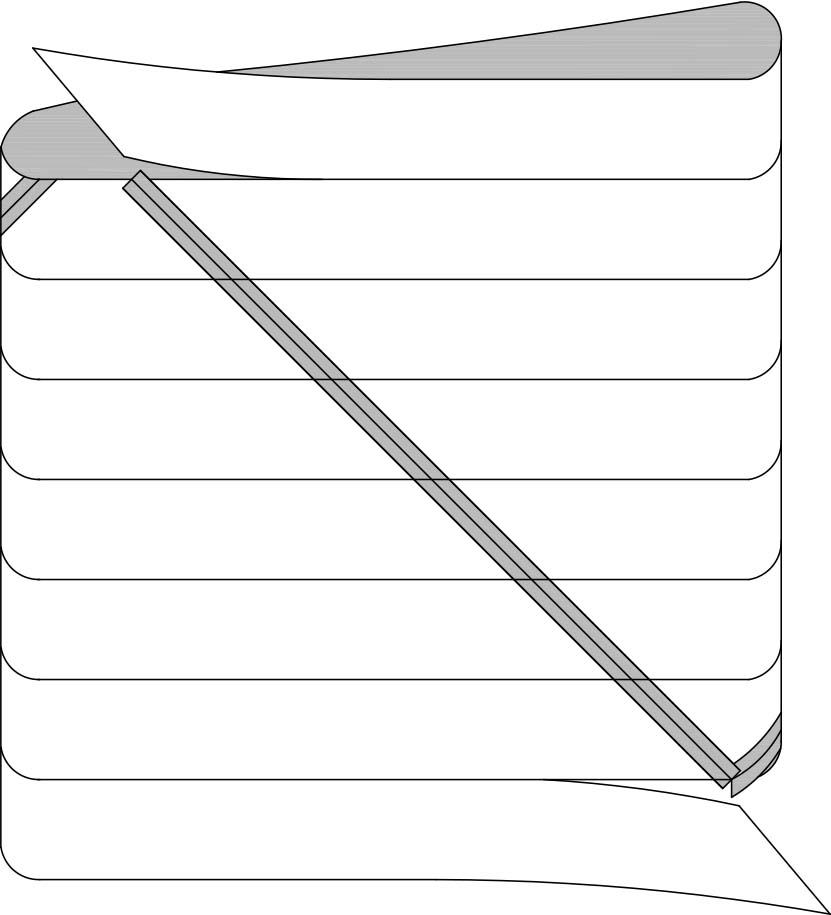
Cut along the remainder of the drawn lines. With the right sides of the fabric facing out, fold the binding in half lengthwise and press. (Figure 12)
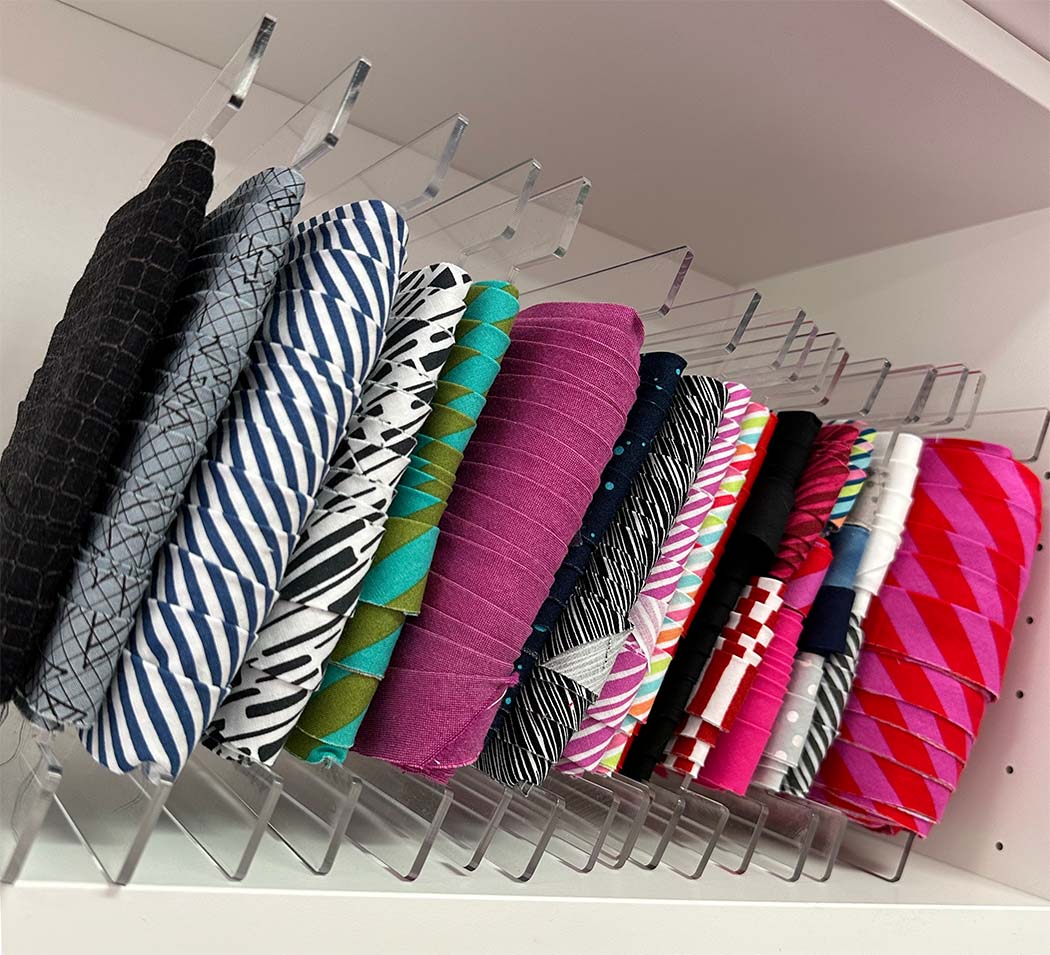
Watch for the next post where we will discuss how to attach and finish your binding! If you like to make extra binding like I do, this is how I store it.

3 Comments
Pat A
August 15, 2025 at 9:21 amThese are great directions. I always do this, but occasionally I’ll realize I cut the binding on the grain and not the bias. Your diagrams are super helpful.
The only thing I do extra, is make a small cross bar 1/4 in from the edge on the cutting lines. I then pin right through both intersections when I pin up my tube #
How to Achieve Perfect Quilt Binding Results Every Single Time – The (not so) Dramatic Life
August 22, 2025 at 12:01 am[…] the previous post, I shared how to construct continuous bias binding, and today we will go over how to apply the binding to a quilt for a beautiful and functional […]
Confusing Corners and Classy Curves: How to Bind Unexpected Quilt Edges – The (not so) Dramatic Life
September 12, 2025 at 12:01 am[…] More About Potholder Quilts Constructing Continuous Bias Binding Attaching Binding to a […]