Congratulations! You have put hours into creating an awesome quilt top, found (or made) the ideal backing, and quilted your project to the perfect density. Now, you only have one significant step left: the binding.
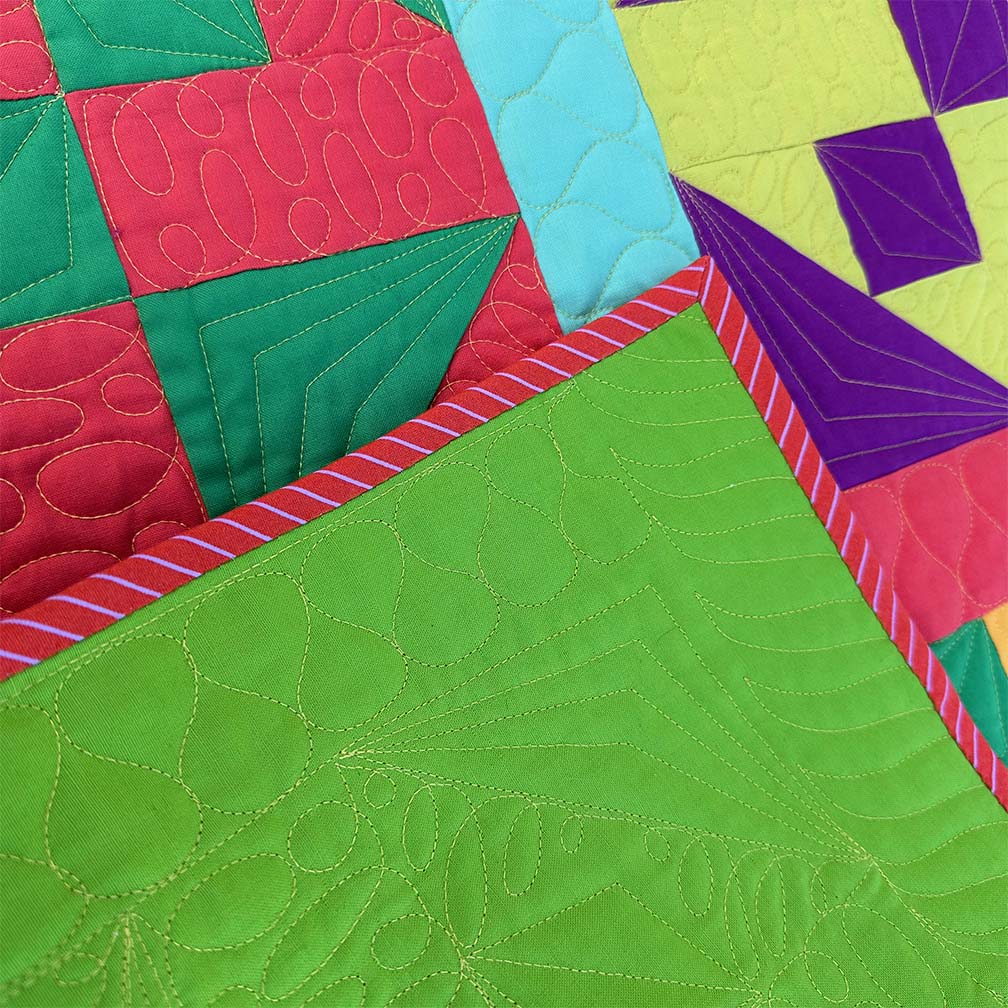
Binding is a small part of the overall quilt surface, but it can make or break your quilt, both functionally and aesthetically. A snug, even binding wears well over time, protecting the edges of your quilt from the wear it experiences from day-to-day use, and creates a pleasing visual frame for your quilted composition.
In the previous post, I shared how to construct continuous bias binding, and today we will go over how to apply the binding to a quilt for a beautiful and functional finish.
What type of binding should I use?
There are two basic types of binding: bias and on-grain. On-grain binding is cut on either the straight or cross-grain of the fabric, while bias binding is cut diagonal to the grain lines of the fabric.
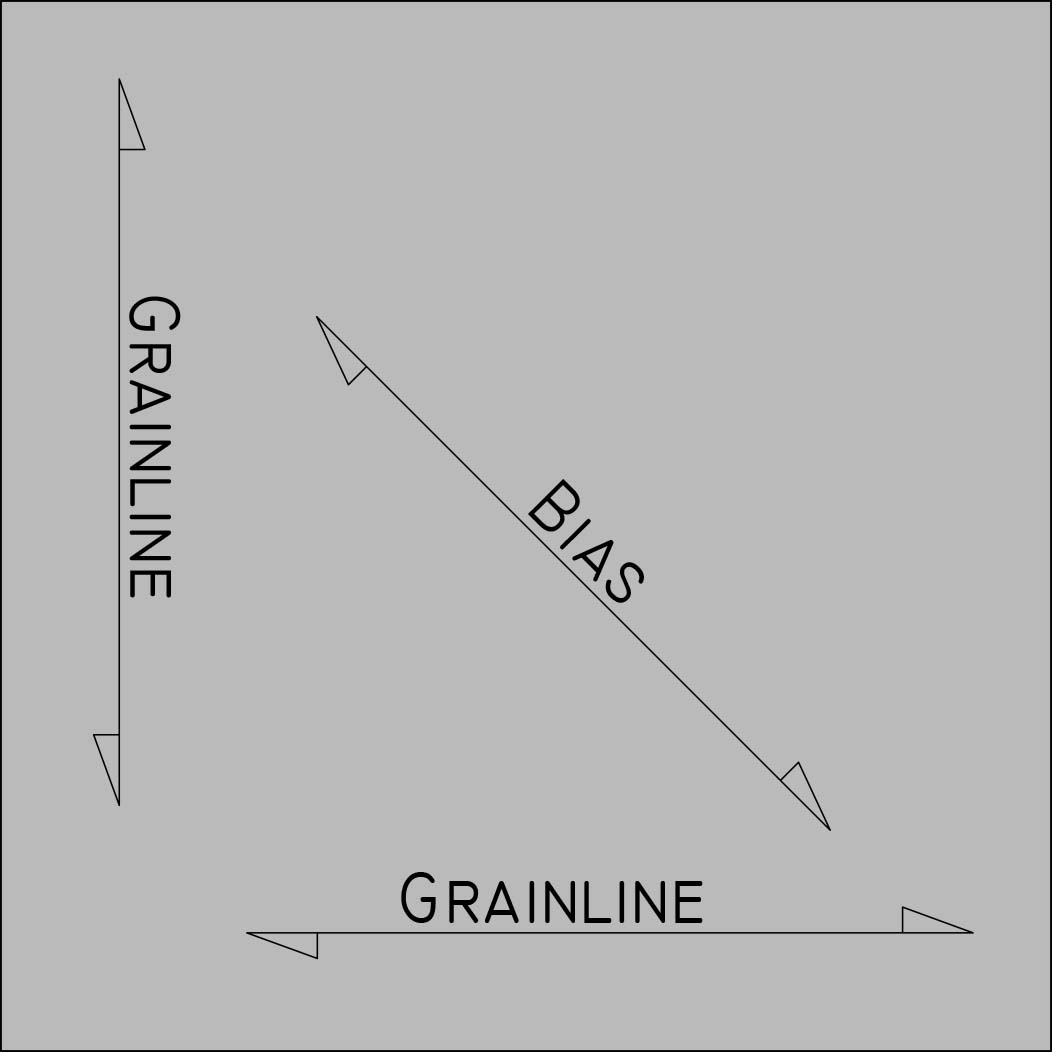
Bias Binding
While I tend to use bias binding for most projects, bias is rarely an absolute must for a quilt. There are good reasons to use bias:
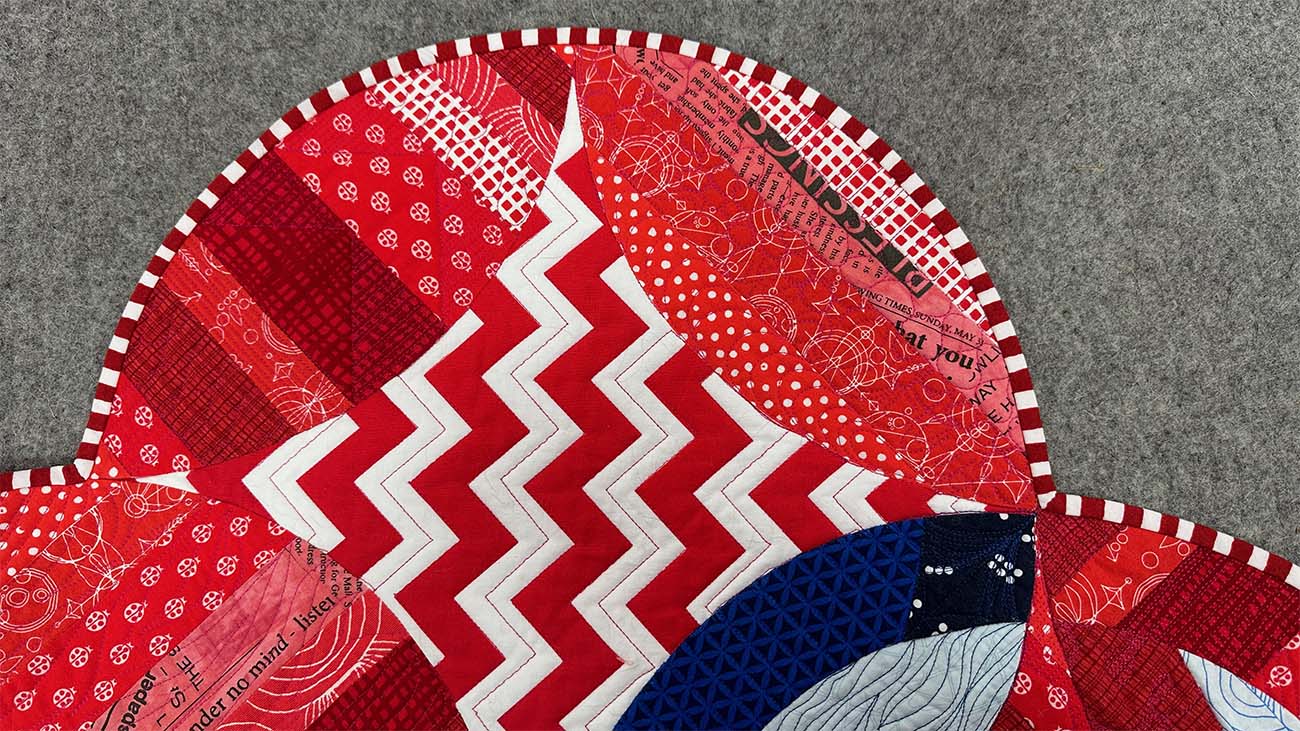
- Bias is an absolute must for curved edges.
- The slight stretch of bias binding hugs the edges of the quilt, providing a smooth and snug finish.
- Since the warp and weft threads of the fabric run diagonally to the edge of the quilt, bias tends to wear out more slowly when your quilt receives heavy use.
On-Grain Binding
On-grain binding can be cut on either the warp (straight-grain, parallel to the selvage edge) or the weft (cross-grain, perpendicular to the selvage edge). Cutting on the straight grain typically results in less stretch than cutting on the cross-grain; however, either direction is extremely stable compared to the generous stretch of a bias-cut piece of fabric.
When constructing on-grain binding, ensure that you connect the ends of the strips with a diagonal seam. The diagonal seam disperses the additional bulk of the seam allowance along the edge of the quilt. In contrast, a straight seam causes the bulk of the seam allowance to layer on top of itself multiple times in the same location, resulting in a lump in the binding at each seam.
Since on-grain binding has minimal stretch, you may find that you need a slightly wider binding than if you are using bias binding. I suggest binding a section of a test quilt sandwich using the same batting that is in your quilt to determine the best cutting width for your project. For instance, I typically cut my bias binding in 2″ wide strips, but frequently find 2-1/4″ wide strips work better for projects using on-grain binding.
Applying the Binding to the Quilt
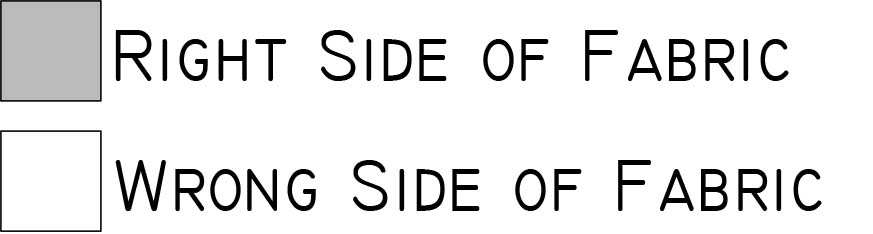
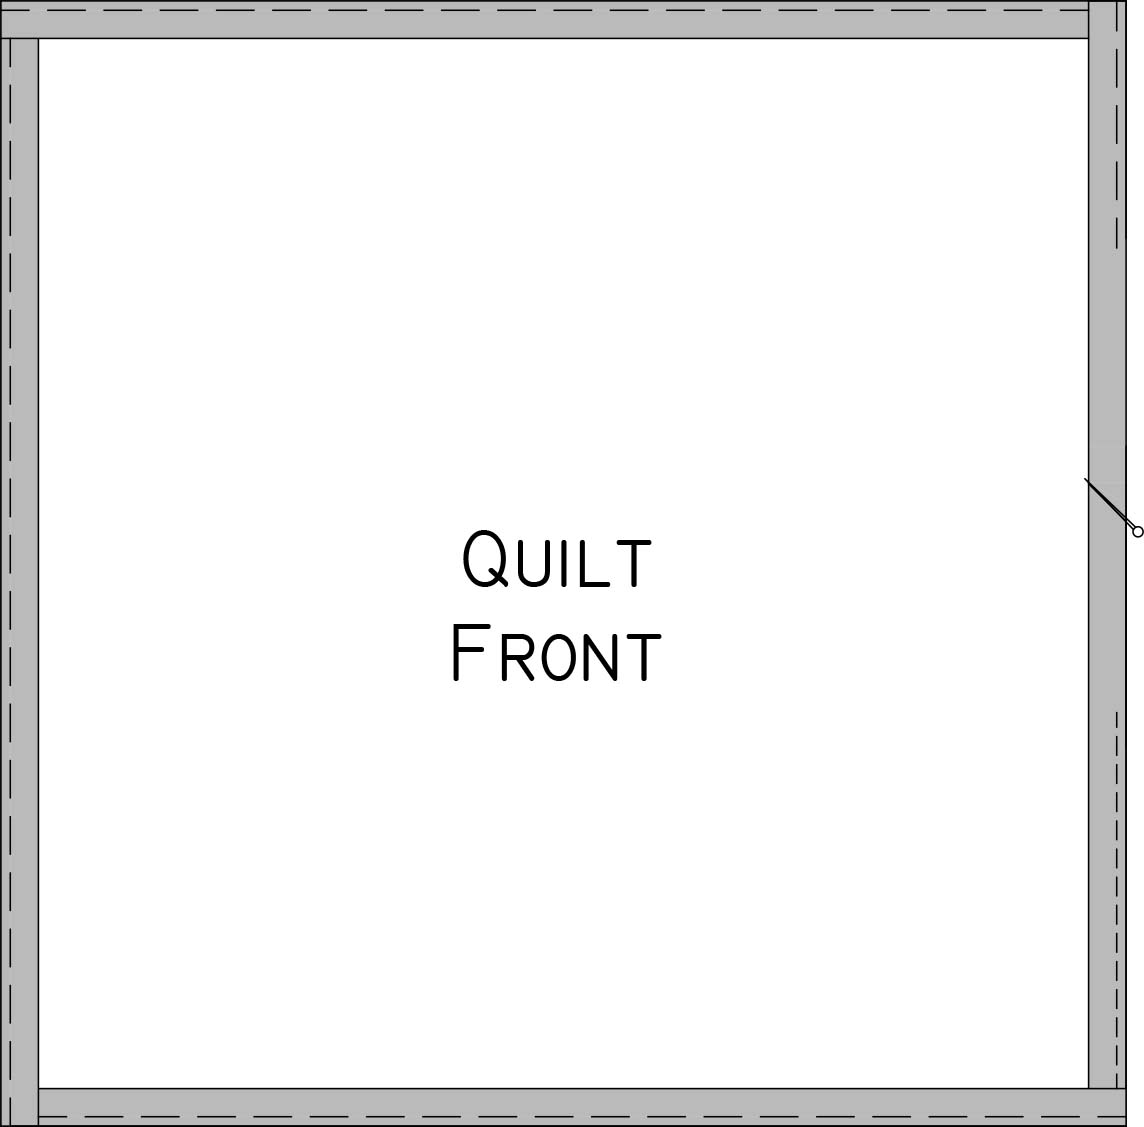
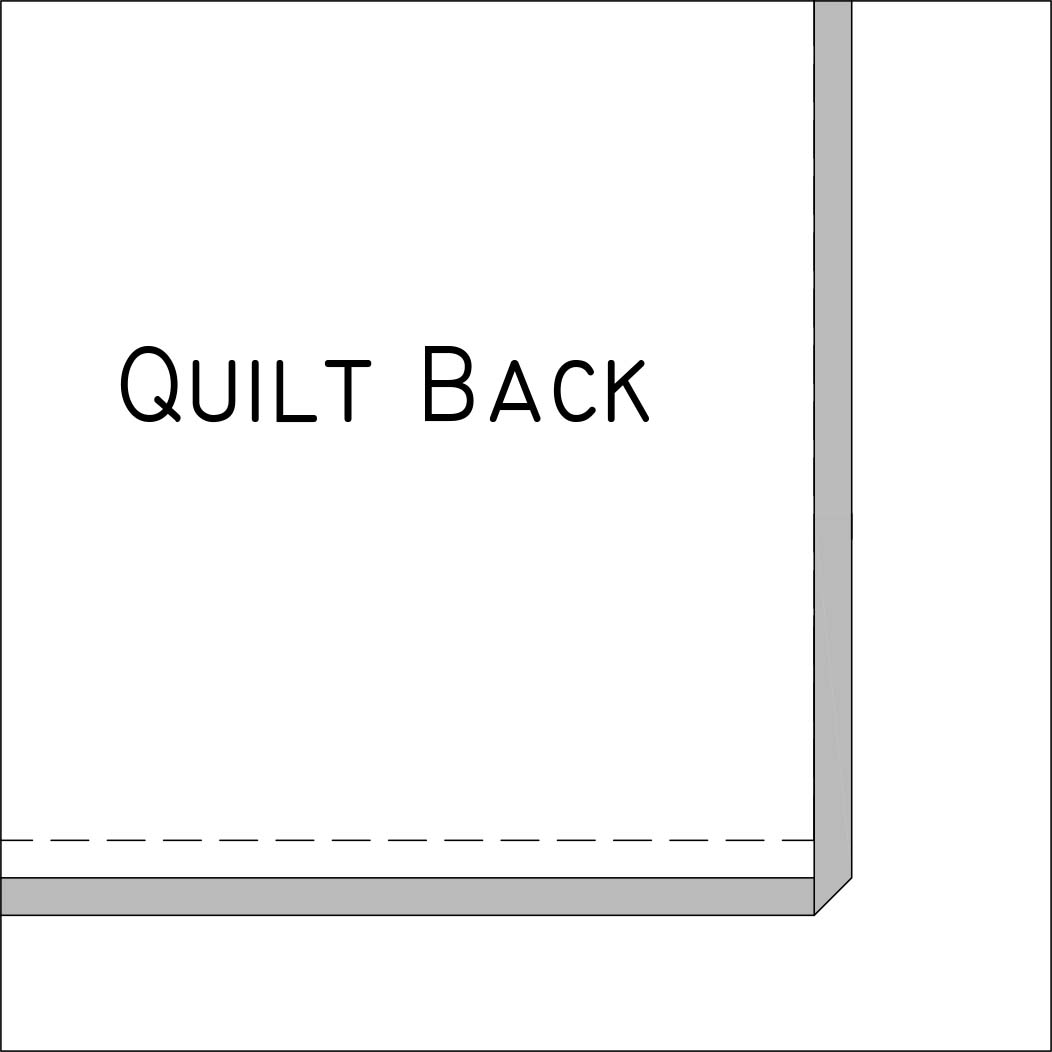
For this tutorial, the front, or right side, of the fabric is shown in grey. The back, or wrong side, of the fabric is shown in white. (Figure 1)
For standard binding, with a finishing width of approximately 1/4″, trim the quilt at the edge of the quilt top. If you prefer using binding that is cut wider than 2″ to 2-1/4″, consider trimming your quilt larger than the quilt top by 1/8″ or more.
Leaving a binding tail several inches long, position and stitch the cut edges of the binding along the trimmed edge of the quilt. Stitch using a 1/4″ seam allowance. Stop the stitching line 1/4″ before the edge of the quilt. Backstitch. (Figure 2)
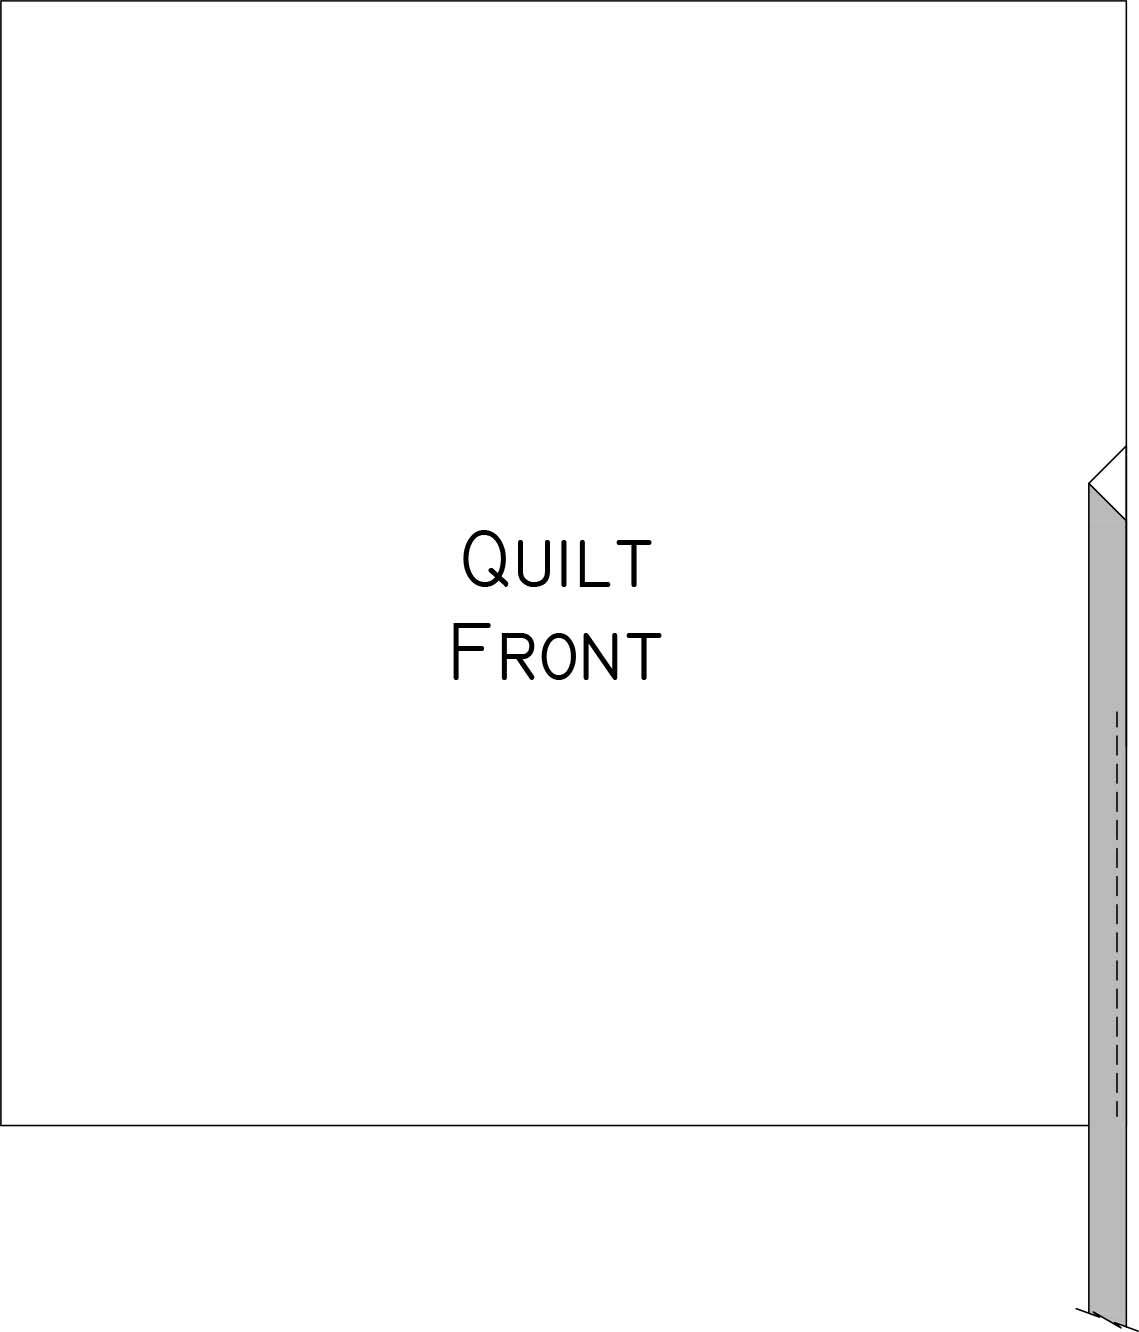
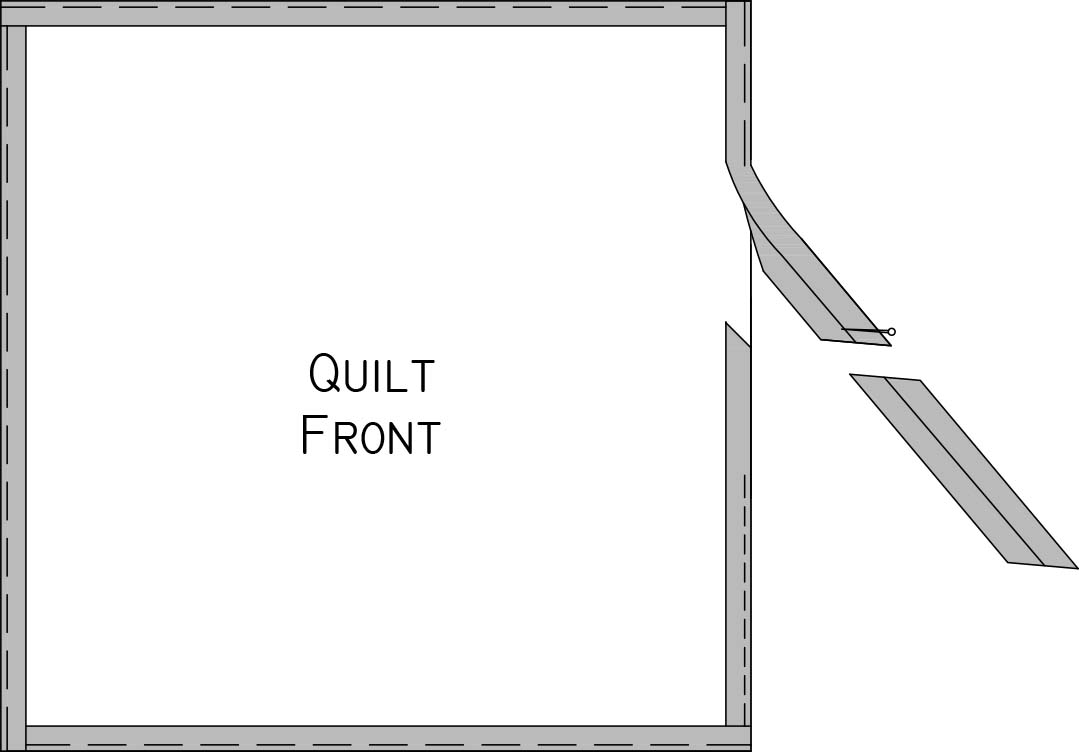
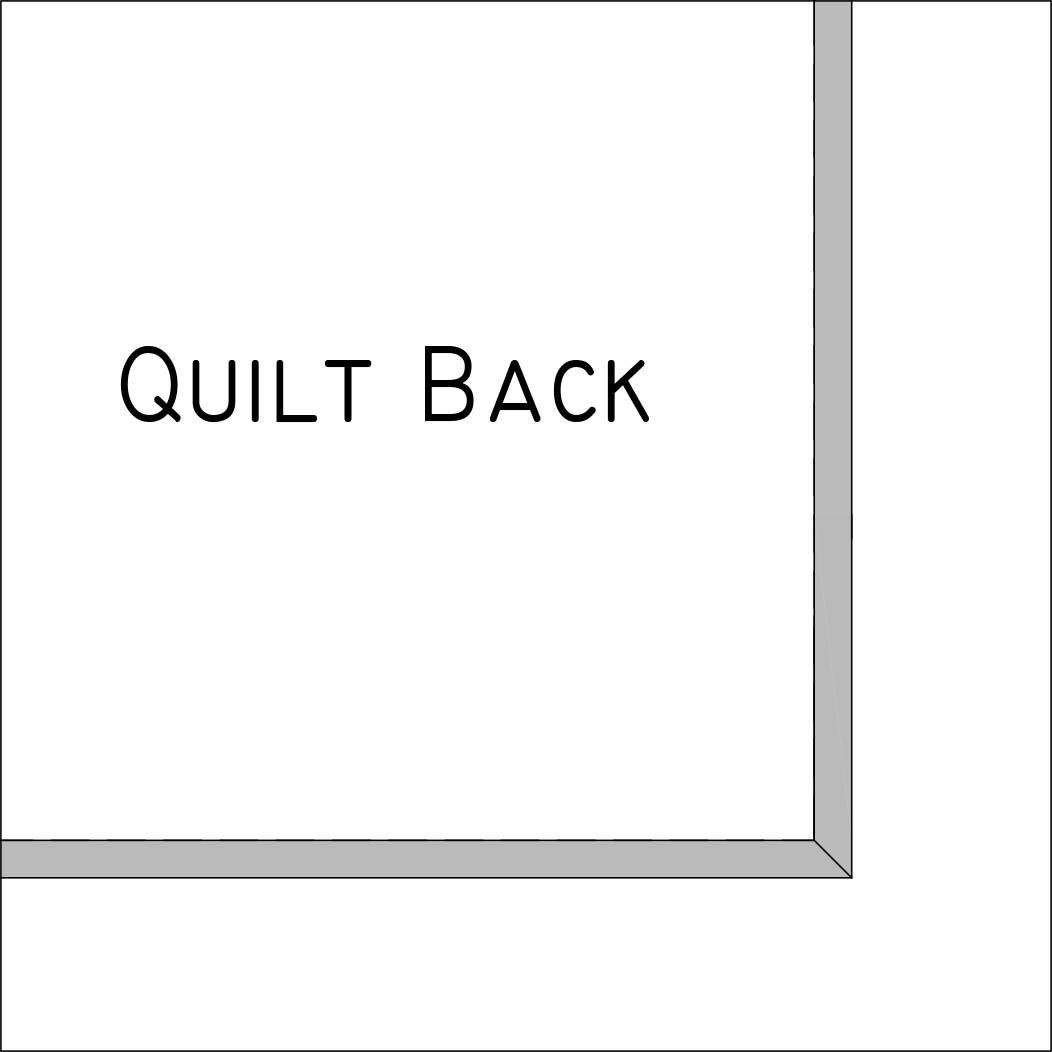
Fold the binding at a 45-degree angle so that the cut edges of the binding create a continuous line with the trimmed edge of the quilt. (Figure 3)
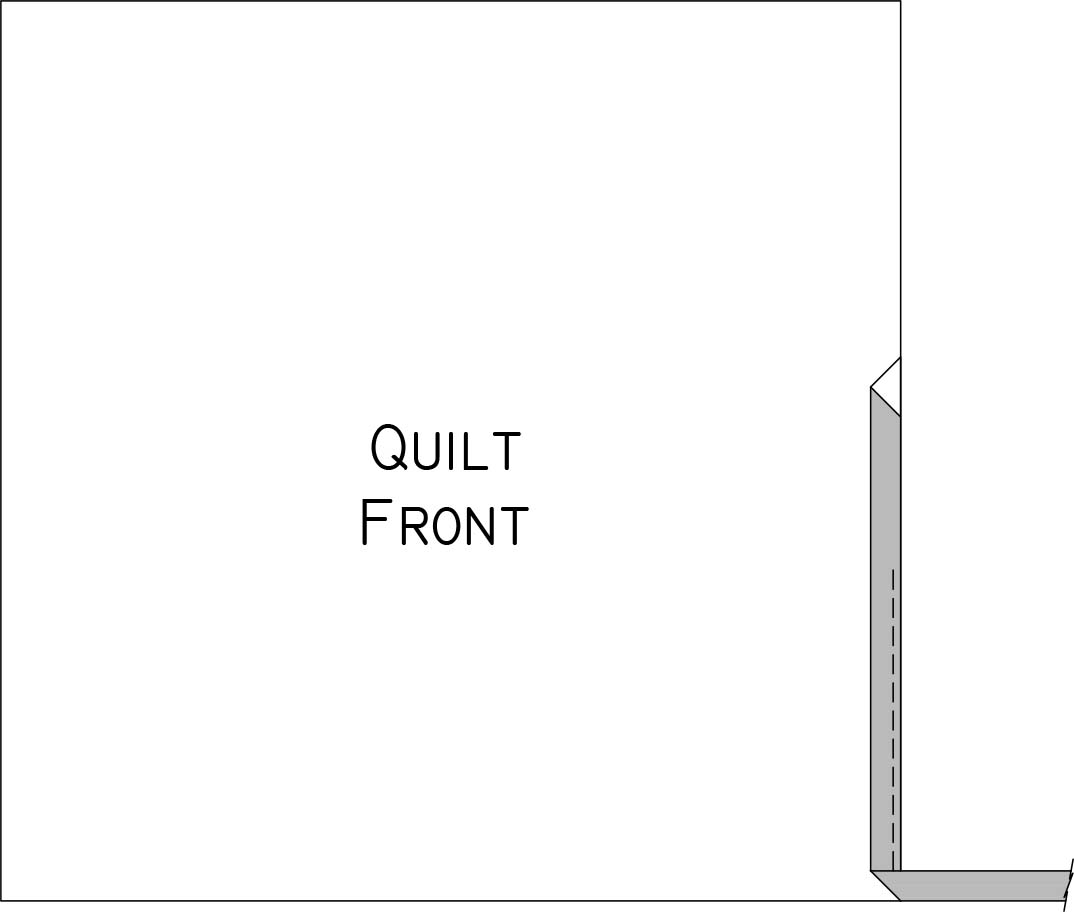
While maintaining the 45-degree angle formed in the previous step, fold the binding back over the next edge of the quilt. The fold of the binding will line up with the edge that was just stitched. The cut edge of the binding will run along the trimmed edge of the quilt. Machine stitch using 1/4″ seam allowance. Start at the edge of the binding fold, backstitch, and stitch to 1/4″ away from the next edge of the quilt. Backstitch. (Figure 4)
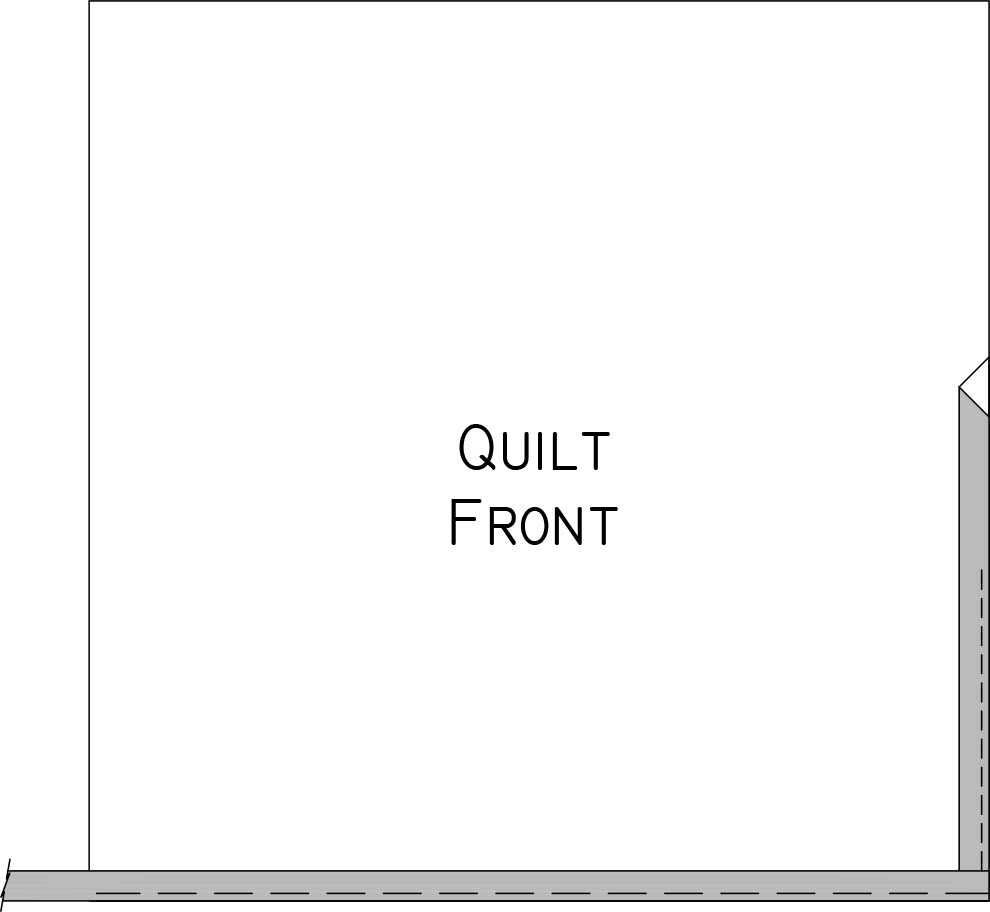
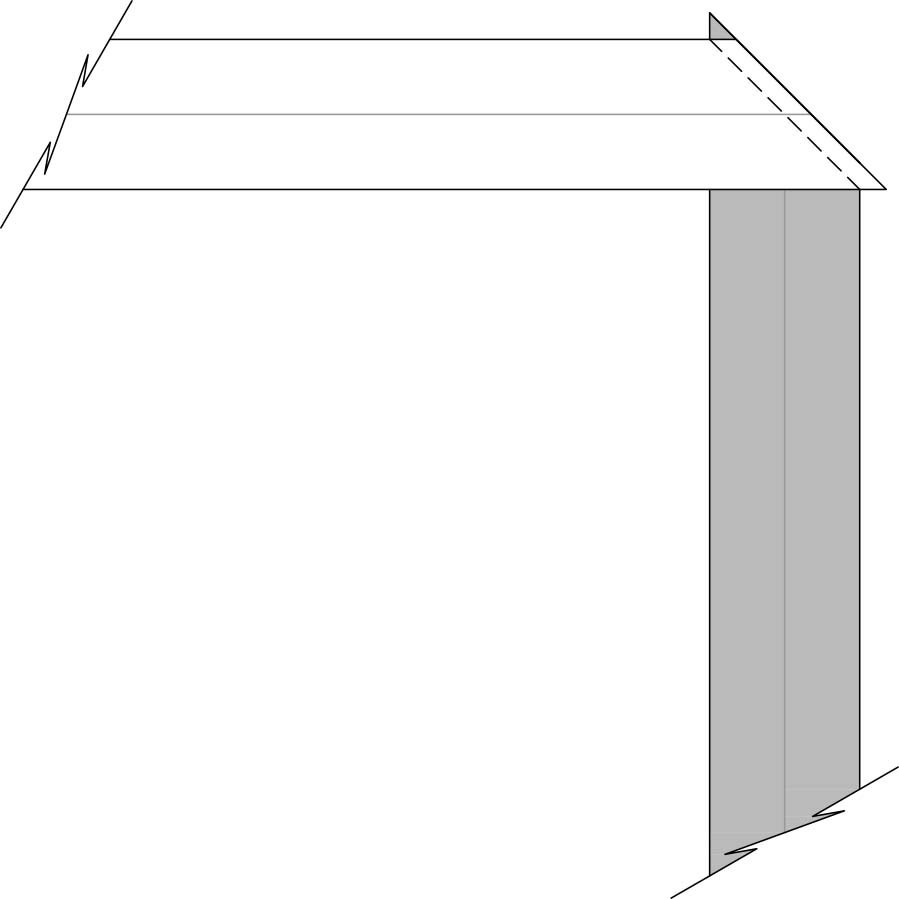
Work your way around the quilt following the process described in the previous steps. When you come to the final side of the quilt, leave a tail of binding several inches from the beginning of the binding strip. (Figure 5)
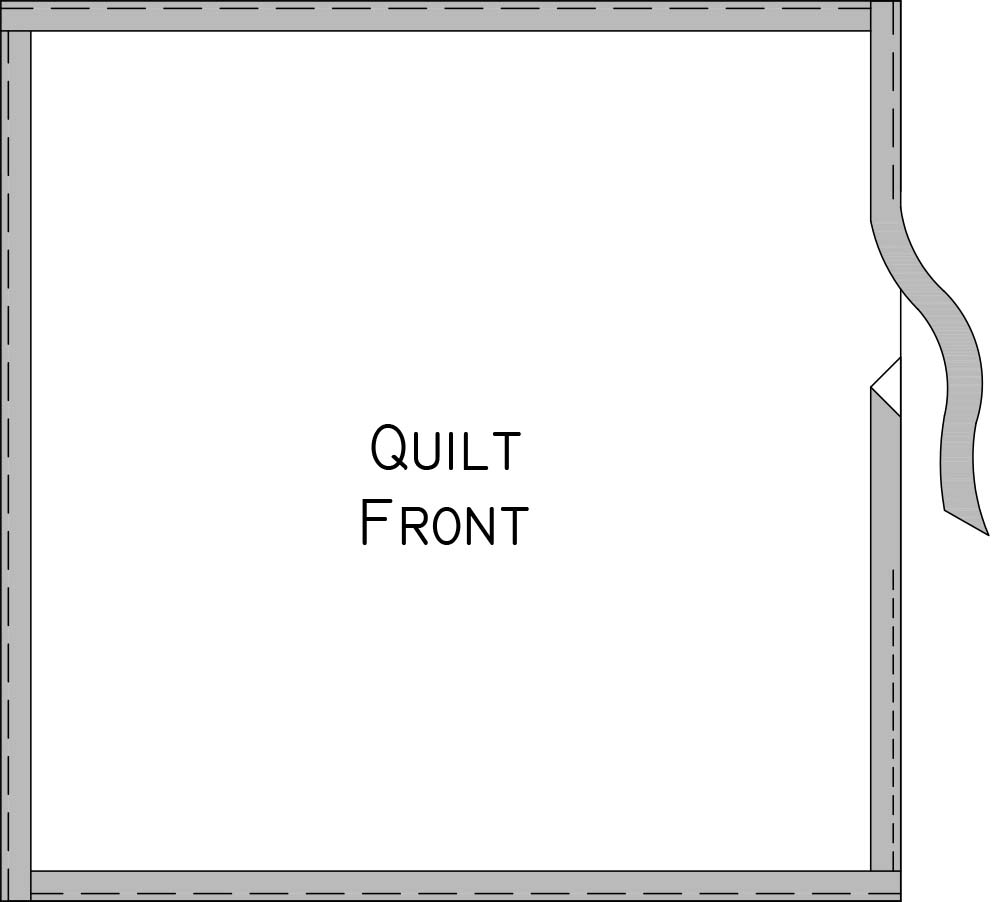
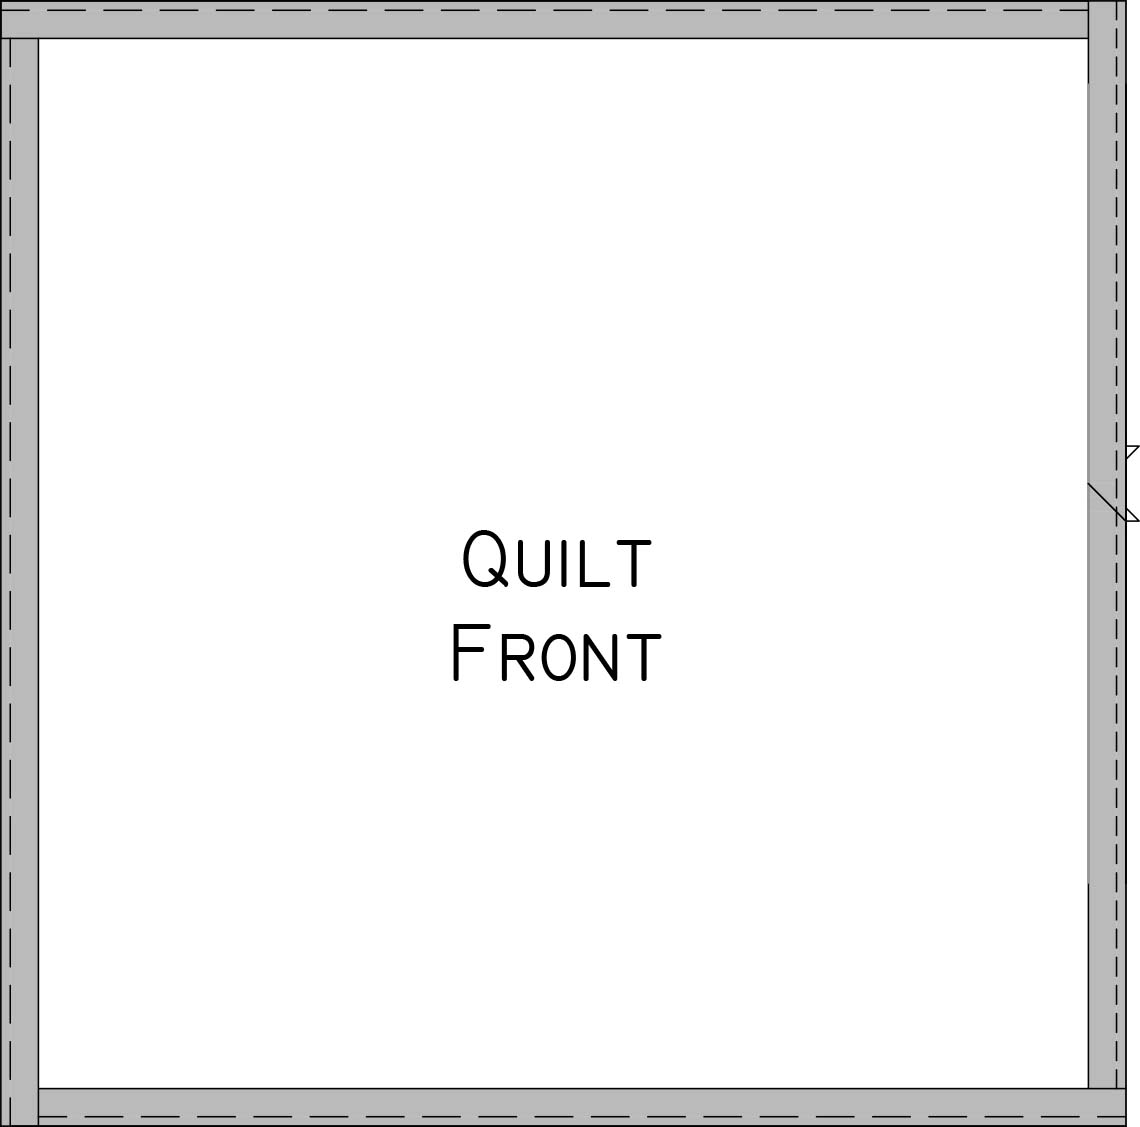
Tuck the end of the binding tail into the beginning of the binding tail so that they lie smoothly against the edge of the quilt. Catching just one layer of the binding end tail, place a straight pin where the edge of the beginning tail falls. (Figure 6)
Remove the end binding tail, unfold, and mark the line indicated by the straight pin all the way across the binding piece. Make the mark either with pins or a disappearing fabric marker. Cut the binding 1/2” longer than the mark you just made. (Figure 7)
Unfold the beginning and end binding tails. Place them right sides together at a 45-degree angle and offset by 1/4” to account for the seam allowance. Stitch together. (Figure 8). Bunching or folding the quilt slightly will be necessary to prevent stretching the binding while finishing the ends.
Press seam allowances open. (Figure 9)

Fold back in half lengthwise. (Figure 10)

Reposition the binding at the edge of the quilt and stitch down the remaining section. (Figure 11)
Turn the binding to the back of the quilt and use a slip or whip stitch to sew down the folded edge just beyond the stitching line that attached the binding to the front of the quilt. When you come to a corner, form a 45-degree angle as the binding from the adjoining edge is pulled around from the front of the quilt. (Figure 12)
Bring the 45-degree angle fold toward the back of the quilt and stitch the diagonal corner fold before continuing to stitch around the folded edge of the binding. (Figure 13)

1 Comment
Erika
August 23, 2025 at 7:38 amDear Cassandra,
thank you very much for the precise explanation.
Best regards
Erika