Binding can make or break the overall look of a quilt. It can be tempting to rush through this critical step, but the edge finish of a quilt has the potential to either enhance or detract from its design and quality.
But how do you handle unusual edge shapes? How do you sew a corner that isn’t 90 degrees? How do you create smoothly finished, curved edges?

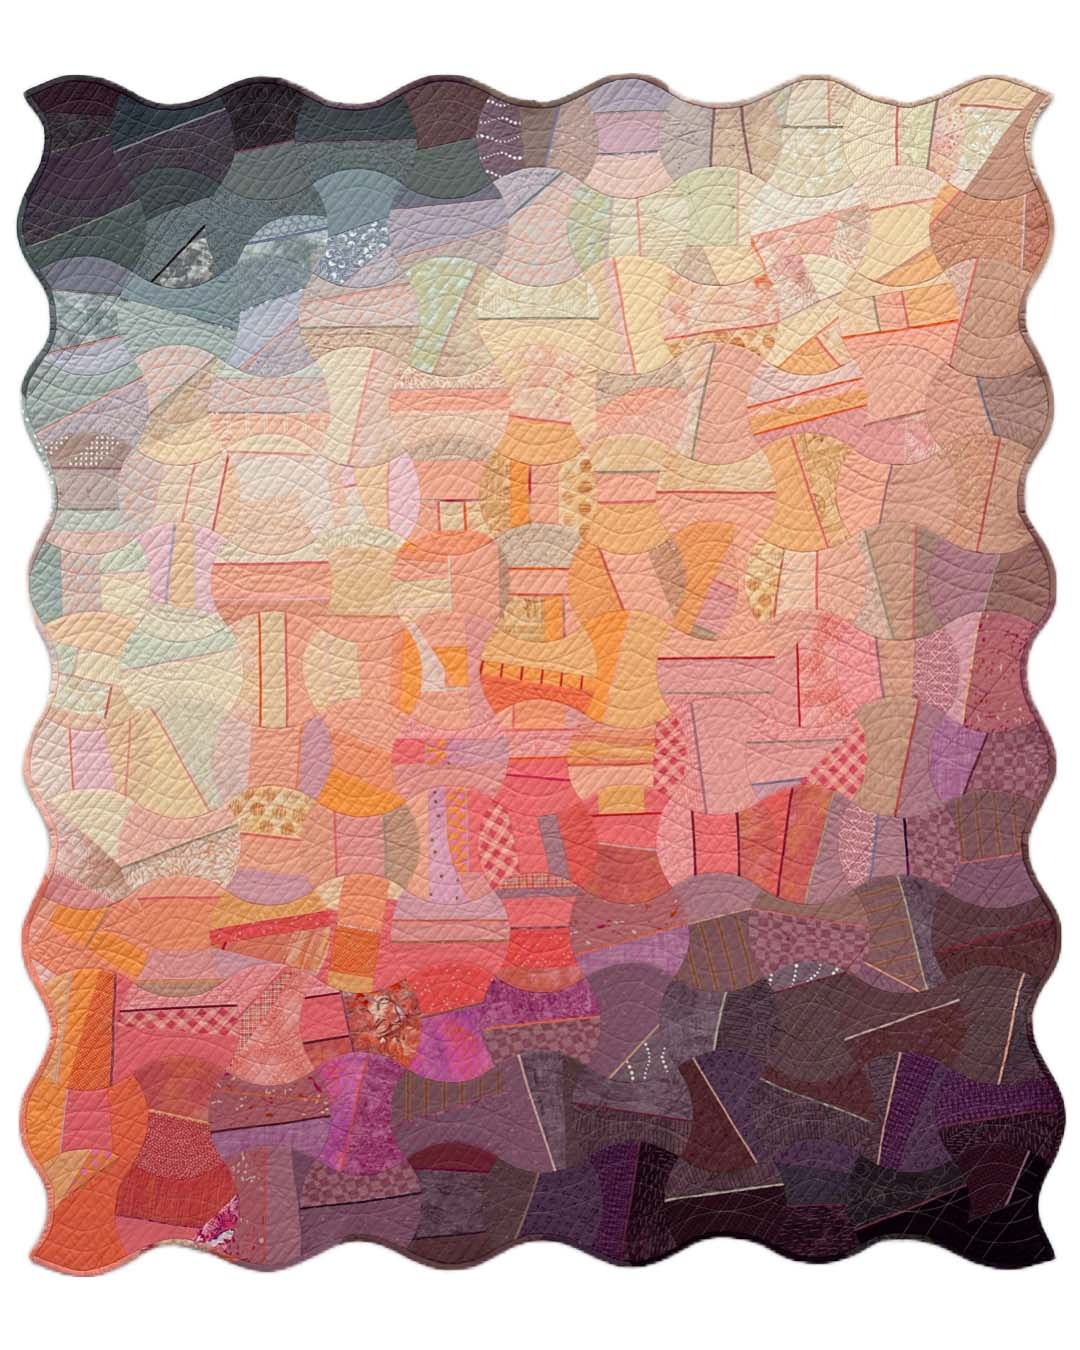
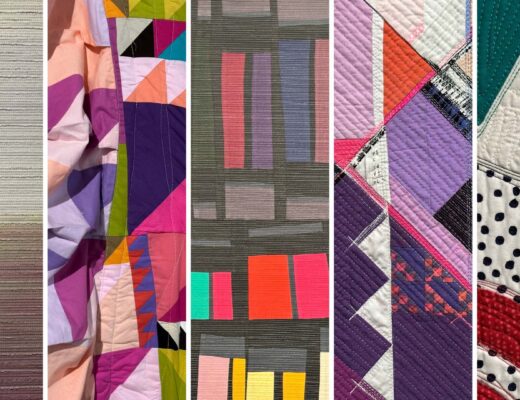
I’m currently (meaning off and on for years now!) working on a potholder quilt that incorporates segments with unusual corner angles, as well as both concave and convex curves. In recent posts, I have shared how to construct continuous bias binding and an easy way to attach binding to a quilt. Today, we’ll take this a step further to explore how to tackle some unusual angles and incredible curves.
Tips for Successfully Binding Unusual Shapes
Bias Binding
Bias binding hugs the edges of your quilt, creating a snug, even finish that is particularly useful for unusual shapes. Bias binding is essential for creating curved quilt edges.
Pinning
I am a big believer in pinning your binding in place before you start to sew it to the quilt. I know that this step is often skipped, but there are a few reasons I do it:
- Knowing where binding seams fall on the quilt: I don’t want to have binding seams in the corners of my quilts, and I also don’t want to stop to cut and re-piece to work around the existing seams. I find that method annoying (and wasteful).
- The binding has less opportunity to stretch if it’s pinned before you sew. This is especially true when working with bias binding.
- I can finish the ends of the binding before attaching it to the quilts, so if I need more slack to maneuver the joining seam, I simply need to pull a pin rather than ripping out stitches.
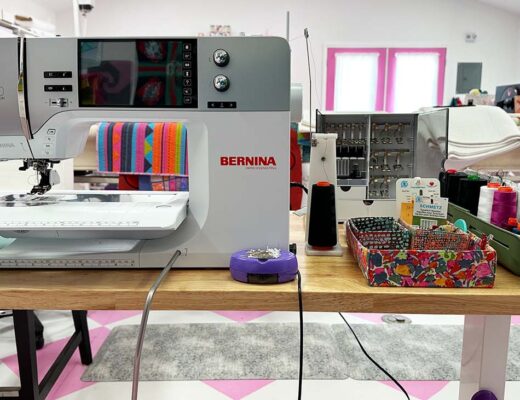
Machine Prep
Ensure your machine sets you up for success by selecting the optimal settings.
Presser Foot
Most bindings are sewn with a quarter-inch seam allowance, so ensure you have a presser foot that indicates a quarter-inch measurement. A walking foot is my favorite tool for attaching binding. If you don’t have a walking foot, using the dual feed option on your mis achina viable alternativeks well. If neither option is available, you can stick with your standard patchwork foot.
Stitch Settings
To attach binding, I usually use a stitch length of 2 to 2.5. If I’m binding an edge that included hand stitching where the knots may have been cut during the trimming process, I may go shorter.
Tension
Just like quilting, it’s a good idea to check the tension on your binding stitches. Since you are sewing through a thicker-than-average seam, make sure your seam is strong enough to protect the edge of your quilt for years to come. I usually do this by sewing several inches and then checking the seam to ensure it’s secure.
Presser Foot Pressure
Presser foot pressure is one of the most underrated features of most newer sewing machines. Have you ever noticed a small bubble of fabric forming in front of your presser foot as you sew? One reason for this is that the presser foot pressure may be too heavy, causing the foot to push the fabric forward instead of feeding it through smoothly. When sewing thick seams, such as binding, reducing the presser foot pressure can help create a neatly bound edge.
Tackling Challenging Corners
Quilt corners of any angle are approached with the same general techniques you would use to sew a typical 90-degree angle. For hand-finishing (recommended), machine-stitch the binding to the front of the quilt and hand-finish on the back.
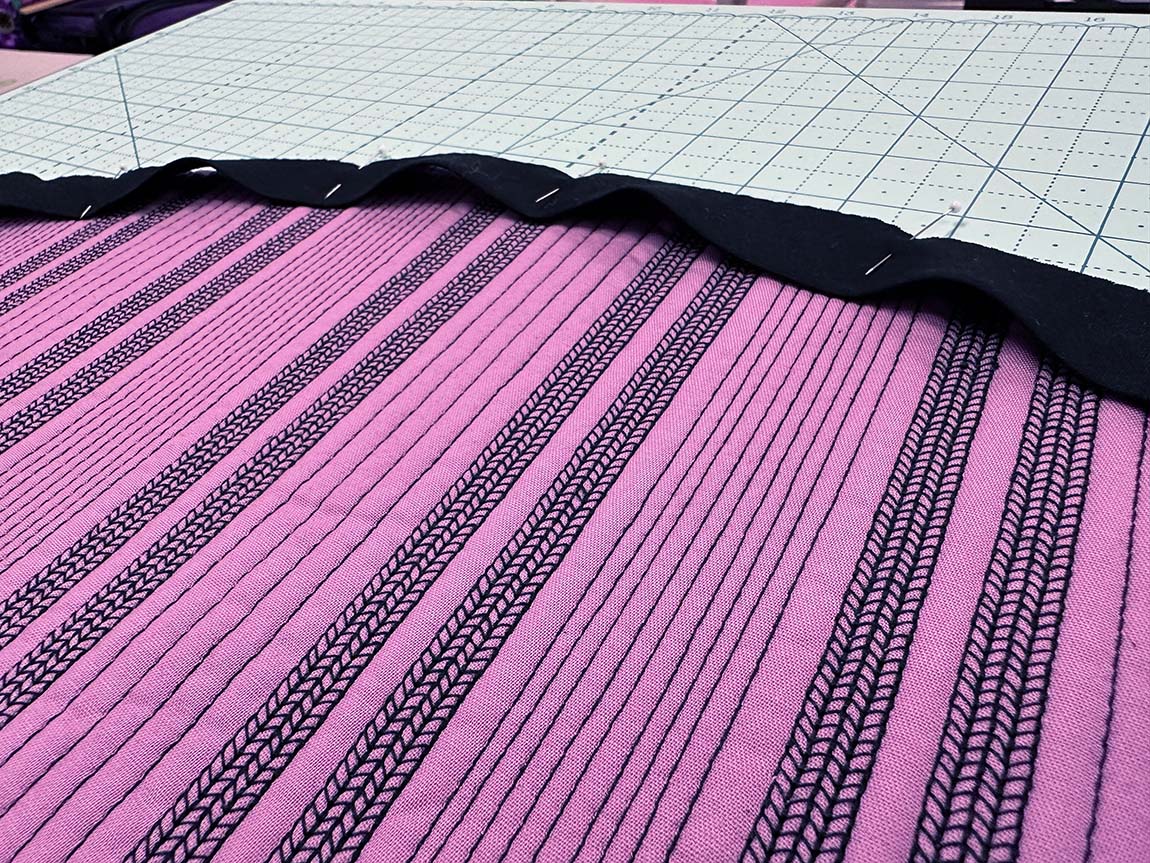
Pinning the Binding
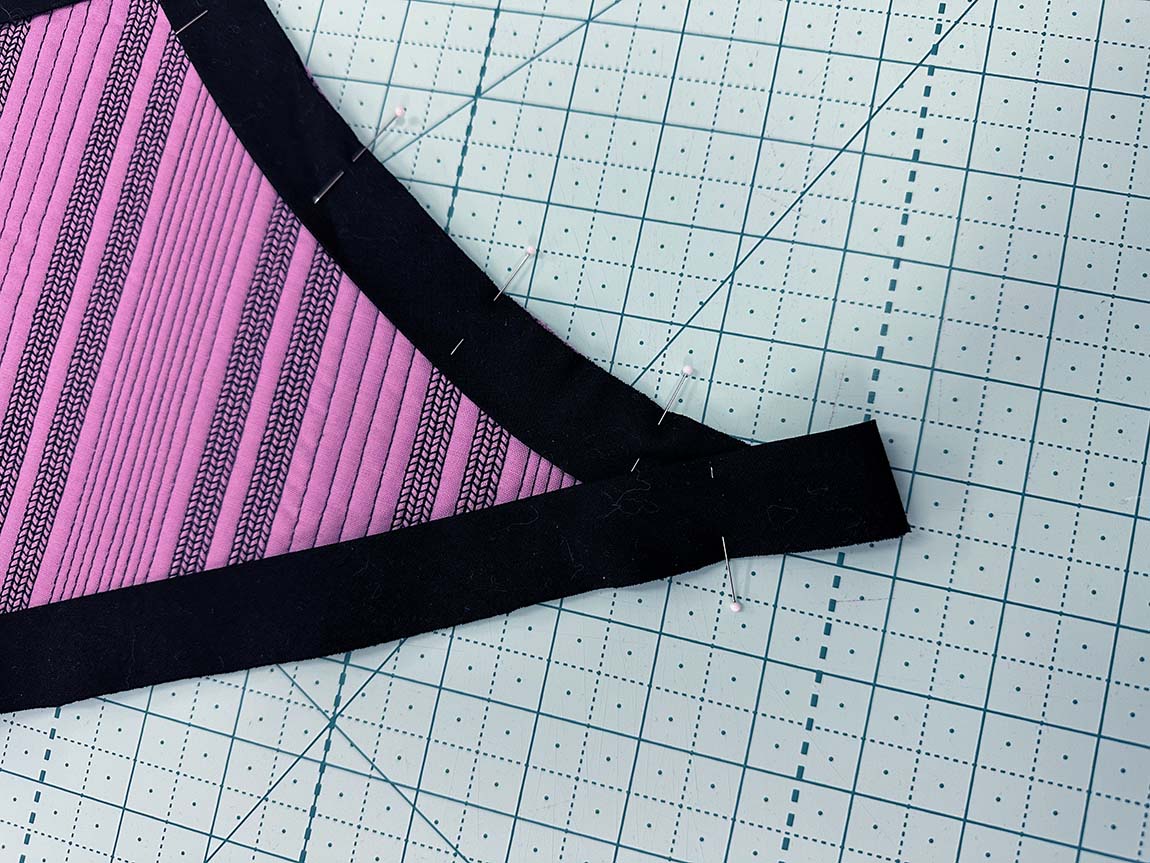
Place your binding loosely around the edge of your quilt to ensure you know where the binding seams will land. Pin the binding to the quilt.
As you approach the corner of your quilt, mark the binding 1/4” from the next edge. (Notice I said the next edge, not the point of the corner.) Place the binding all the way to the corner of the quilt, placing the final pin about 1” from the edge.
To turn the corner, fold the binding back, ensuring it still extends all the way to the corner. When you fold the binding back, align it so the raw edge of the binding forms a continuous line with the next side of the quilt. Finger press this crease.
At the corner of the quilt, fold the binding once again so that the raw edge of the binding aligns with the raw edge of the quilt. Finger press this crease as well. Pin in place.
Stitching the Binding
Start stitching the binding in the center of one side. As you approach the corner, backstitch when you reach the mark 1/4” from the adjoining edge of the quilt. You will need to remove a few pins around the corner in order to complete the stitching.
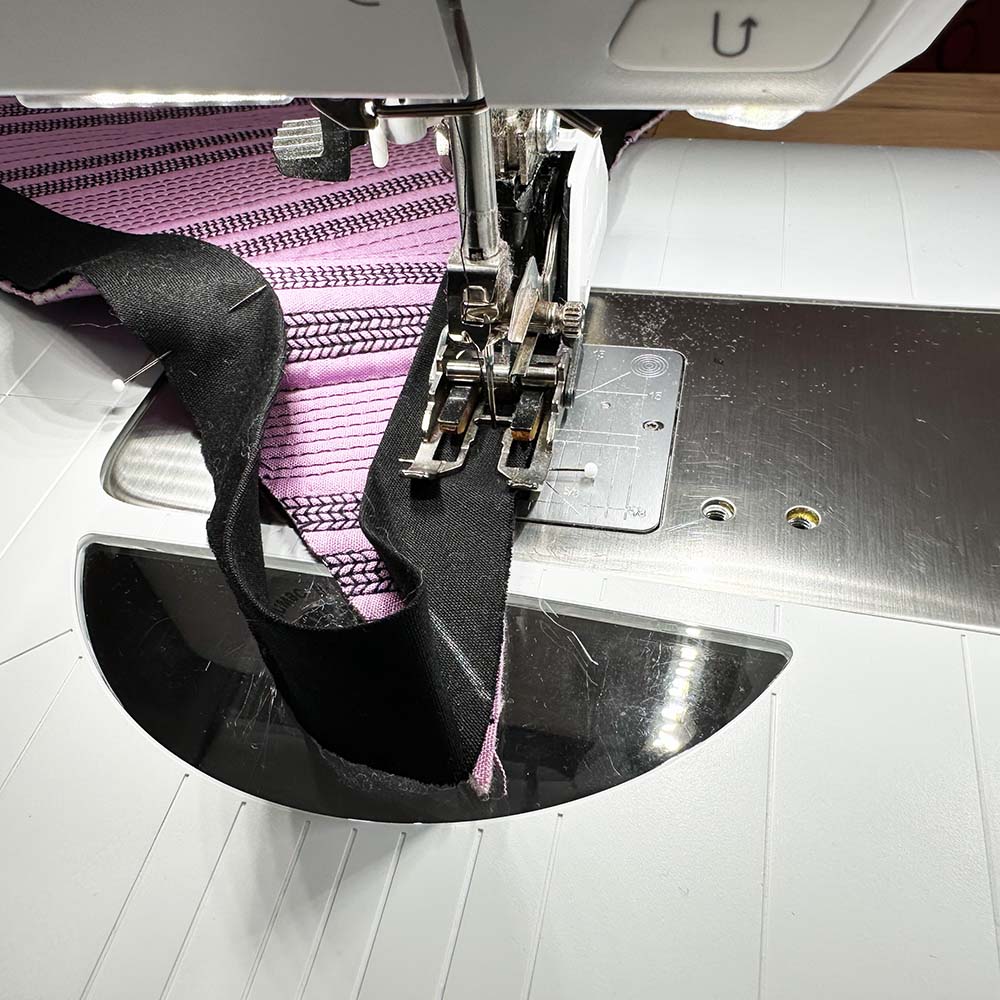
Use the finger-pressed creases to align and re-pin the binding in place. Backstitch and sew the next edge.
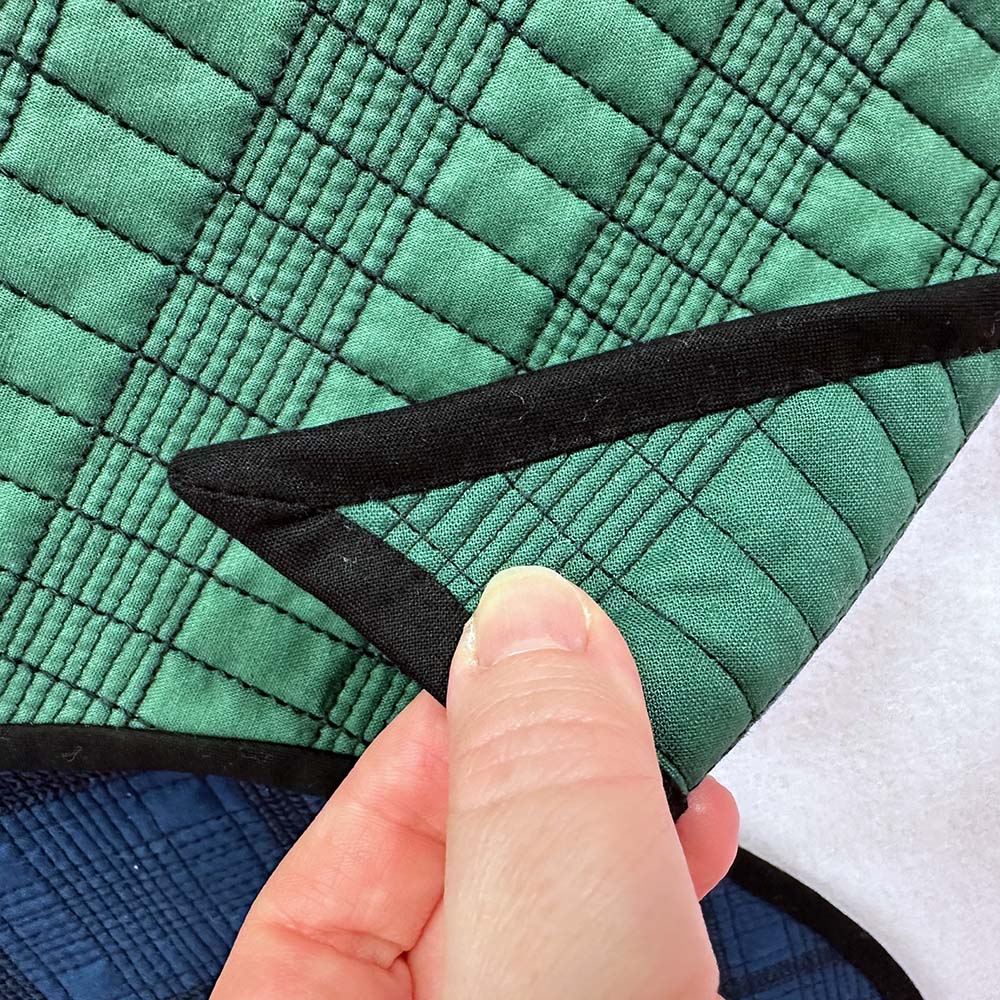
Finishing the Binding Corner
Once the binding is attached around the entire quilt, finish by hand or machine. For unusually angled corners, particularly the extremely sharp ones, I suggest hand-finishing.
When you turn the binding to the back of the quilt, your corner should create a miter that goes from the corner to the quilt to the inner corner of the binding. Mirror that angle when folding the binding on the back of the quilt. Try to place the bulk of the binding fold on the opposite side of the bulk on the front of the quilt. At sharp angles, you may have more bulk in the corner than you are accustomed to having. Maneuver the fabric to lay as flat as possible and use tiny stitches to hold the miter in place as you stitch the binding back in place. Take the time to stitch the front miter closed as well as the back.

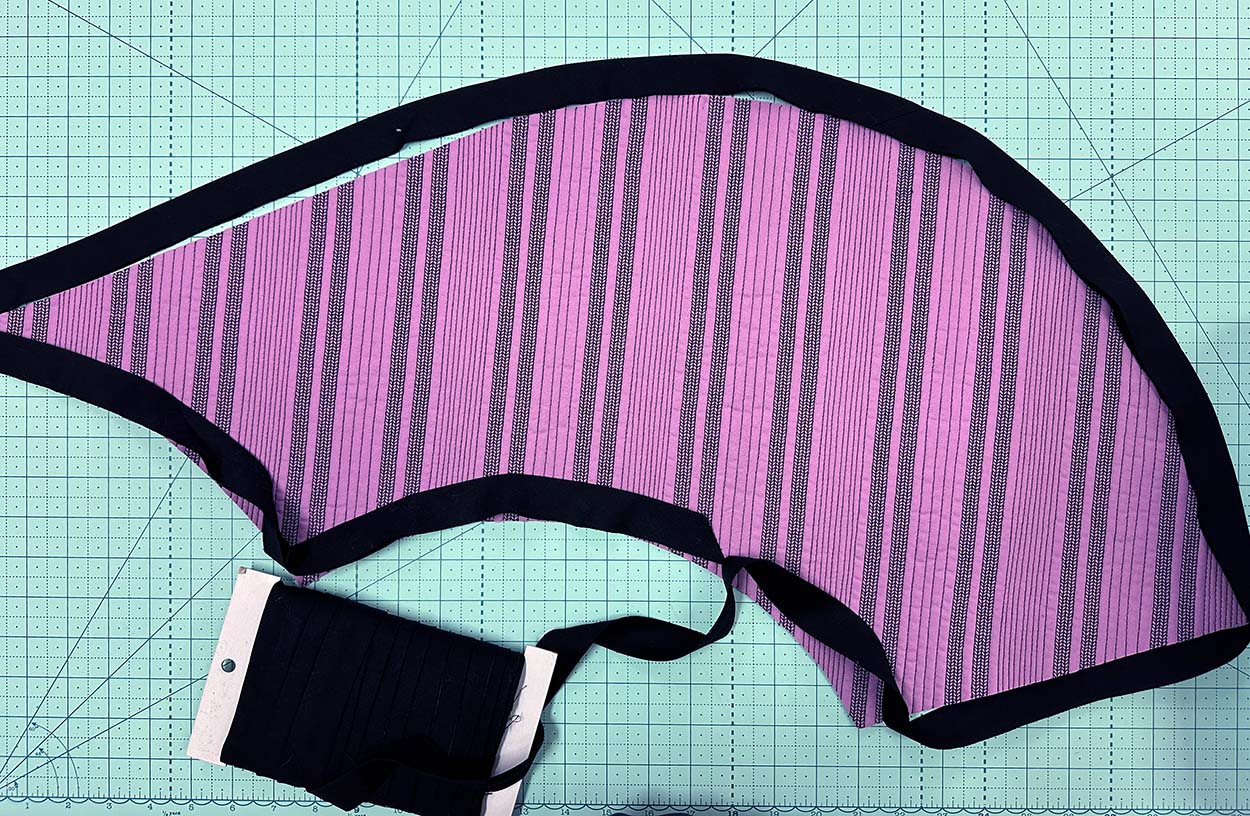
Handling Curved Binding
With just a little practice, curved binding is actually fairly easy. While bias binding is nice on other edges, it’s a must-have on curved edges. The slight stretch of the bias hugs the edges of the curves, resulting in a smooth finish.
Working with strips of bias binding allows you to slightly stretch or contract the binding to accommodate the quilt’s specific curved edges.
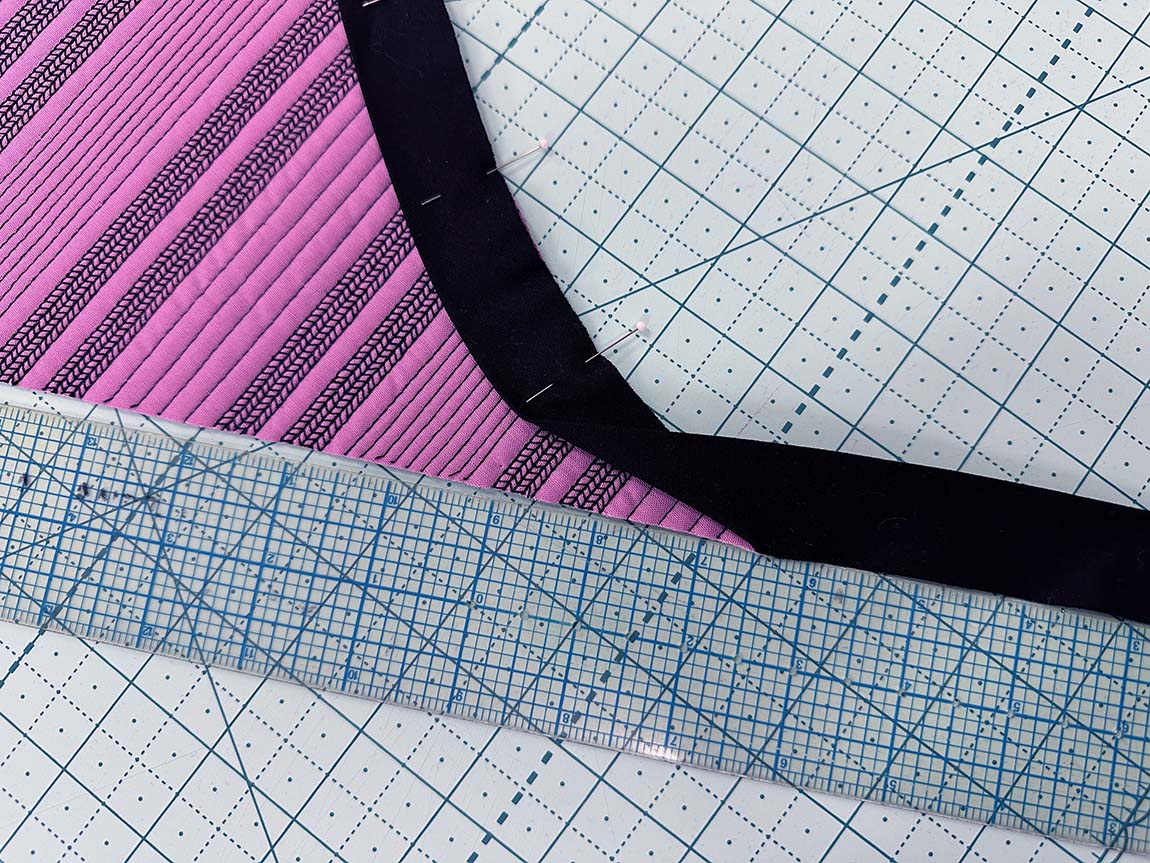
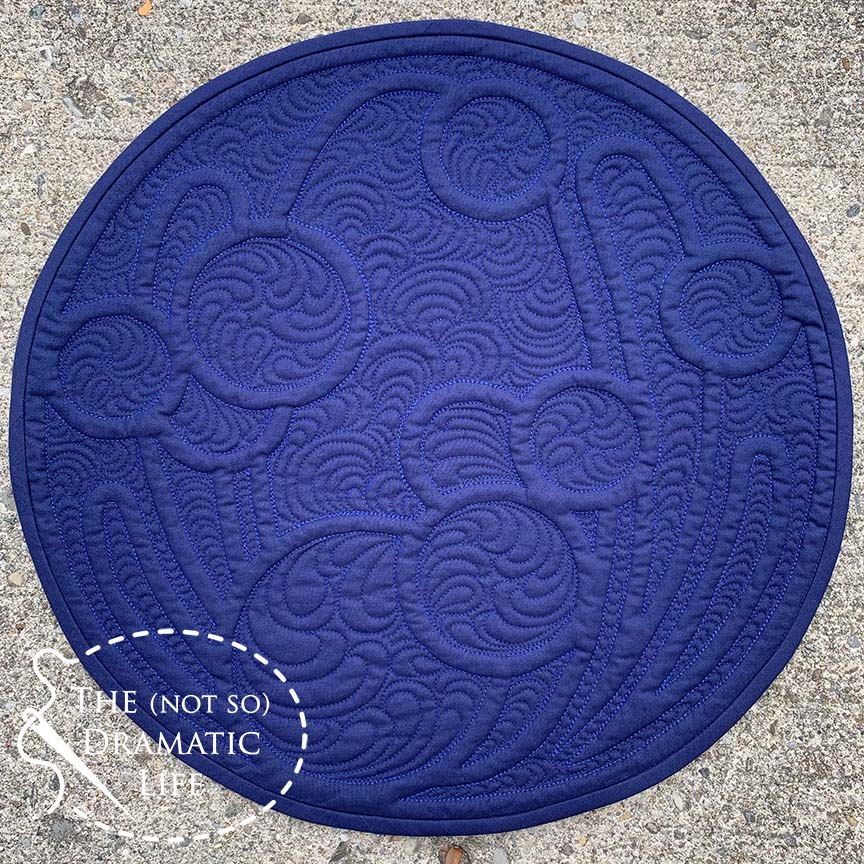
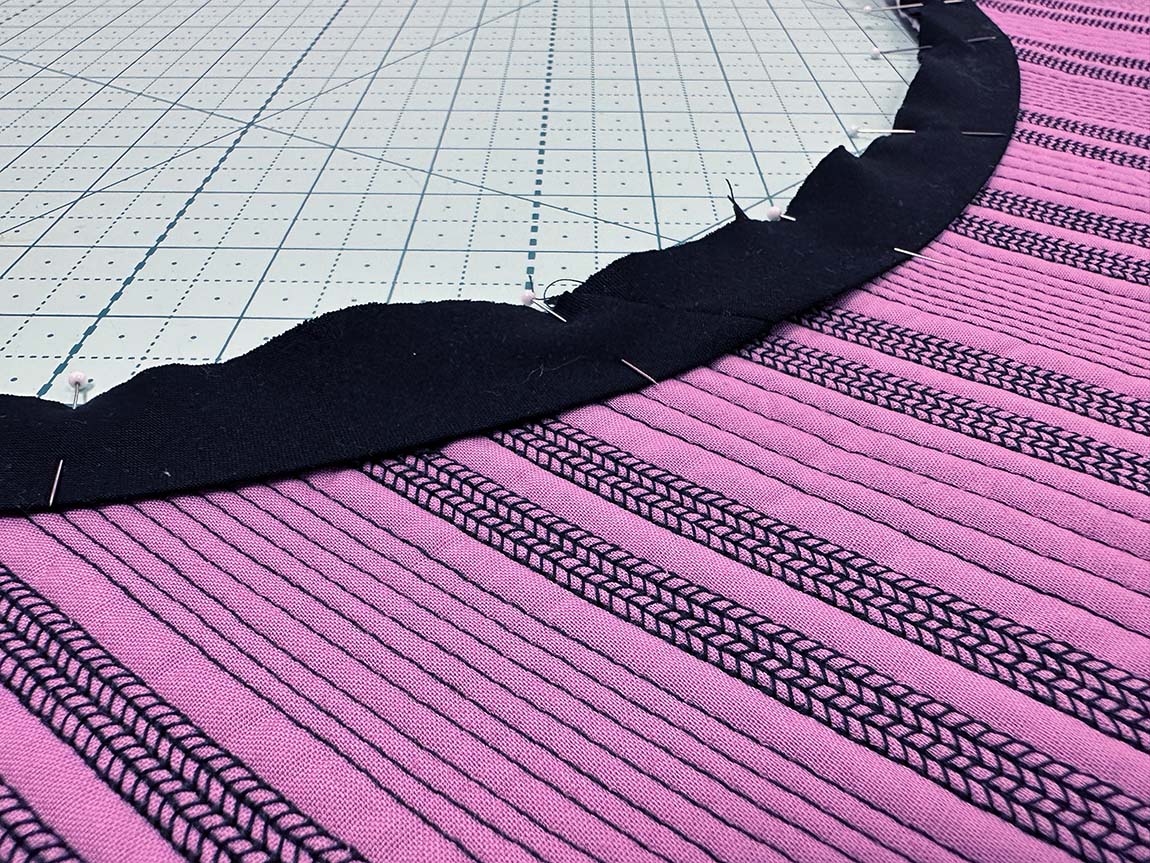
Convex Curves
Convex curves push outwards away from the center of the quilt. At its most extreme, a convex curve would eventually form a circular quilt.
The seam you stitch around a convex curve is actually slightly shorter than the actual edge of the quilt. Bias binding will stretch slightly to accommodate the larger cut edge, but you will find it helpful to ease in a tiny bit of extra binding along a convex edge. You will get a feel for how much extra binding you need to ease in, but you will never add so much that it would result in tucks in your seam. I would estimate that I ease in no more than 1/4” for every foot of overall length and sometimes less for shallow curves.
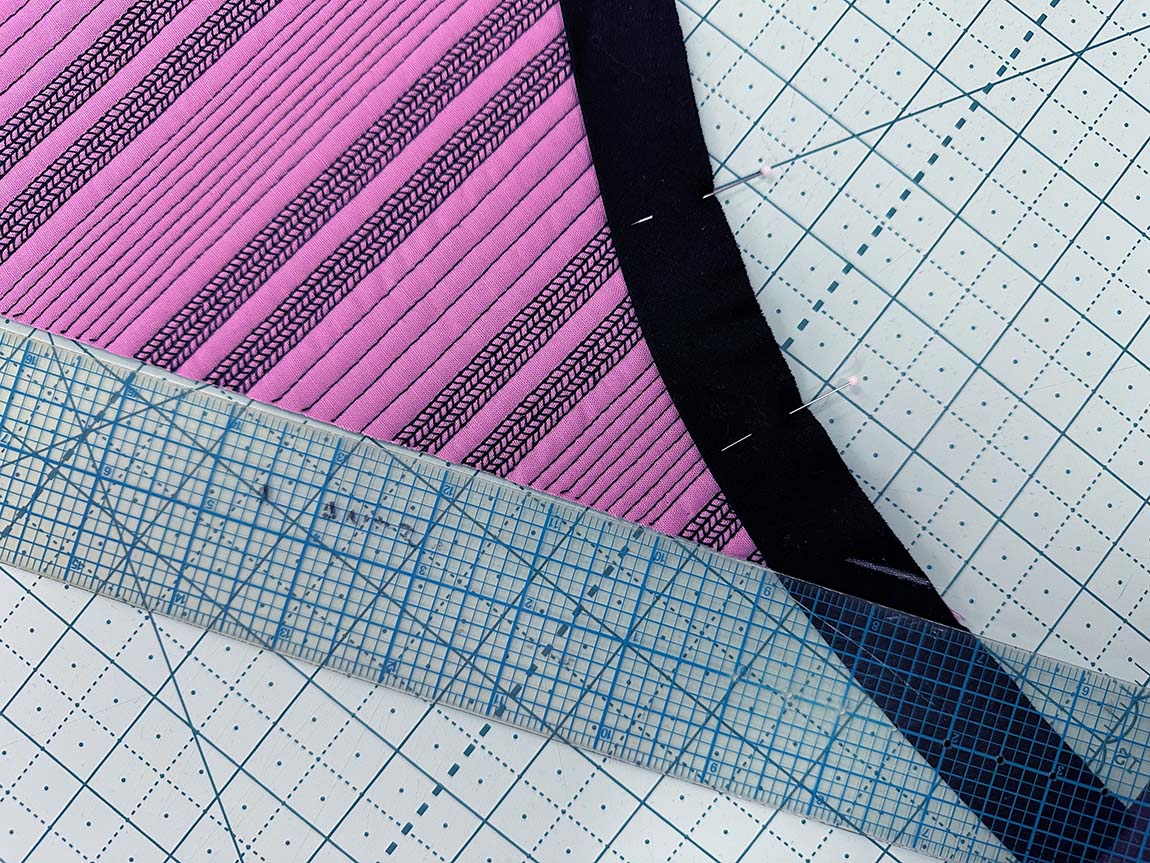
Concave Curves
Concave curves dip inward toward the center of the quilt.

The seam you stitch around a concave curve is slightly longer than the actual edge of the quilt. The bias binding will contract slightly to hug the shorter cut edge. However, to achieve the smoothest possible finish, you will want to stretch the bias binding slightly (I really do mean a tiny bit) to prevent ripples on the edge of a concave curve.
Finishing Curved Binding
Curved binding is very satisfying to finish. Most of the time, the binding will flip to the back of the quilt and hug the edge beautifully with almost no effort on your part. If you find the binding needs a little help to lay nicely, a steam iron can help it along. (Always test your batting to make sure it won’t melt with the heat of an iron before trying this!)
Quilt Edges
Have you made a quilt with unusual edges? Do you prefer playing with angles or experimenting with curves?
No Comments