How long do you use your travel accessories before you go for an upgrade?
I’ve been using a toiletry travel bag for around twenty years, and it’s a little small and a bit dreary, so it is finally time for something bigger and a lot cuter.
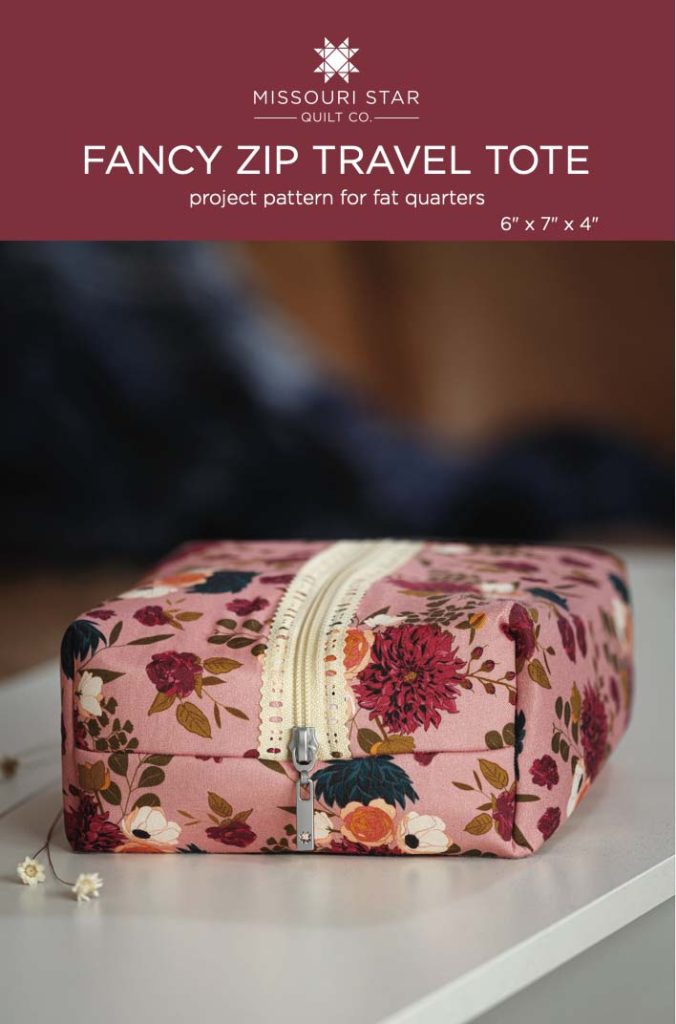
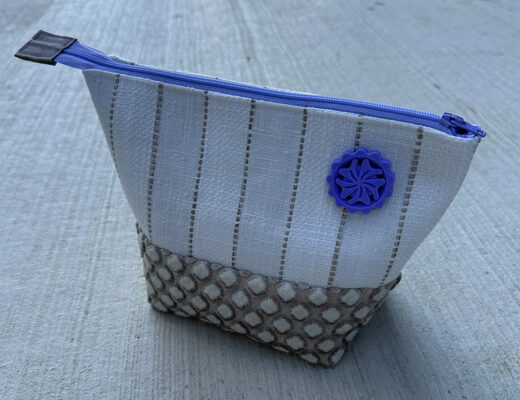
Enter the Fancy Zip Travel Tote.
(This post includes some affiliate links. If you click on an affiliate link and choose to make a purchase, I receive a small percentage of the sale at no cost to you. These funds help keep this blog running and content FREE for everyone!)

This Missouri Star pattern is easy, fat quarter friendly, and available as a PDF or hard copy. The tote is moderately structured, easy to assemble, and has an exposed decorative zipper. You can also add an iron-on vinyl lining to make it more durable as a toiletries pouch.
Iron-On Vinyl
When I was selecting the iron-on vinyl, I had two options available. One was offered by the yard, and the other came pre-packaged in a two-yard length. I ordered both to compare, but it turns out that they were from the same manufacturer! I always suggest testing a swatch of any new product, so the first thing I did before starting the project was test a swatch of each vinyl.
Ultimately, I selected the vinyl offered by the yard because it was wider than the longest measurement for the pouch, which meant it was a much more efficient use of materials.
Zippers
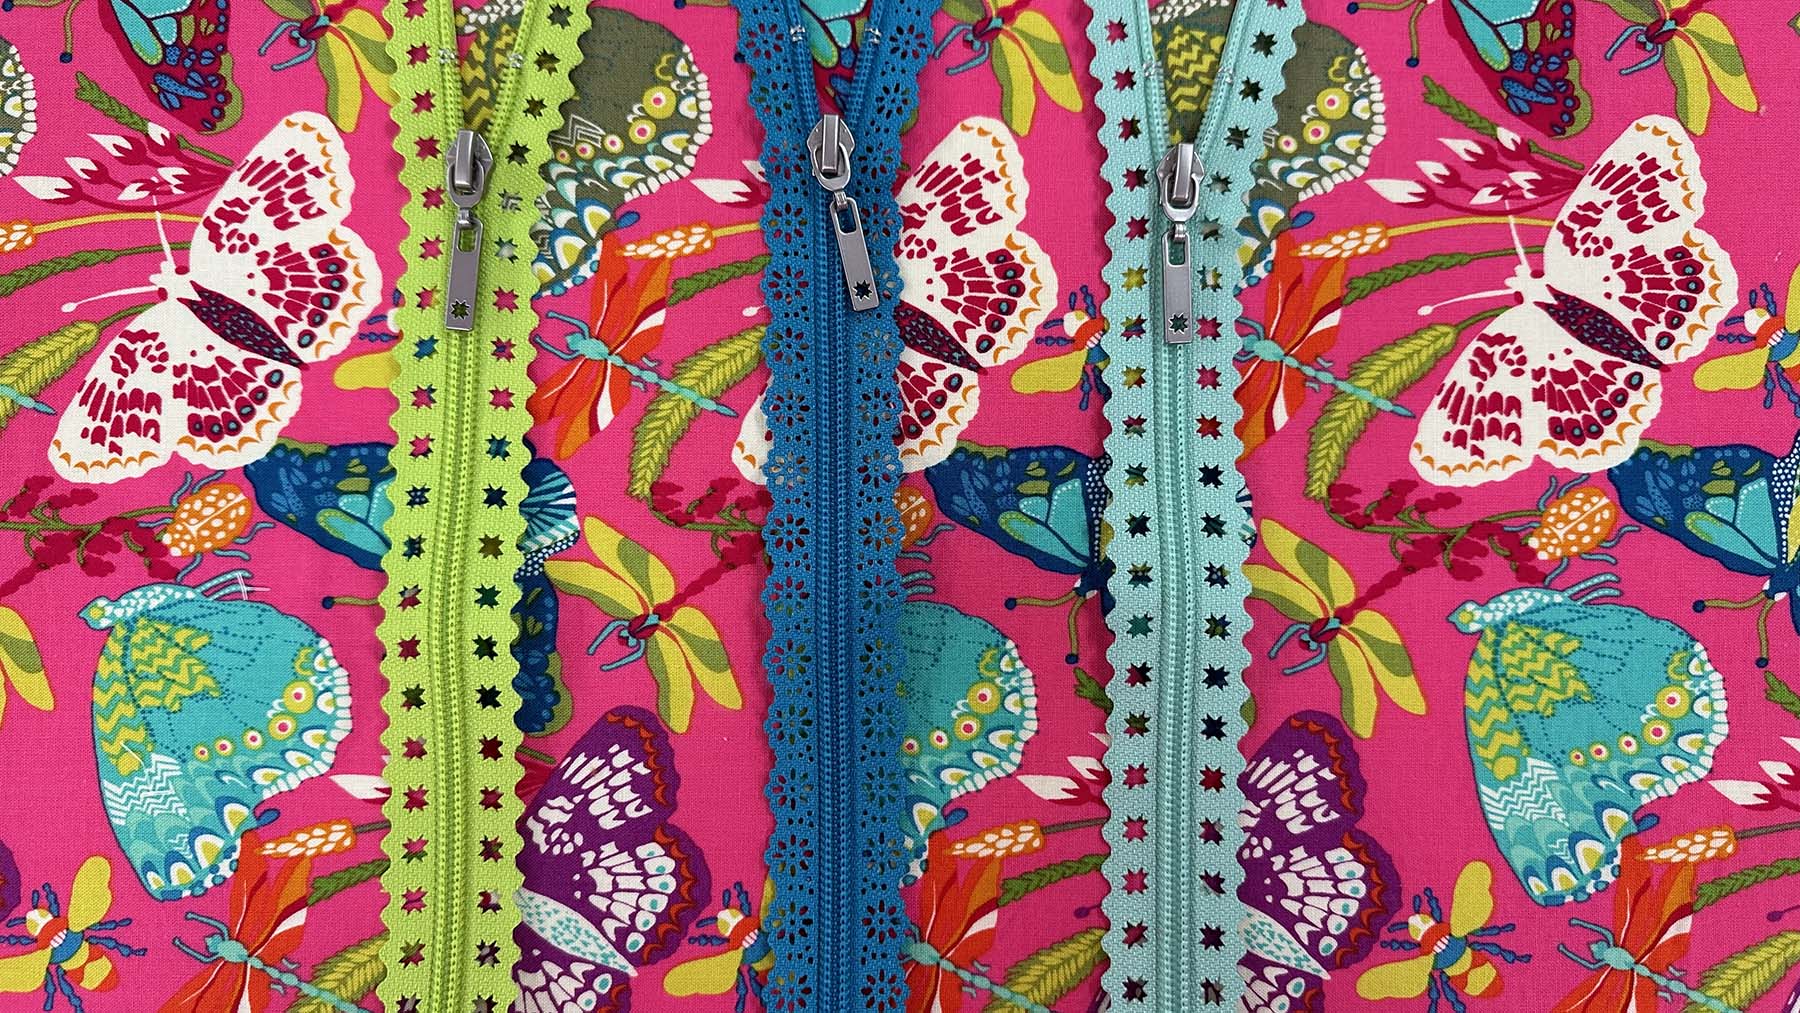
Part of the appeal of this project is that it features Missouri Star Fancy Zips. These zippers have shaped decorative edges and fun motifs cut from the zipper tape meant to be exposed.
I had an assorted multi-pack to choose from, and below are my top three choices. The turquoise zipper was my ultimate choice because the color and the floral motif in the zipper coordinated with the butterfly print I pulled from my stash to make the bag.
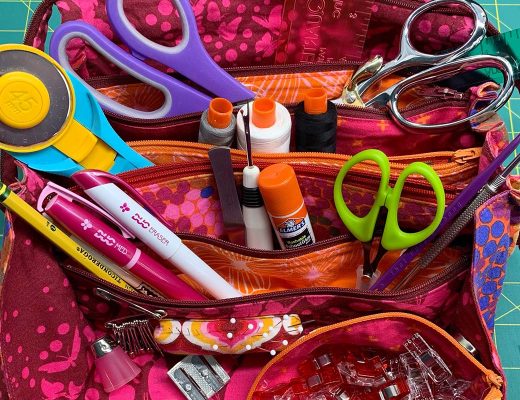
Other Materials
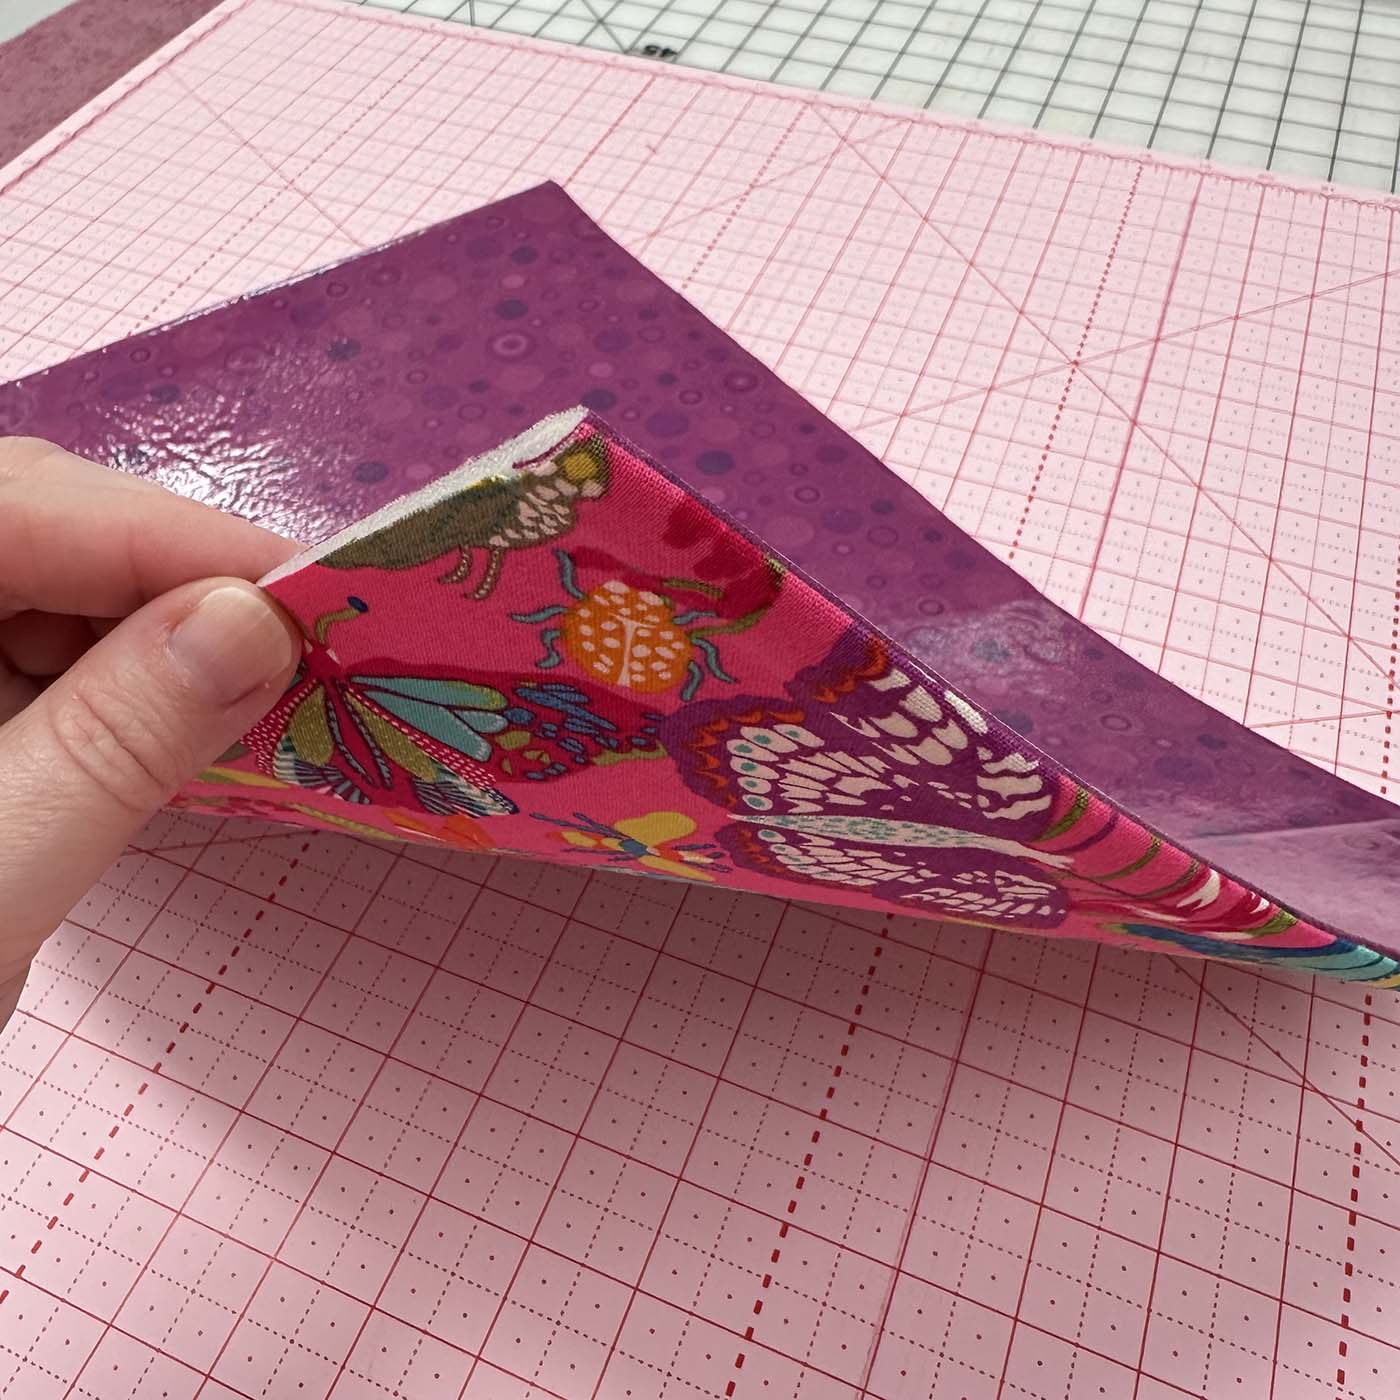
I pulled the exterior and lining fabrics for this bag from my stash. Both of these fabrics wrap around the bag continuously from one side of the zipper to the other.
Tip: Because of this continuous construction, I suggest selecting an all-over, non-directional fabric print so you don’t end up having the design upside down for part of the bag.
The stabilizer for this pouch is a double-sided fusible foam that you sandwich between the interior and exterior fabrics.
Construction Tips
Installing the Zipper
Making this pouch was my first time working with an entirely exposed zipper, and it was pretty easy. Since the zipper is a decorative feature, using a thread that matches the zipper tape is particularly important. You don’t want the installation stitches to detract from the design. I did use a bobbin thread that matched my lining fabric, but if you need to pick just one thread, go for the one that matches the zipper.
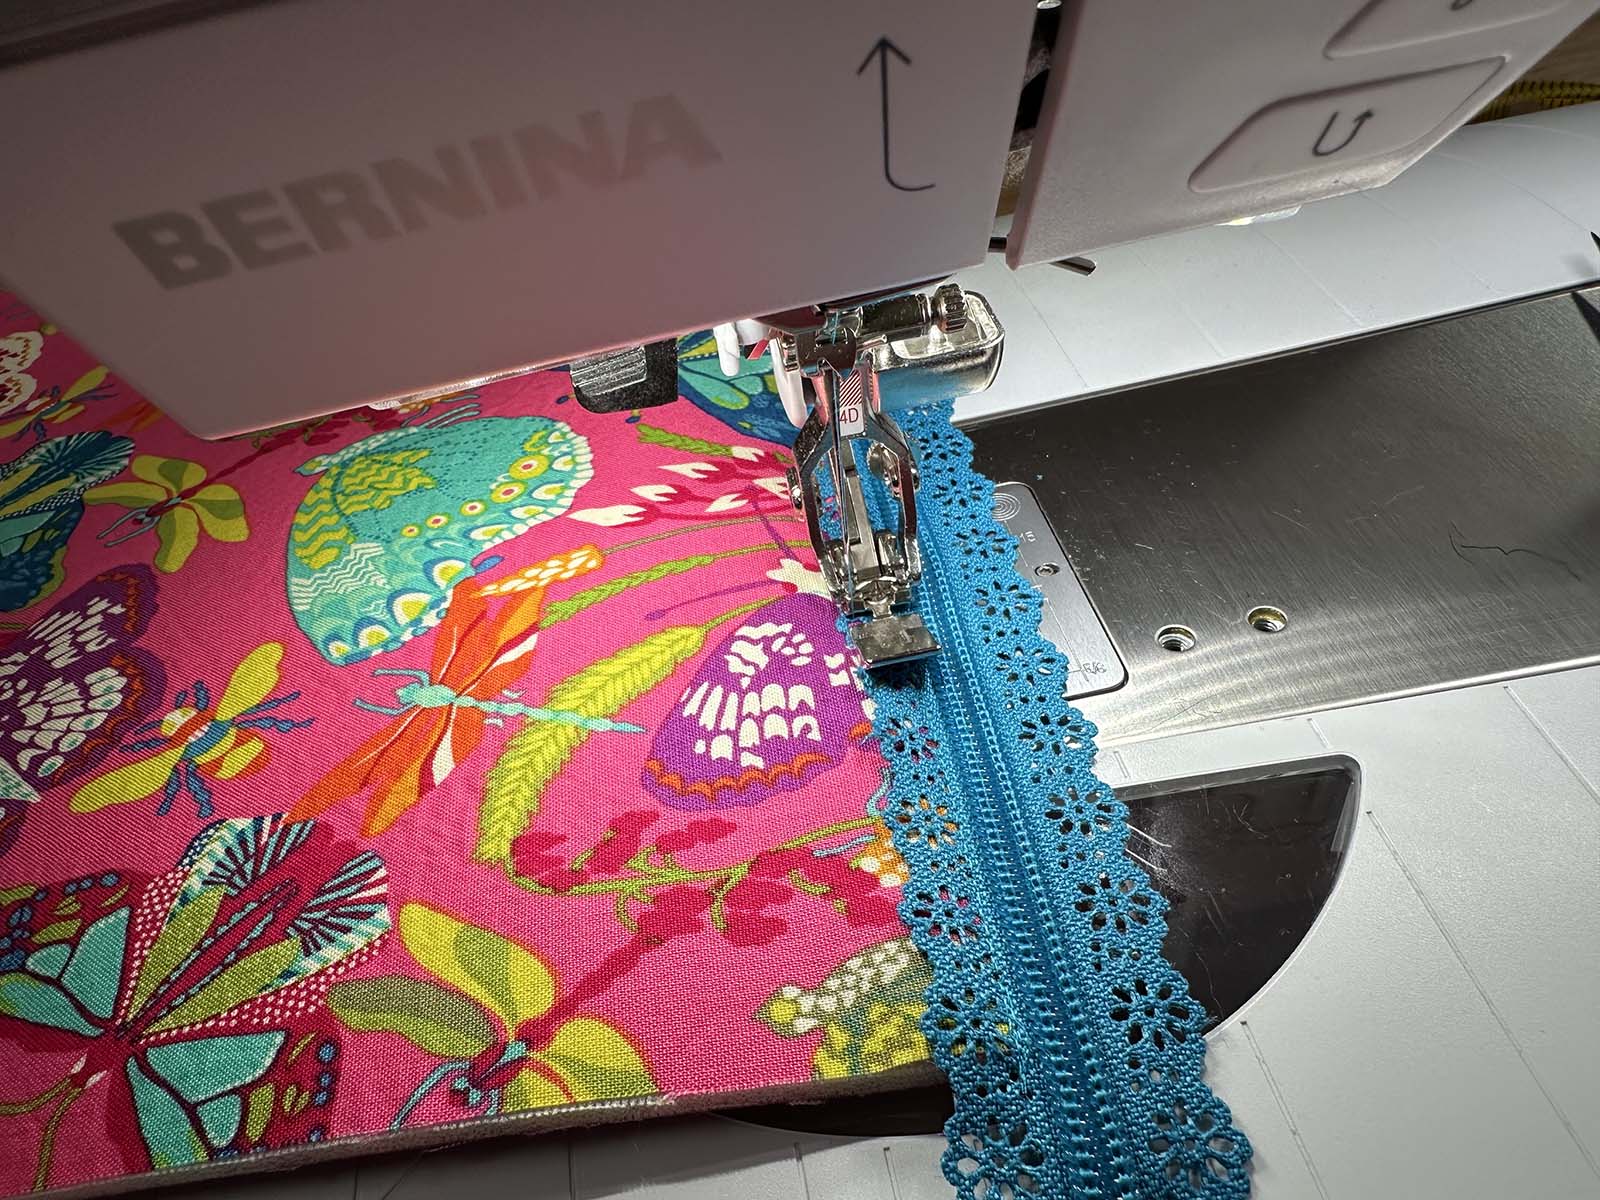
All of the stitching for the Fancy Zip is topstitching. I started with the line closest to the zipper and then stitched a second row as close as possible to the edge of the zipper tape.
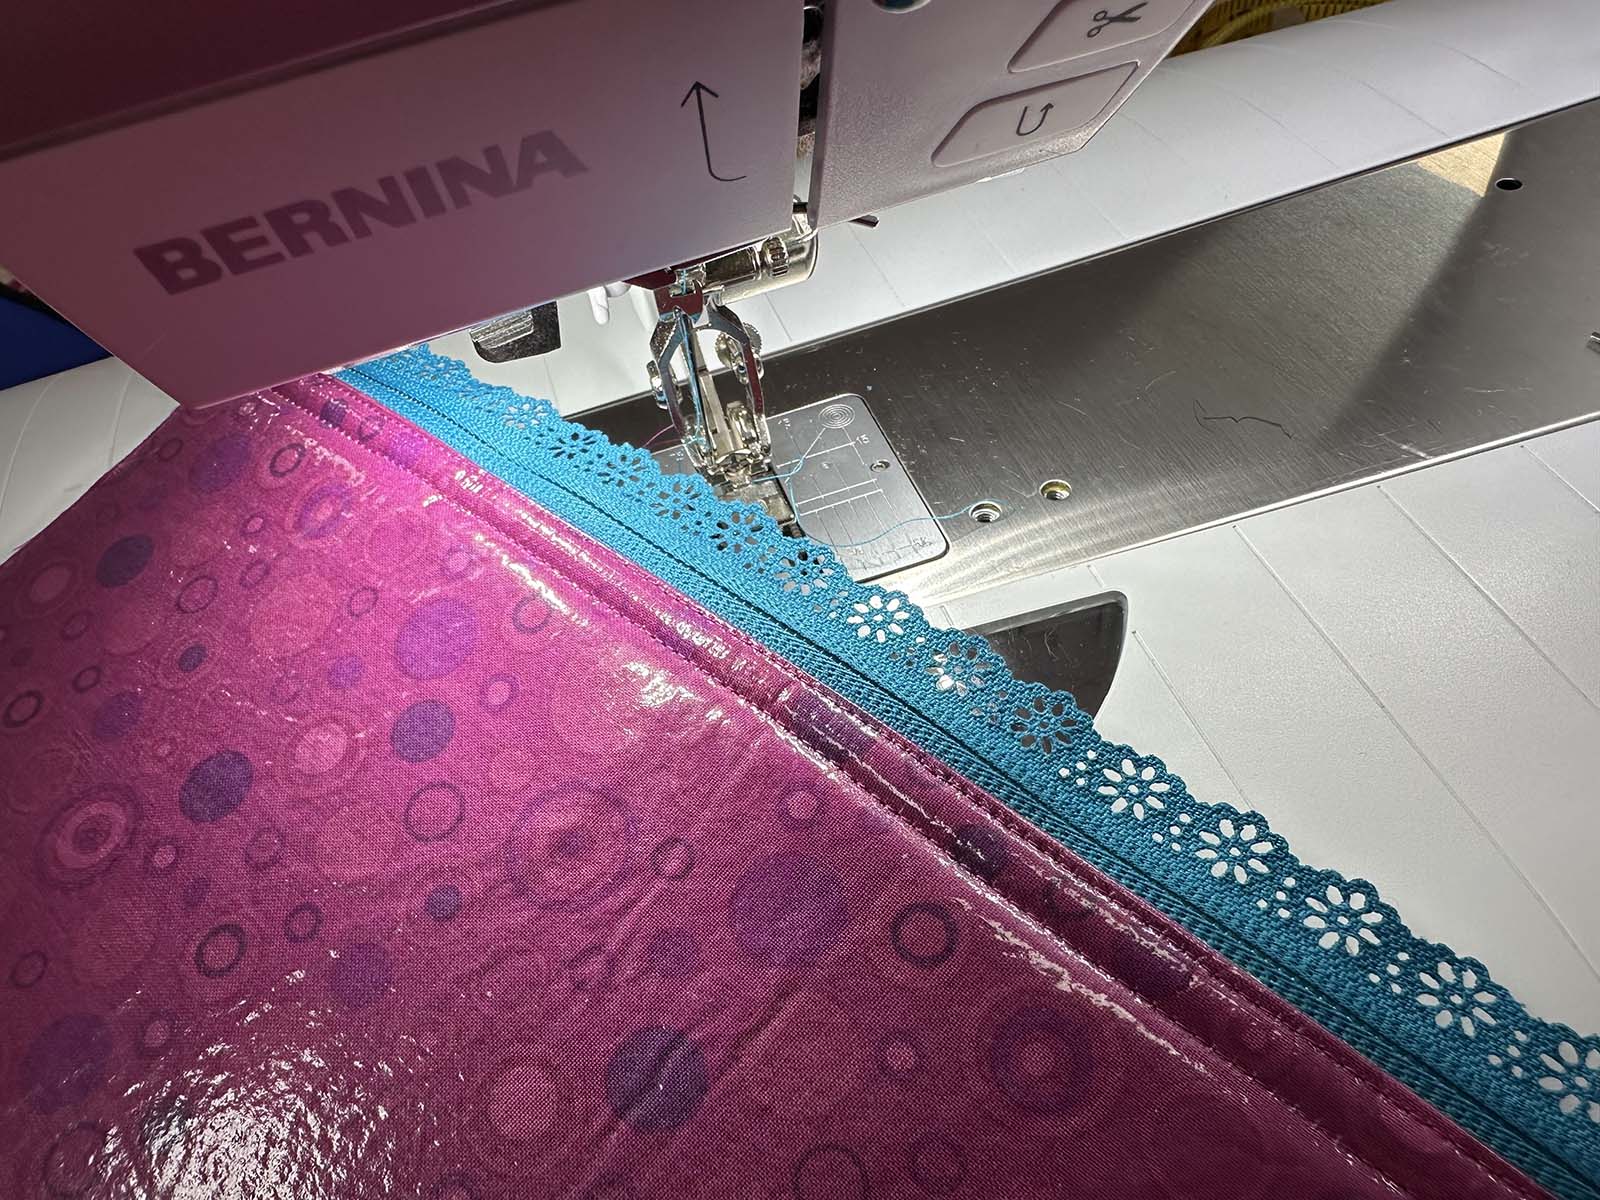
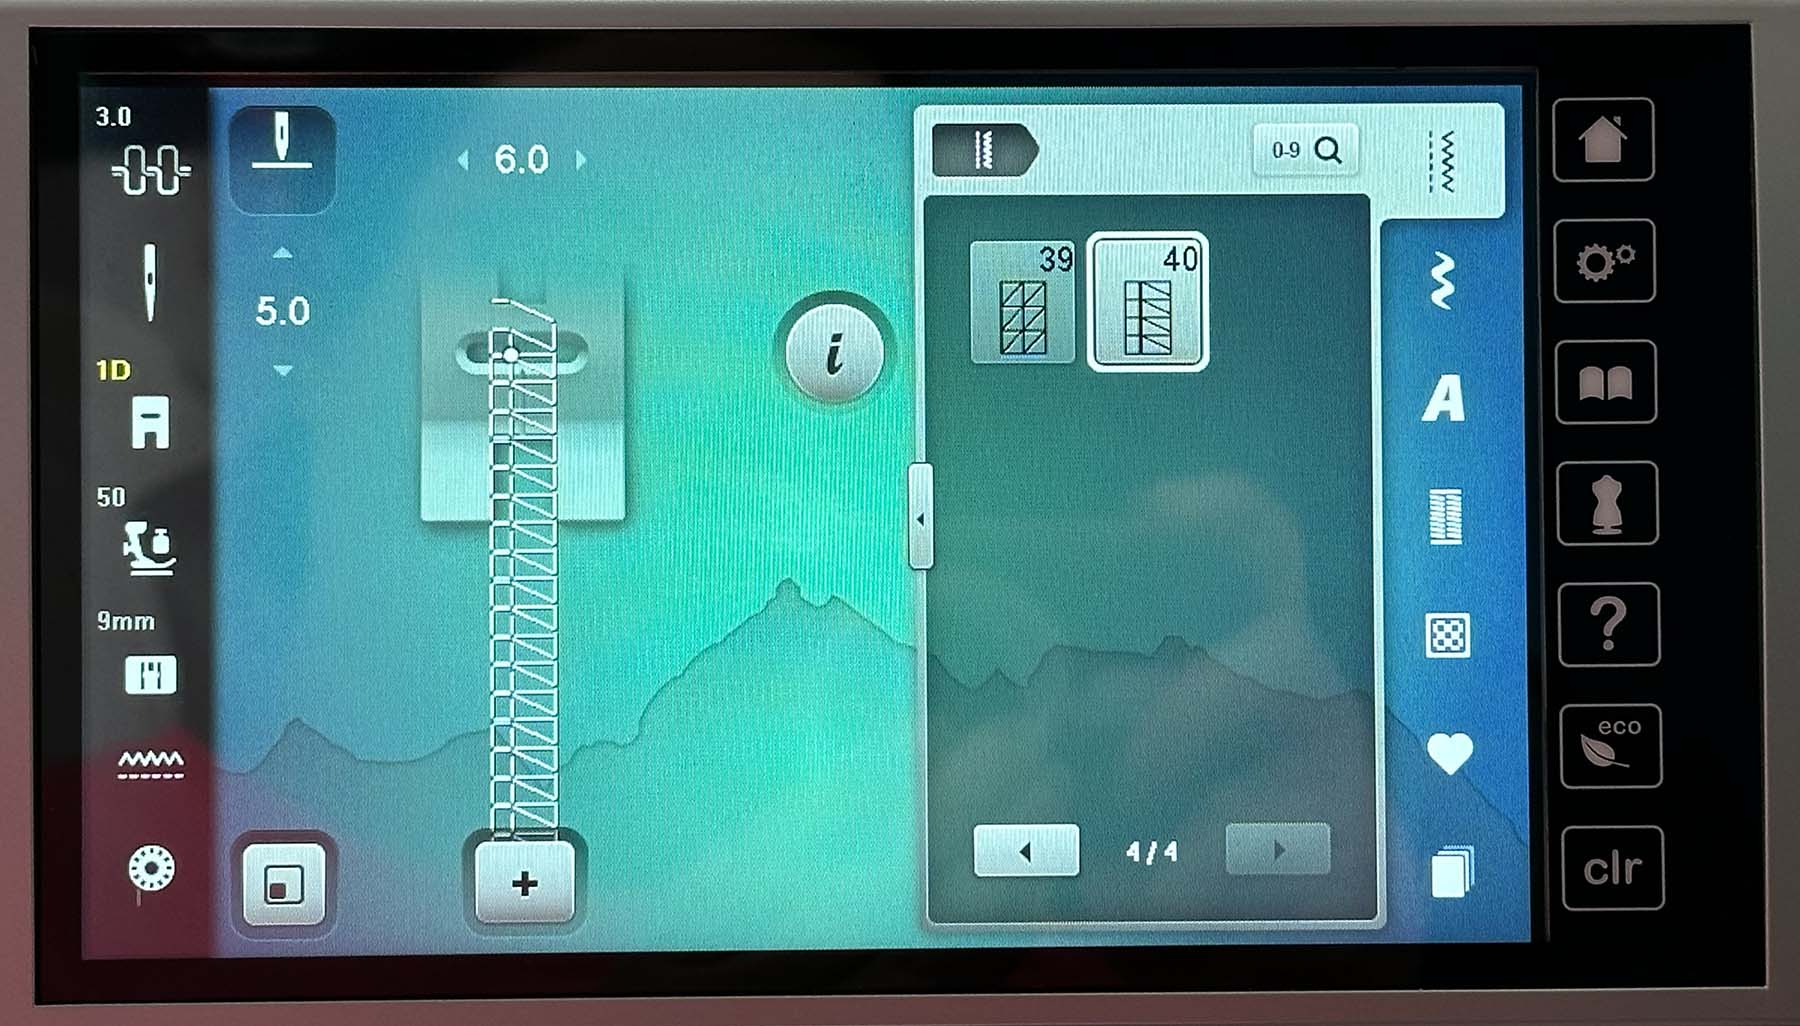
Treating the Edges of the Seams
Typically, I choose an entirely enclosed seam, but to achieve this, the construction method would have to be altered to include an additional interior seam, making the pouch less water-resistant. The pattern says that treating the edges of the seams is optional, but I want the threads from the fabric layers to stay put over the years.
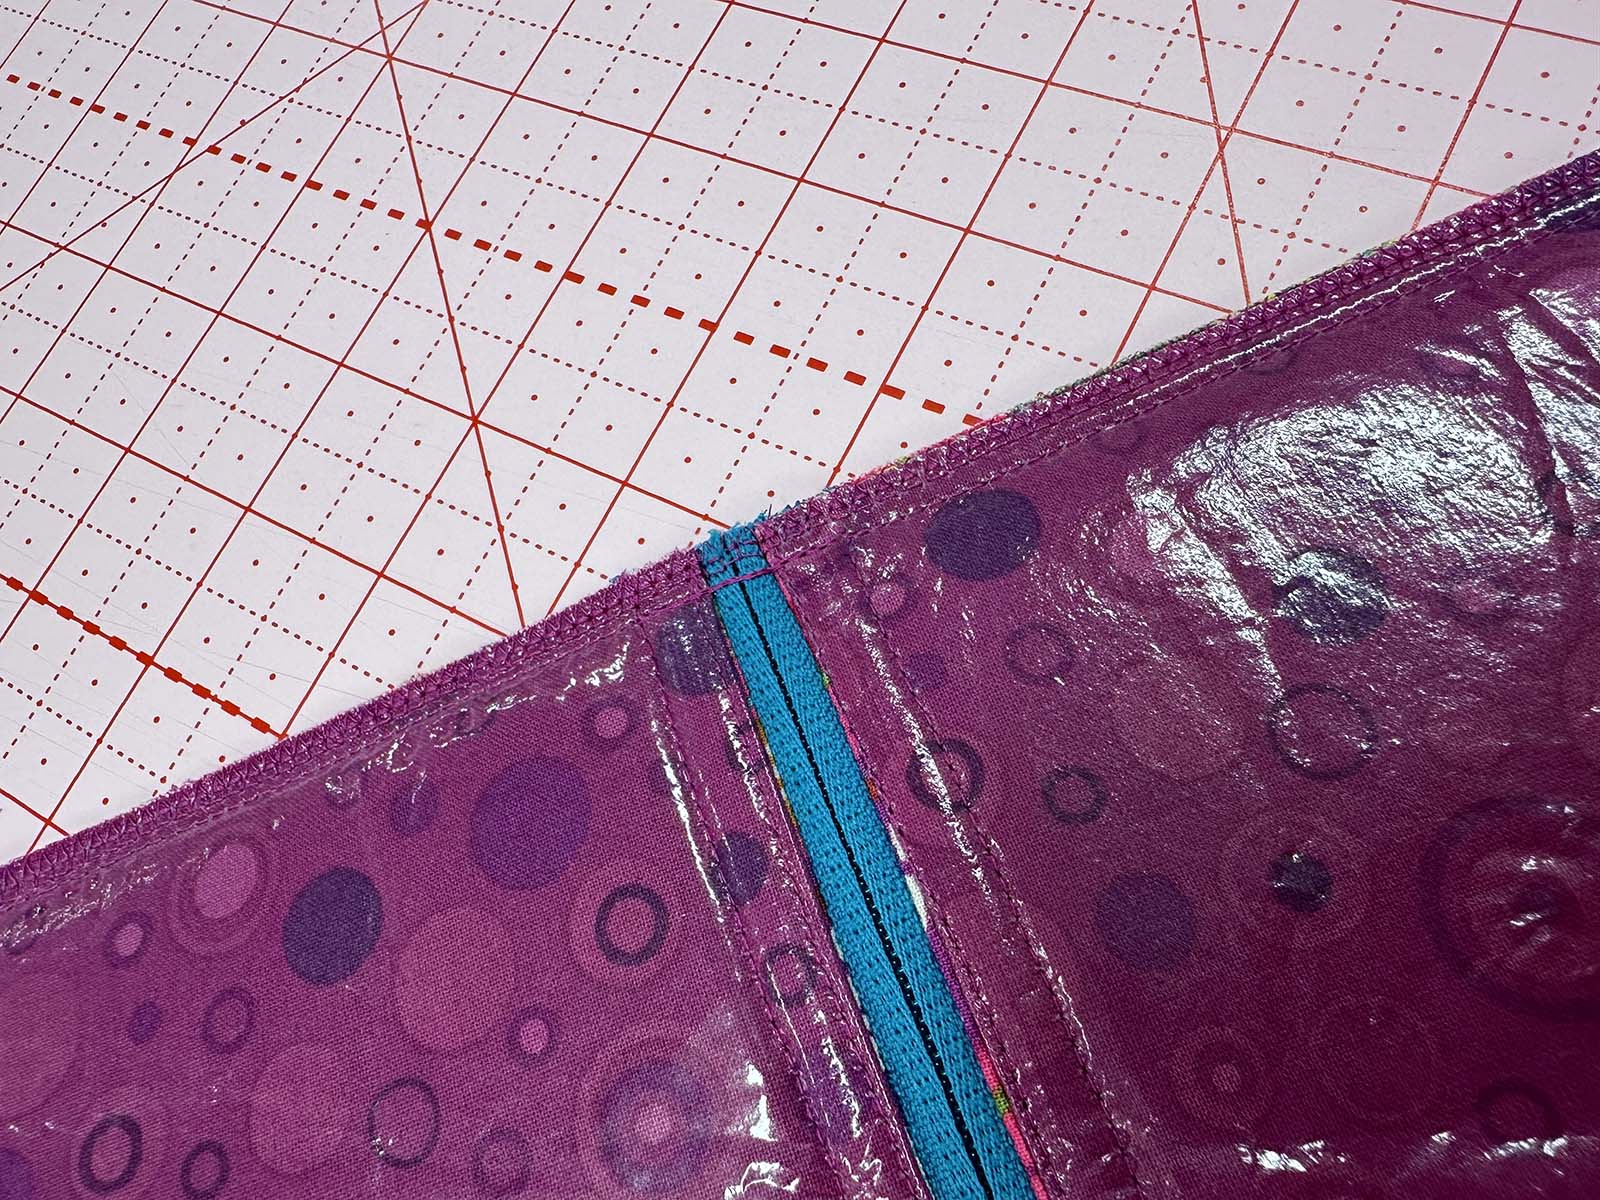
Instead of a standard zig-zag stitch, which would have been ok, I went with the number 40 stitch on my BERNINA 770QE PLUS because it covers the raw edge of the fabric more densely and even looks a bit like a serger stitch when completed.
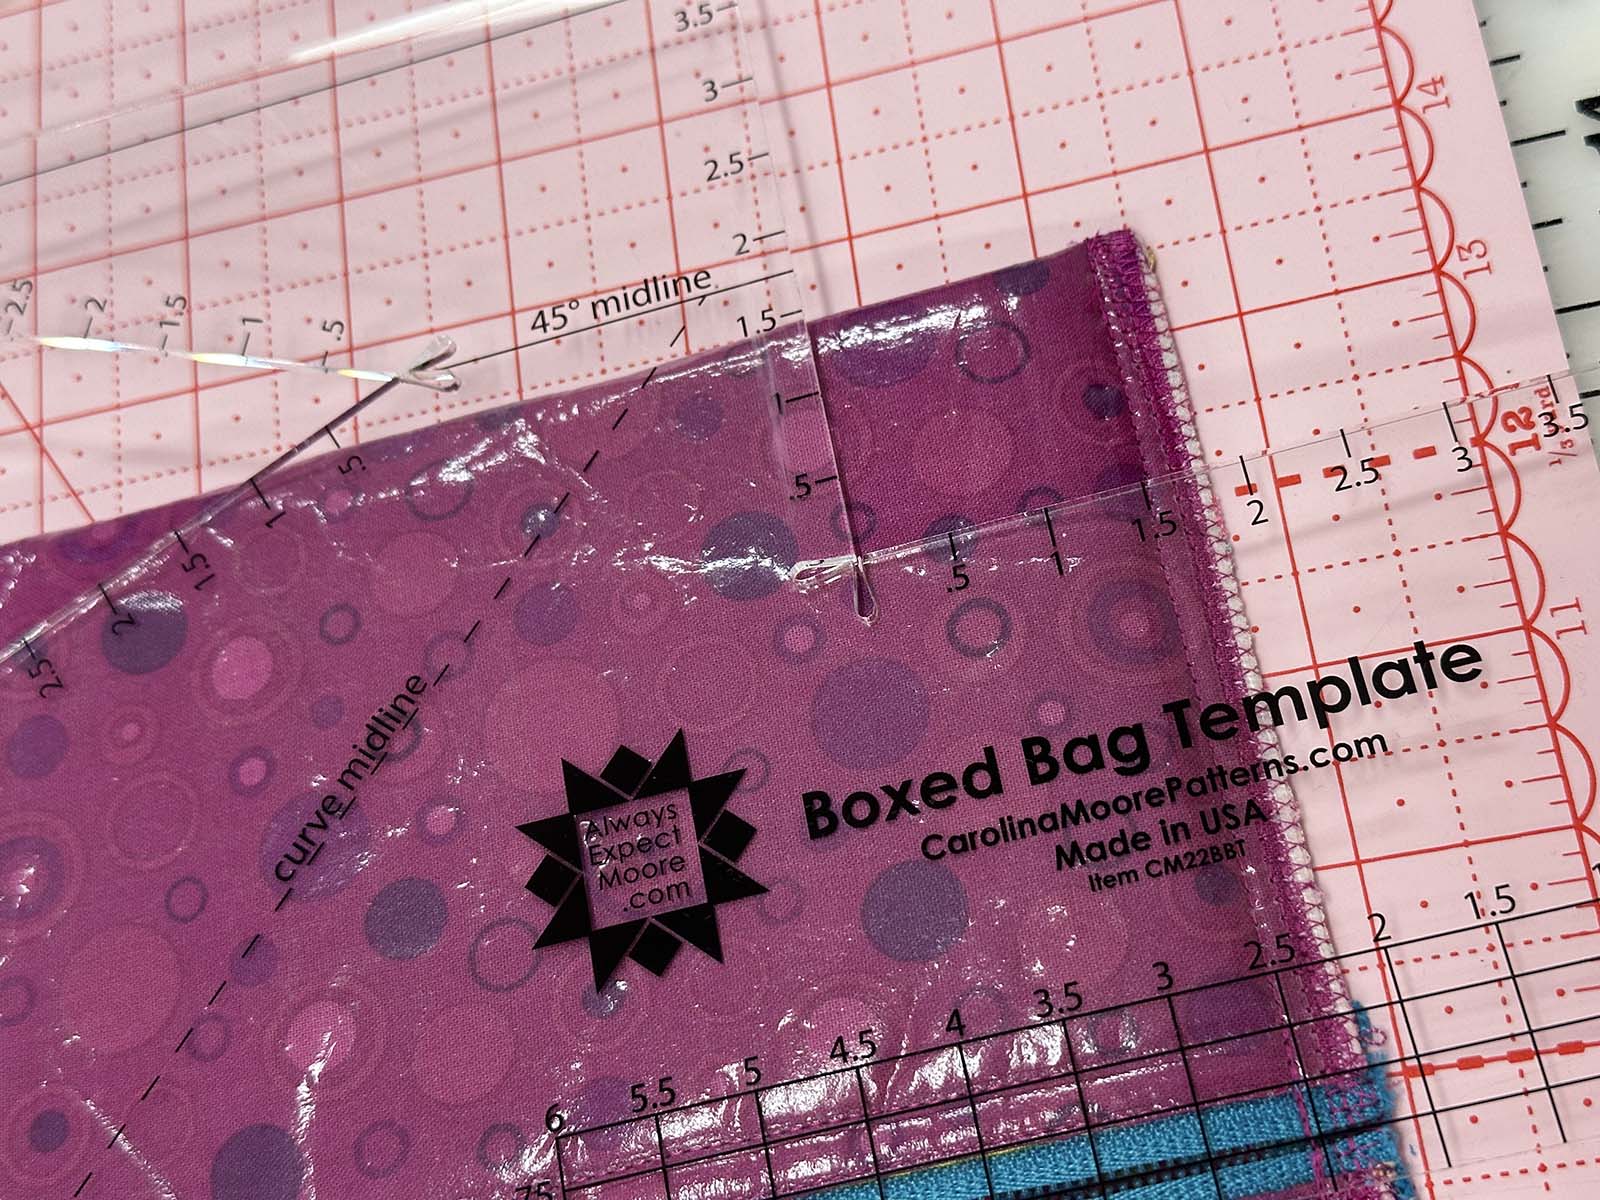
Trimming the Box Corners
Since I have a Boxed Bag Template, I used it to mark the corners of the pouch. Since the foam stabilizer is thick, I used the template to mark the cut lines and scissors to cut out the corners.
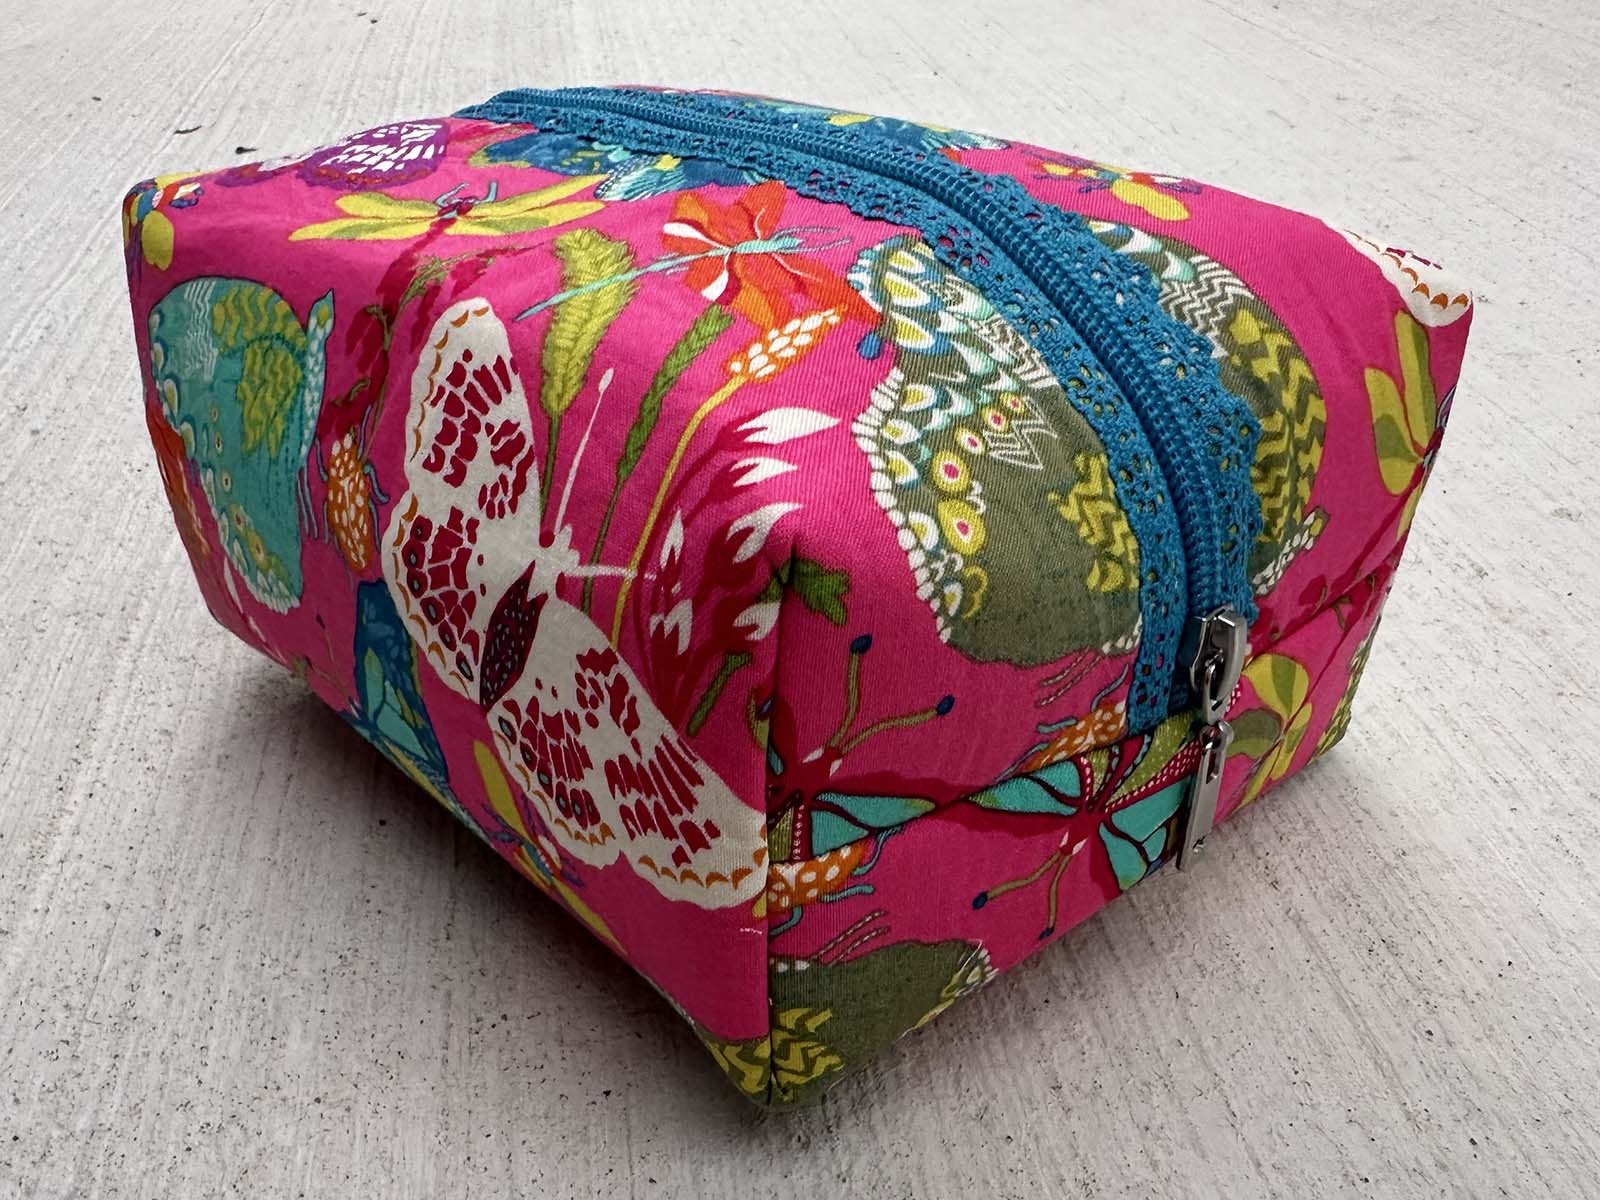
The Finished Fancy Zip Travel Tote
The interior of the pouch has a continuous piece of vinyl-covered fabric that should make it mostly water-resistant. The long zipper that extends down the sides of the pouch makes it easy to turn right side out and should make it easy to fill with all of my travel supplies.
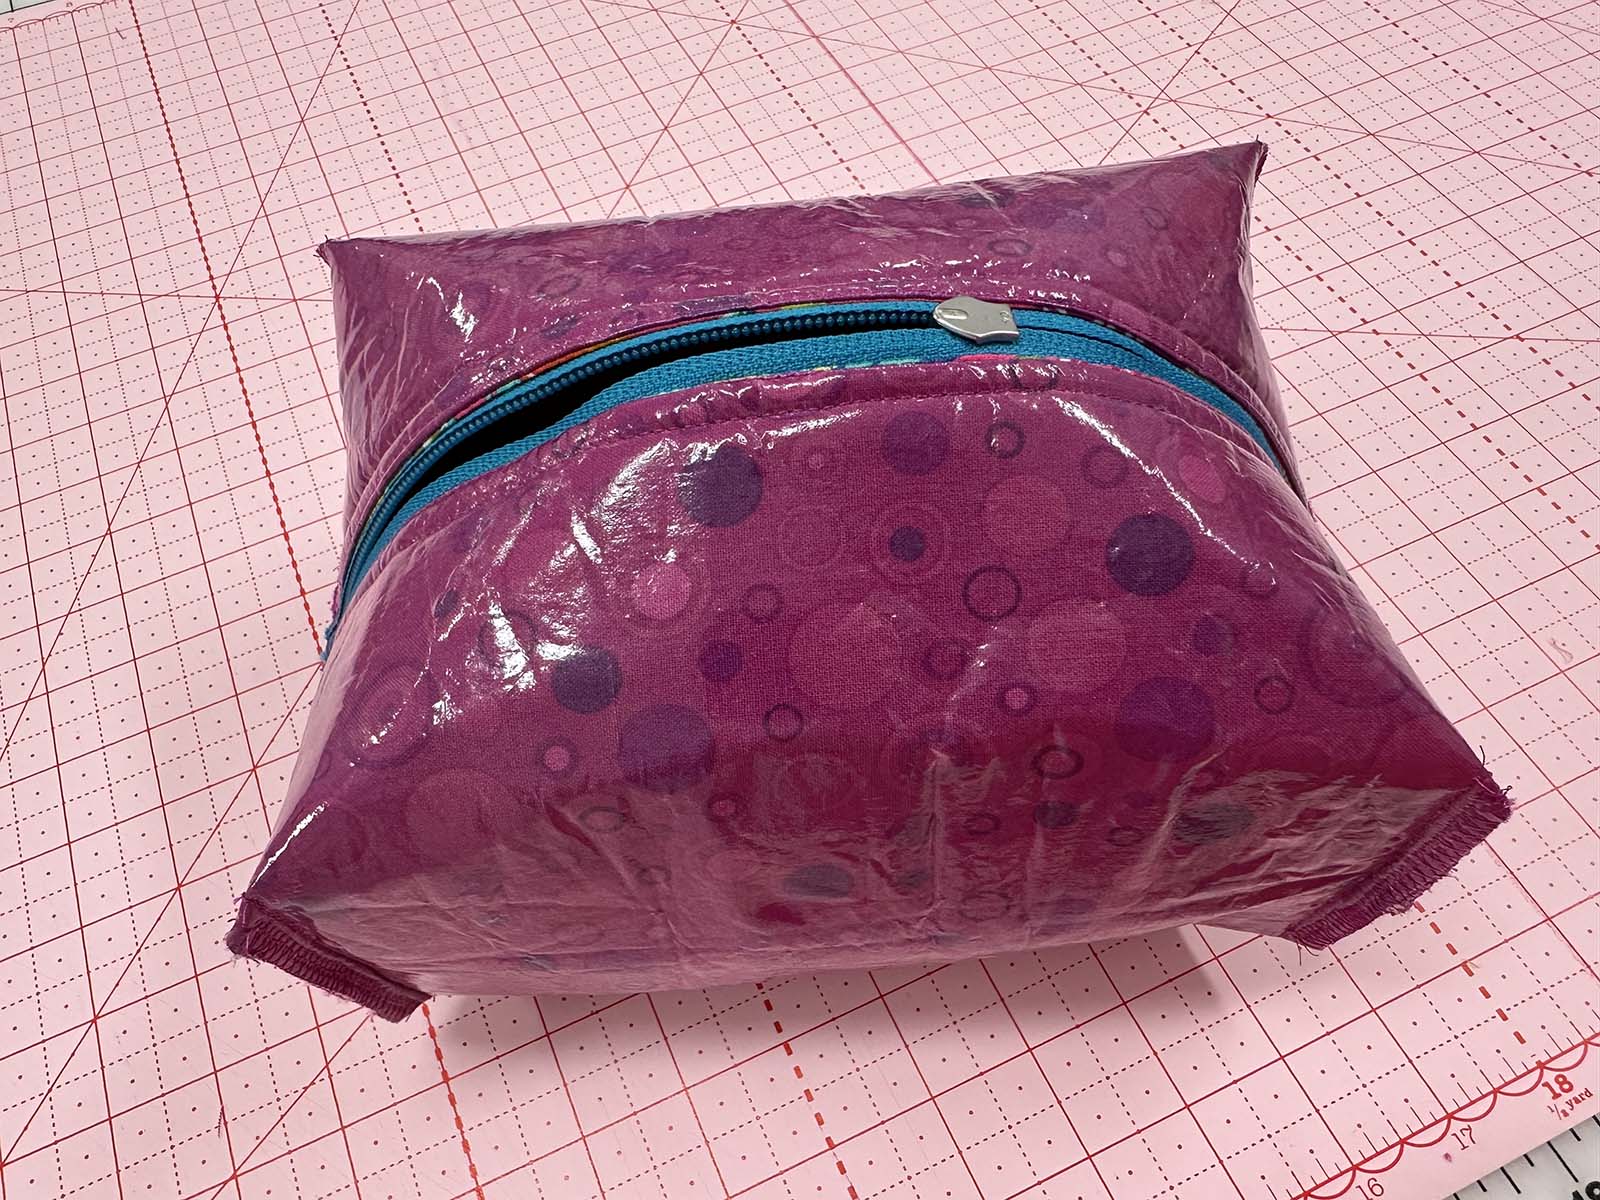
My favorite feature is how the adorable zipper combines with the cute exterior fabric!


1 Comment
50+ Quality Quilting New Year’s Resolutions (That Don’t Require Cleaning!) – The (not so) Dramatic Life
December 27, 2024 at 12:02 am[…] Fancy Zip Pouch features a decorative zipper that is simple to […]