Is it dry in here?
This week, I’ve been focusing on my desert-themed appliqué quilt as I work on the hand-stitching portion of the project. Last week, I shared my design process as I went from inspirational photographs to a final design. This week is all about fabric choices and the appliqué process.
Over three posts, I will share the process of going from photographic inspiration to a finished quilt. Here’s what you can expect:
- Part 1: Creating the Design (October 18, 2024)
- Part 2: Appliqué (October 25, 2024)
- Part 3: Quilting and Finishing (November 8, 2024—There will be no blog post on November 1 because QuiltCon entries are due October 31, and honestly, I’ll be working until the deadline this year).
(This post includes some affiliate links. If you click on an affiliate link and choose to make a purchase, I receive a small percentage of the sale at no cost to you. These funds help keep this blog running and content FREE for everyone!)
Selecting the Fabrics
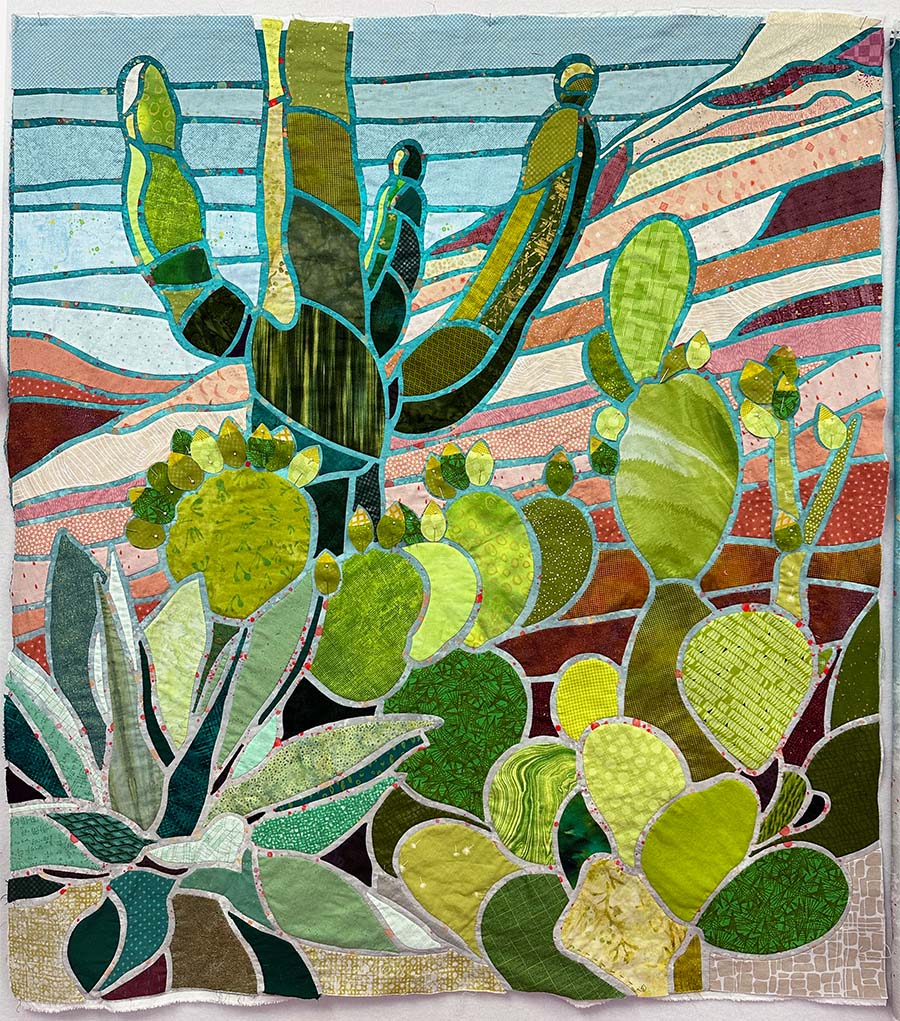
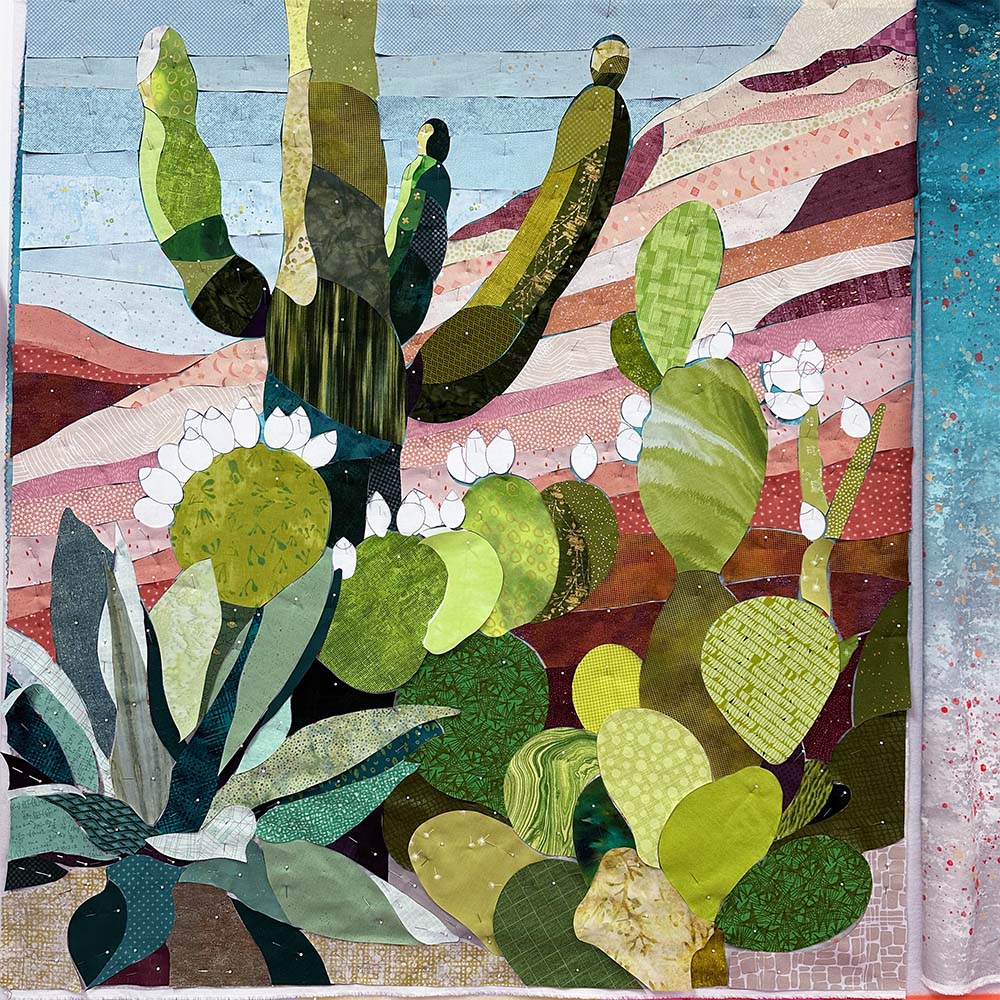
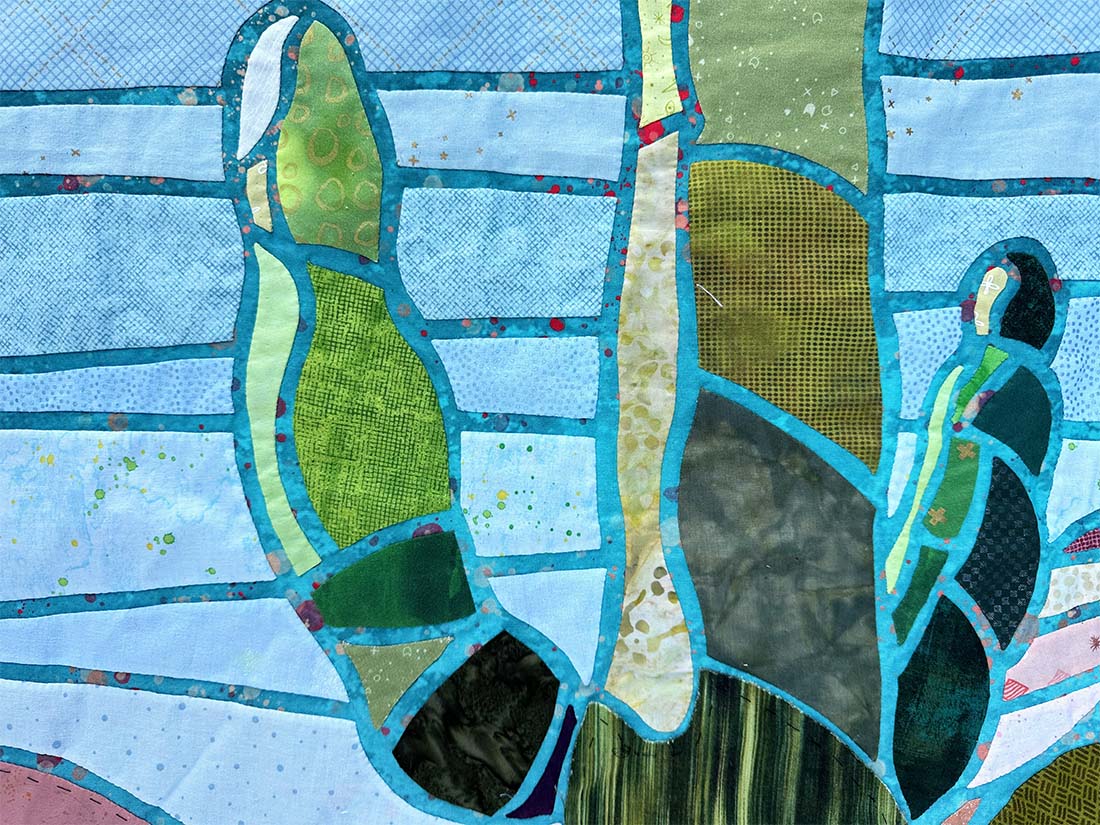
This quilt Design consists of five major elements: three plants, mountains, and sky. Each element has a primary color palette to differentiate it from the other sections of the design.
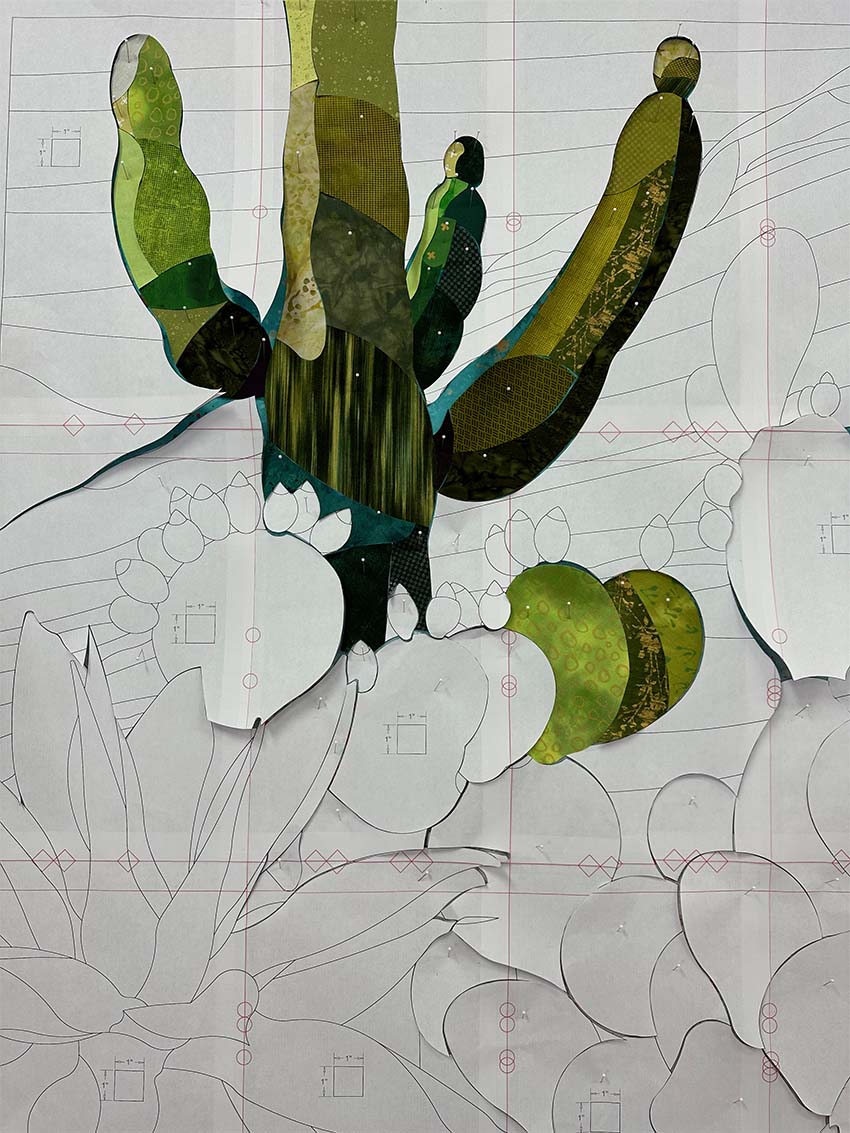
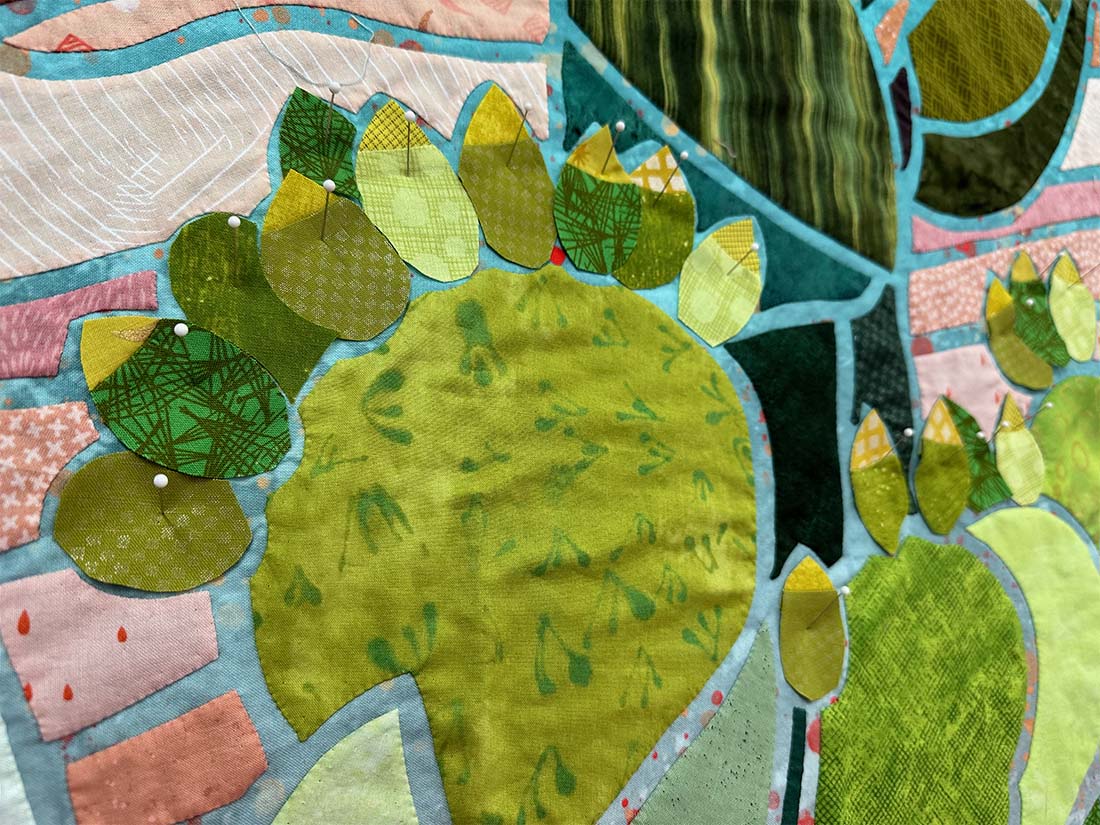
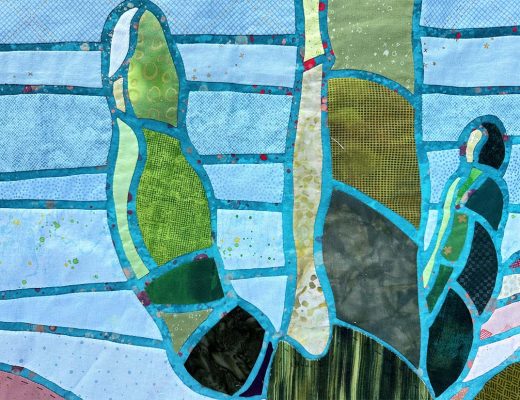
I started the fabric placement with the plants since they are the focal point of the overall design. The tall Saguaro Cactus in the upper left portion of the quilt uses high-contrast fabrics, mostly in the olive green range, while the Prickly Pear Cactus has mostly chartreuse fabrics and less contrast due to its relatively flat surfaces. The coloring of the Agave plant in the lower left corner leans heavily into a mint green palette.

As I selected and placed fabrics, many sections were cut multiple times. As I worked through the design, I added additional context to each section of the quilt. The addition of each fabric had the potential to require other elements to adjust in order for the entire composition to function. Do you see some fabrics that changed from one process photo to the next?
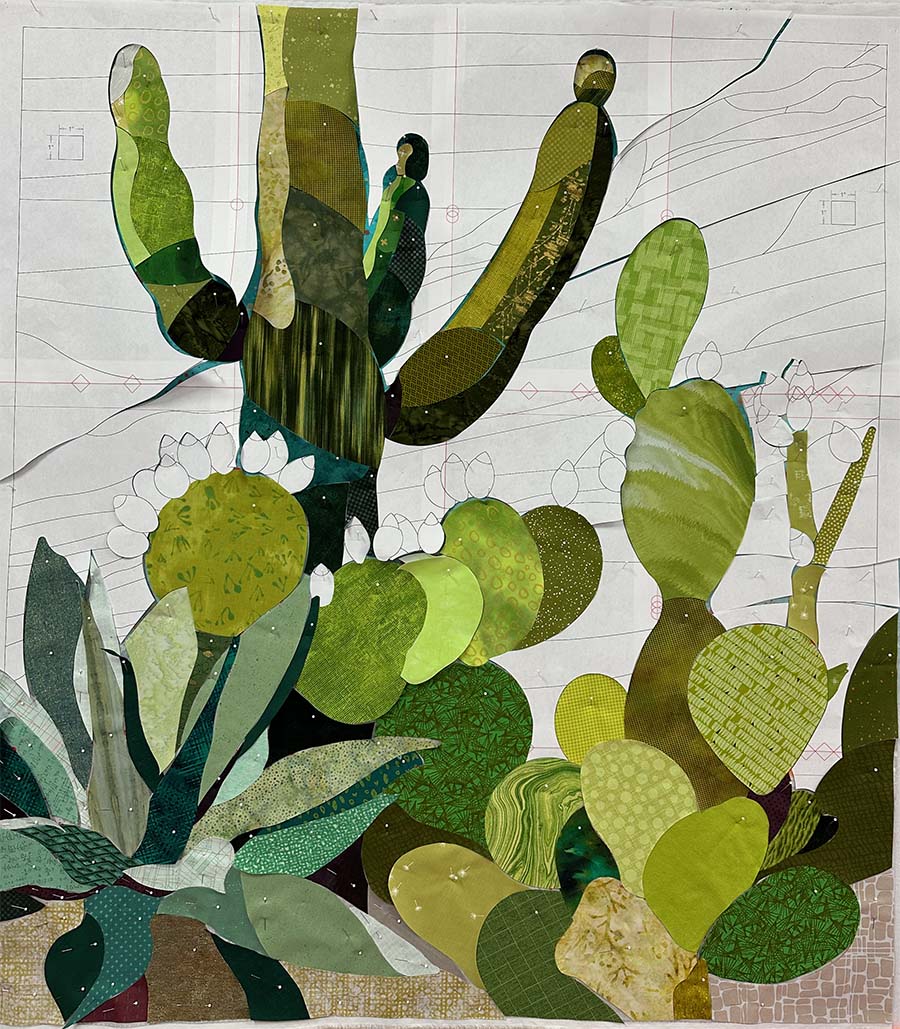
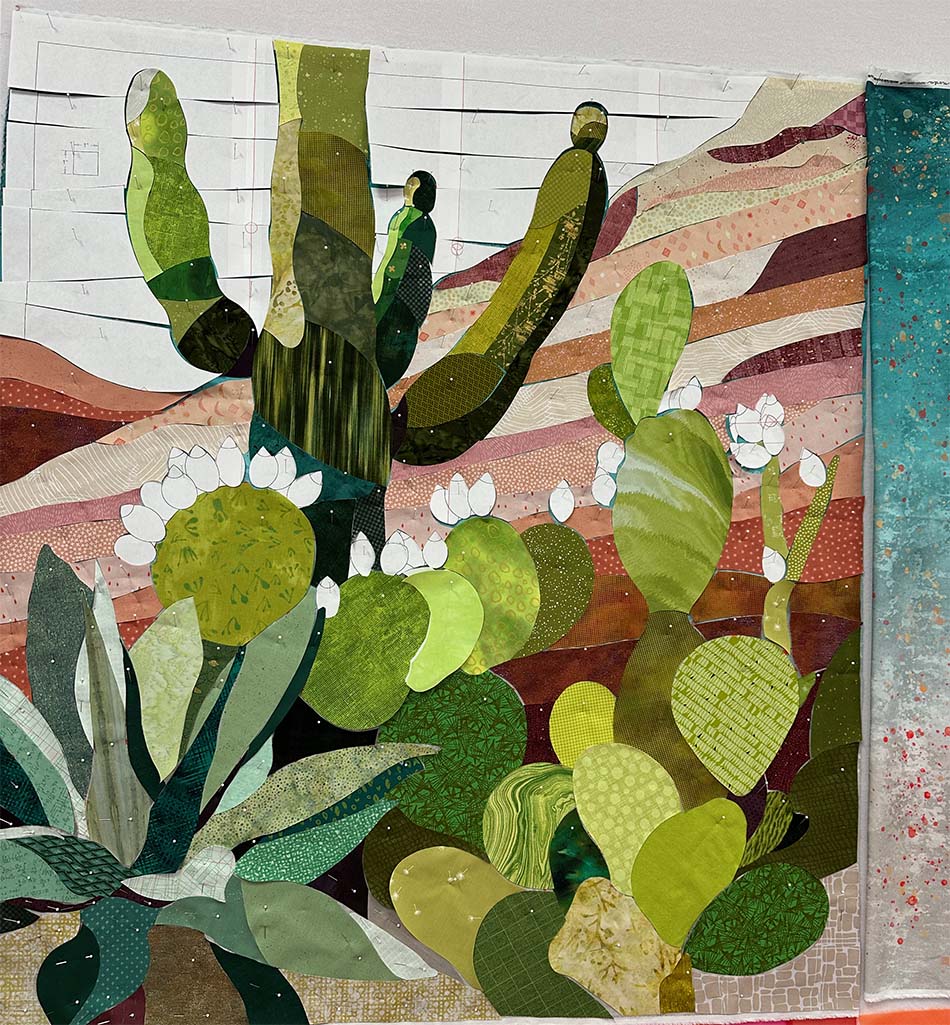
My mountain fabric choices highlight the subtle hues in a desert landscape. The fabrics used here are a wide range of peach, pink, rose, red-violet, rust, burgundy, and purple. Only a tiny amount of brown, tan, and beige is used in about four of the prints in the quilt. Using more pure colors rather than relying on brown creates a more complementary color scheme that enlivens the overall design.
The sky consists of prints creating a subtle shift of light to dark as the composition reaches the top of the quilt.
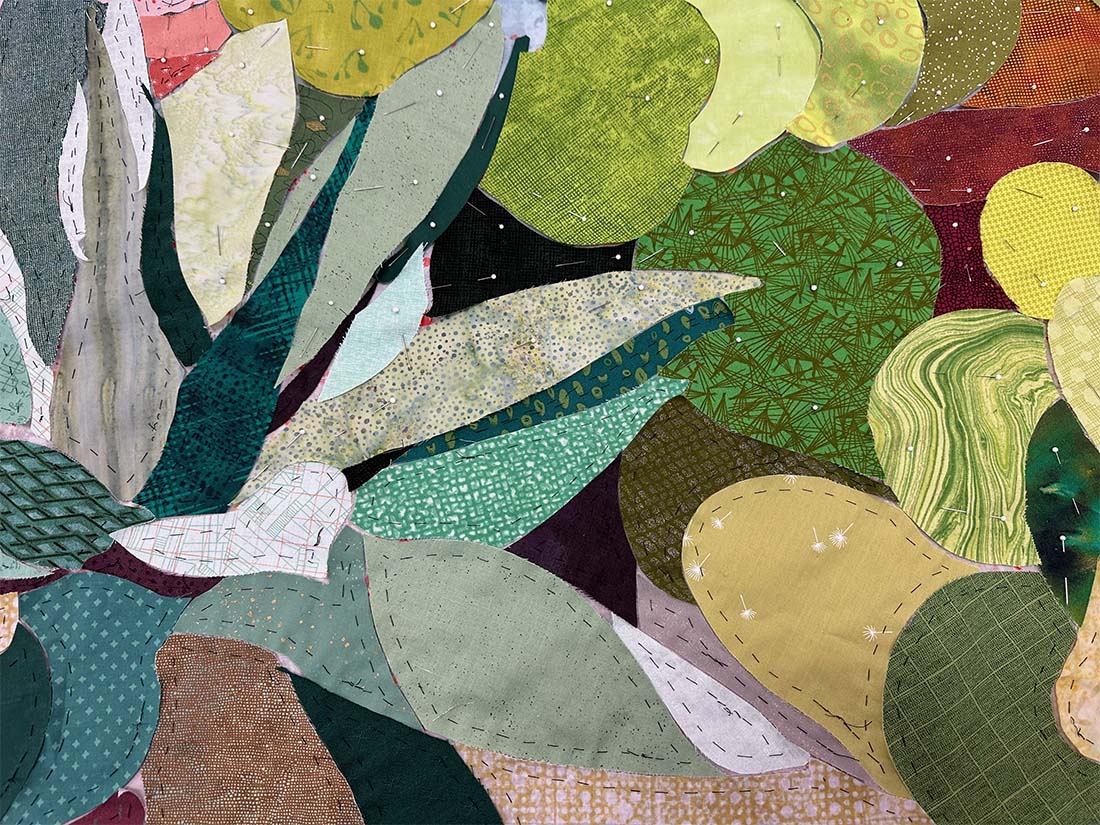
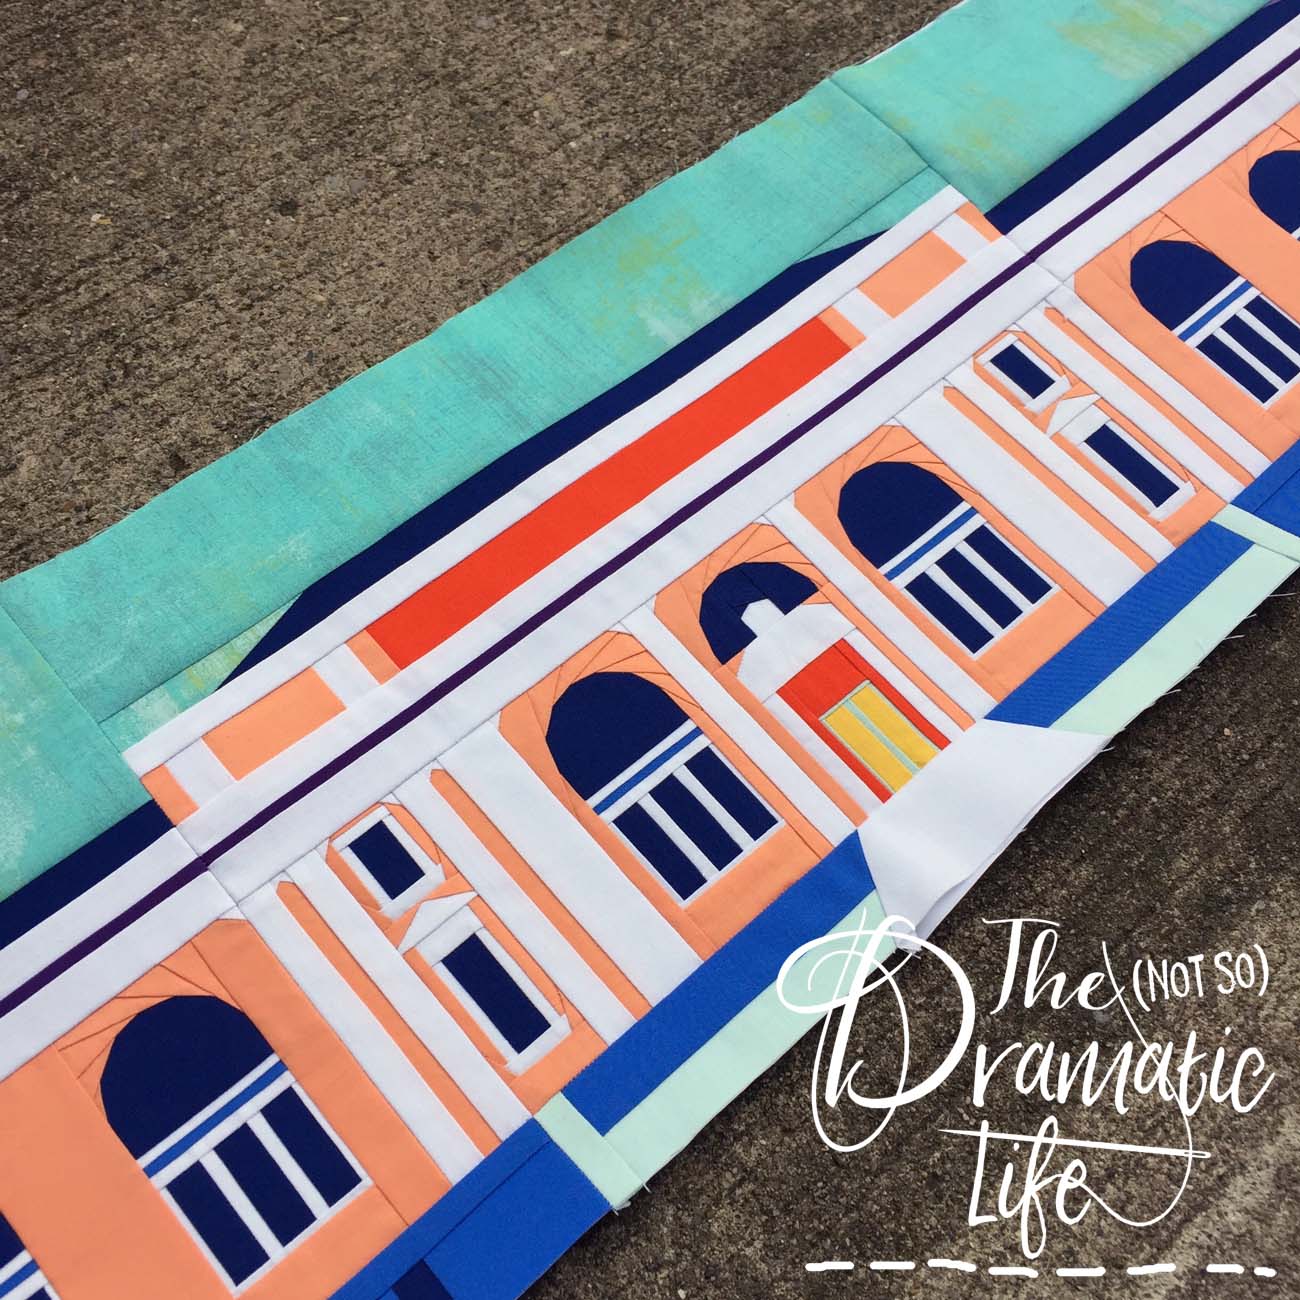
The appliqué technique I use in this design starts with all of the components having the raw cut edges butt up against each other. The background fabric isn’t visible then but will be revealed during stitching. If you look to the side of the images above and below, you can see an extra section of the background fabric I’m using for this design. I think gradients add depth to this type of design, and I selected one that moves from grey at the bottom to an intense teal at the top.
Preparing to Appliqué
Once the fabric is in place, I prepare the quilt top for stitching. With my favorite technique, each piece is stitched twice—let’s look at why that happens!
Pinning
The first step in starting stitching is removing the quilt top from the wall. When placing the fabrics into the design, I use a boatload of straight pins and just stab them into the design wall to hold the pieces in place.
To move the quilt top, I repositioned each pin so it moves through the appliqué and background fabrics but doesn’t go through the fabric on the design wall.
Basting
Right now, you have a porcupine of a quilt top, so my goal is to get all of those pins out of the way as quickly as possible. They are prickly, catch on your sewing thread, and fall out constantly, no matter how careful you are.
With this appliqué technique, the basting serves two purposes. First, it lets you get rid of those irritating pins. Second, it helps guide the seam allowances for the final appliqué. I hand-baste approximately 1/4″ from the edge of each piece of fabric. As I put in the final stitching, I turn the cut edges under until they meet the basting line. This results in a fold line, creating a 1/8″ seam allowance.
Can you machine baste? Yes. However, I rarely find it more efficient.
- Maneuvering the quilt top through the machine requires many turns on a design like this. You are constantly lifting the presser foot to turn and reposition the quilt top.
- This movement causes pins to fall out and pieces to fall off, not to mention getting poked with tons of pins. (Yes, more than hand-basting)
- No matter how large you make the machine stitch, removing hand-basting is always easier.
Thread Selection and Tools
Hand needle-turn appliqué aims to show as little stitching as necessary while still holding the fabrics in place. The easiest way to achieve this is by using a thin thread that closely matches the color of the appliqué fabric.
Thread
Thread Weight
Thin thread practically melts into the appliqué fabric, making them hard to see, which is what you are going for. Choose a 50-weight or finer thread for appliqué. With thread, the larger the number, the finer the thread. I typically use 50-weight Aurifil, but sometimes pull out the 80-weight for particularly small work.
Thread Color
Since I have the full range of Aurifil thread, I use a lot of colors, but if you are just getting started, try to have a dark, medium, and light value of warm (tan) and cool (grey) colors as well as black and white. Then, you can add other colors as needed for specific projects.

Scissors
Small scissors with a super sharp point are essential tools for needle-turn appliqué. I am fond of Karen Kay Buckley scissors with either green or orange handles for this type of work.
Needles
A thin needle is essential for appliqué, especially if you use a lot of tightly woven fabrics such as batiks. I typically use the Tulip Appliqué Needles, but the best place to start is with whatever needle you like hand sewing with.
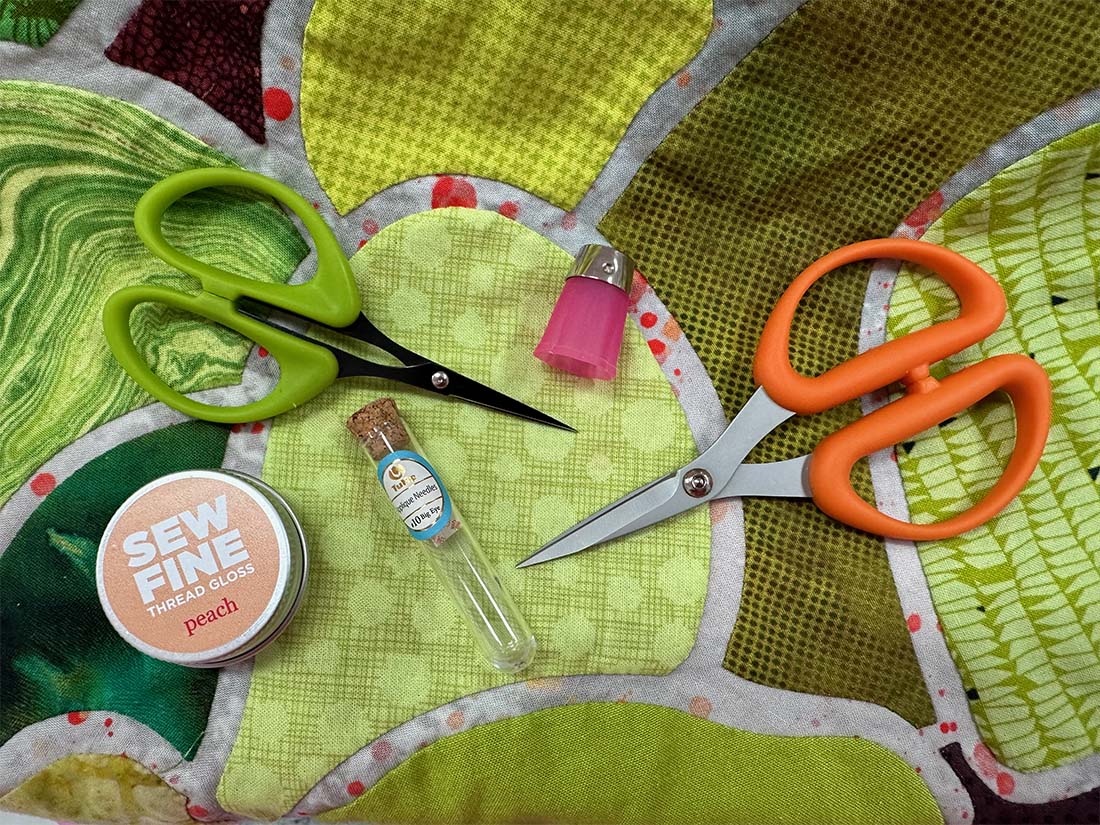
Thread Gloss
Technically, thread gloss is optional, but running your thread through it prior to stitching cuts down on thread tangles. I prefer natural wax, such as Sew Fine, for most projects, but there are synthetic options as well.
Thimble
I hate hand sewing without a thimble. I always suggest using the one you are most comfortable with or none if that is your preference.

The Hand Appliqué Process
Once you have done all the prep, the actual appliqué process is fun! (At least for me!)
Please note that this isn’t a thorough hand appliqué tutorial but a high-level overview. Let me know in the comments if you want more detailed instructions in a future post!
For each section of applique, I start by using my fingers to turn the cut edge of the fabric under until it meets the line of basting stitches. I then insert my needle into the fold and pull the thread to the knot.
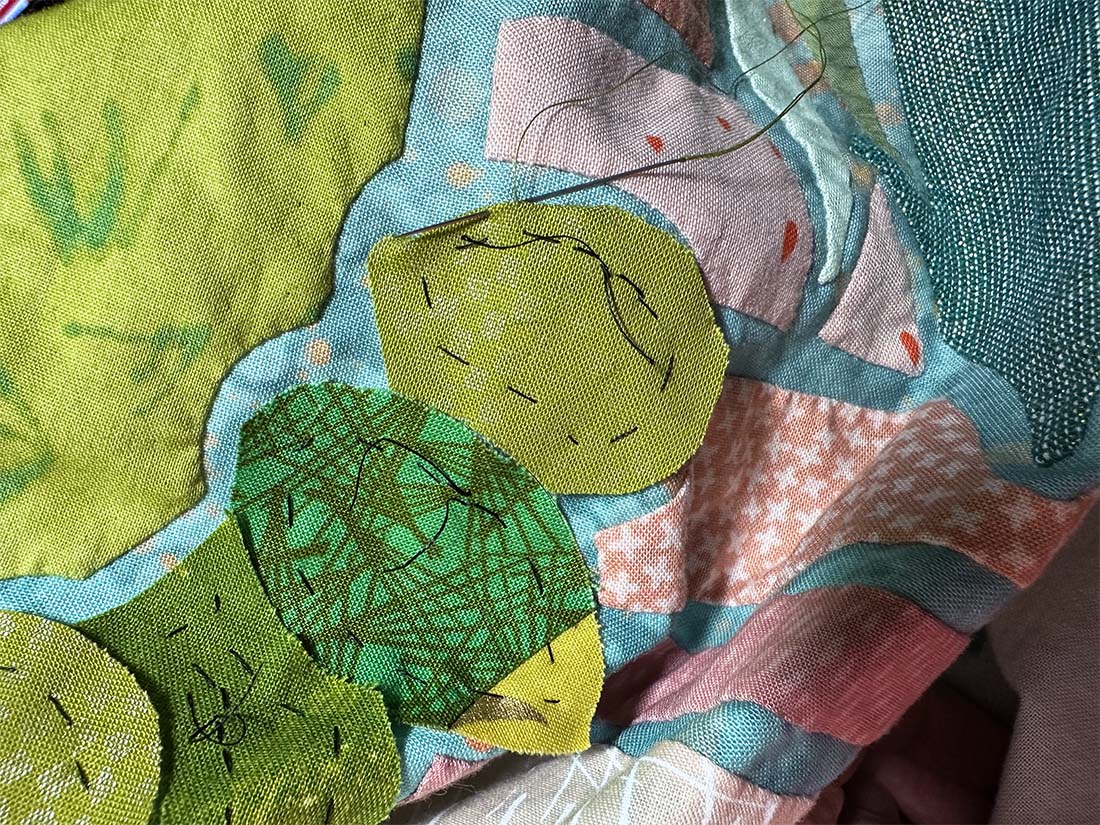
The goal for each stitch is to have the least amount of thread exposed as possible. The best way to achieve this goal is to take a stitch through the appliqué fabric that only catches 1-2 threads, then go through the background fabric directly next to the stitch, and travel to the next stitch position along the back of the background fabric. Many tiny stitches are vastly superior to fewer larger stitches. Notice in the photo below what the stitching looks like on the back of the background fabric- It almost forms a solid line!
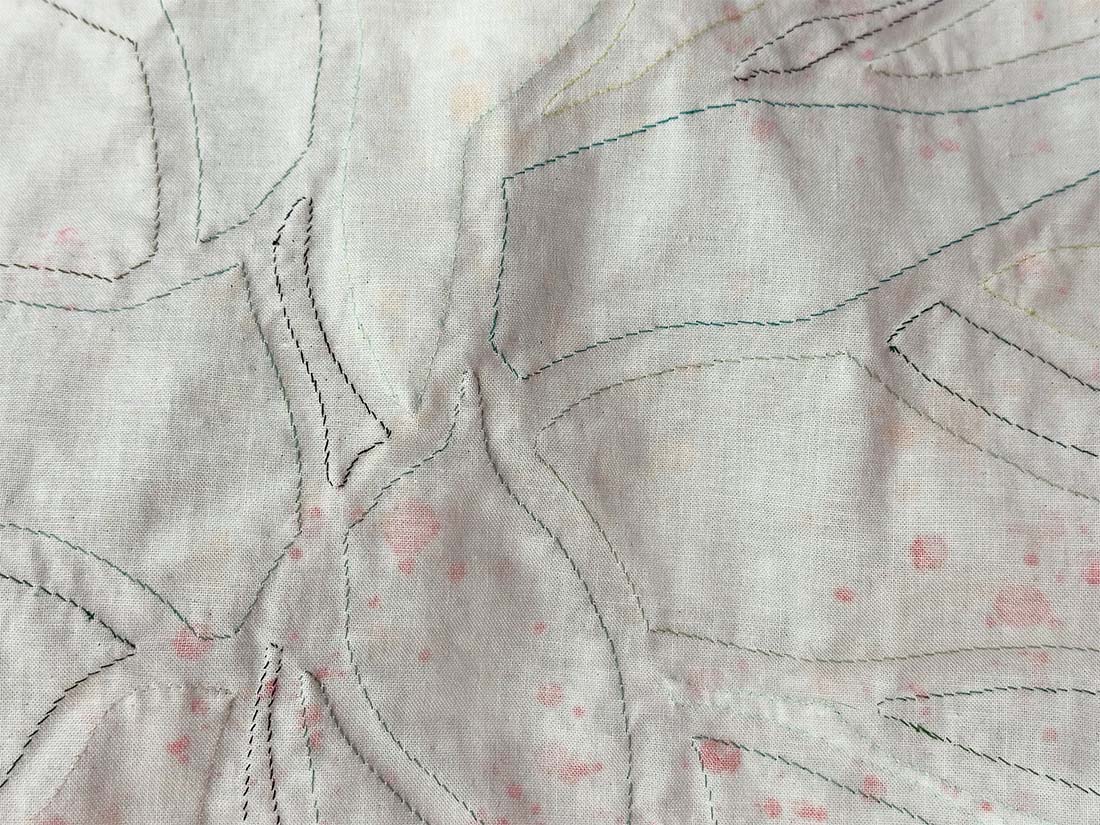
As you approach curves and corners, you will need to manipulate the fabric a bit more to ensure all raw edges are concealed under the appliqué fabric. This process takes some practice, but the results are worth it.
Concave curves require a little help to make them lay smoothly. Using those small, sharp, pointy scissors, make a series of shallow snips along the cut edge of the curve. Make these cuts just over 1/16″ deep and perpendicular to the cut edge of the fabric. Many small cuts work much better than fewer, deeper cuts. You will use the same principle for interior corners, too. For a sharp corner, make the cut slightly deeper.

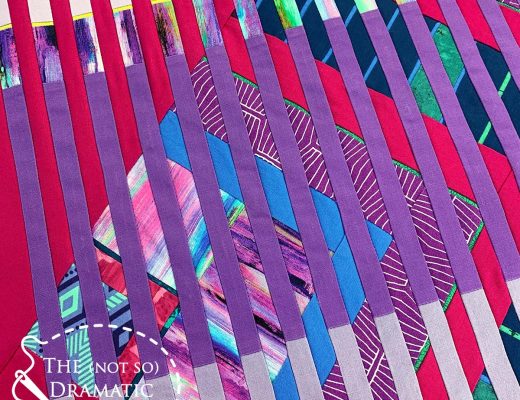
Do you see how the quilt’s background reveals itself as I stitch? Since each appliqué edge gets turned under 1/8″, there is approximately 1/4″ between all of the components in the quilt, creating an effect similar to stained glass.

Final Details
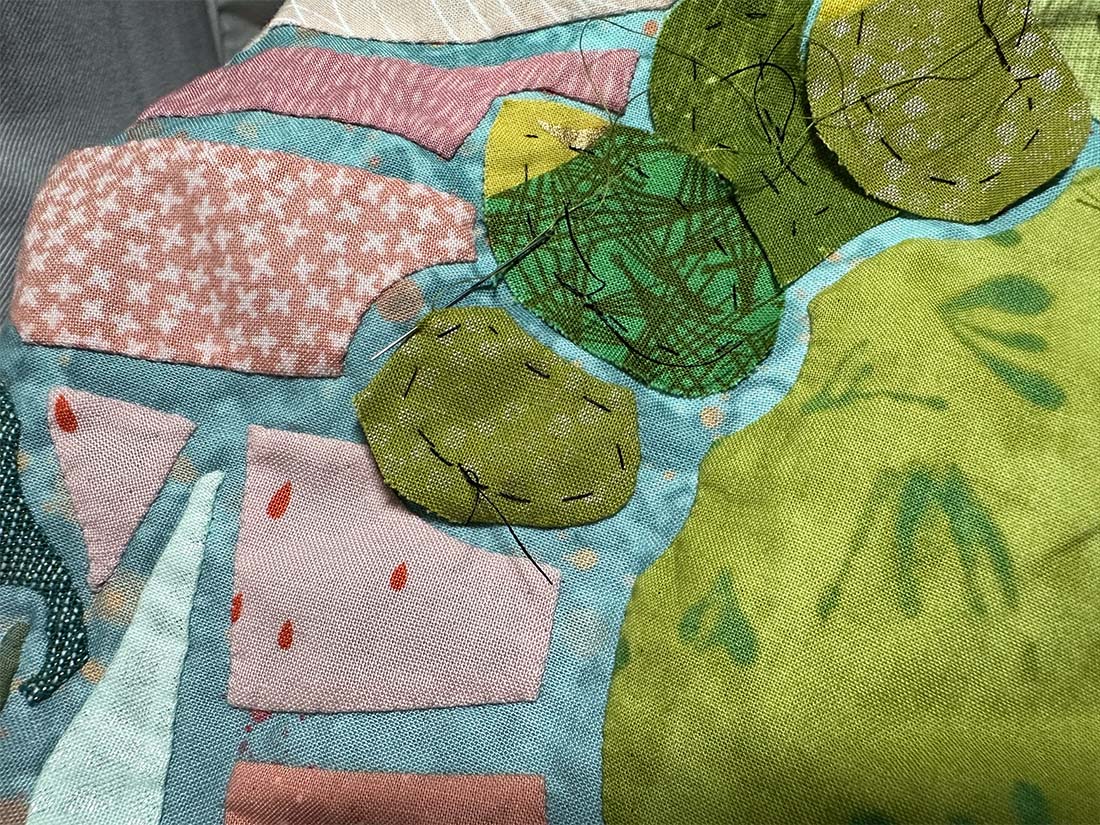
For this piece, I decided to save the cactus buds until the rest of the quilt was appliquéd. Small pieces tend to get caught on sewing thread, and since I machine-pieced these sections, there were even more edges to potentially get caught.
Why piecing? I didn’t want to lose the yellow tips of these elements in the design, but they would be so small on their own that they would practically disappear. Piecing allows them to remain a part of the overall design.
The appliqué is almost finished. Join me two weeks from today to see the final reveal of the quilt!

3 Comments
Ursula
May 17, 2025 at 2:39 pmDear Cassandra
What a wonderful stunning Quilt !
Would you sell your pattern?
Your instructions are so detailed and easy to understand.
I’m totally in love with that quilt, Ursula
Ursula
May 19, 2025 at 4:47 pmDear Cassandra,
Your Desert-themed applique is a work of art! I love the detailed instructions, which are easy to follow. Do you happen to have a pattern for this quilt that I can purchase? Ursula
thenotsodramaticlifeadmin
November 14, 2025 at 11:40 amThank you so much! This quilt was a one-off, so there isn’t a pattern for it.