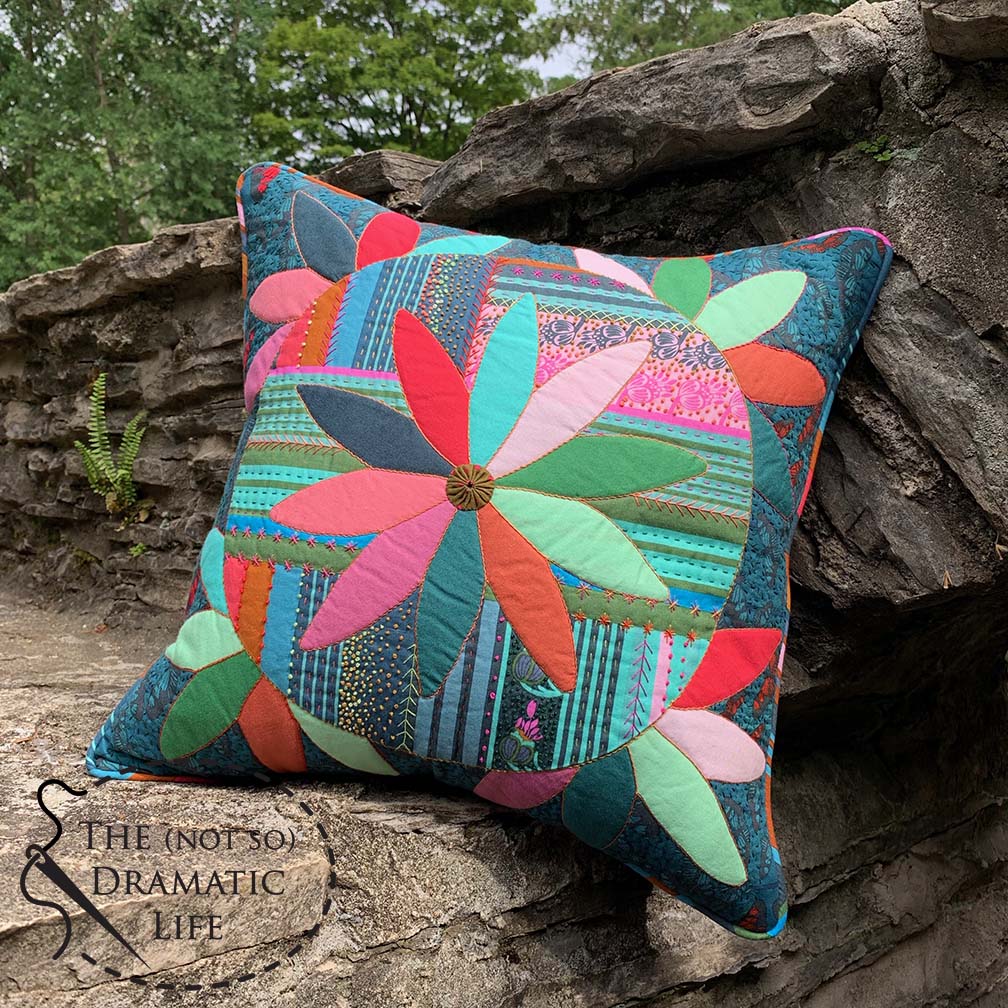
My favorite way to explore contemporary quilting is using traditional techniques with a modern twist.
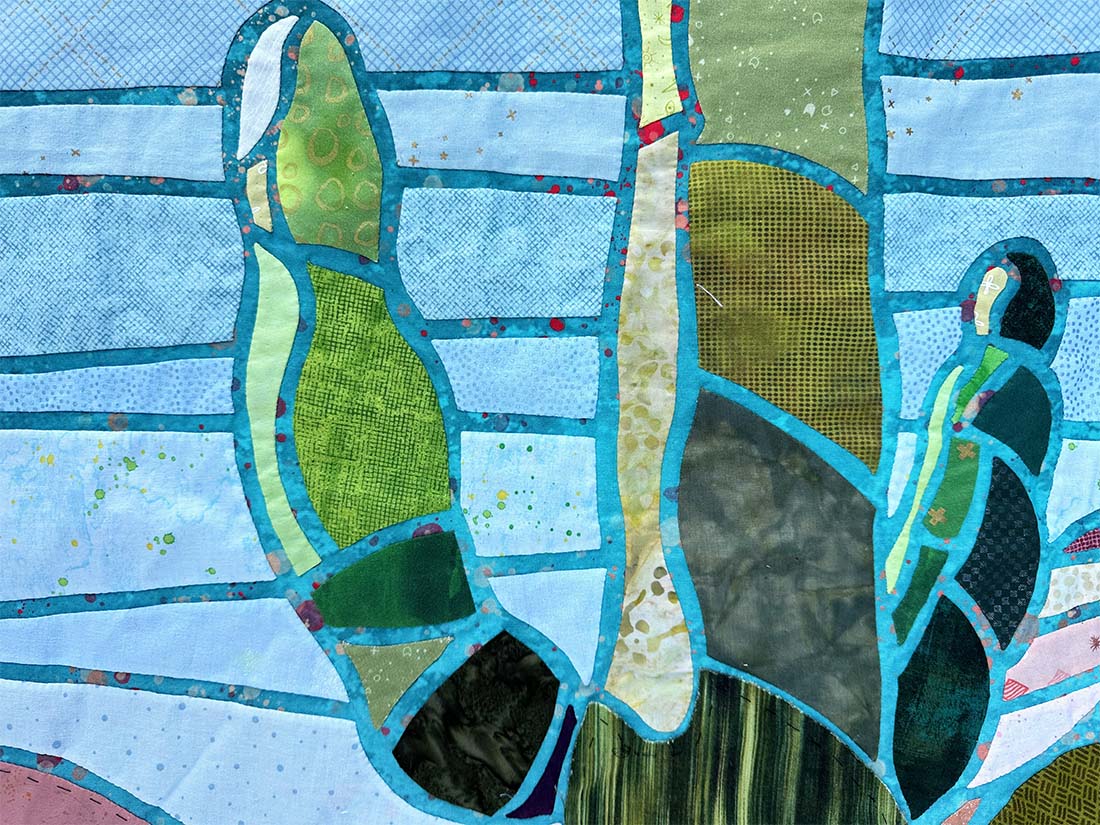
Last year, I created 100 Days of Greenery based on plants from a local botanical garden. I paired this design with a version of needle-turn appliqué that exposes the background fabric only when the seam allowances are turned under as you sew.
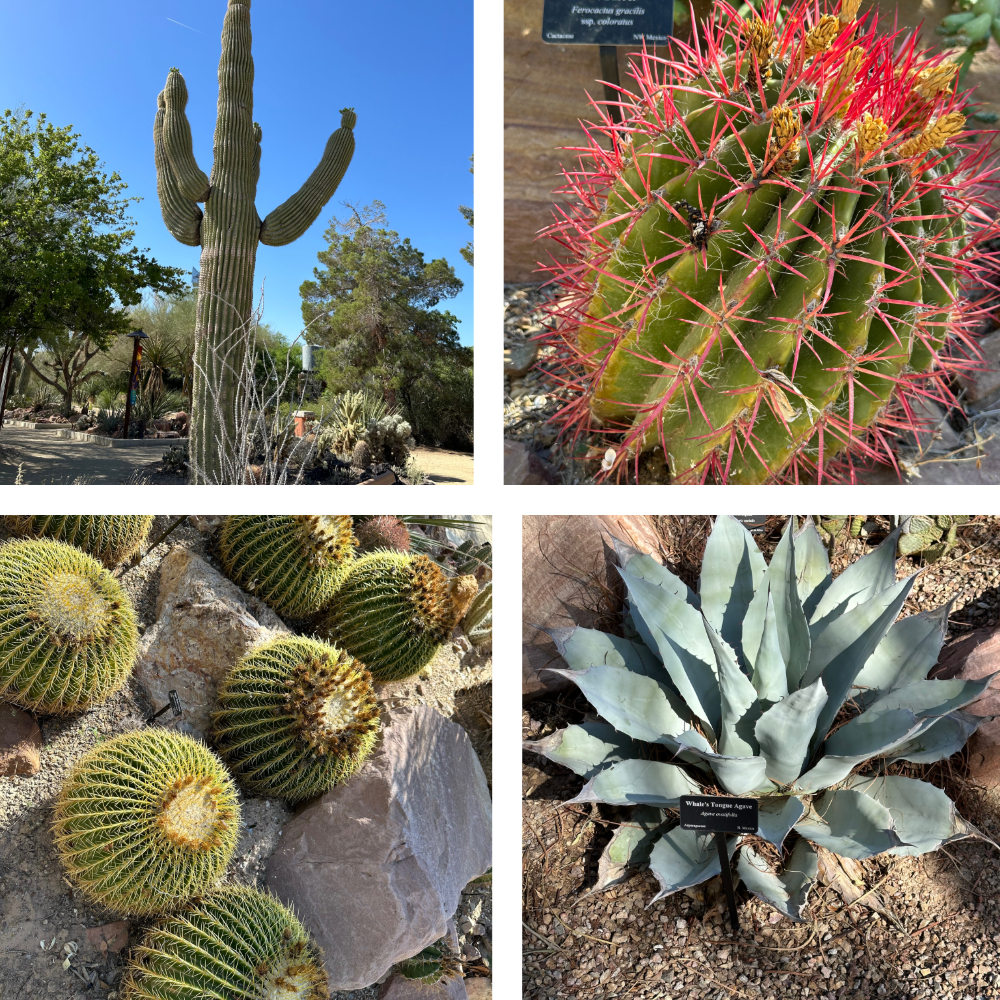
This Summer, I took a road trip around parts of the central and western United States. One of the must-visit places on my list was Springs Preserve in Las Vegas. This botanical garden has an extensive collection of cacti and other desert plants that I couldn’t wait to use for quilting inspiration.
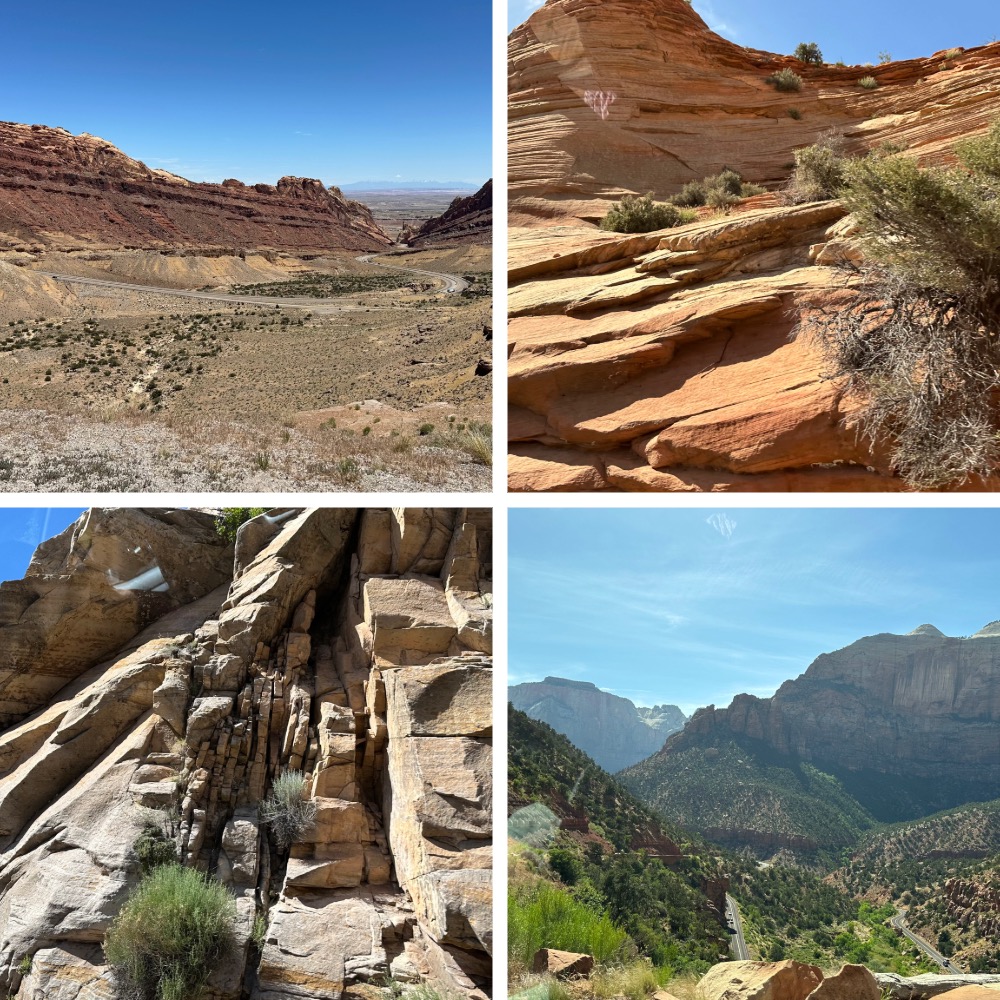
I spent many Summers working in theatre in Southern Utah, and I was excited to revisit the area’s red rock landscapes.
For my current project, I combined separate plant images with landscape inspiration to create a dynamic new quilt design.
Over three posts, I will share the process of going from photographic inspiration to a finished quilt. Here’s what you can expect:
- Part 1: Creating the Design
- Part 2: Appliqué
- Part 3: Quilting and Finishing
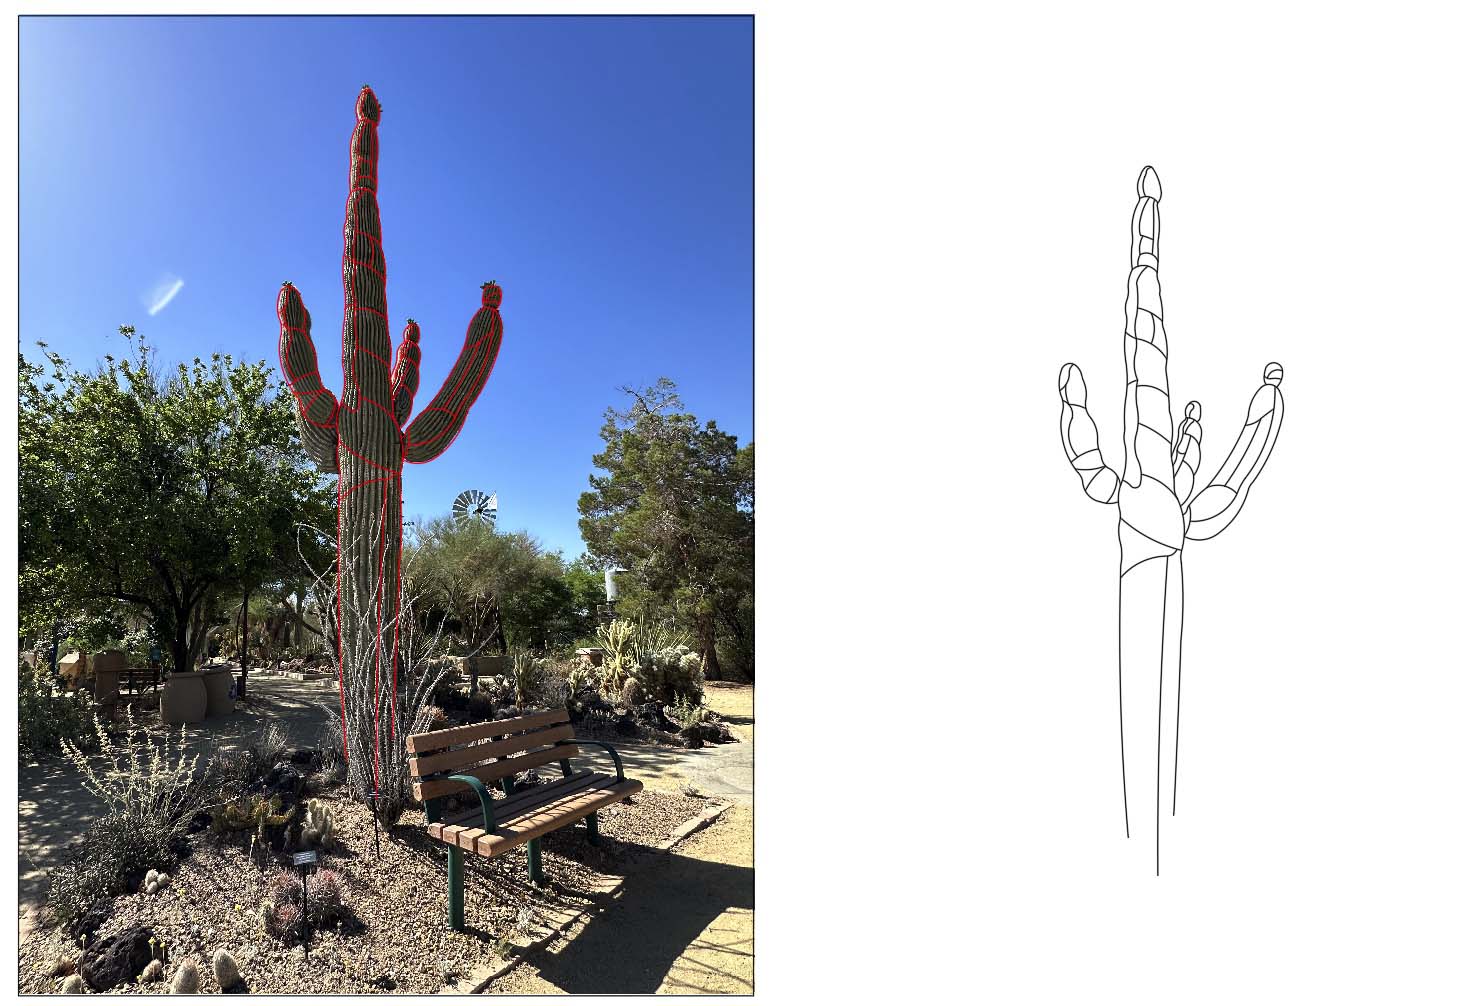
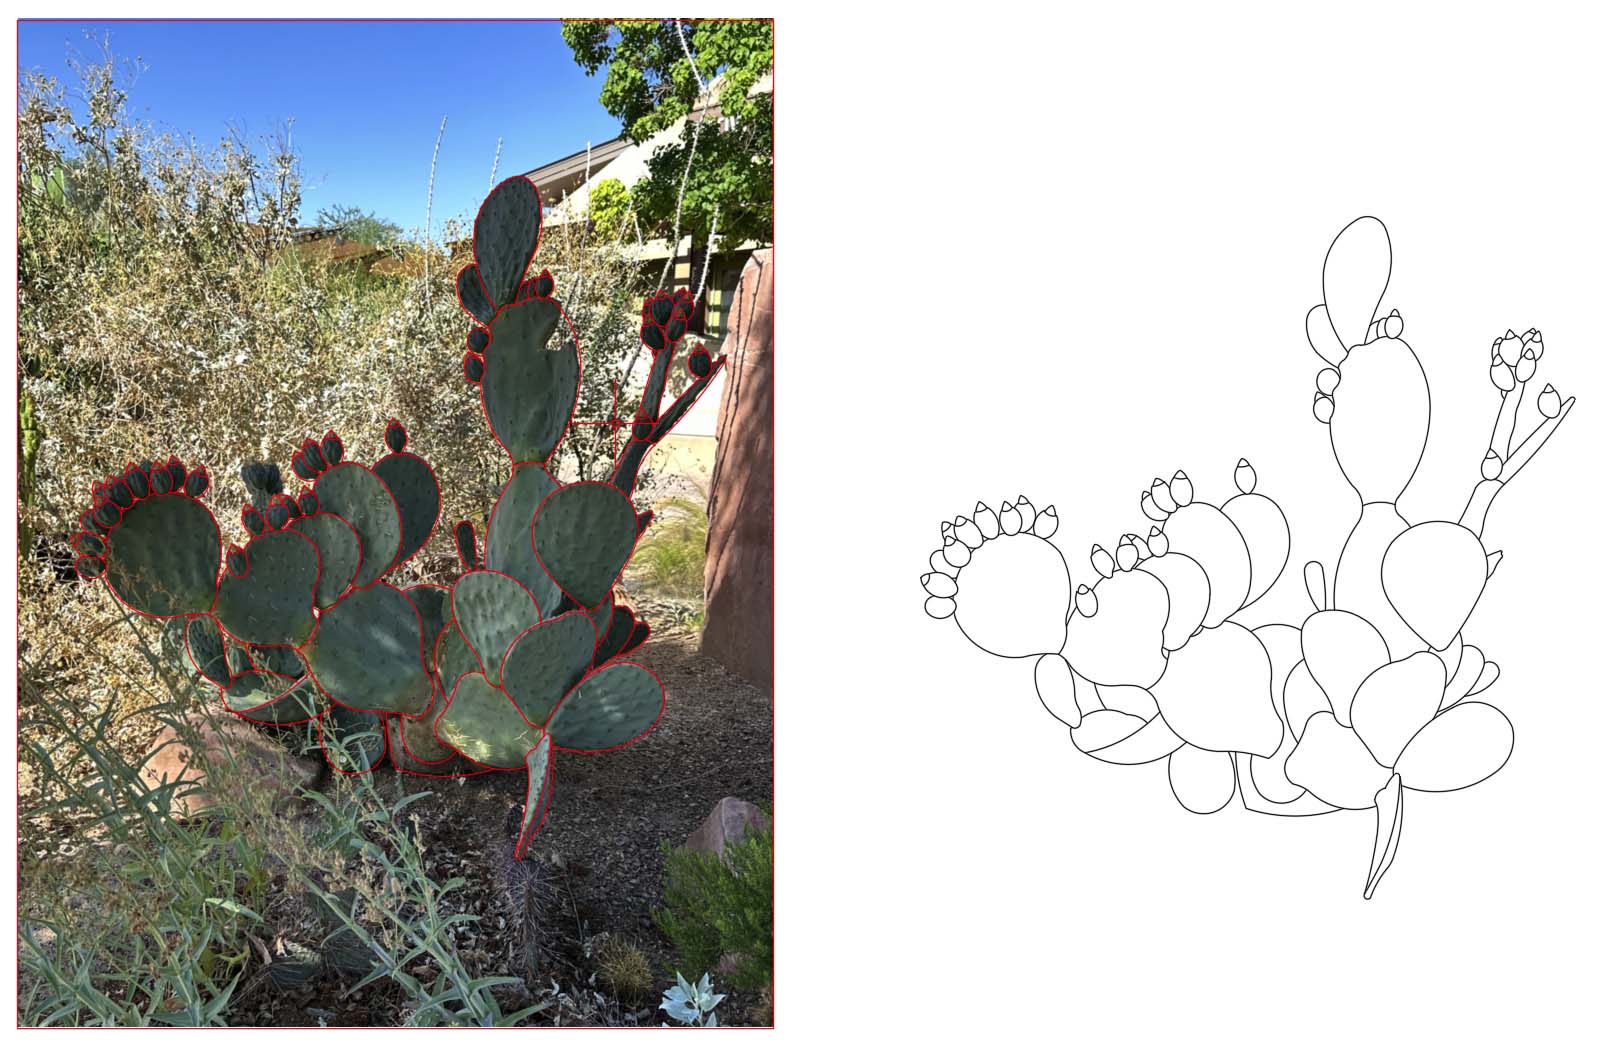
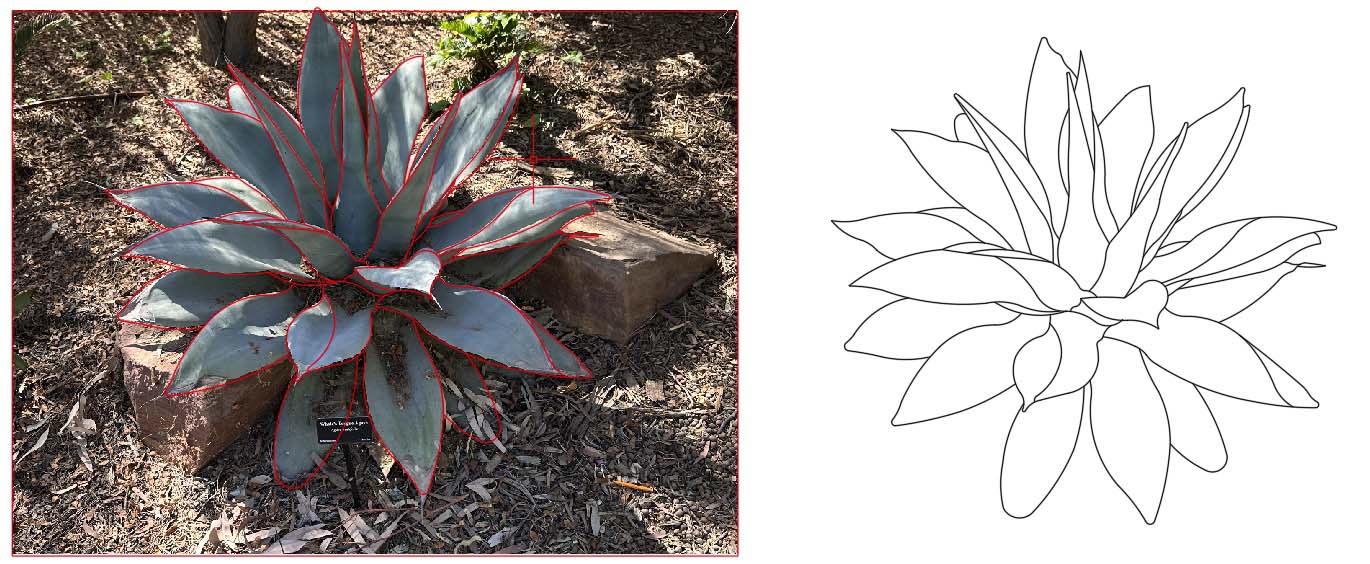
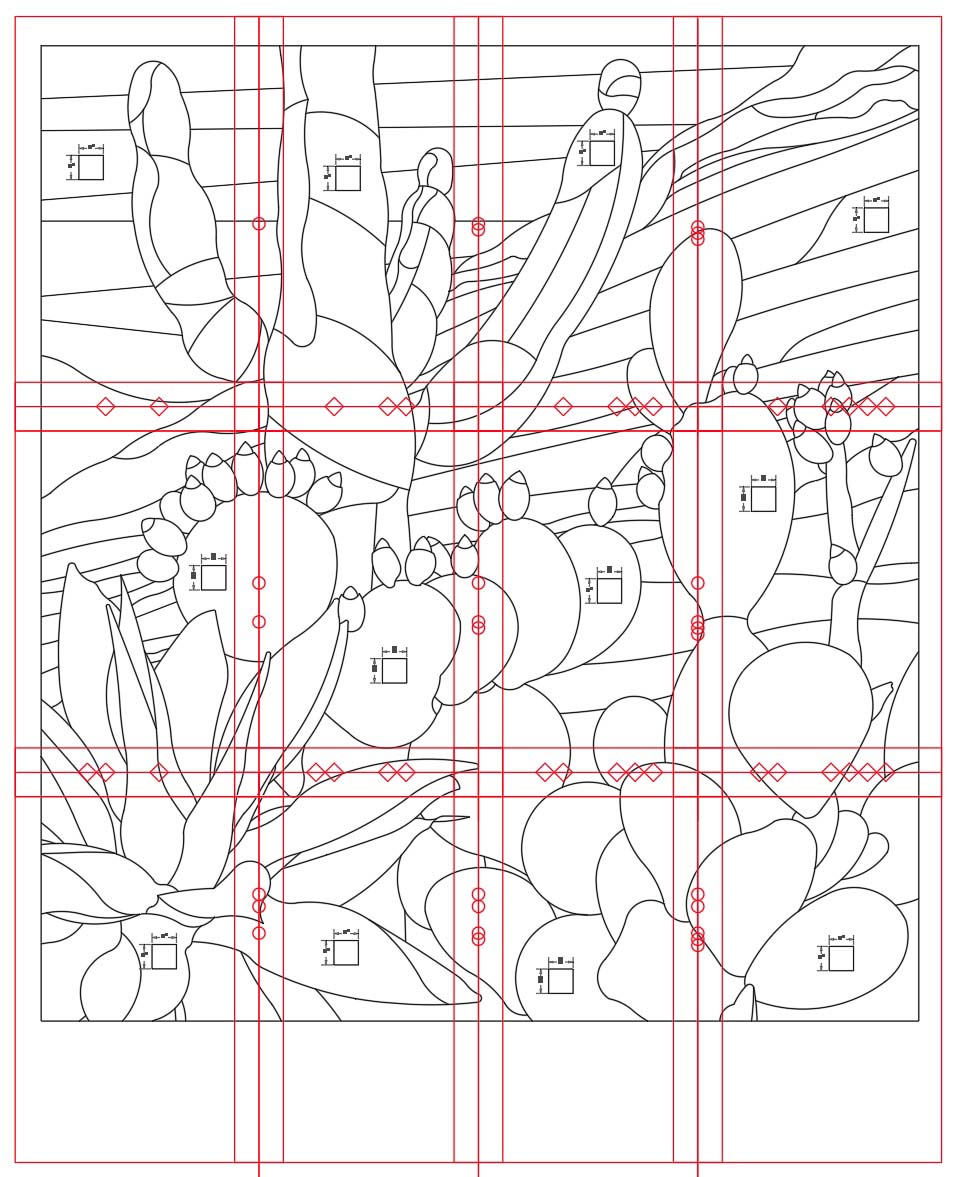
From Reference to Line Drawing
I use AutoCAD LT to create my drawings, but if you want to try this process, you can use any vector-based drawing program to draw over a photograph in a separate layer. You can also create a line drawing on tracing paper placed over a printed photograph and illuminated with a lightbox.
Plant 1
This cactus is enormous—at least a few times taller than I am! I also knew that this plant was going to be the featured plant in my first desert-themed quilt. I used its natural height as a focal point.
Plant 2
The second cactus in this design was about to bloom, offering opportunities to add a hint of color to the plant. I chose this cactus for this composition because of its flat sections at various angles and moderate height.
Plant 3
For the final plant, I selected agave, with its spikey leaves and natural placement near the ground.
Creating the Composition
To determine the composition, I draw a rectangle indicating the size of the finished quilt. I then start adding components to that space, adjusting their scale and exact rotation as I work.
I plan to use a gradient print for the quilt’s background, which means I need to keep the quilt’s height to about 40 inches.

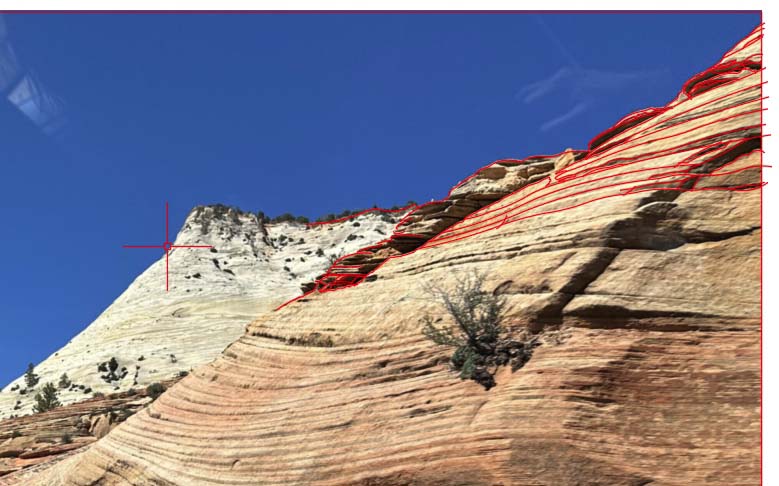
Once the main elements of the composition are in place, I select images for the background to enhance the overall composition. In this case, I use the red rocks as my primary inspiration, both for their color, which complements the plants and for their shapes, which draw our focus to the giant cactus.
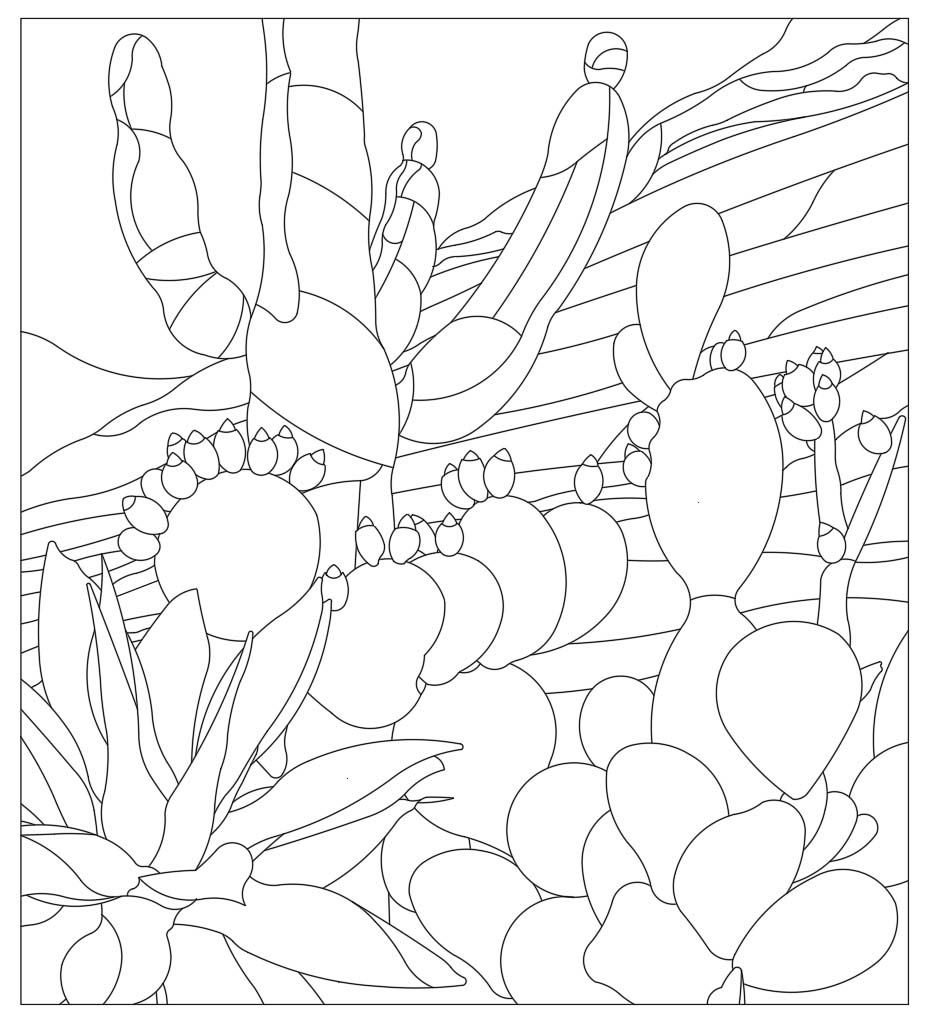
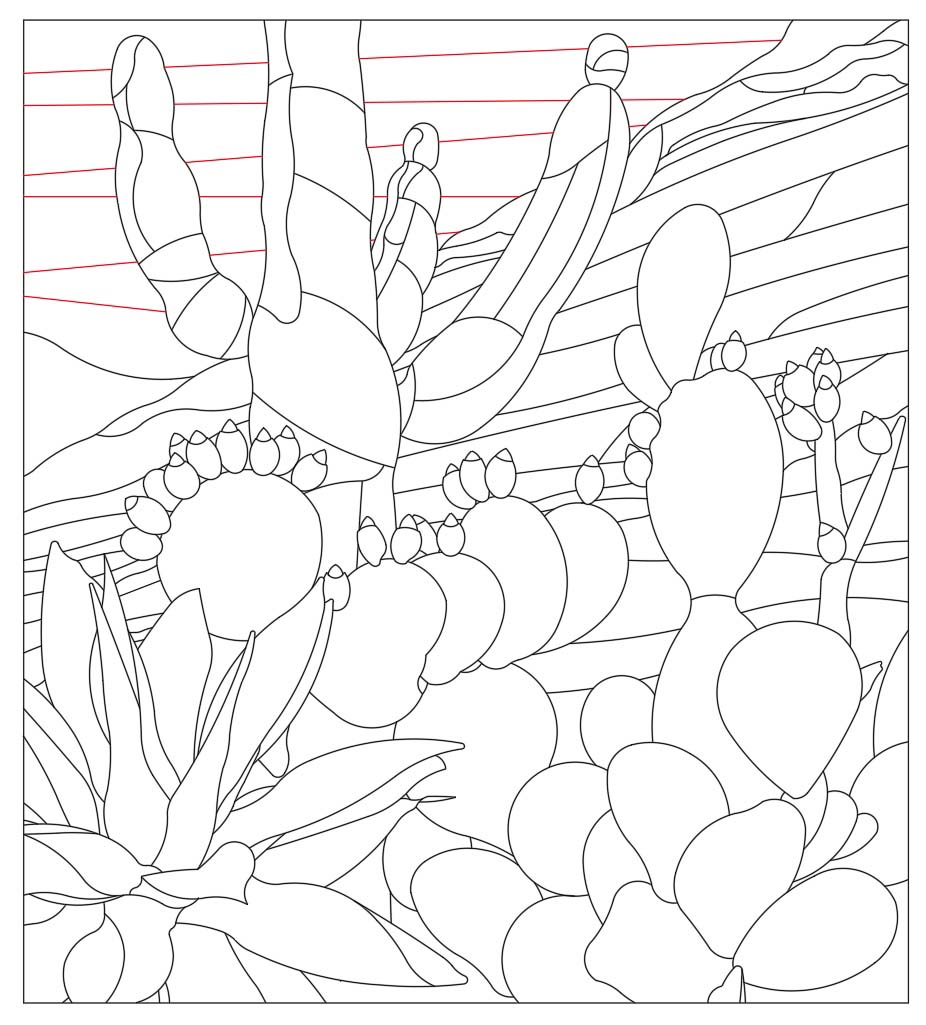
Once major landscape elements are in place, I add simple sky sections. I want variety in this field of blue, but I definitely don’t want a large section of appliqué done with a single swath of blue fabric.
Preparing the Design
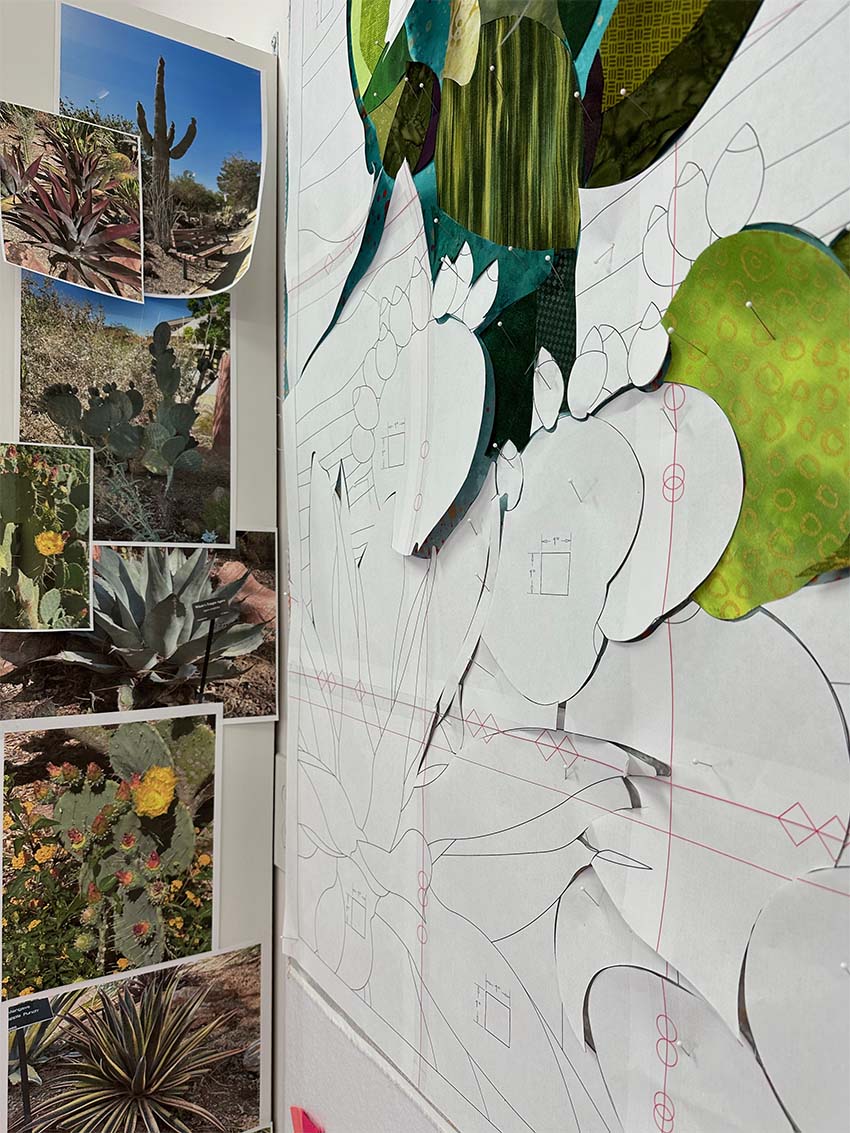
The largest page I can print is 11″ x 17″, so I arranged an overlay layer with registration lines and points over the entire design. I printed and taped together the sheets of paper.
With the pattern in hand, I placed my gradient fabric background on the design wall, followed by the paper template. I then cut the paper into templates to use as pattern pieces. I cut one or two significant sections of the paper template at a time to have a manageable amount of little pieces of paper floating around my sewing space.
For this quilt, I knew that I must differentiate between the colors of each plant, so I set up my design space with the quilt at one end of the design wall with photographic reference covering the end of an adjoining bookcase.
What’s the Next Step?
Did you notice that all of the paper pieces butt up against each other? The fabric pieces will also butt up against each other, but as I stitch the fabric components, I with turn under approximately 1/8″ on all sides, exposing roughly a quarter inch of the background fabric as I sew.
Join me for Part 2 to discuss the appliqué stitching options!


1 Comment
Beth
October 18, 2024 at 8:47 amLove this post. It is great to see your design process so well illustrated. Looking foward to seeing the finished quilt. Thanks for sharing.