Do you do a quilting test on a sample sandwich before quilting your final project?
It’s easy to get excited and dive right into quilting a big project, but quilting tests can help us take our quilts from good to great.
Why Should You Do a Quilting Test?
Quilting tests can range from basic to complex and provide valuable insights into what we can expect in the quilting process. A quilting test can tell us:
- If our tension and machine settings are correct for the materials we are using
- What length of stitches works best for the quilting style
- Which motifs will work with the design?
- The color and weight of the thread that will look the best in the quilt
Many of my quilts rely on thread color and weight as key aspects of the overall quilt design, so testing the thread options helps ensure the final quilt will be a success. Today, I’m sharing an initial test I did for an upcoming quilt.
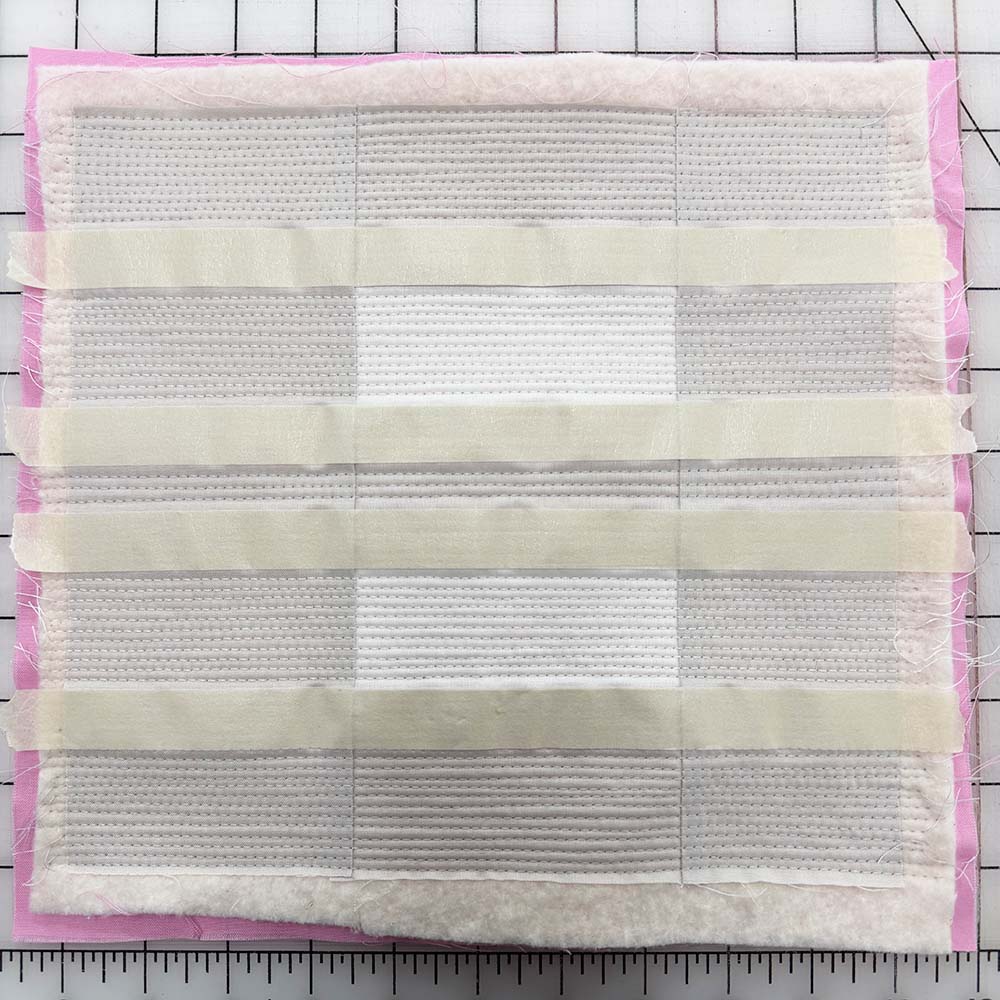
Preparing the Test Quilt Sandwich
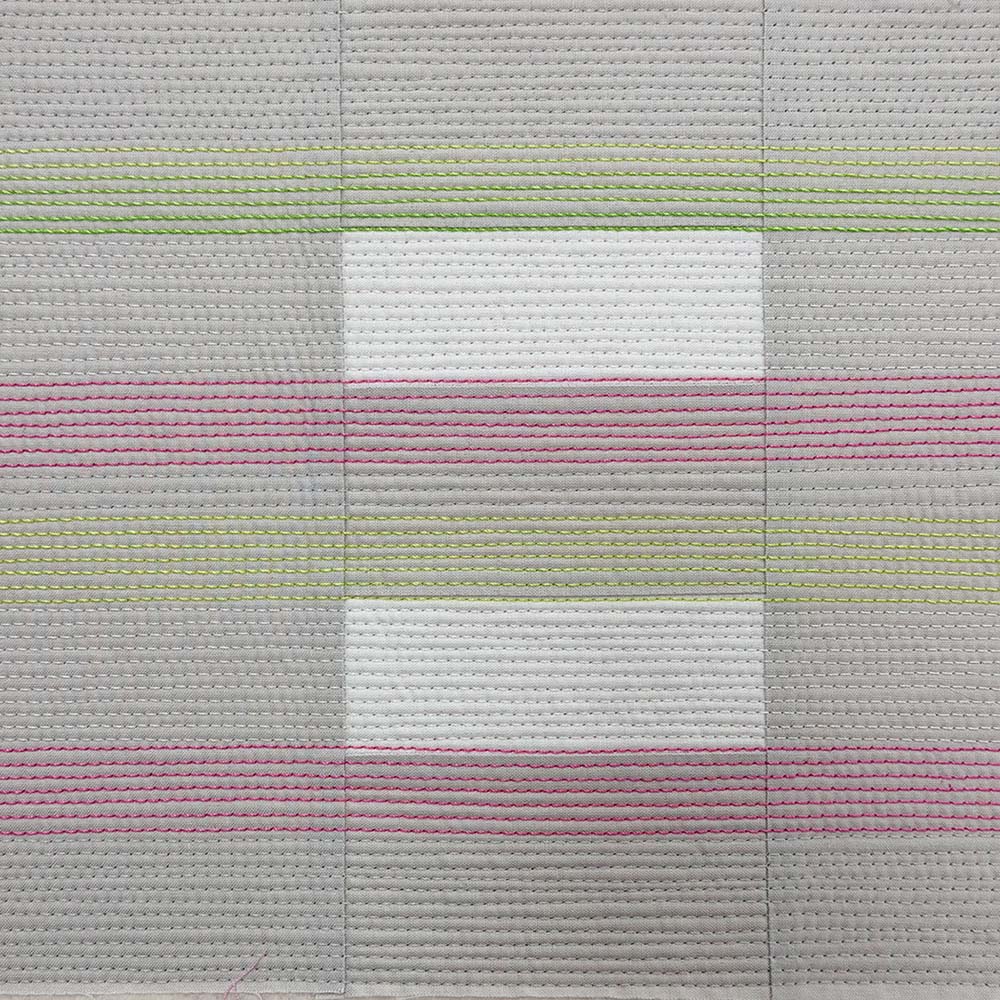
The piecing of the new quilt will be simple with light, neutral colors. To test the quilting, I made a block about 9” square that incorporates both of the main colors in the quilt. The design of this block is not the same as the final quilt, but the rectangles give me a decent idea of how the quilting will interact with the fabrics.
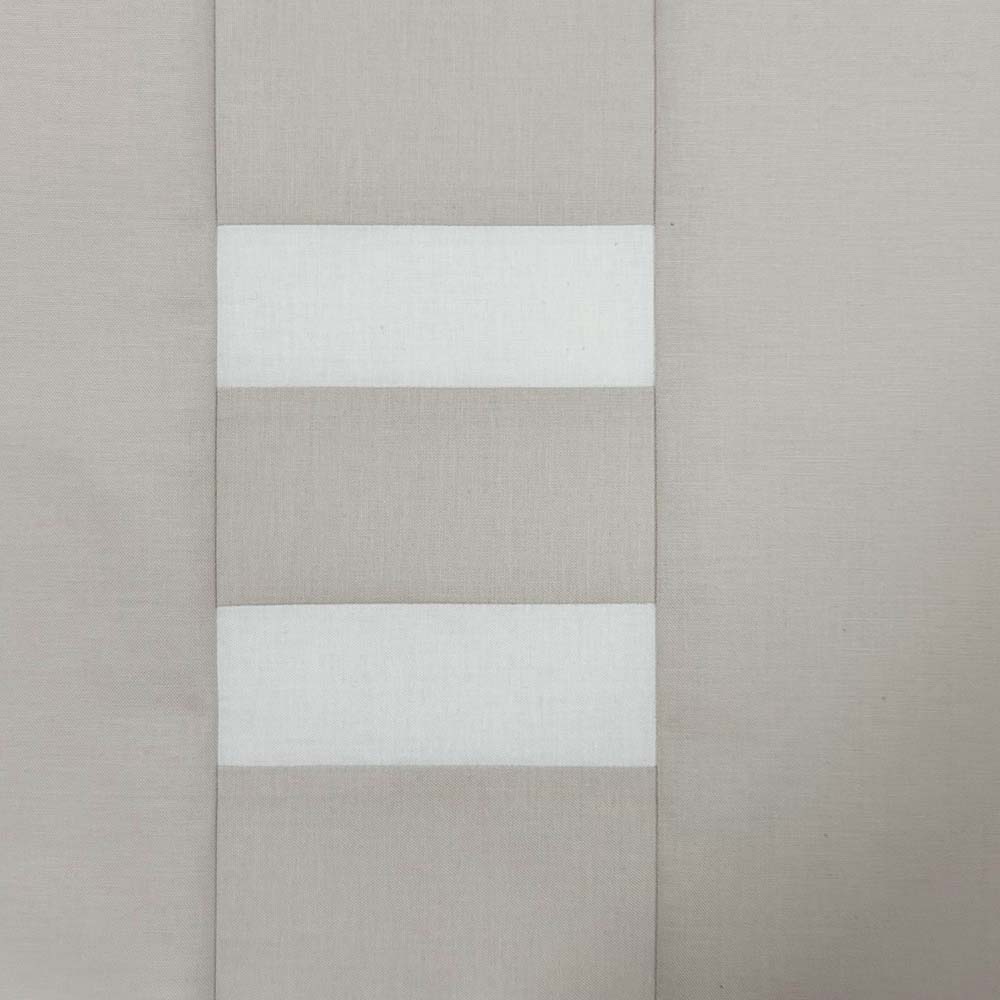
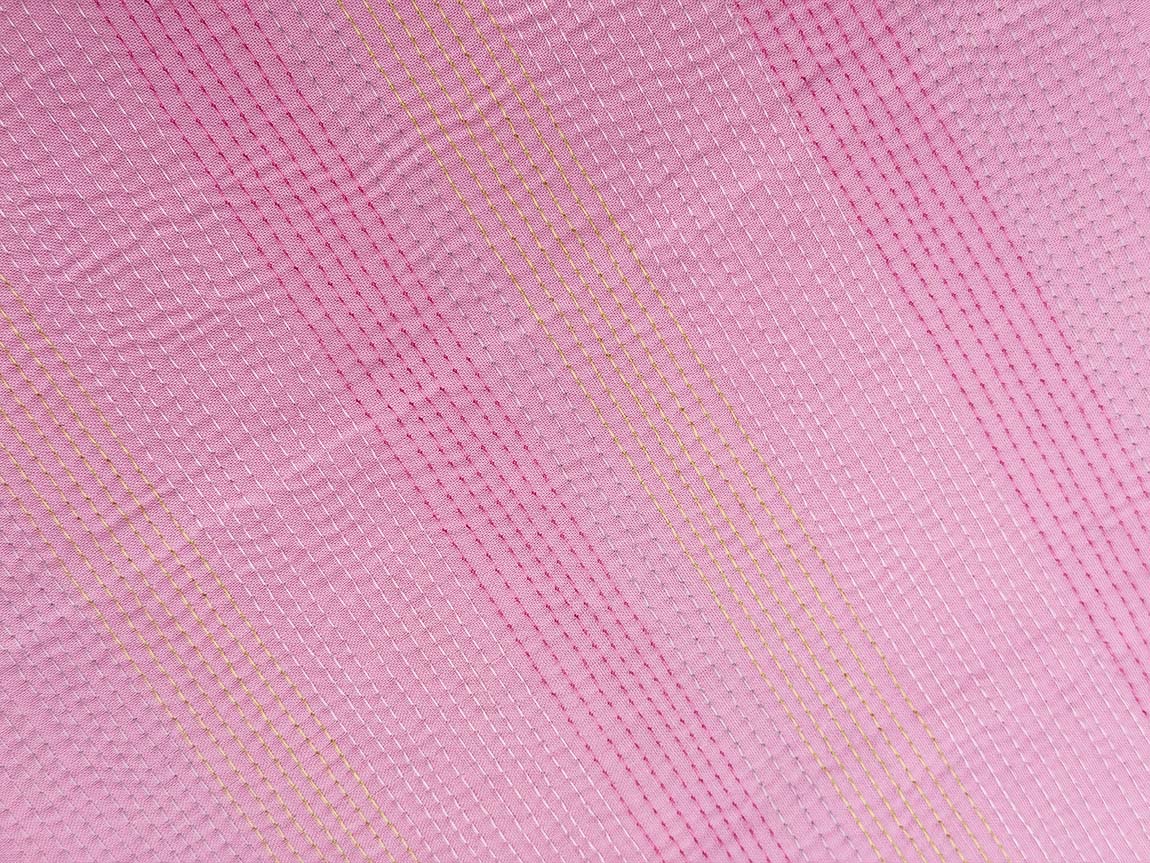
Since this is such a small piece, I used 3/4” wide masking tape to mark the lines where I will add colorful quilting. For the finished quilt, I’m planning to use a backing fabric with some color, so I chose a medium-light pink to back this swatch, hoping it will give me an idea of whether it will work on the final project.

Quilting the Sample
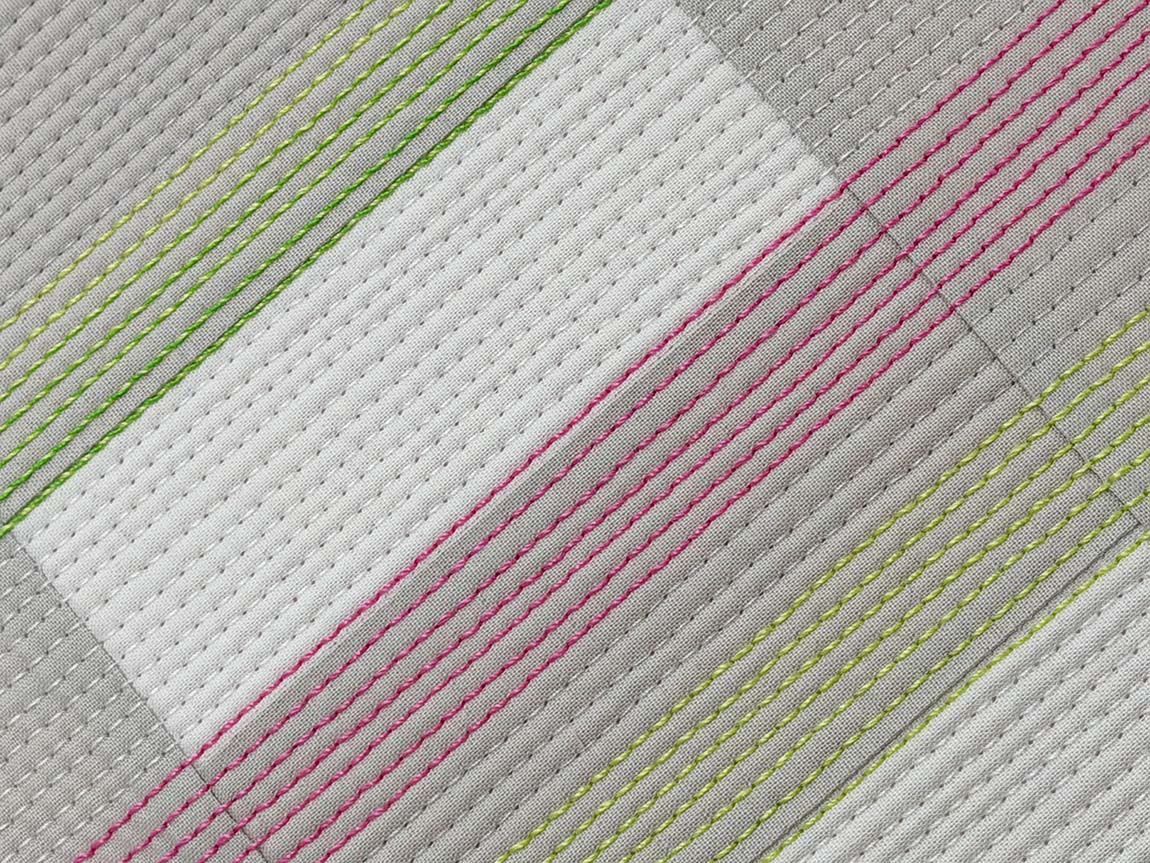
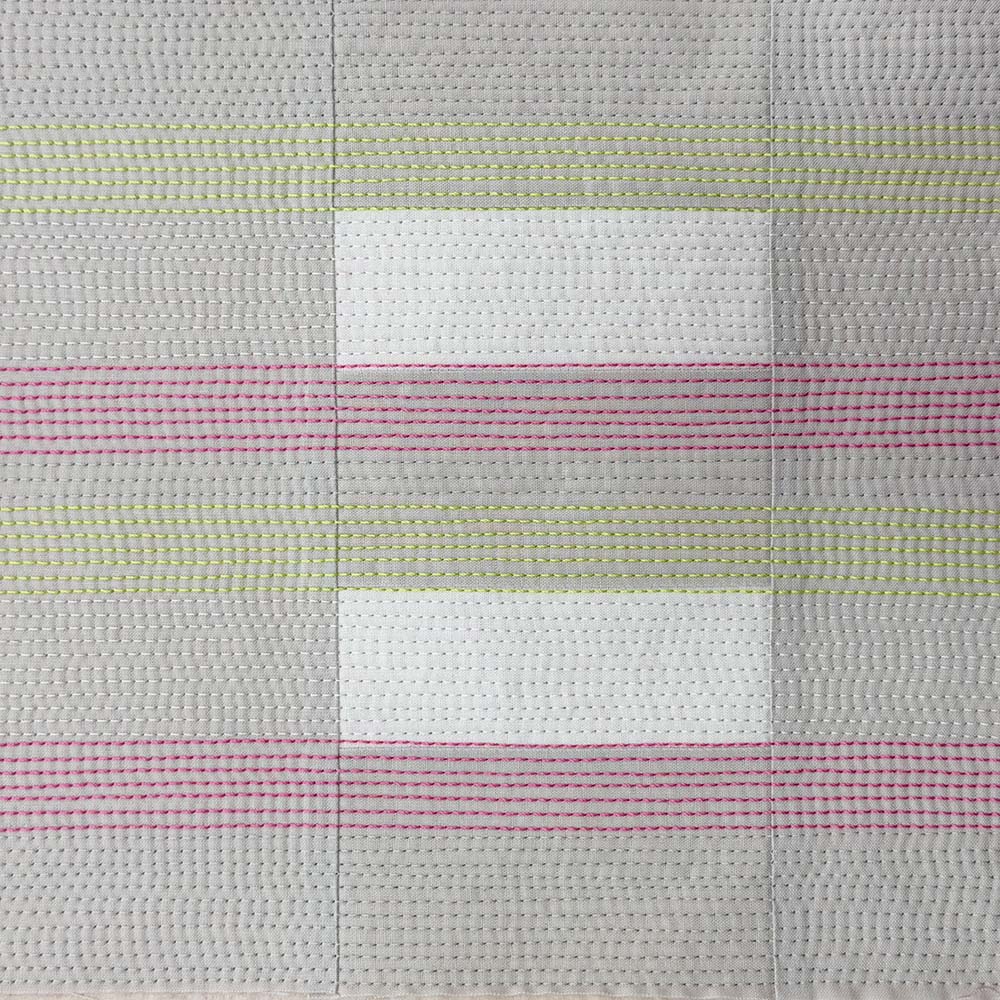
I started by quilting white lines through the white-pieced rectangles and light grey lines in the mist-colored background. I used 40-weight thread in the white sections, but I think that I’ll ultimately need to go with a 28-weight or even a 12-weight thread to get the effect I want. The grey thread in the mist-colored fabric worked pretty well, but I’m going to look at other thread options to see if there is a slightly warmer grey that may match even better. The 50-weight thread worked great for the background.
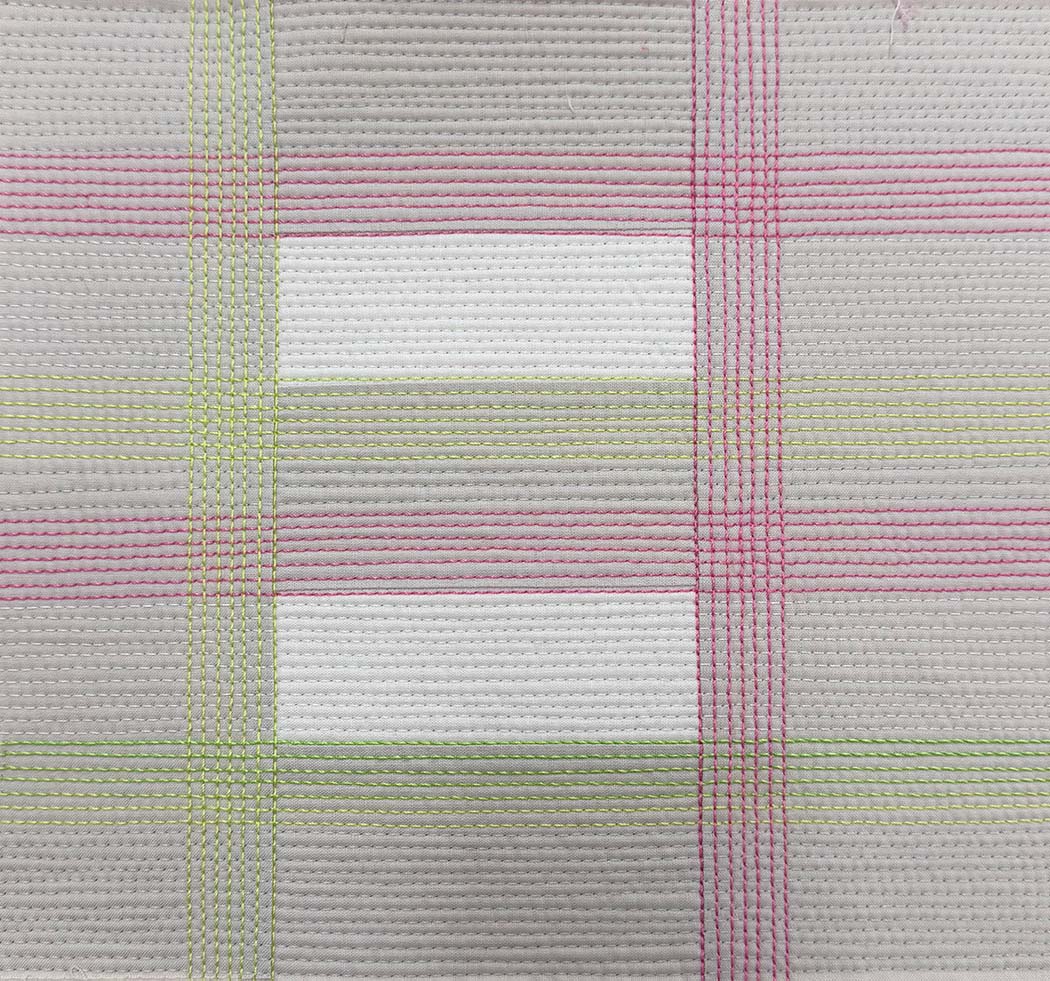
Next, I added stripes of my dominant colors using 12-weight thread. I love how these look, but the neon yellow blended into the background just a bit too much for what I’m trying to accomplish.
To emphasize the yellow lines, I decided to wrap some of the stitches with lime green thread. In the two lines closest to the white rectangle, I used a 12-weight thread to wrap the machine quilting stitches. In the next two lines, I used 28-weight thread, then 50-weight thread in the following line. If you had asked me if I would ever wrap stitching with 50-weight thread before this quilting test, I would have laughed, but this is exactly what this quilting needs to create a subtle gradient.
I’m thinking about adding wrapped stitches to some of the pink lines as well, but I need to order some thread colors to experiment with.

Finally, I added a couple of sections of perpendicular stitches to get a general idea of how these intersections will work in the final quilt.
With the quilting finished, I checked out the backing fabric and was pleased with the results. I used all matching 50-weight thread in the bobbin for each color, and the pink fabric showed the stitching without overwhelming it or showing through the front of the quilt sandwich.
Once I get more thread in, I will probably add to this test or make a new one to ensure I get a result that works well on the final quilt.
No Comments