
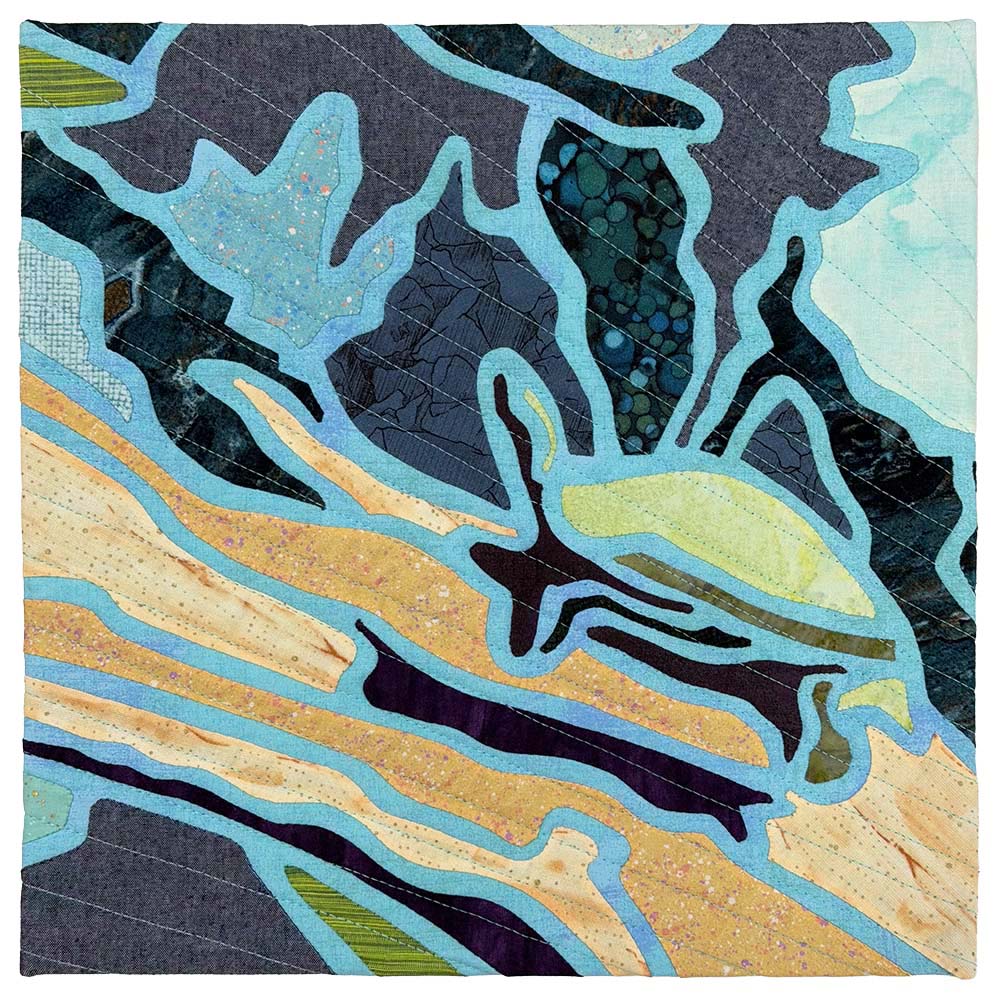
Implementing constraints in your design process is one of the best ways to encourage creativity, so when one of my quilting groups did a challenge earlier this year, I was excited to participate. This particular challenge was the visual equivalent of a game of telephone, with each participant creating a mini quilt to inspire the next person’s design.
The Game of Telephone
Telephone is a game where one person whispers a phrase to the next, passing it down the line. The last person announces the final phrase—it’s rarely the original thought, and it’s often hilarious. For this challenge, the information is passed visually rather than orally, with each participant passing photos of their quilts to the next person.
How It Works
We were divided into groups of five. For the first round, we each selected a photograph to send to the next person on the list. For this project, we all used nature photographs we took ourselves to ensure we wouldn’t run into any copyright issues when the quilts are exhibited.

We each spent one month creating a mini quilt based on the initial photograph and sent the quilt image to the next person on the list. We never saw any inspiration except for the mini quilt directly before us in the design order. Our designs could be as realistic or as abstract as we liked, so there was quite an evolution in most of them.
Timeline
This challenge ran from January through April, and we had one month to create each quilt.
The Quilts
Each group created five collections, each consisting of one photograph and four mini quilts. We never made a quilt inspired by our own image. The quilts were all initially inspired by a nature photograph and finished at 12” square. Beyond those requirements, we could use any quilting techniques or materials.
My First Telephone Tag Quilt
The inspiration photograph I received showed a body of water, with a log diagonally across the bottom of the image and a turtle resting near the center of the log. (As of publication, I have not received permission from the photographer to share the original image, so I’m only showing the images that I have adapted significantly in the design process.)
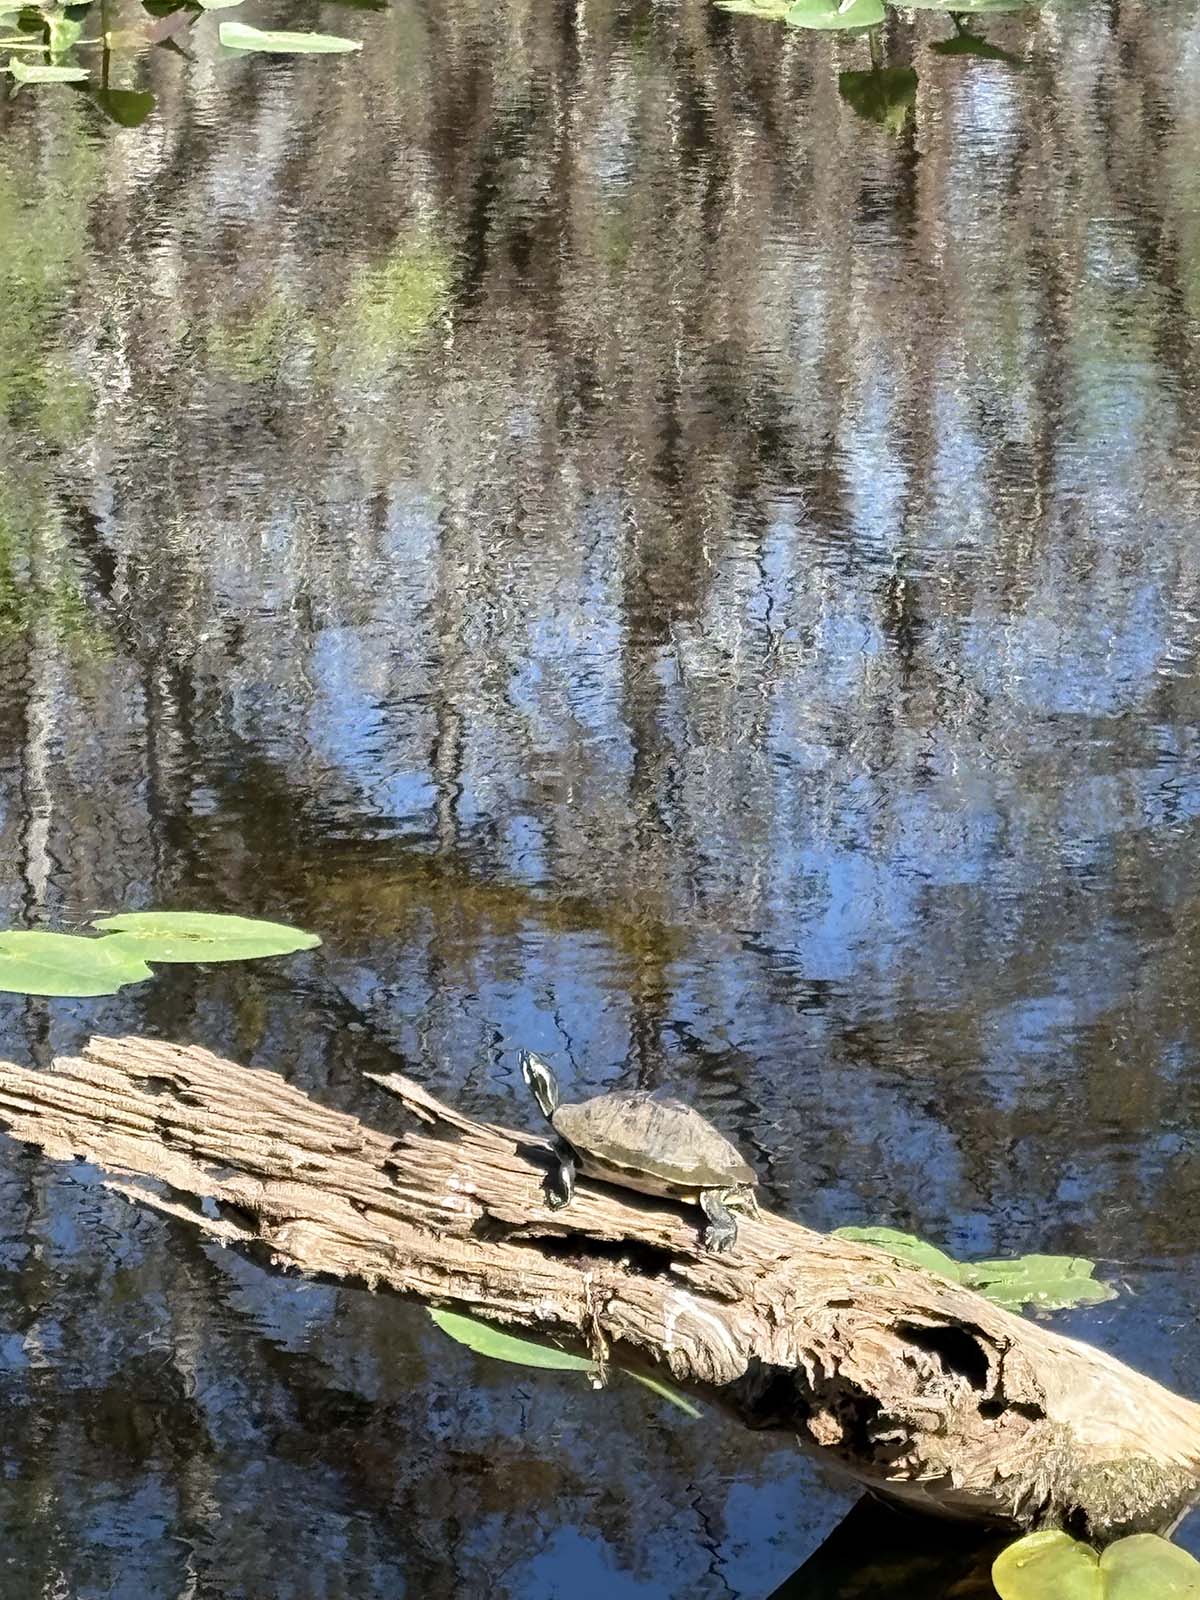
The Design Process
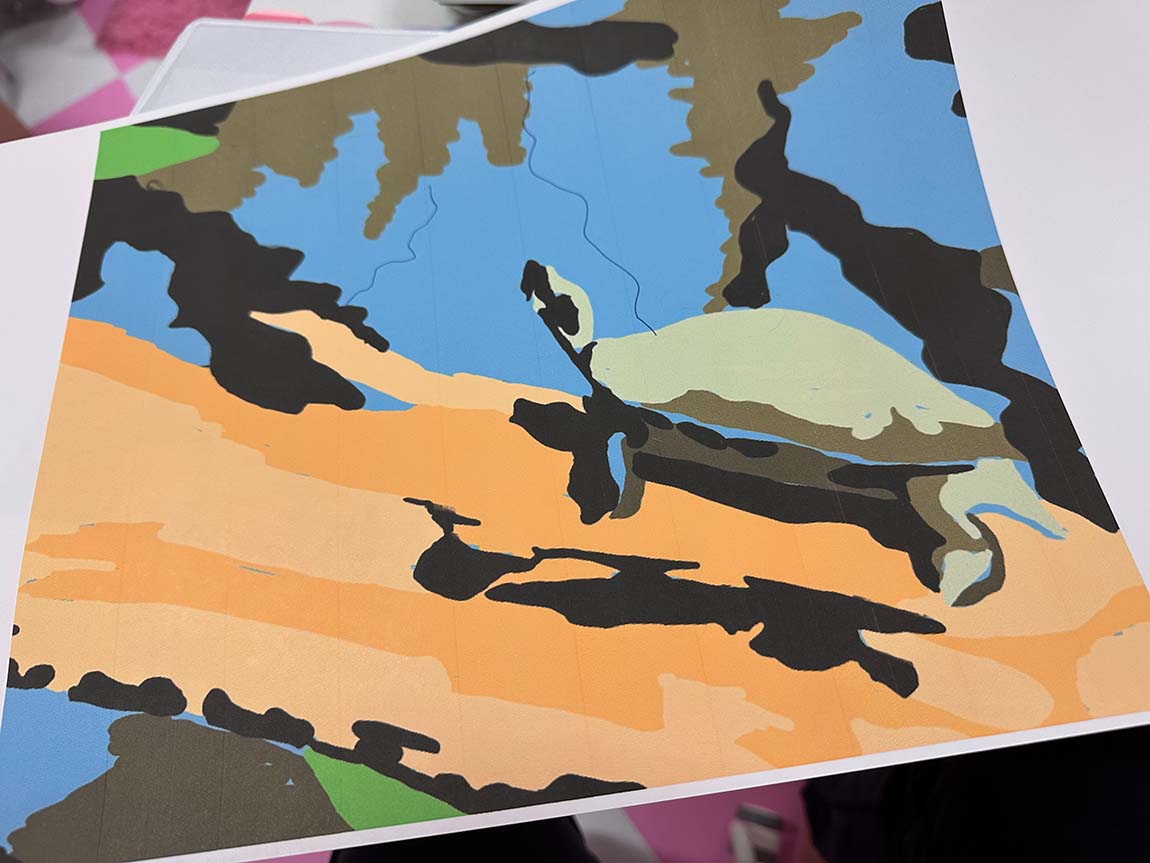
The water was highly reflective with a sharp contrast between highlights and shadows, and I wanted that broken feel in the final quilt. I started the design by placing the image in ProCreate and coloring each section of the photo with blocks of color.
My goal was to simplify the image into organically shaped chunks of color, while still keeping the turtle recognizable. For the color palette, I selected the most saturated colors from the original image.
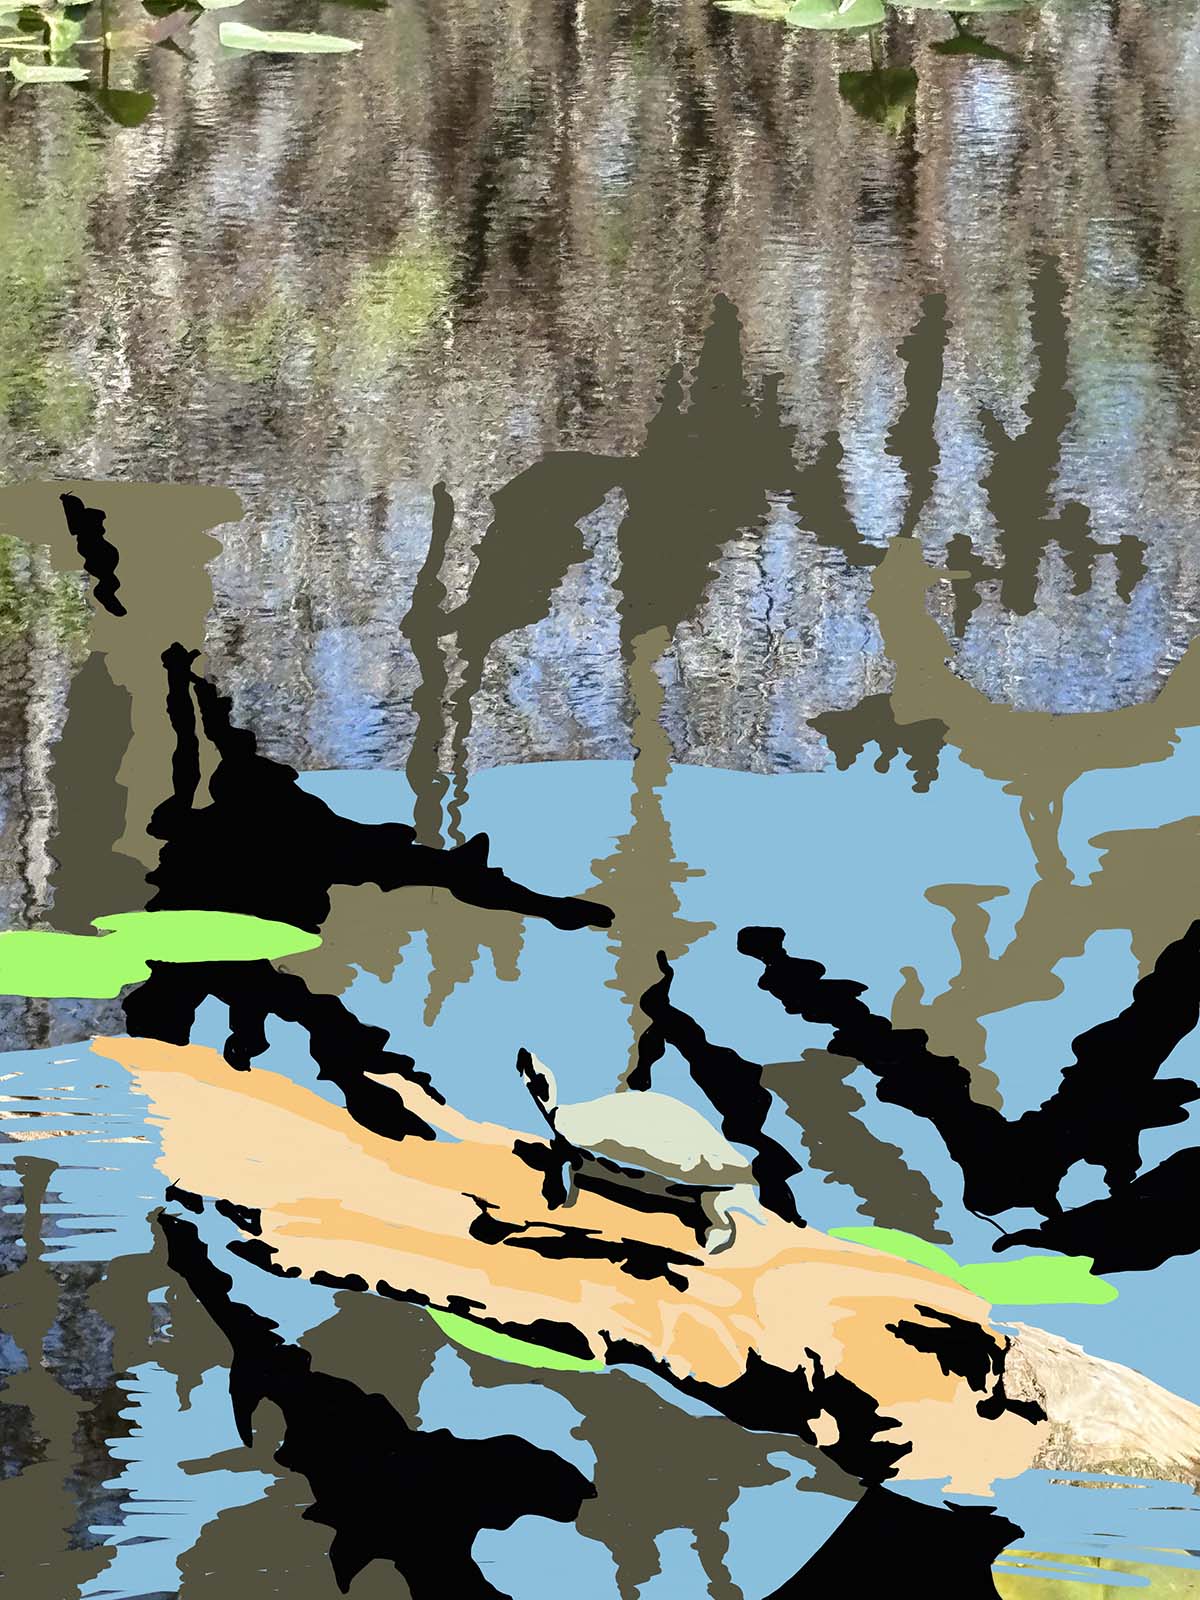
Once I had a large portion of the image colored, I cropped the image to the final square format.
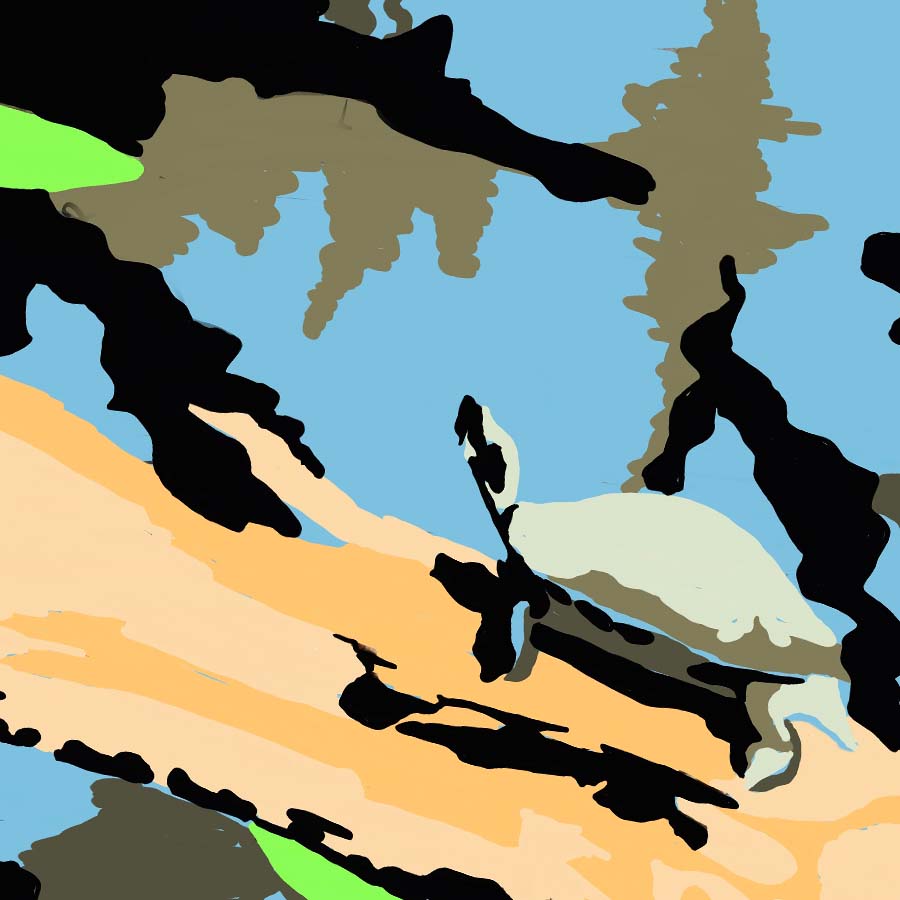
To finalize the design, I printed the image at (almost) full scale on 11” x 17” paper. At this point, I cut out each section of color, adjusting the exact lines and shapes as I cut.
Laying Out the Quilt
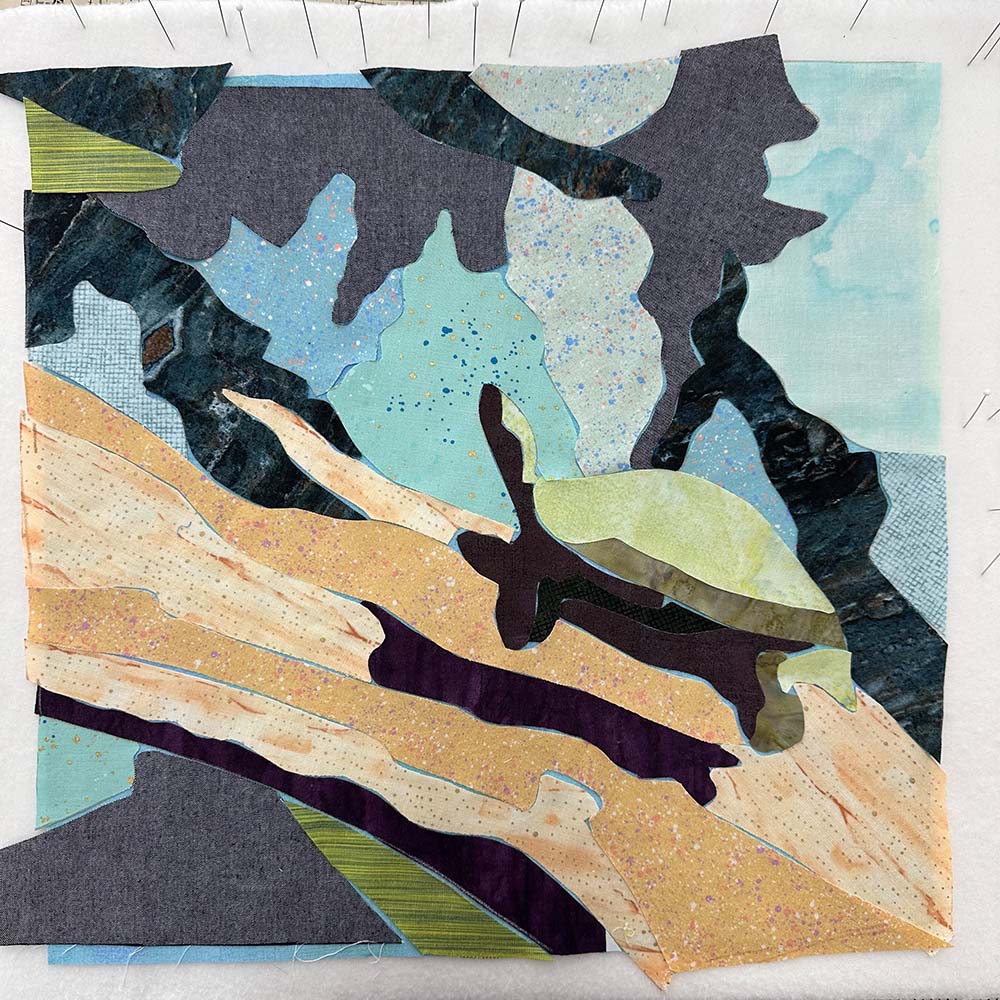
I wanted to make sure the quilt would easily finish at 12” square, so I used a 13-1/2” square piece of background fabric as the base for my appliqué design. I added extra fabric to the edges of the paper templates along the outer edges of the square to accommodate the larger square. The fabrics in the center of the design were cut to the exact template size.
I like to design small quilts on pieces of fleece-covered foam core so I can pin directly to the surface when needed.
Appliqué
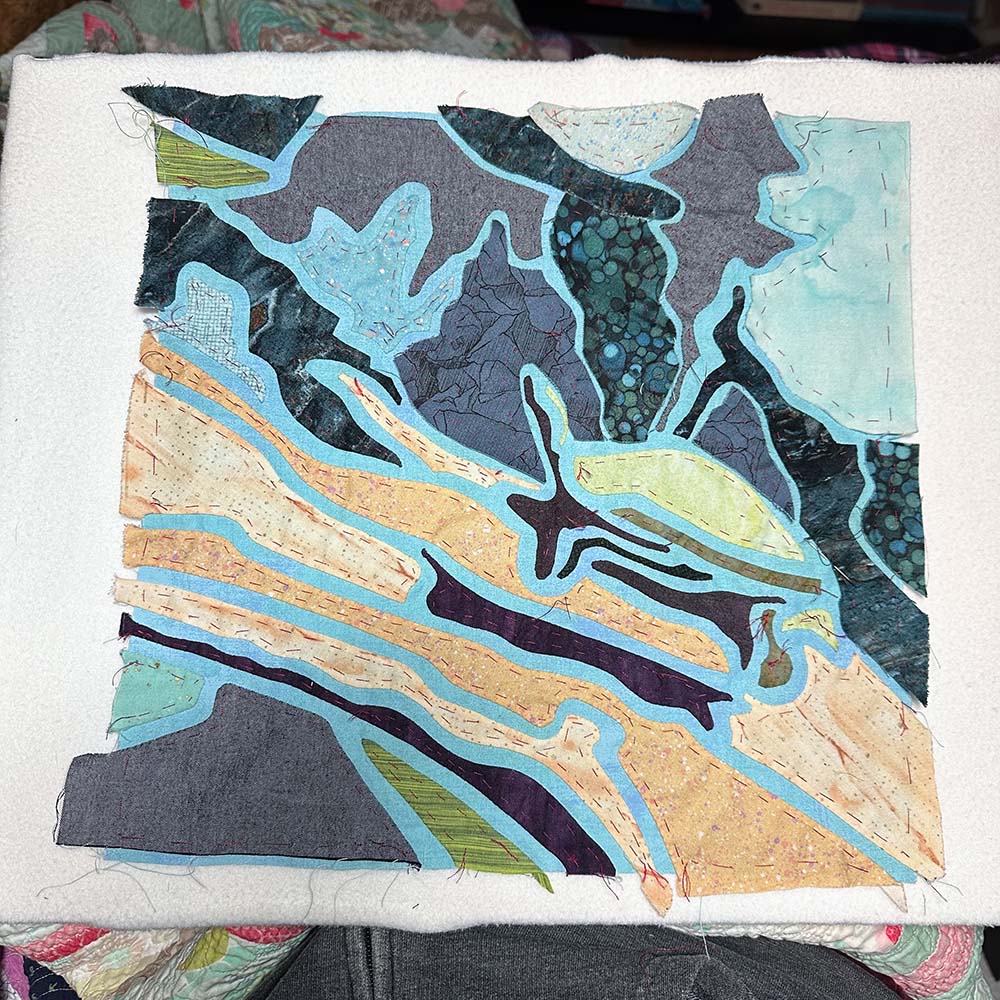
To appliqué, I baste 1/4” from the edges of each piece of fabric. When I turn under the edges as I do the final stitching, the raw edge meets the basting line, leaving a 1/4” gap that reveals the background between the appliqué fabrics. The lines of blue remind me of the shimmering highlights from the original photos.
Quilting
Simple quilting keeps the appliqué more graphic, so I decided to use diagonal lines that emphasize the angle of the log placement.
Finishing
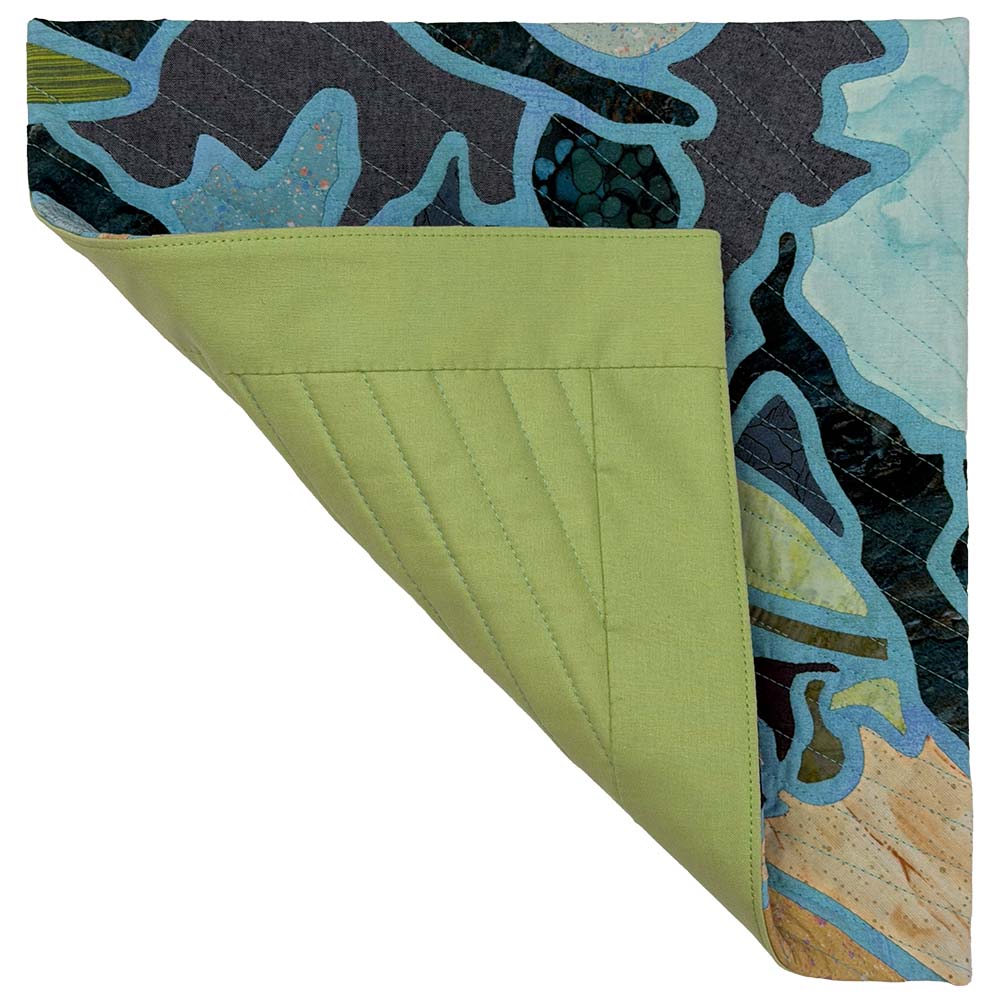
I wanted to maintain the illusion that this design could continue far beyond the quilt’s edges, so I chose a faced edge to finish the quilt.
Quilt Stats
- Title: Reflections
- Size: 12” x 12”
- Techniques: Hand Needle Turn Appliqué
- Quilting: Walking Foot Quilting on a BERNINA 770 QE PLUS
- Fabric: Assorted print and woven fabrics from my stash
- Batting: A scrap of Hobbs 80/20 Cotton/Wool blend
- Thread: 50 Aurifil in a variety of colors
- Edge Finish: Facing


2 Comments
Kathie
July 17, 2026 at 7:20 amI would have loved to see the original photo of the turtle. Still, it’s interesting how you used your computer to filter out unnecessary details to arrive at your final design. Thumbs up!
Fenny
July 24, 2026 at 10:09 amHow lovely to follow your design progress