What’s better than a mini quilt? LOTS of mini quilts!
When you make lots of mini quilts and stitch them together, you get a potholder quilt, a technique popular for group quilts in New England during the Civil War Era.
To make a potholder quilt, you construct a quilt block or component, quilt it, and bind it. Then, you stitch it together with other quilted and bound components to create a larger quilt.
These traditional quilts have fascinated me for years. After seeing my first one in a museum, I was excited to try the technique with a modern aesthetic, starting with Modern Log Cabin.

Quilt Inspiration
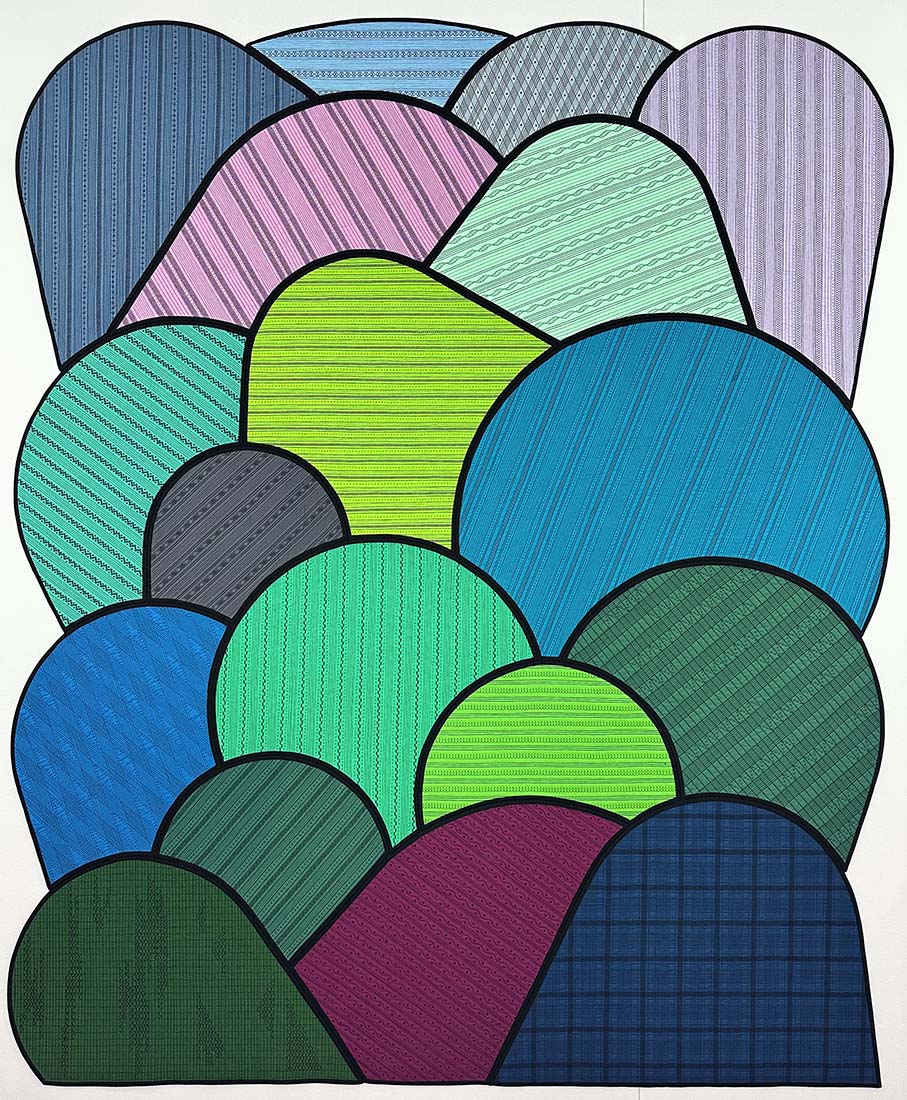
Rolling Hills is the convergence of three key sources of inspiration, pulling from nature, traditional quilt design, and illustration.
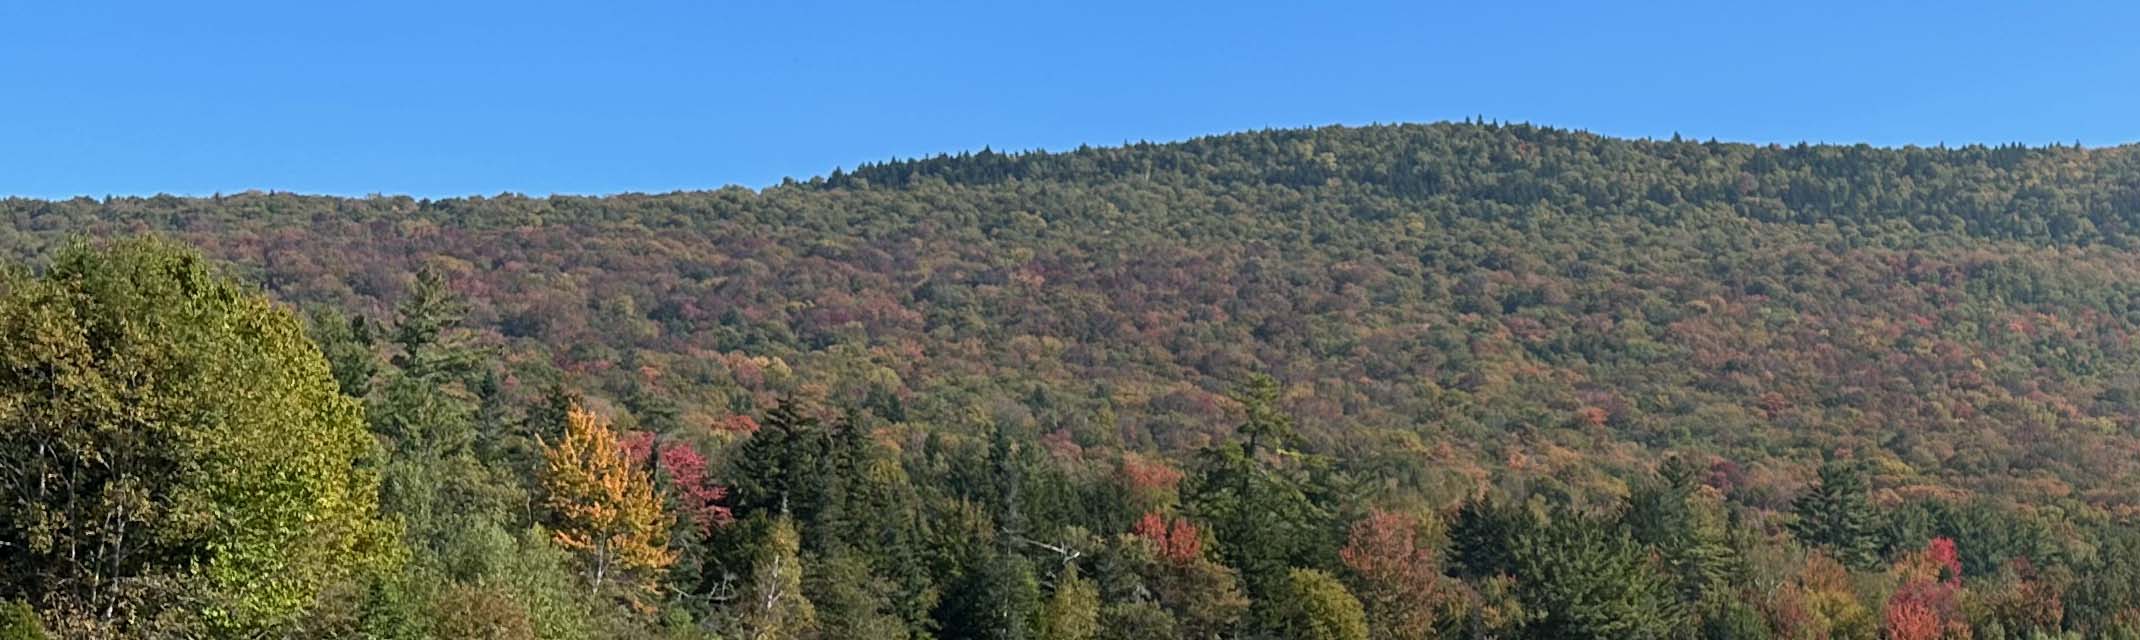
Tree Lined Hills
Have you ever looked at a tree-covered hill or mountain? Especially in transitional moments in the Spring and Autumn, these trees create irregular domed formations with each tree taking on a different color. Infinite shades of green combine with purples, which fade into blues and greys as the trees merge into the skyline.

Traditional Clamshell Quilts
The dome-shaped trees on a hillside remind me of clamshell quilt blocks. In Hills and Valleys, I used a limited green palette with black and white accents to create an abstract landscape.
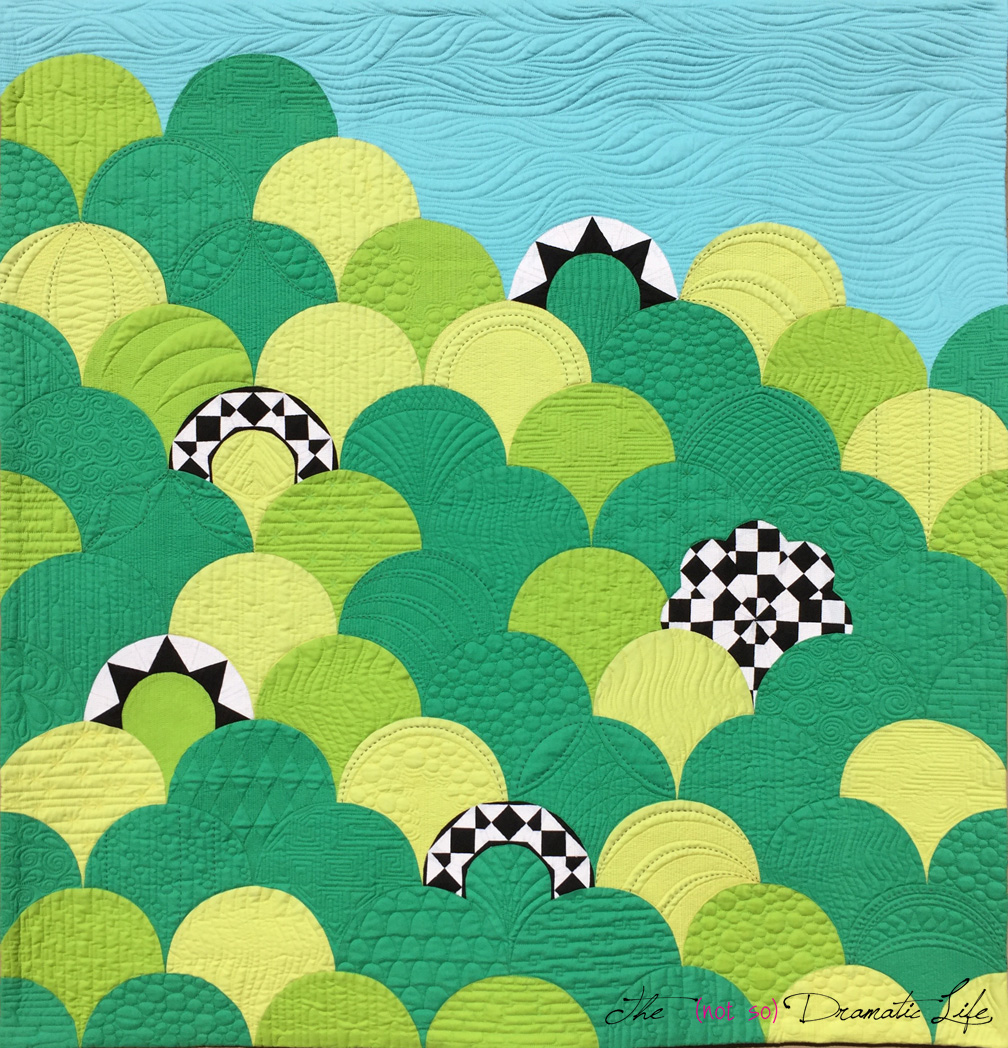
For Rolling Hills, I decided to explore the abstract landscape effect further by using irregularly shaped clamshell-inspired motifs.
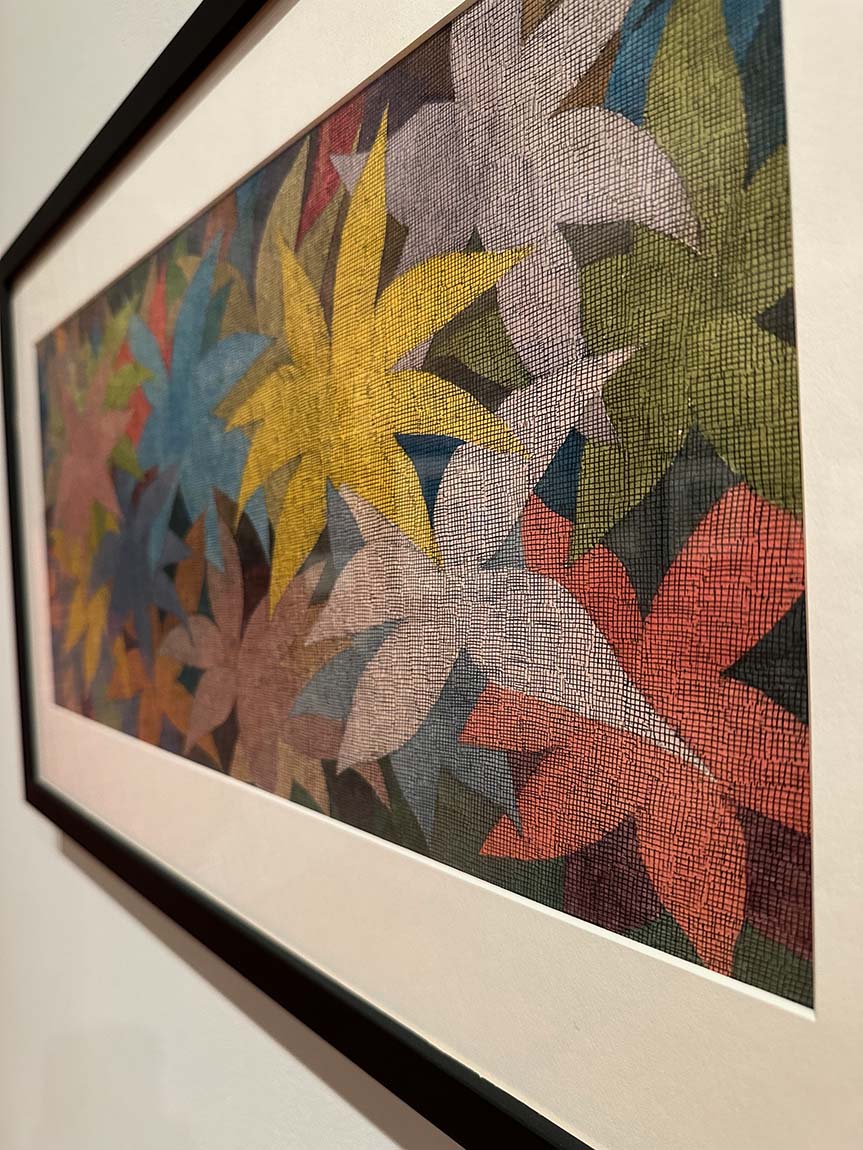
The Illustrations of Maurice Sendak
I’m fond of multimedia drawing styles, especially when linework is mixed with a painterly aesthetic. Maurice Sendak (famous for Where the Wild Things Are) captures this style perfectly with dense linework over painted colors.
Around the time I began designing this quilt, the Columbus Museum of Art in Ohio had an extensive exhibit of Sendak’s work, and I had the opportunity to see how his line work takes simple fields of color to a new level. This layering creates depth and texture that inspired the quilting stitches in Rolling Hills.
Design
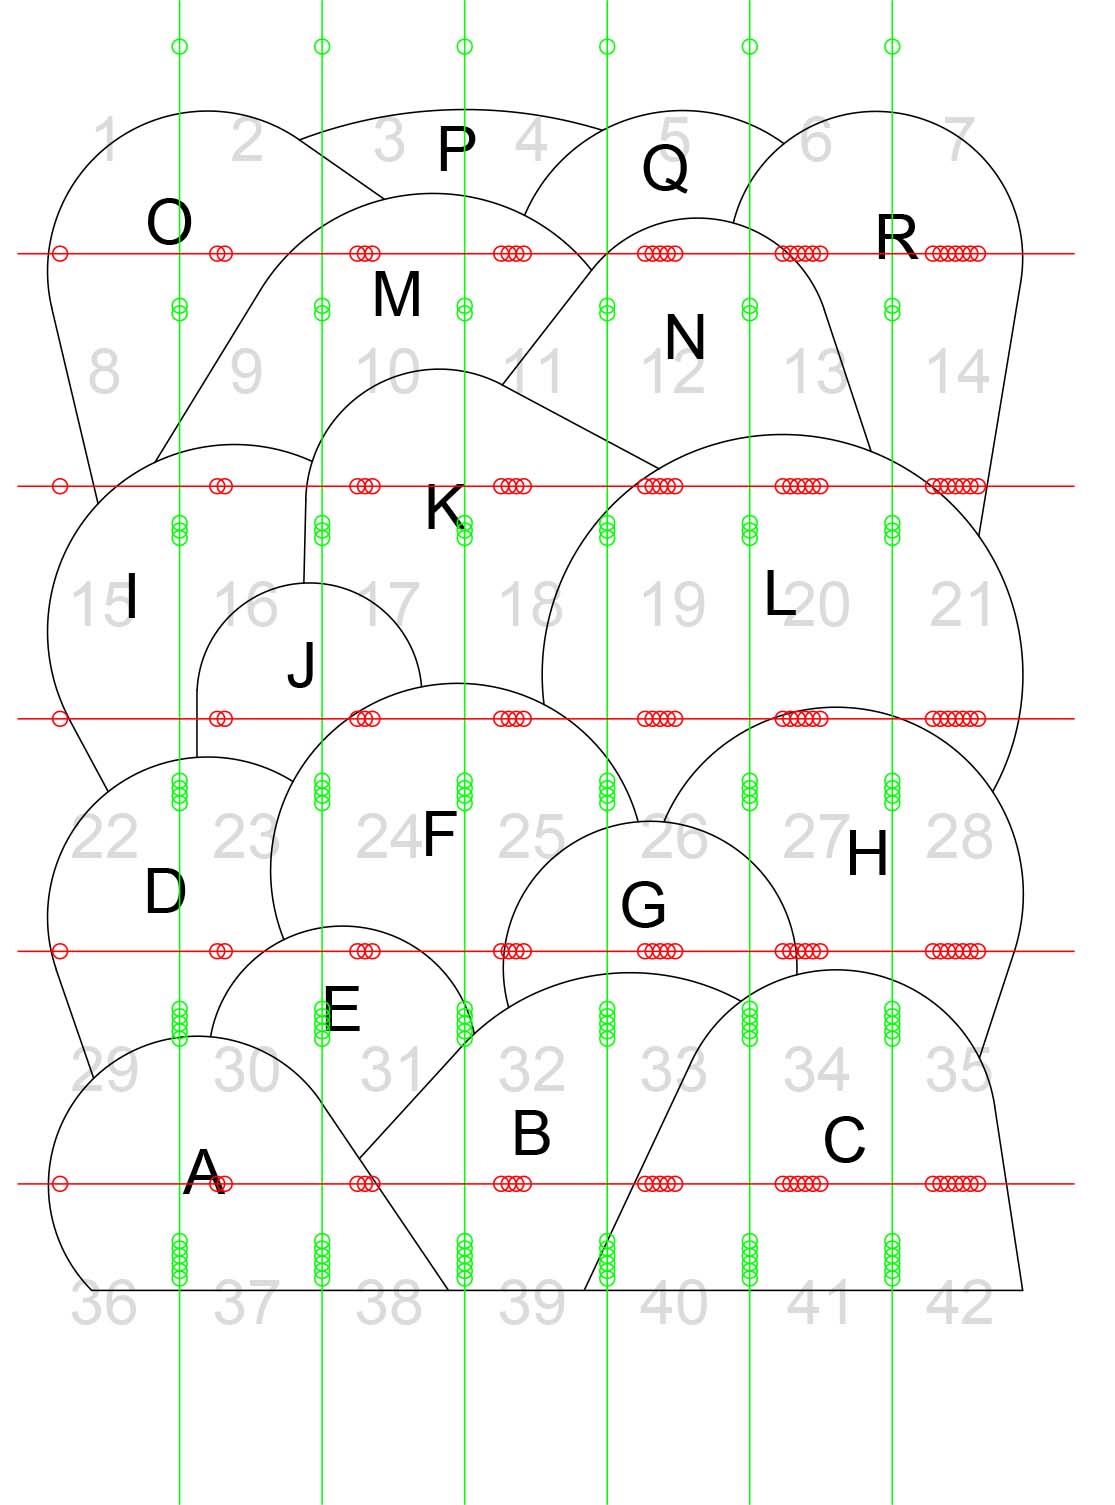
Each section of Rolling Hills is a wholecloth mini quilt made in a shape that interlocks with the components around it. I drafted the entire quilt using AutoCAD and adjusted the component shapes until I was happy with how each component worked with the surrounding sections.
Since each section is unique and requires accurate shaping to guarantee the pieces fit together, I printed the entire quilt using 11” x 17” paper and taped it together, allowing me to work with full-sized templates. The red and green lines in the image below helped me line up the printed papers, making it easier to tape the pieces together.
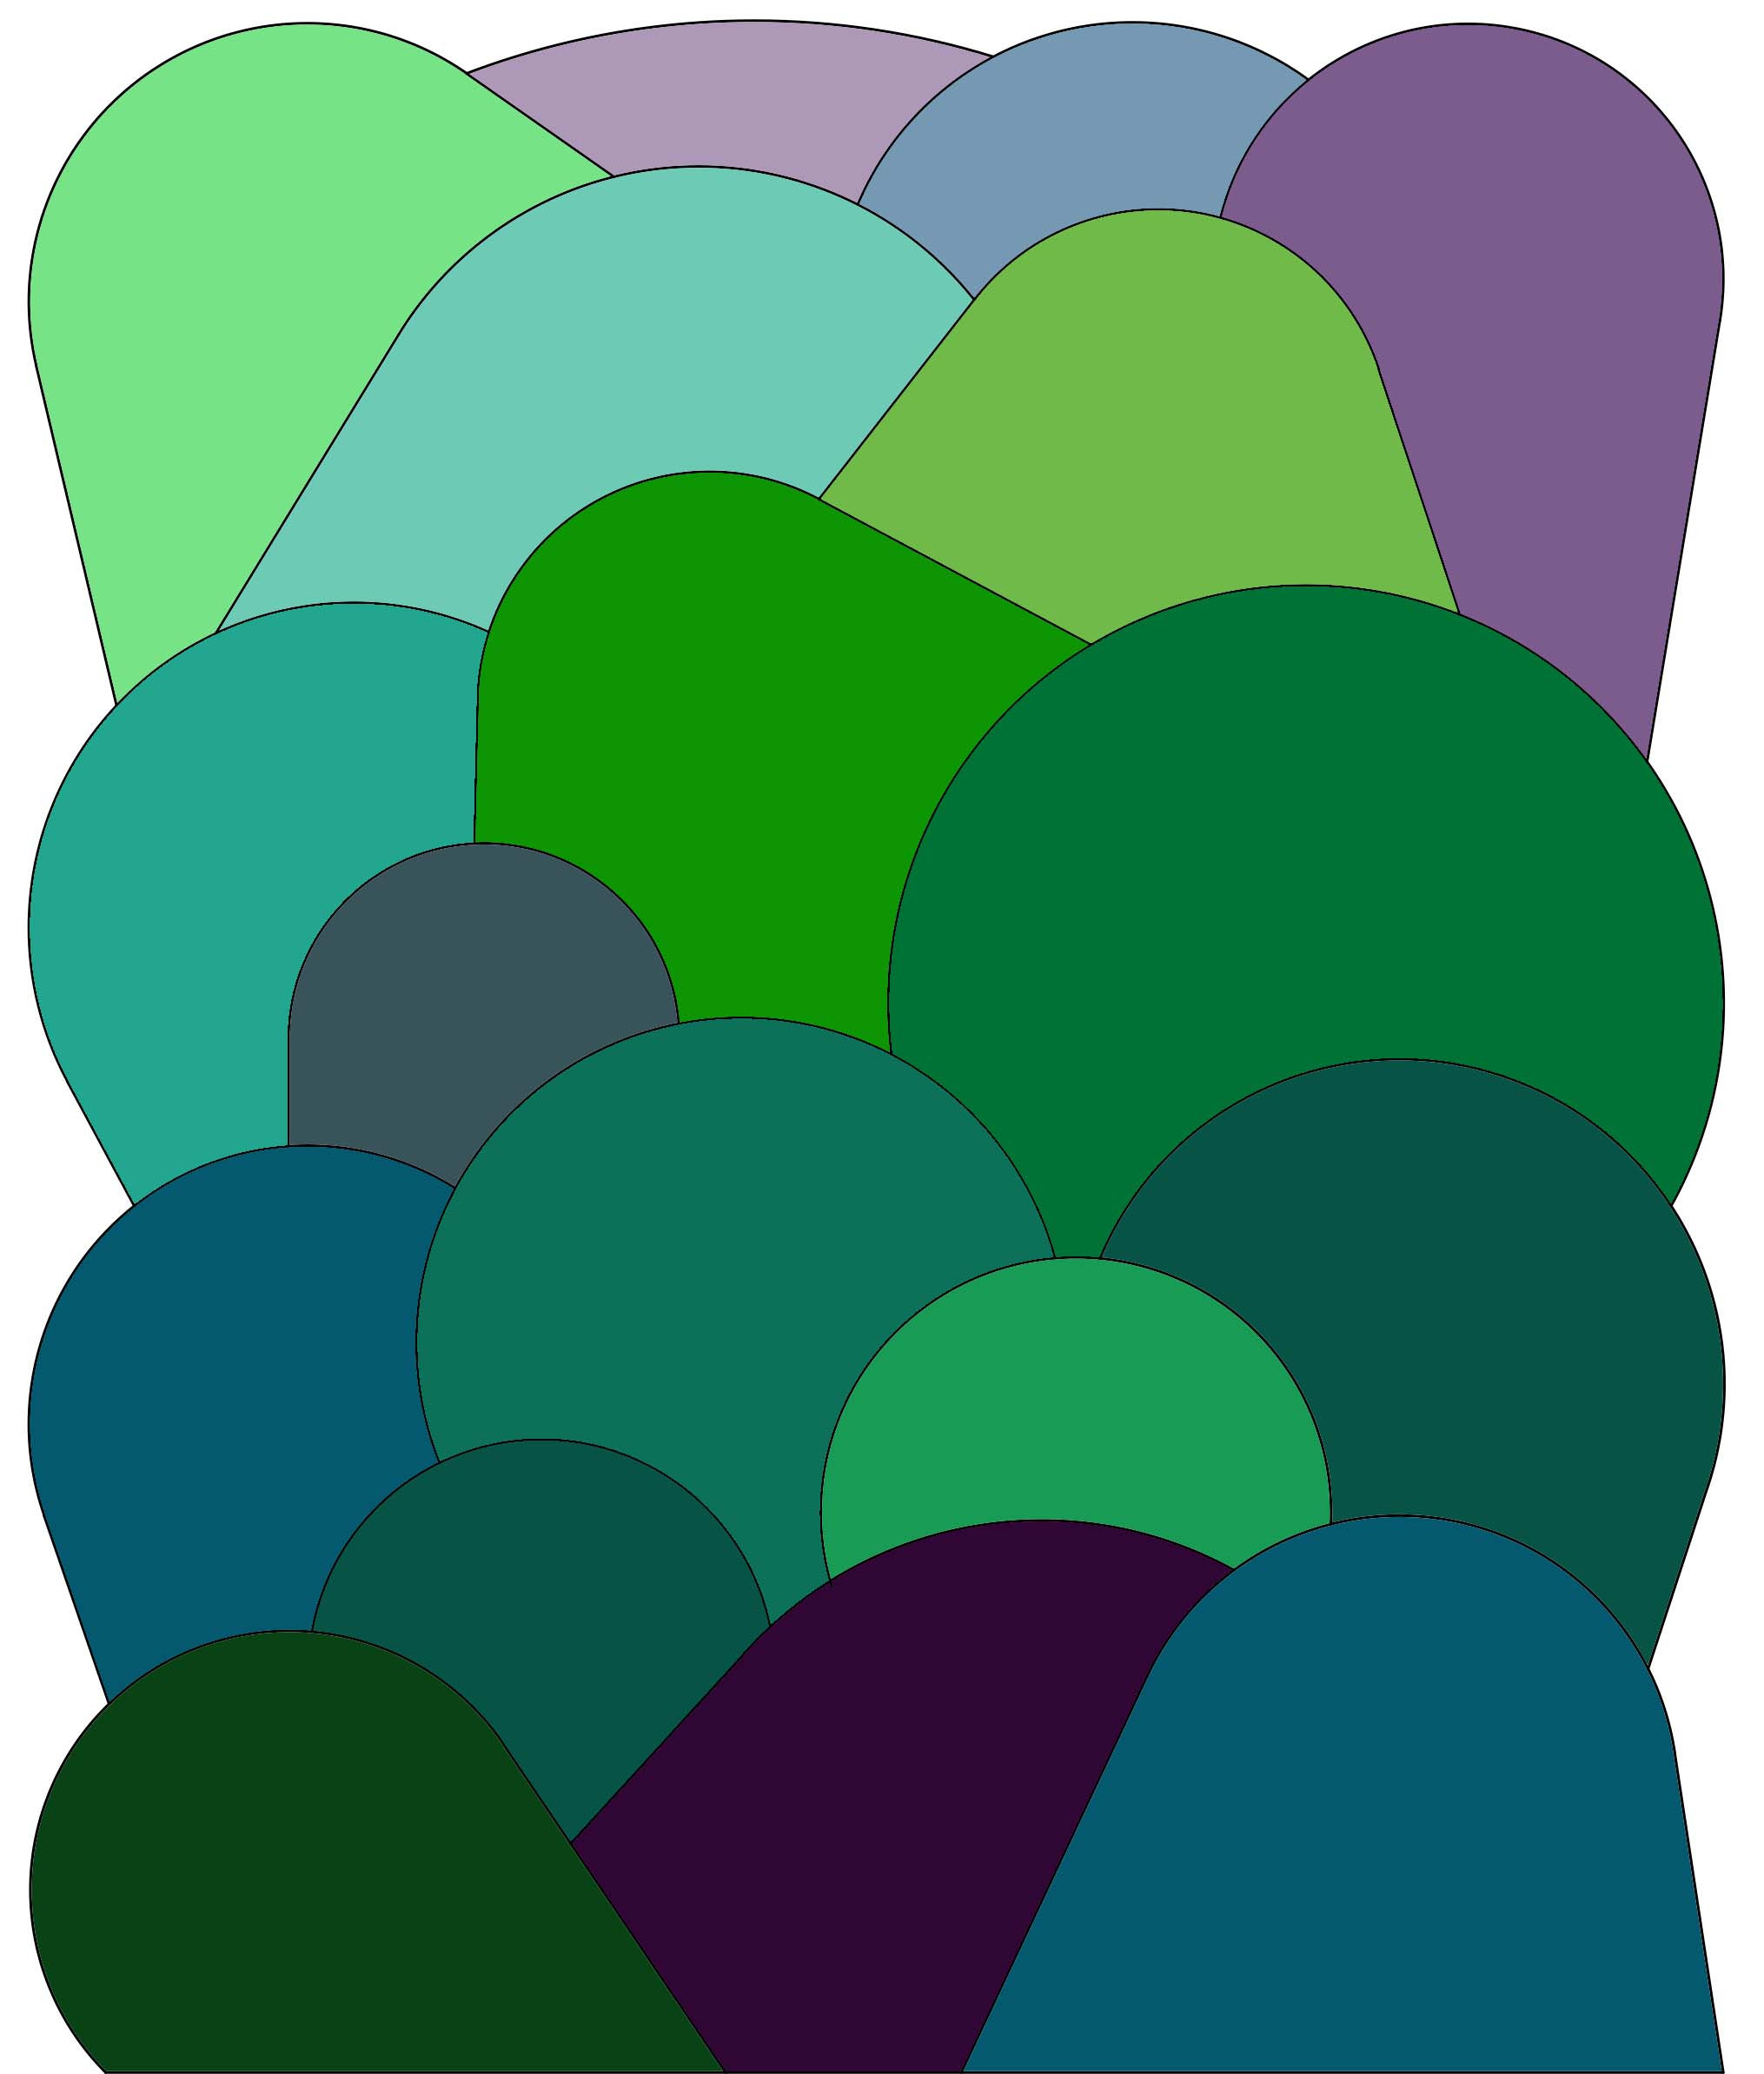
I like to have a general color map in place before starting a project like this, so I put the line drawing into Photoshop to start placing color for the quilt. The actual colors evolved when I started working with actual fabric, but this gave me a solid starting point.
Quilting
The individual mini quilts are the main design feature of the quilt, but quilting is the only opportunity to add pattern and texture within each component. Since each piece is a wholecloth quilt, I cut all three layers (top, batting, and backing) at least two inches larger on each side of the template. This added fabric allowed me to quilt the piece very densely without worrying that the component would shrink too much, meaning it would no longer fit into the composition. After each component was quilted, I used the paper template to trim it to the exact finished size.
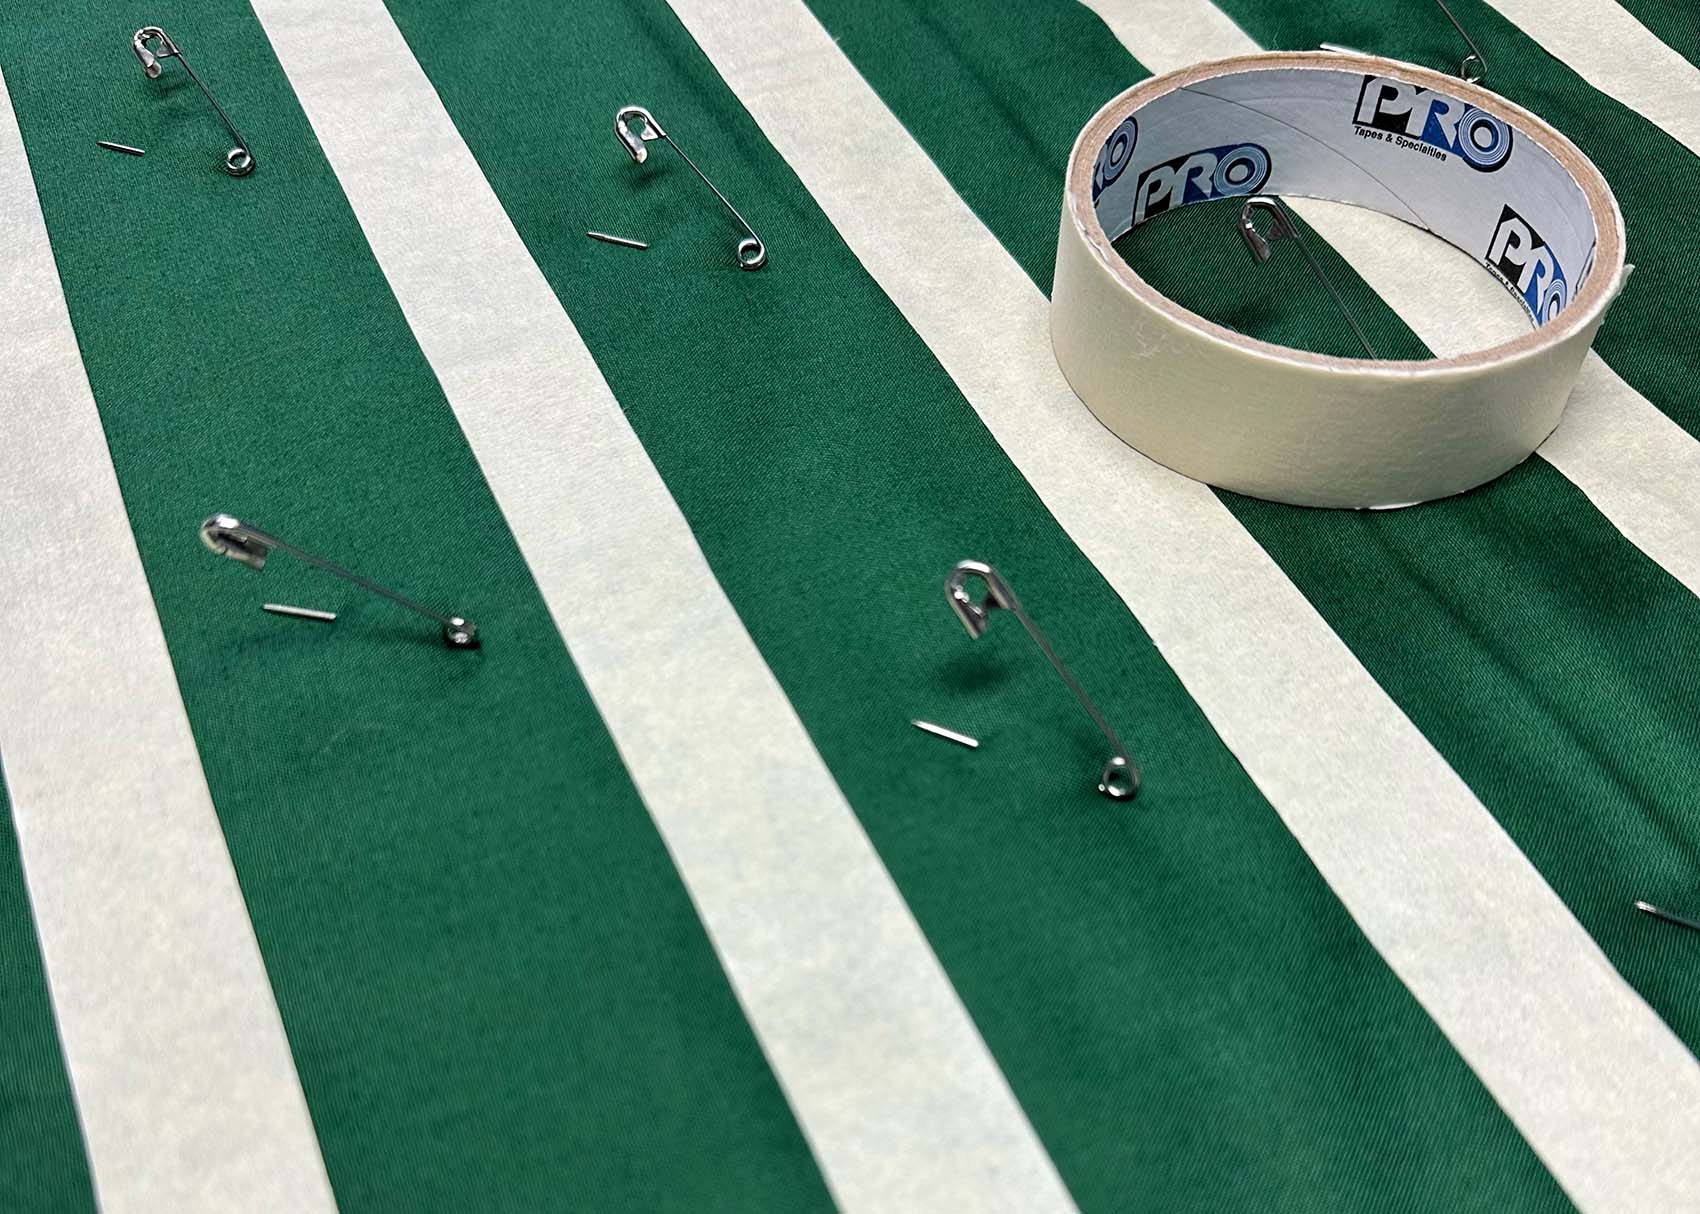
All of the quilting is linear, so the direction of the lines guides the viewer around the quilt. I used various widths of masking tape to mark my quilting lines.
Machine Quilting
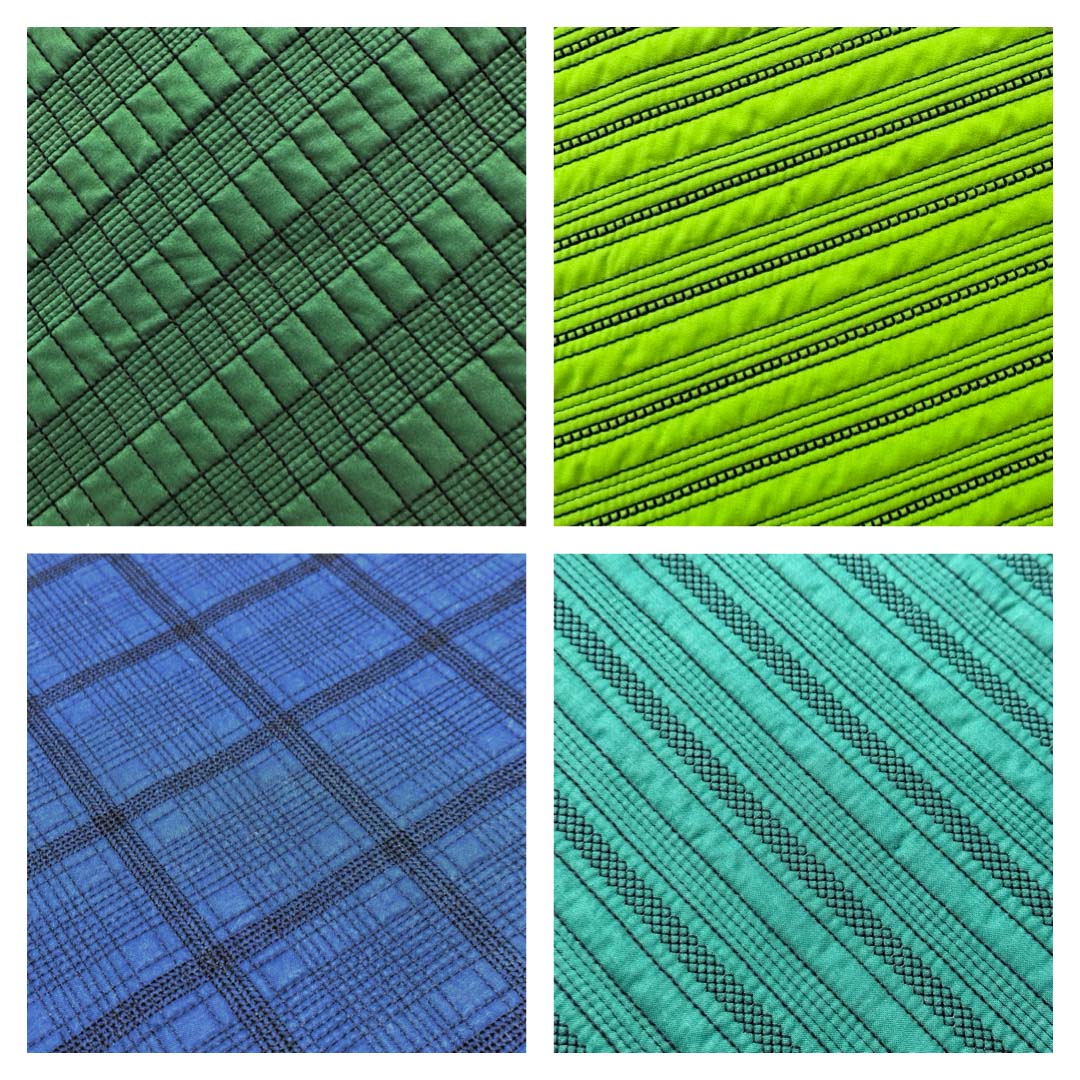
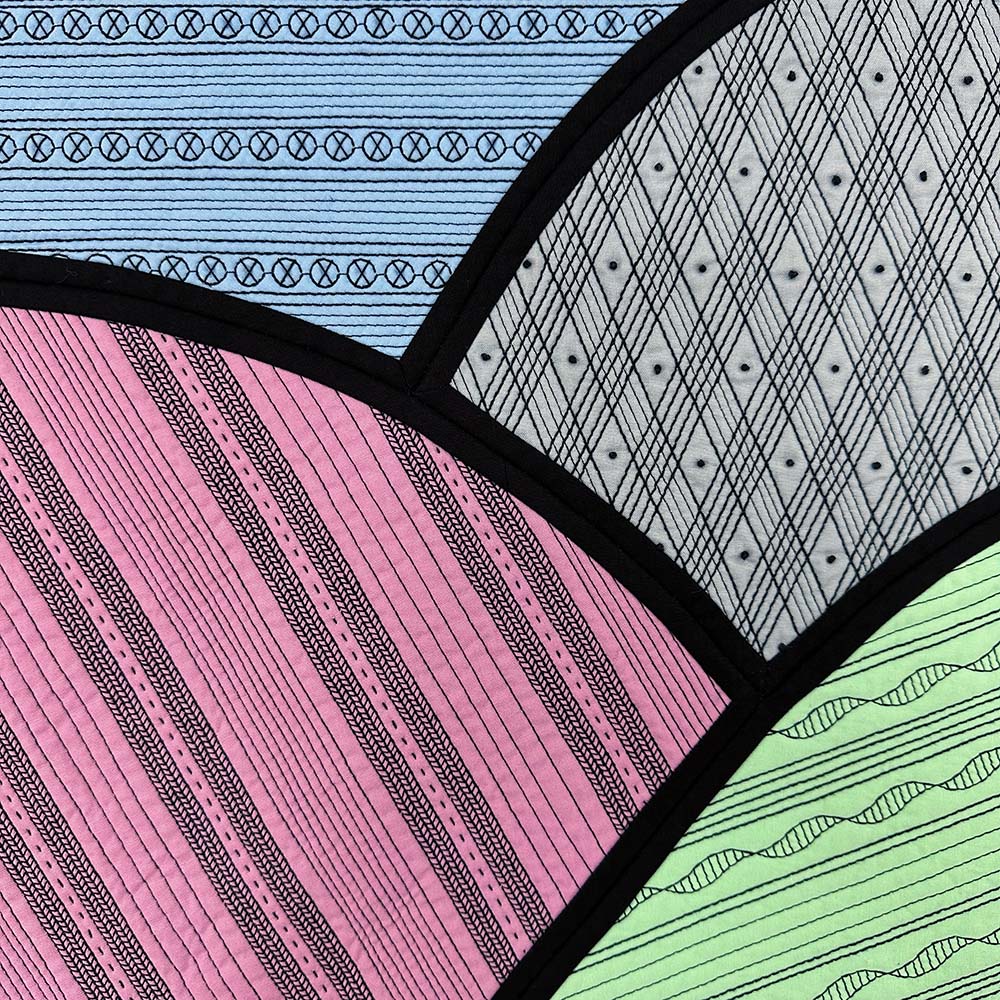
The machine quilting on this piece is a combination of straight line and decorative stitches using 12, 28, 40, and 50-weight thread. I bought a cone of each weight and tested each decorative stitch to see which thread weight looked the best with each design.
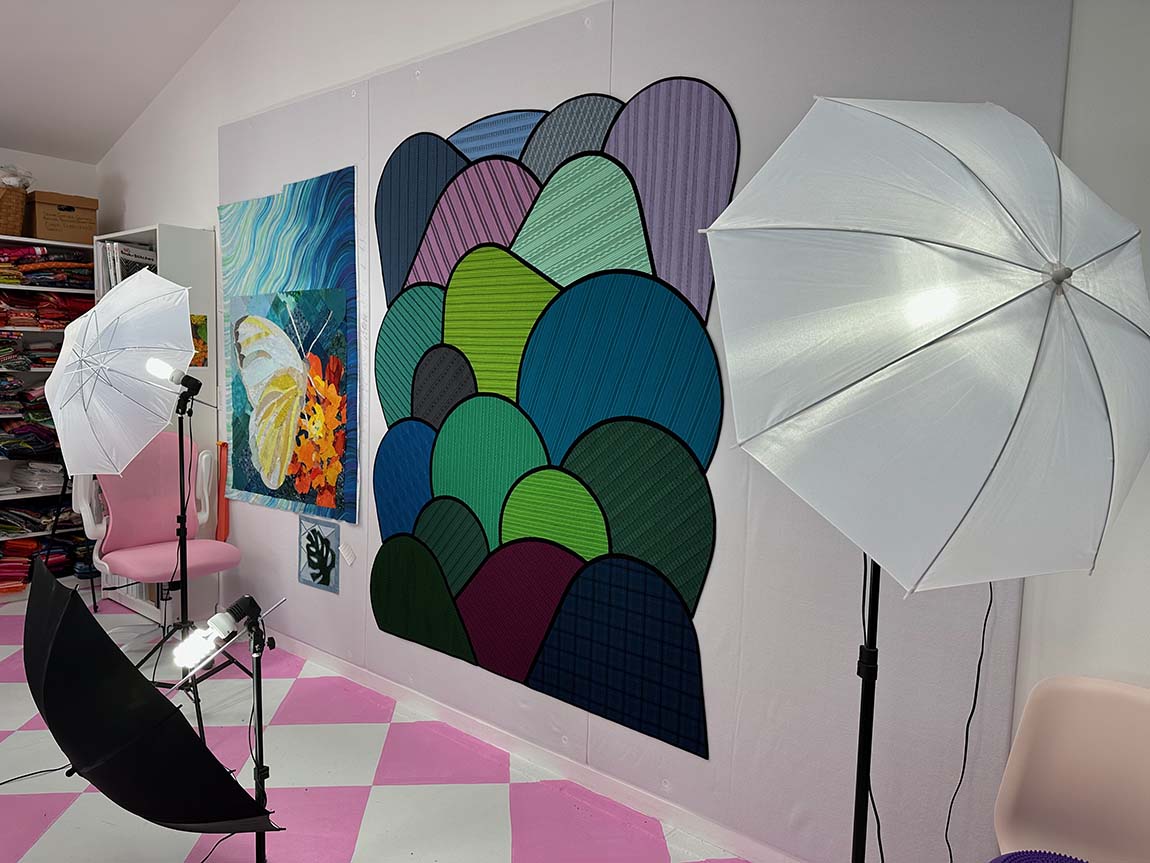
As I finished quilting each section, I added it to the design wall. Rolling Hills is one of my longest-term work in progress- you may recognize the apple core quilt next to it that was finished long ago!

Adding Hand Quilting
I actually thought the quilting was finished when I started to stitch the segments together, but it quickly became apparent to me that the quilt needed a little extra texture. I added running or decorative stitches to most of the sections as I added them to the quilt.
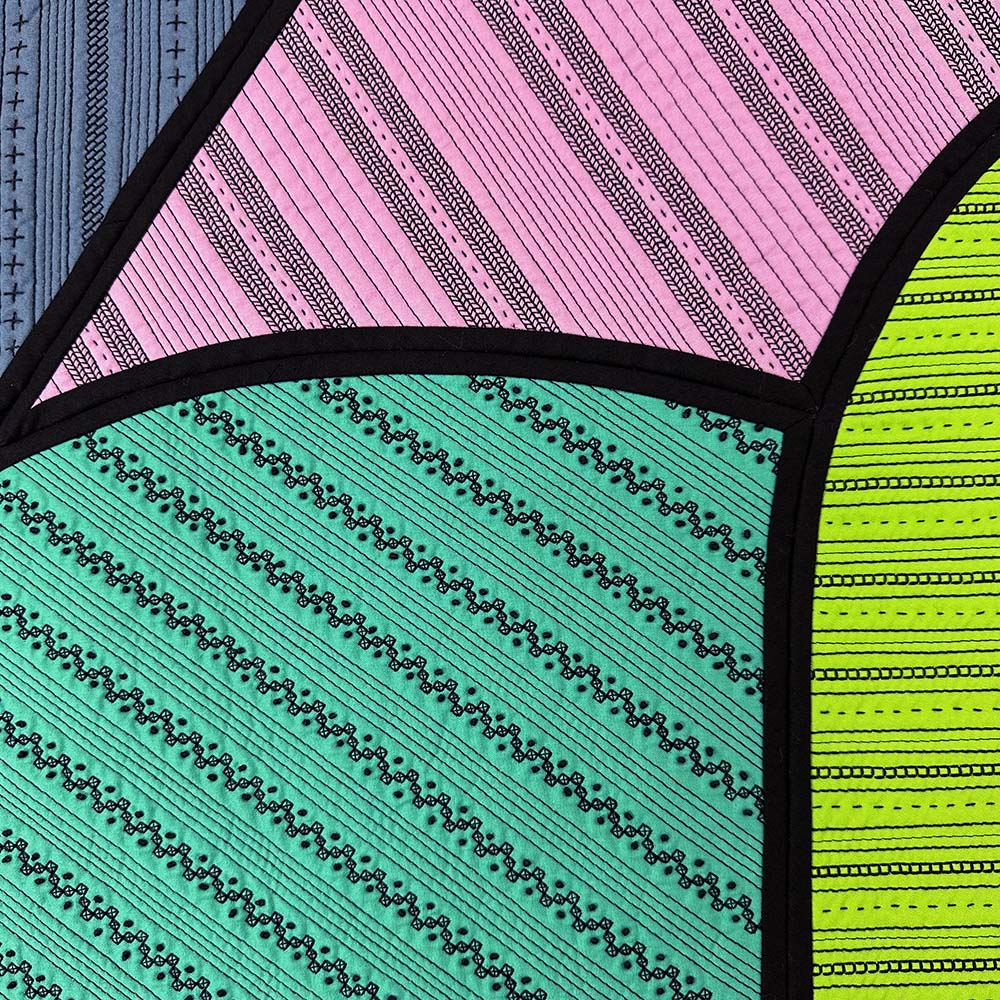
Here, you can see how much interest these French knots add to the decorative machine stitching in this component.

Binding and Finishing
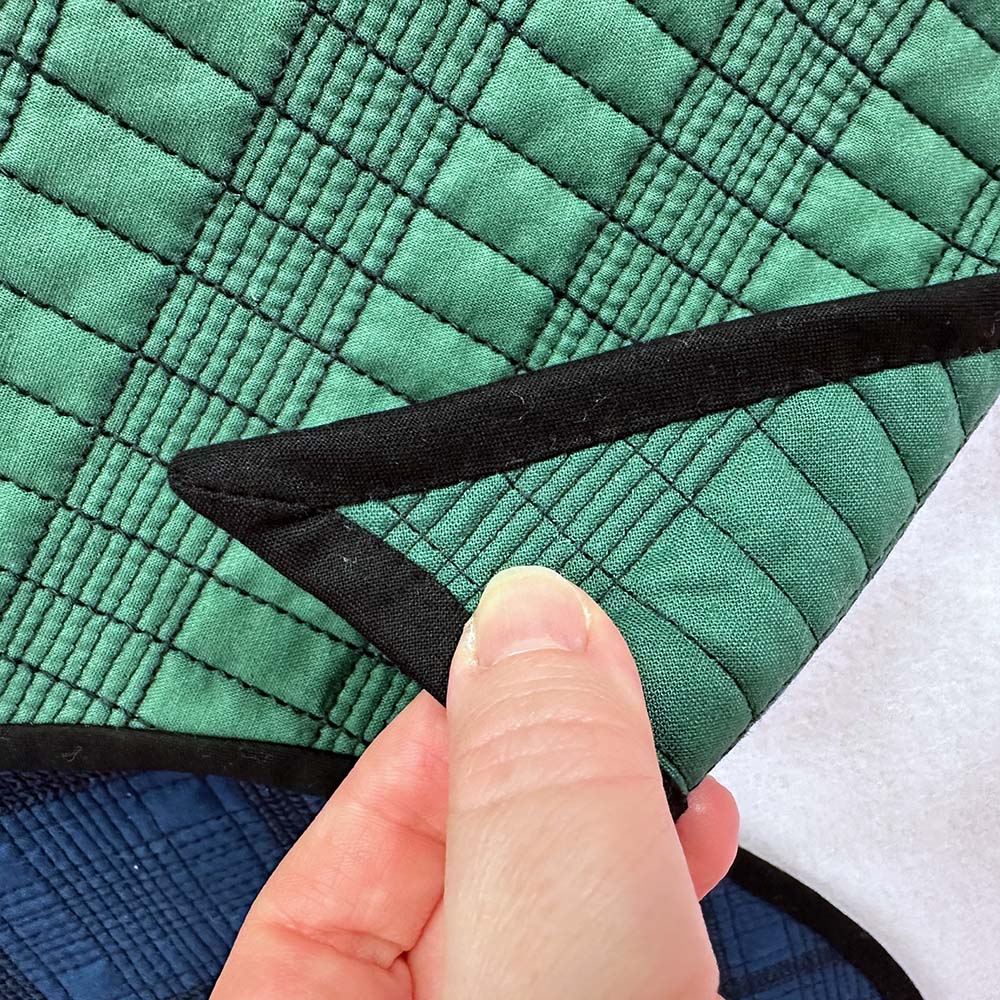
Each section of the quilt is bound with bias binding that hugs the corners and curves of the design. Since this quilt is a one-off that I have no intention of replicating, I just made a boatload of black bias binding and used it until it was gone. Then I made a boatload more and repeated the process.
If you have ever done English Paper Piecing, you may recognize that stitching the quilted components together is a similar process on a larger scale.
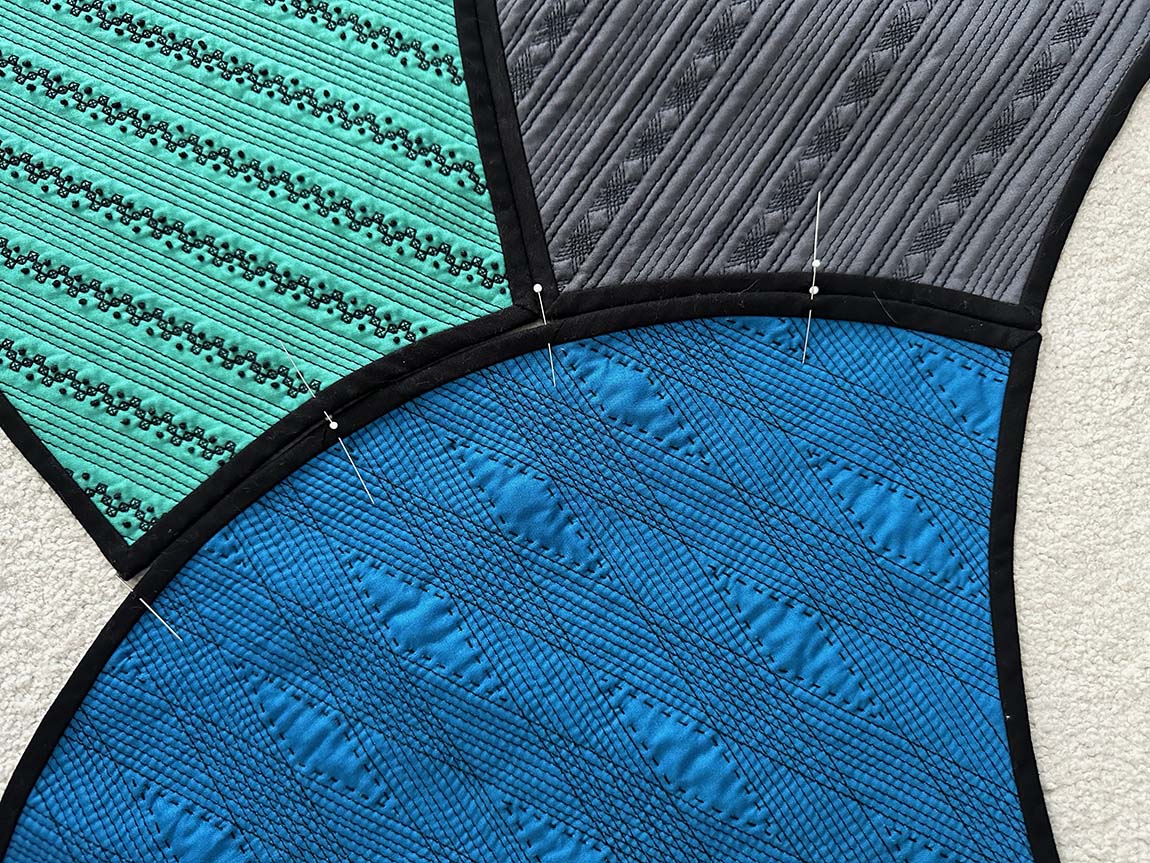
To ensure the curves’ seams meet where they need to for the quilt to lie flat, I make registration marks with straight pins on both sides of the curves. I mark each seam, the end of the final pieces on the edge, and several points along the curve.
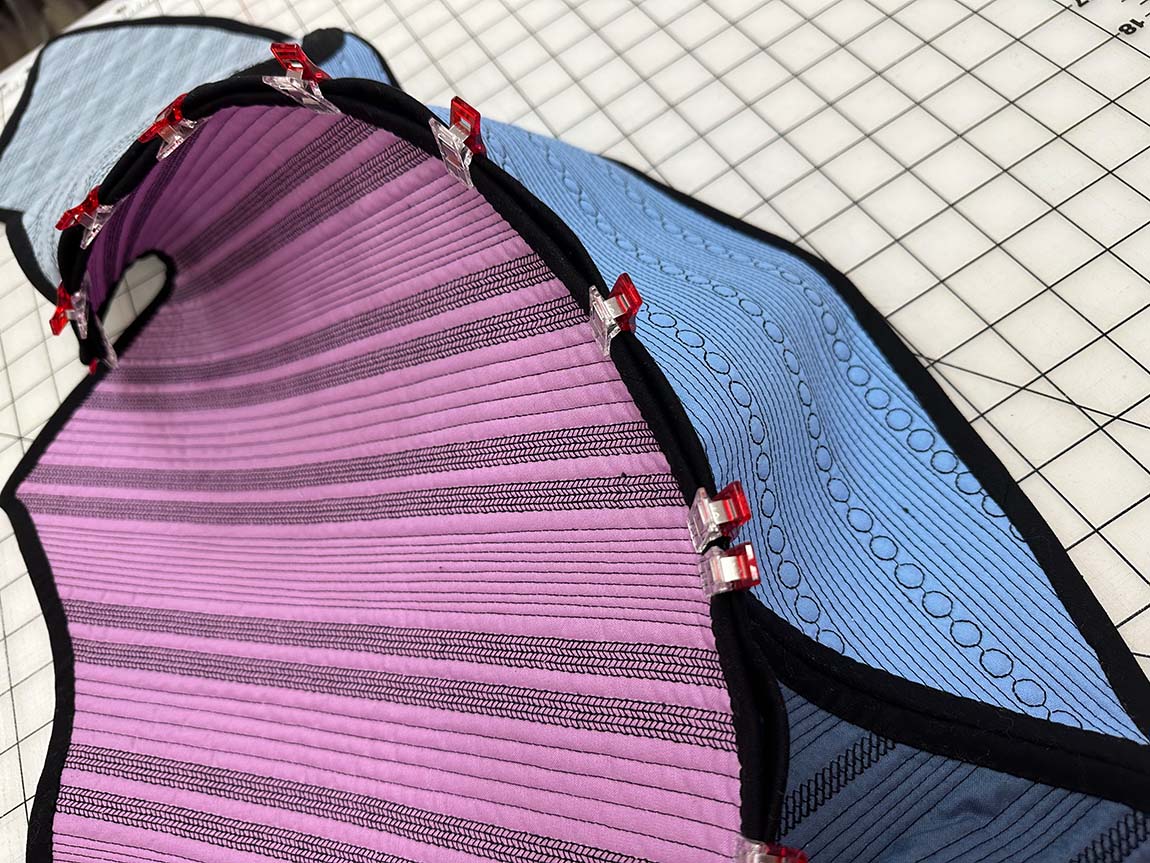
I match up the pins along each curve, and with the front sides of the components together, use clips to hold them in place while I hand whip stitch everything into place.
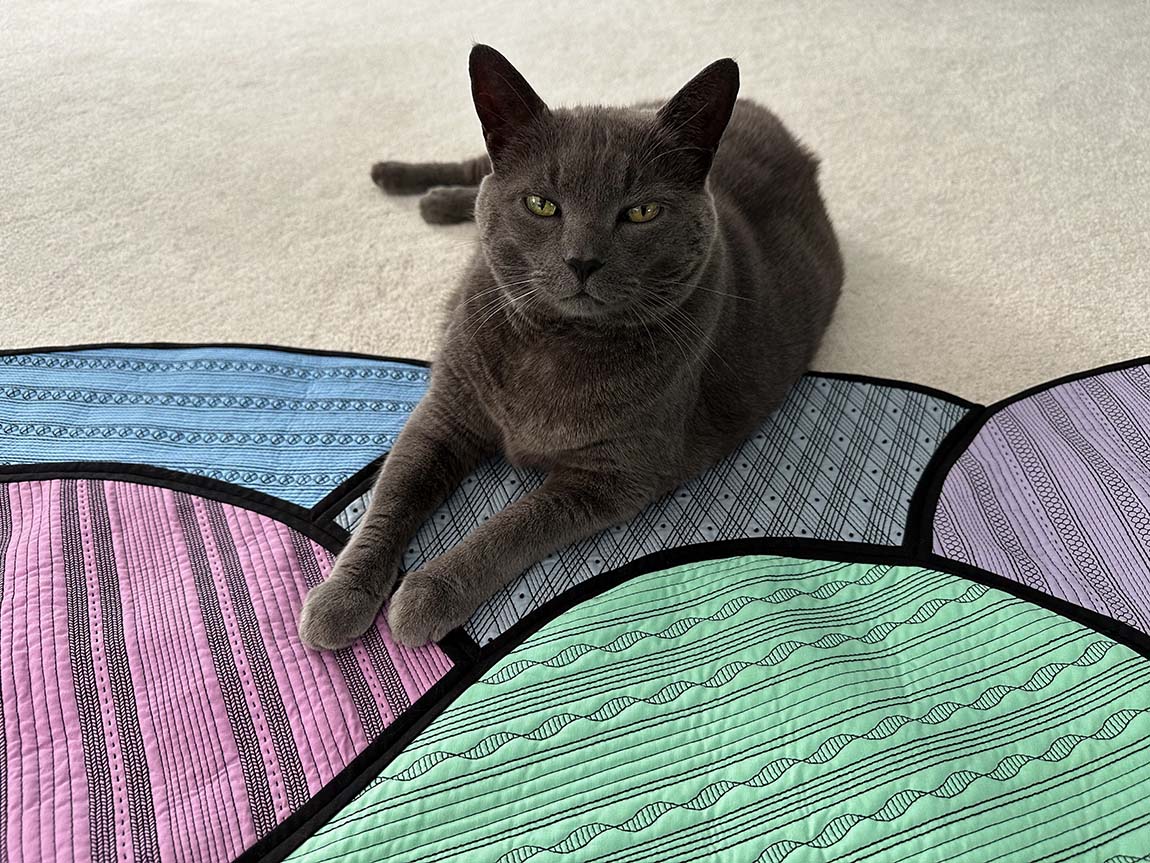
Monty believes that feline assistance was critical for this step.
When completed, the quilt lies flat, and you can’t see much of the stitching.

Results
The completed quilt is my favorite potholder quilt yet! The components fit together well, and I think the stitching keeps your eye moving around the composition.

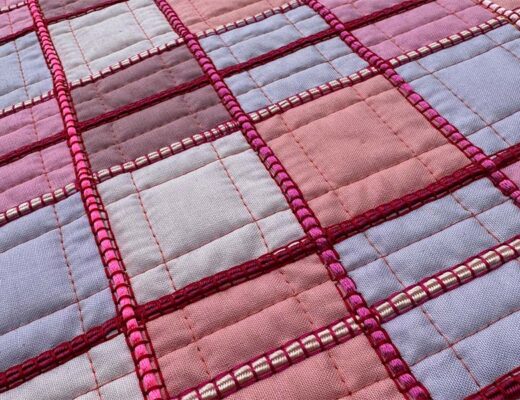
One of my favorite parts of a potholder quilt is the mirrored design on the back.

Quilt Stats
- Title: Rolling Hills Potholder Quilt
- Size: 65” x 80
- Techniques: Potholder quilt, wholecloth quilting
- Quilting: Machine quilting using straight line and decorative stitching, hand running, and decorative stitching
- Fabric: Painter’s Palette Solids from Paint Brush Studios
- Batting: Hobbs Tuscany 80/20 cotton/wool blend
- Thread: Black Aurifil thread in 12, 28, 40, and 50-weight
- Edge Finish: Bias binding edges on each section of the quilt


6 Comments
Pamela
October 17, 2025 at 6:55 amThat is outstanding. Thanks for sharing the details of construction. It fit so perfectly. What a way to use your decorative stitches too! It’s amazing!
CJ Delles
October 17, 2025 at 7:03 amSo glad Monty helped!
Patti rogerstopsail
October 17, 2025 at 8:17 amThis is simply amazing, Cassandra! I feel so privileged to be able to read all about this and see the quilt so beautifully displayed in your studio. It’s a true work of art! Best wishes for an exciting in person reveal!
Kathie
October 17, 2025 at 10:22 amThank you for sharing your design journey. I love how the quilting builds texture in the solids. I will have to play more with walking foot quilting and see what all those decorative stitches can do to enhance my own quilts. Our guild made a potholder quilt for our outgoing president’s gift, and it was so much fun to see all the little masterpieces come together. We were inspired by your piece for the Bernina “We All Sew” blog. Who needs Taylor Swift when we have Cassandra Beaver to inspire us?! LOL
Lorraine Woodruff-Long
October 17, 2025 at 10:36 amWow! Thanks for sharing the detailed process for creating this! The final result is terrific! I hope to see it in person at QuiltCon!
Sheila bieman
October 17, 2025 at 2:36 pmA most interesting quilt and those French knots were perfect. I am looking forward to viewing Mr. Sendak’s paintings.