Each year, the Great Wisconsin Quilt Show issues a challenge within their contest to create quilts with a specific theme. Whereas most quilts at the show are on display for a few days, quilts in this division are displayed separately and travel to different venues for two years following the initial show. These quilts all measure 30″ x 40″ to maintain consistency within the display.
The theme for 2025 is Hexagons, and let’s face it, I do enjoy a good hexagon quilt, so I decided early on that this was a challenge I wanted to participate in, and today I get to share the results.
Designing the Hexagon Quilt
I’ve done hexagons with machine piecing, using a potholder technique, and have even dabbled in some English Paper Piecing from time to time. The one thing these previous projects all had in common was the use of regular hexagons.
What’s a regular hexagon? The regular hexagon is the shape you first think of when someone says the word hexagon. It has sides of equal length, and the angles formed where those sides meet are all the same.
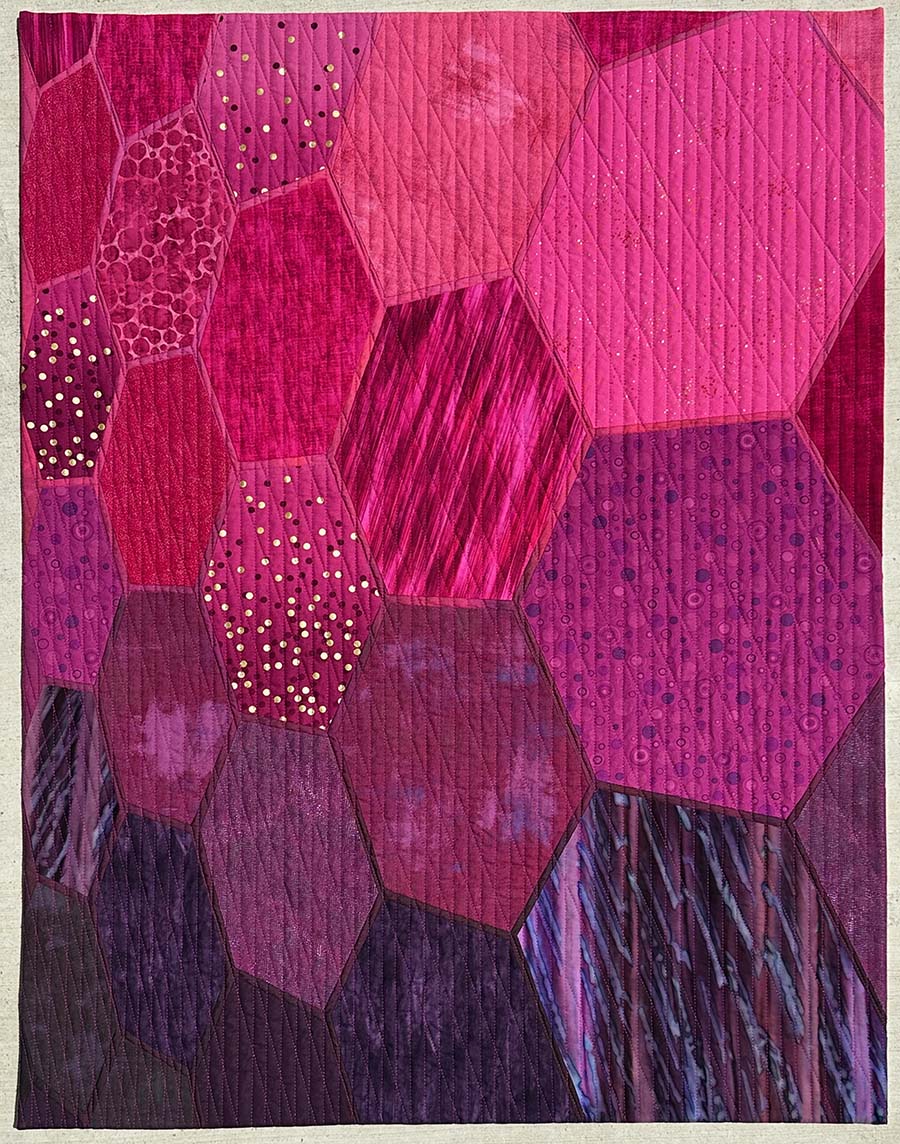
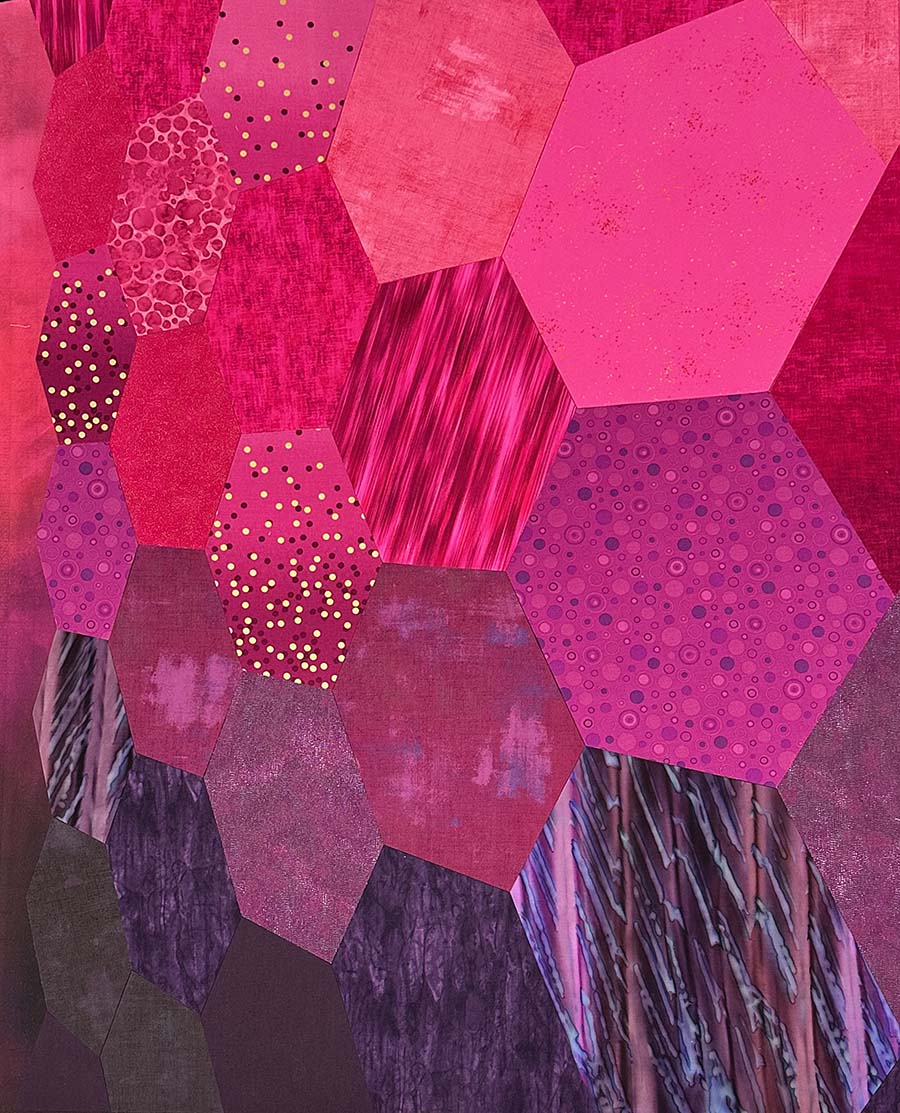
For my challenge quilt, I decided to feature irregular hexagons throughout the quilt. Each hexagon has six sides and six angles, but no two hexagons in the design are identical. Let’s examine the steps I took to achieve the final design.
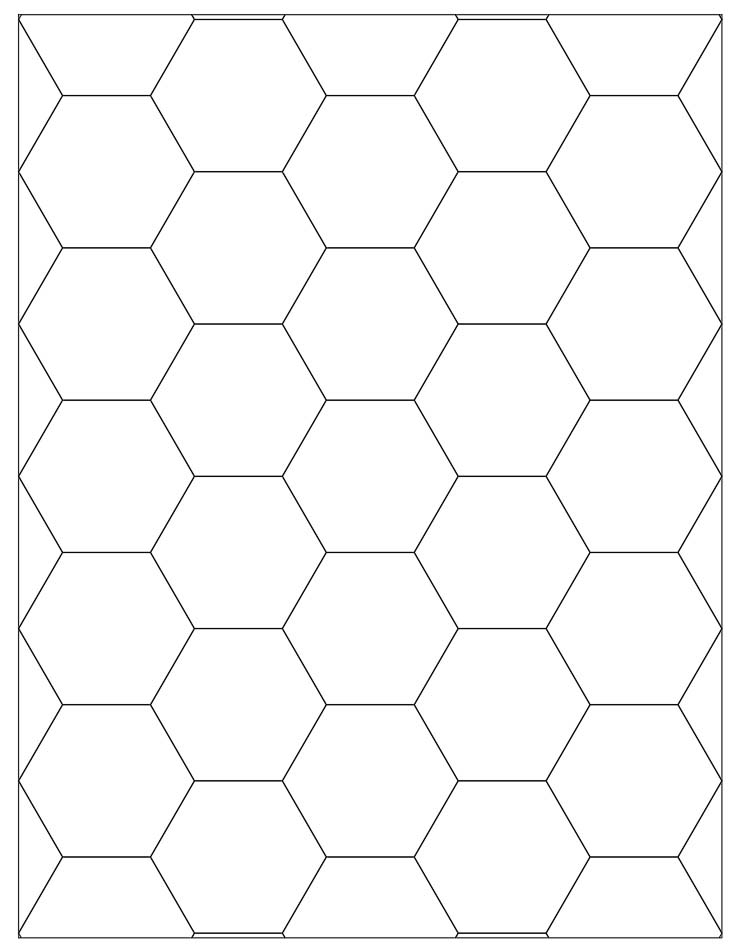
Many of my quilts start as a drafting in AutoCAD, and this is no exception. The polygon tool makes it easy to draft a hexagon shape with just a few clicks, and I had the initial line drawing of regular hexagons in minutes.
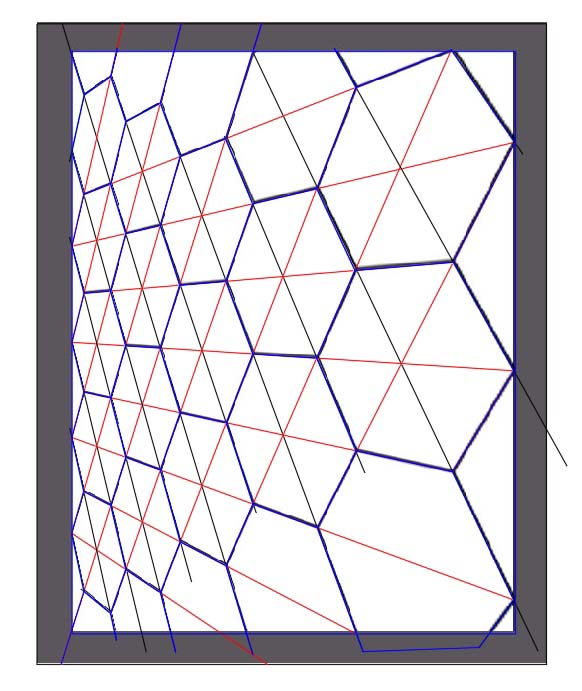
To achieve the forced perspective appearance, I exported the image into Photoshop. I used the perspective, skew, and distort functions within the Transform tool to alter the line drawing in a way that makes you feel as though you are viewing the design from an angle, even though you are seeing it straight on.

I then took this design back into AutoCAD to trace for the final line drawing. Since this quilt has to finish at exactly 30″ x 40″ to meet the challenge criteria, I adjusted the quilt top to be 2″ larger in each direction to account for any shrinkage that may happen in the quilting process.
Constructing the Quilt
Making the Quilt Top
When I’m creating an appliqué quilt with elements that directly adjoin each other, I print out a full-size set of templates. My printer uses paper up to 11″ x 17″, so I still have to tape my template pieces together, but it’s still a lot less work than using standard letter-size paper.
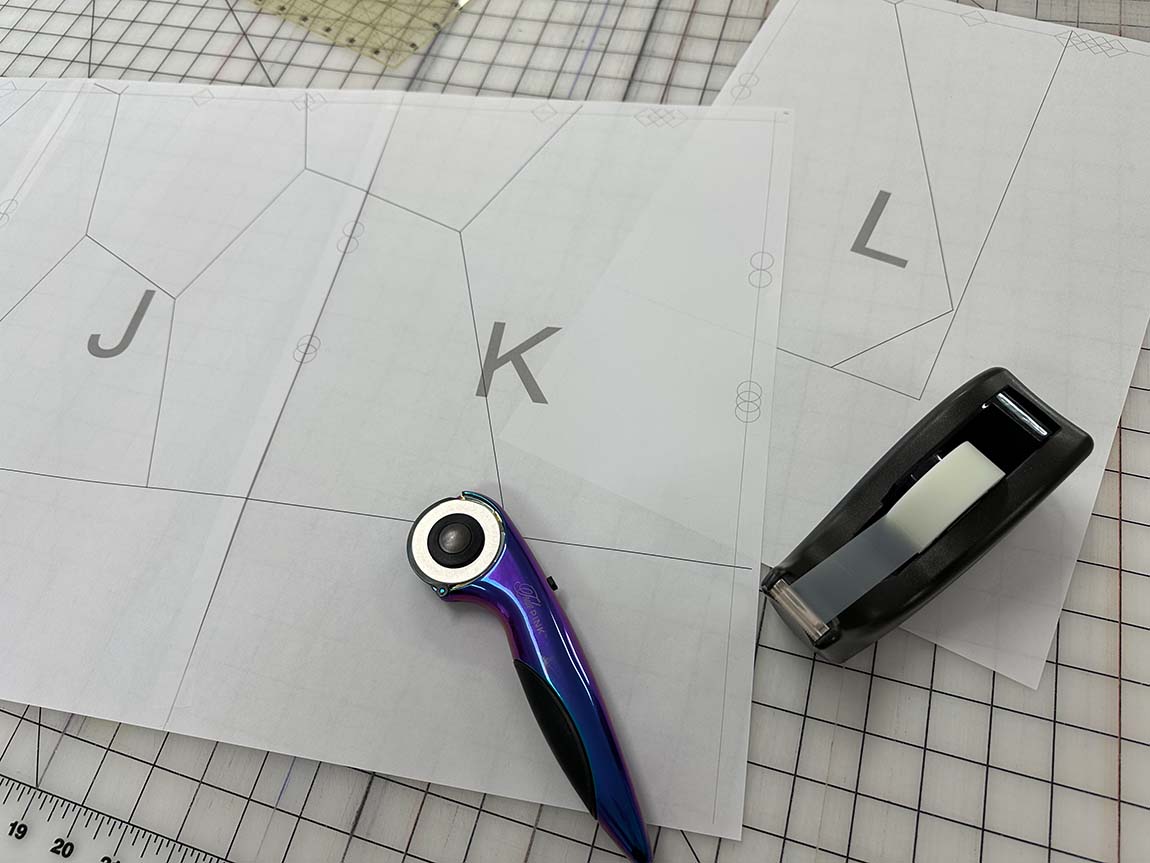
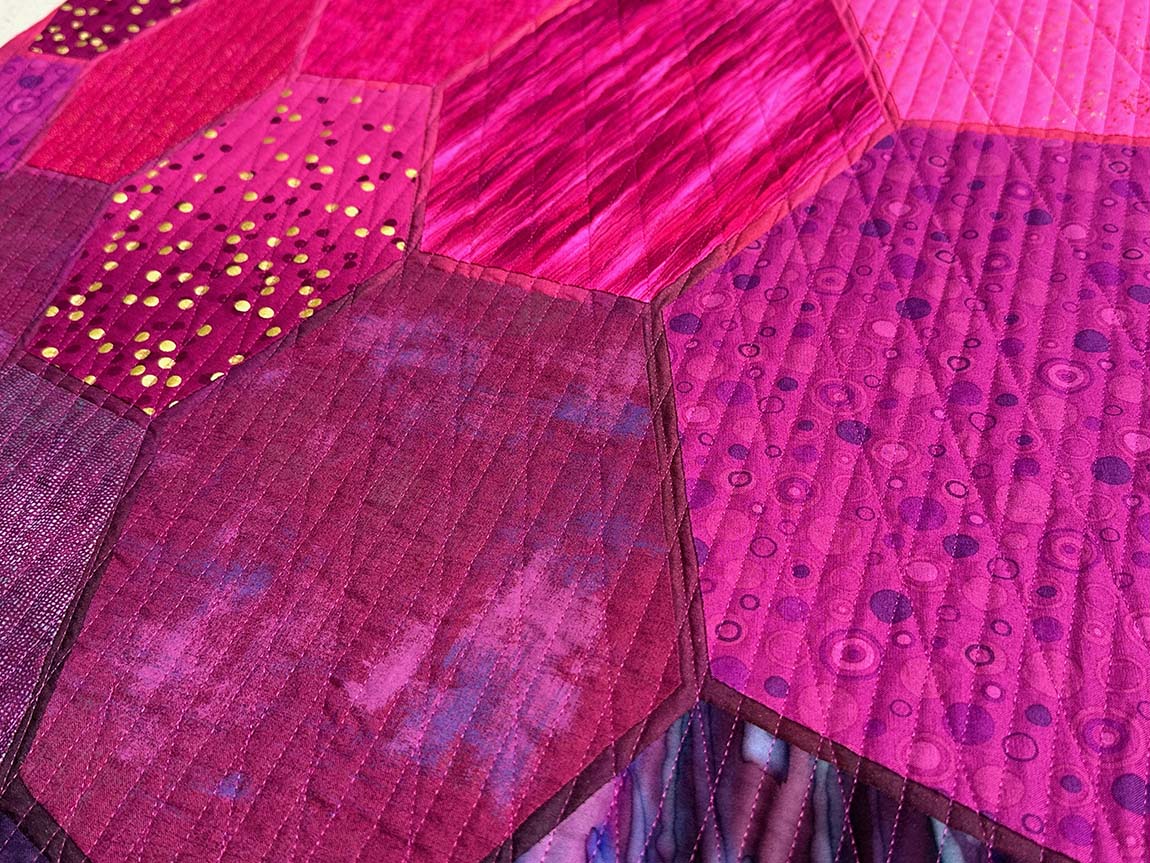
Once the full-size templates are ready, I cut the components apart along the design lines and arrange the components over the background fabric. Subtle color shifts are my focus in this design, and I selected a Jennifer Sampou Sky Ombré in Pomegranate for the background. All of the hexagon motifs are solids and prints that pull their color inspiration from their section of the background fabric.
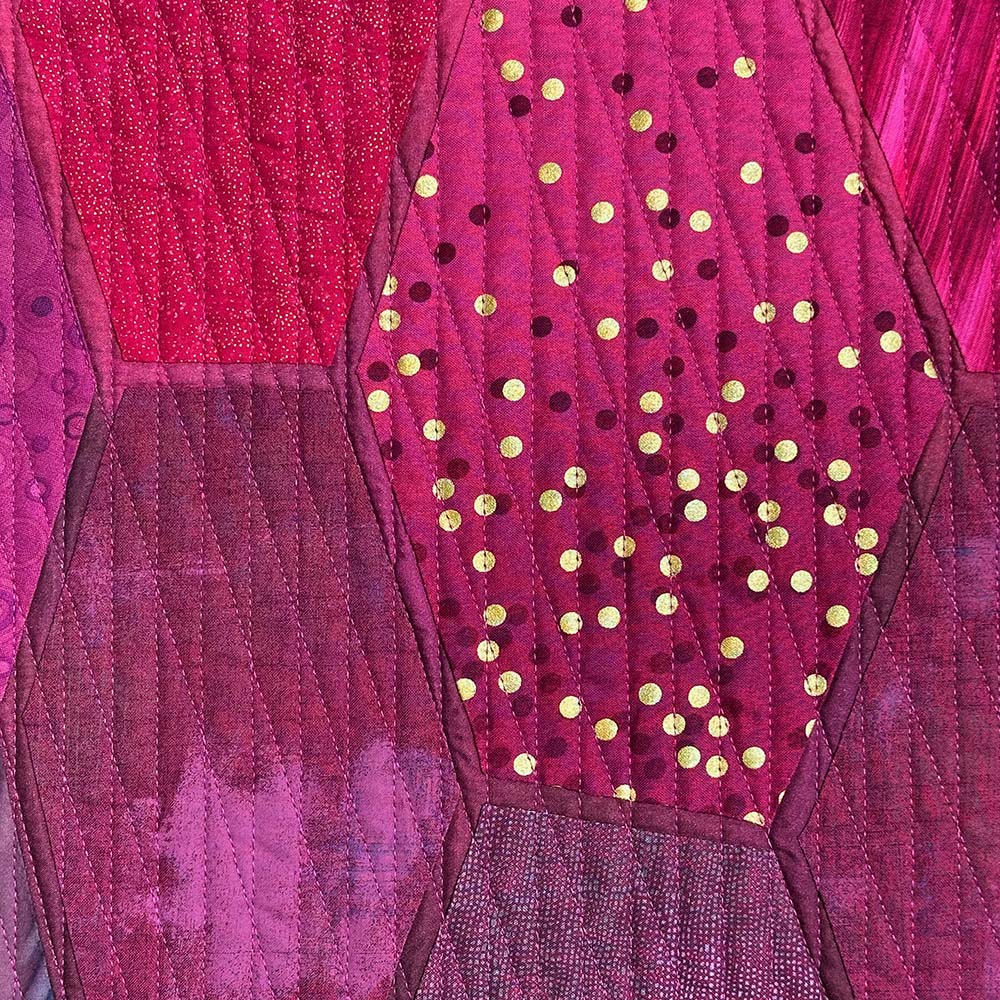
You can see that at this stage of the process, the background fabric isn’t visible, but as I hand needle-turn appliqué each hexagon, the background appears as quarter-inch-wide lines between each shape.
Quilting
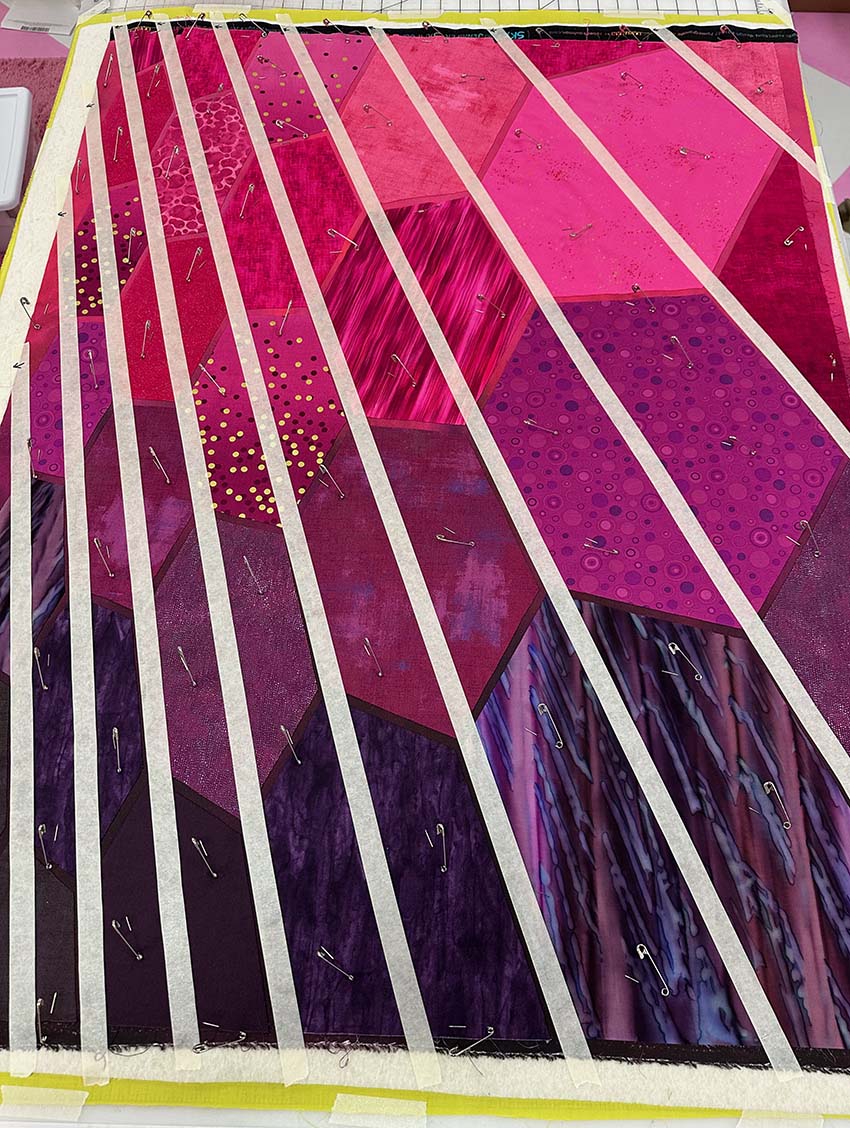
To emphasize the overall design perspective, I decided to quilt perspective lines from the upper left corner of the quilt to the bottom and right edges of the design. I used tape to mark these lines and then pin-basted the layers of the quilt together. Since the perspective lines don’t run parallel to each other, I could only quilt on one side of the tape. If you look very closely, you may see the arrows I drew on the masking tape to indicate which side of the tape I should stitch on. Once I quilted the initial lines and removed the basting pins, I divided the spaces in half and quilted another line, then repeated that process one more time.
I wanted to anchor the design further visually, so I completed the quilting with vertical quilting lines spaced 1/2″ apart.
Finishing
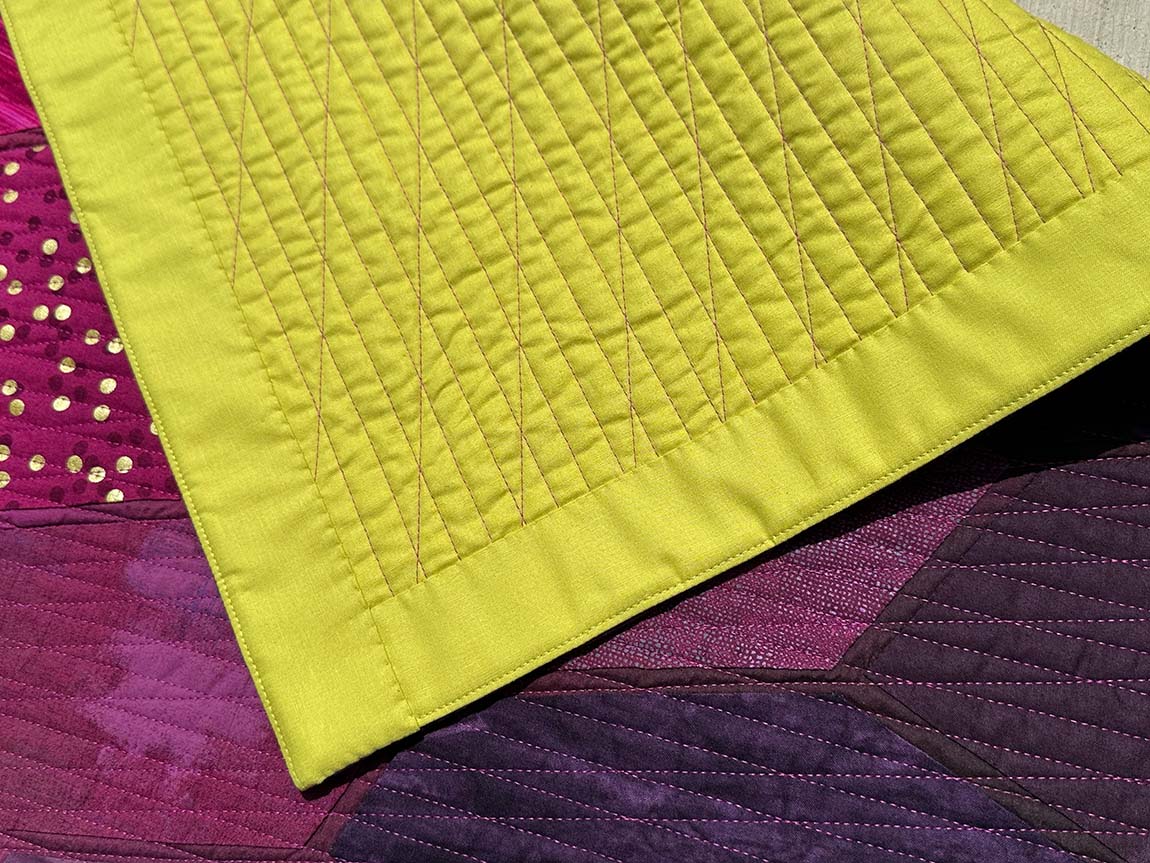
Deciding whether to use binding or make a facing for the edge of the quilt was one of the most challenging choices I had to make on this project. Ultimately, I used a faced edge to allow the perspective to break beyond the edges of the quilt visually.
I finished the quilt and got photographs just in time to enter it in the challenge for The Great Wisconsin Quilt Show, so now I just have to wait for the jury results!

Quilt Stats
- Size: 30″ x 40″
- Techniques: Hand Appliqué
- Quilting: Machine straight line quilting using a walking foot on a BERNINA 770QE PLUS
- Fabric: Sky Ombré background with assorted solid and print hexagons
- Batting: Hobbs Tuscany 80/20 cotton/poly blend
- Thread: Aurifil 50-weight cotton in assorted colors for appliqué and 2535 for quilting
- Edge Finish: Facing


11 Comments
Brendan Berg
July 4, 2025 at 6:56 amCassandra – Another impressive quilt design, perfectly executed and for a small quilt, it’s packed with innovative ideas. The shift in perspective layout encourages the viewer’s eye to spend more time “figuring out” the design. I’ve not seen this done with a quilt layout…this delivers a cool end result. I must also say your hand appliqué skills are like platinum- level execution. Perfectly straight – it looks like they were machine pieced! As always, your quilts have layers of inspiration. Thanks for sharing your talents.
Kathie
July 4, 2025 at 9:10 amI LOVE that! When I first saw your image of the quilt, I wanted to see it photographed head on. This is genius!!!!
Heather Kinion
July 4, 2025 at 10:13 amI also did not understand that the quilt photo was head on and wondered when in the blog post it would get a head on shot!! Obviously as I read, I scrolled back up to look again and make my brain understand it was a front shot. Bravo!!
Louise Morgan
July 4, 2025 at 11:17 amYour ideas are always so spectacular! I get a jolt of inspiration with each of your designs. Thank you for sharing all of the details for creating the perspective and quilting.
JLOH
July 4, 2025 at 2:44 pmReally makes one want to figure out how you did this work. Thank you fir sharing your steps. Very innovative. As the quilt travels. It will be observed and studied. The attributes of a good fine work of art.
Kimberly
July 5, 2025 at 4:50 pmThis is fascinating! Thank you for sharing your process. I wish you a win!
Sarah
July 5, 2025 at 6:51 pmThis is trippy — I 100% thought you had just taken the photo from an angle at first glance! So neat.
Elizabeth
July 6, 2025 at 5:43 pmThank you for explaining your process. Very cool. I hope it’s accepted so I can see it at the show.
Gabrielle
July 13, 2025 at 9:38 amSuperbe
Carol Stewart
September 5, 2025 at 10:19 amYour best work so far! I love it! A sure winner in my book.
Shanda Siekert-Logue
September 5, 2025 at 9:50 pmHi Cassandra! So happy to hear you received 1st place in the hexagon challenge at the Great Wisconsin Quilt Show! Congratulations! I love the palette and interesting hex layout! Cheers!