Do you ever find yourself craving a small, quick project that provides results almost immediately?
This time of year, holiday ornaments are the perfect little project to give your mind a break from bigger undertakings, and this year, one of my small quilting groups did an ornament exchange based on the song The Twelve Days of Christmas. A few months ago, we each drew a line from the song, and I ended up with Nine Ladies Dancing.
Designing a Nine Ladies Dancing Ornament
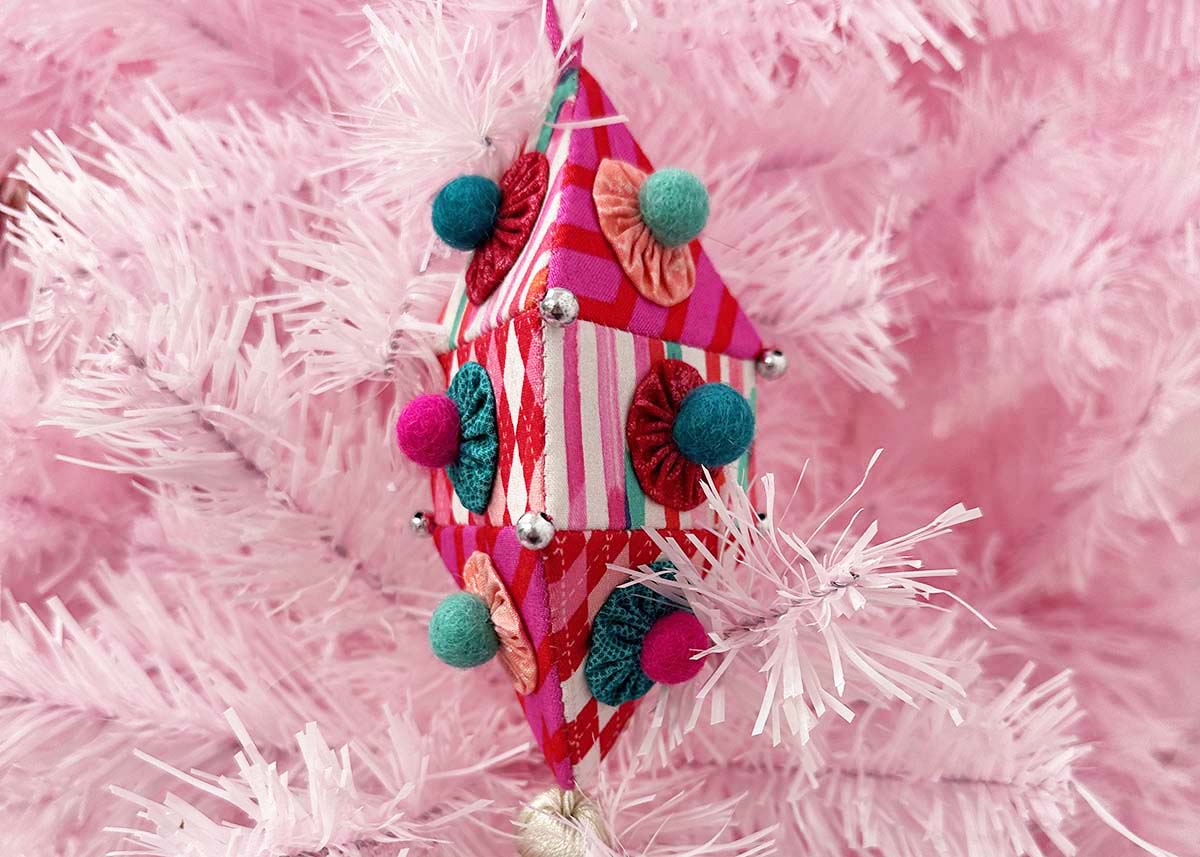
As I considered different approaches to the ornament design, I kept coming back to images of twirling skirts and ballet tutus. Representing anything in multiples of nine within a single ornament can be challenging, so I decided that abstraction would be useful for conveying the design’s story.
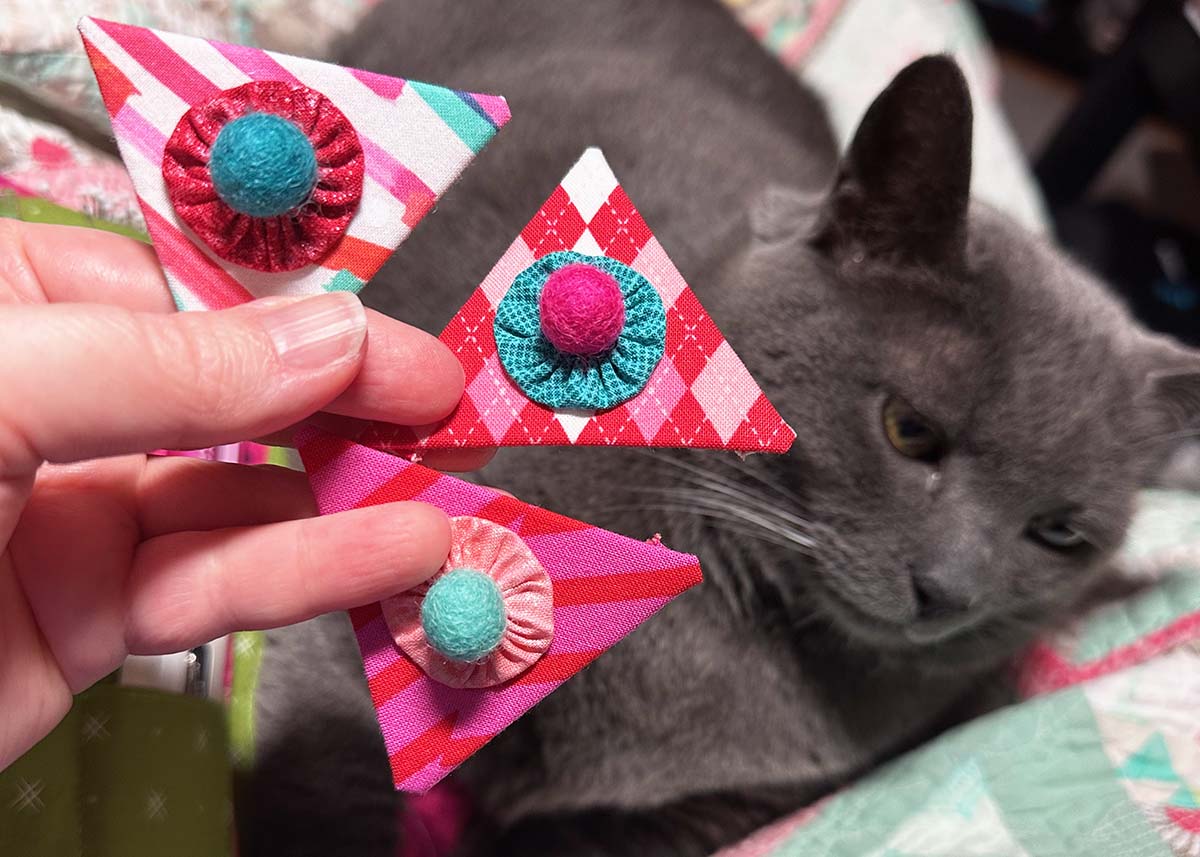
I decided to capture the fullness of the dancers’ skirts from an aerial perspective by making fabric yo-yos topped with small wool pom-poms.
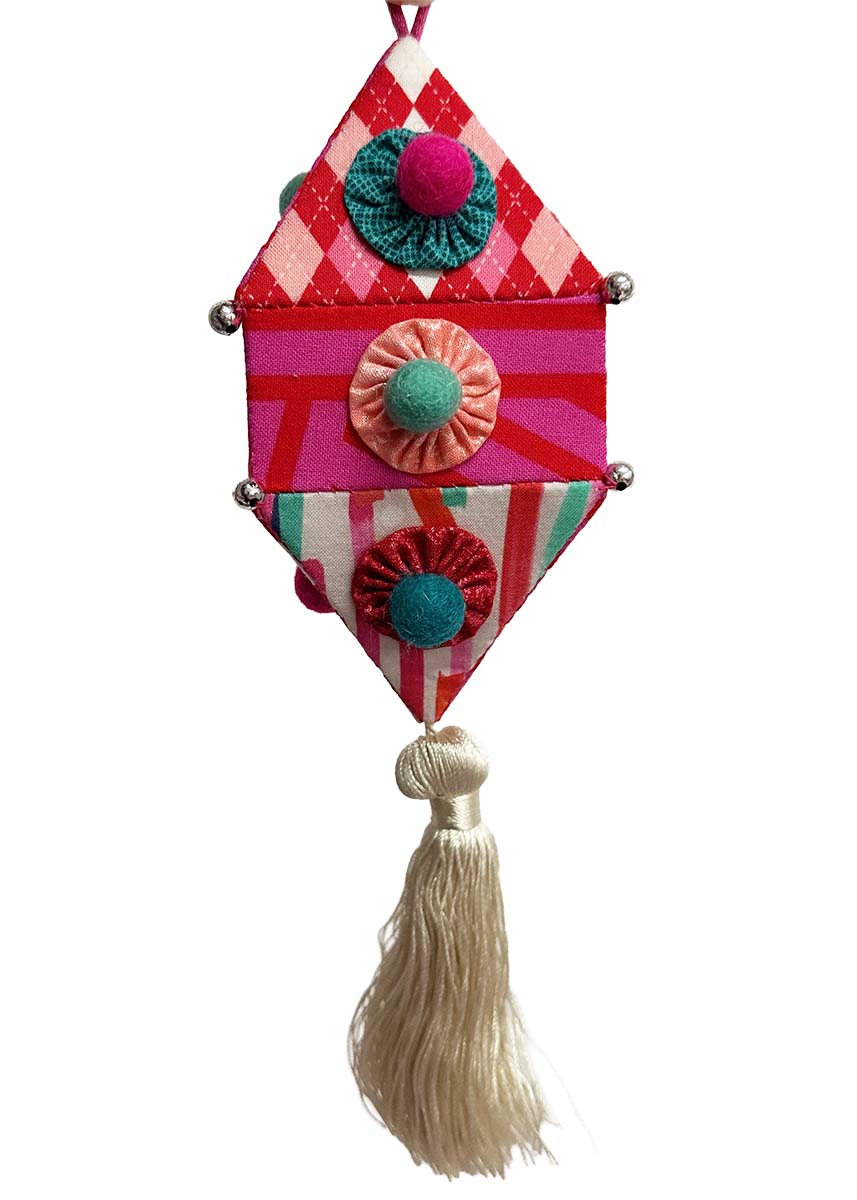
The next challenge was deciding how to incorporate nine sections into an ornament design that looks cohesive. I considered several options before finally landing on a design with three sides, each with three sections.

The first iteration of this three-sided ornament included different proportions on the top and bottom of the piece. After drafting the initial design in AutoCAD, I printed and assembled a paper mockup to check the proportions before moving forward with the final piece. I’m glad I did this step because I ended up altering the ornament’s height and width and making the top and bottom of the piece mirror each other.
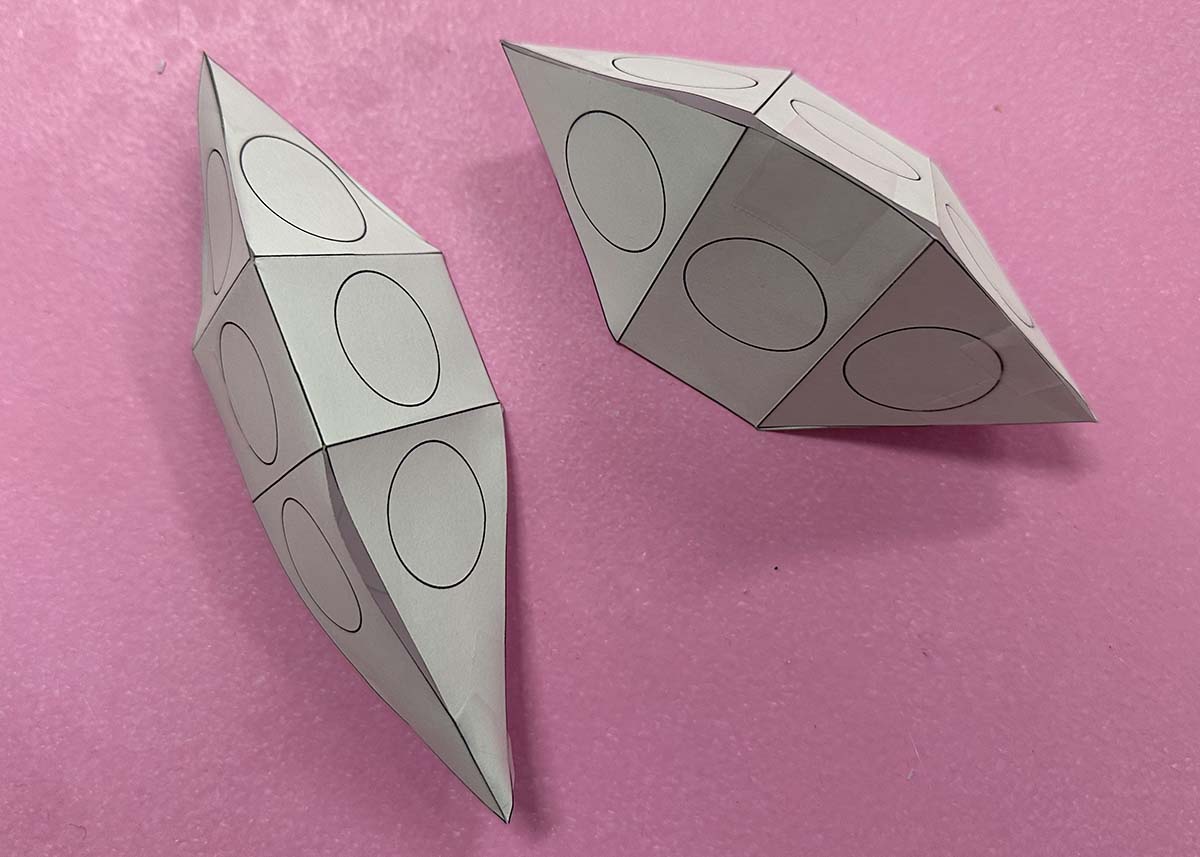
It was important to me that the ornament’s proportions look good from all angles, including the top and bottom of the piece.
Constructing the Ornament
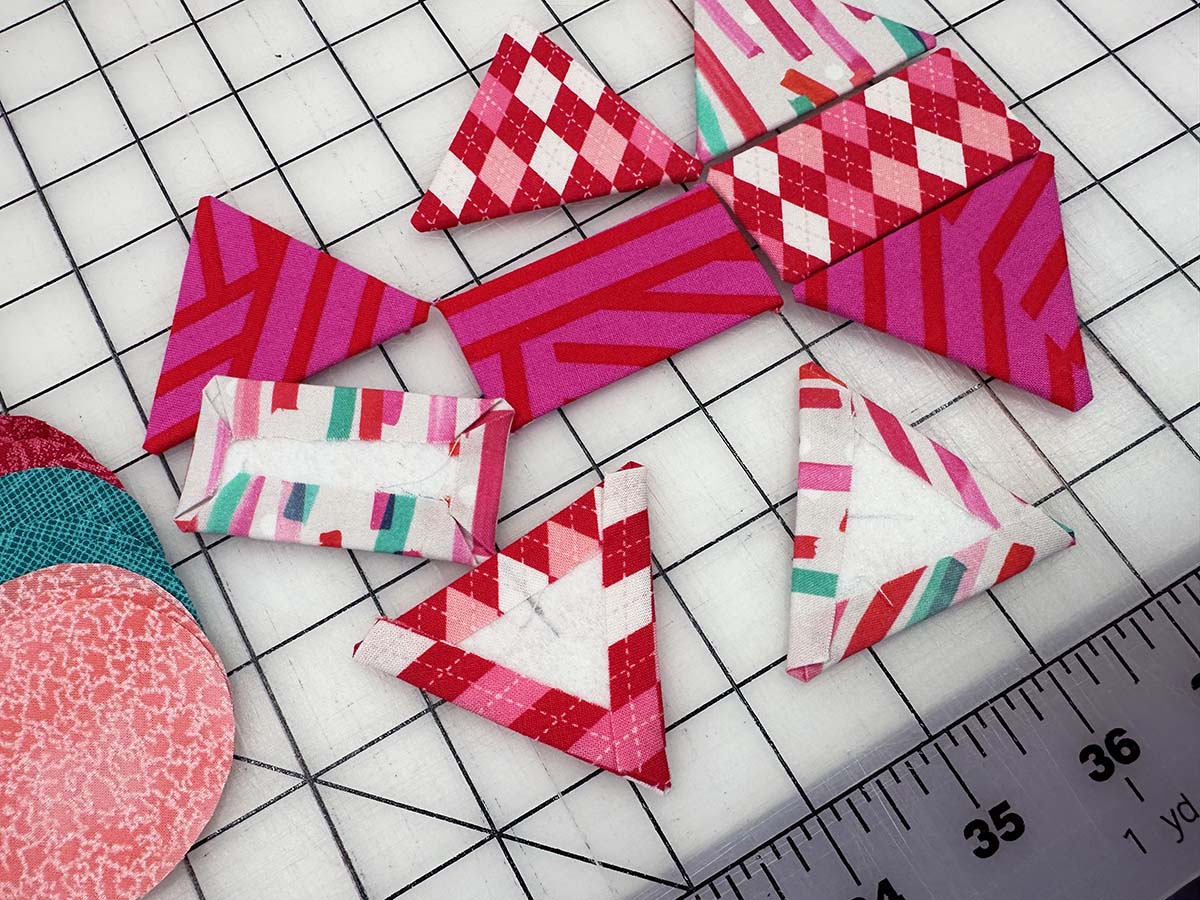
I considered making the ornament from a single fabric or from different fabrics, but ultimately chose to make the ornament base from three fabrics and another three for the yo-yo accents. Two of the fabrics I selected were intended as Christmas prints, but the rest were prints from the main part of my stash.
The group I’m in typically likes modern fabrics, and pink is generally well-liked, so I felt safe in using a slightly less traditional holiday color palette. I pulled the teal from one of the prints for one of the yo-yo fabrics and two of the pom-poms.

The primary ornament base is made from a very heavy double-sided fusible interfacing. I was careful to keep my iron from making direct contact with the fusible while wrapping the fabric around each section of interfacing. I used a piece of parchment paper on the ironing board to prevent the pieces from sticking to my ironing surface. Lots of steam guaranteed the fabric adhered well to the interfacing structure.
As I made each yo-yo, I attached it to the pom-pom and the appropriate section of the base structure.
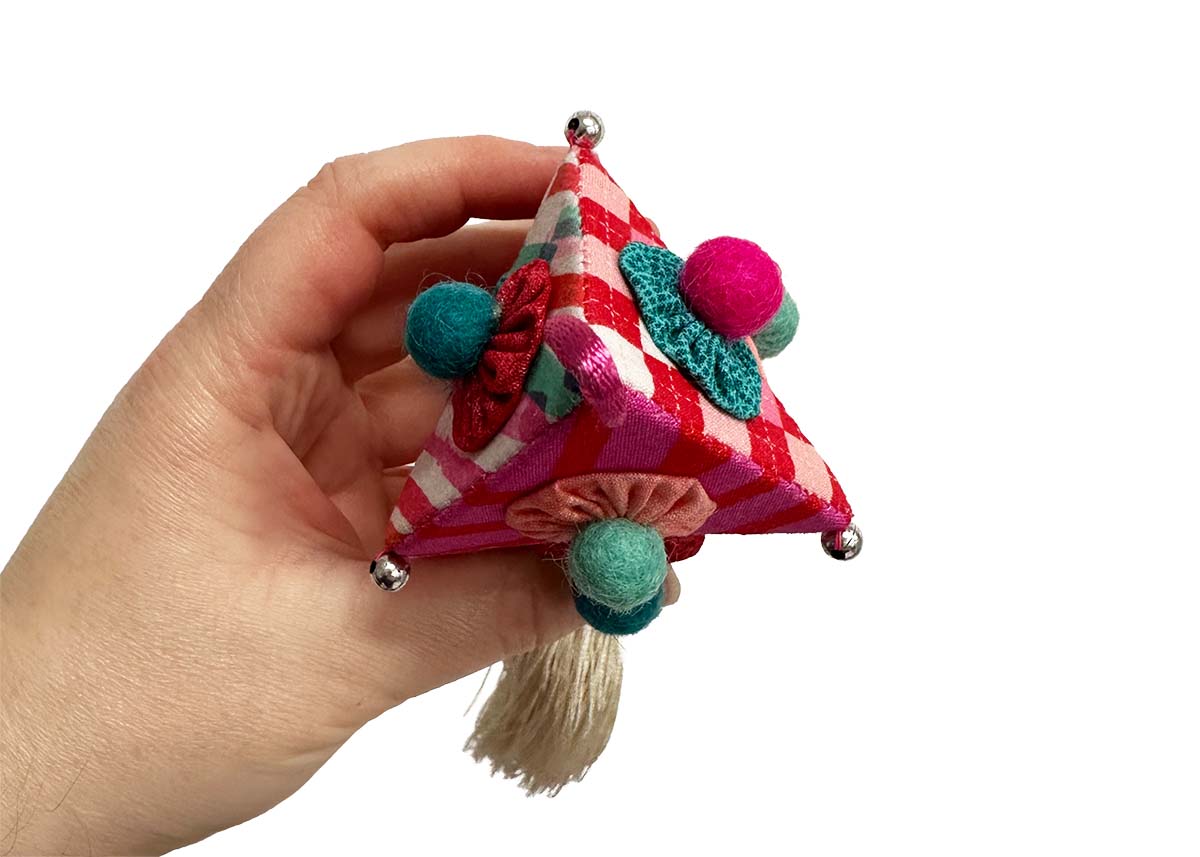
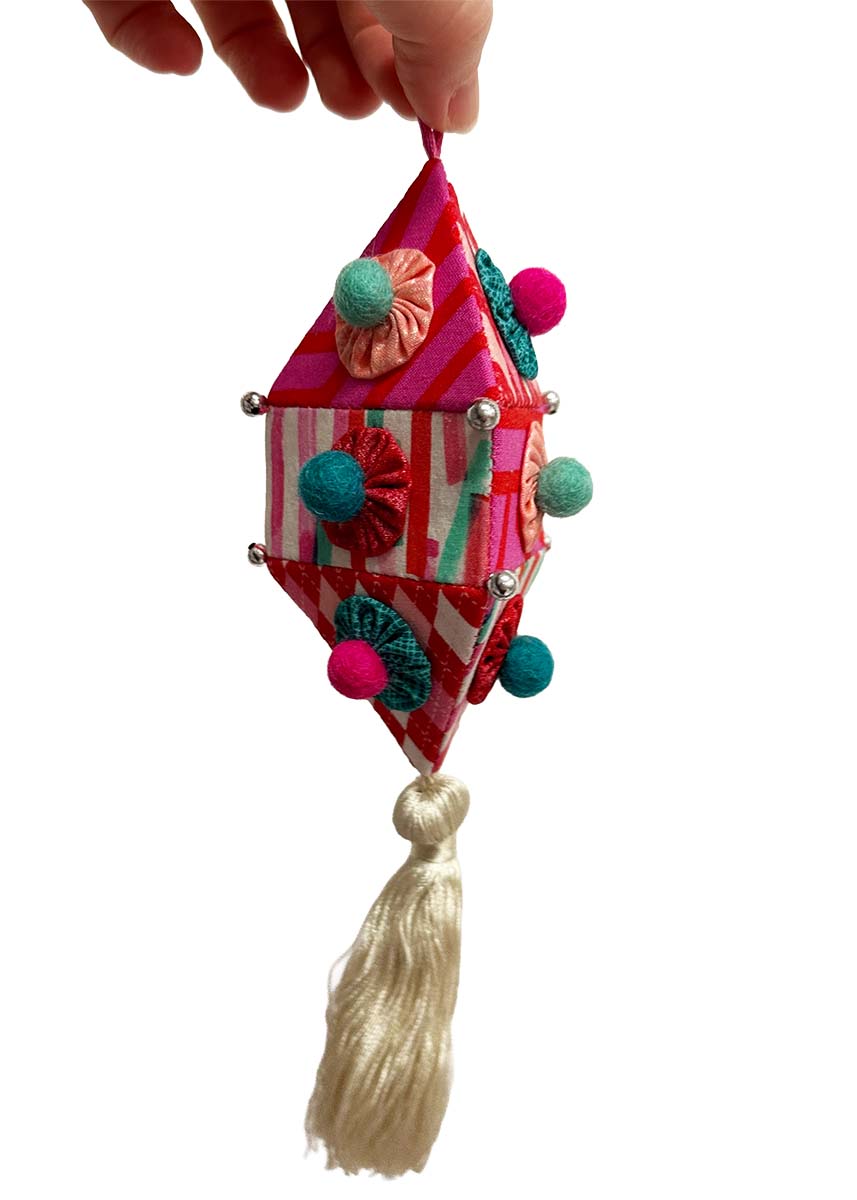
All of the ornament components are hand-stitched together, using a technique similar to English Paper Piecing. As I stitched the components together, I added a silver colored bead to each corner, a hanging loop to the top, and a premade tassel to the bottom.
I actually ended up liking this ornament so much that I made a second one with the same fabrics for my own tree before putting all of the materials away.
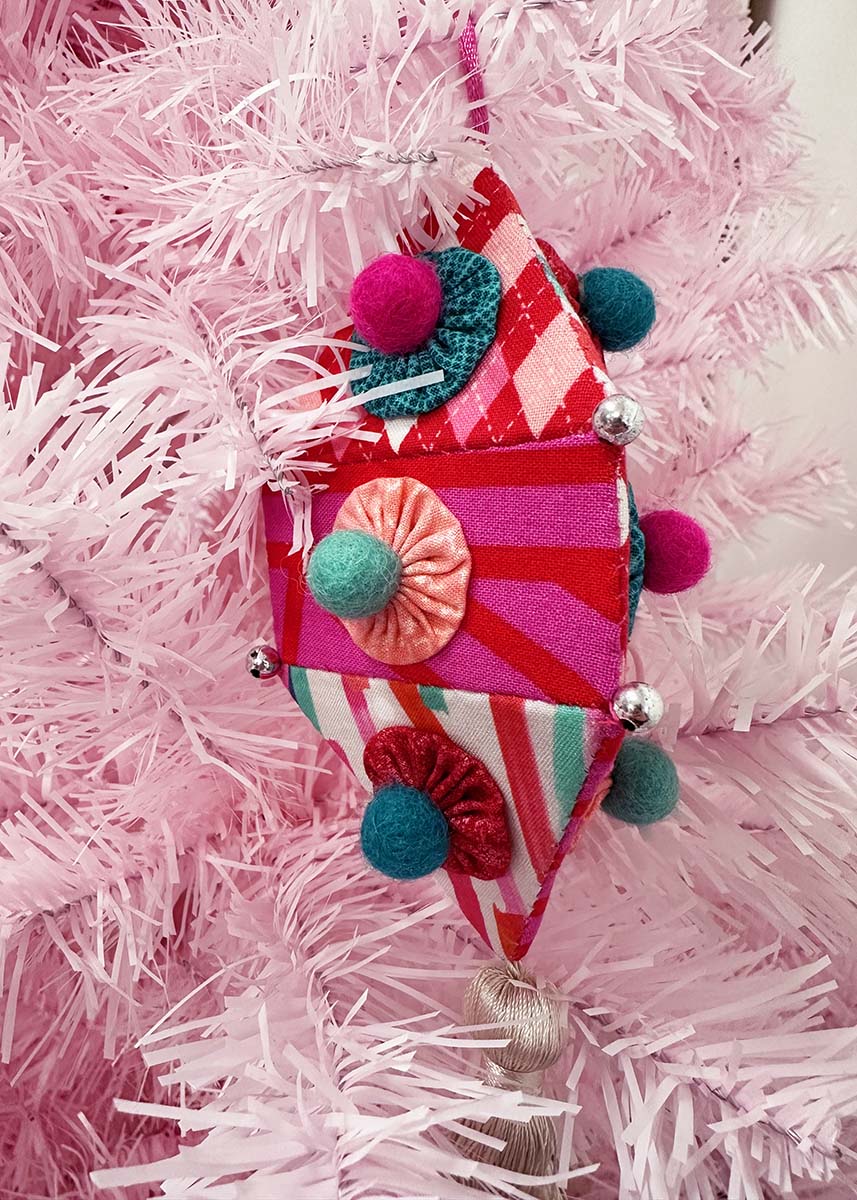
Without the tassel, the ornament is just under five inches tall.
I’m thrilled with how this ornament turned out, and I’m hoping to experiment with more shapes using this technique in future projects.


4 Comments
Kathie
December 19, 2025 at 9:39 amSew Cute! I’m already making it “my own” in my head. Merry Christmas!
Rochelle
December 19, 2025 at 11:53 amGorgeous. The recipient must have been thrilled. I’m glad you made one for yourself, too.
Denise Nash
December 19, 2025 at 7:10 pmAbsolutely the most beautiful hand-made Christmas ornament I have ever seen!
Ruth Crump
January 2, 2026 at 1:00 pmI’ll have to try this one. /a fun ornament to hang anywhere, anytime!