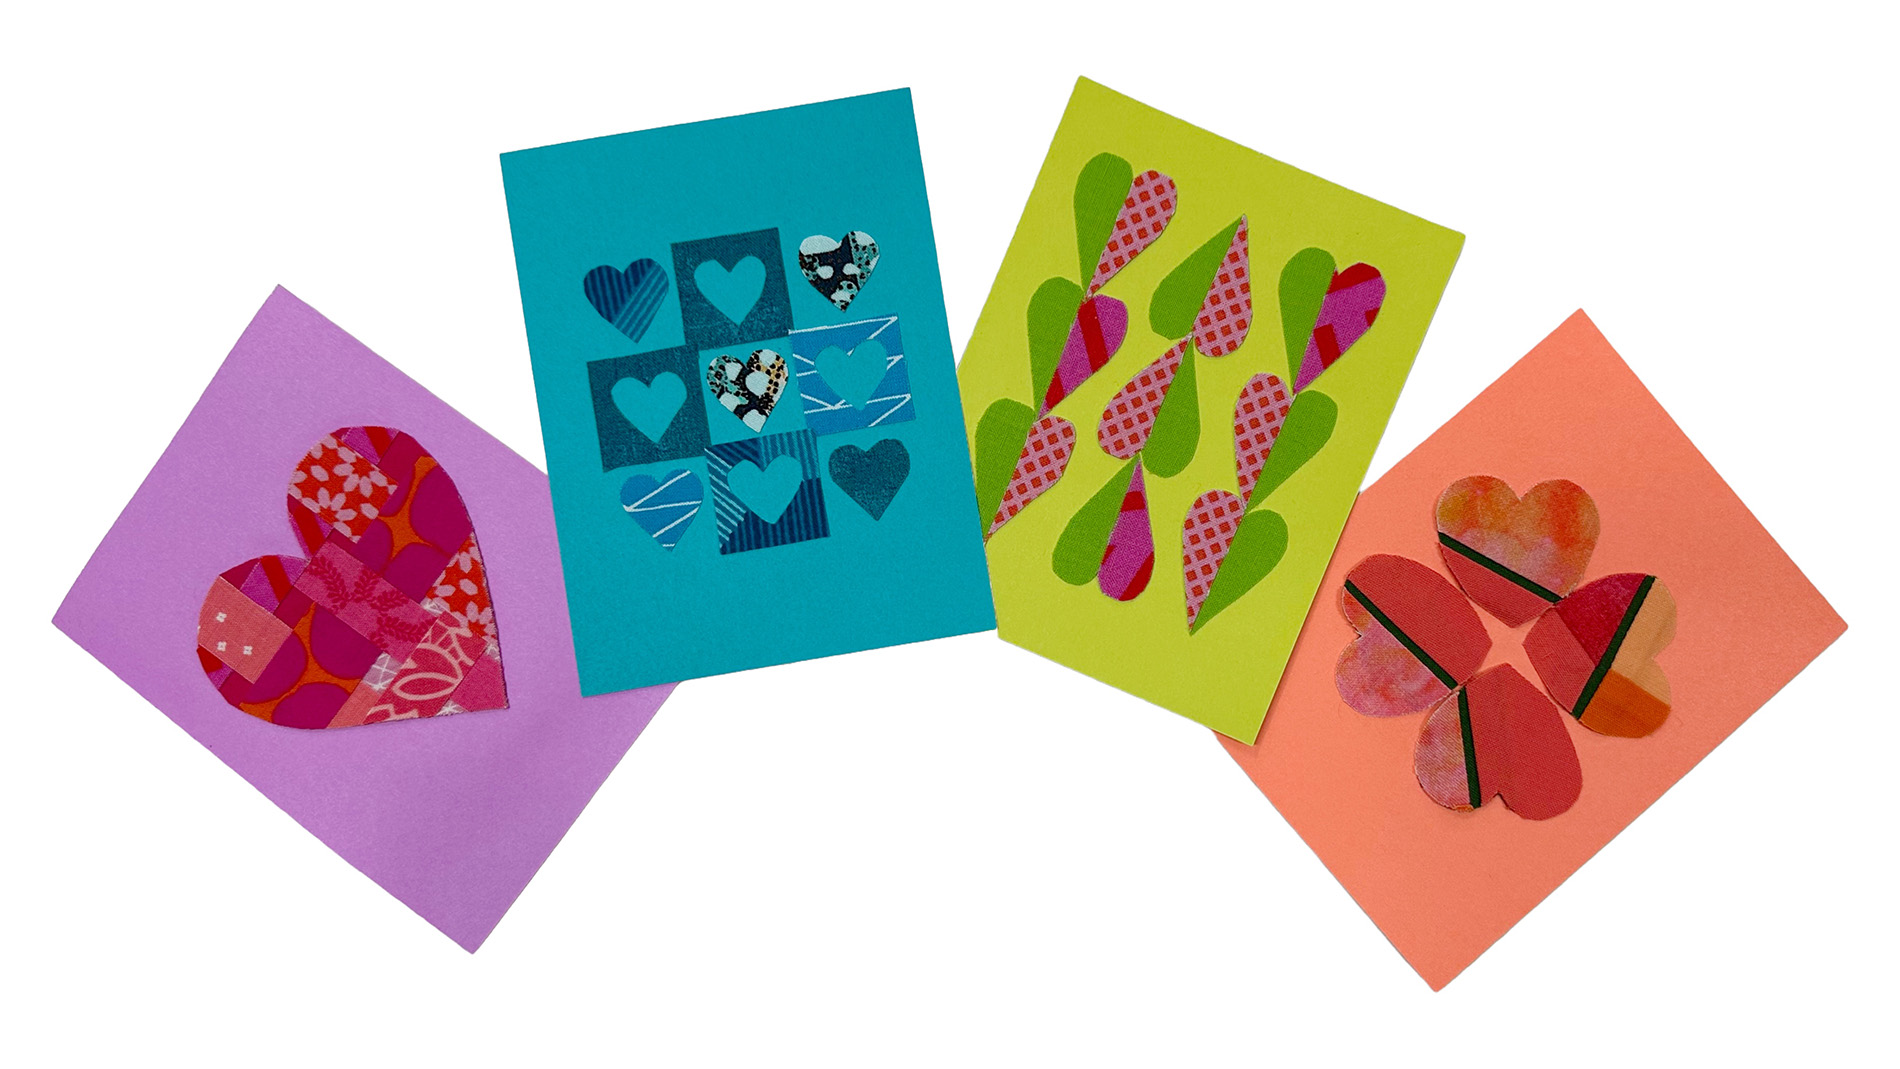
Today is National Send a Card to a Friend Day, so let’s use some of our favorite fabric scraps to create adorable cards to brighten someone’s day!
Since Valentine’s Day is coming up next week, I’ve used a few different heart shapes for these cards, but you can easily make quilt-block-themed cards using one-inch squares of fabric.
(This post includes some affiliate links. If you click on an affiliate link and choose to make a purchase, I receive a small percentage of the sale at no cost to you. These funds help keep this blog running and content FREE for everyone!)
Supplies for Handcrafted Cards
- Blank notecards: I’m using cards measuring 4″ x 5.25″ and 4″ x 6″
- Steam-a-Seam Light: You can use any fusible, but Steam-a-Seam Light is great because it acts as a re-positionable sticker until you iron it with steam.
- Fabric Scraps: Anything larger than a square inch is perfect for this project.
- Iron: You’ll want an iron with steam to activate the fusible.
- Pencil or Removable Fabric Pen: The pencil is for drawing on the backing paper, but if you want to trace your shapes from the fabric side, use the removable fabric-safe pen.
- Scissors: Fiscar recently released non-stick scissors that are great for working with fusible (I don’t have a current source for them, so keep an eye out), but any small sharp scissors are perfect for this project.
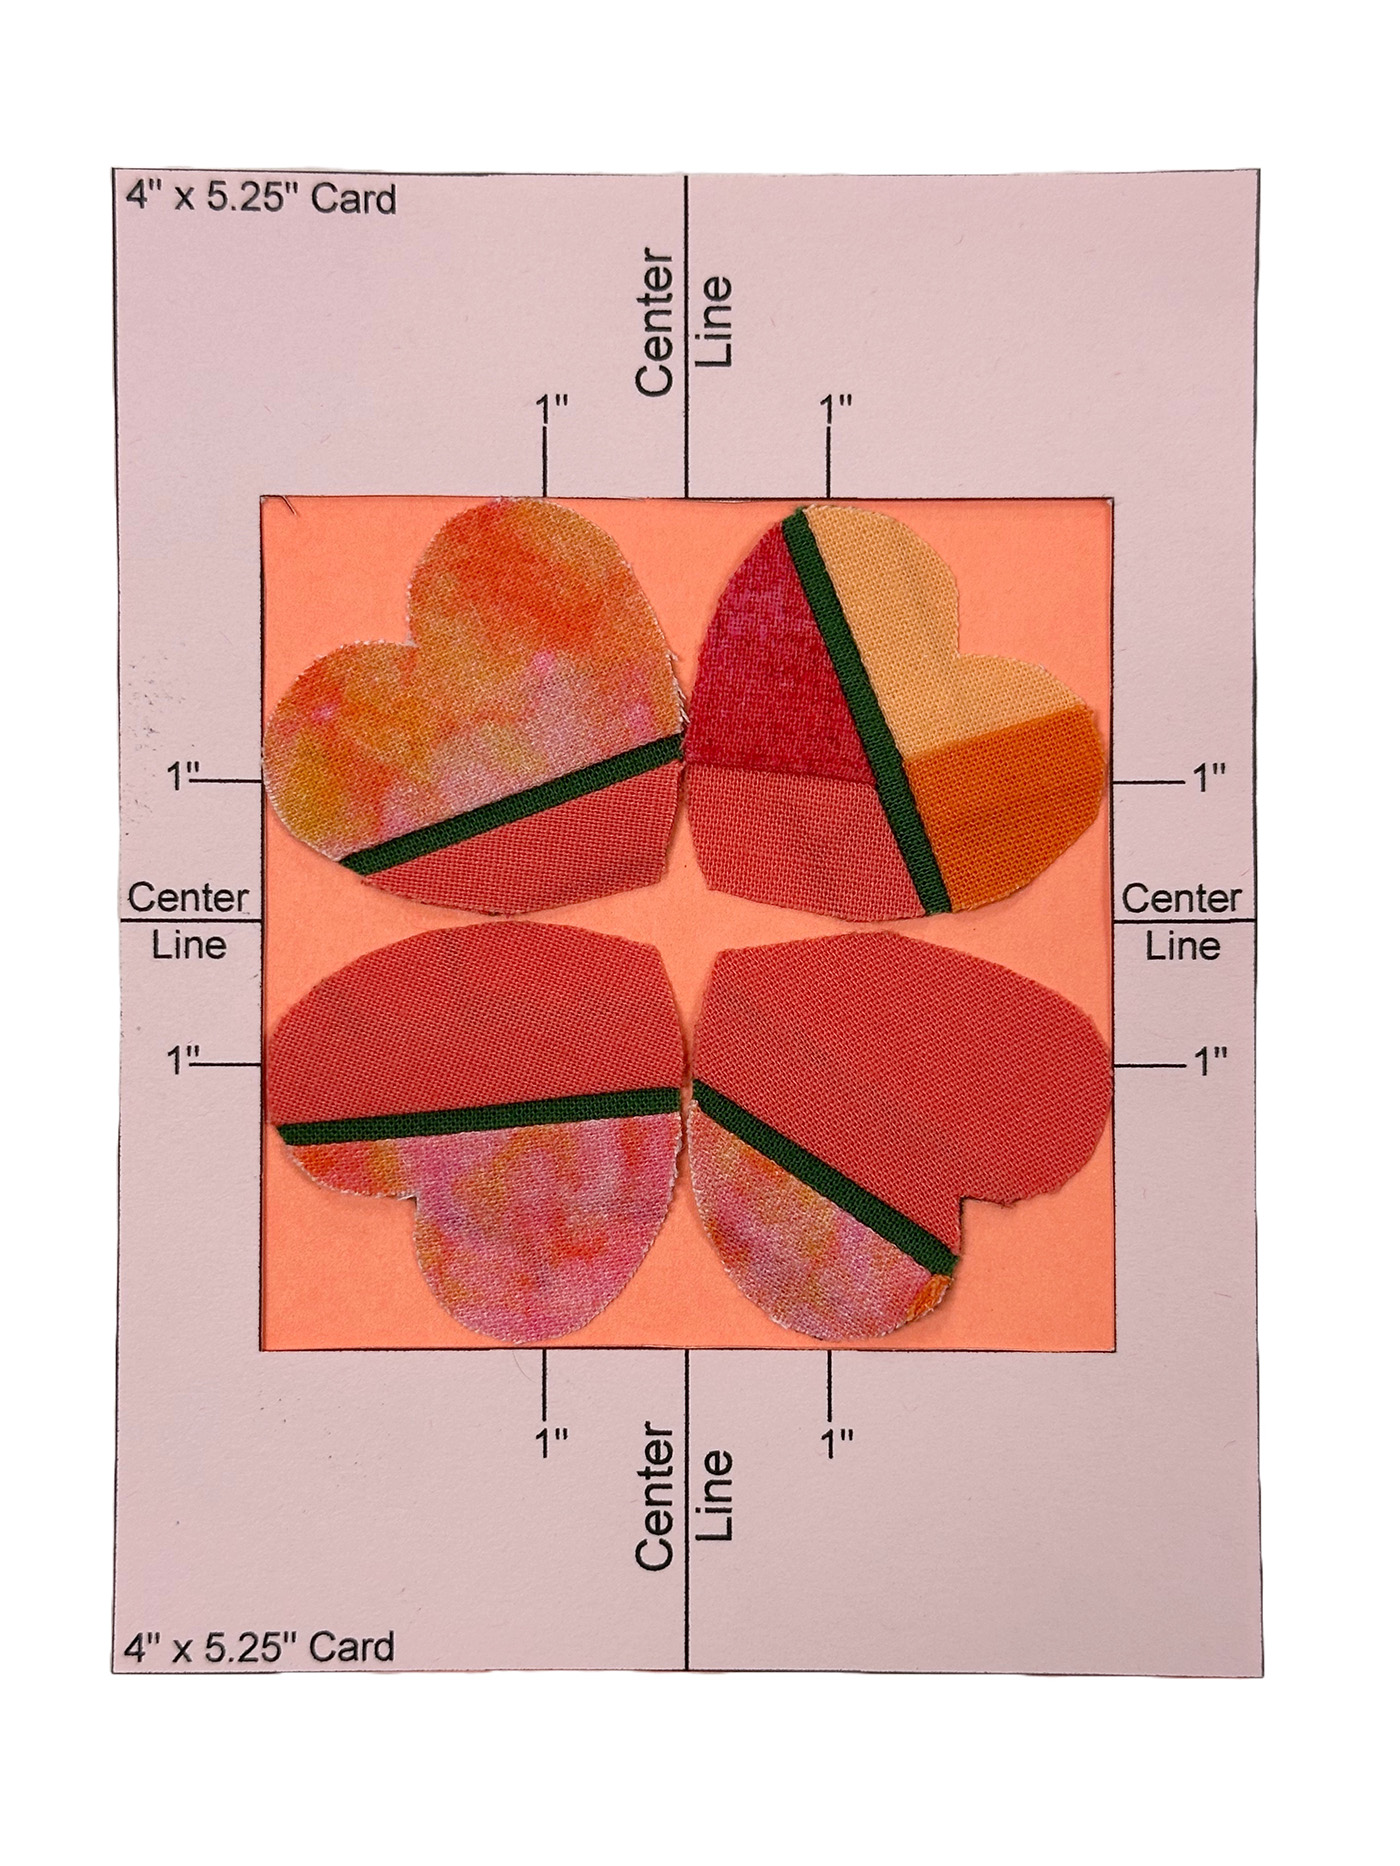
Template for Design Placement
To make placing your fabric designs on your notecards even more manageable, I’ve made a template to place a three-inch square design in the center of a card measuring 4″ x 5.25″ or 4″ x 6″.
Download and print the template below. Then, cut it out on the outer line matching the size of your cards, and carefully cut out the 3″ square.
If you want to make some Valentine ‘s-themed cards, I’ve also included a few heart templates to help you get started.
Using Fusible
I don’t do much work using fusible, but Lite Steam-a-Seam 2 is my go-to material when I do. I love that it is sticky on both sides, so you can position and re-position each shape until you are happy with the location. Then, it stays in place long enough to iron the pieces to create a permanent bond.
Regardless of which fusible you like to use, always follow the instructions for that specific project to achieve the best results.
When using Lite Steam-a-Seam 2, you rough cut a section larger than the final shape you intend to cut. Peel off the paper backing on the non-gridded side and stick the adhesive to the back of your fabric. Always ensure the fabric is larger than the fusible so you don’t accidentally stick your project to your iron! Give the fabric a light press without steam to help the fusible stay in place as you cut your shape.
Next, trace or draw the shape you want to cut onto the fusible using a pencil or onto the fabric side using a removable fabric marker. Cut out your shape through all of the layers.
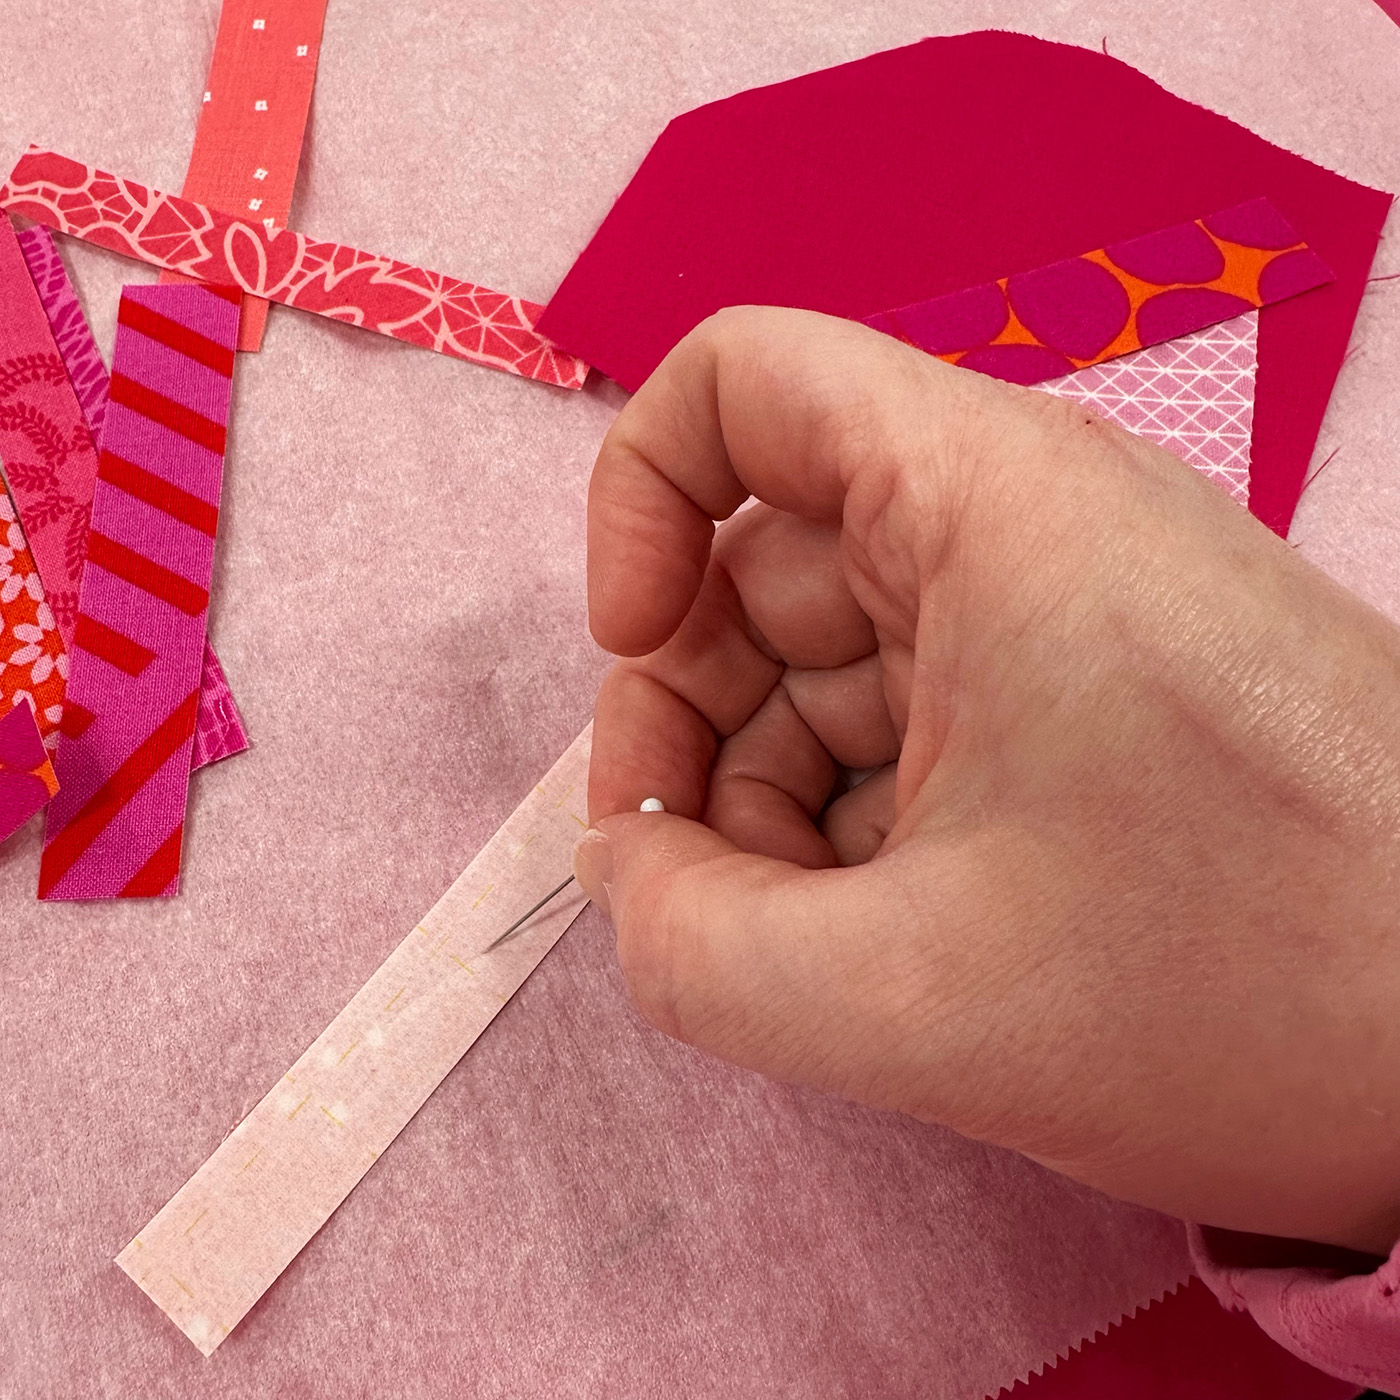
Once your shape is cut, remove the paper backing to the adhesive and place the shape into your design. If you find it challenging to remove the paper backing, take a straight pin and scrape it along the center of the paper backing. This process will tear the paper and allow you to pull it off from the center of the piece rather than the edges. Pulling from the center decreases the chance the fabric edges will fray.
I use steam to set my shapes, but while the card is still slightly warm, I put it under a heavy book to keep it flat as the card cools. This step helps keep the cardstock from warping.
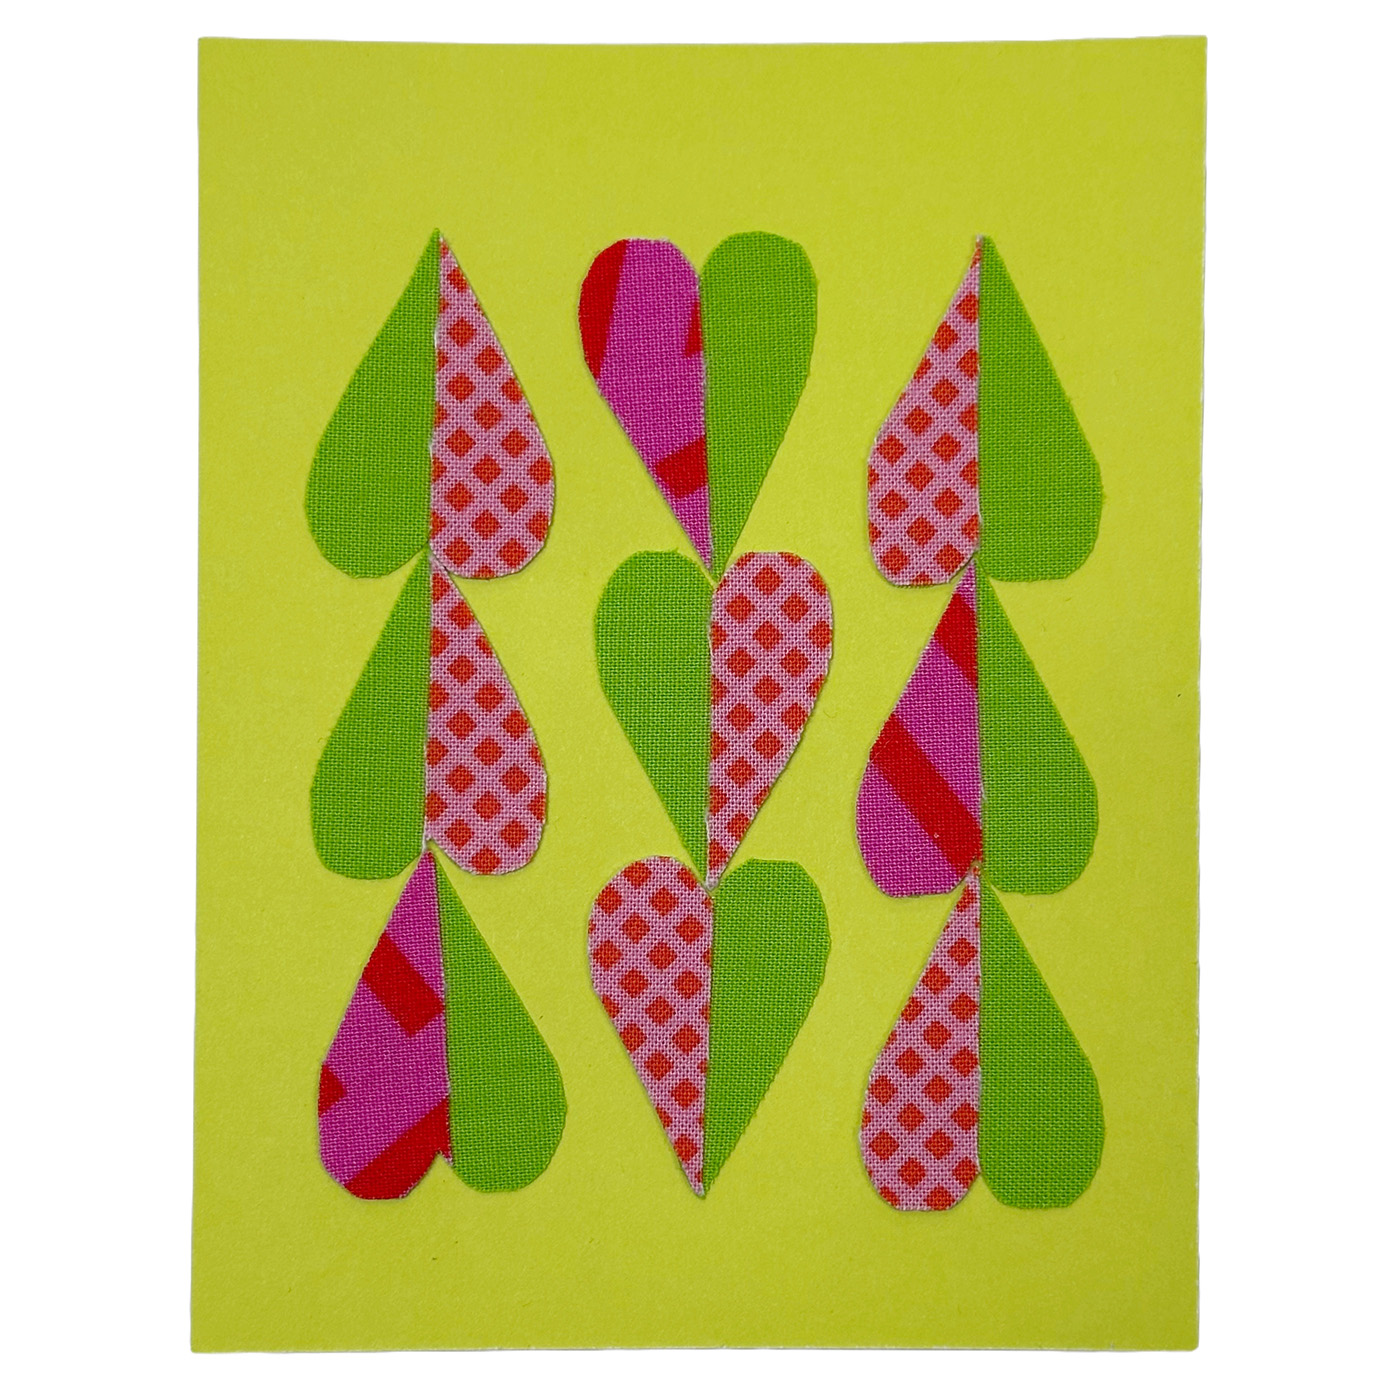
Elongated Hearts Card
Nine elongated hearts make up the first design. Since the hearts flip directions, this card can rotate in two directions. For the first example, I used single fabrics from my scrap bins. The central row is placed down the center of the card, and the center of each side row is 1″ away from the center line.
For the second card using this motif, I cut pink fabric strips covered in fusible into 3/4″ wide strips and adhered them to green fabric with fusible on the back. When I traced the shapes, I aligned the cut edge of the pink fabric to fall along the center of the heart. I think this card styling evokes the movie Wicked.
Floral Heart Card
The second card design uses a rounder heart shape, creating a floral-inspired motif.
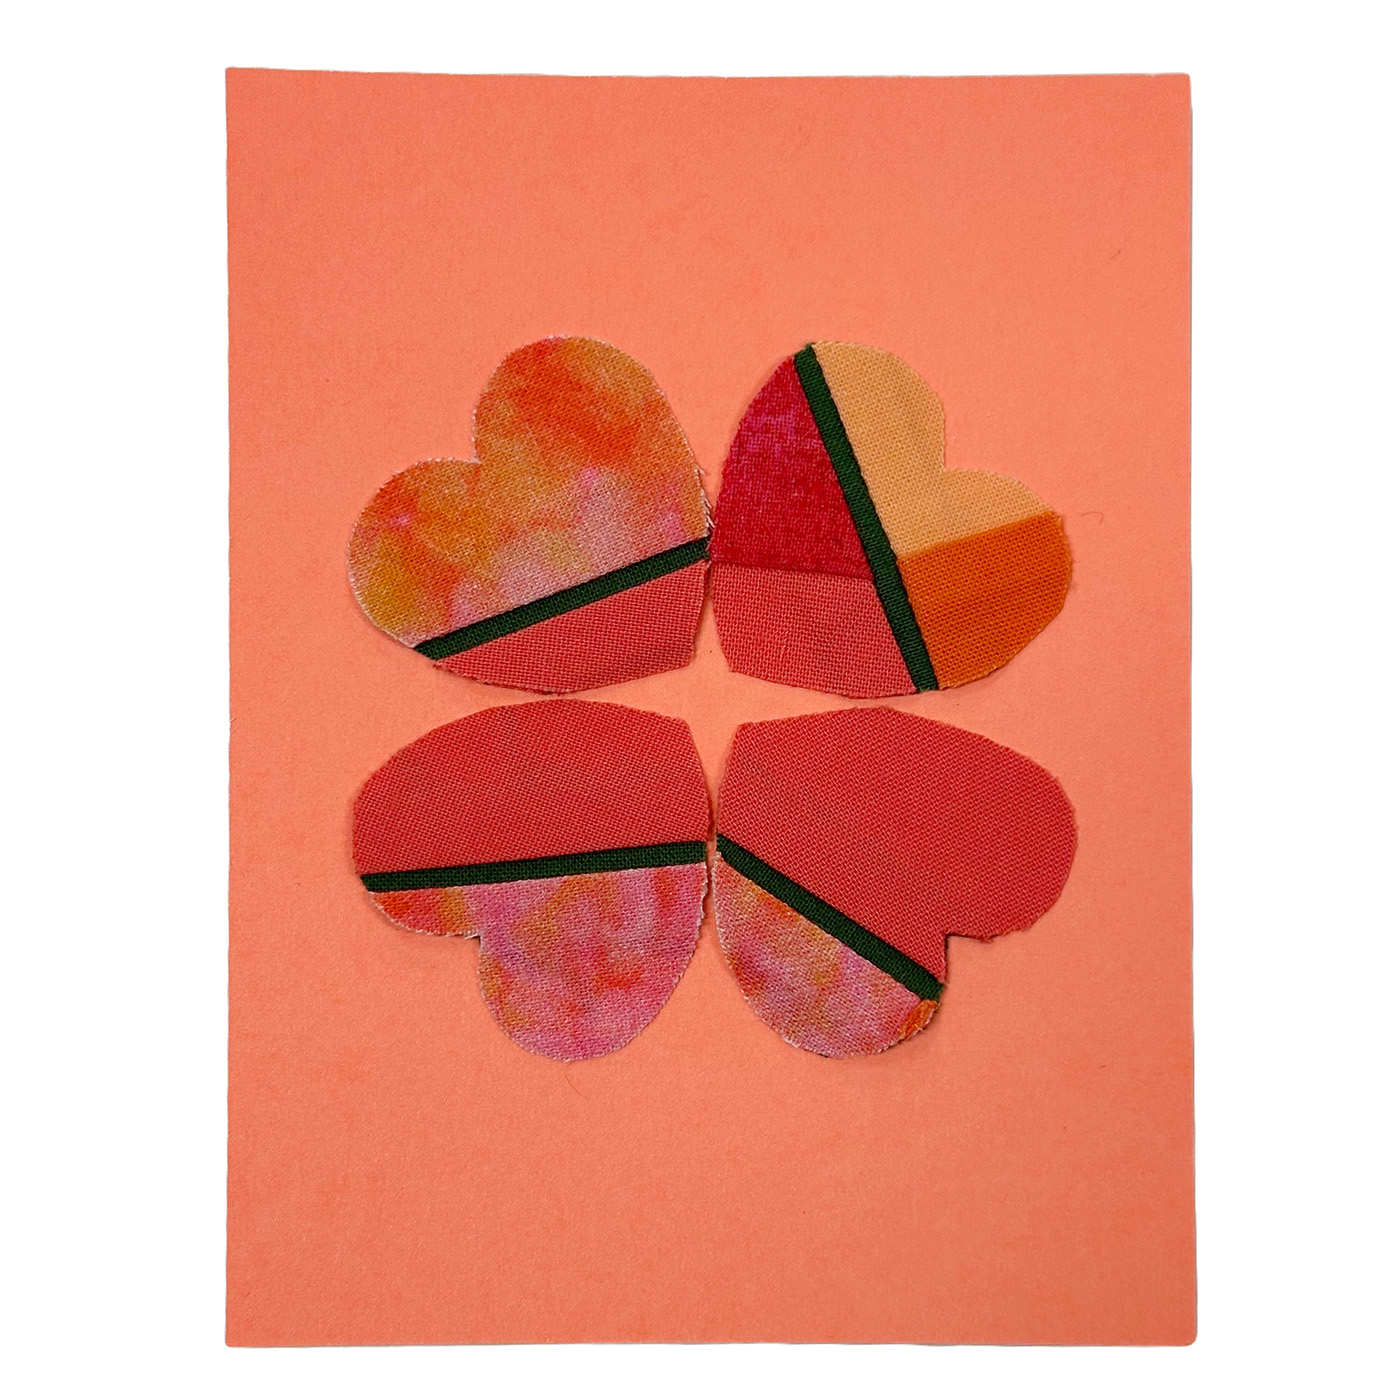
This design looks great with each petal as a single fabric; however, when I discovered a piece of improv piecing in my scraps, I thought it would be fun to incorporate it into the card.
I positioned separate pieces of fusible onto the back of the piecing so each heart could go in different directions.
When using the alignment template, the two top bumps of the heart hit right at the 1″ lines, and the bottom point is directed to the center of the square.
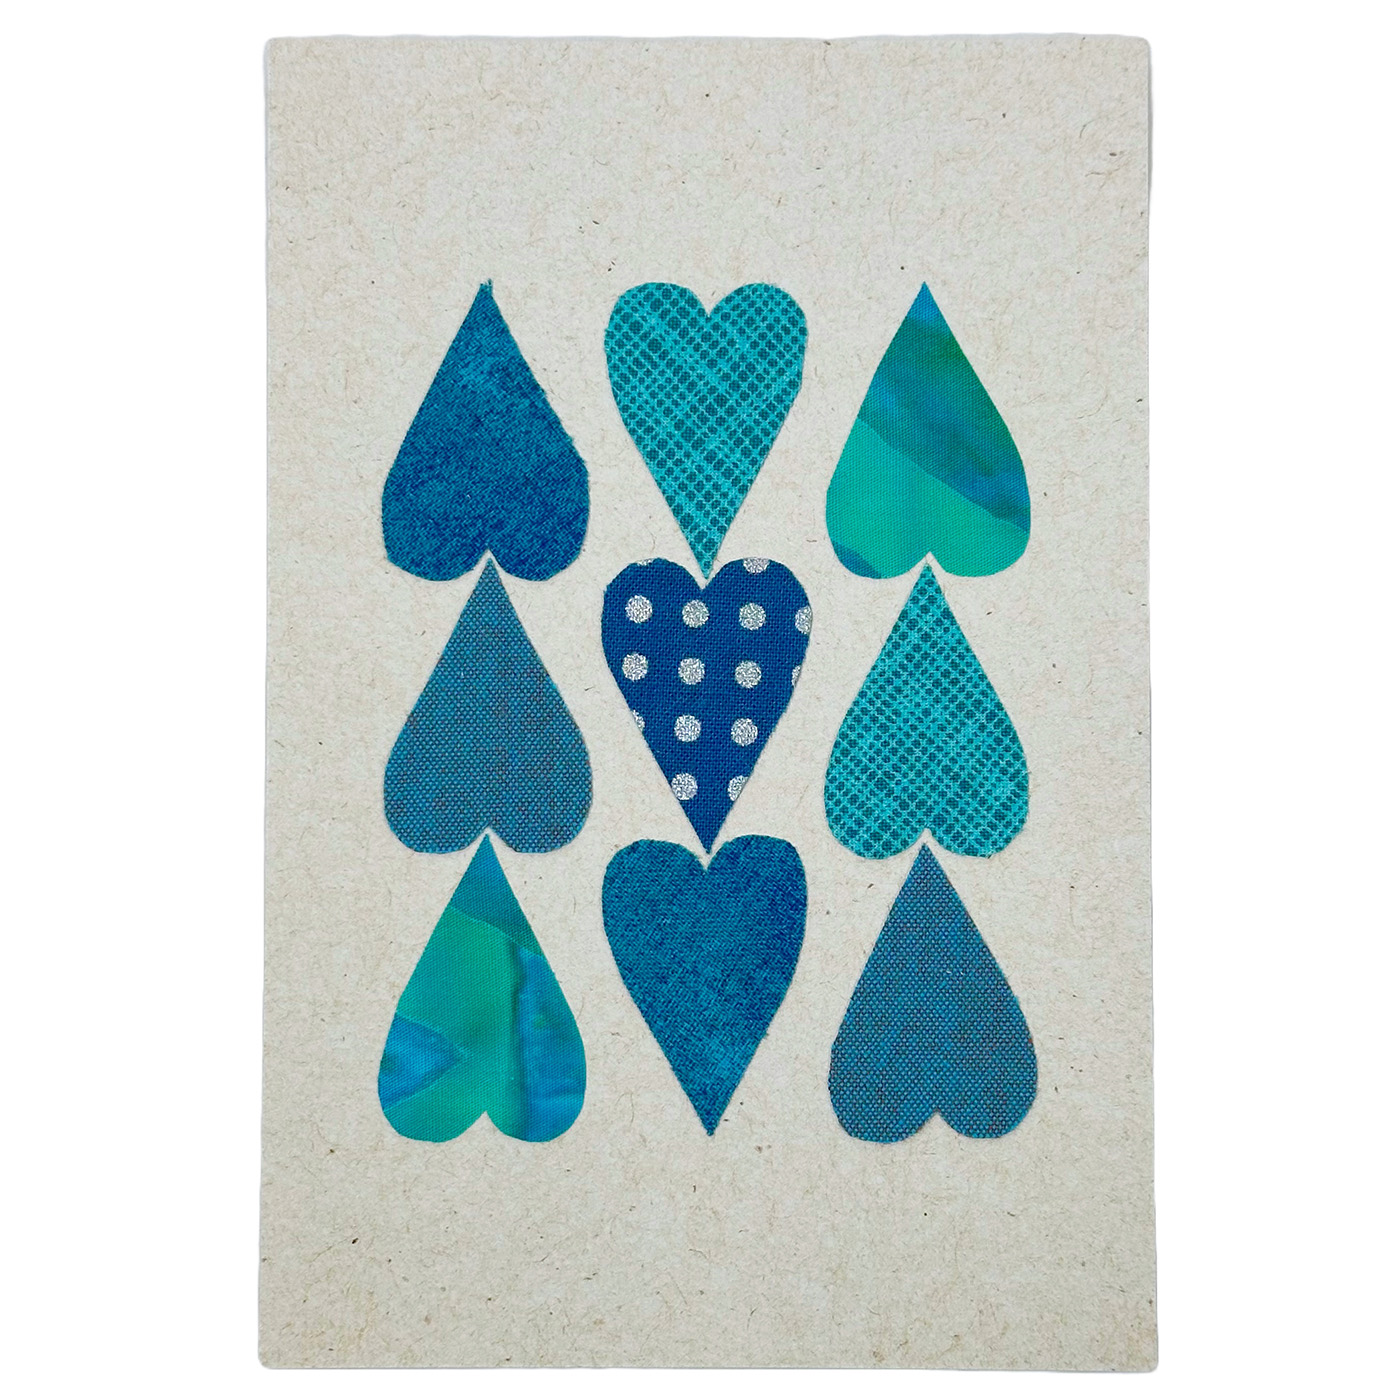
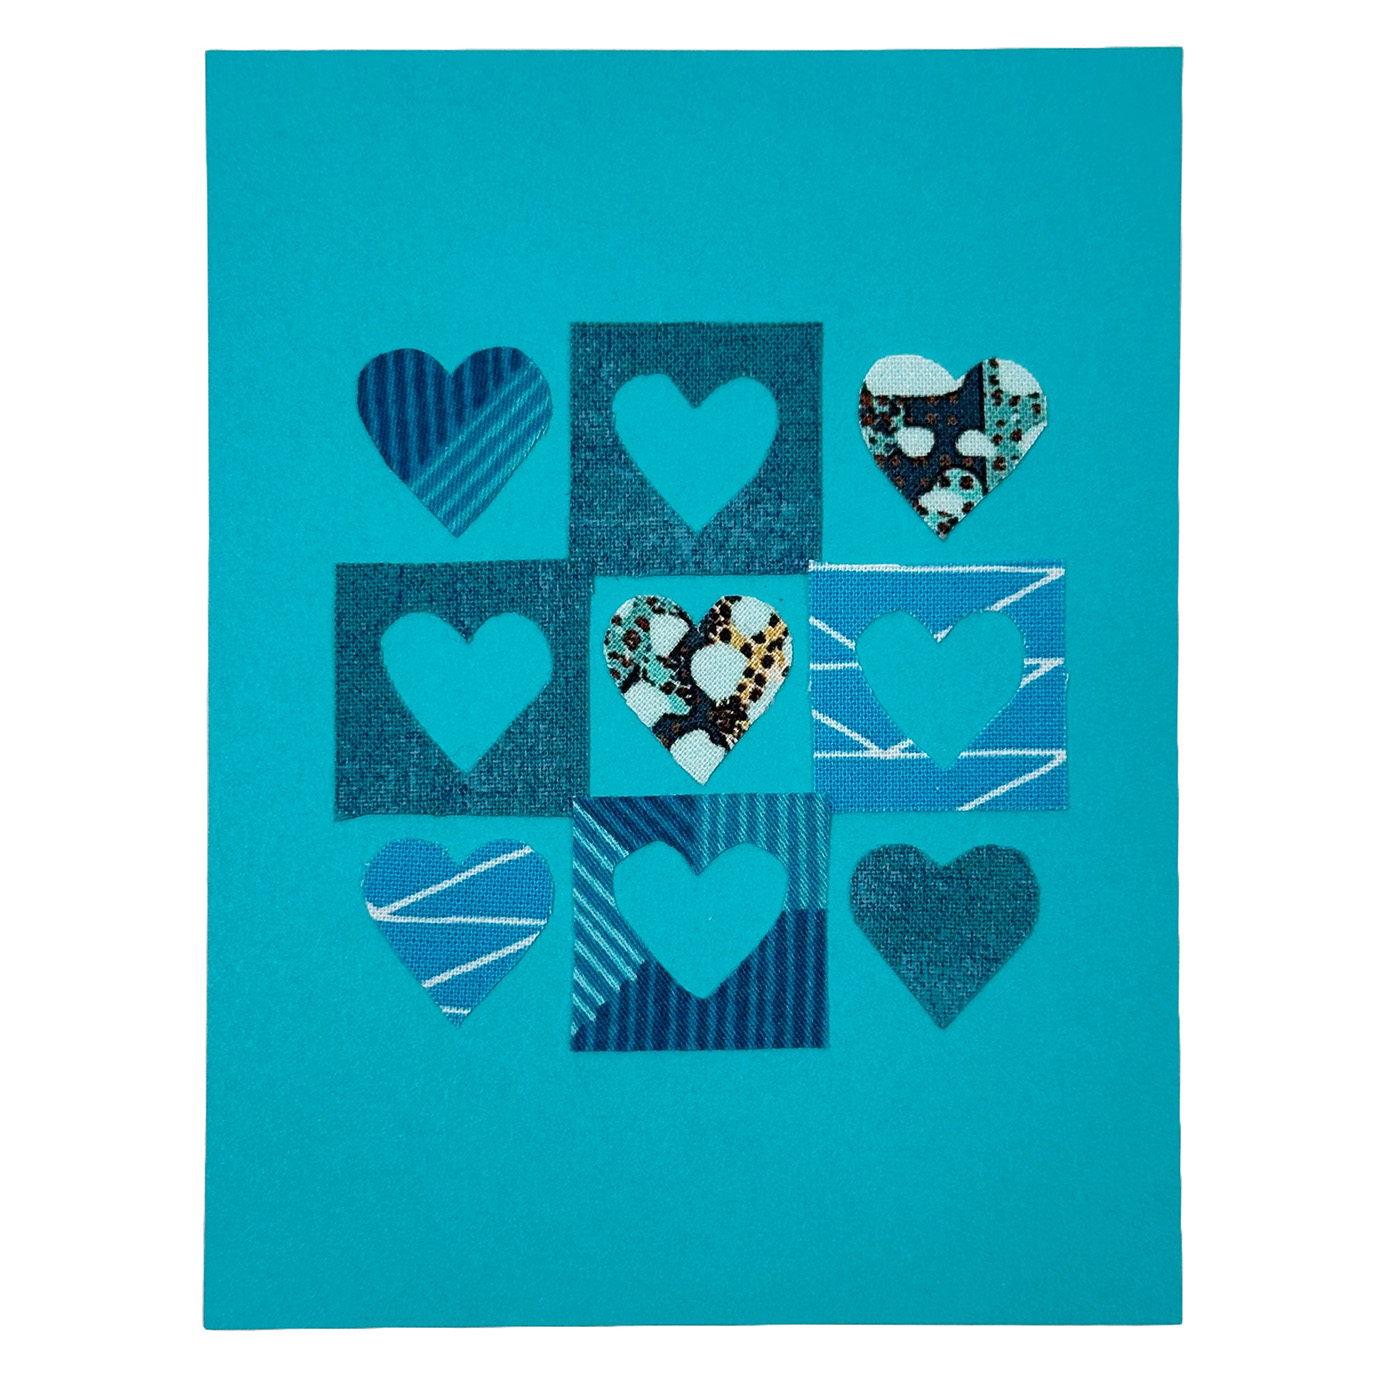
Nine Patch Hearts
This nine-patch-inspired heart design combines five hearts and four squares with heart shapes cut out from them.
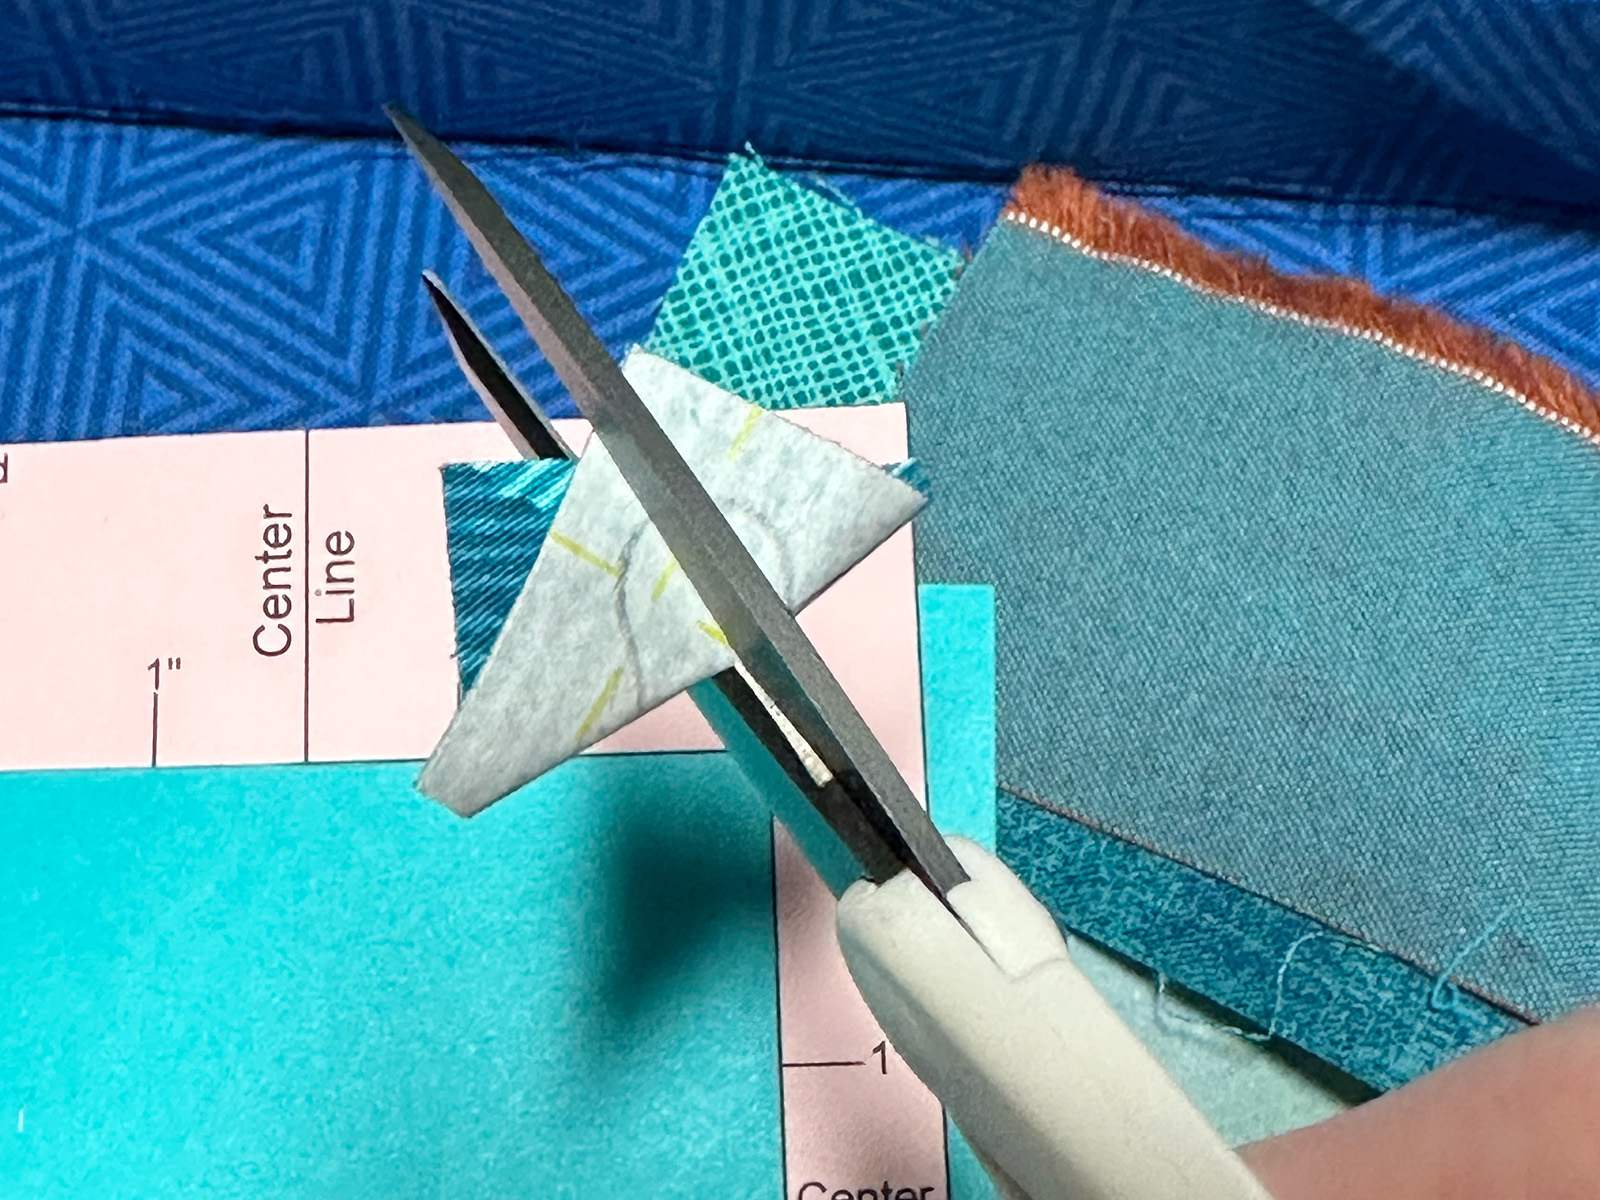
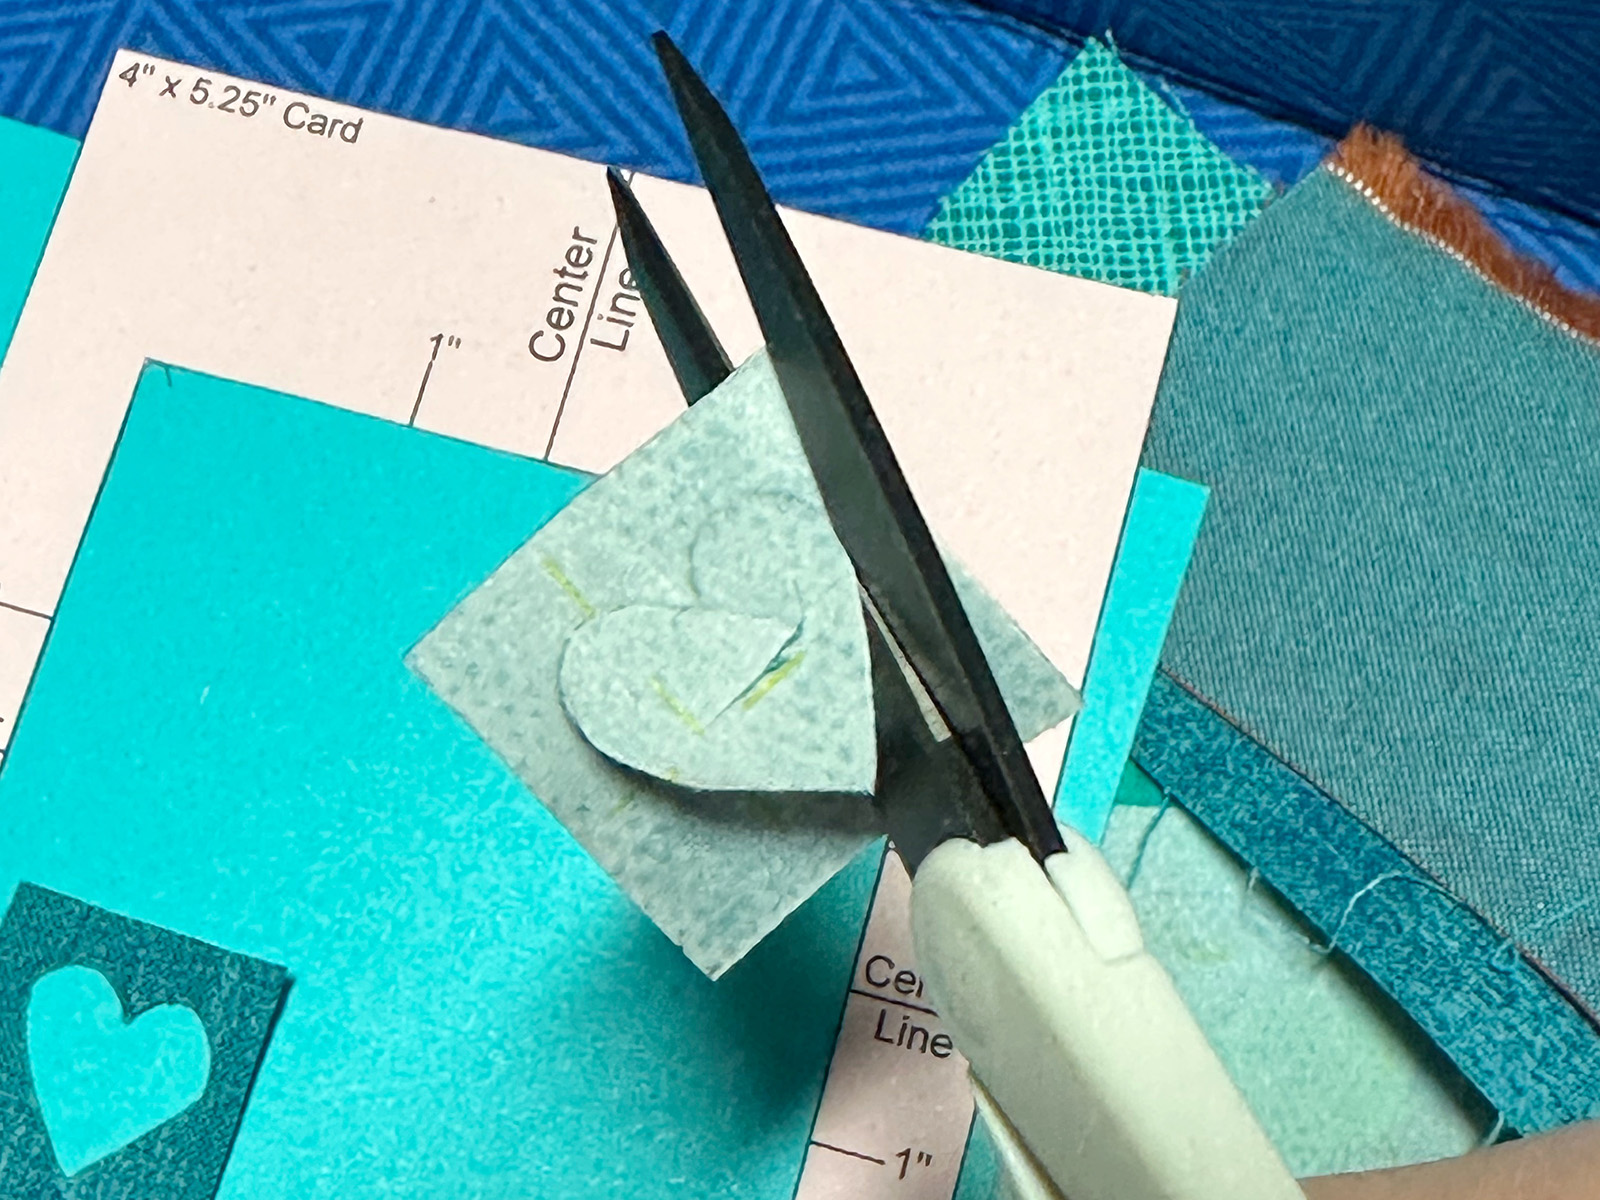
Cutting out the heart from inside the squares isn’t hard, but it takes patience. I cut out each square first, then fold it in half to take a small snip in the heart’s center. This snip must be large enough to fit the tip of your scissors easily but cannot extend past the drawn line of the heart.
Next, carefully cut out the shape from the center to complete the motif.
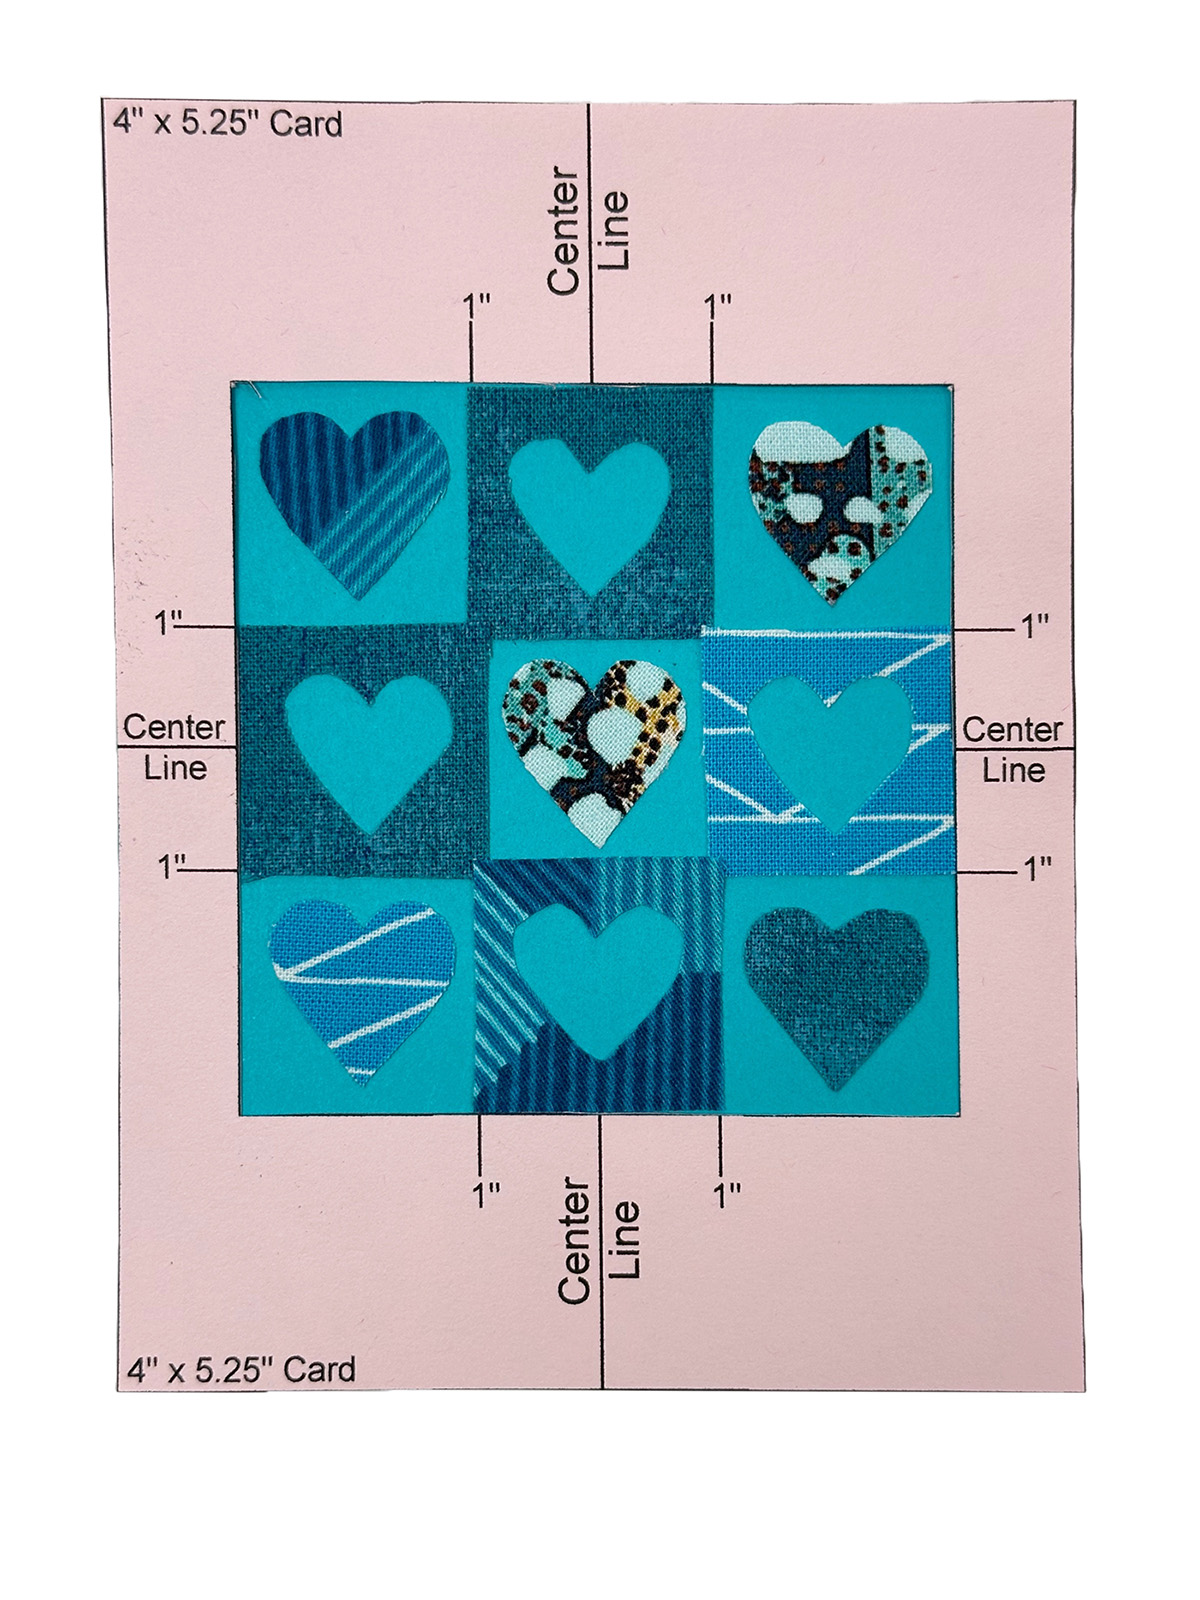
For this design, I would first position the square heart surrounds so the edges align with the 1″ indicators on the placement template. Once I have these shapes in place, it’s easier to position the hearts in each open area.
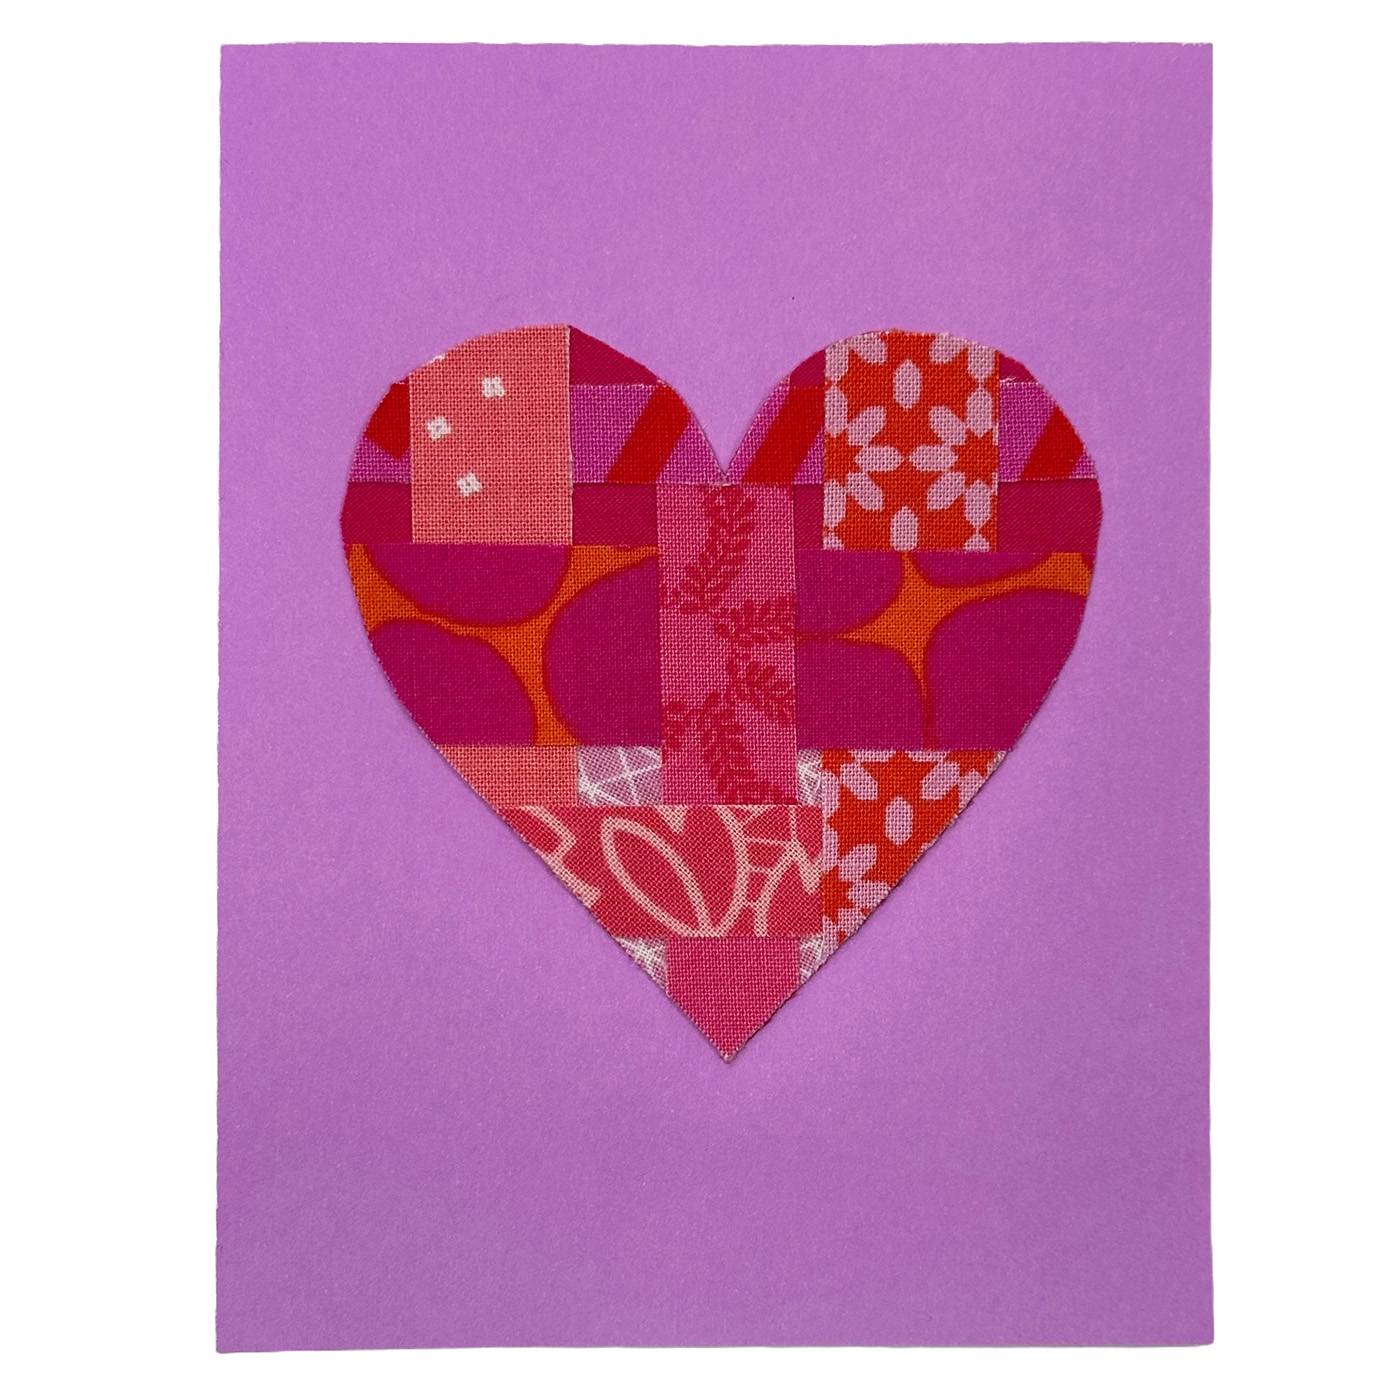
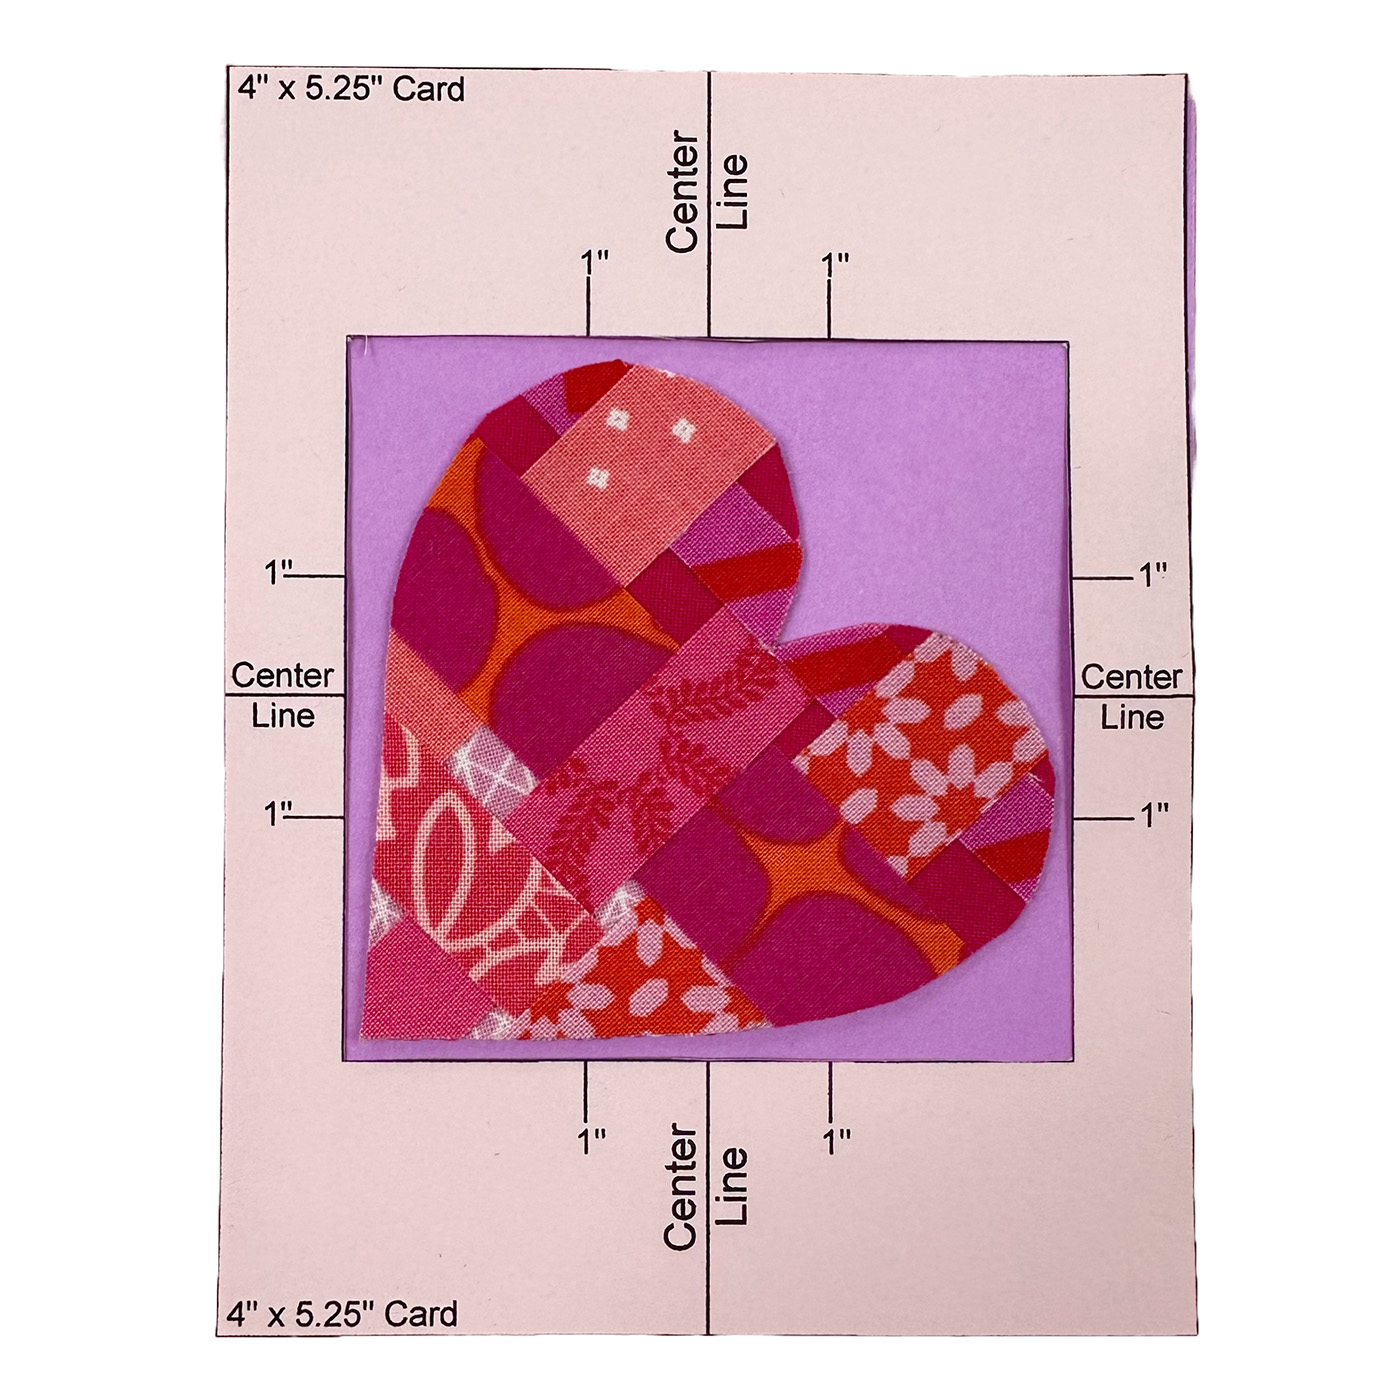
Single Heart Card Design
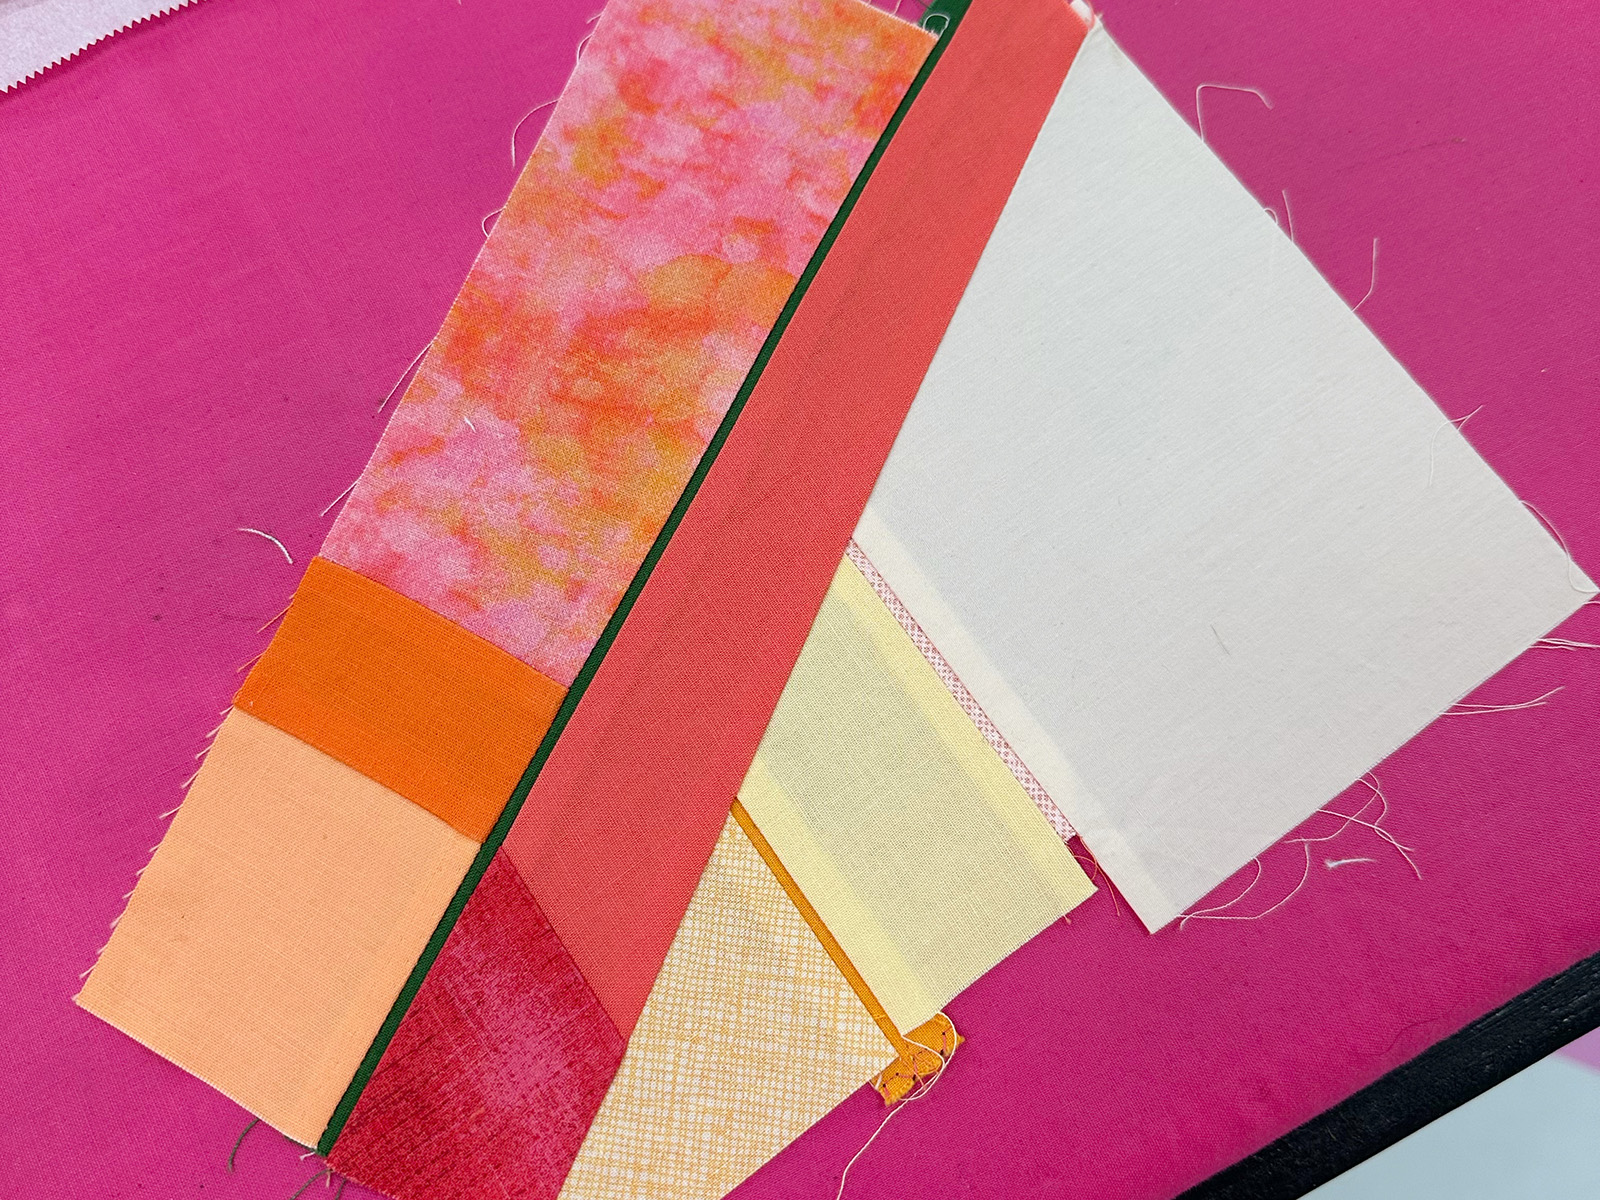
The final design uses a single heart, which is perfect for fussy cuts from a favorite fabric scrap. For my card, I decided to incorporate woven strips to add texture and design interest.
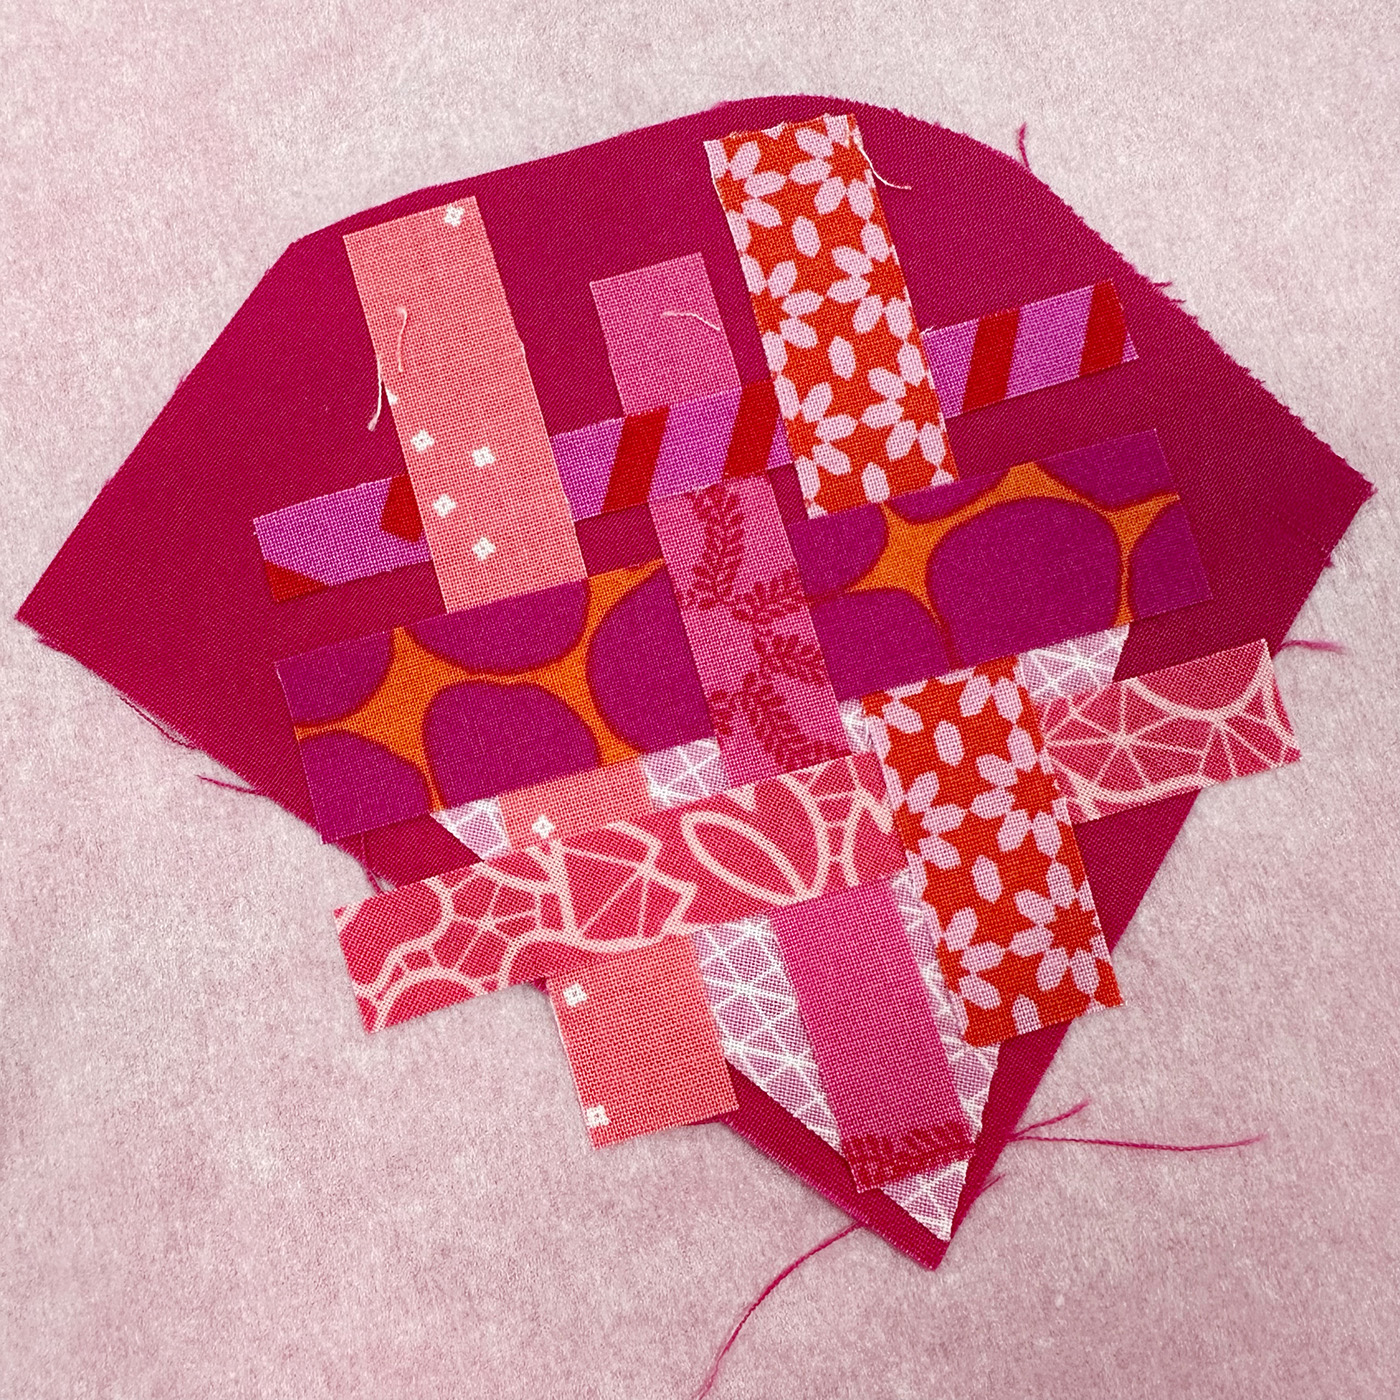
I started by cutting a piece of fabric a bit larger than the final heart and backing it with fusible. For each strip of fabric I planned to incorporate, I backed it with a section of fusible before cutting the strip to ensure the adhesive would extend to all edges of the fabric.
Once I prepared all of the components, I positioned the strips into a design I liked and pressed all of the layers together so they would stay in place. Since some of my strips extended beyond the edges of the backing fabric, I ironed it on top of a piece of parchment paper with a press cloth on top of the whole thing.
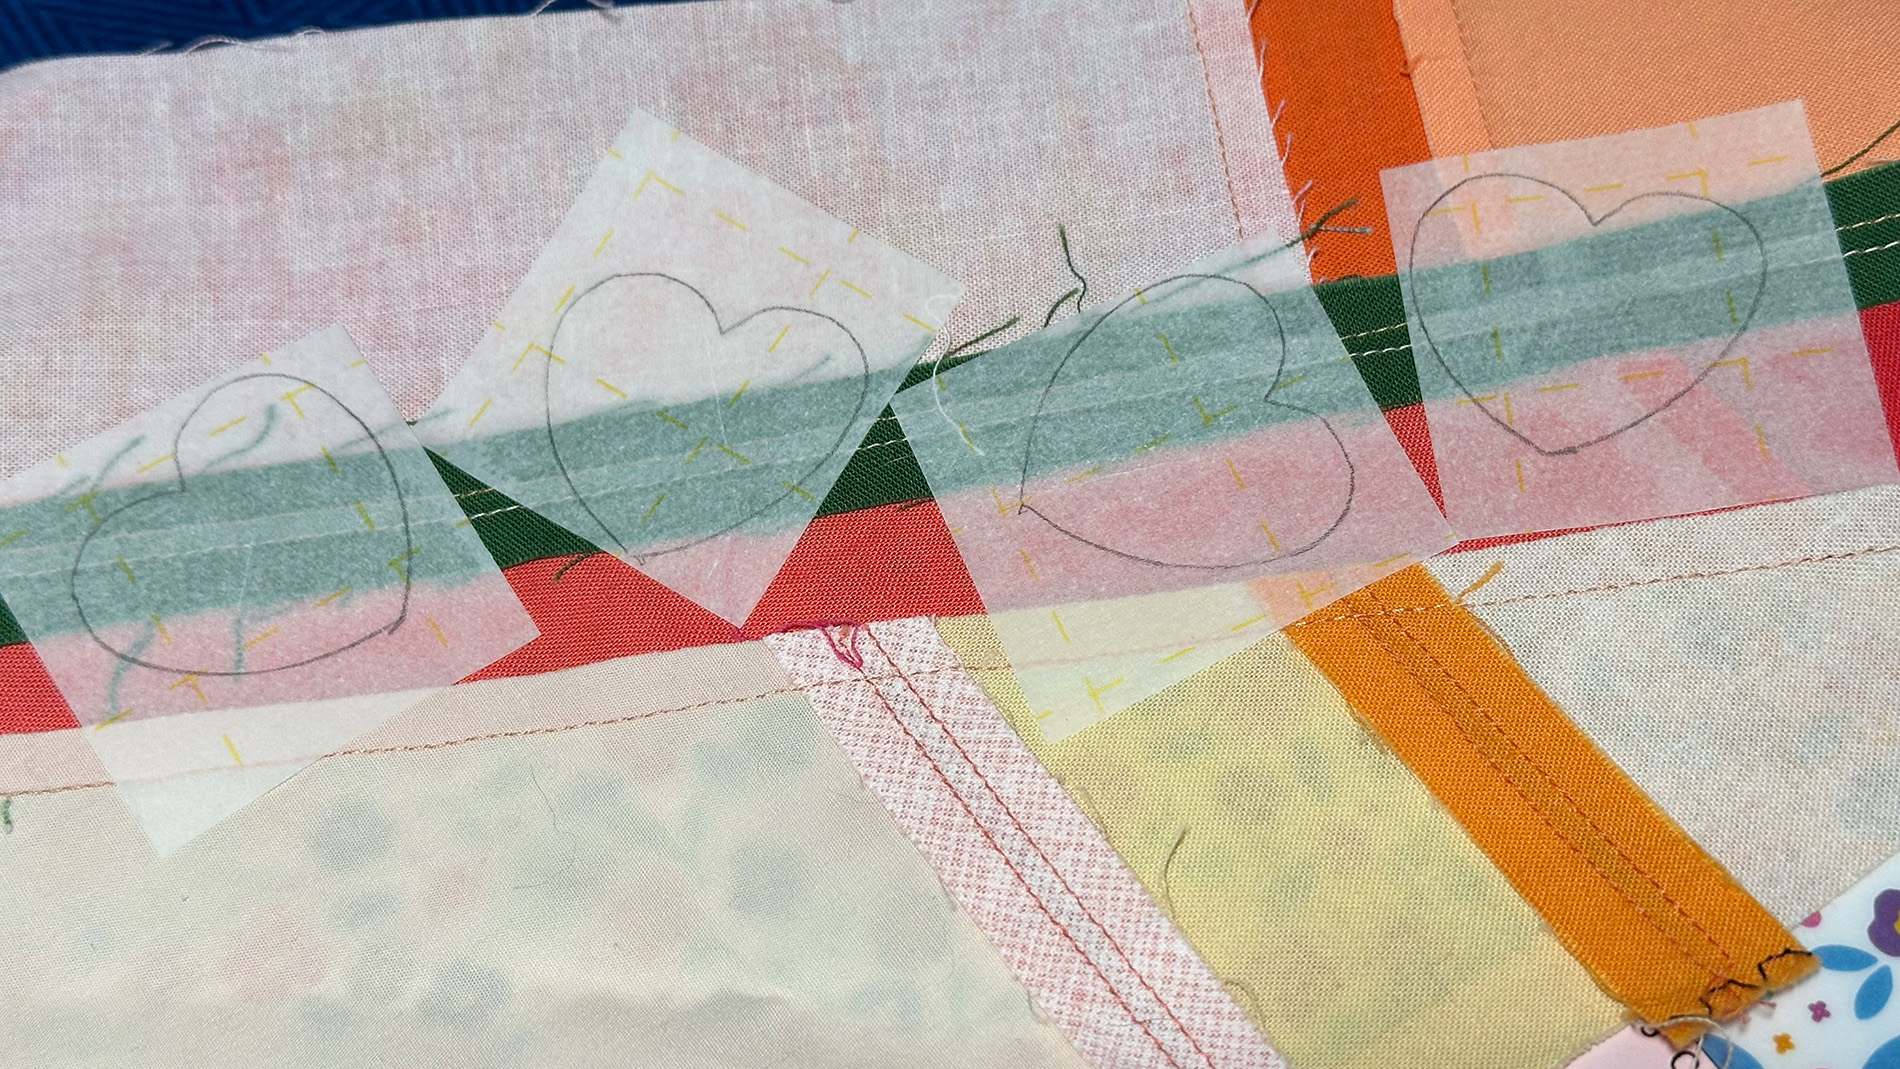
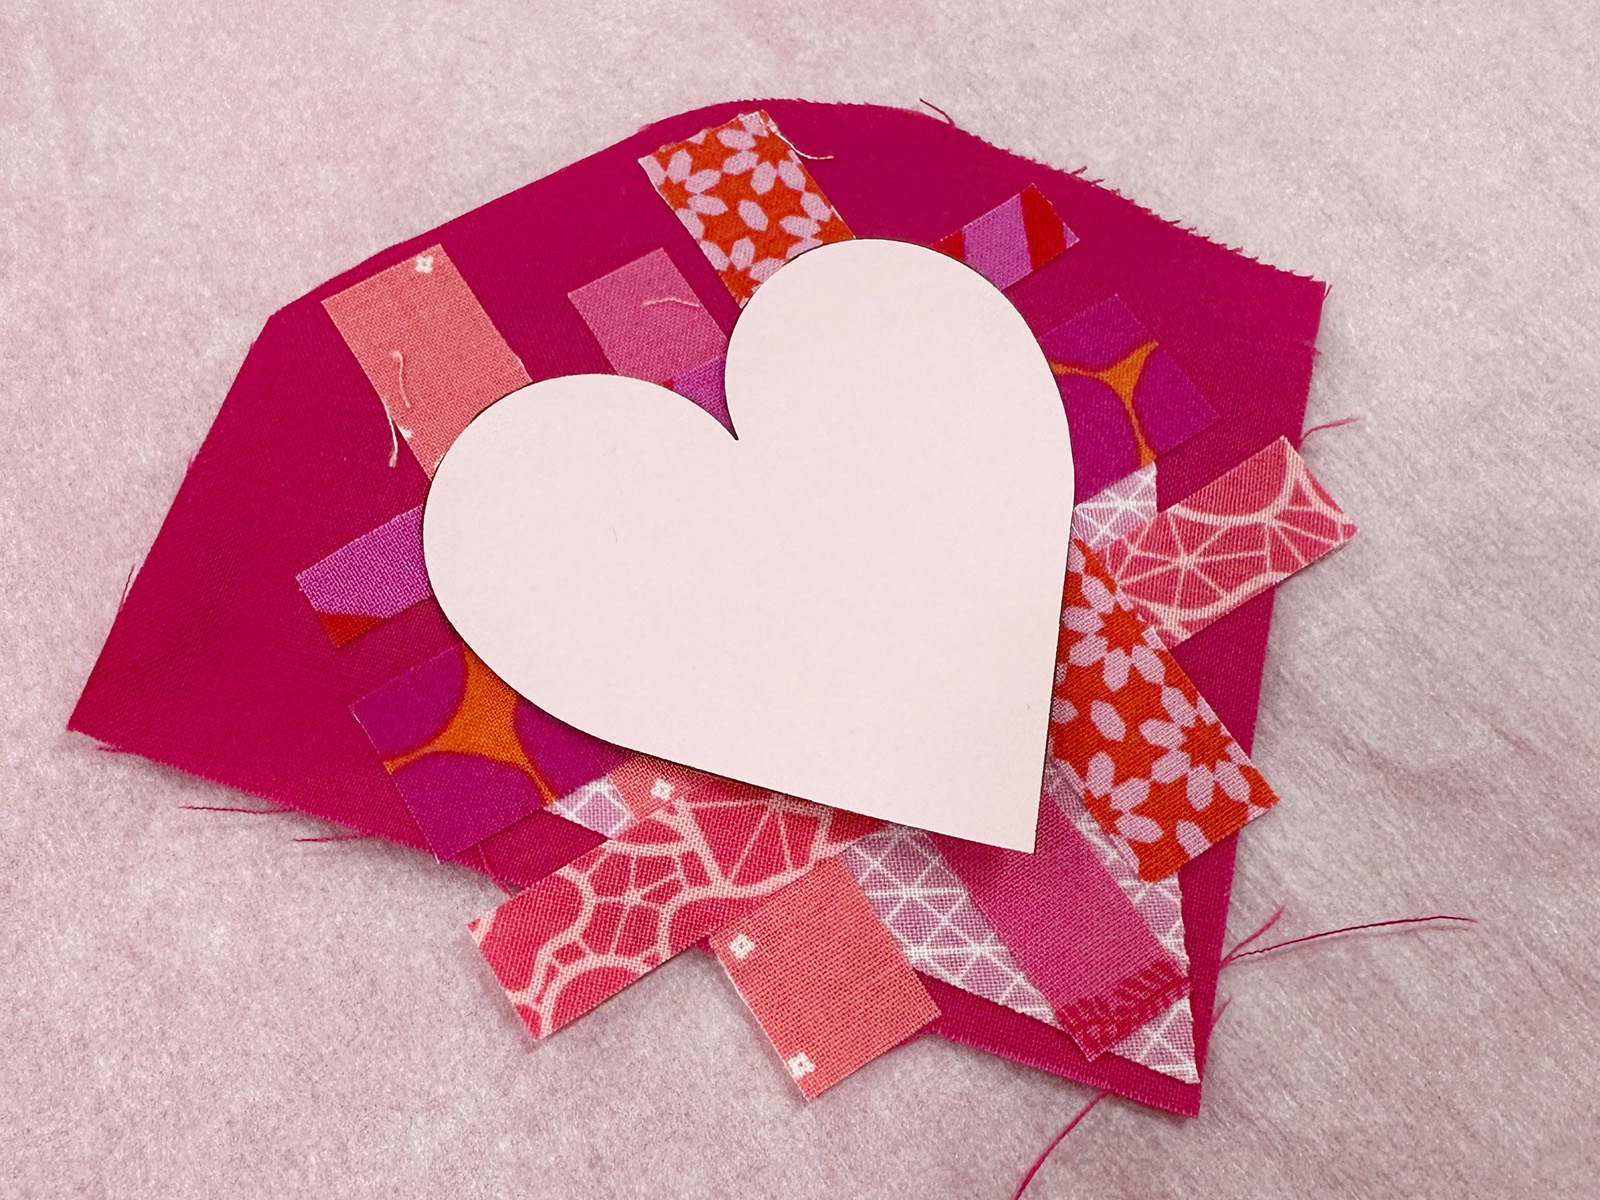
I usually trace my designs from the paper side of the unit, but this time, I wanted to see exactly where the heart motif would fall on the woven material, so I used a removable fabric pen to trace the shape.
There are a couple of placement options for the single heart. I positioned my heart straight within the square on the placement template, with the bottom point aligning with the center line and the outermost edges of the heart touching the edges of the bounding box.
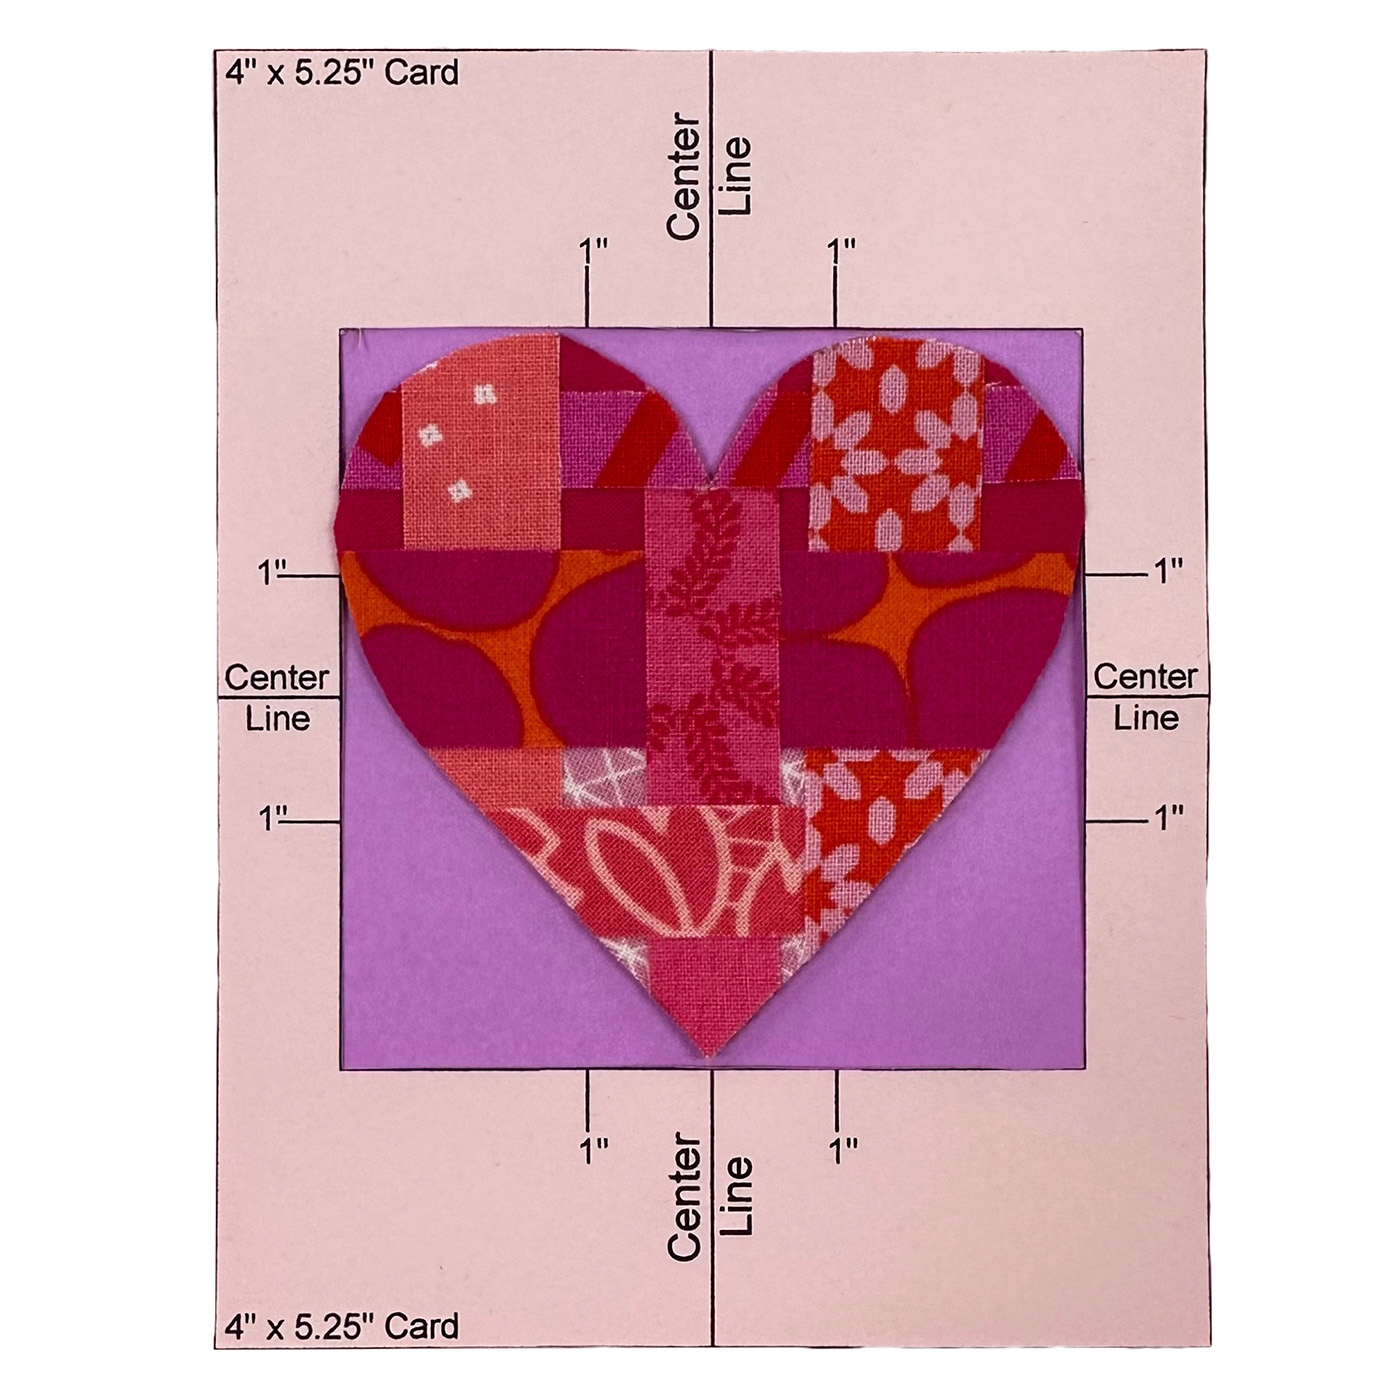
You can also rotate the heart for an angled look. In this position, the outermost edges of the heart are approximately 1/8″ away from the edges of the interior square.
The possibilities for using your scraps to create a thoughtful, handcrafted card are endless. Which friend would love to receive a fun handmade card from you?


No Comments