When an art form has been around as long as quilting, it is challenging to discover new ways of innovating within the parameters of traditional techniques, especially when you’re also working within quilt show rules!
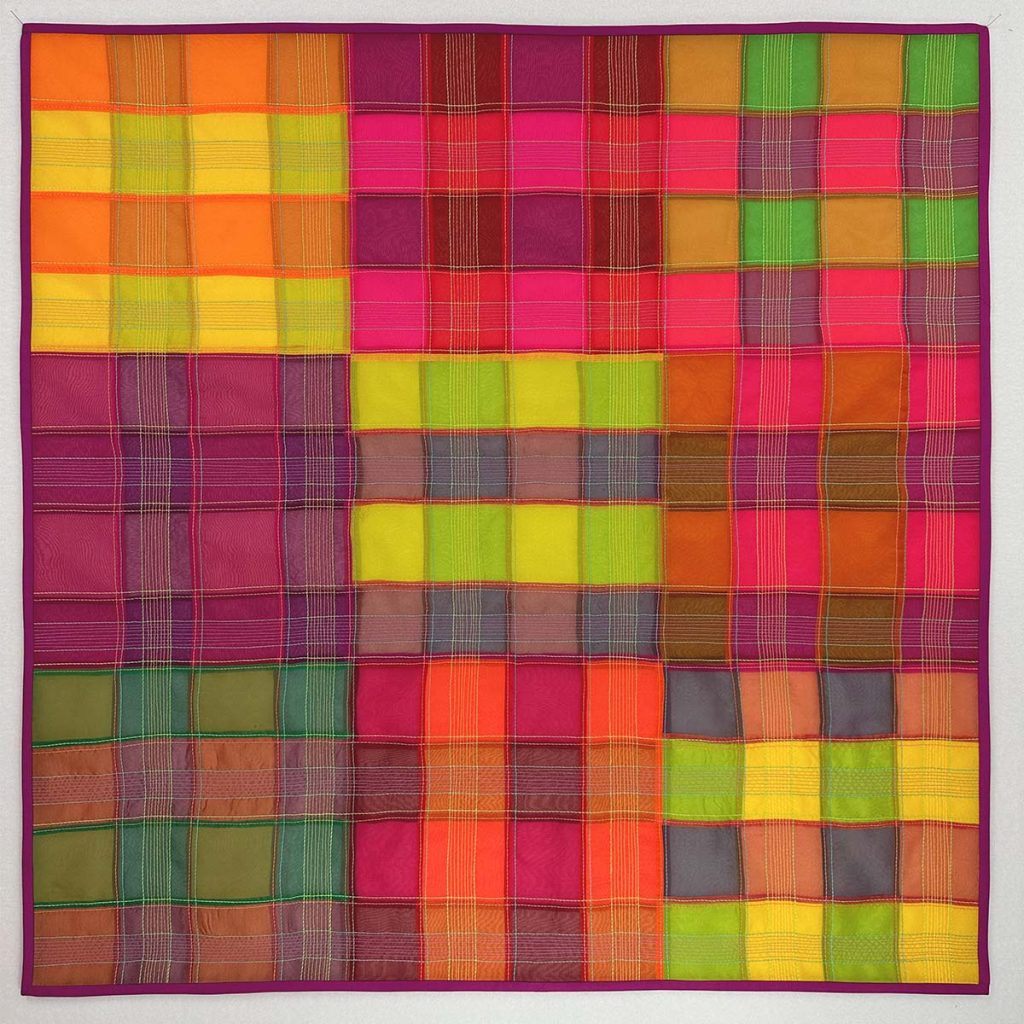
The Transparency Challenge
Each year, the QuiltCon contest includes a different themed category focused on an aspect of design in Modern Quilting. For the 2025 show, this category is Transparency.
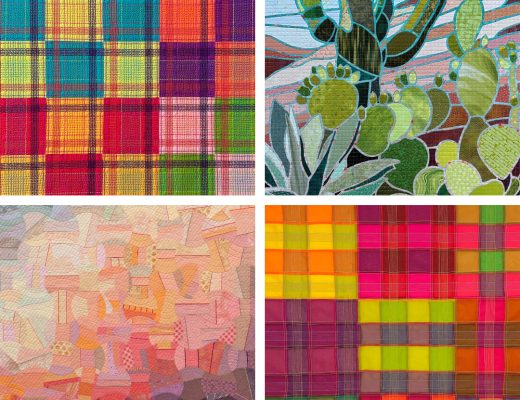
Transparency in quiltmaking is a visual illusion – an implied sense of transparency created by the combination of fabrics that makes them appear as though they are overlapping and blending into one another. Quilters create this effect by playing with different colors that are next to one another on the color wheel. Alternatively, quilters can play with value within a single color to create transparency. The key to a successful composition that evokes transparency is fabric selection. A common technology trick to help differentiate values in fabrics is to take a photo with your phone, then edit the photo to grayscale, removing all color and thus making it easier to differentiate between light and dark fabrics within the same color.
https://quiltcon.com/apq-quilting-challenge/
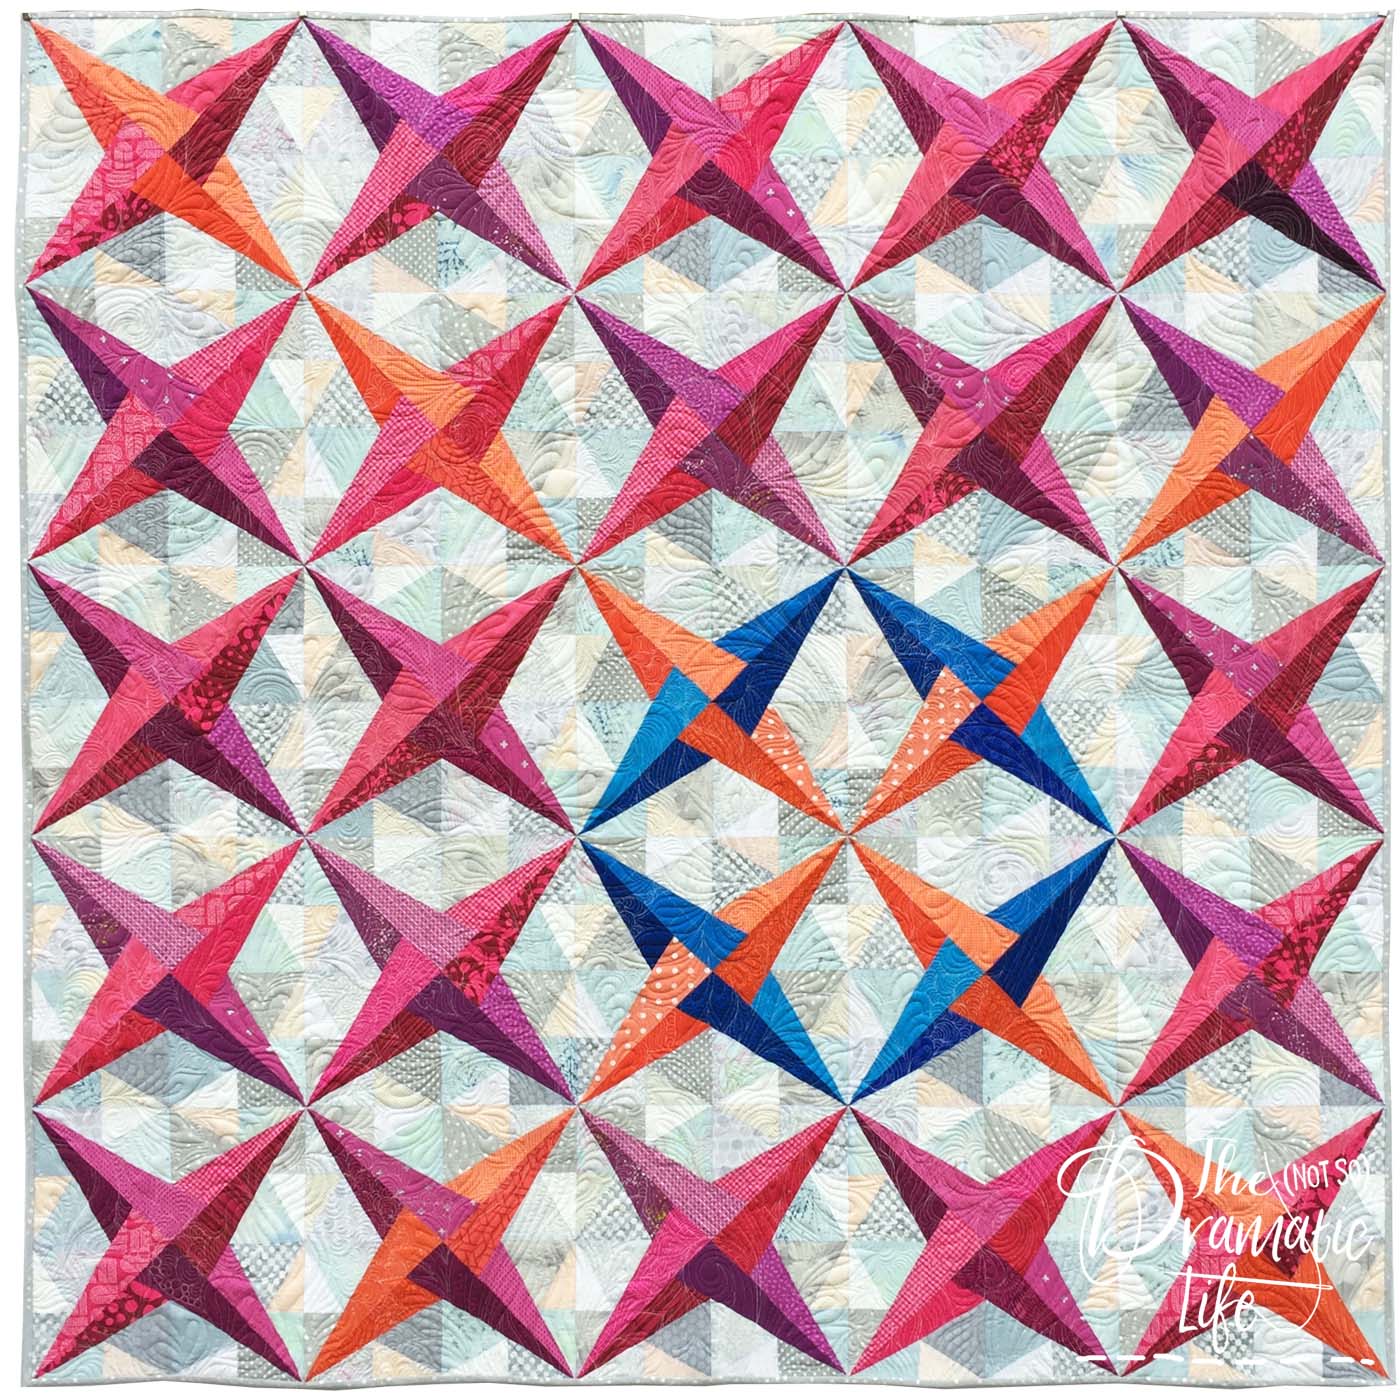
I was delighted that the MQG used one of my quilts, Complementary Convergence, as one of the transparency samples from a past show. However, I wanted to explore the concept of transparency in an entirely new way.
Most transparency in quilting isn’t transparency at all—it’s typically an illusion created through careful choices of fabrics and threads. For this challenge, I decided to make the entire quilt physically transparent.
What Makes a Quilt?
In its most essential form, a quilt is made of three layers of material (top, batting, and backing) held together with stitching.
Triple Silk Translucence required me to rethink which materials would go into each layer.
Fabric Selection
To make a transparent quilt, I needed to sew with transparent fabrics. Since I created this quilt with the intention that it would be displayed among other quilts at a show, I wanted the final piece to have enough body to make it easy to handle and hang using standard show hardware. I wouldn’t want to use fabrics that are prone to ripping when inserting a hanging rod!
Few fabrics are transparent and have enough body to make them somewhat patchwork-friendly and likely to withstand the rigors of quilt show display. Silk organza was an easy choice, and I started by ordering some yardage and a mystery pack from a small seller.
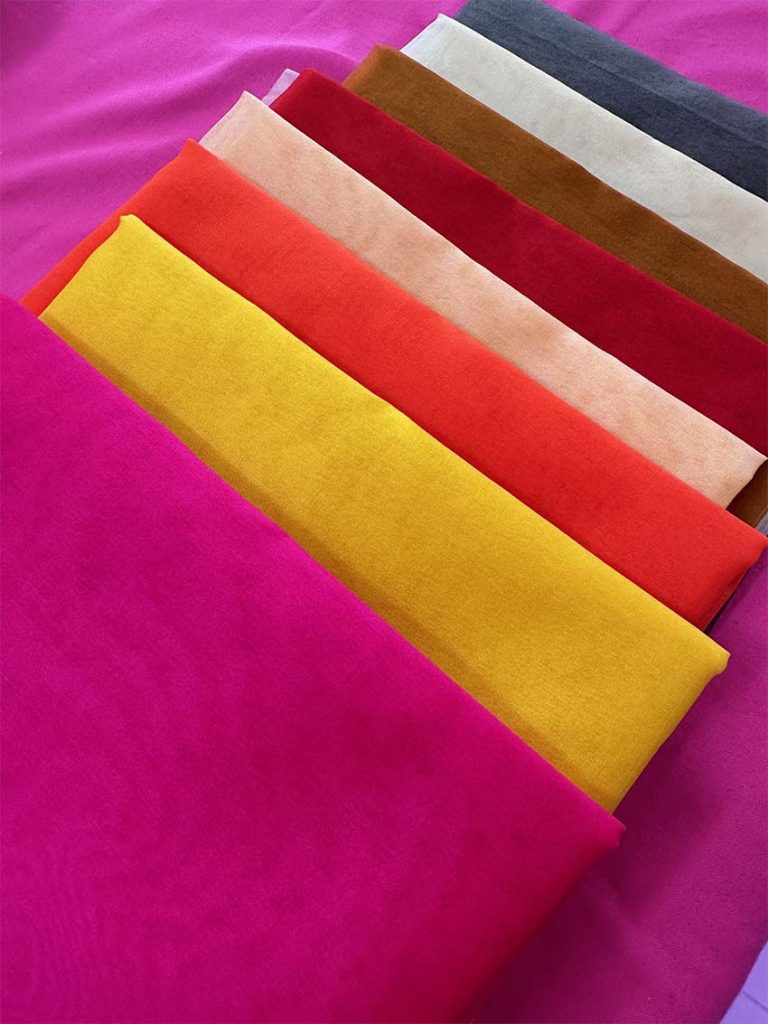
I used these fabrics to test some blocks and then ordered the remaining colors I couldn’t get from the original seller from a larger company.
Testing the Concept
One of my favorite pattern motifs is plaid, and these transparent blocks were a perfect opportunity to explore the design in a new way. The quilt’s three layers consist of two sets of pieced blocks with a solid, sheer backing. The two pieced layers are simple pieced stripes that alternate between vertical and horizontal to create a plaid effect.
I constructed my first pair of blocks using flat felled seams, which involve folding one seam allowance over to encase the other, narrower seam allowance, and two rows of stitching, one hidden and one exposed.
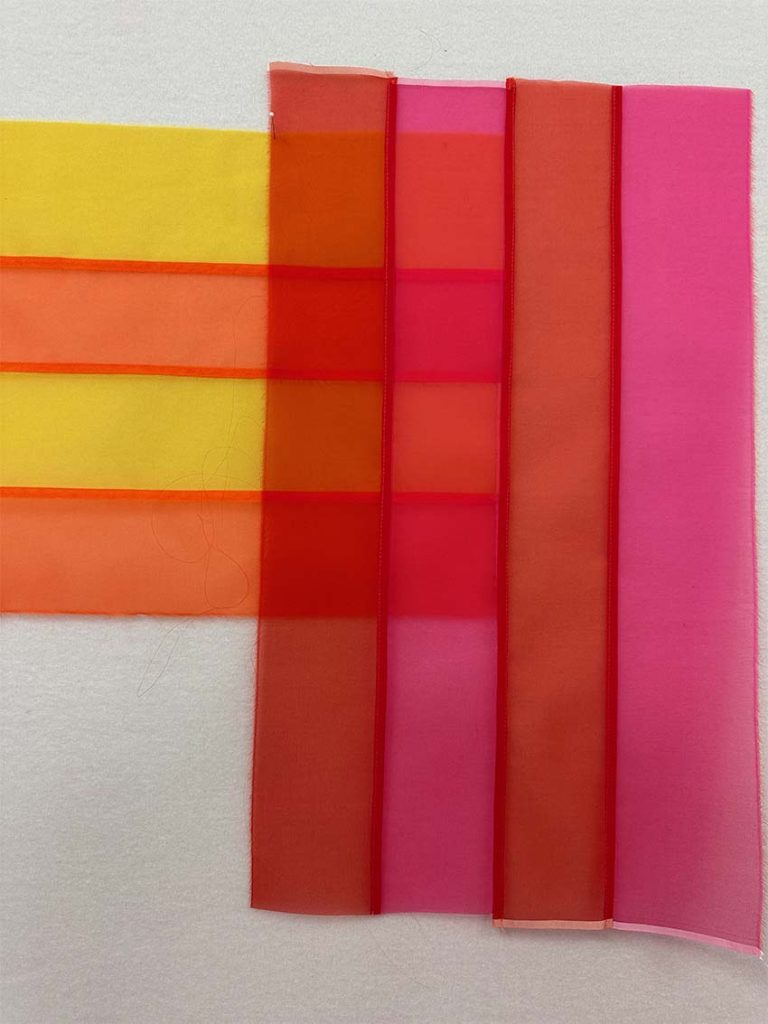
After this initial test, I altered the process to use one row of stitching in the piecing process and planned to incorporate the second row of stitching in the quilting process.
Quilt Block Layout
The process of creating the components of this quilt was different than any previous project because the color effects of the fabrics altered significantly as I layered them. Color theory can give you a general idea of what will happen, but it’s hard to guess the exact effect until the fabrics are on top of each other.
One Layer at a Time
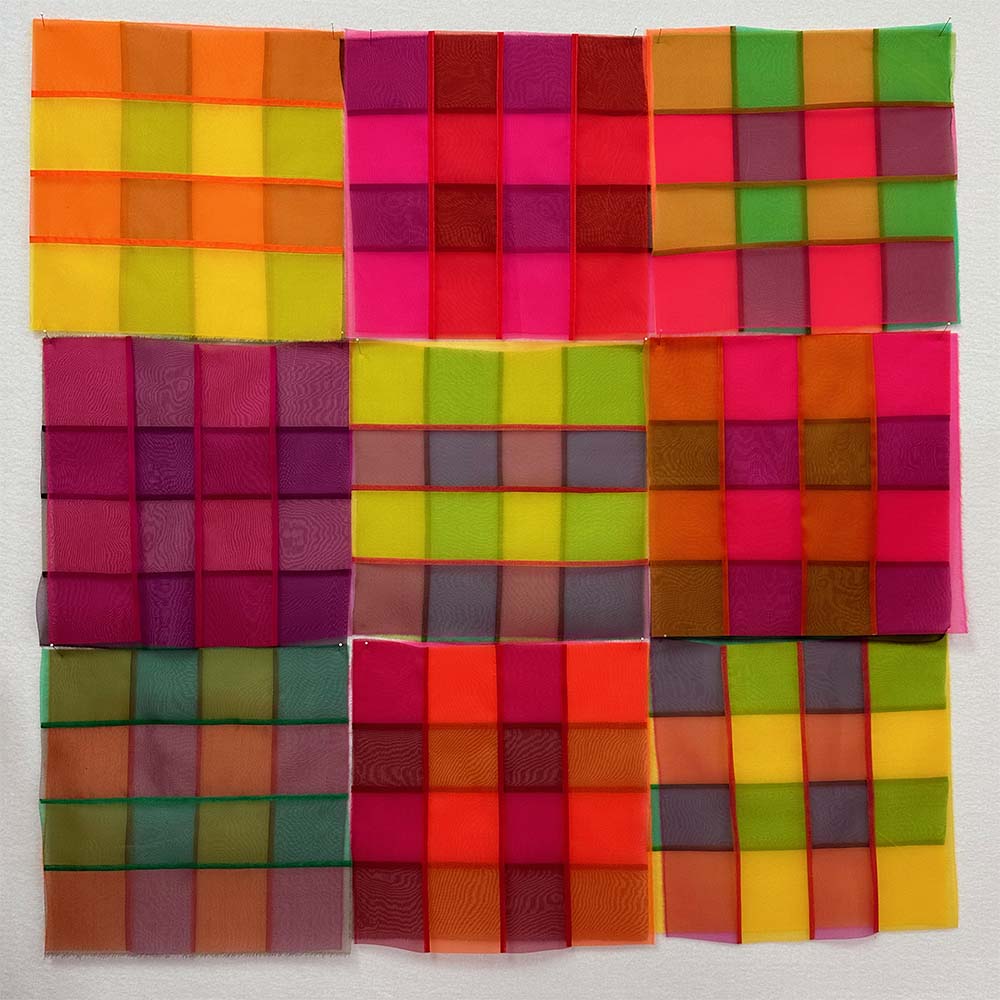
I assembled the top and middle layers of the quilt separately. Still, the layout had to happen all at once, so I experimented with how the fabrics interacted with each other as I positioned the blocks. As I worked, I discovered that the darker fabrics worked best in the center layer of the quilt most of the time.
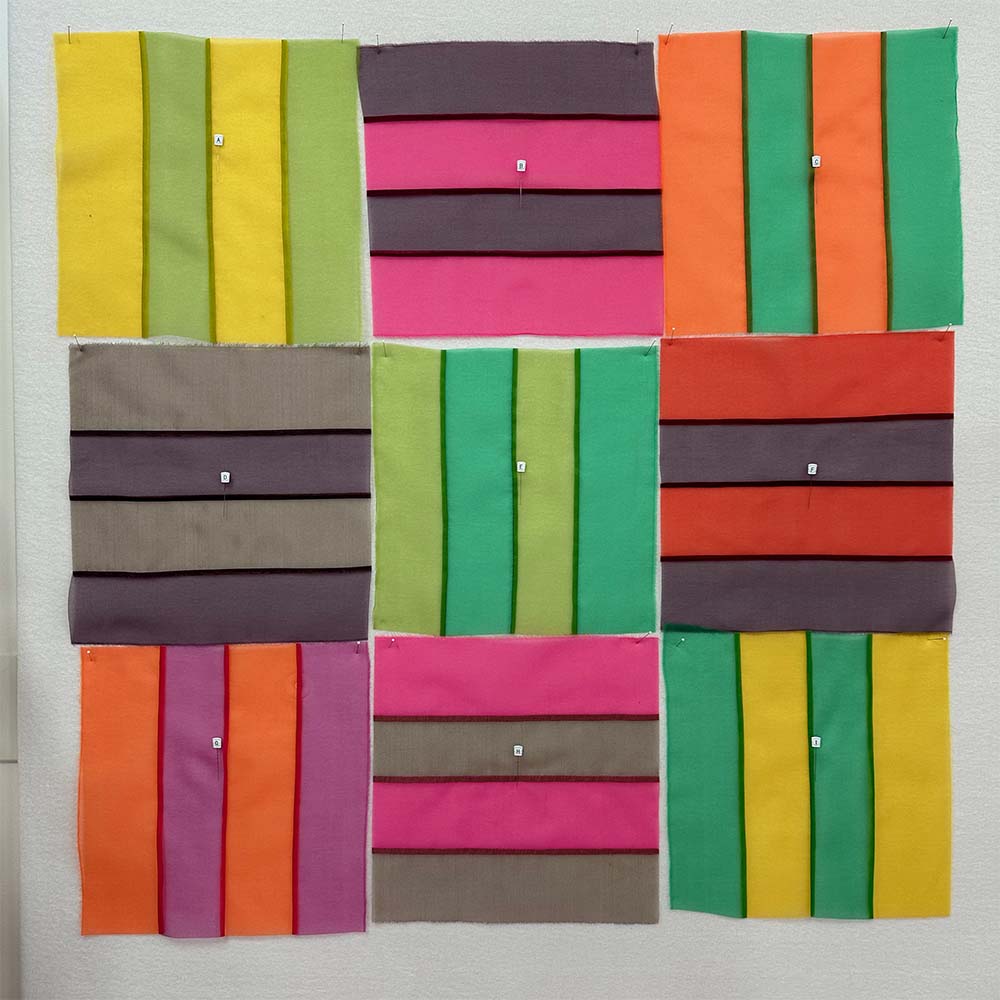
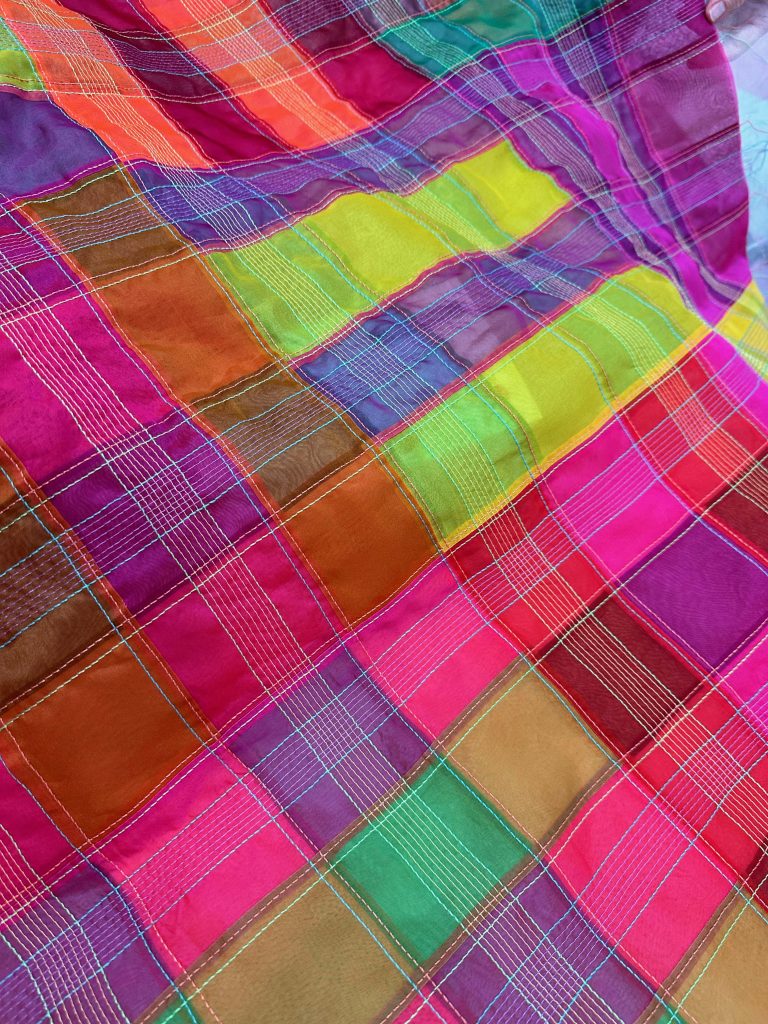
In the photo below, you can see how wildly the colors change through the layering process. I was particularly intrigued by the sections of the quilt that appear almost blue- I certainly wasn’t expecting that effect based on the color palette of my fabrics!
Selecting the Backing
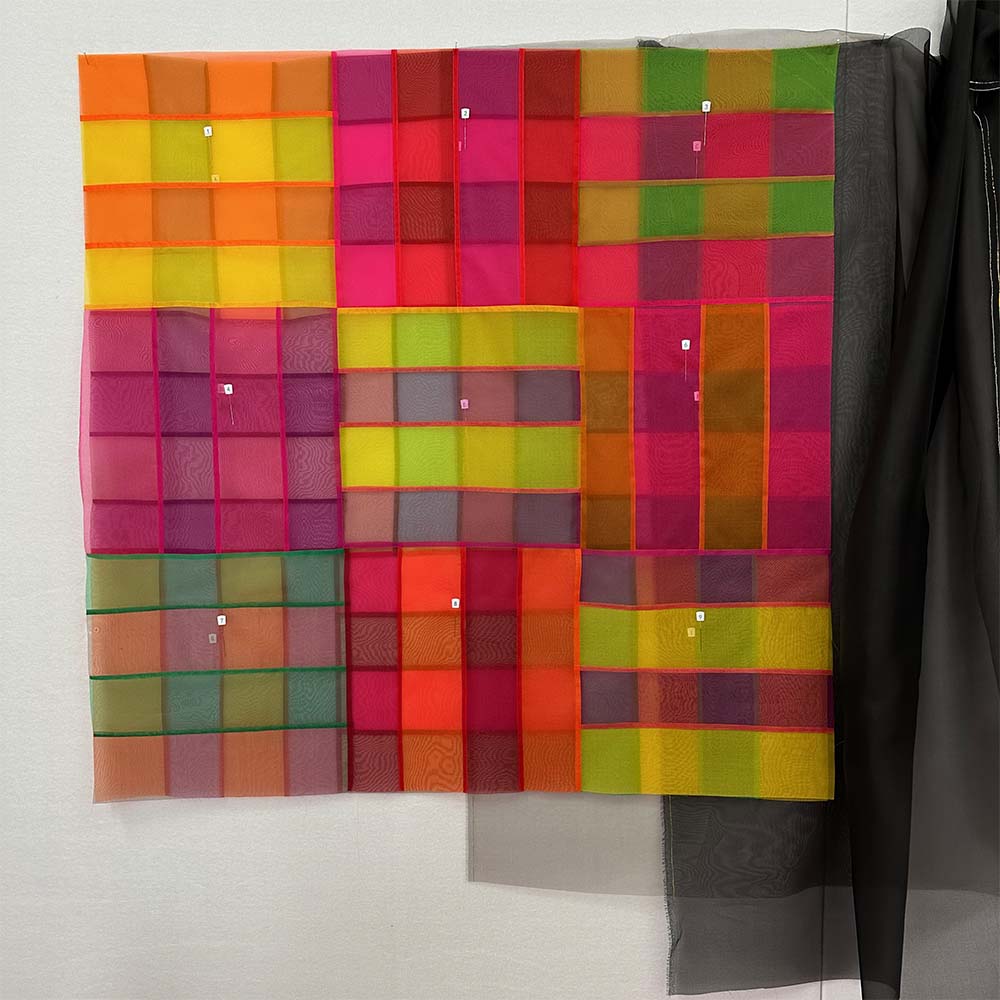
With a transparent quilt, the final backing layer is just as important as the quilt top. I initially considered creating a back with a white center and grey and black borders to create a glowing effect. After assembling the top two layers, I positioned the grey and black organza behind them and decided it muted the colors more than I wanted. Ultimately, I landed on using a piece of white organza on the back of the quilt, which creates a pastel effect when looking at the quilt from the back.
Basting
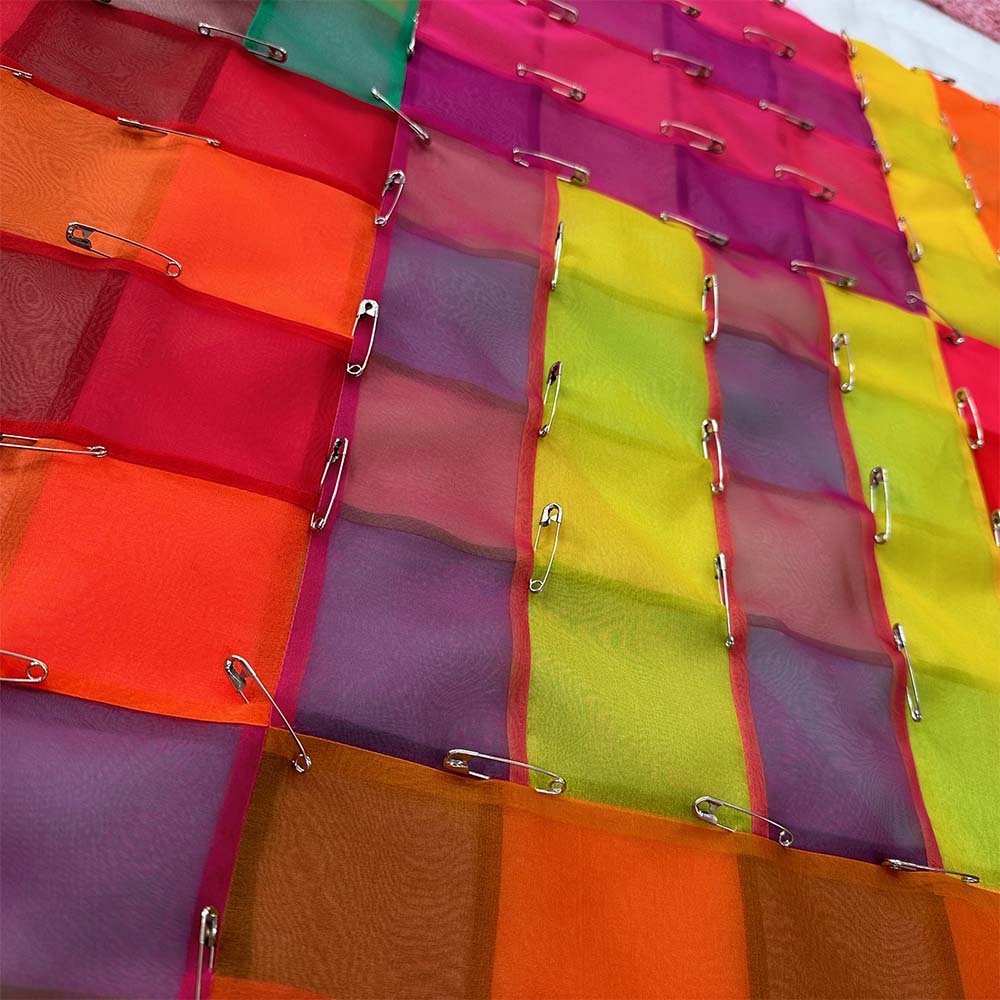
For this quilt, I did my best to align the pieced layers as closely as possible in the basting process, so I placed safety pins at each seam intersection.
Quilting
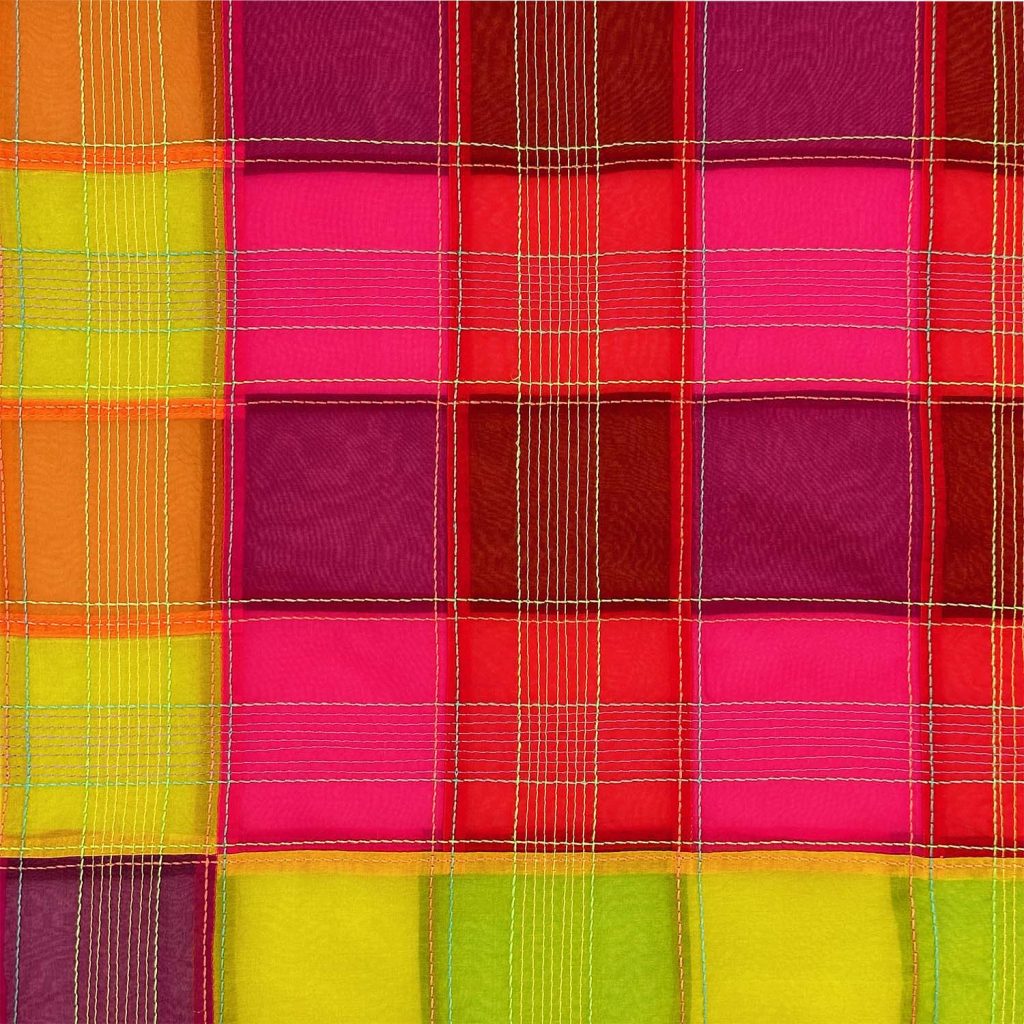
For this piece, I decided on linear quilting in contrasting colors to further explore the interaction of color transparency. A mix of 12 and 50-weight threads adds more variation in color and texture. Quilting on either side of each seam secures the seam allowances, and matchstick quilting in every other row adds to the plaid motif.
Pressing
The organza became extremely rumpled during the quilting process, but a good press with a steam iron smoothed everything out. The lower right corner of the image below shows how much better the quilt looks after pressing.
Finishing
To give the quilt a solid edge to help it withstand future travel and handling, I made binding with a quilting cotton cut on the straight grain.

Quilt Stats
- Title: Triple Silk Translucence
- Size: 35.5″ x 35.5″
- Techniques: Machine Piecing
- Quilting: Domestic Machine Quilted with a walking foot on a BERNINA 770QE PLUS
- Fabric: Three layers of silk organza
- Batting: Pieced silk organza
- Thread: Pieced and quilted with 12 and 50-weight Aurifil in multiple colors
- Binding: Quilting Cotton cut on the straight of grain, machine stitched to the front and hand finished on the back

9 Comments
Pat A
November 22, 2024 at 6:31 amAmazing! I do want to see the finished back.
Sue
November 22, 2024 at 8:44 amThanks for taking us through your process. I’d love to have your transparency quilt on my wall!
Kathie Banks
November 23, 2024 at 7:53 pmThanks so much for sharing your process. This quilt is gorgeous! I especially love how the quilting reinforces the idea of plaid.
Carol Ann Remmick
January 3, 2025 at 7:41 pmIt turned out beautiful
Joanne
January 3, 2025 at 9:14 pmThe quilt is stunning. And, your description of your selection of fabric, creation of design, construction methods, changes made, products used, etc. to complete this work of art is outstanding. I felt like I was by your side as you went through the entire process understanding each step you took. Thank you for sharing this with me.
JuneyG
January 31, 2025 at 8:57 amBreathtaking and beautiful…I want to hold it up to the light and examine each stitch. You did a masterful job.
Vineca Gray
March 7, 2025 at 7:19 amLove this! I am experimenting with almost clear crystal organza. Upcycling used burlap bags (from coffee farm) that are very coarse to the touch. I will add a top layer of this organza on those pieces. Still waiting for the coffee bags :)) Your beautiful work here is an inspiration to colour outside of the lines. Thank you!
QuiltCon Judging Results Are In- And They Win for Most Improved! – The (not so) Dramatic Life
March 14, 2025 at 1:54 am[…] Read more about triple silk translucence […]
Candace
March 17, 2025 at 8:15 pmThanks for sharing your process on how you made these quilts. Your quilt are stunning! I follow your newsletter regularly. I love reading about all the quilt challenges to work on and complete. Some of them interest me enough I would like to perhaps try them myself. Would it be possible to find out the perameters for some of the quilt challenges you take part in?