National Yo-Yo Day is every June 6th, and I think the best way a quilter can celebrate (unless you are also a master of the yo-yo arts) is to create fabric yo-yos to incorporate into one of your sewing projects.
Yo-yos are easy, fun projects, perfect to carry along with you on your Summer travels or when waiting for an appointment. I made my first extensive batch of yo-yos during a power outage. They work beautifully with scraps and don’t require any special equipment, so let’s dive into the process!

Making Fabric Yo-Yos
Supplies:
The supply list is short, and if you quilt or sew, you most likely already have everything on hand!
- Scraps of fabric 2” x 2” or larger
- Hand sewing needle
- Thread that coordinates or blends with the yo-yo fabric color
- Circle templates approximately twice the diameter of the desired finished yo-yo size (See template section below)
- Fabric pen or pencil to trace the templates
- Scissors
You can buy specific yo-yo templates, guages, and guides to help refine your stitch placement, but today we are going to use what we have on hand to start our yo-yo-making journey.
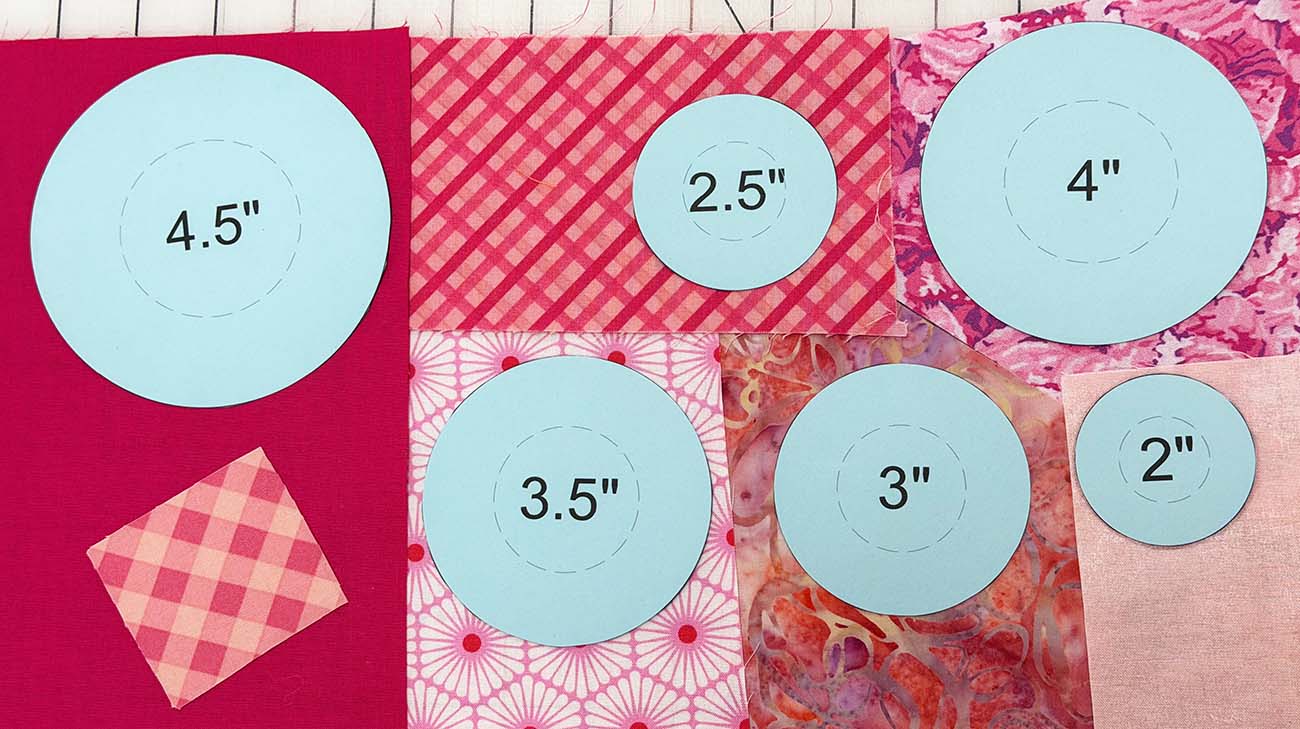
Templates
Any circle will work for a yo-yo template, so raid your sewing space and kitchen to find almost any size you want to work with. Cups, saucers, and any round containers are just waiting to become a yo-yo template! Remember that the edges of the circle are cinched into the center, making the size of the finished yo-yo approximately half the diameter of the cut circle.
You can also use circle template sets, circle cutters, or a cutting system like Accuquilt to cut your circles. You can also download this circle template file I made for you. Print the templates onto cardstock and cut them out to try several different yo-yo sizes.
Fabric Selection
Raid your scrap bin to start making yo-yos! Since each one only takes a bit of fabric, they are a great way to use all of your fun leftovers. Any fabric can be used, but quilting cotton and similar-weight fabrics work well, especially if you are making your first yo-yos. Once you get the hang of it, try silk, linen, and other substrates.
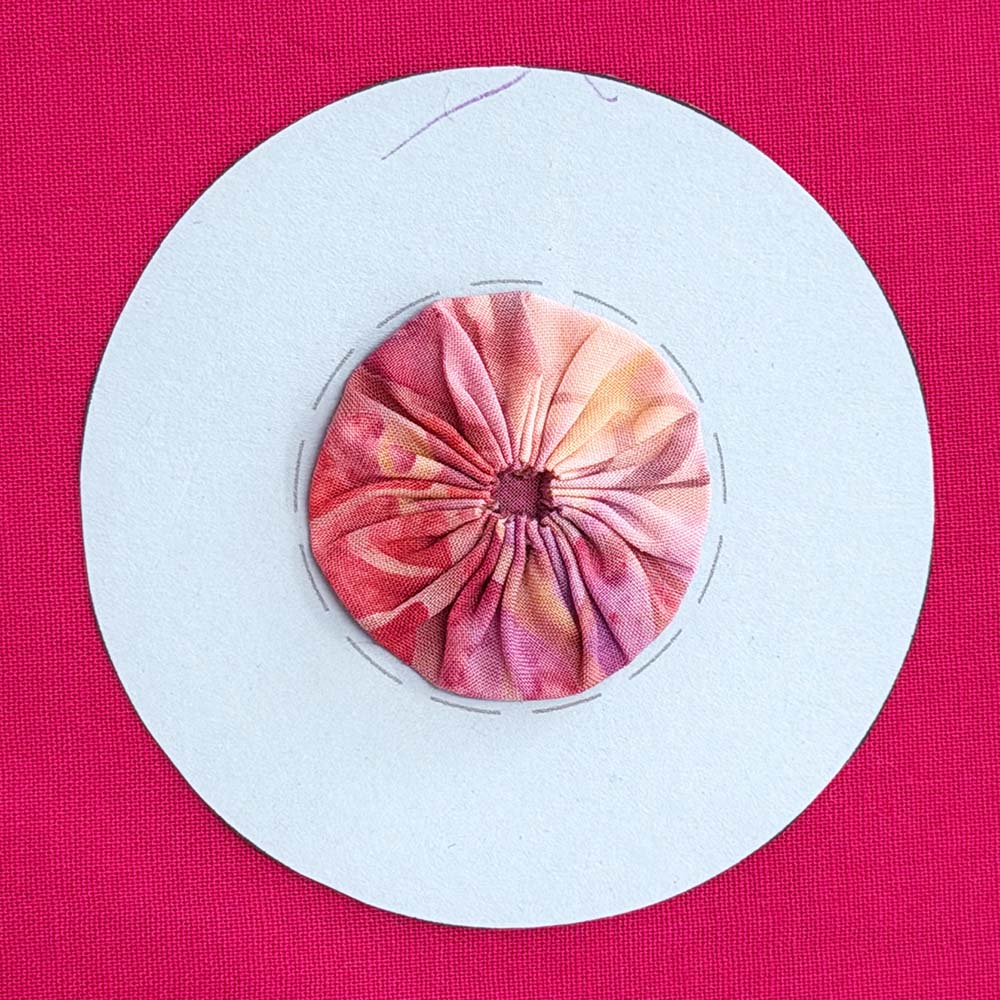
The sample fabrics are standard quilting cottons, but their weights vary somewhat from piece to piece. The 2” circle is Grunge, the 3” circle is batik, and the 4” circle is a Spoonflower print.
Stitching a Yo-Yo
Trace your circle template onto a fabric scrap and cut out the circle.
Cut a length of thread more than double the circumference of the cut circle, fold it in half, and feed the cut ends through the eye of the needle to create a doubled thread. I suggest running your thread through thread gloss or wax at this point to reduce the likelihood of tangling during stitching. Knot the folded end of the thread.
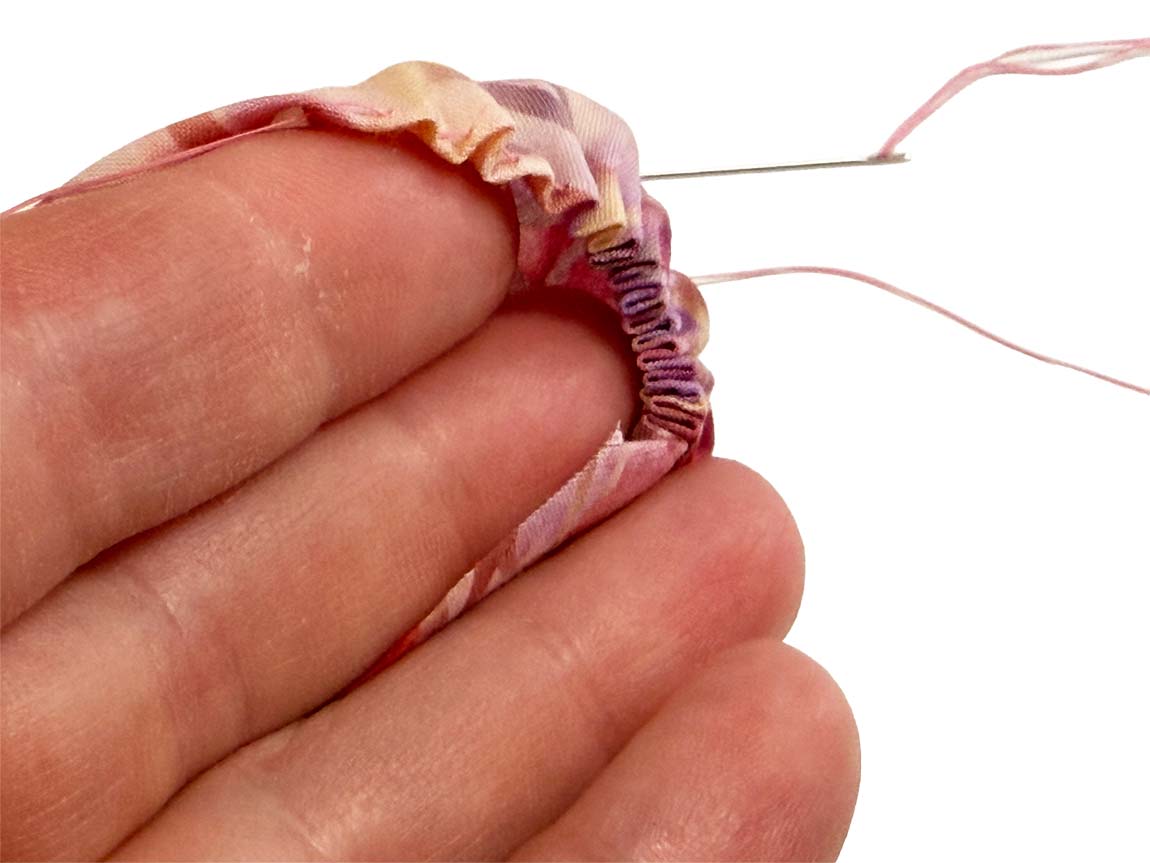
Approximately 1/8” away from the cut edge of the circle, insert your needle through the fabric from the wrong side to the right side and pull the thread through to the knot.
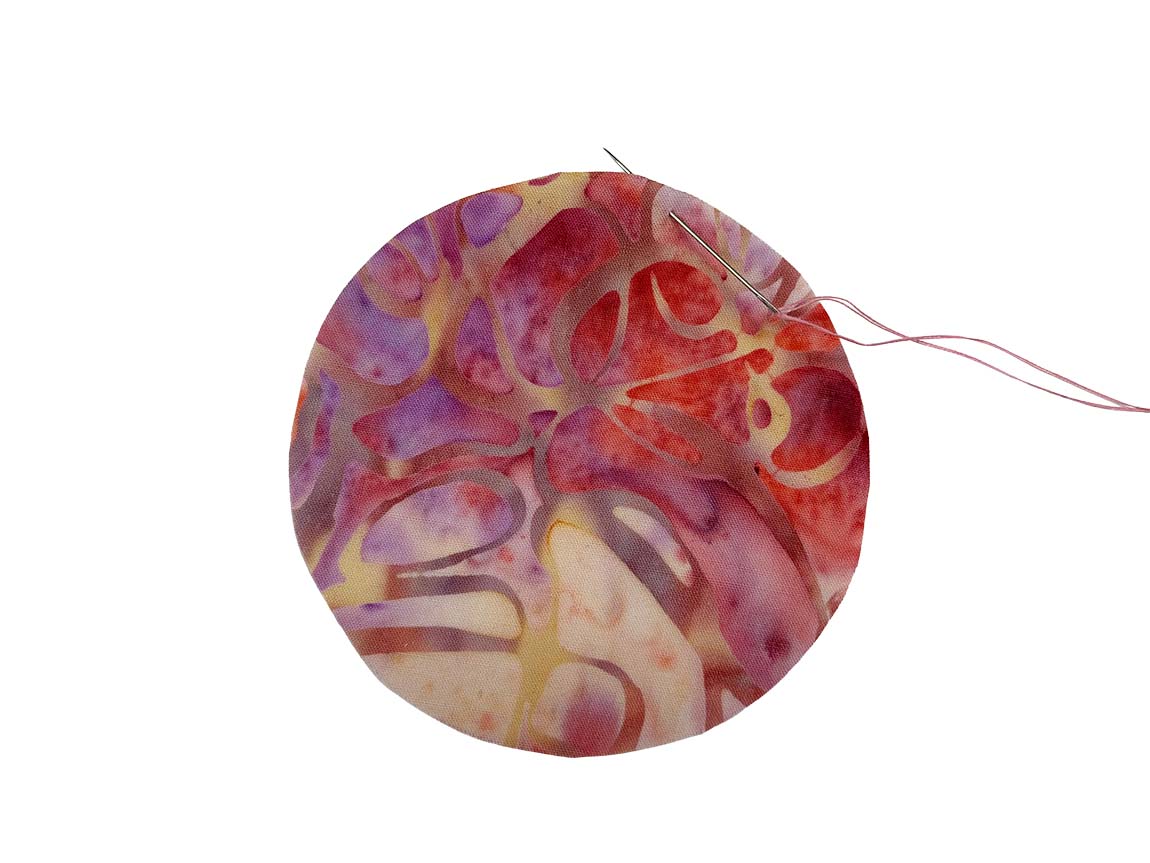
Start stitching around the circle at the point of the knot, using an even straight stitch around the edge of the circle and folding the cut edge in approximately 1/8” as you sew. I suggest starting with stitches a bit longer than 1/8”, but you may need to adjust the length depending on the size of your yo-yo and the thickness of your fabric.
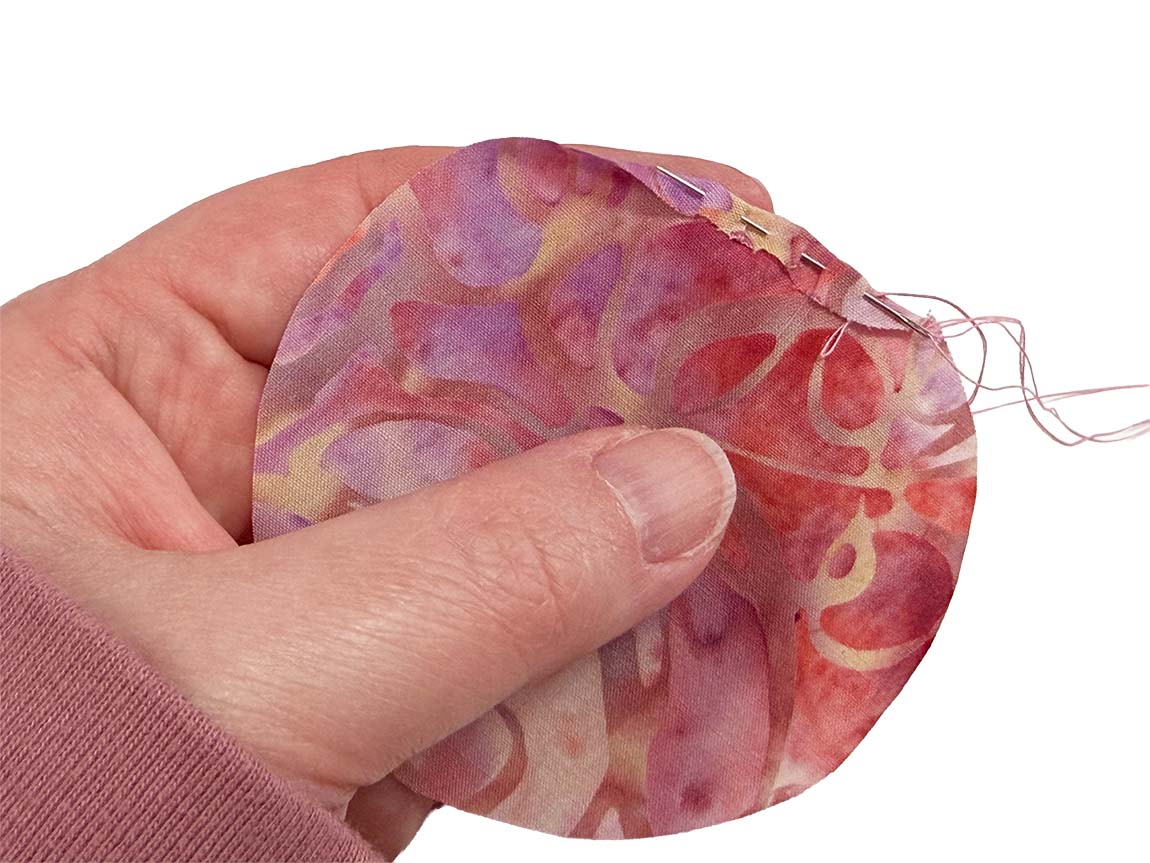
You can begin pulling the thread tighter as you sew to gather the yo-yo edges toward the center of the circle. Even stitches will result in even fabric gathers.
As you approach the end of the stitching, adjust your stitch length slightly in the last few stitches so the final stitch will end with the thread coming out of the right side of the fabric. To help secure the stitching, stitch back through the first 3-4 folds in the fabric.
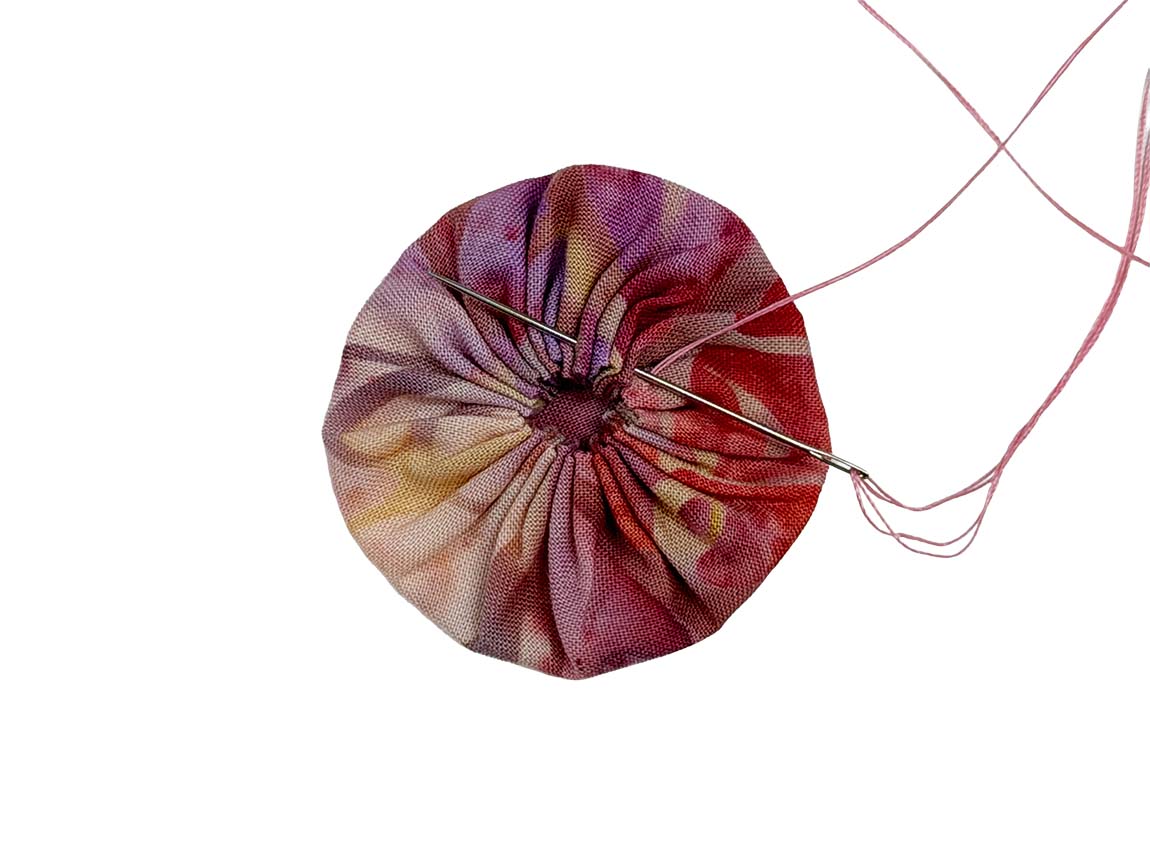
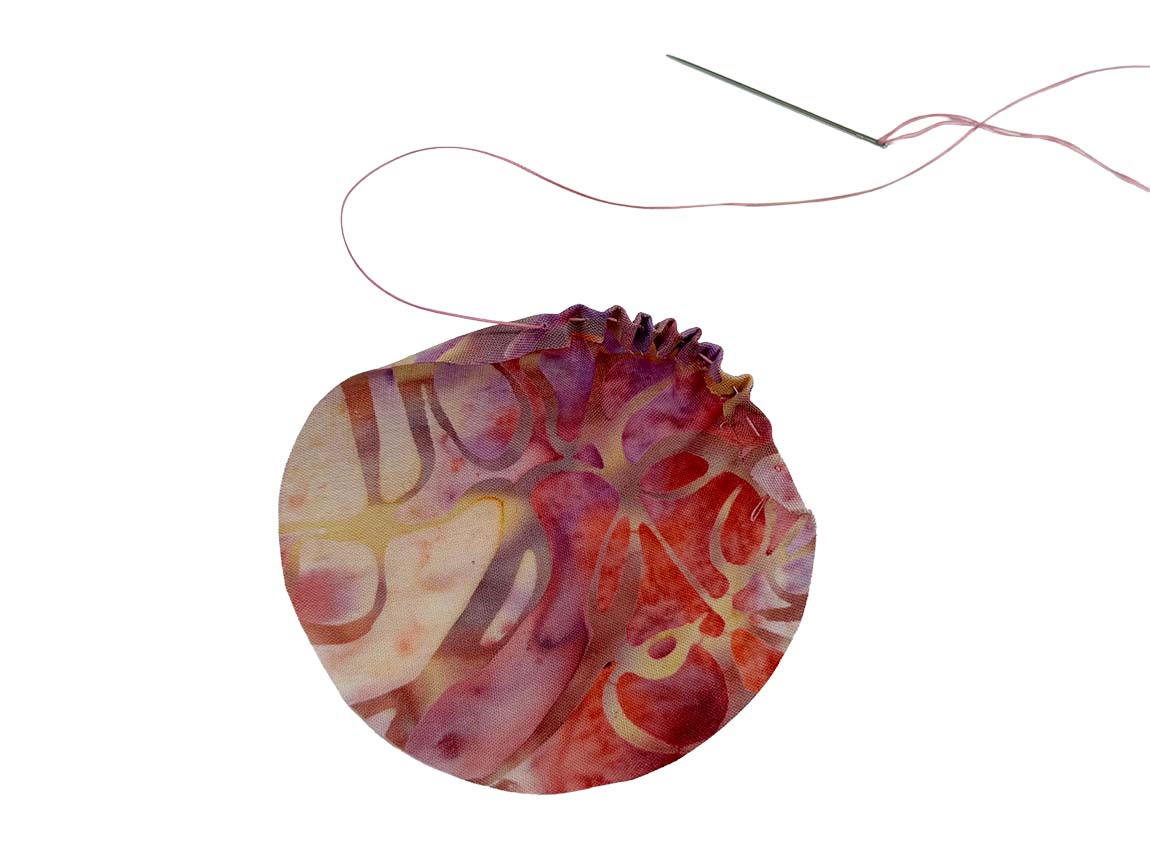
Knot the thread between two folds in the fabric.
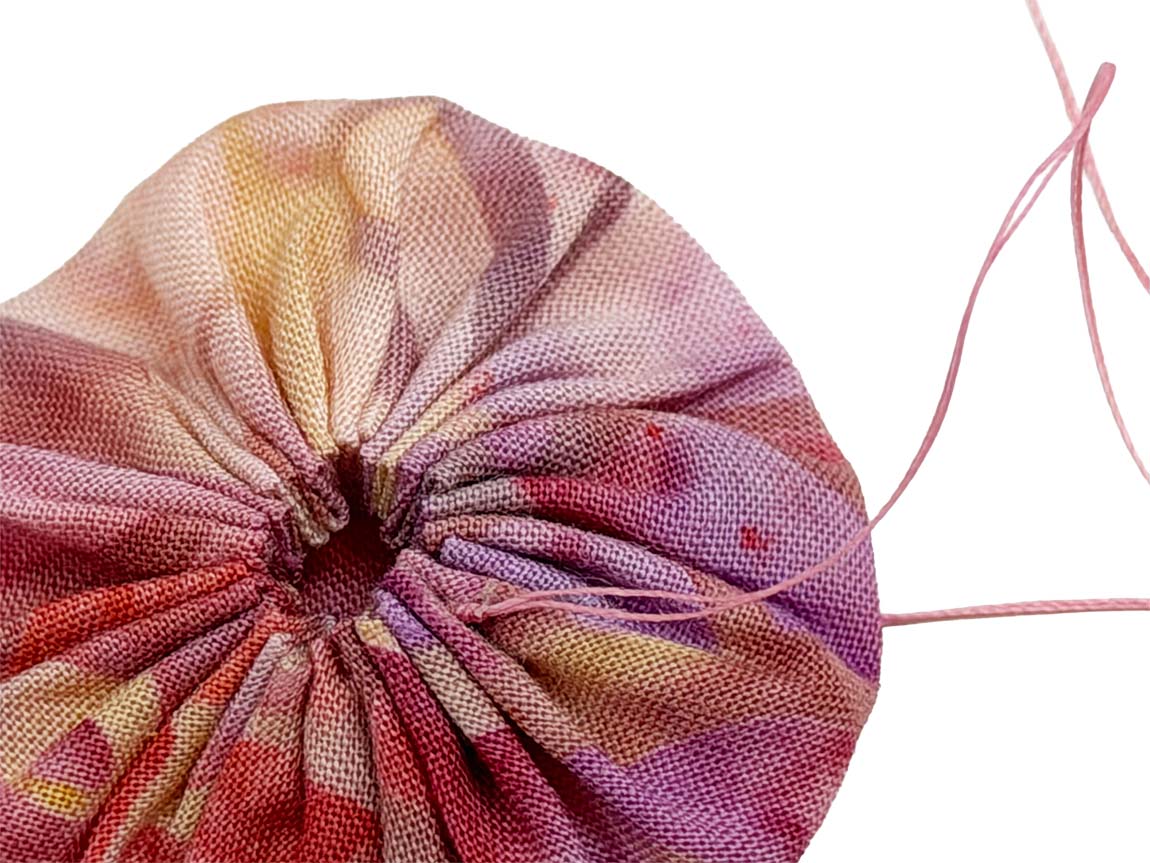
Stitch through another 3-4 folds in the fabric to bury the thread tail and clip the thread.
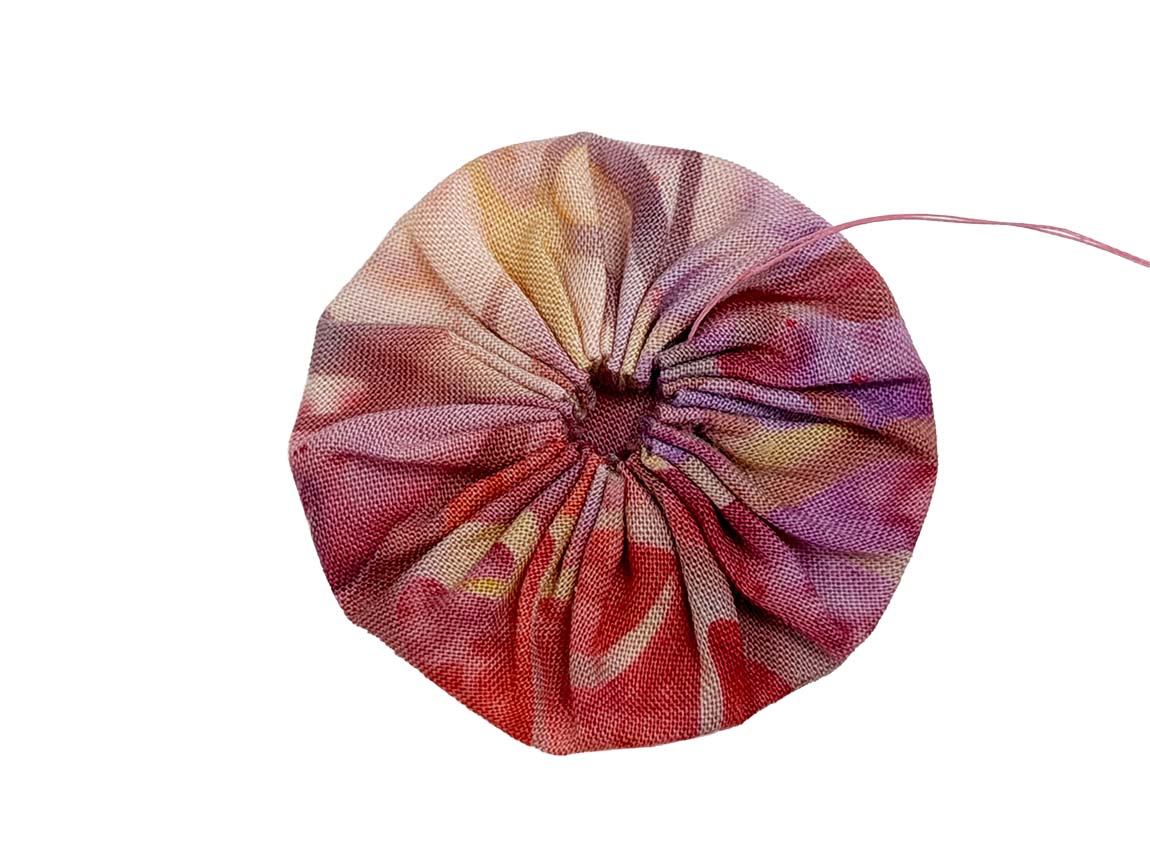
Your finished yo-yo will be approximately half the size of the original cut circle. The exact size will depend on exactly how much fabric you turned under at the cut edge of the circle and the length of your stitches.
Stitch Length
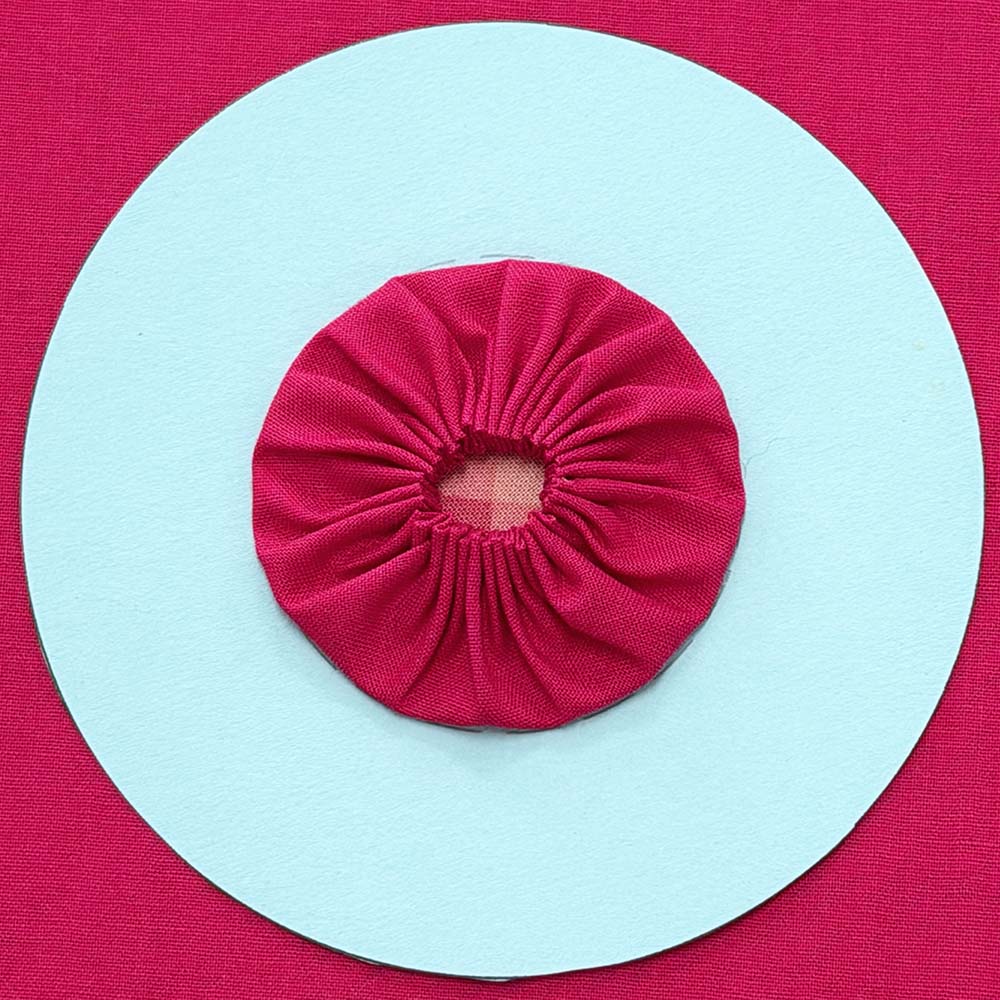
The perfect stitch length for fabric yo-yos is a balancing act. If your stitches are too long, the overall yo-yo will appear less circular. If the stitches are too short, you will have more gathers in the center of your circle. Since each gather includes four layers of fabric, this creates bulk, resulting in a bigger gap in the center of your circle.
Larger circles almost always end up with a gap in the center of the circle, so you can use this to your advantage by fusing a small circle of contrasting fabric to the center of the wrong side of the larger circle.
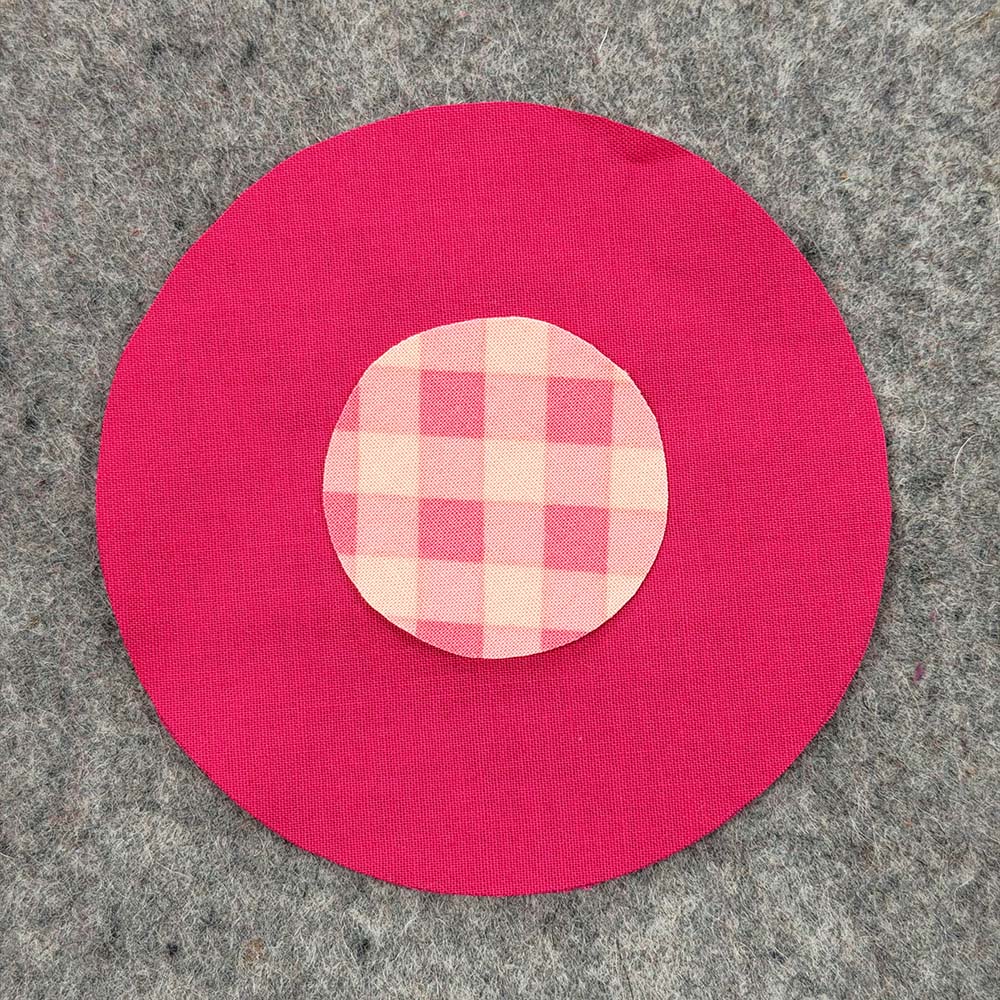
When you gather the edges in, the contrasting fabric will peek through the center of the yo-yo.
What Do You Do With Your Yo-Yos?
If you want the full effect, you can sew yo-yos directly to one another to create a coverlet or a garment like this stunning dress by Bianca Springer.
Rachael of @bluemountaindaisy is bound to inspire you with her quilts using large-scale yo-yos. She even pieces the yo-yo fabrics to achieve specific effects!
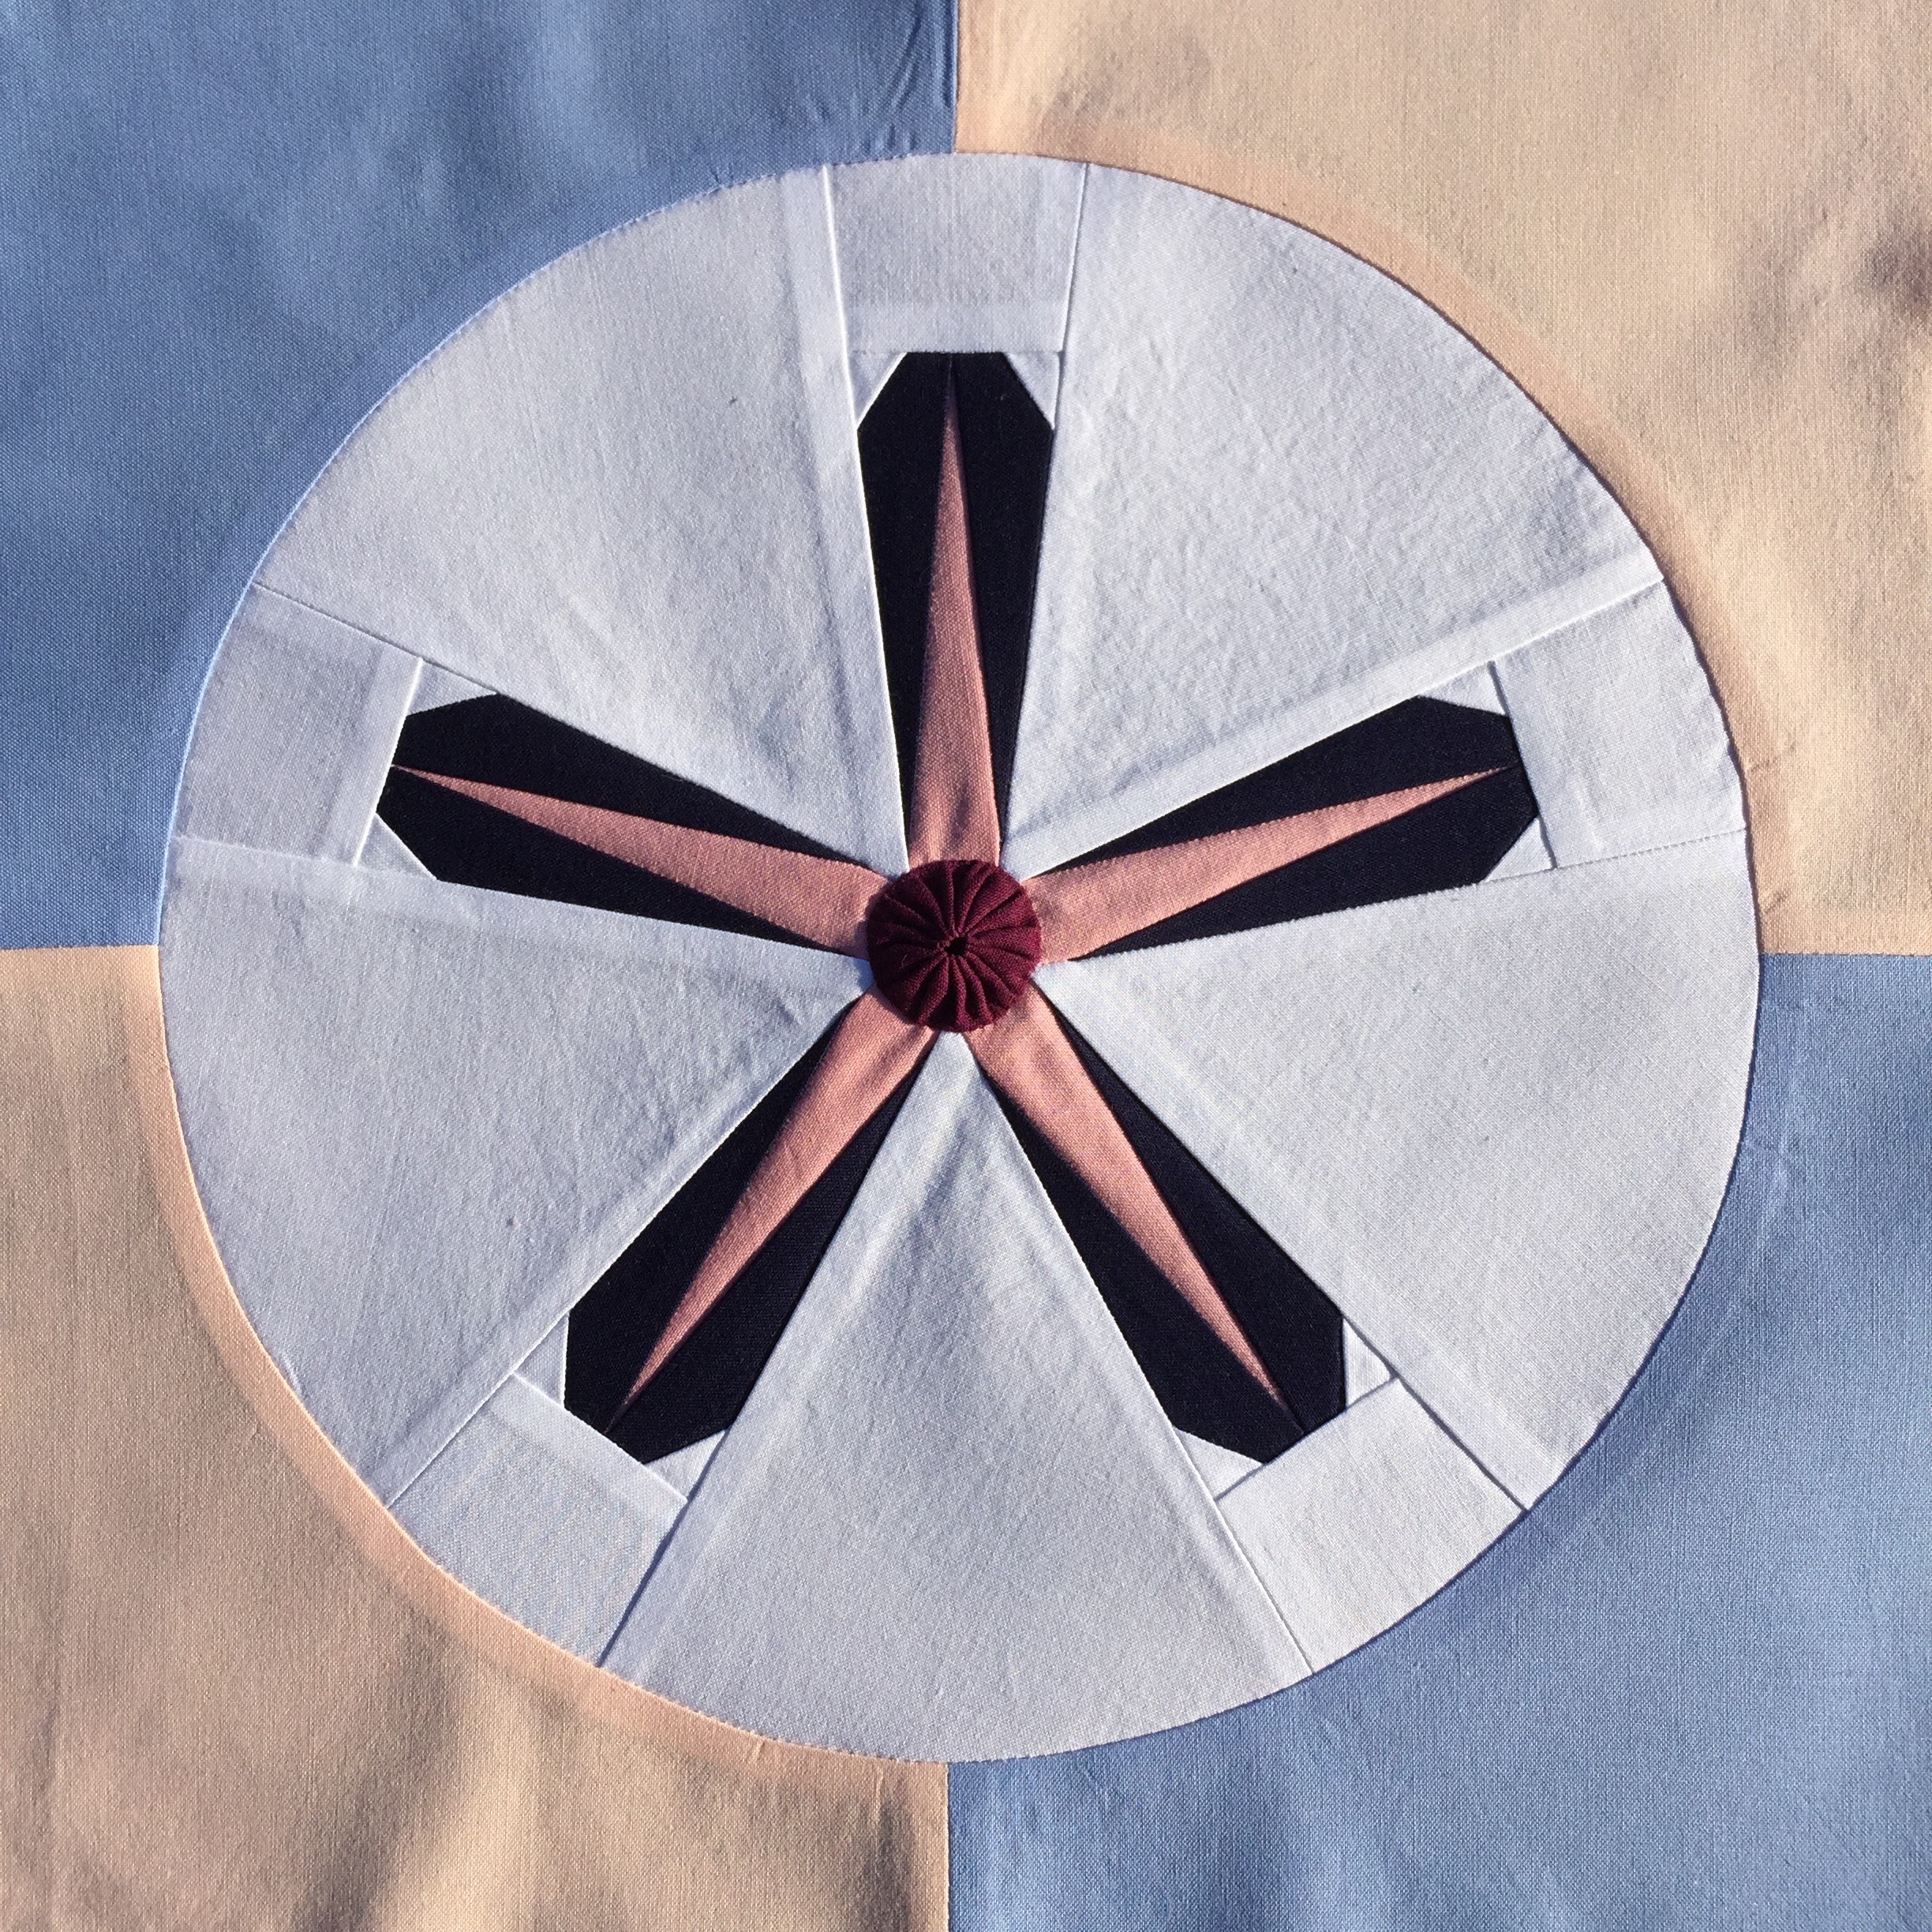
I used a single yo-yo to finish off my Sand Dollar Star quilt block pattern.
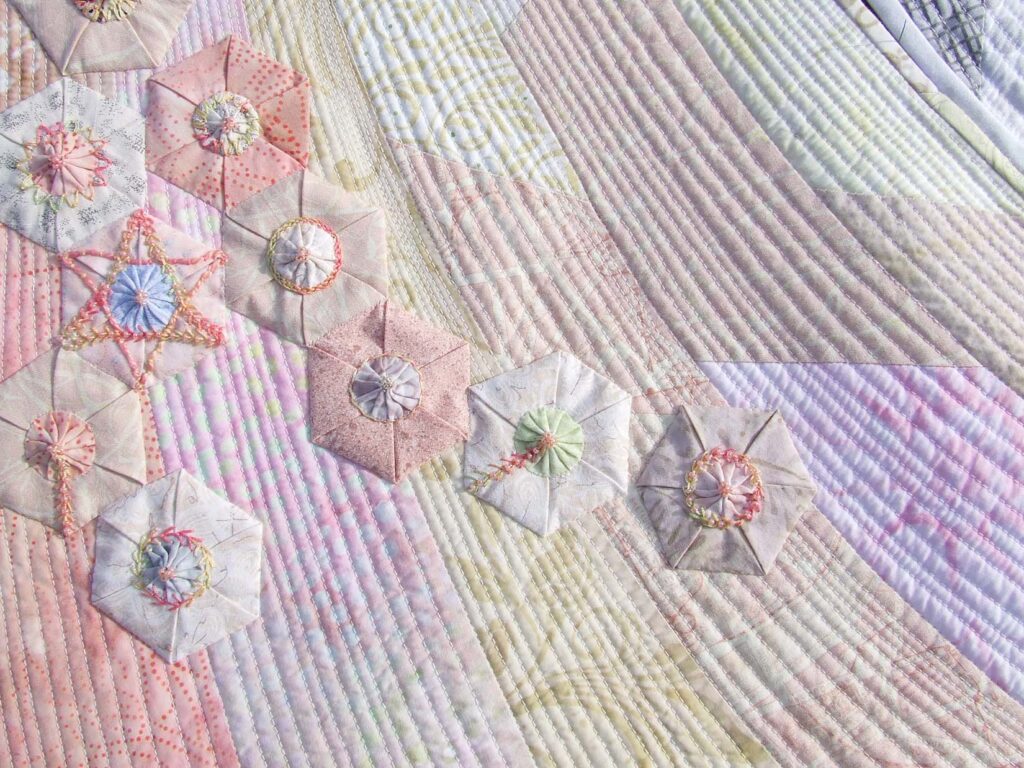
I also sprinkled folded hexagons with yo-yo centers across this potholder quilt to create a sense of petals blowing in the wind.
What will you use yo-yos to create?


No Comments