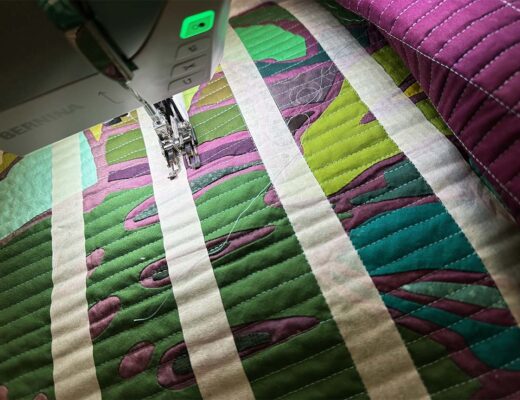
Who loves straight-line quilting? It’s one of my go-to quilting methods, and I love to do it with a walking foot on my domestic machine.
Basting is a key element to the success of straight line quilting, and over the course of dozens (or hundreds) of quilts, I have found a technique that works well for me. Are there other methods? Yep. This is the one that works for me.
Basting Types
There are lots of ways to baste a quilt. I was taught thread basting as a kid, first learning to quilt. Pin basting and basting with various adhesives are now options, too.
This tutorial is for pin basting. Specifically, I cover how I pinbaste when I’m planning to do straight-line quilting. This process also works for free motion quilting, but you will omit marking stitching lines.
Someone is already itching to tell me that I should spray baste. I don’t spray-baste quilts. If I use a spray baste for a small, quilting adjacent project, I do it outdoors and wear a respirator (one with appropriate cartridges- not an N95). If you spray baste, please carefully read and consider all instructions and health information for your spray product. I have a health history that makes spray-basting an undesirable choice, so I avoid it, and definitely would never use it indoors or without a respirator. If you choose to spray-baste, always follow the instructions and never use it around other people.
Project Size
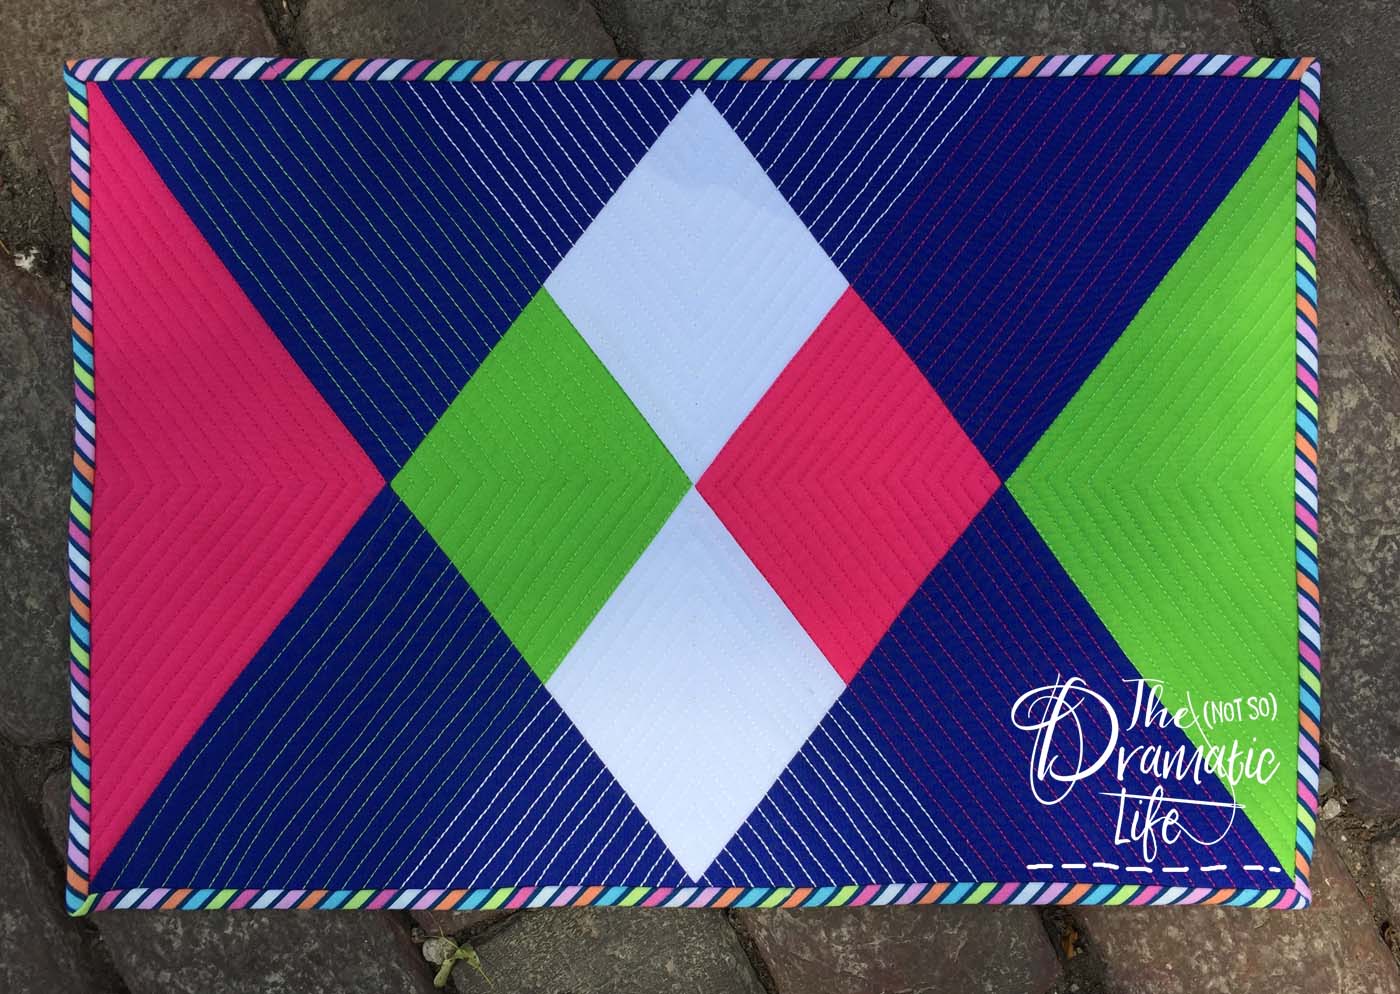
I own a longarm, so I use it to quilt some projects and baste others. I typically pinbaste anything about the size of one yard of fabric or smaller. This technique also works well for larger quilts if you need to pin-baste. For scale, the quilt I’m showing in this tutorial is about the size of a yard of fabric.
How to Pin Baste
(This post may include some affiliate links. If you click on an affiliate link and choose to make a purchase, I receive a small percentage of the sale at no cost to you. These funds help keep this blog running and programs like the Quilt Concert FREE for everyone!)
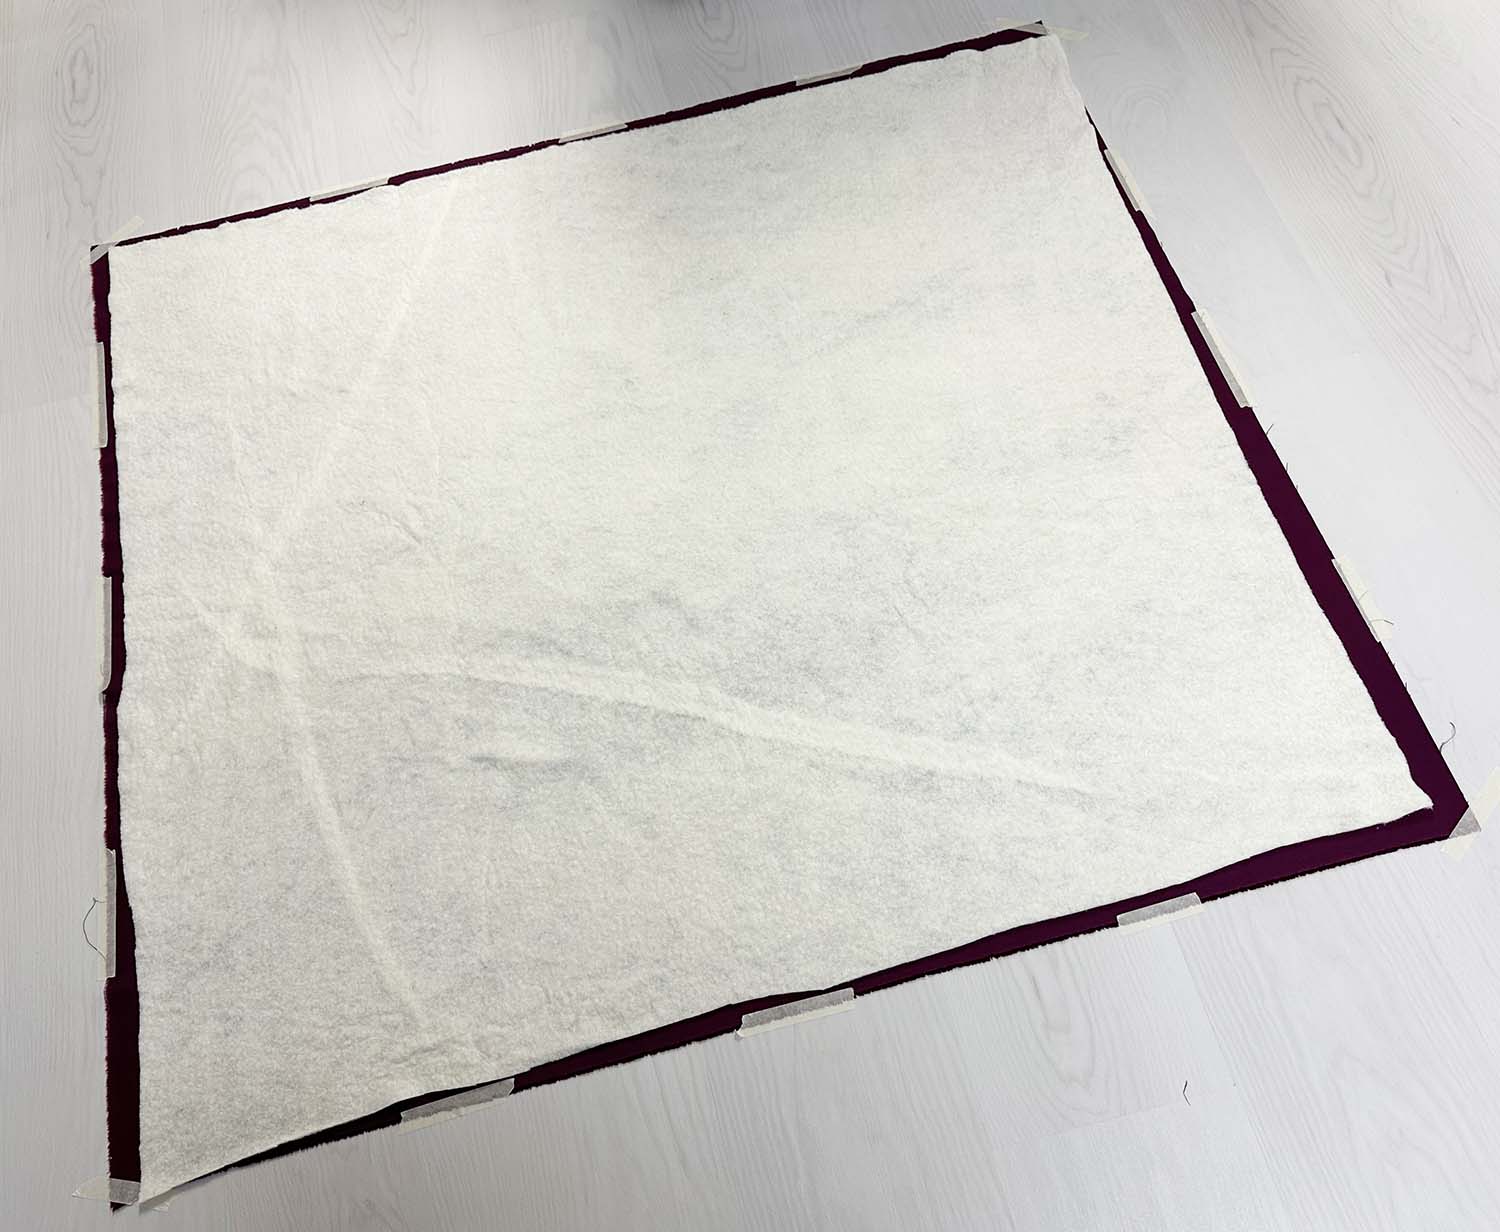
- Use a clean surface large enough to hold the quilt backing. For domestic machine quilting (or hand quilting), cut your backing fabric at least 2-3 inches larger than your quilt top on each side. That means your backing should measure 4-6 inches longer and wider than your quilt top.
- With the right side of the backing fabric facing down, lay the backing on your clean surface. Smooth the fabric and use masking tape to tape down the corners. The fabric should lay flat without any indications of pulling.
- Tape along the edges of the backing to help keep it in position during the basting process.

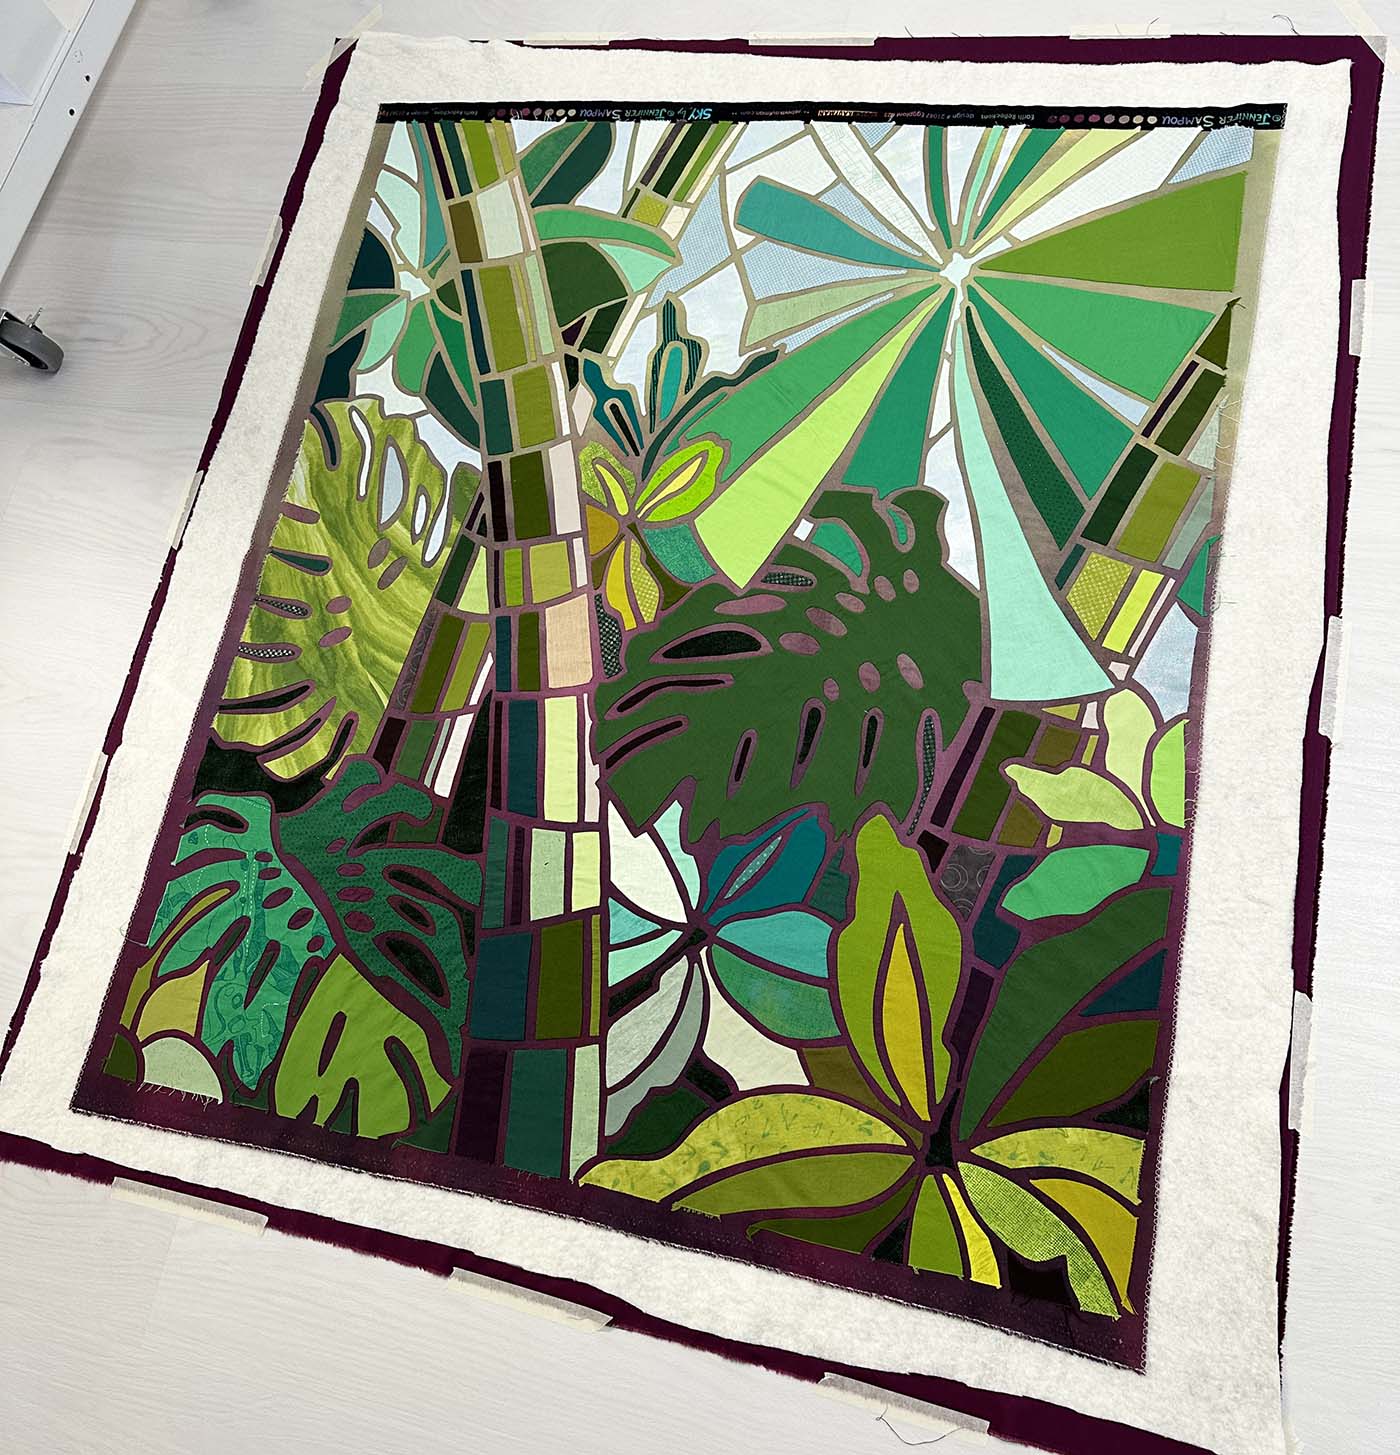
4. Position the batting on the backing fabric. Cut the batting slightly smaller than the backing fabric. Typically, 1 inch smaller on each side works well. Make sure the batting is smooth. If you have a batting that has a front and back, make sure the front is facing up. I am using Hobbs 80/20 Cotton/Wool blend for this quilt, which has no front and back.
5. Position your quilt top on the batting. Try to keep it close to the center of the backing and batting. Ensure it is smooth and that any seams and edges are as straight and square as possible. A little extra fussing at this stage of the process can save a lot of struggles later.
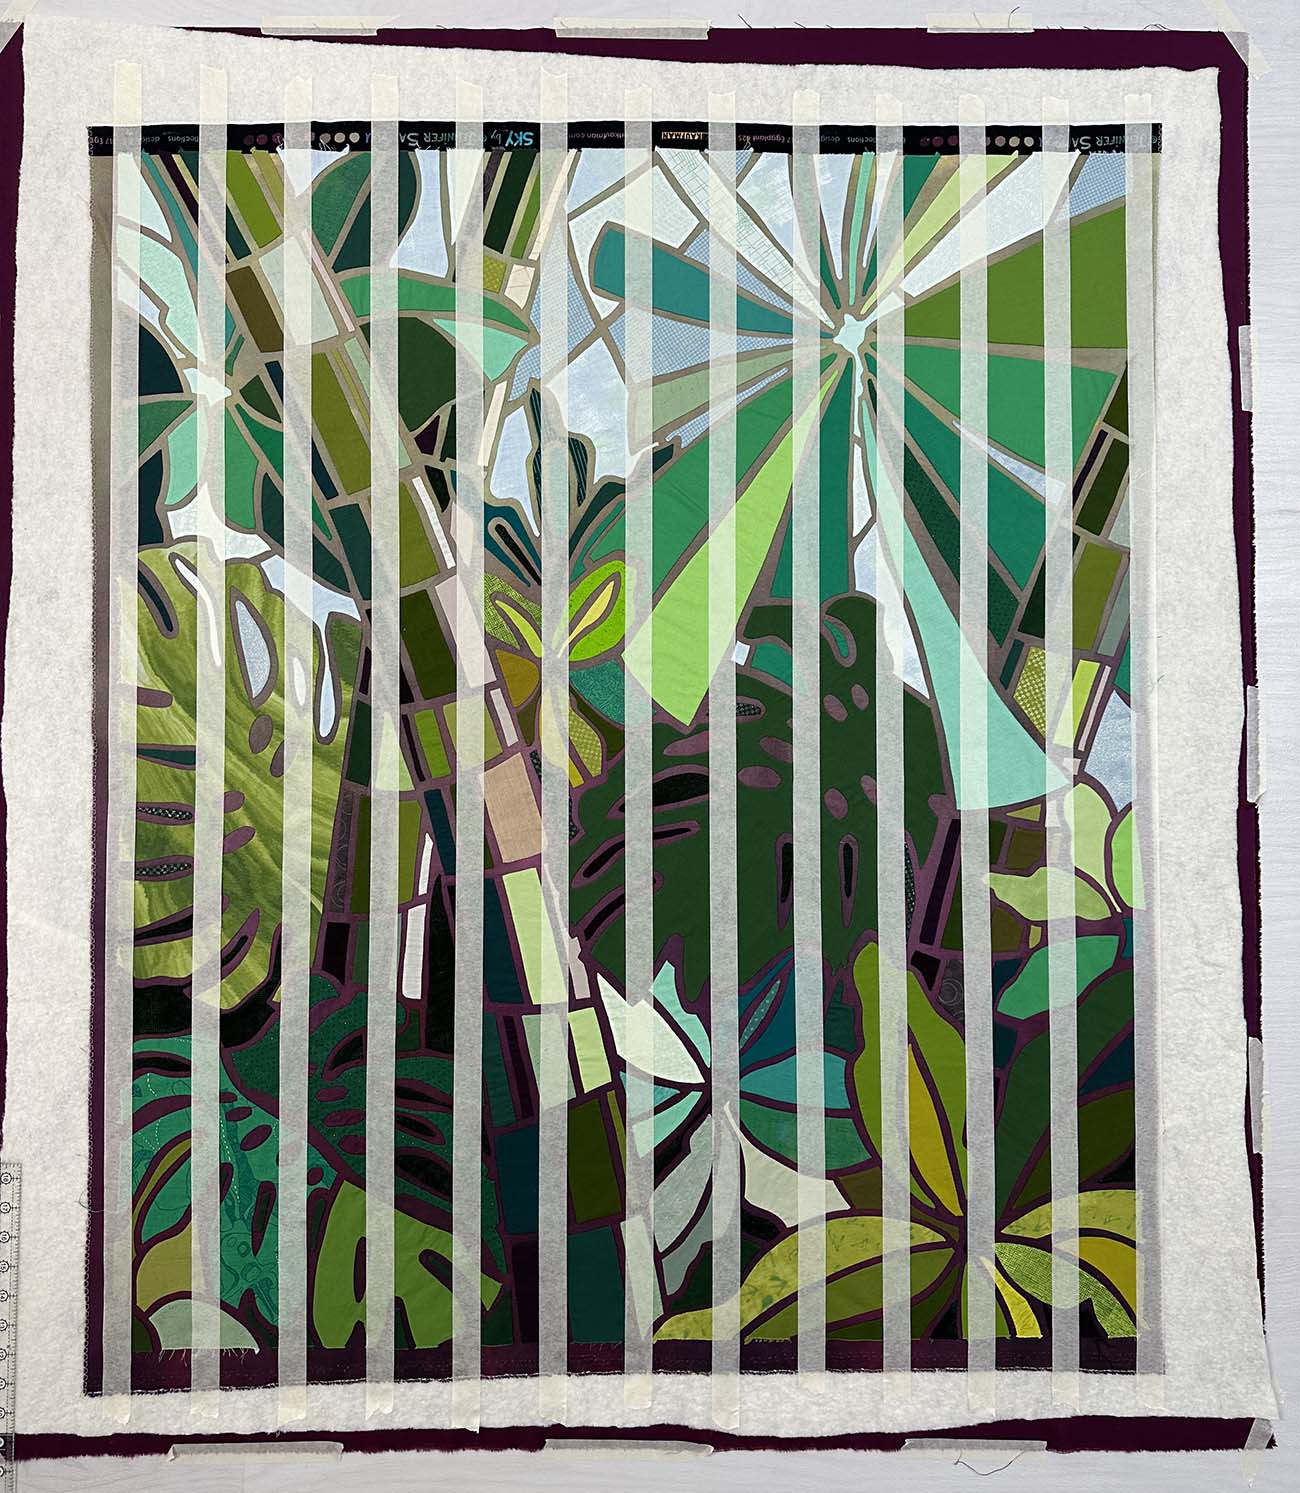
6. Position a long ruler near the quilt’s center in the direction you will start quilting your lines. (Omit steps 6-8 if you are not doing straight-line quilting.) Using a large square ruler in the corner of your quilt top can help you place the first vertical or horizontal quilting line so that it doesn’t slant in an undesirable way. For a pieced quilt, sometimes a seam line can be used to help locate this first line.
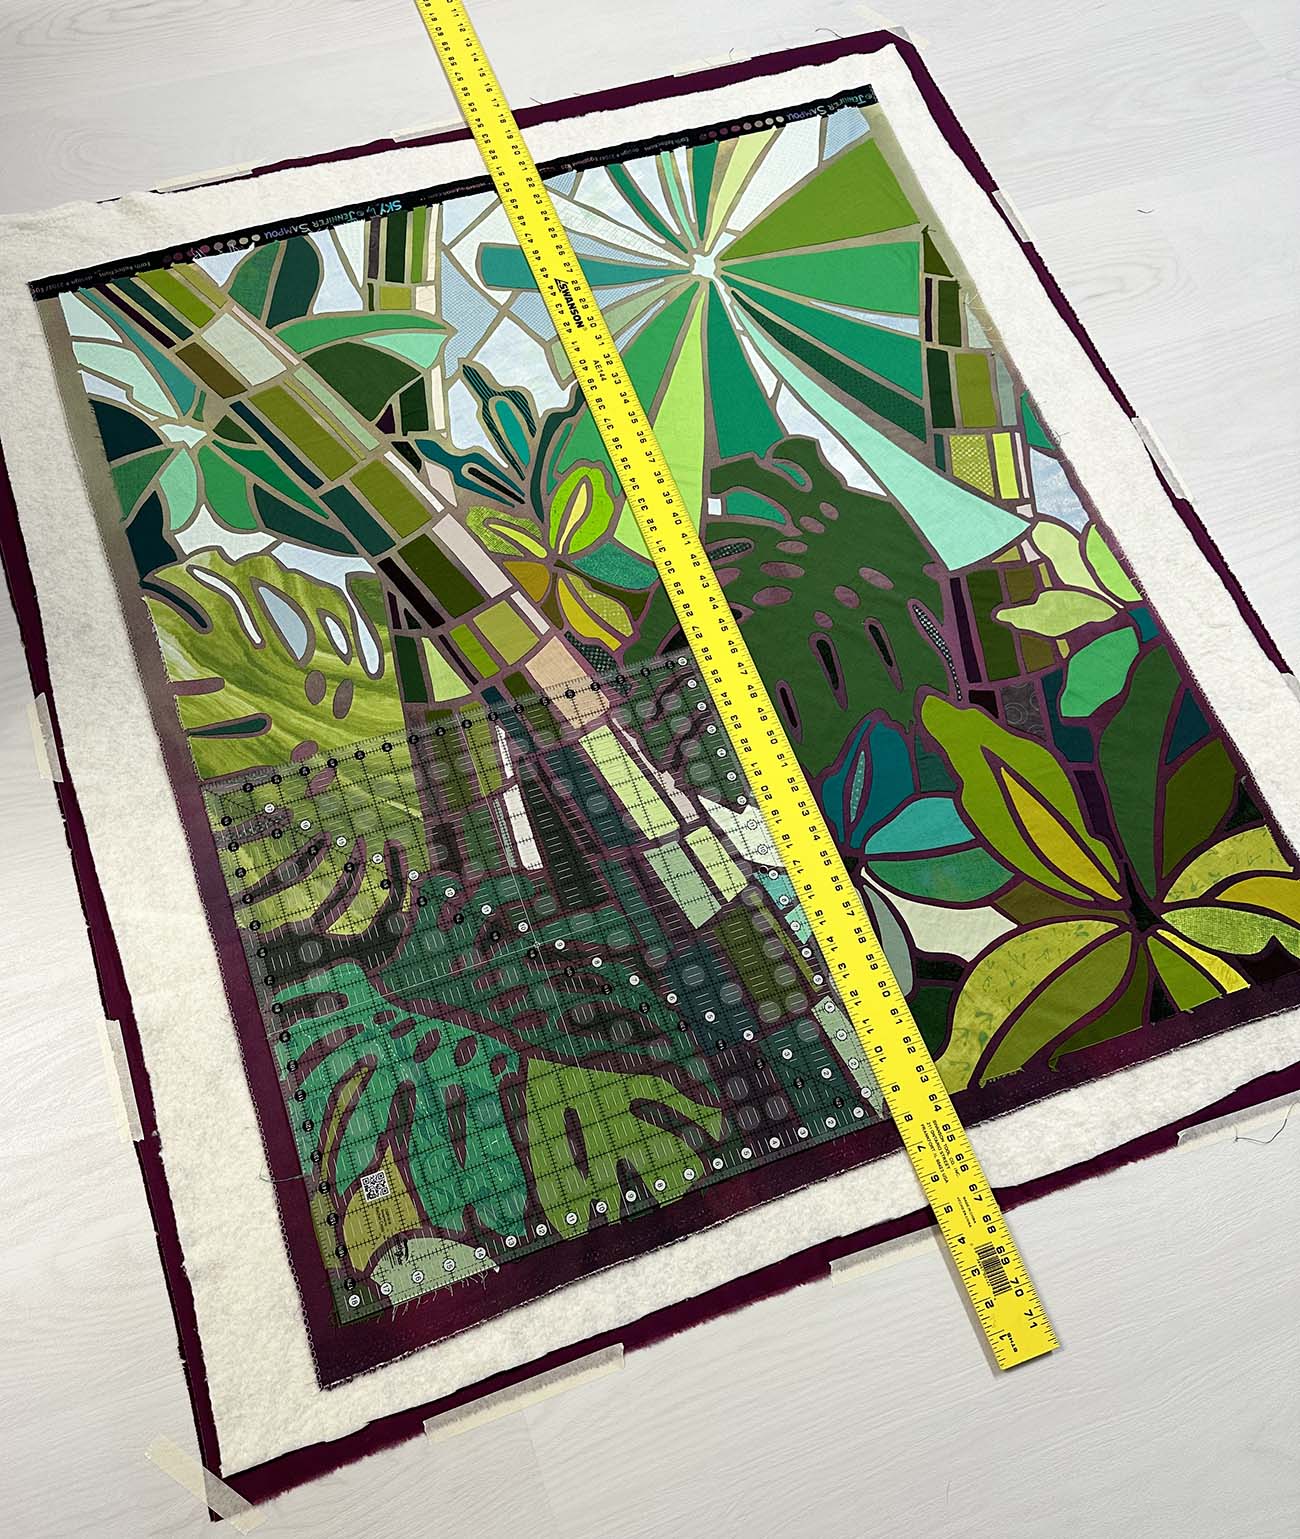
7. Place a piece of 1-inch wide masking tape along one side of the ruler. The ruler I use is 2 inches wide, which is perfect for how I do straight-line quilting, so I go ahead and place 1-inch wide tape on both sides of the ruler. Then, I move the ruler to the other side of one tape line to tape the next row.
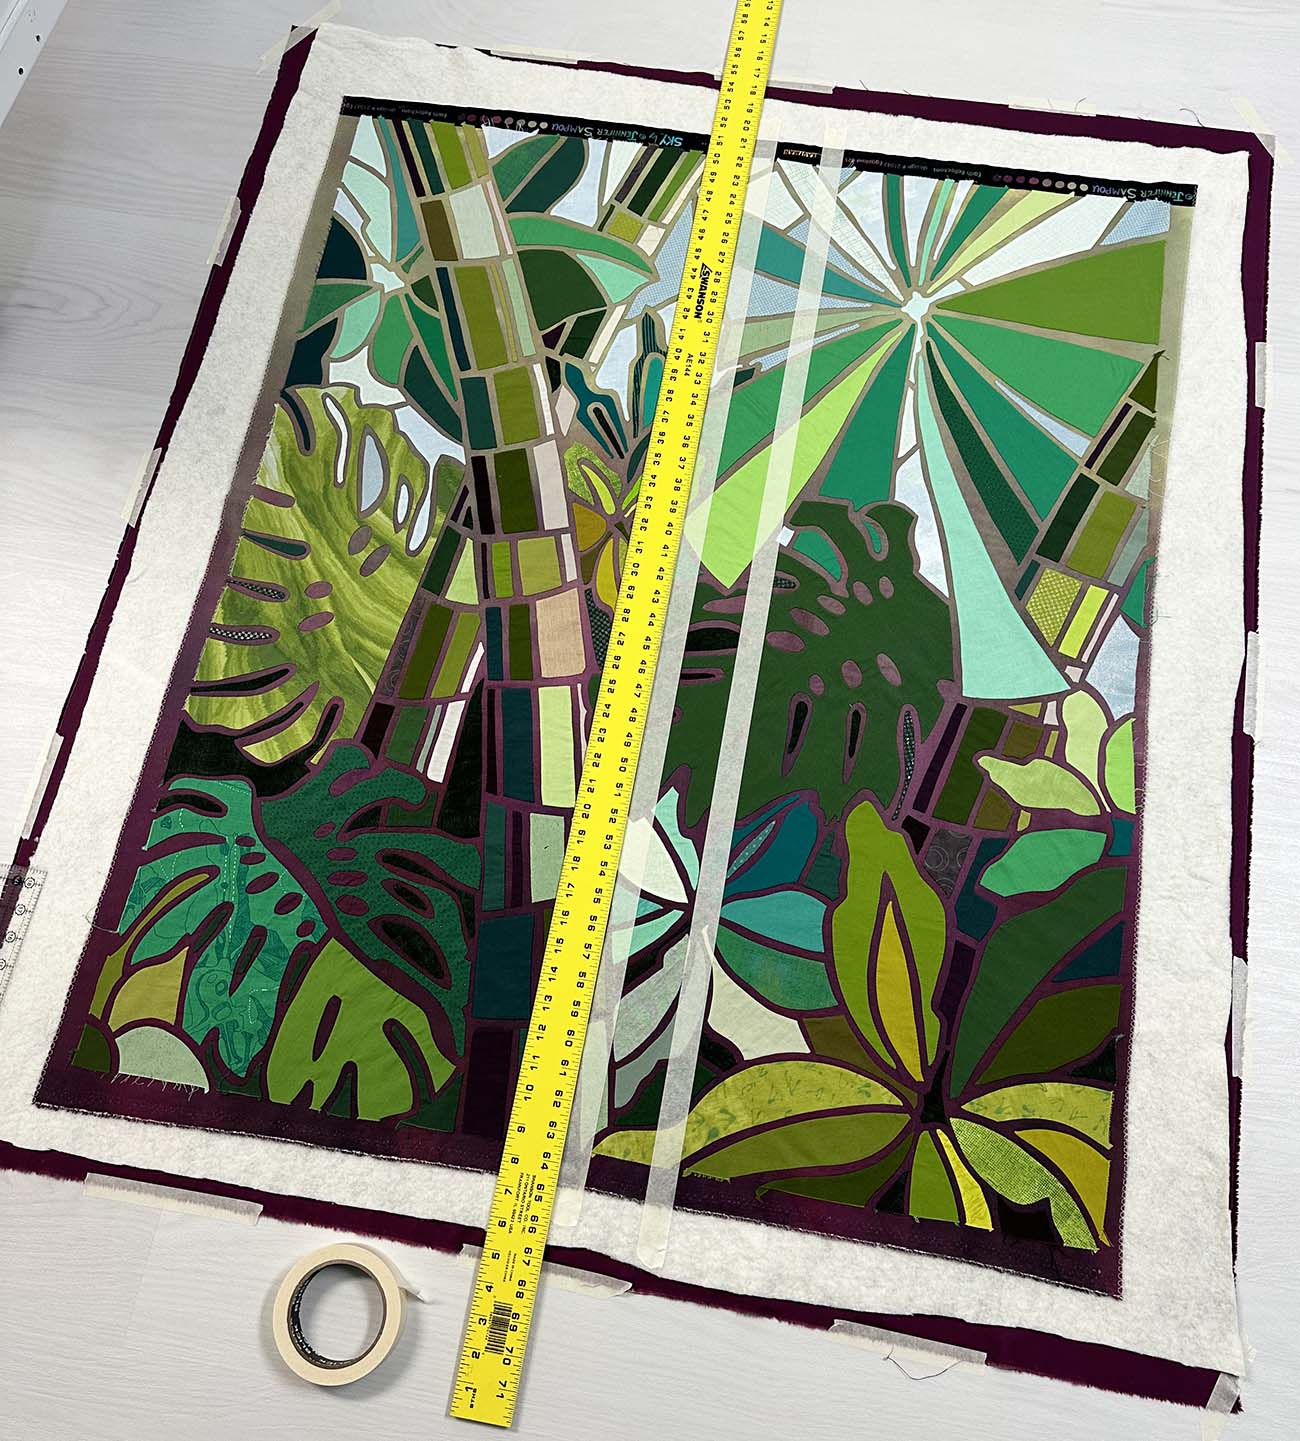
8. Work your way across the entire quilt top, using 1-inch wide tape lines alternating with 2-inch wide gaps. For this piece, I will quilt at 1/2-inch wide increments, so this is the best method to maintain straight lines. You may choose a different tape or gap width if you use different stitching increments.
Are you tempted only to mark the center line and then use the presser foot or guide for the remaining lines? Approach this method with caution! It is very easy to end up with quilting lines with a severe tilt by the time you reach the edges of the quilt!
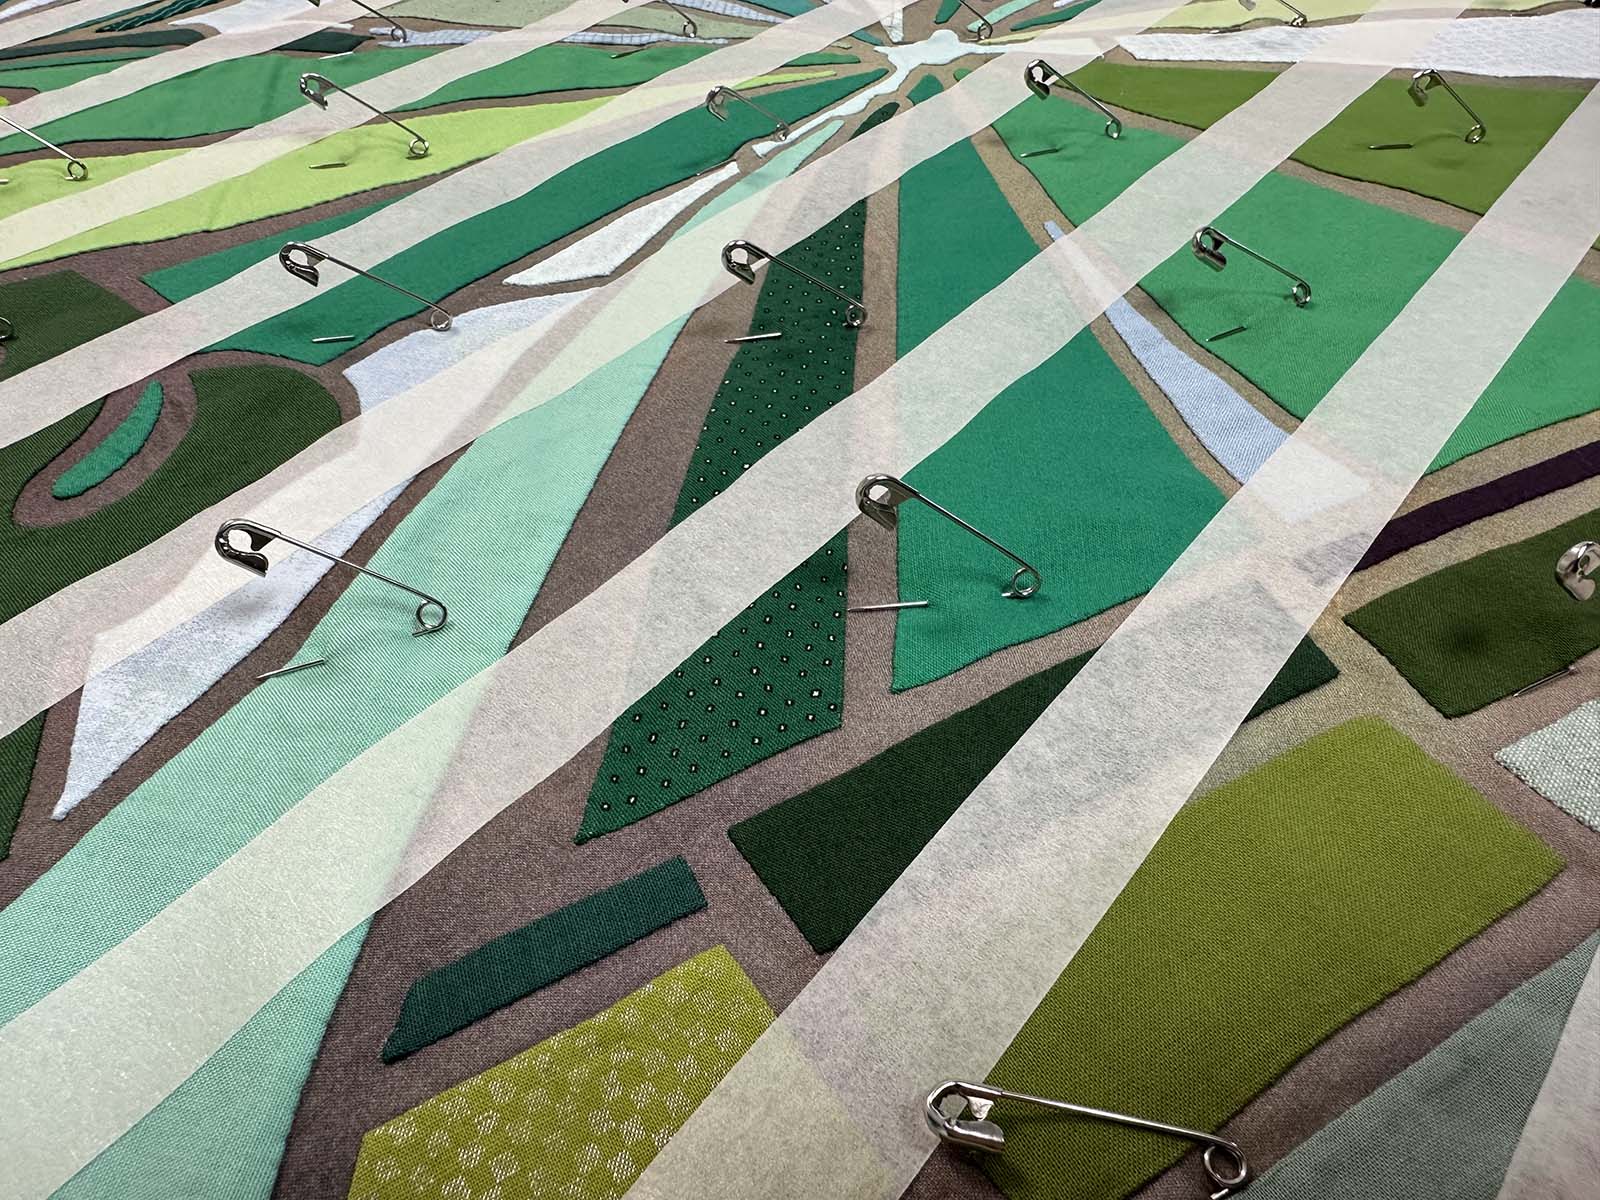
9. Pin the layers together. Start in the center of the quilt and safety pin a line out to each edge of the quilt both vertically and horizontally. Keep the pins relatively close together. I like to place the pins just far enough apart that I can place my palm between them. In the next gap row between tape lines, I position the pins halfway between the previous row’s pins. Leave the safety pins open at this point in the process.
Is this a lot of pins? Yes, but many pins help prevent your layers from shifting during quilting. I have never regretted putting in extra pins, but I have definitely regretted not putting in enough!
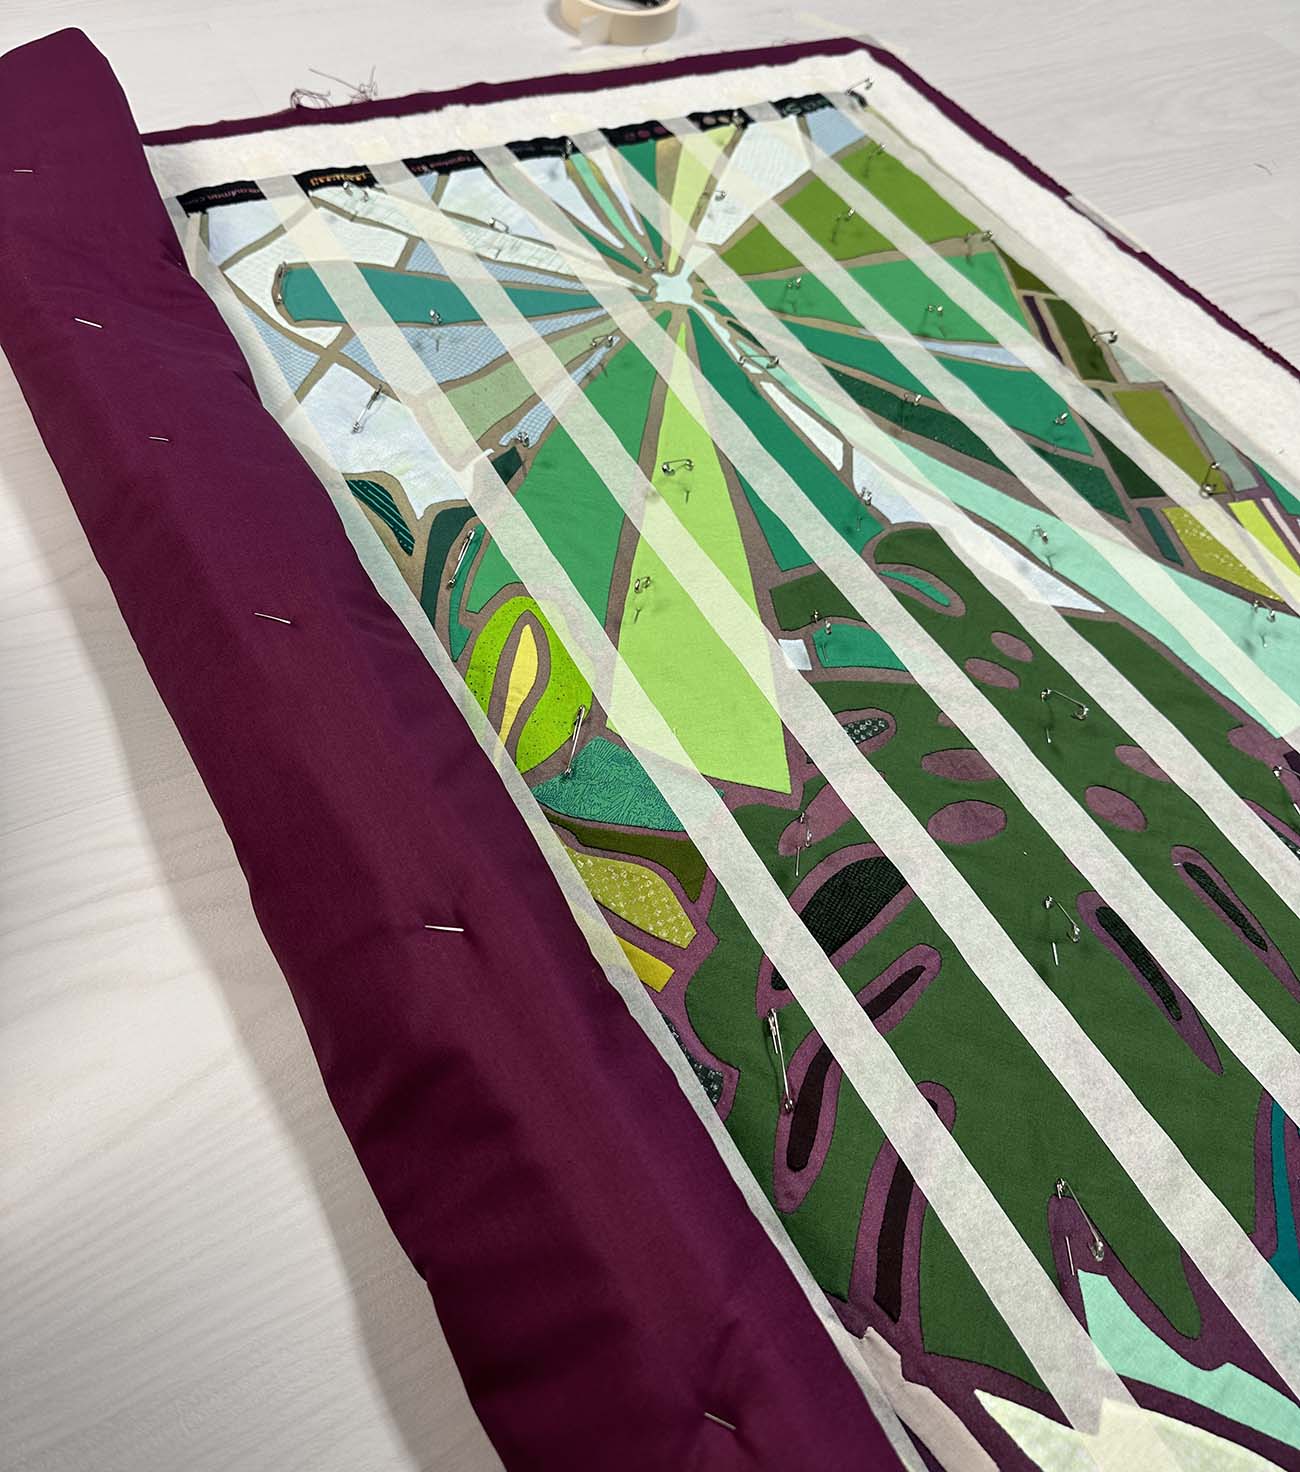
10. With everything pinned, pull the tape off of one side of the backing fabric. Peek under the quilt to make sure the pins have gone all the way through the quilt sandwich and everything looks smooth. Then start closing the safety pins along that edge of the quilt. Because the quilt sandwich is partially released from the basting surface, you can reach underneath the quilt to help close the pins more easily. (Yes, there are special tools for this, but this is the fastest and easiest method for me.)

11. As you close the pins, you can roll the quilt to make reaching the pins in the center of the quilt easier. Release the tape from the backing fabric as you move across the quilt, always pausing to look underneath the sandwich to make sure everything is smooth and pinned all the way through before closing the pins and rolling the quilt.
WooHoo! We are all pinned and ready to quilt!

2 Comments
Denise Smart
September 30, 2023 at 10:03 amCan you please tell me what kind of tape you are using? it doesn’t look like blue painter tape. Thanks
thenotsodramaticlifeadmin
October 5, 2023 at 3:53 pmIt’s an artist’s masking tape. It comes in lots of widths and is the perfect level of sticky- more than painter’s tape, but doesn’t leave a residue either!