Last week, I shared two easy techniques for creating flying geese quilt blocks that work every time. Each method offered sizing options to create blocks that did and did not require trimming at the end of the construction process. I even included a handy, downloadable chart of cutting measurements!
If you prefer the no-trim methods, then you are good to go! However, if you are like me and like the extra precision you can get from trimming your flying geese blocks, this post is for you!
Today, I am excited to share not just one but three different techniques for trimming Flying Geese Blocks, each with its unique advantages and disadvantages. This variety ensures a method for every quilter, regardless of style or preference.
The results are the same regardless of your chosen method, so let’s look at how each technique works. Stick around until the end to see why people with different quilting styles may all prefer a different method or tool.
(This post includes some affiliate links. If you click on an affiliate link and choose to make a purchase, I receive a small percentage of the sale at no cost to you. These funds help keep this blog running and content FREE for everyone!)
The Basics of Trimming Flying Geese Blocks
There are two critical elements to accurate trimming of Flying Geese Blocks:
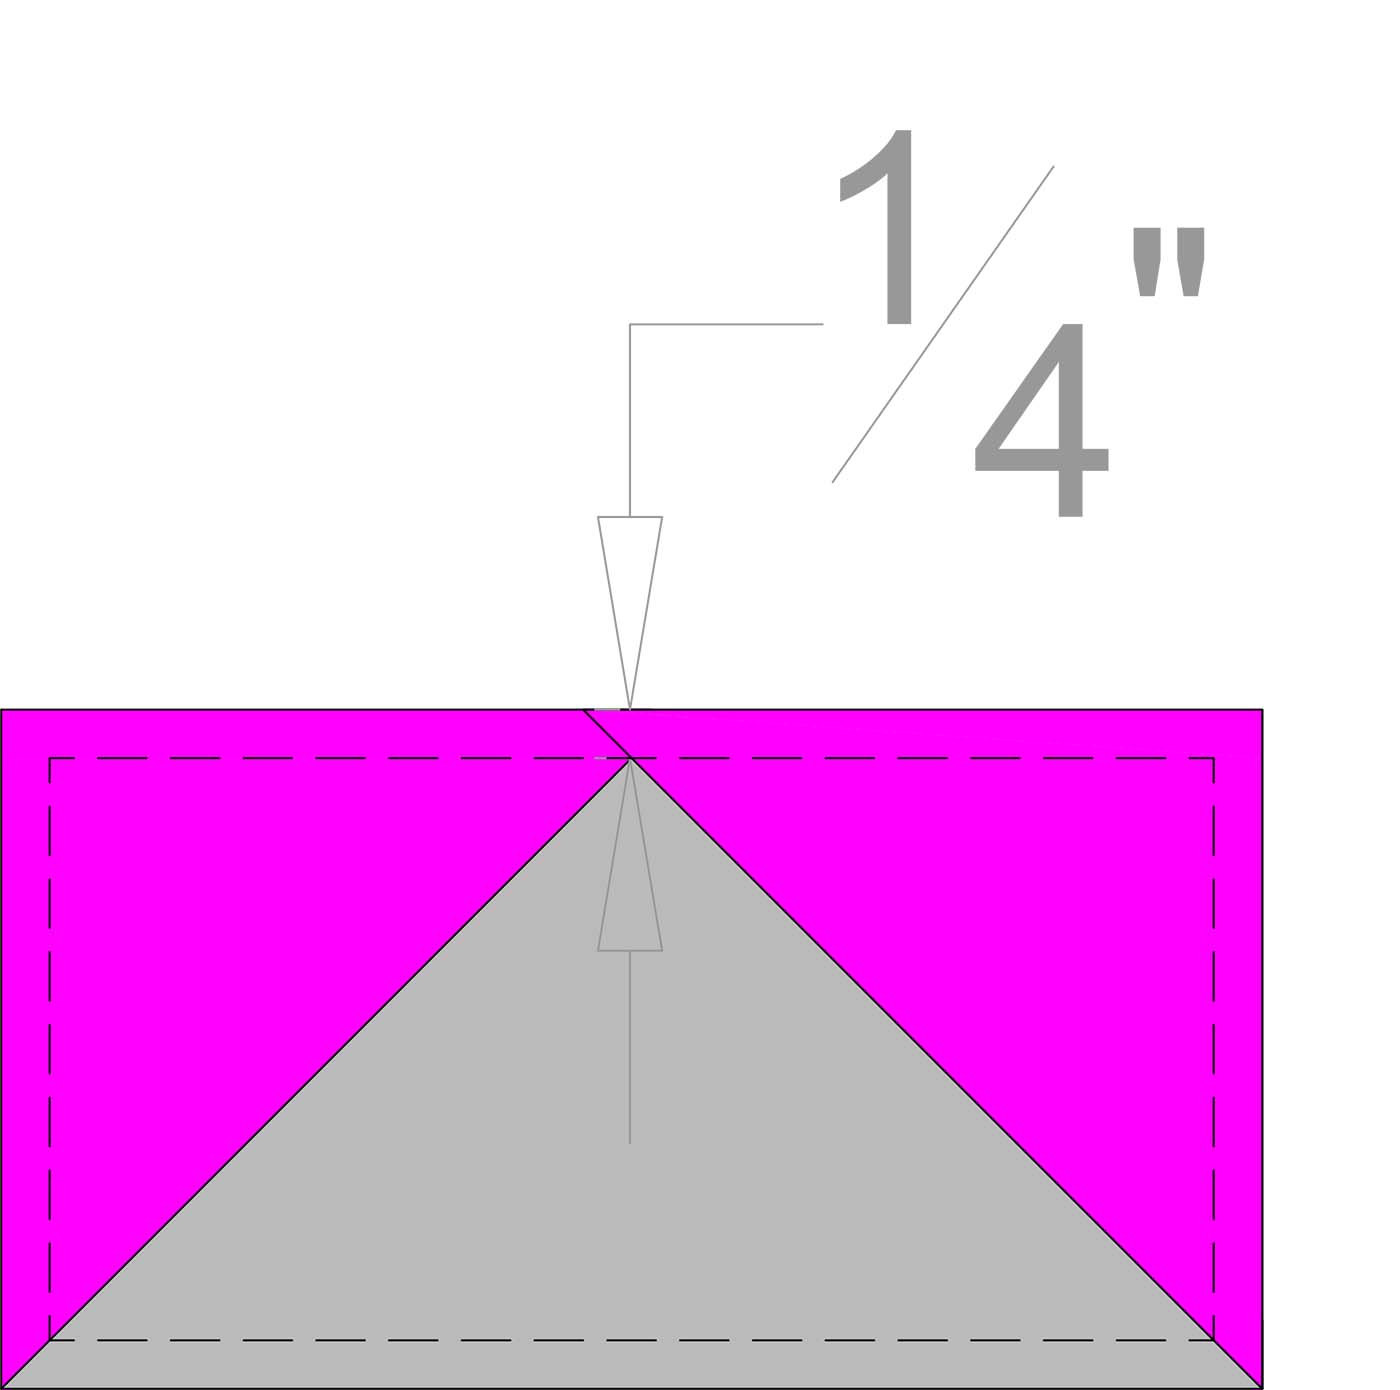
- Trim the top side of the Flying Geese Block so there is a 1/4″ seam allowance beyond the central pieced point.
- Ensure seams come to a point at the trimmed edge of the bottom two corners.
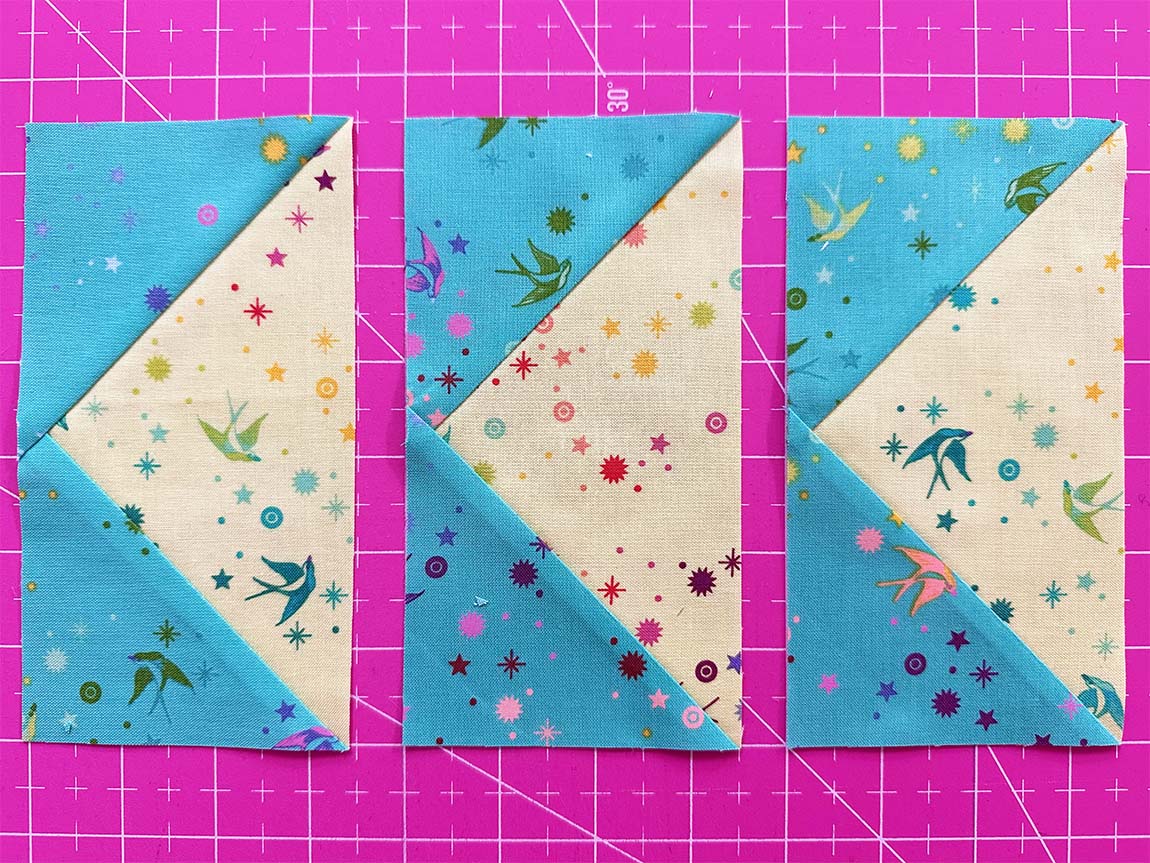
All of the Flying Geese Blocks I am trimming in this tutorial finish at 3″ x 6″, which means I am trimming them to 3-1/2″ x 6-1/2″.
The diagram below shows a trimmed block with a dashed line indicating the seam allowance line where the Flying Geese Block will finish once you add other blocks or block components around it.
Tools for Trimming Flying Geese Quilt Blocks
There are many tools available for creating Flying Geese Blocks. Today, I will start with a method that uses essential tools you already have in your sewing space, including a ruler (preferably square) and optional masking tape. All the techniques I’m using require a rotary cutter and a cutting mat.
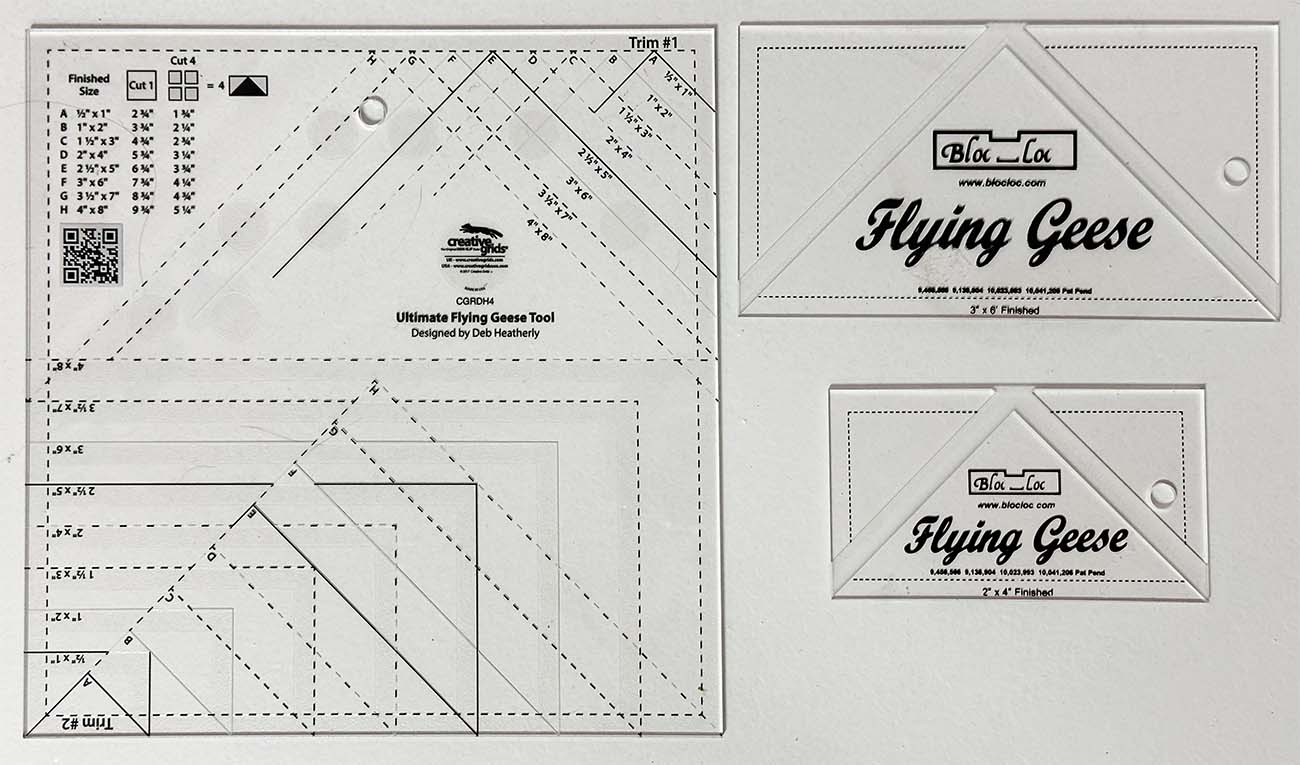
If you make more than the occasional Flying Geese Block, you may want to use a specialty ruler to make trimming easier. I am demonstrating two: The Ultimate Flying Geese Tool from Creative Grids and The Flying Geese trimming tools from Bloc_Loc.
If you want to add a Flying Geese Ruler (or almost anything else from Missouri Star) to your quilting toolbox, Missouri Star Quilt Company is giving my readers 20% off their purchase of $50 or more.

3 Trimming Techniques for Flying Geese Quilt Blocks
Trimming Technique 1: Using Tools You Have in Your Sewing Space
I trimmed my Flying Geese Blocks using this technique for years, and if you are careful with your alignments, you can get terrific results.
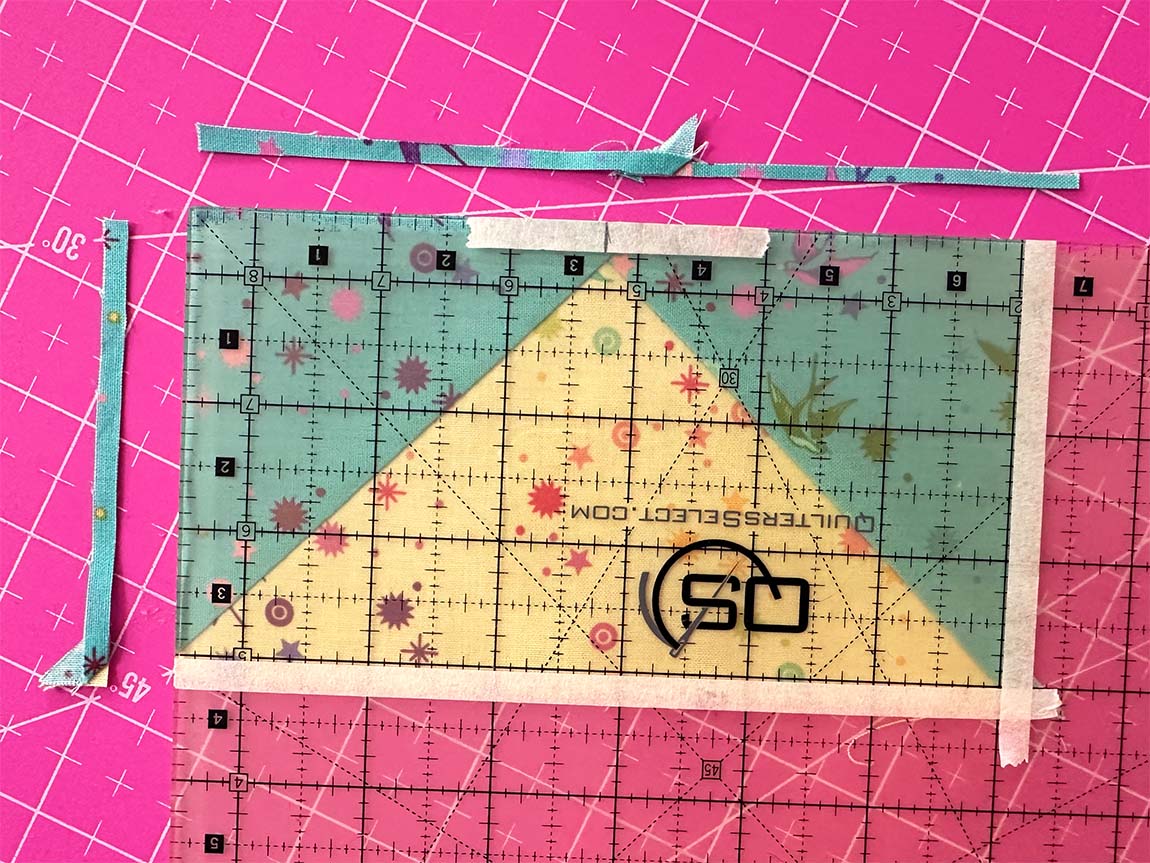
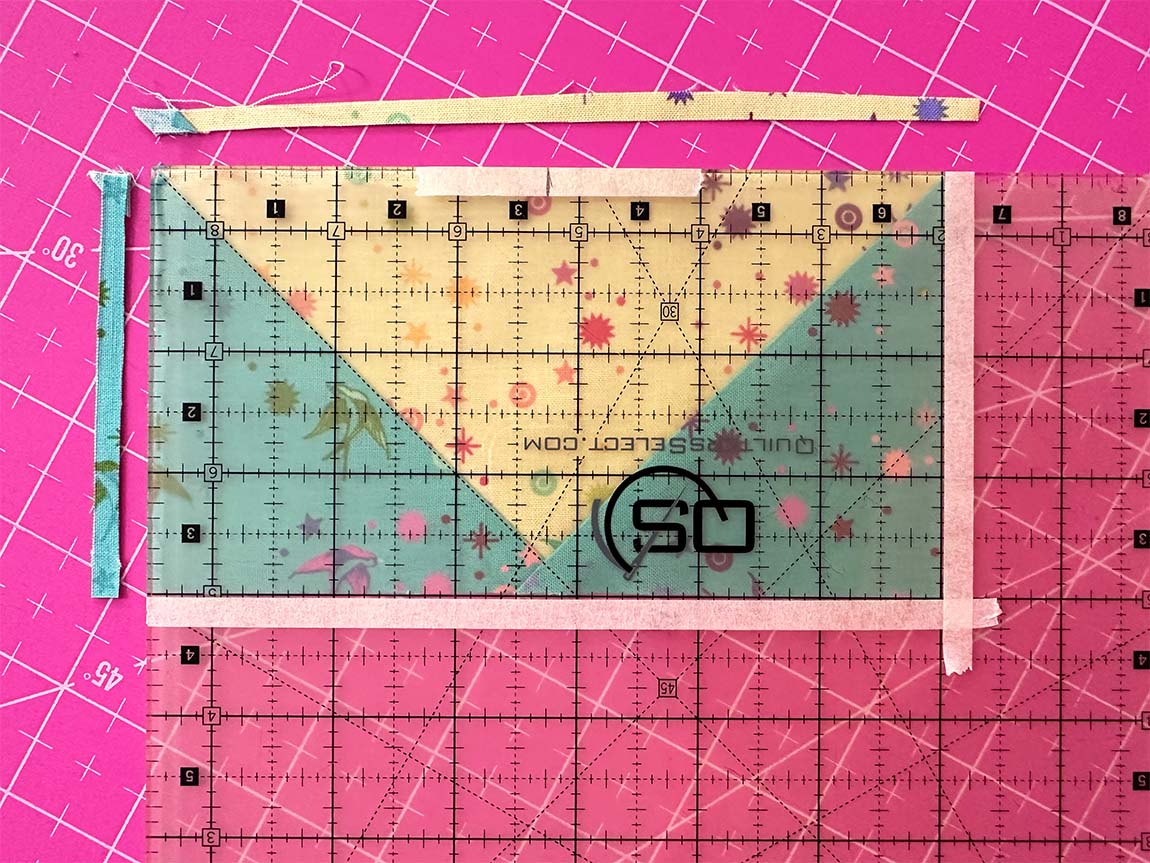
While it is optional, I like to place masking tape lines on my ruler to indicate how much I will trim my block. This step is especially helpful when making a lot of blocks measuring the same size.
Remember to account for seam allowances when marking your trim lines. If you want your Flying Geese Blocks to measure 3″ x 6″ in your finished quilt, trim them at this stage to measure 3-1/2″ x 6-1/2″.
I also like to add a piece of 1/4″ wide tape to the top center of the block area and mark a line at the midpoint so I know where to align the center point of the Flying Geese Block. This tape mark helps remind me to keep a 1/4″ seam allowance to maintain the Flying Geese point.
Once the ruler is marked, or you have made a mental note as to which lines you are using on the ruler, you are ready to trim the block.
Position the untrimmed block under the ruler with the point lining up in the center of the trimming area, 1/4″ in from the ruler’s edge. Ensure the block’s bottom corners align with the trimming area’s corners. Trim the top and one side of the block.
Rotate the block so it is at a comfortable cutting angle. Reposition the ruler so the trimmed edges of the block are on the lines marked with masking tape. Ensure the block’s bottom corners align with the corners at the top edge of the rule. Trim the bottom and remaining side of the block.
Trimming Technique 2: The Ultimate Flying Geese Tool from Creative Grids
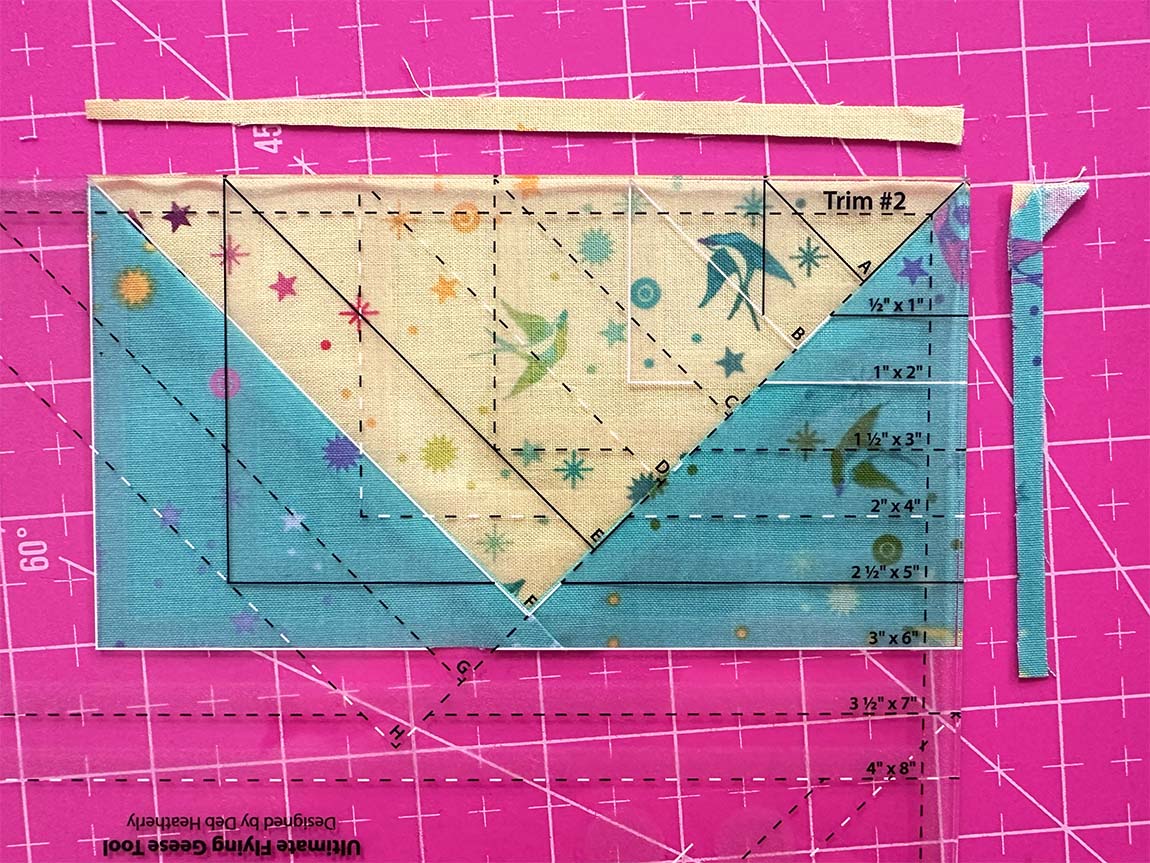
The Ultimate Flying Geese Tool also uses a two-step process to trim your Flying Geese Blocks, but it provides several valuable markings to make the process easier.
Position your Flying Geese Block in the corner marked “Trim #1.” Notice that the trim line for each size is marked with a different line type. The line for the 3″ x 6″ finished block is a solid white line that falls directly on the seams of the block. Once you position the lines on the sewn seams, trim the top and one side of the block.

Rotate the block to a comfortable cutting angle. Position the ruler over the block, aligning the trimmed edges to the rectangle markings for your block size. This side of the ruler is marked “Trim #2.” There are also angle marks indicating the positioning of the angled seams. Trim the bottom and other side of the block.
Trimming Technique 3: The Bloc_Loc Flying Geese Ruler
The final method for trimming Flying Geese is the easiest but the most limited in sizing. This ruler is well suited to use with a rotating cutting mat, but this is an optional tool.
This tool requires you to press your seam allowance out towards the edges of the block. This ruler has two 1/4″ wide grooves cut into the back that catch the seam allowances and hold them in place while you trim the block. This feature dramatically reduces the risk of having your ruler or block move out of position while cutting.
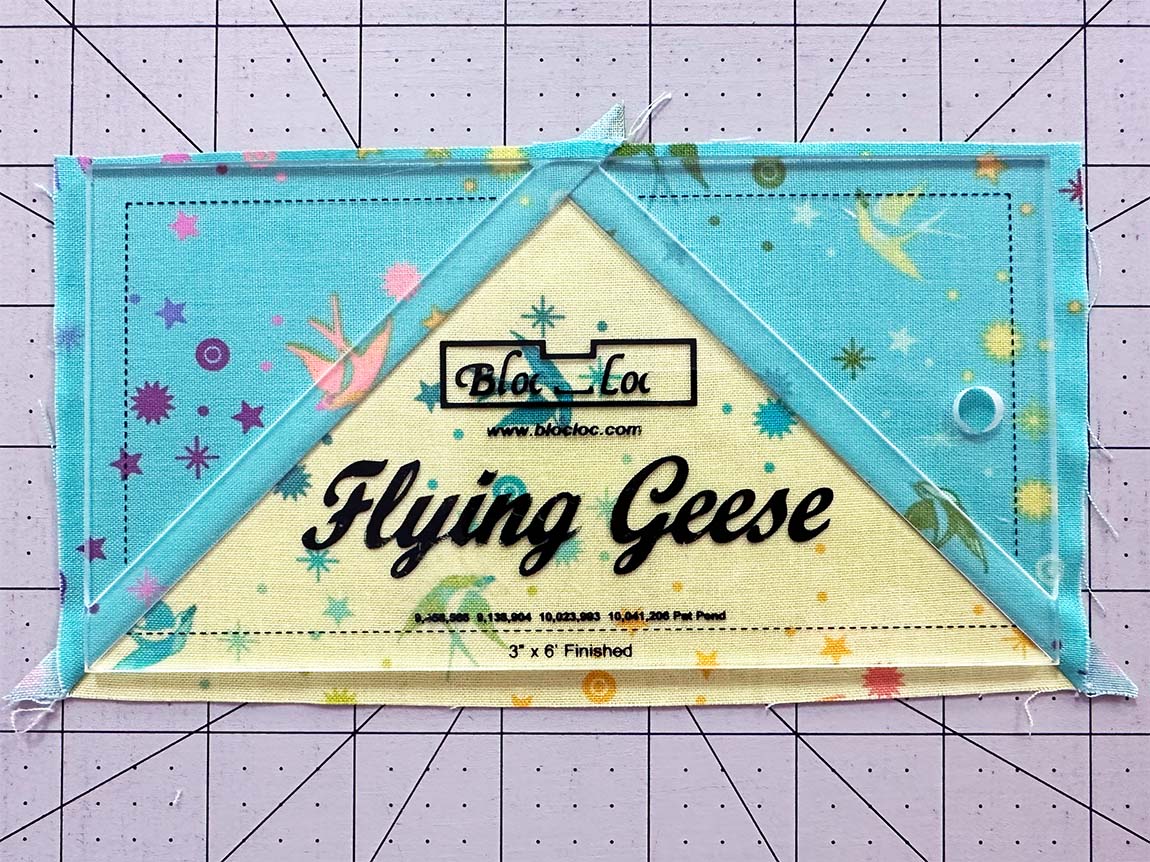
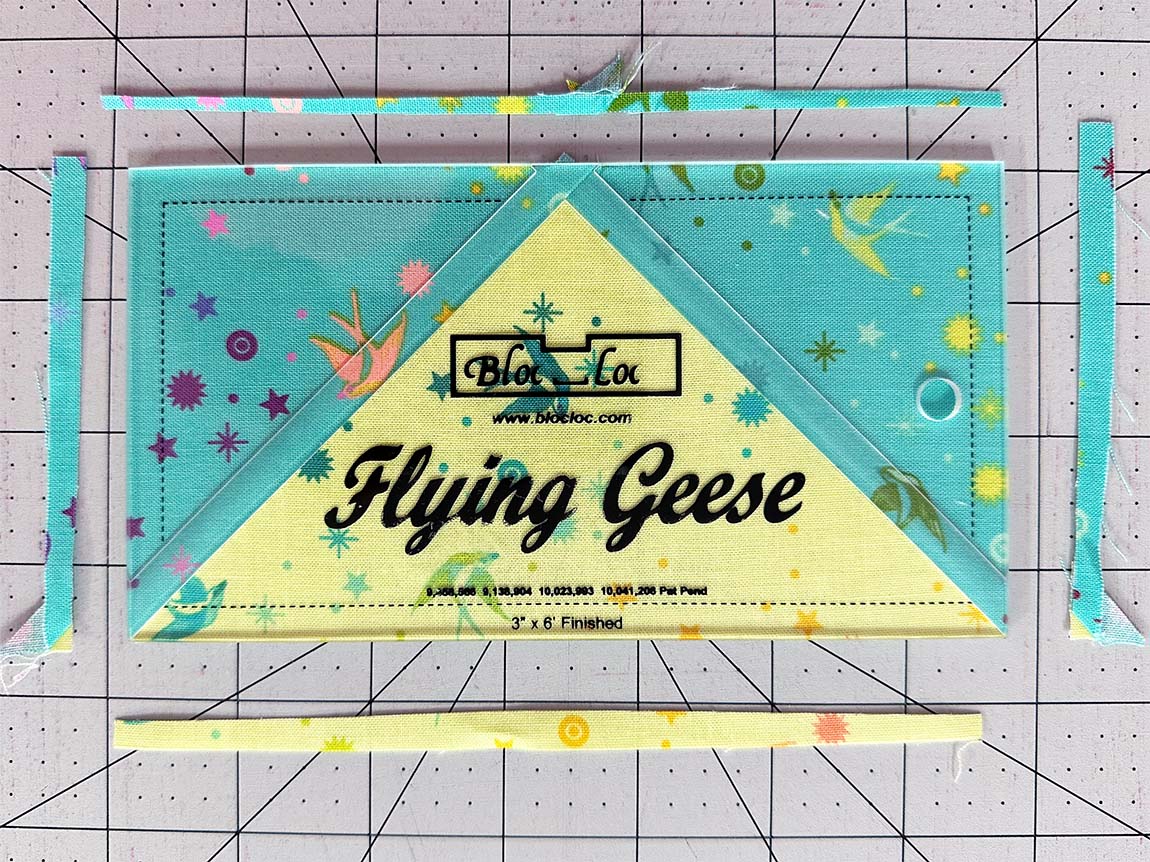
To use the Bloc_Loc Flying Geese Ruler, place the ruler over the block, catching the seam allowances in the grooves. Trim all four sides of the block. This is easiest with a rotating cutting mat, but you can also rotate the block with the ruler.
Which technique will work best for you?
Each method I demonstrated has pros and cons, so you must decide which technique and tool will suit your needs. Remember that the end results will be the same regardless of your chosen method.

Choose Technique 1: Using Tools You Have in Your Sewing Space if you:
- Only make Flying Geese Blocks occasionally
- Are precise with your cutting and trimming and don’t require extra guidelines to help
- Make Flying Geese Larger than the other trimming tools can accommodate
- Have a limited budget or storage space for specialty tools
Cons to Technique 1:
- There are no markings for the seam placement, which can result in miscut blocks.
- The ruler requires two separate placements to trim each block
Choose Technique 2: The Ultimate Flying Geese Tool from Creative Grids if you:
- Frequently construct Flying Geese of different sizes
- Like the ease of having seam line positioning marked on the ruler
- Want to store only one ruler that can work for a range of block sizes
Cons to Technique 2:
- The ruler requires two separate placements to trim each block
- You still need to be aware of the seam placement of the block as you position the ruler
Choose Technique 3: The Bloc_Loc Flying Geese Ruler if you:
- Are making a large number of Flying Geese Blocks in one or two sizes
- Prefer the added accuracy of having the seam allowances nestle into the grooves of the ruler to prevent shifting during the trimming process
- Want to position the ruler one time to trim all sides of the block
Cons to Technique 3:
- You need a different ruler for every size you cut, which can become a storage/expense issue.
So what do I use?
Now that I have various tools available, what will I use?
I will use the Bloc_Loc rulers to trim if I make Flying Geese in the two sizes I have available.
I will use the Ultimate Flying Geese Tool for any other block size.
Even though I used the first method for years, I will only return to that technique if I am constructing large Flying Geese blocks that won’t fit with one of the specialty ruler options.
If you want to add a Flying Geese Ruler (or almost anything else from Missouri Star) to your quilting toolbox, Missouri Star Quilt Company is giving my readers 20% off their purchase of $50 or more.
Missouri Star Quilt Company provided the Ultimate Flying Geese Tool, the Bloc_Loc Rulers, and the fabric for this post. All designs and opinions in this blog are accurate and based on my experiences.


2 Comments
Nann
June 21, 2024 at 7:02 amI have an 1880’s flying geese strippy quilt — all the geese have nipped beaks! I use Wing Clipper (Studio 180) which appears to be rather like the Creative Grids ruler you show.
Wendy
June 22, 2024 at 7:43 pmI always learn so much from you! Thank you!