Welcome to Part 4 in out tote bag series! This week is a lot of fun because we get to see our bags really come together. All of these tutorial posts are pretty long, and this is no exception. To keep it a bit more manageable, I have added a section to this site for Tips and Techniques, and I will be linking to topics within that category throughout this post. The addition of this section will also make basic techniques more easily accessible as a reference. As always, please contact me with any questions. You may email me or leave a comment, and I will do my best to give you a clear answer!
The following Technique pages are referred to in this post:
- Flatlining
- Pinning and Stitching on a Line
- Thread Tracing
- Grading, Clipping, and Notching
- Understitching
If you are just joining us, this is a 5 part series. Here are the other segments (links are updated as posts are added):
- Part 1: Gathering Supplies
- Part 2: Drafting Your Pattern
- Part 3: Cutting the Fabric
- Part 4: Assembling the Bag (You’re here now!)
- Part 5: Finishing Techniques
Pull out all of the beautifully cut tote bag pieces from last week and locate the canvas pieces and the bag top and bottom exterior fabric pieces. Flatline the canvas pieces to the outer fabric pieces. For this project you will want to finish the edges of the pieces as described in the flatlining tutorial.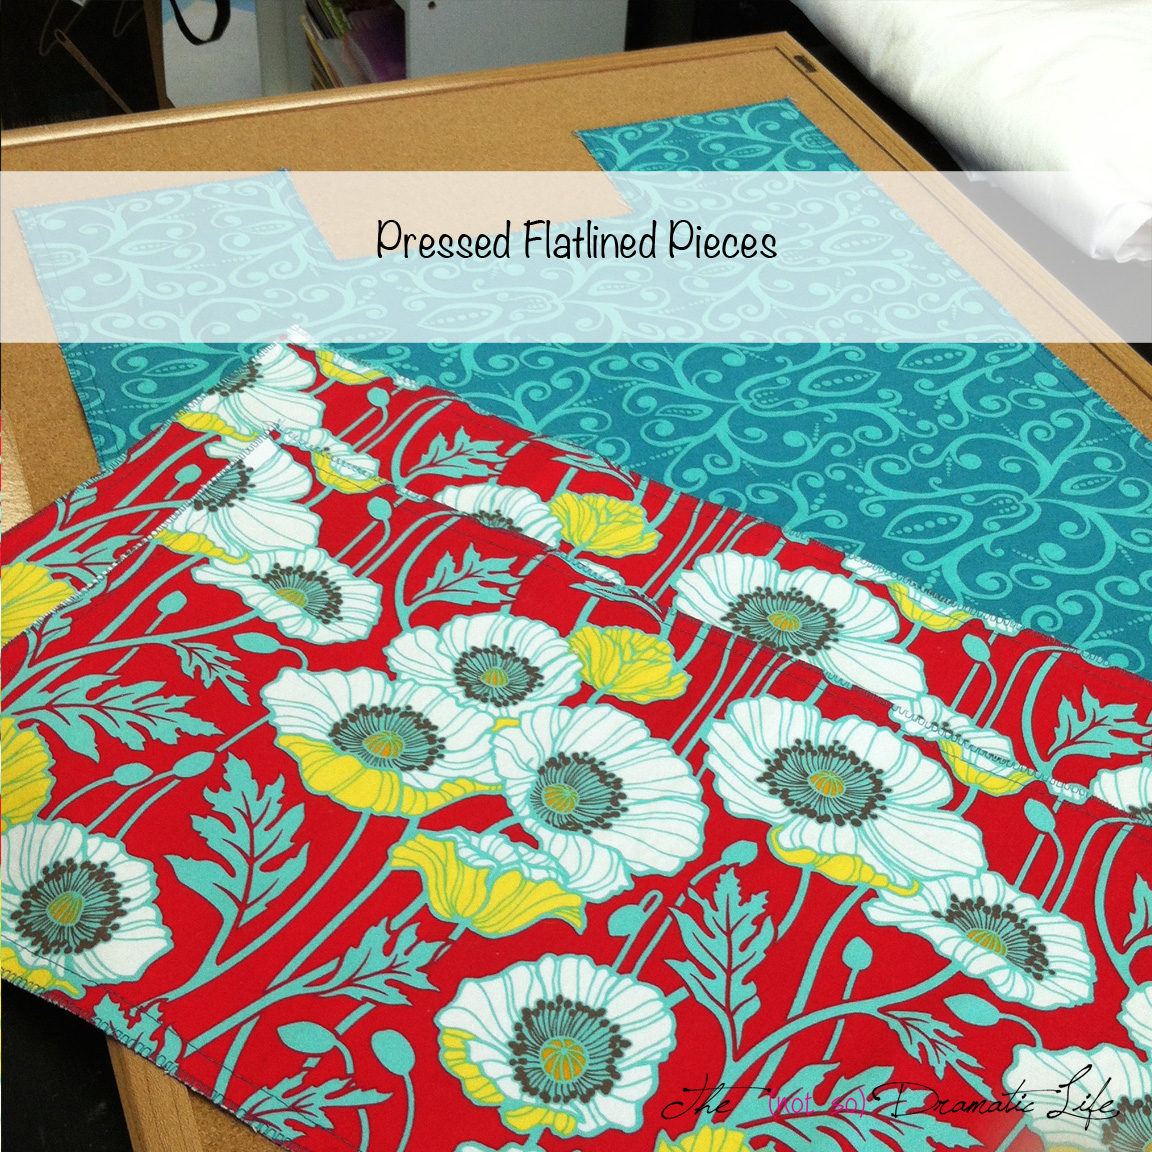
In a few steps, we will need to see the precise placement of the bag handles on the exterior of the bag. To achieve this, we need to Thread Trace the bag placement lines.
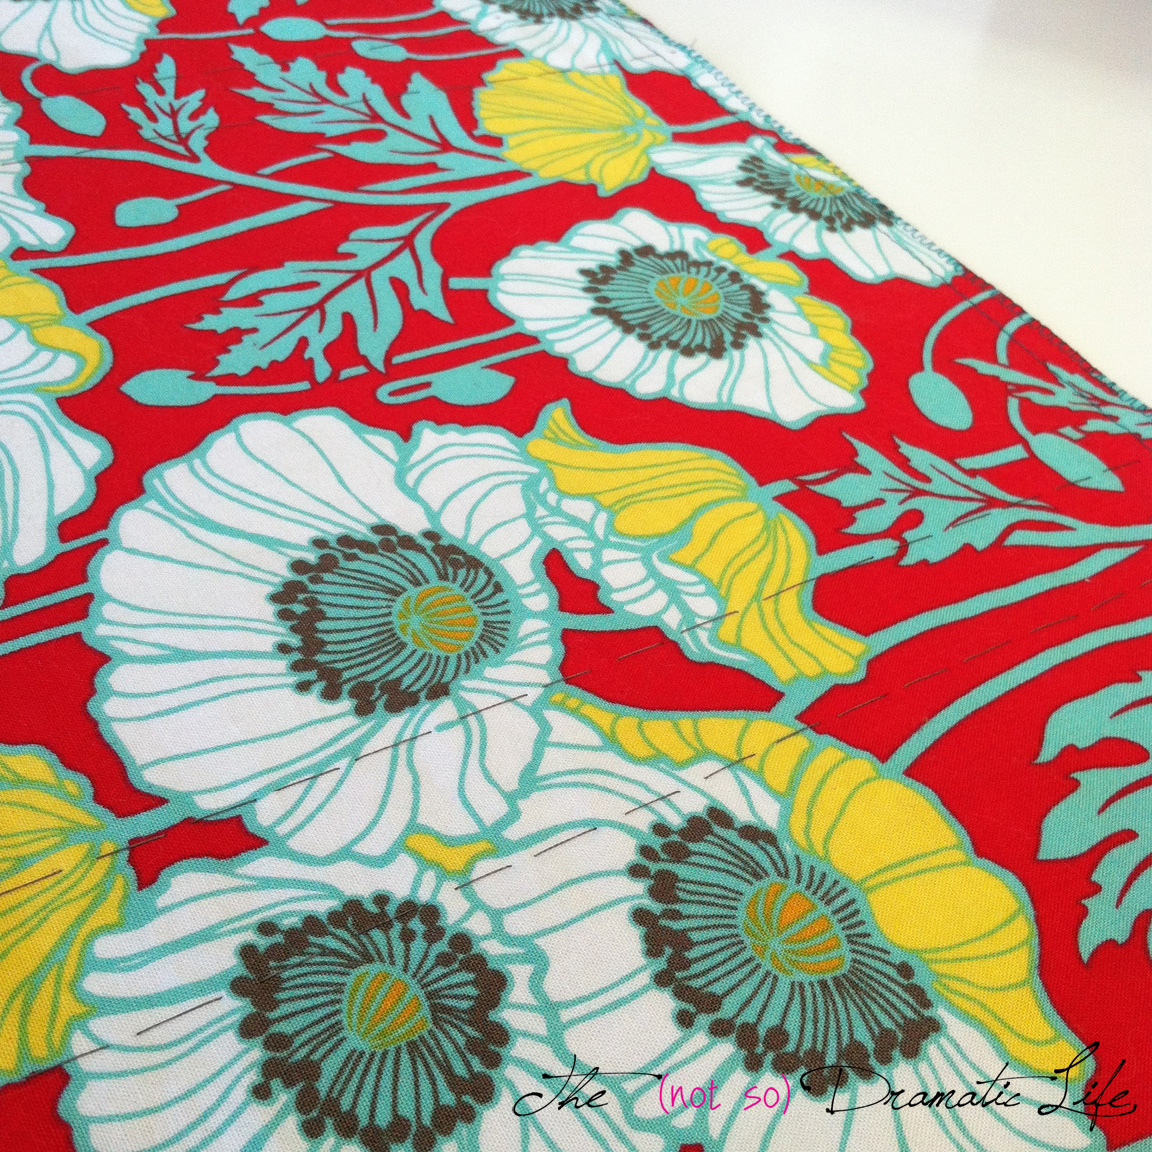
Front View of the Uneven Basting Stitch
Next we are going to prepare the pockets to be attached to the bag. The pocket sides will be incased by the bag handles, and the pocket bottom will become a part of the seam attaching the bag top to the bag bottom. That just leaves us the top of each pocket to deal with right now.
Find the exterior (with interfacing attached) and lining pieces for the rectangular pocket. Place the pieces right sides together and pin and stitch along the top line. Grade the seam allowance before turning the pocket right side out. Carefully press the seam allowance toward the lining fabric. Understitch the seam allowance to the lining fabric. Lay the pocket out flat and give it a final press.
Find the exterior (with interfacing attached) and lining pieces for the pocket with flap. Place the pieces right sides together and pin and stitch along the flap edge, pivoting with the needle down at any corners. Notch and grade the seam allowance before turning the pocket right side out. Lay the pocket out flat and give it a final press. Under-stitching is really difficult on seams of this shape, so careful pressing is essential.
Find the exterior (with interfacing attached) and lining pieces for the curved top pocket. Place the pieces right sides together and pin and stitch along the curved line. Clip and grade the seam allowance before turning the pocket right side out. Carefully press the seam allowance toward the lining fabric. Under-stitch the seam allowance to the lining fabric. Lay the pocket out flat and give it a final press.
There are button closures on two pockets which require a buttonhole on both the curved pocket and the pocket with a flap. Pull out the buttons you plan to use for these pockets. Determine the size of the button hole by measuring the thickness of the button and adding it to the diameter of the button. You will always want to make a test buttonhole on a scrap of the fabric you are using for the project. Follow the buttonhole directions for your sewing machine, cut open the sample hole and test the size by moving the button through the opening. If it is too loose or too tight, adjust the size and make another test buttonhole. Once you know the size of the buttonhole, determine where you would like it to be placed on the pocket. I usually use a center placement since I like symmetrical pockets, but an asymmetrical pocket may look better with a different buttonhole placement. Mark your buttonholes on the pockets using a fabric pencil or pin that will disappear over time or with washing. Make the buttonholes and cut them open.
Take out one piece of the bag top and the curved pocket. Place the bag top piece right side up. Place the pocket between the handle placement lines. The bottom of the pocket should line up with the bottom edge of the bag top piece. The sides of the pocket should extend about 1/2″ into each handle placement lines. Baste the pockets into place either by hand or machine. The basting stitches should fall at the edges of the pocket, well within the handle placement lines.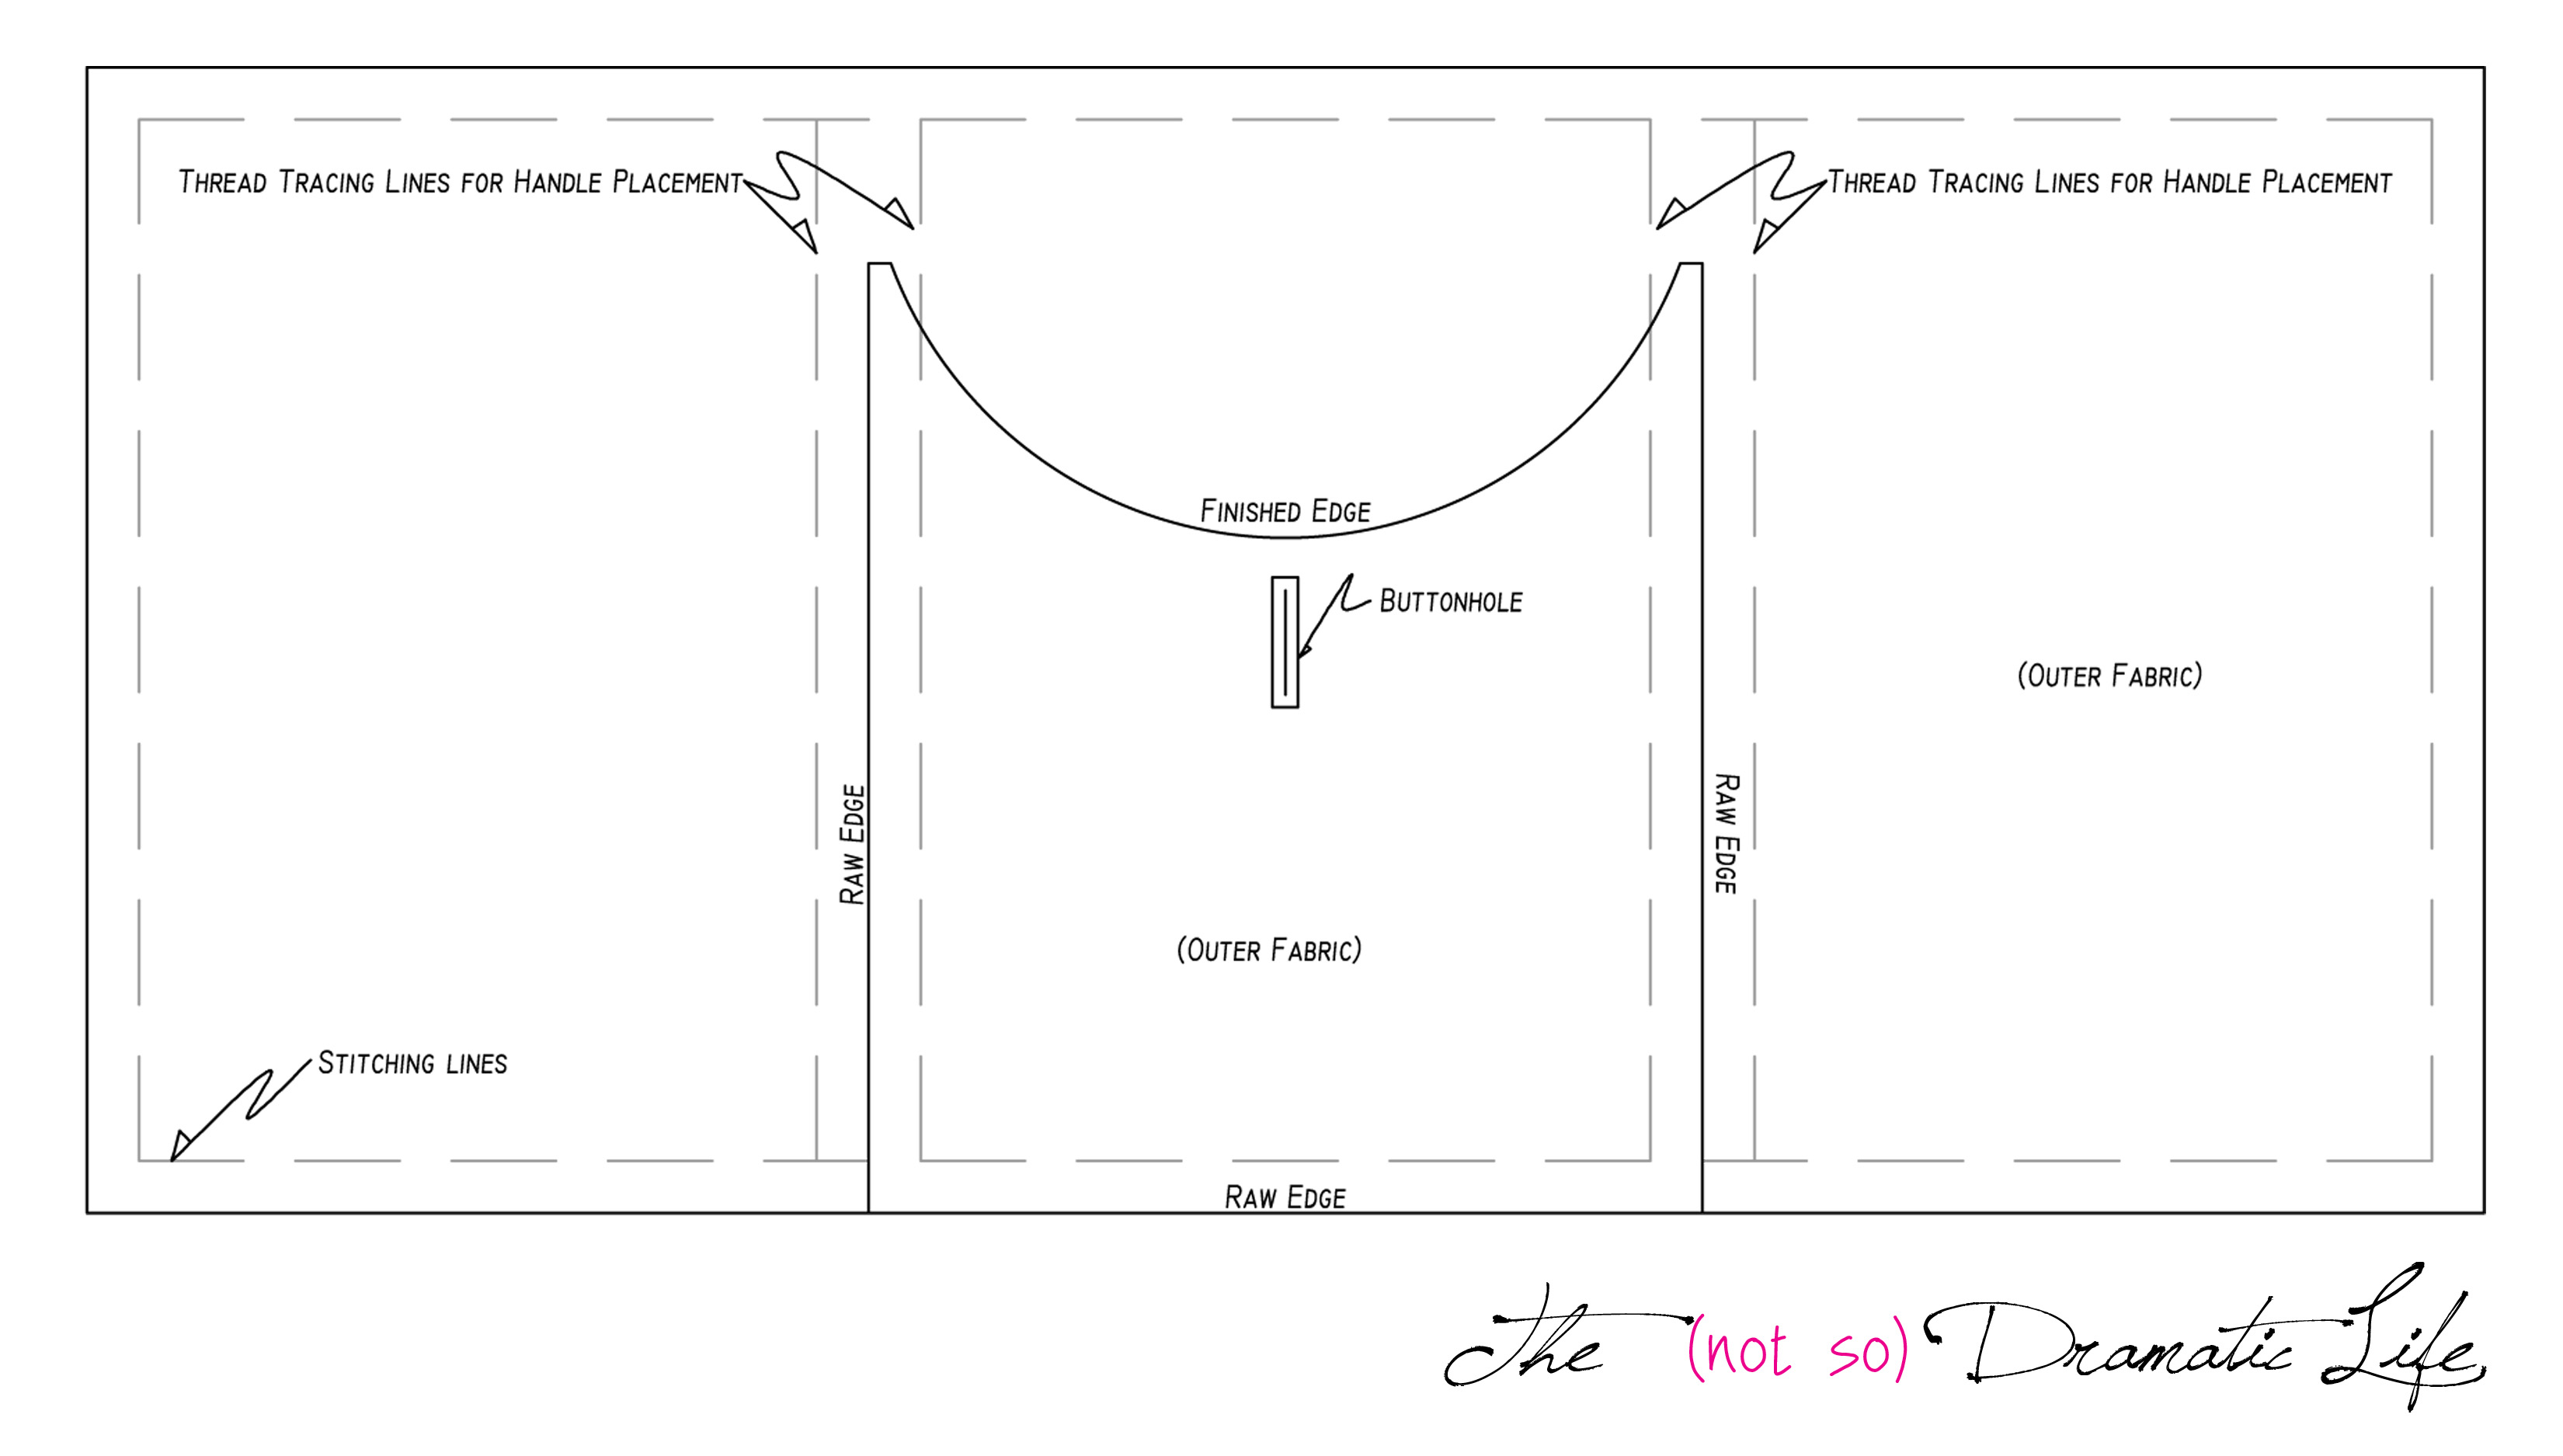
Finished Curved Pocket with side and bottom edges incased
For the other side of the bag you will need the bag top piece as well as the rectangular pocket and the pocket with flap. Place the bag top piece right side up. Lay the pocket with flap lining side up between the handle placement lines. On top of the pocket with flap, place the rectangular pocket exterior side up. Make sure to line up the pockets with the bottom edge of the bag top and between the handle placement lines. Baste in place, just as you did with the curved pocket. You will notice that you have actually created two pockets on this side of the bag. The front pocket will be covered with the button flap. Behind the flap layer is a pocket with an open top.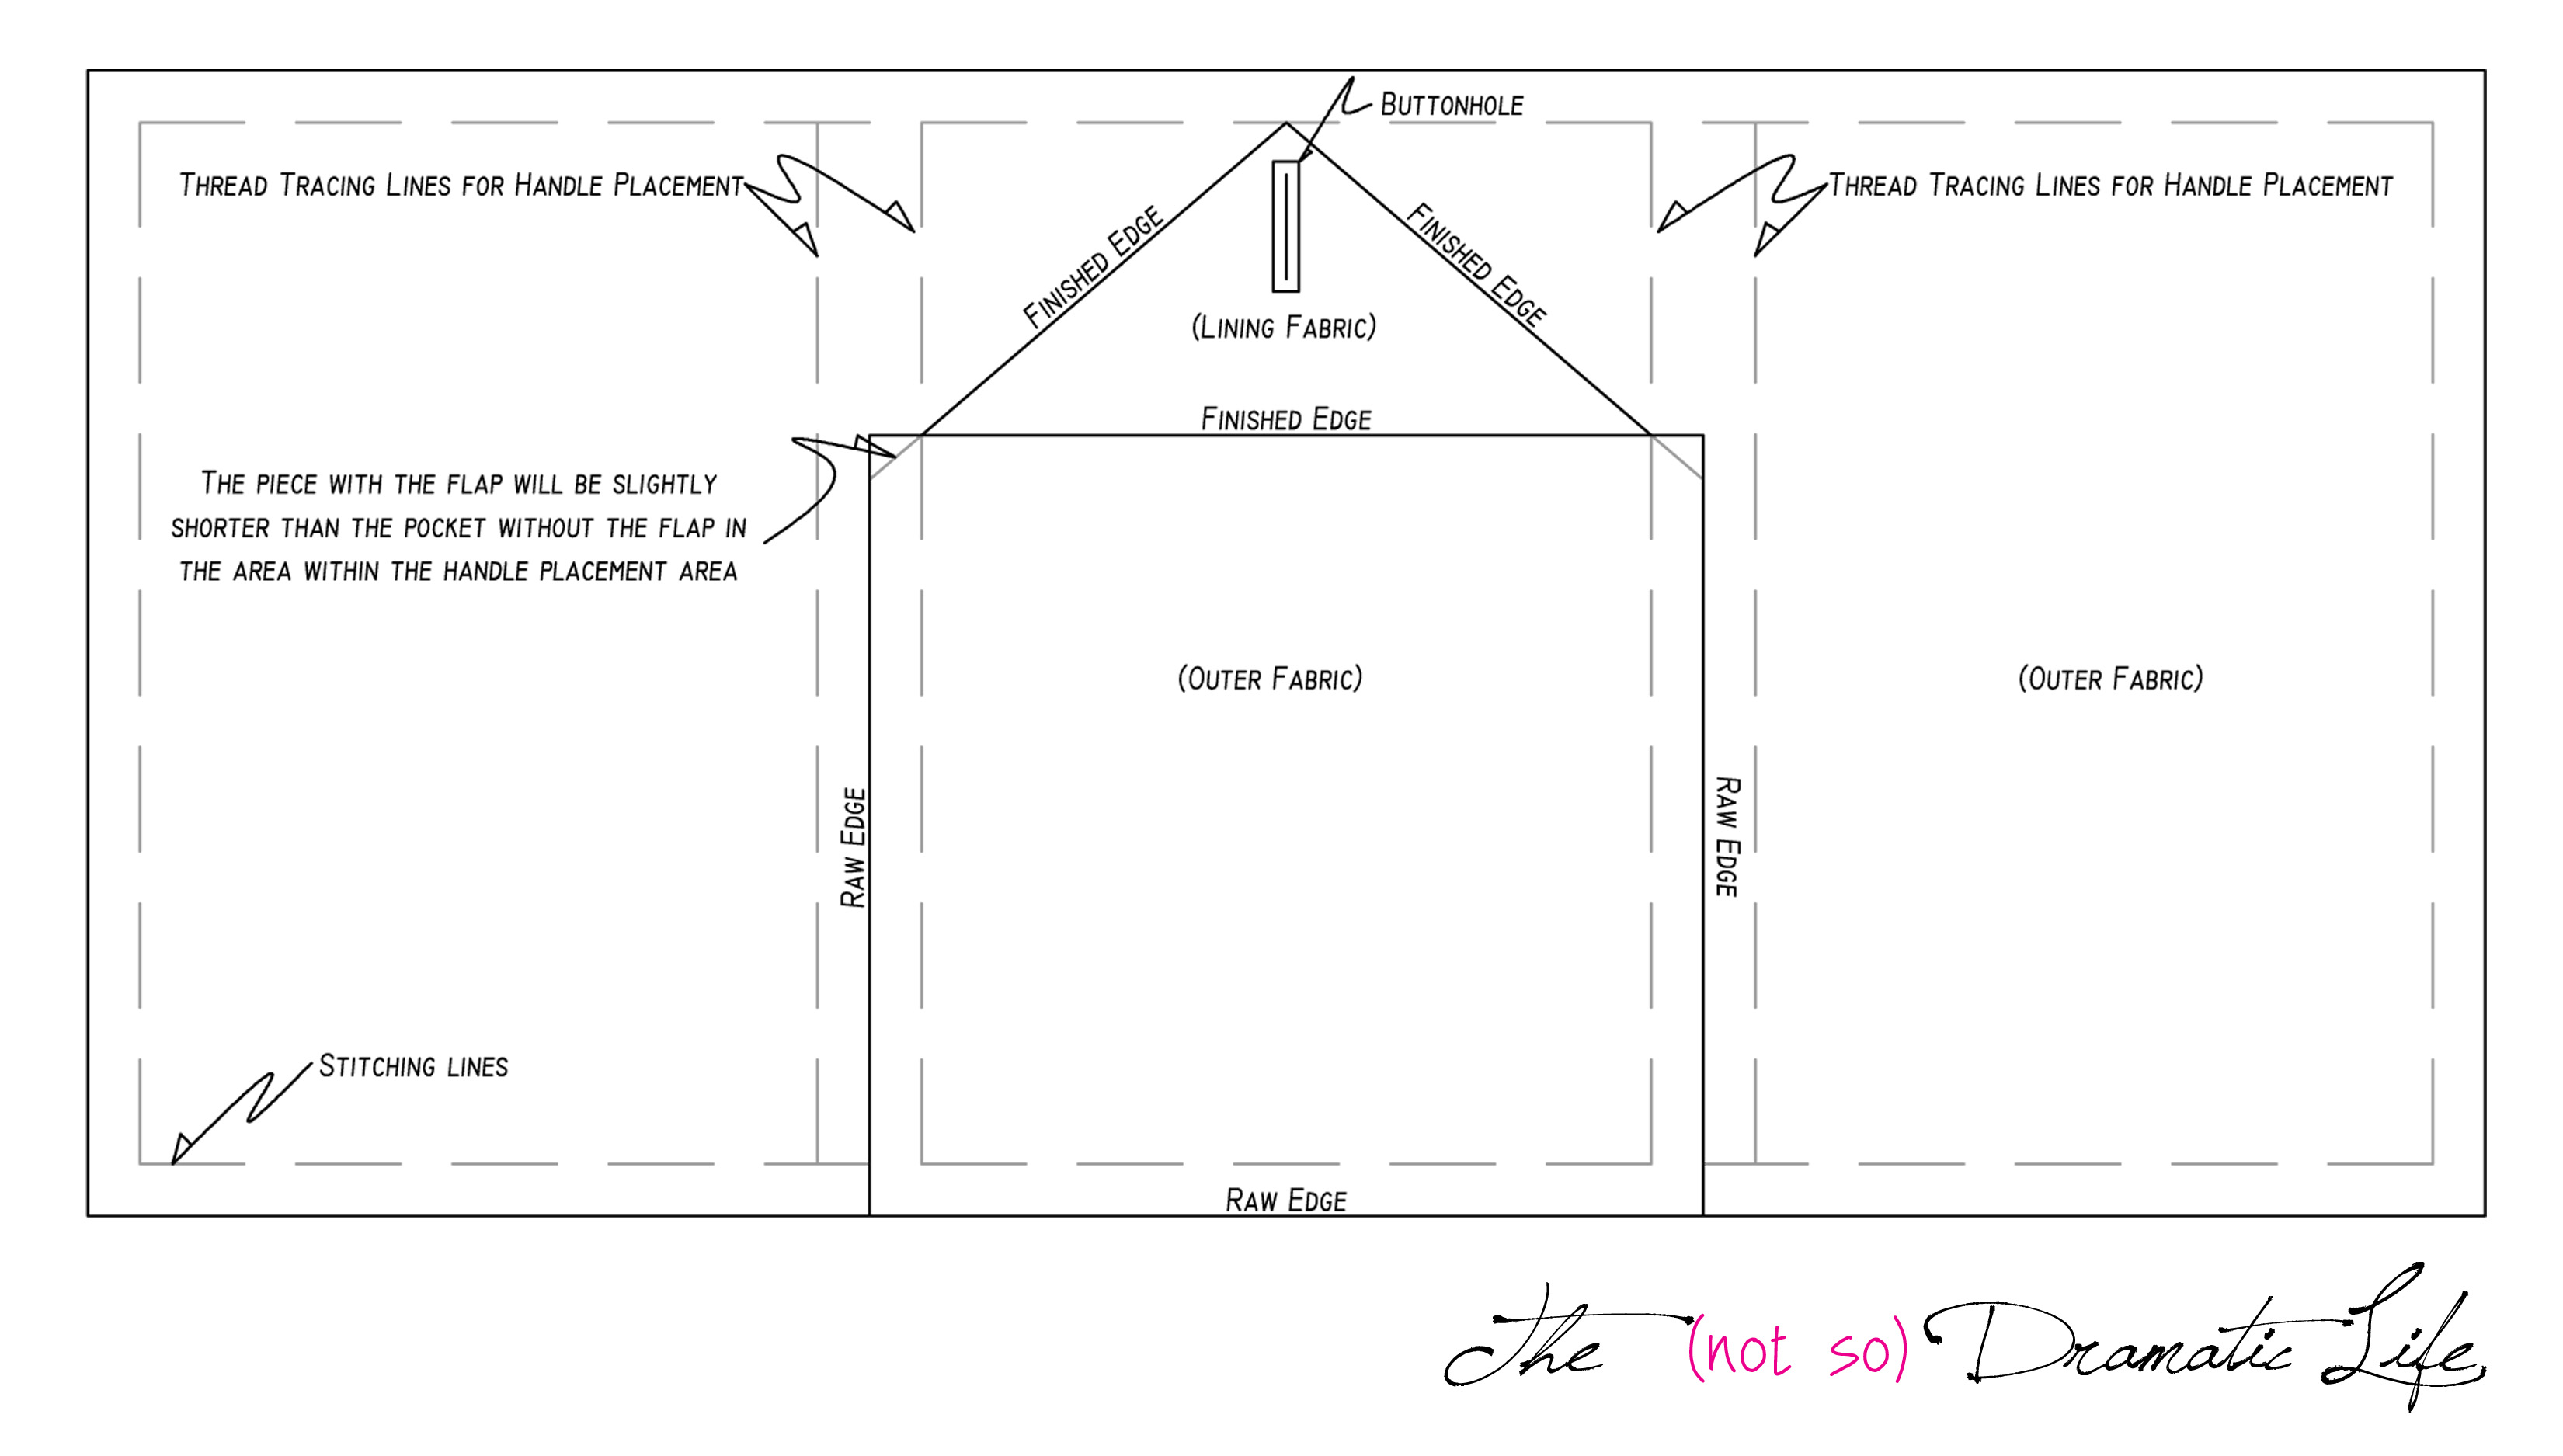
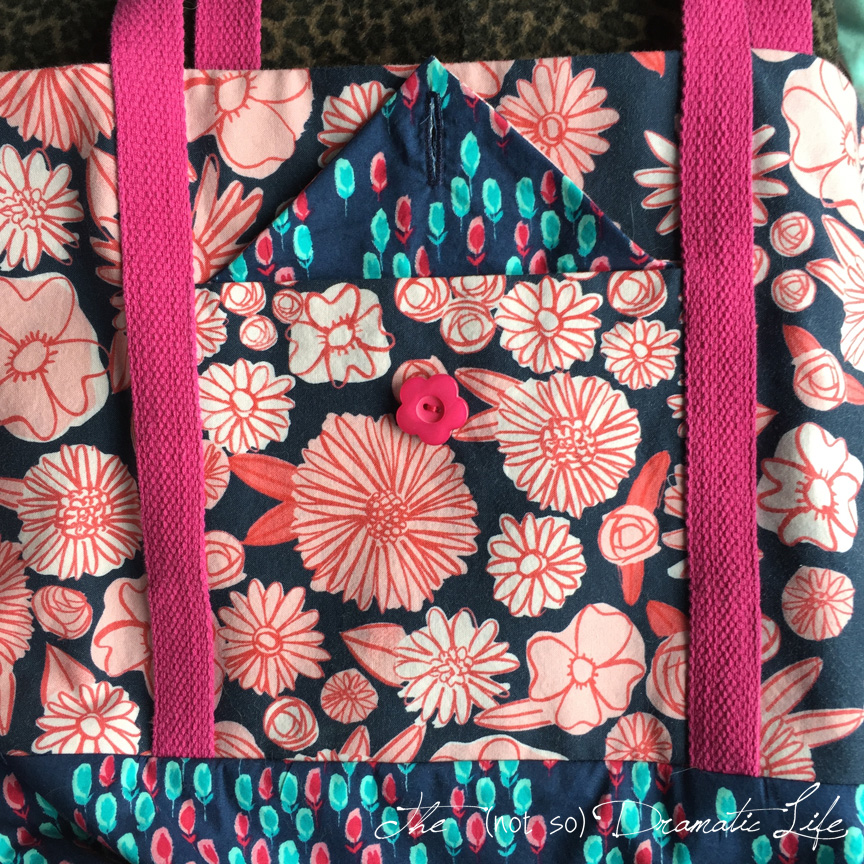
Finished Pocket with flap open and side and bottom edges incased
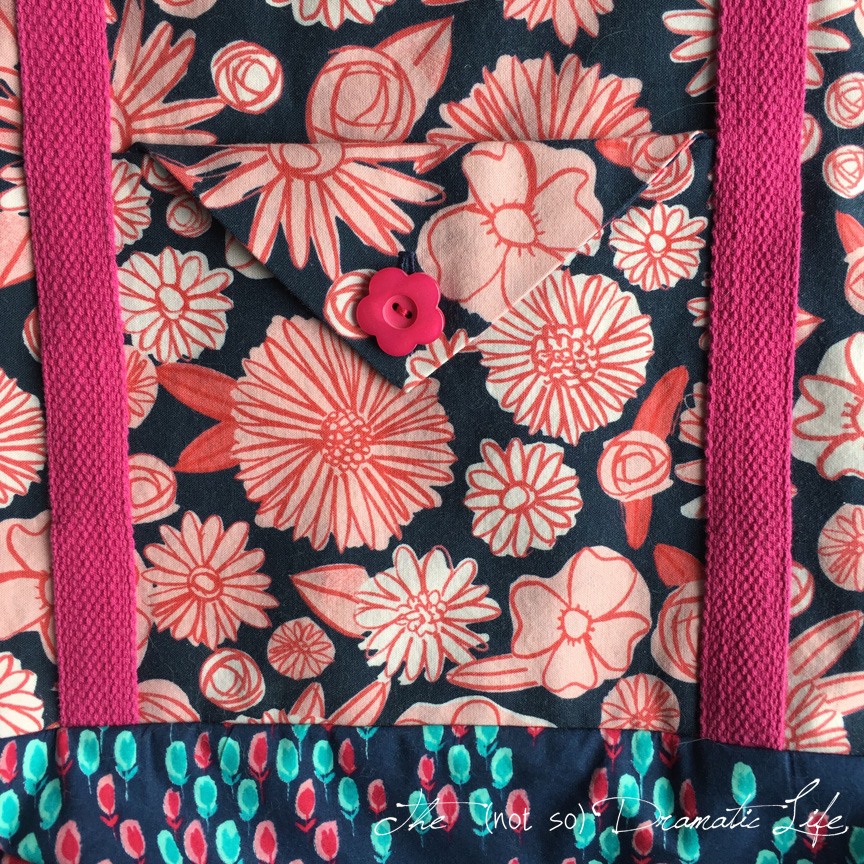
Finished pocket with flap closed
Now we are going to assemble the side seams. Place the bag tops right sides together, making sure the top of the pieces are going the same direction. Pin and stitch the side seams on the stitching lines. 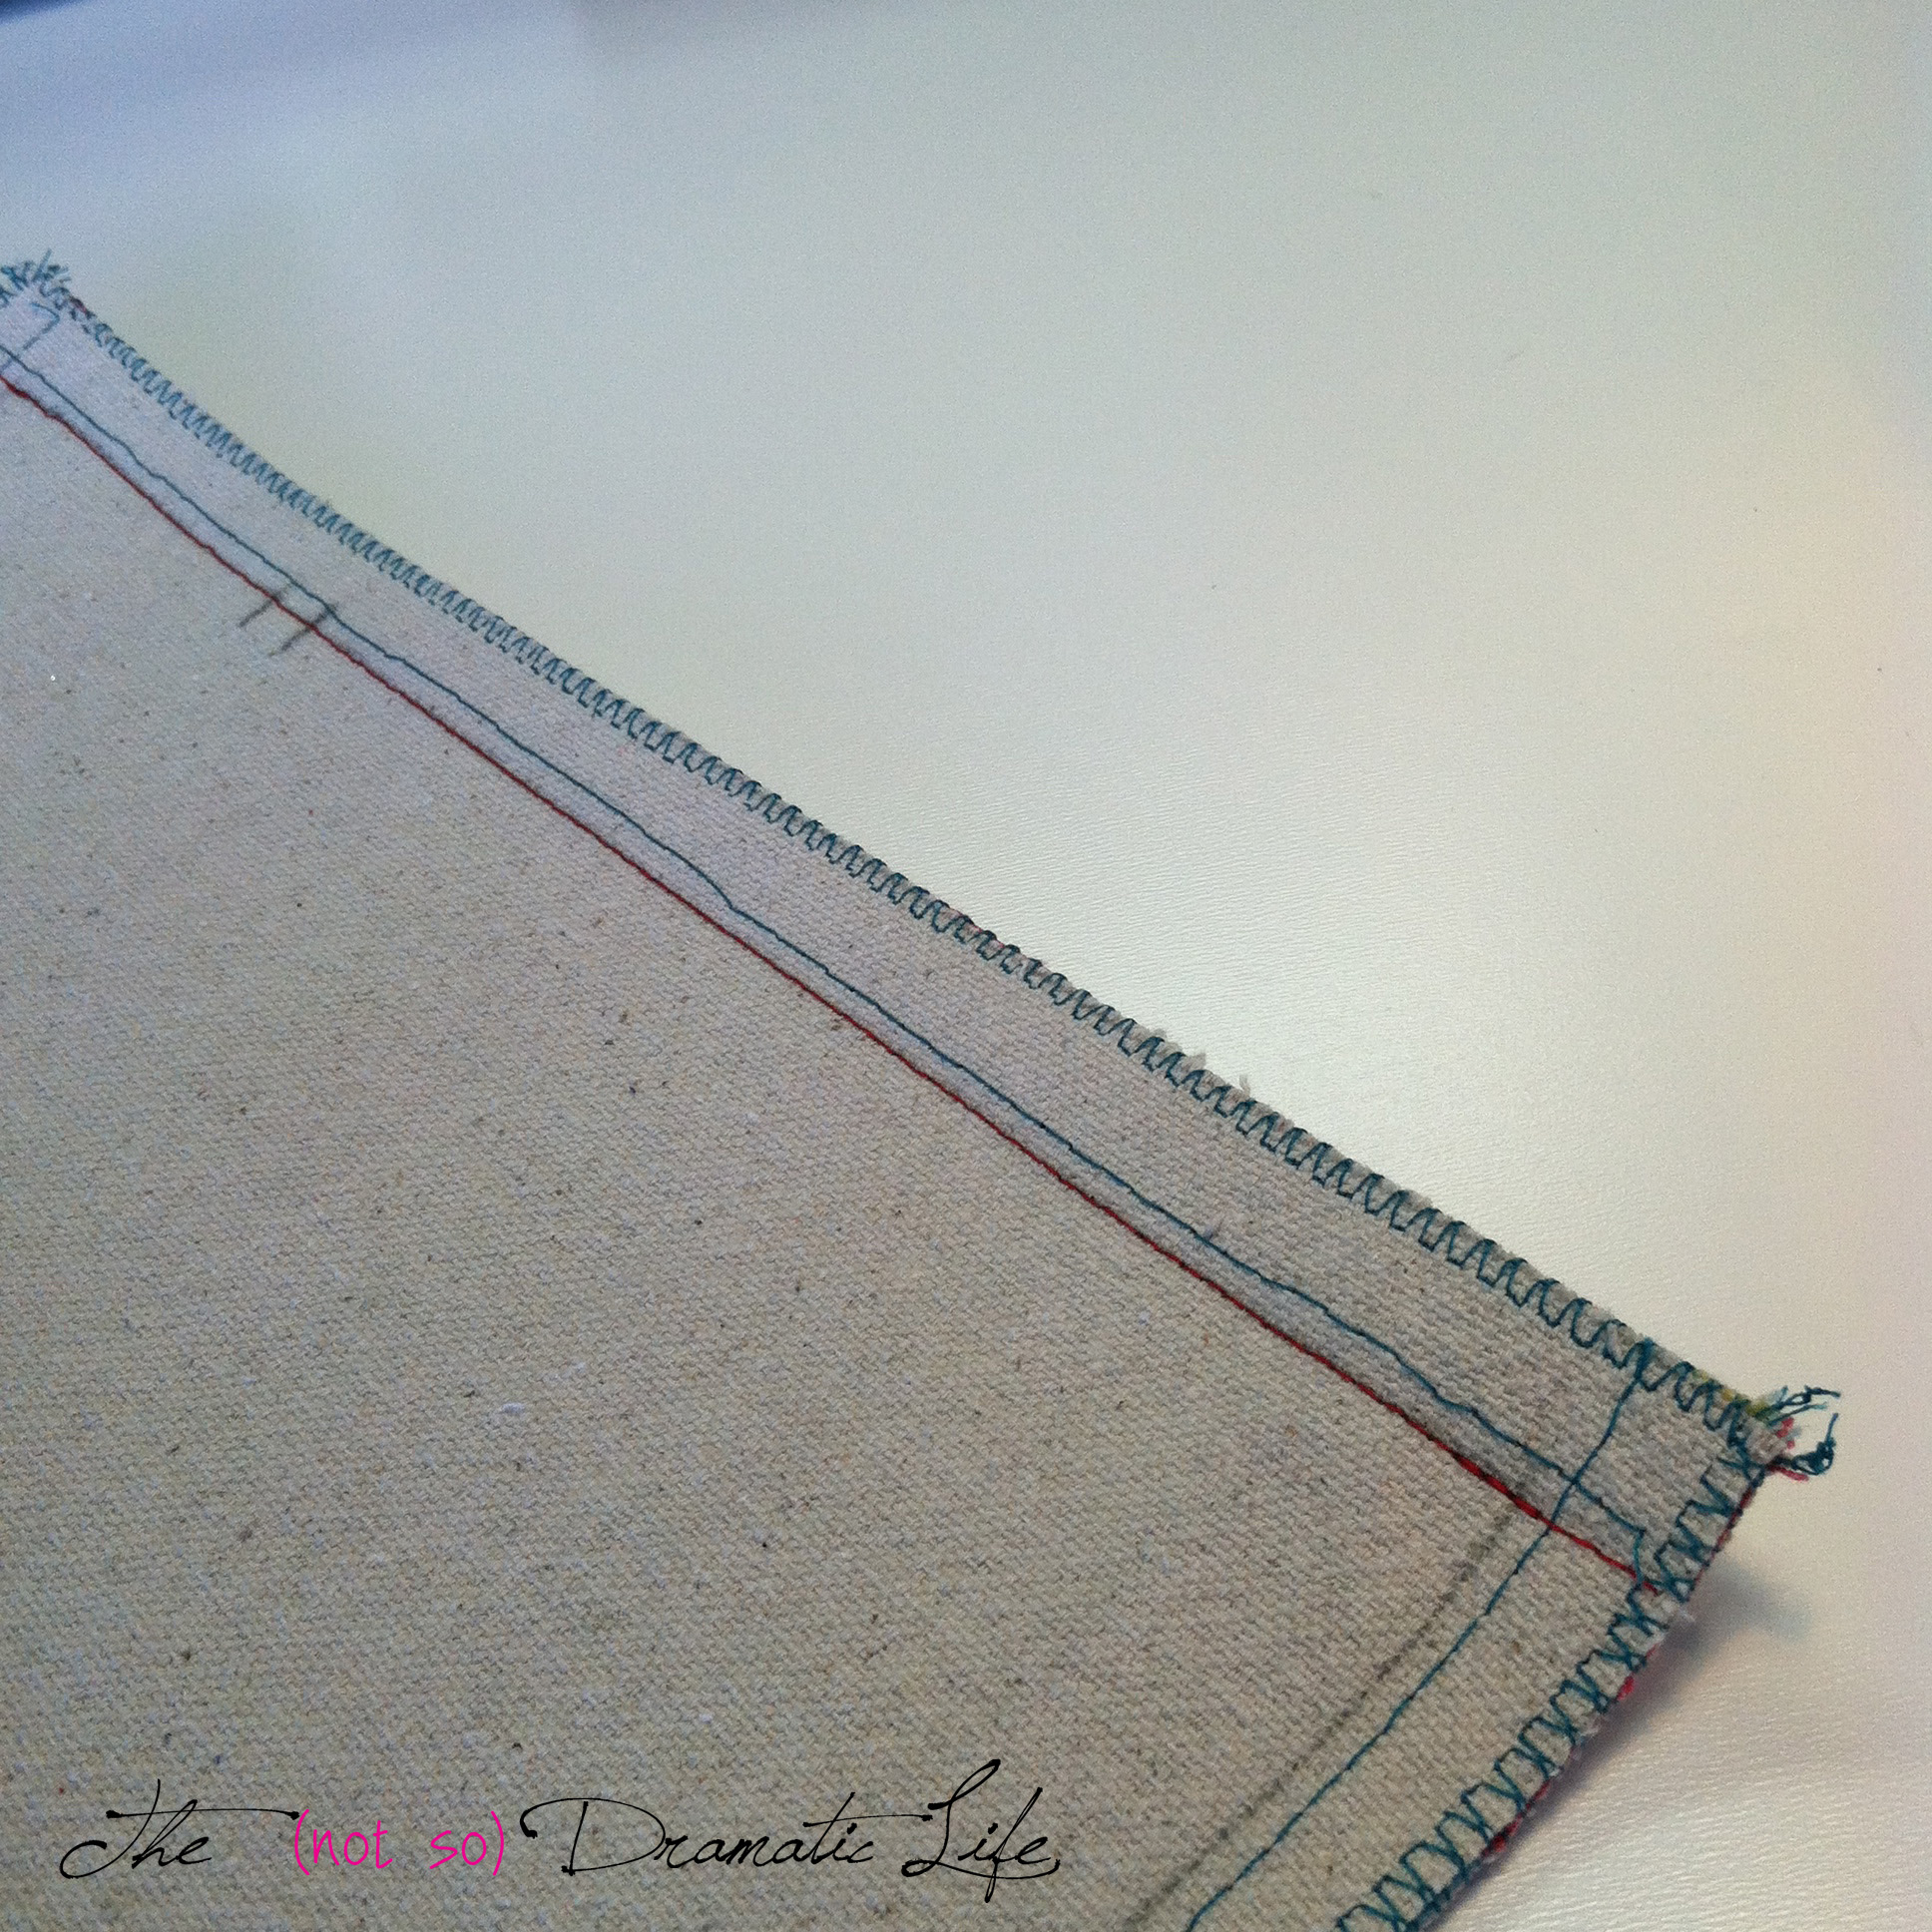
Press the side seams open.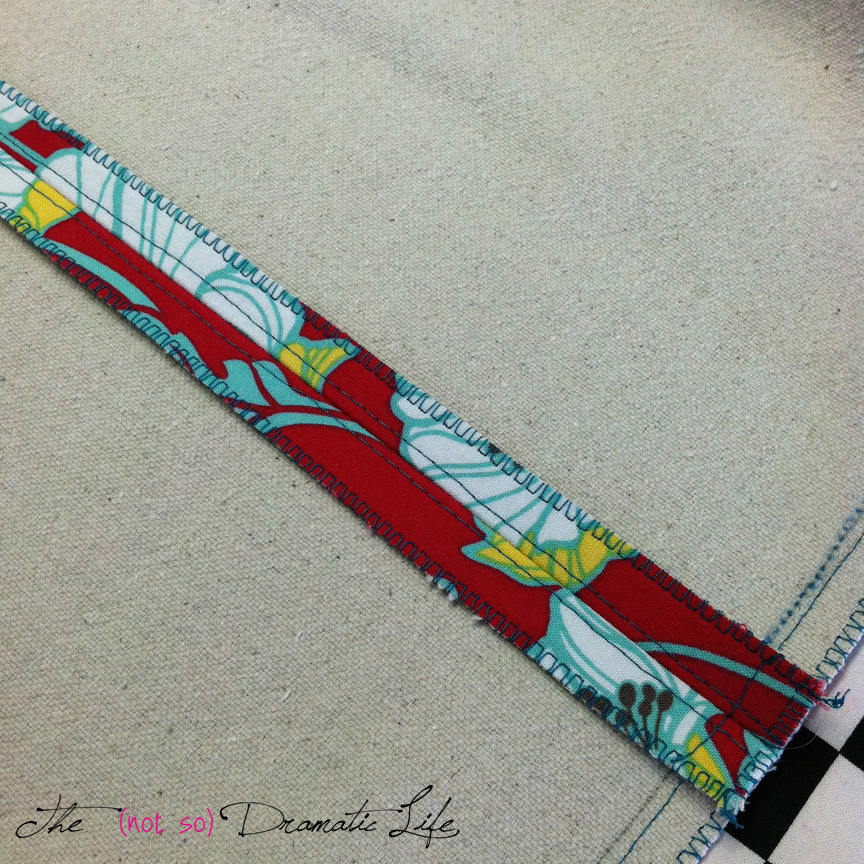
For the bag bottom, fold the piece in half lengthwise with the right sides together (when folded, it should look like the pattern piece). Pin and stitch both side seams. Press open the seams.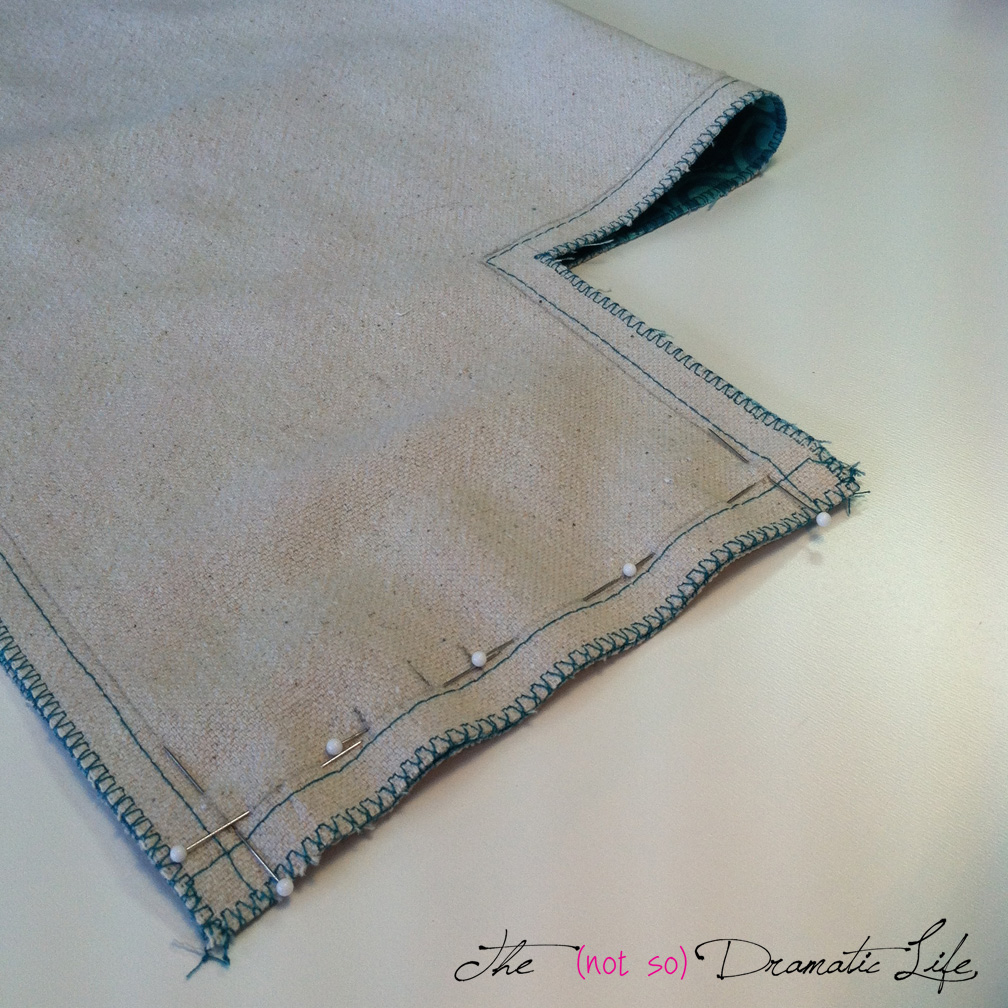
Pin the shaping seam for the bag bottom. The side seam should match up with the center of the bag bottom. Pin and stitch on the line.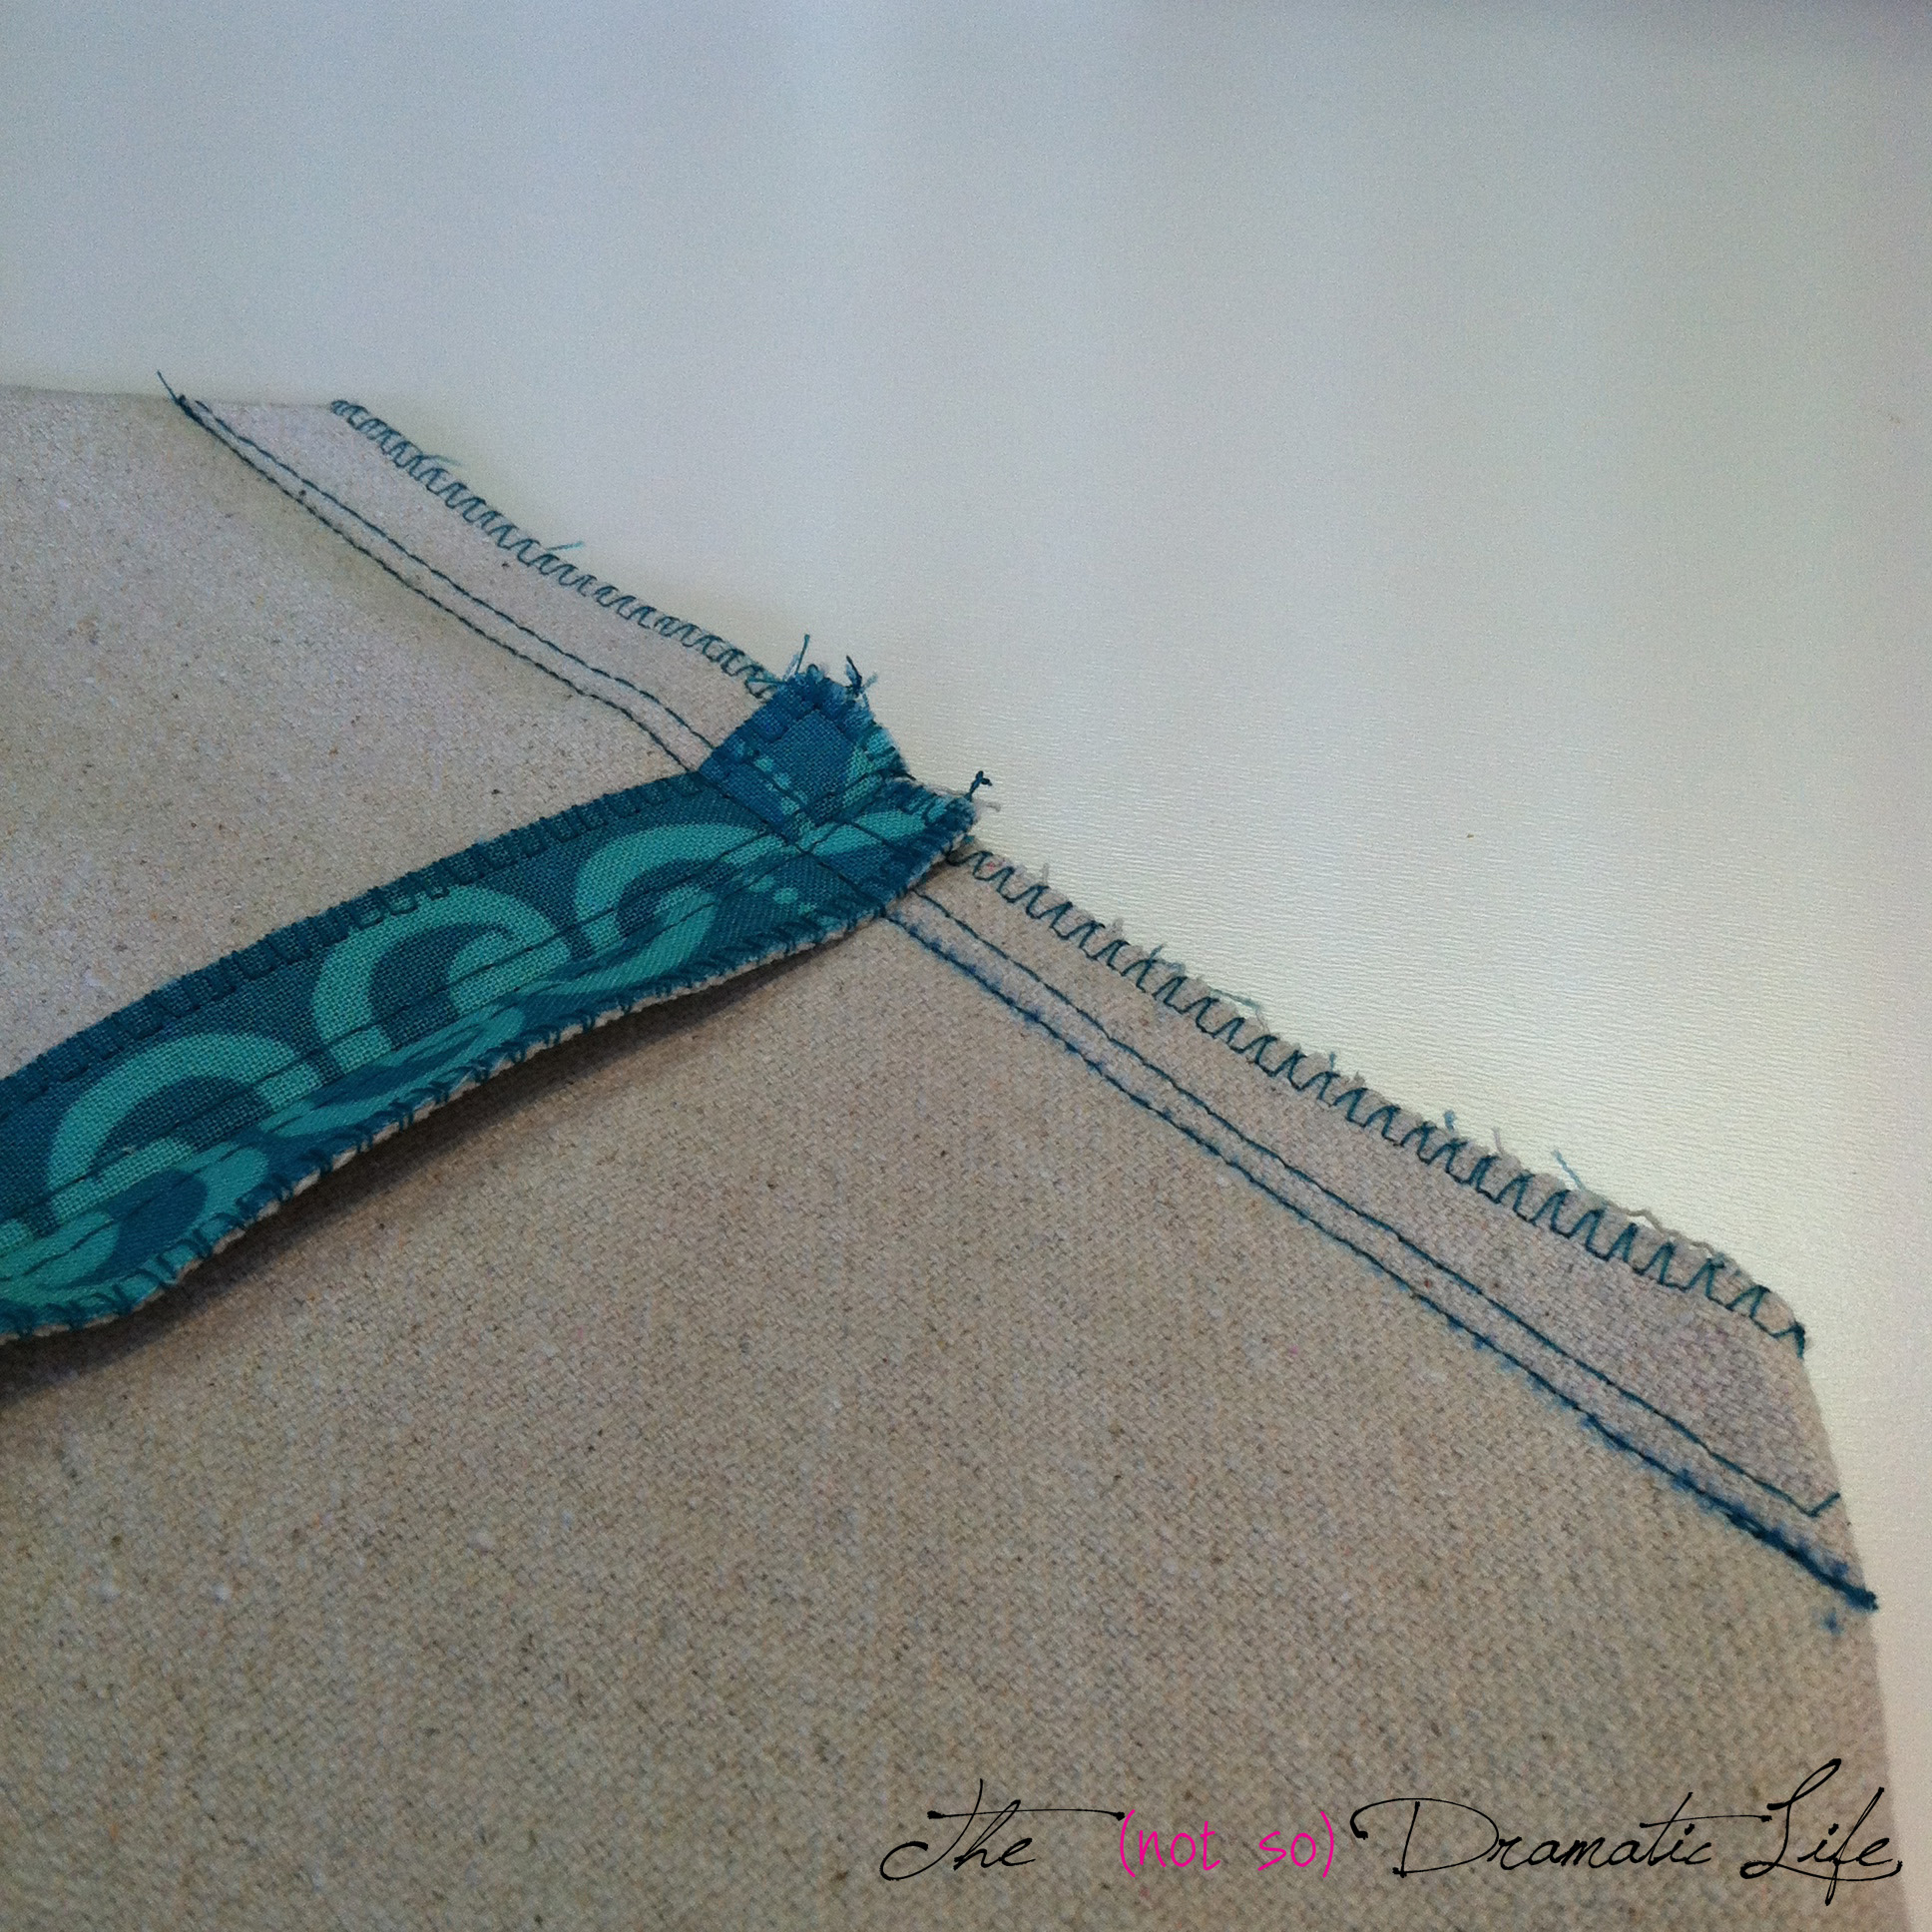
Place the pieces for the bag lining right sides together. Pin and stitch the side seams on the stitching lines, finish the raw edges, then press the seams open. 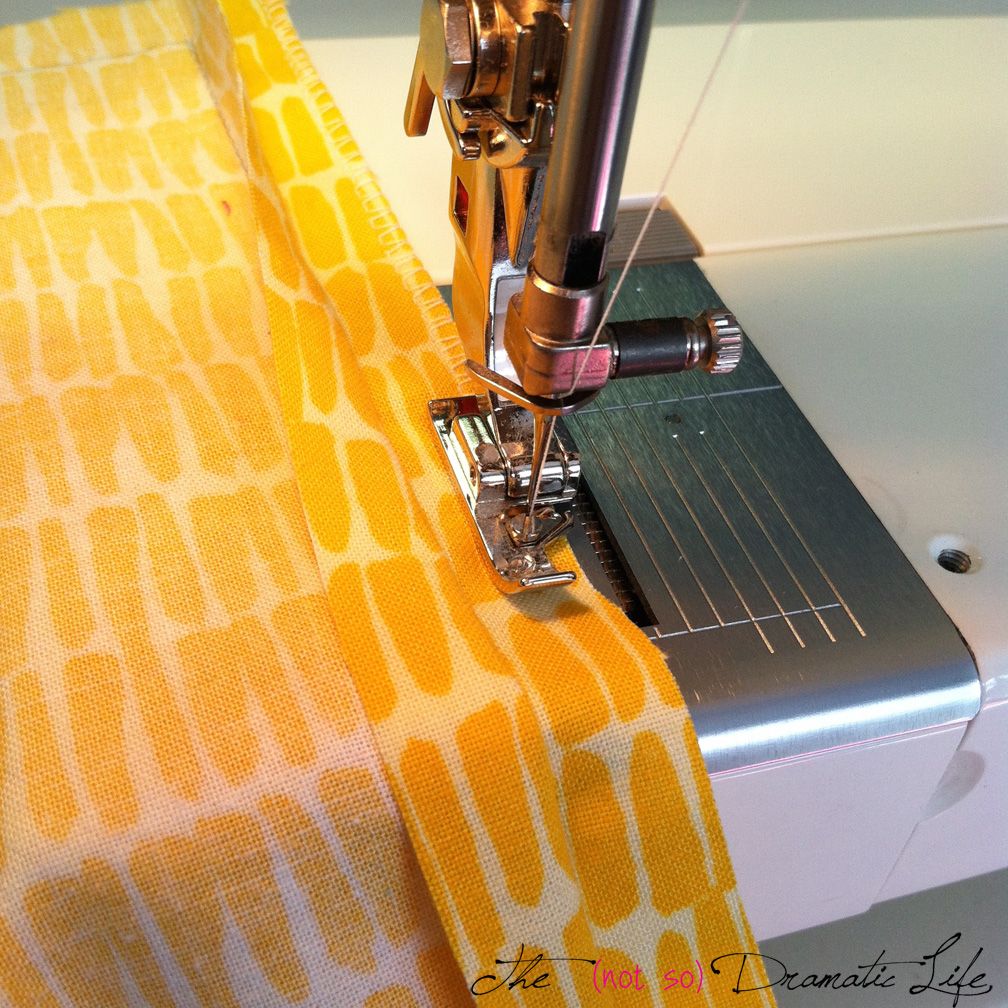

You will also want to pin and stitch the bottom of the bag, leaving several inches in the center of the seam open. This opening is what you will use to turn the finished bag right side out, so don’t try to make it too small. Pin and stitch the shaping seams of the bag lining. When lining this seam up, the side seam will match up to the bottom seam.
With right sides together, pin and stitch the top of the bag top to the top of the bag lining. Since this is a circular seam, you will want to match the side seams up to start with. 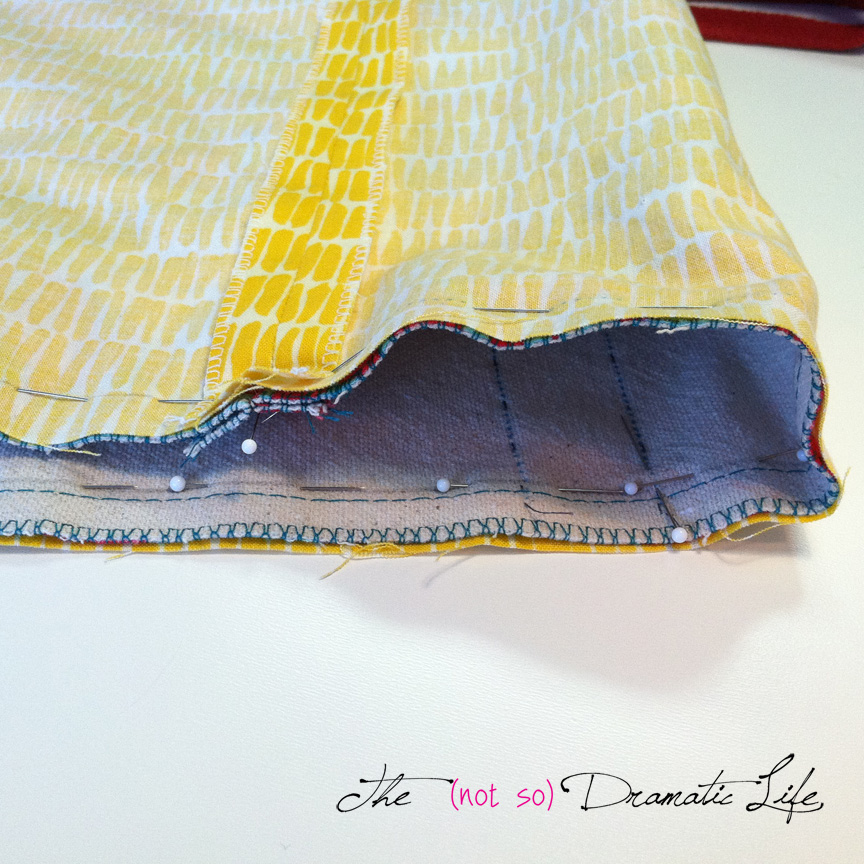
Grade the seam allowance and press it toward the lining. Understitch the seam allowance to the lining of the bag.
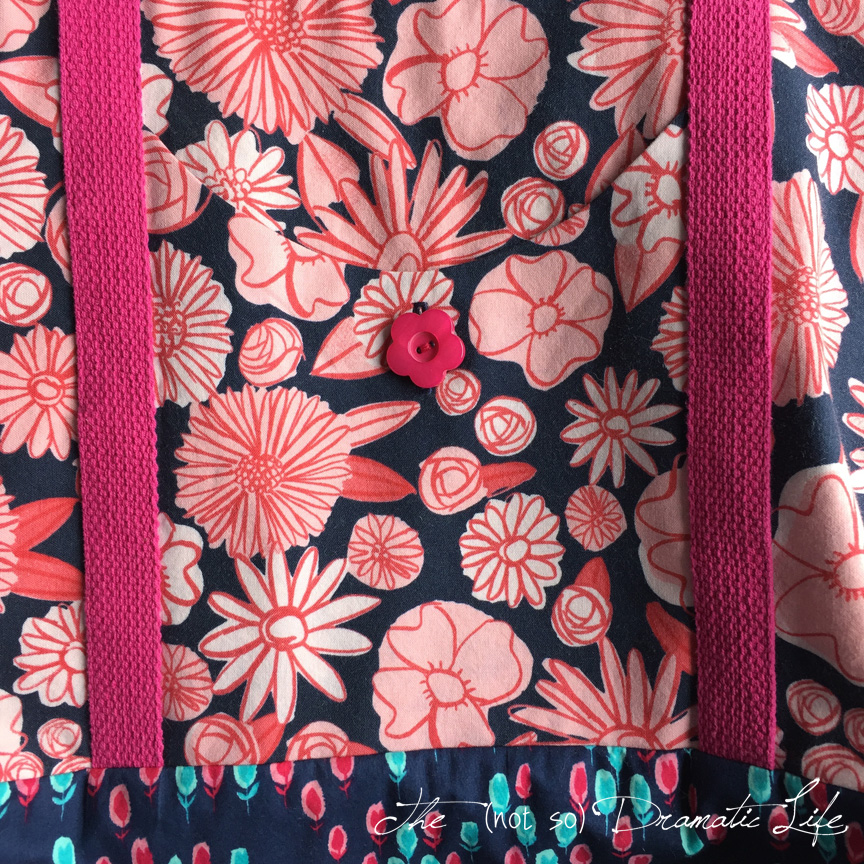
Situate the bag so the right side of the bag upper is readily accessible and the lining is pulled out away from the bag top. We are now going to position the bag handles. Before cutting the webbing, estimate the length you think you will need and pin it roughly in place. Check the length and when you are happy, mark the length, unpin it, and cut two sections of webbing exactly the length. Starting at the each end of the webbing, pin the webbing carefully in place between the handle placement thread tracing lines. Double check that the handles didn’t get twisted in the pinning process. 
Stitch up one side of the handle, across the top of the webbing (just before you reach the top of the bag where it joins the lining) and back down the other side of the webbing. Make sure you have the lining out of the way, so it doesn’t get caught up in the handle stitching. Repeat this process for each section of handle.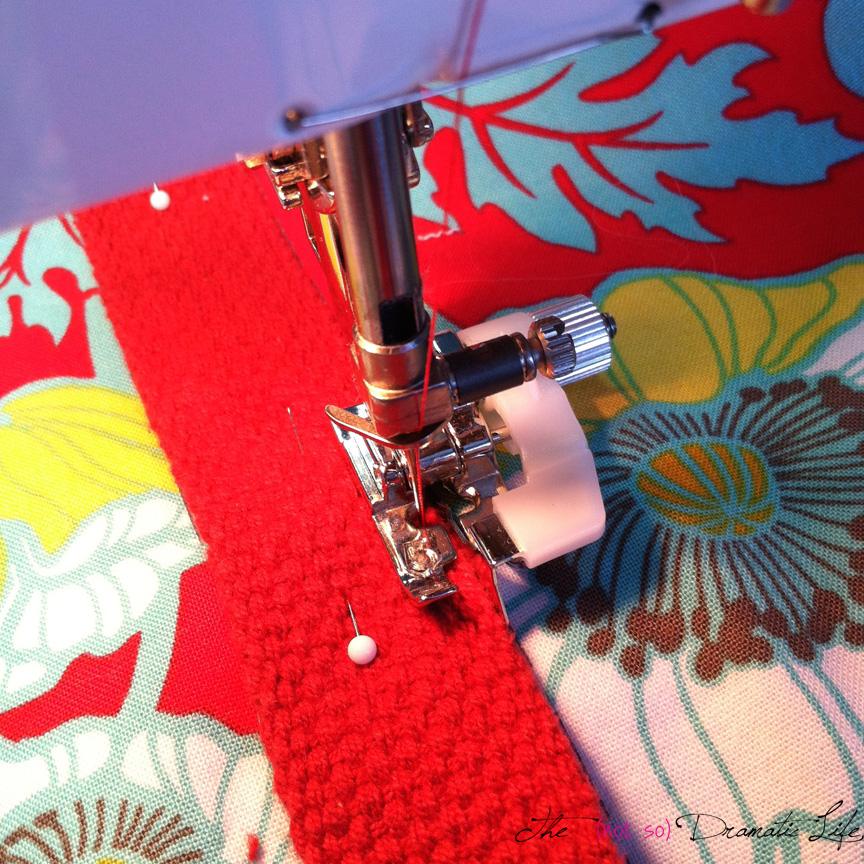
With right sides together, pin and stitch the bag bottom to the bag top. Hint: I turn the bag bottom right side out, the bag top wrong side out, and slip the bag bottom inside the bag top.
Clip the bag top seam allowance just outside the bag handles. Press the bag top to bag bottom seam open at the bag sides and down at the pocket and handle sections.
Turn the bag right side out and press the lining toward the inside at the top edge. 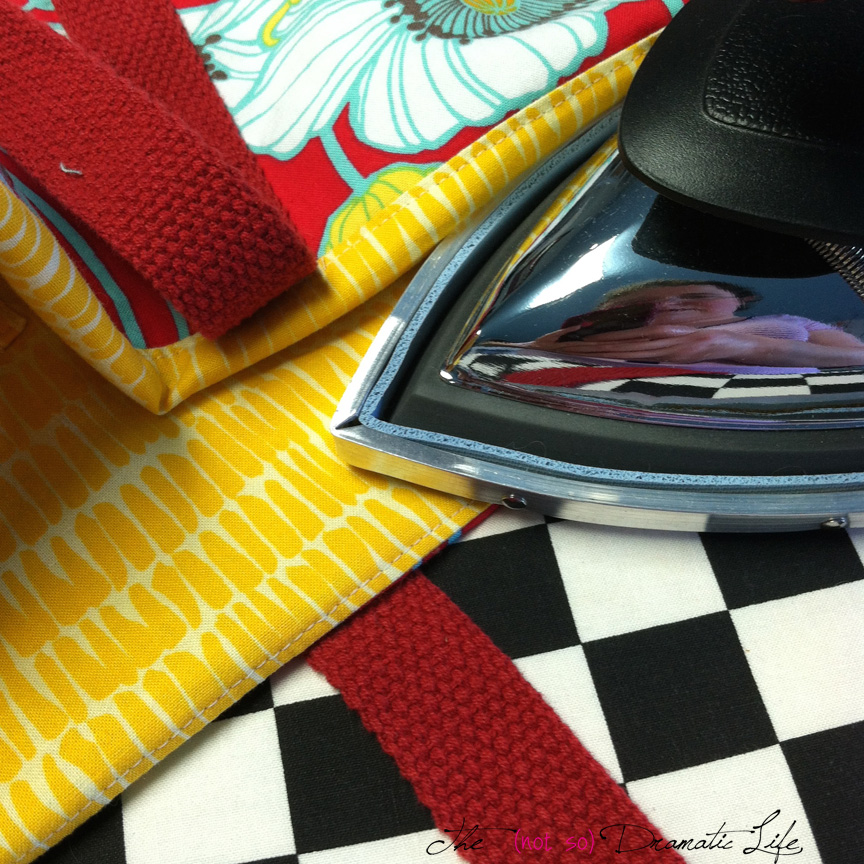
You are almost there- Next week we’ll be finishing up!
I am linking this post up with WIP Wednesday at Freshly Pieced. Please look in to see what everyone is working on!

4 Comments
Tote Bag Tutorial Part 1: Gathering Supplies | The (not so) Dramatic Life
February 11, 2015 at 12:19 pm[…] Part 4: Assembling the Bag […]
Tote Bag Tutorial Part 2: Creating the Pattern | The (not so) Dramatic Life
February 11, 2015 at 12:19 pm[…] Part 4: Assembling the Bag […]
Tote Bag Tutorial Part 3: Cutting Out Your Bag | The (not so) Dramatic Life
February 11, 2015 at 12:20 pm[…] Part 4: Assembling the Bag […]
Jasmine
February 12, 2015 at 12:17 amGreat and informative.