Grading
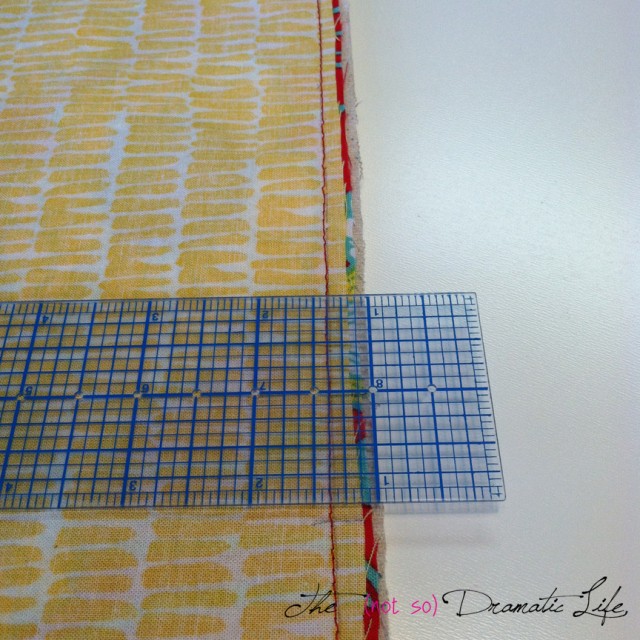
When you grade a seam allowance you are cutting each layer of the seam allowance down slightly to reduce bulk in the finished project. When grading, you cut parallel to the stitching line. This series of cuts creates “stair steps” which will help to prevent an unsightly ridge that may show through on the finished product. You want to try to have the longest seam allowance closest to the outer layer of the garment or other project. When both grading and clipping/notching a seam allowance, it is generally easier to grade first.

Graded Seam Allowance. The yellow fabric is the inner lining, the red is the outer fabric, and the tan is the flatlining. When the project is turned right side out, the flatlining will be closest to the exterior of the project. This is why it is the longest layer.
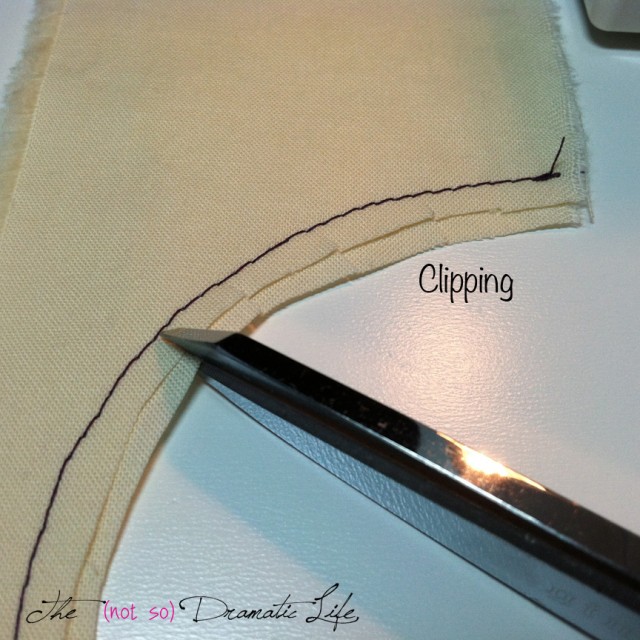
Clipping
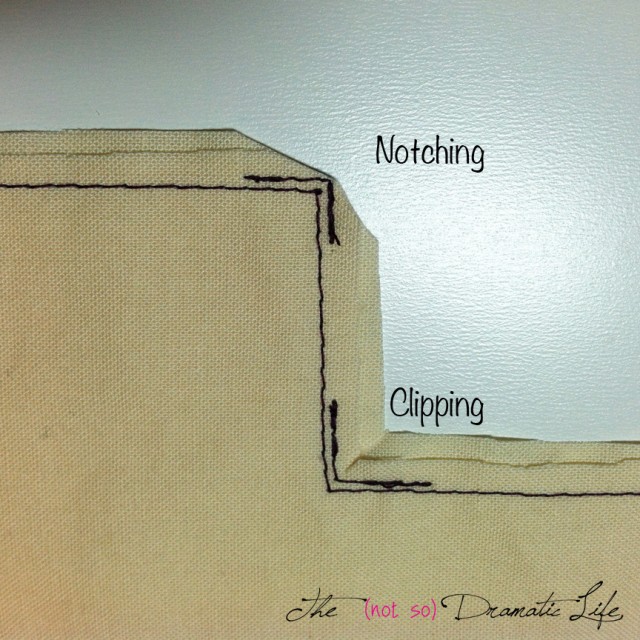
When you clip a seam allowance, you make a series of small cuts perpendicular to the edge of the fabric. When you have a concave curve or an interior corner which needs to be turned right side out, you will need to clip to release the tension of the seam allowance. In these situations the seam allowance is smaller than the area it is being turned into. Clipping can also be used in other instances where you feel the seam allowances straining. Tighter curves will require more frequent clips than more shallow curves.
Notching
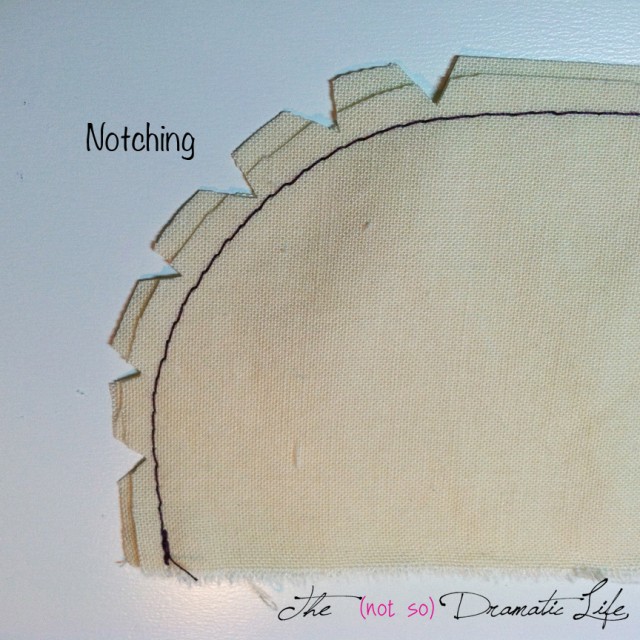
Notching is similar to clipping, but instead of taking a single snip out of the fabric, you cut out a small amount of fabric. Notching is used on convex curves and exterior corners because the seam allowance is larger than the space it will be turned into. Since notching removes small amounts of fabric, it will reduce bulk in the finished product. Corners are notched by cutting the seam allowance diagonally across the corner. Sometimes an additional row of tiny stitches is placed within the seam allowance close to the main stitching line. This will help to reinforce the corner prior to notching.
Curves are notched with a series of “V” shaped cuts.


No Comments