Flatlining is super useful when you want to add structure to a bag or garment you are constructing. When you flat line, you are sewing two pieces of fabric together to create a single section that will then be put together with the other pieces of your project. The fabric that is used as flat lining is almost always a more stable than the decorative fabric used on the exterior of the project. For instance, in this tote bag tutorial, you flatline the exterior fabrics with canvas to make the bag more durable. Flatlining is a technique which can be used in conjunction with an interior finished lining, but it isn’t always necessary.
So how do I flatline?
Remember that our main goal is to make two pieces of fabric behave as one. Make sure both fabric pieces are pressed nicely before you begin. Place the flatlining fabric on a table with the wrong side down. If you have drawn stitching lines or other marks on the flatlining, this means that the side with the marks will be on the table, and the side without markings is facing up toward you. Now take the corresponding exterior fabric piece and lay it face up on top of the flatlining piece. Are you now looking at the pretty side of the fabric? Good!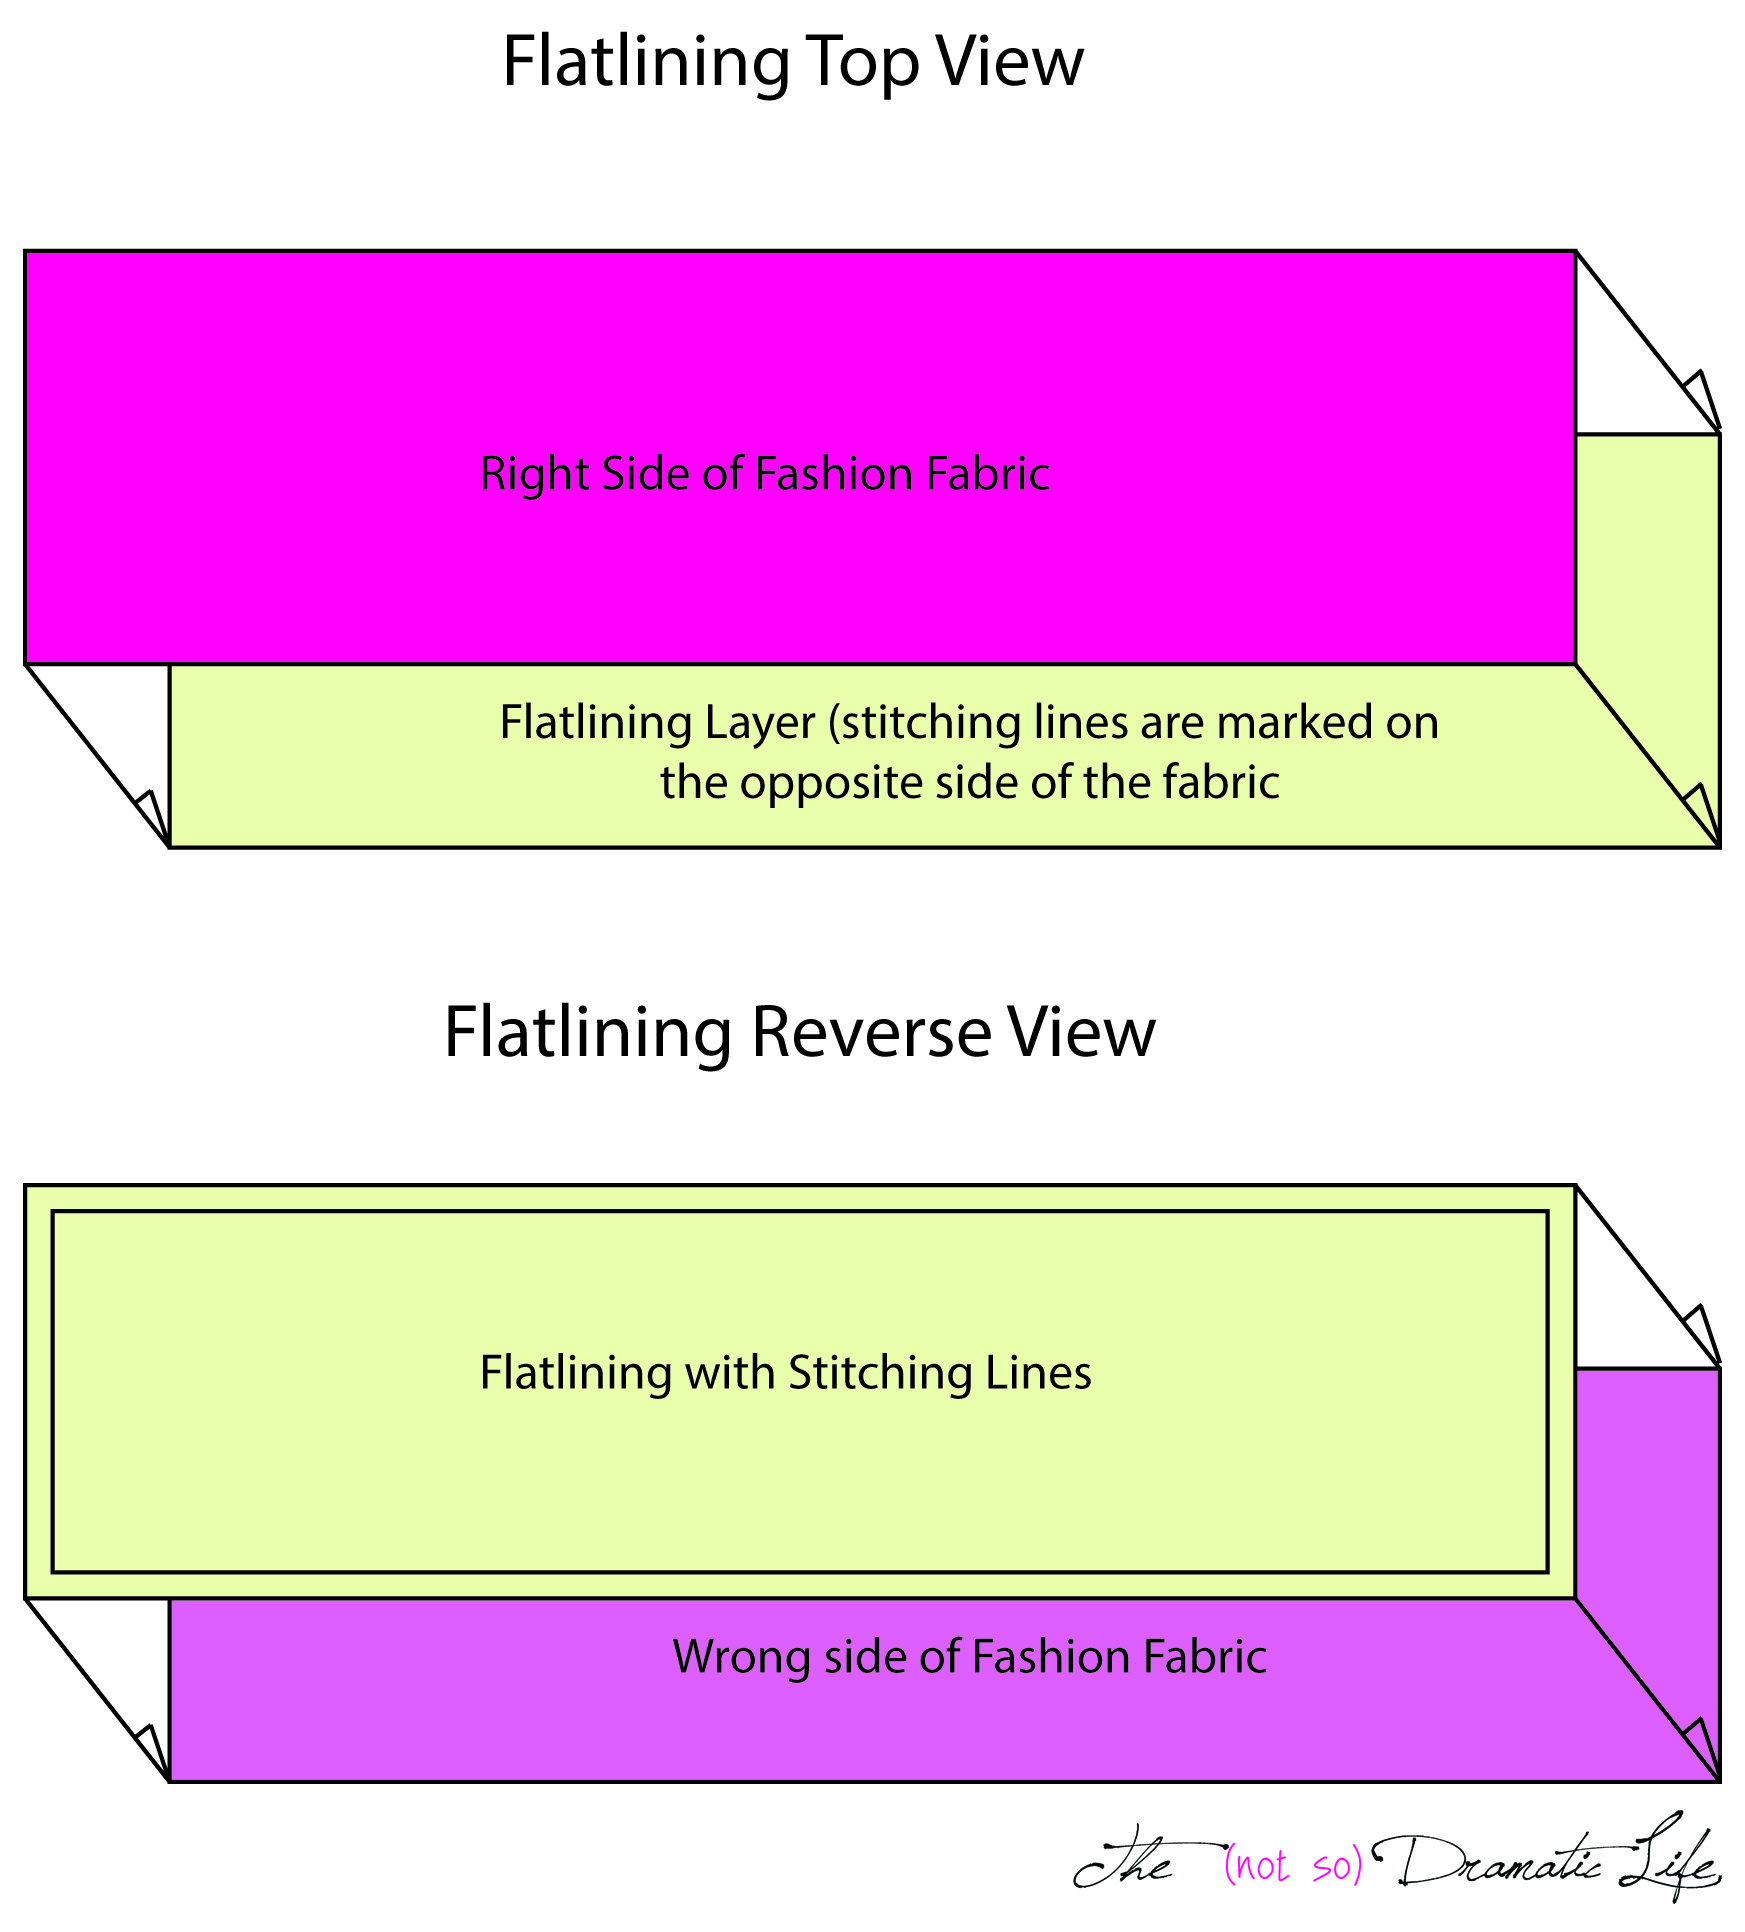
Gently smooth the top fabric over the flatlining. You don’t want to pull at the fabric, but you do want to make sure there are no bubbles, rumples, or puckers. Now you want to keep the pieces on the table while you pin around all of the edges of the piece. Place your pins perpendicular to the edge of the fabric.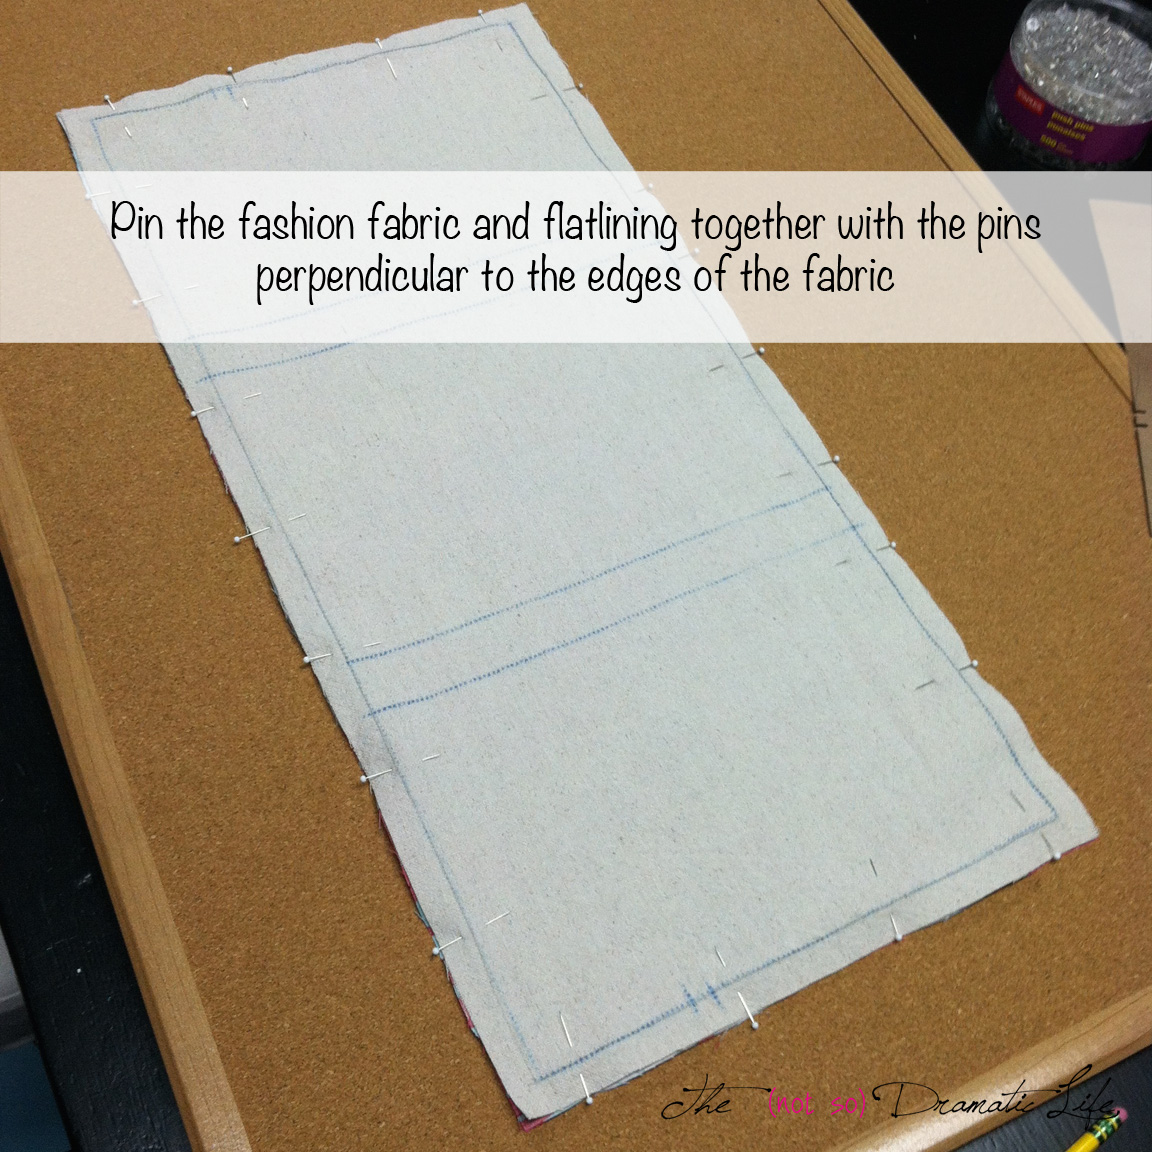
Is everything pinned? Double check that on one side of your pinned piece you see the beautiful exterior fabric you want to see forever and ever, and that on the other side you see the stitching lines and/or other marks you will use for construction.
Head on over to your sewing machine- you can flatline by hand, but I tend to save that for super delicate or fussy fabrics. I use the sewing machine about 99.99999999% of the time. You are going to use a straight stitch that is fairly long. I set my stitch length to about halfway between the longest stitch setting and a medium stitch.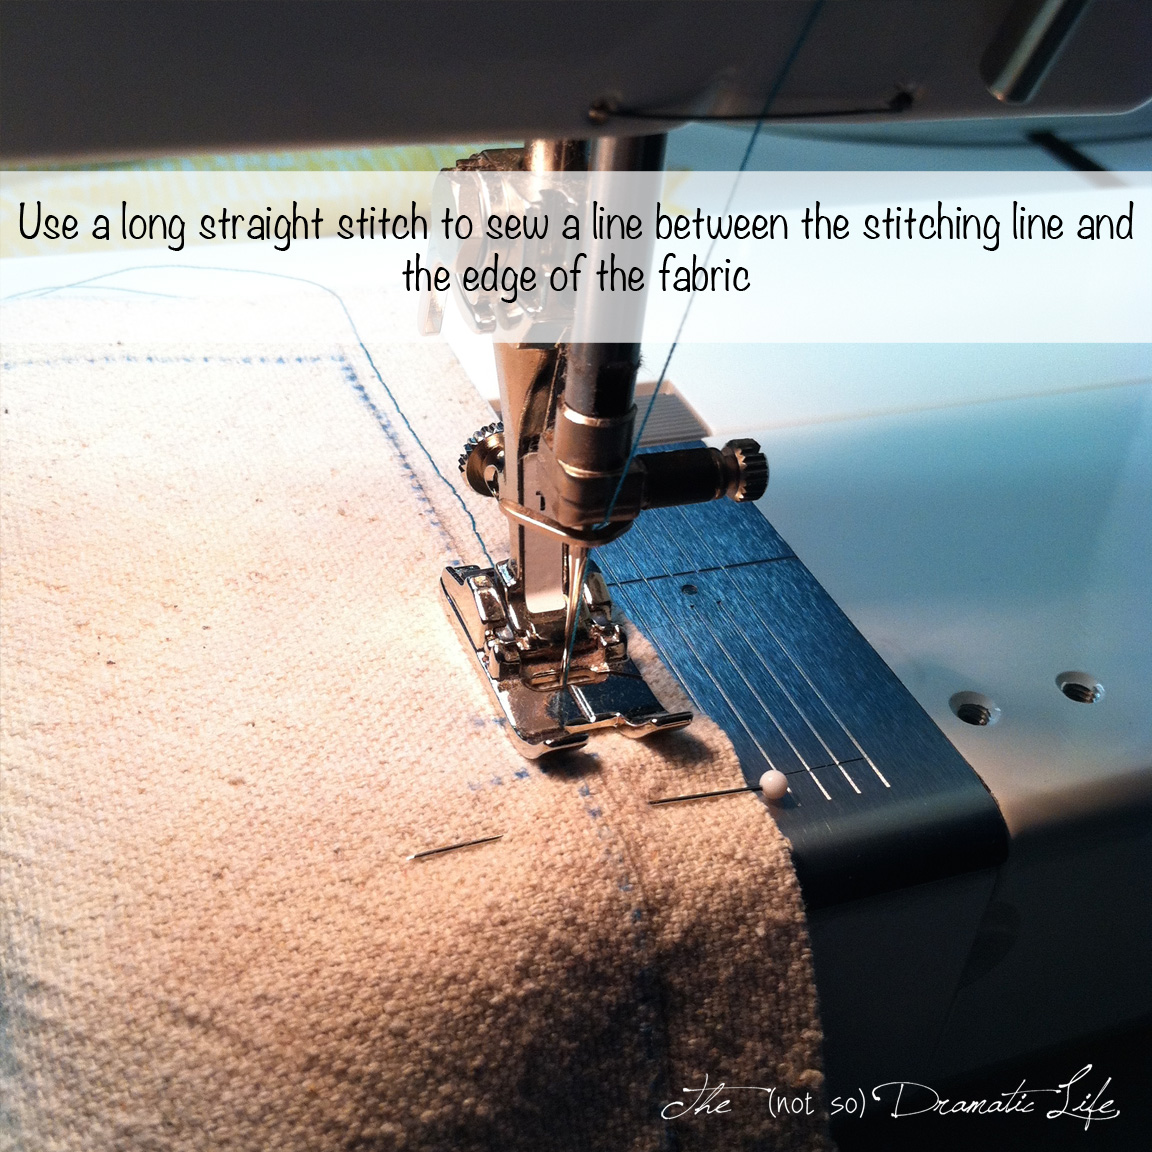
Remember that our goal is to make two pieces of fabric become one. Since you won’t want your flatline stitching to show on your finished project, you will want to stitch in the seam allowance area of each piece. Work your way around the piece, sewing one side at a time. Start at the edge of the fabric and sew to the next edge of the fabric. Do NOT backstitch. Do NOT pivot at exterior corners, but you may pivot at an interior corner. You will want to have just a little bit of wiggle room in case the fabrics need to move very slightly in the final pressing. Stitching without pivoting or backstitching allows you that bit of flexibility.
If you plan to finish the edges of the pieces, I recommend doing that now. If you have an overlock machine/serger, by all means use it to finish the edges of your pieces. Just make sure that you only cut off only a hair of the seam allowance to even things up. If you don’t have an overlock machine, you can use an overcast stitch or zig-zag on your regular machine. If there is a discrepancy between the size of the outer fabric and flatlining, you may need to trim away a small amount of the seam allowance. This is where having a stitching line marked can really help you- the stitching line doesn’t change just because the seam allowance changes a smidgen.
Once the piece is flatlined, you may look at it and think “Oh my goodness! This looks rumply and awful!” This reaction is fine, but don’t panic! 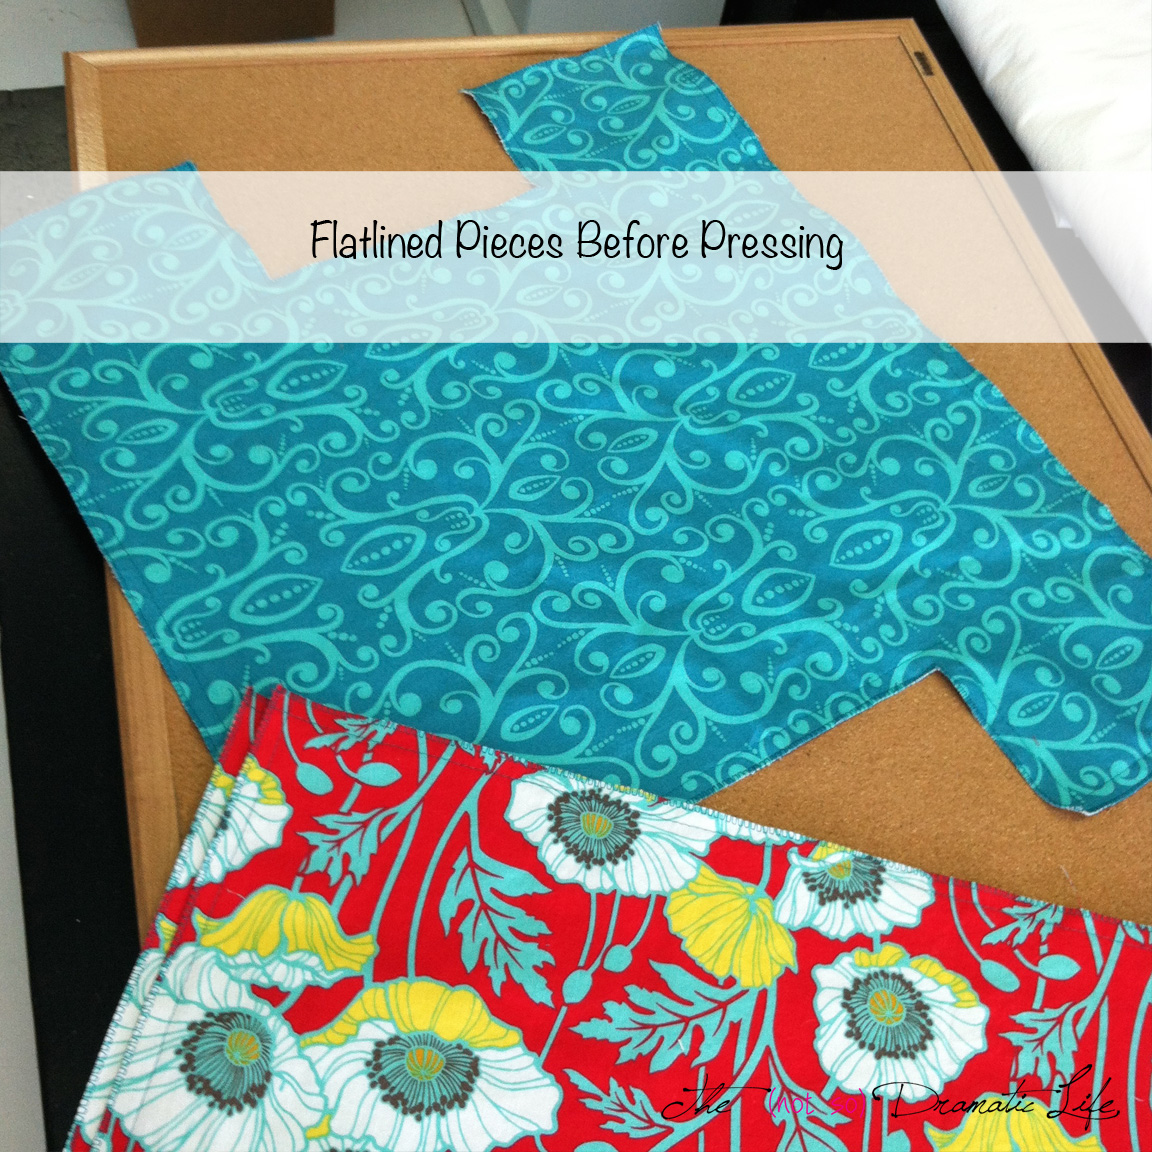
The final step is to go to the iron and press the piece carefully using lots of steam. Make sure you are pressing (using a gentle up and down movement) and not ironing (running the iron back and forth over the piece).  Now isn’t that so much better?
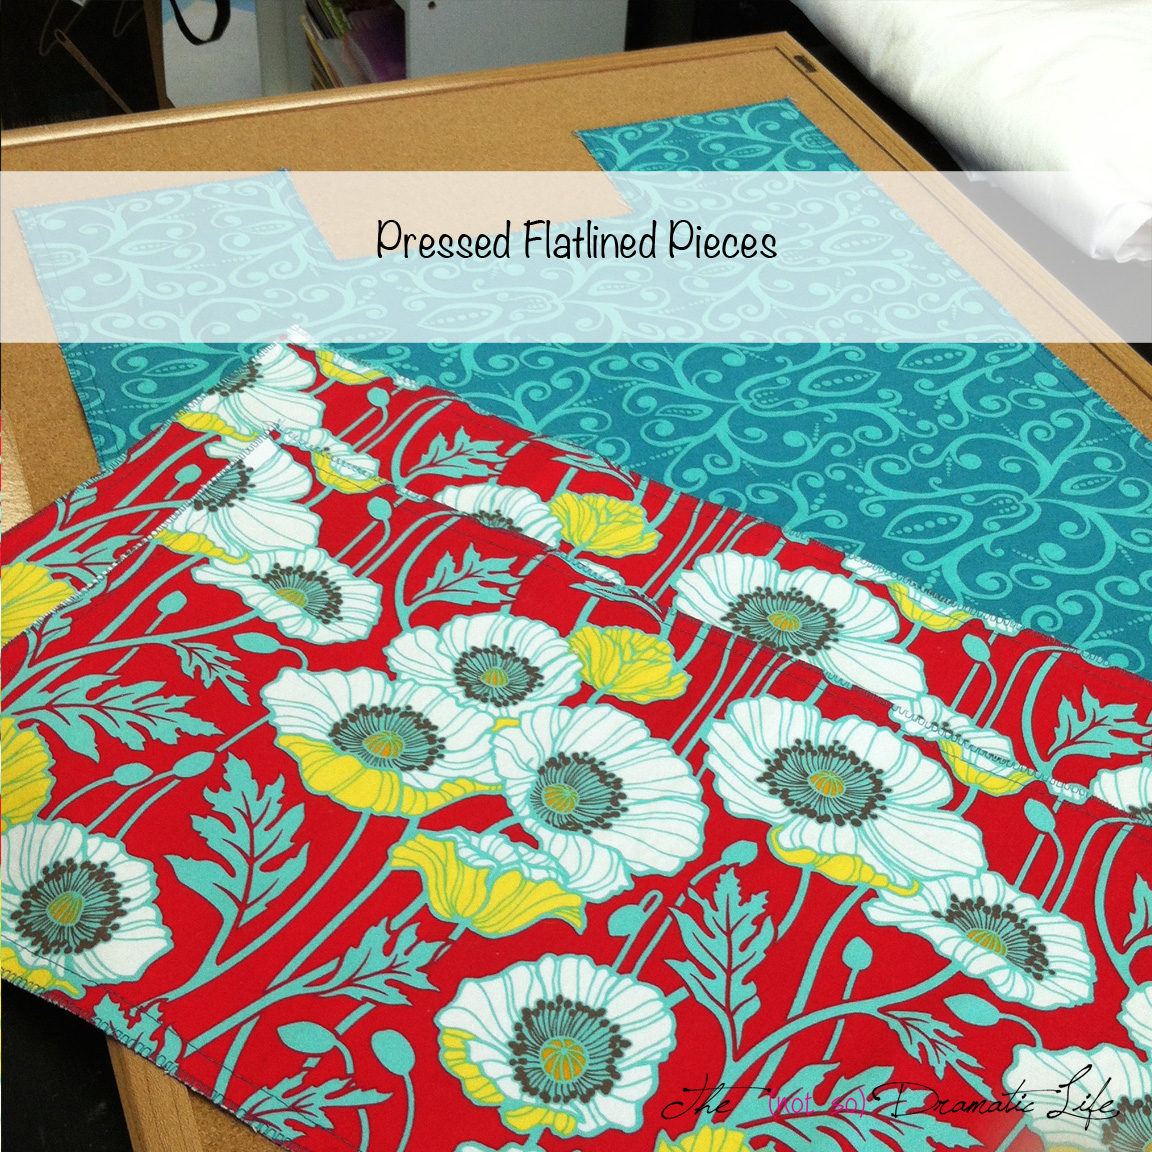
Congratulations! You have flatlined! Now repeat that process with each flatlined piece of your pattern.
1 Comment
Tote Bag Tutorial Part 4: Assembling the Bag | The (not so) Dramatic Life
February 11, 2015 at 12:17 pm[…] Fun with Flatlining! […]