Flying Geese quilt blocks pop up all the time, both on their own and in concert with other block components, so knowing a couple of ways to construct them is super helpful to any quilter. Today, I am sharing my two favorite methods of constructing flying geese blocks, including measurements for seven sizes with trimmable and no-trim options.
Are you ready to get started? Let’s Go!
Two Techniques for Flying Geese Quilt Blocks
Are there more than two ways to construct flying geese blocks? Yep. However, these are my two favorites.
Flying geese blocks require bias edges, and those love to stretch. Both methods I’m sharing today allow you to stitch while all the pieces involved still have their cut edges on the straight grain. This method significantly decreases the likelihood of having your fabric stretch.
Four-at-a-Time, No Waste Flying Geese
No Waste? I’m in! This method is my go-to technique for creating Flying Geese in larger numbers, which is almost all of the time. The No-Waste Flying Geese Technique:
- Constructs four identical blocks at once
- Creates little to no fabric waste
- Works well with fabrics featuring solids or all-over, non-directional prints
Stitch and Flip
Sometimes, you don’t need four identical flying geese, or you have fabrics that require a bit more care in the cutting process. That’s when the stitch-and-flip method comes in handy. The Stitch-and-Flip Technique:
- Creates one Flying Goose block at a time
- Allows more control over fabric placement
- Works better with directional prints
To Trim or Not to Trim?
There are two types of quilters: those who want to trim every block component to maintain optimal accuracy and those who can go their entire quilting lives without ever trimming a block component.
I am almost always a trimmer, but there is also a place for no-trim blocks. I am sharing the cutting sizes for these two methods for trimmable and no-trim options.
Note: Keep your seam allowances to a scant quarter inch if you use the no-trim method. What is a scant quarter inch? A Scant Quarter inch is about one thread width narrower than an accurate quarter inch. This slightly narrower seam allowance accounts for the thickness of your sewing thread, fabric, and pressing technique and helps you achieve a more accurate block.
If you plan to trim your blocks, use a standard quarter-inch seam allowance because your block has some built-in leeway.
This post focuses on block construction, but if you are a trimmer, make sure you come back next time when I share 3 Easy and Accurate Ways to Trim Flying Geese Quilt Blocks!
Cutting Chart for Flying Geese
The following chart has a cutting list for seven different sizes of Flying Geese Blocks. Each size includes options for the two methods I share here, with trimmable and no-trim finishing options. You can even download the PDF here:

Constructing Flying Geese Blocks
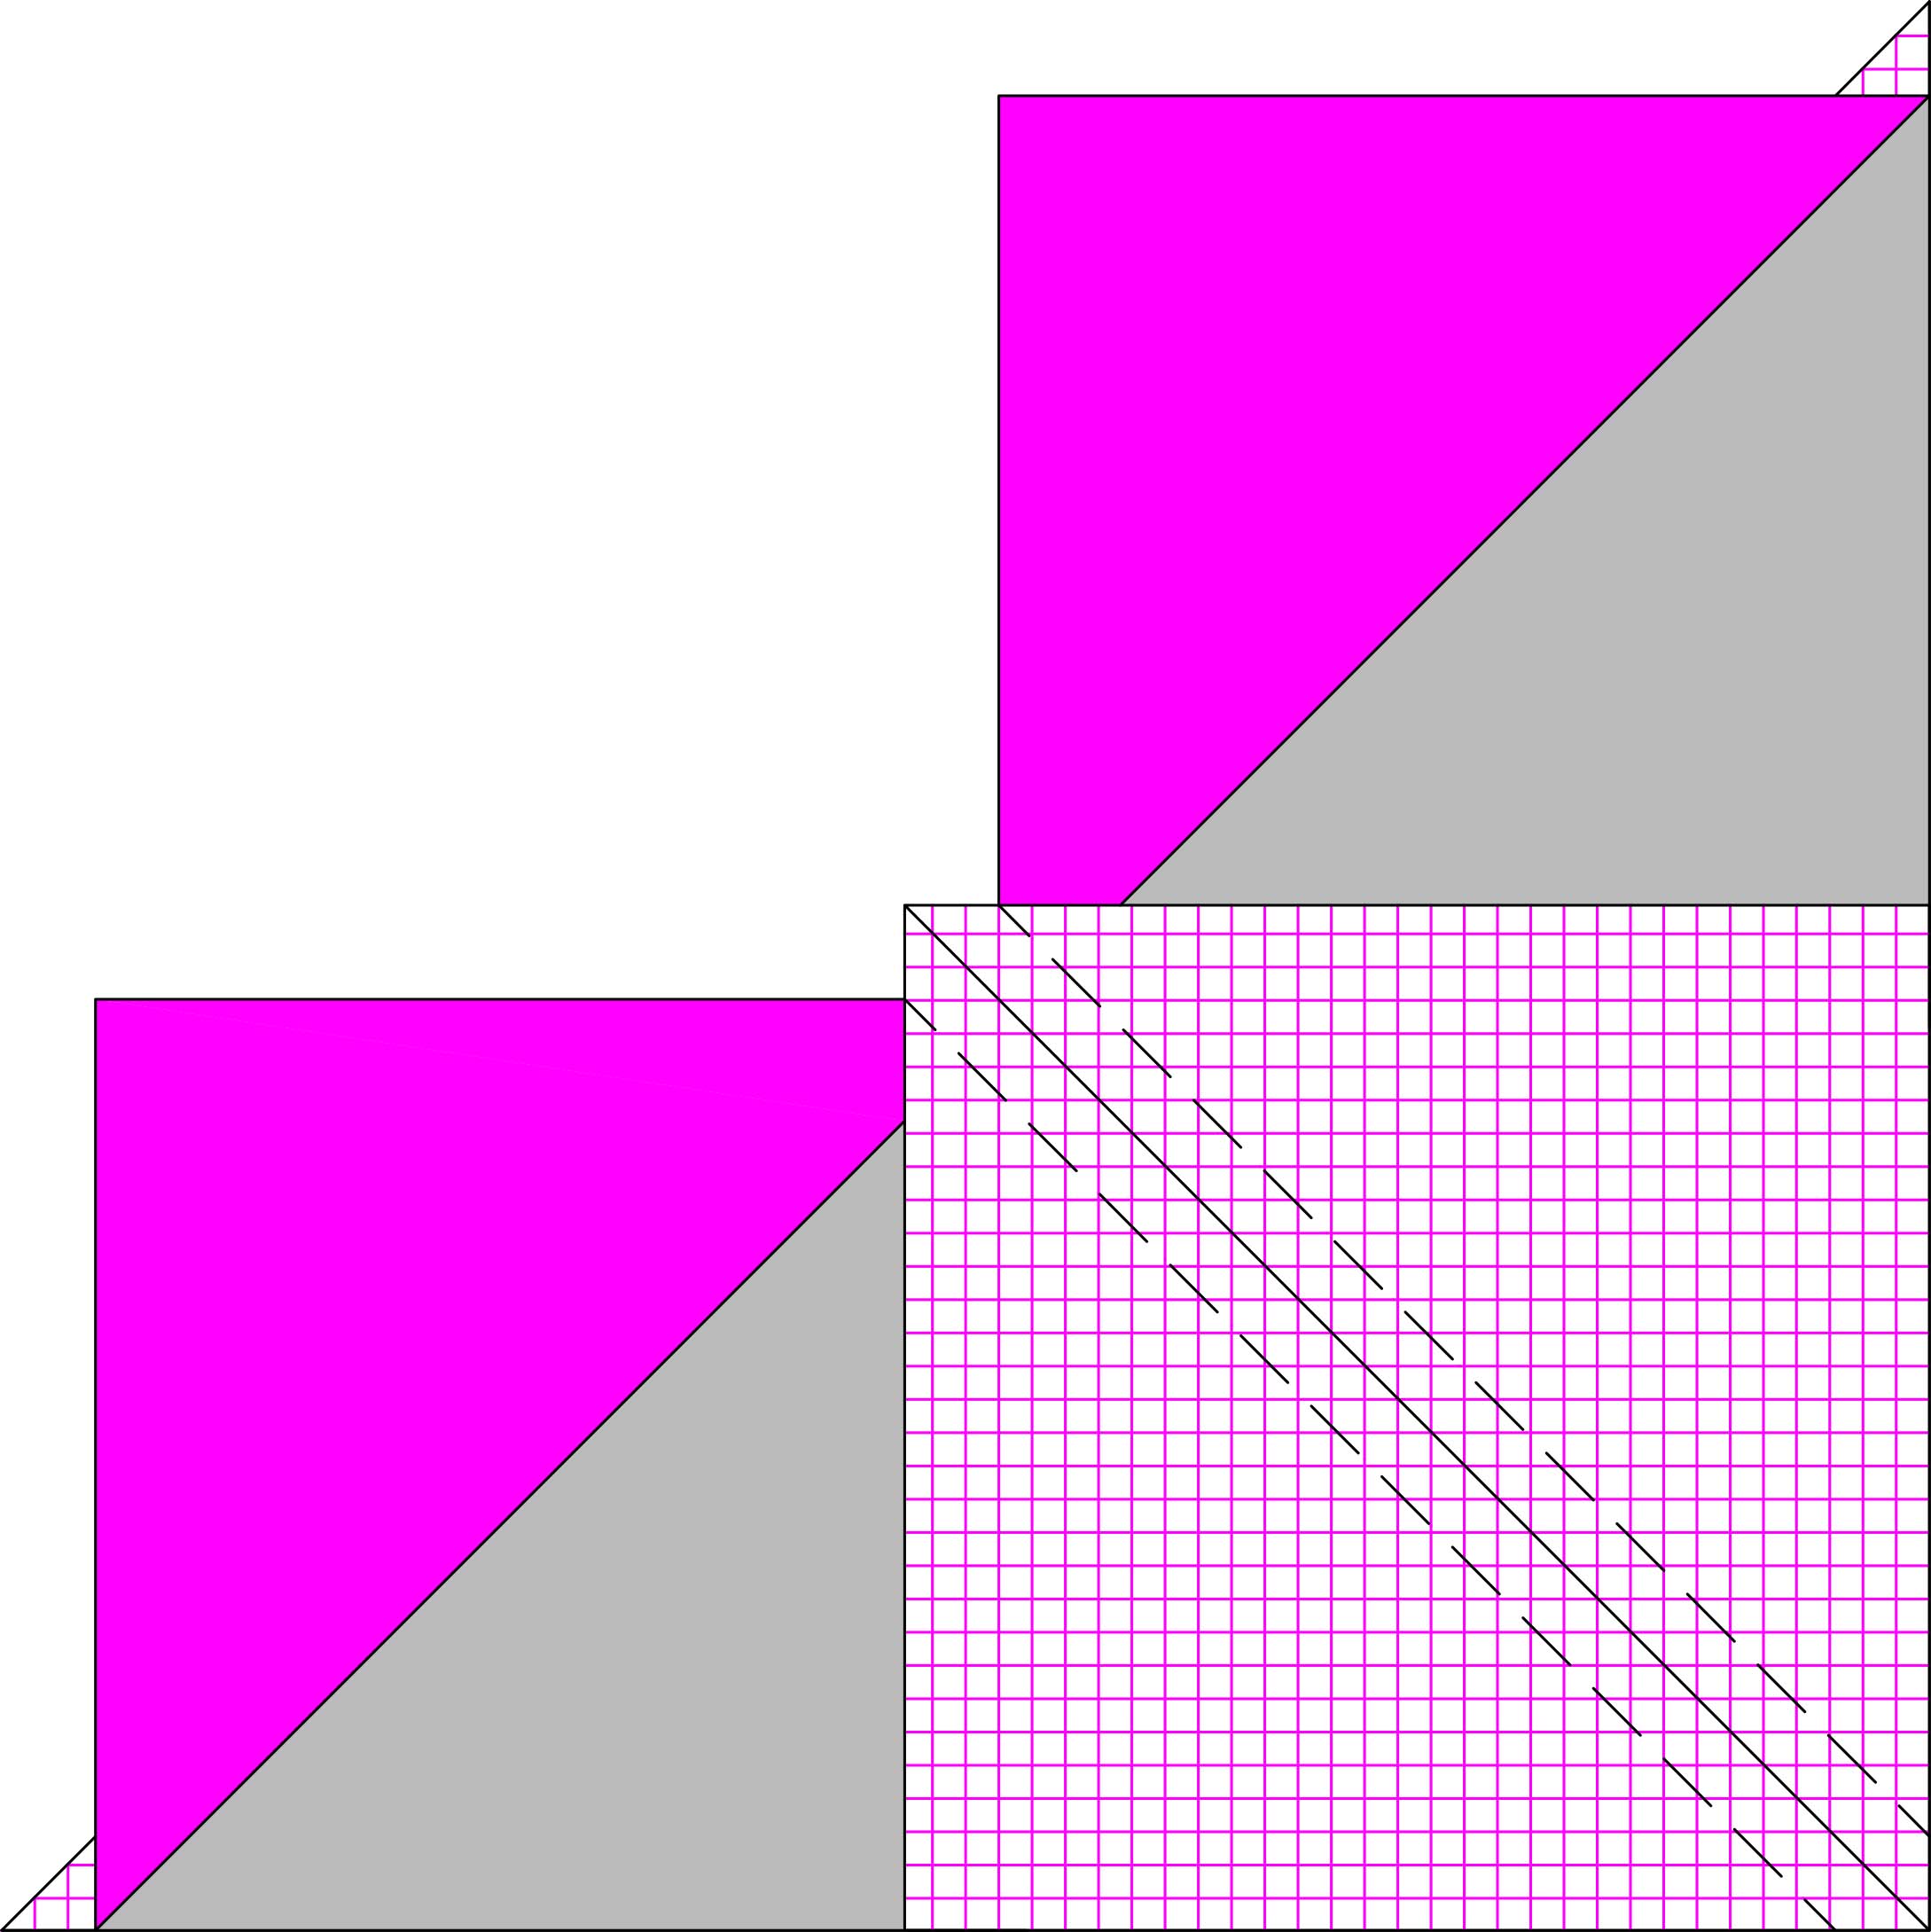
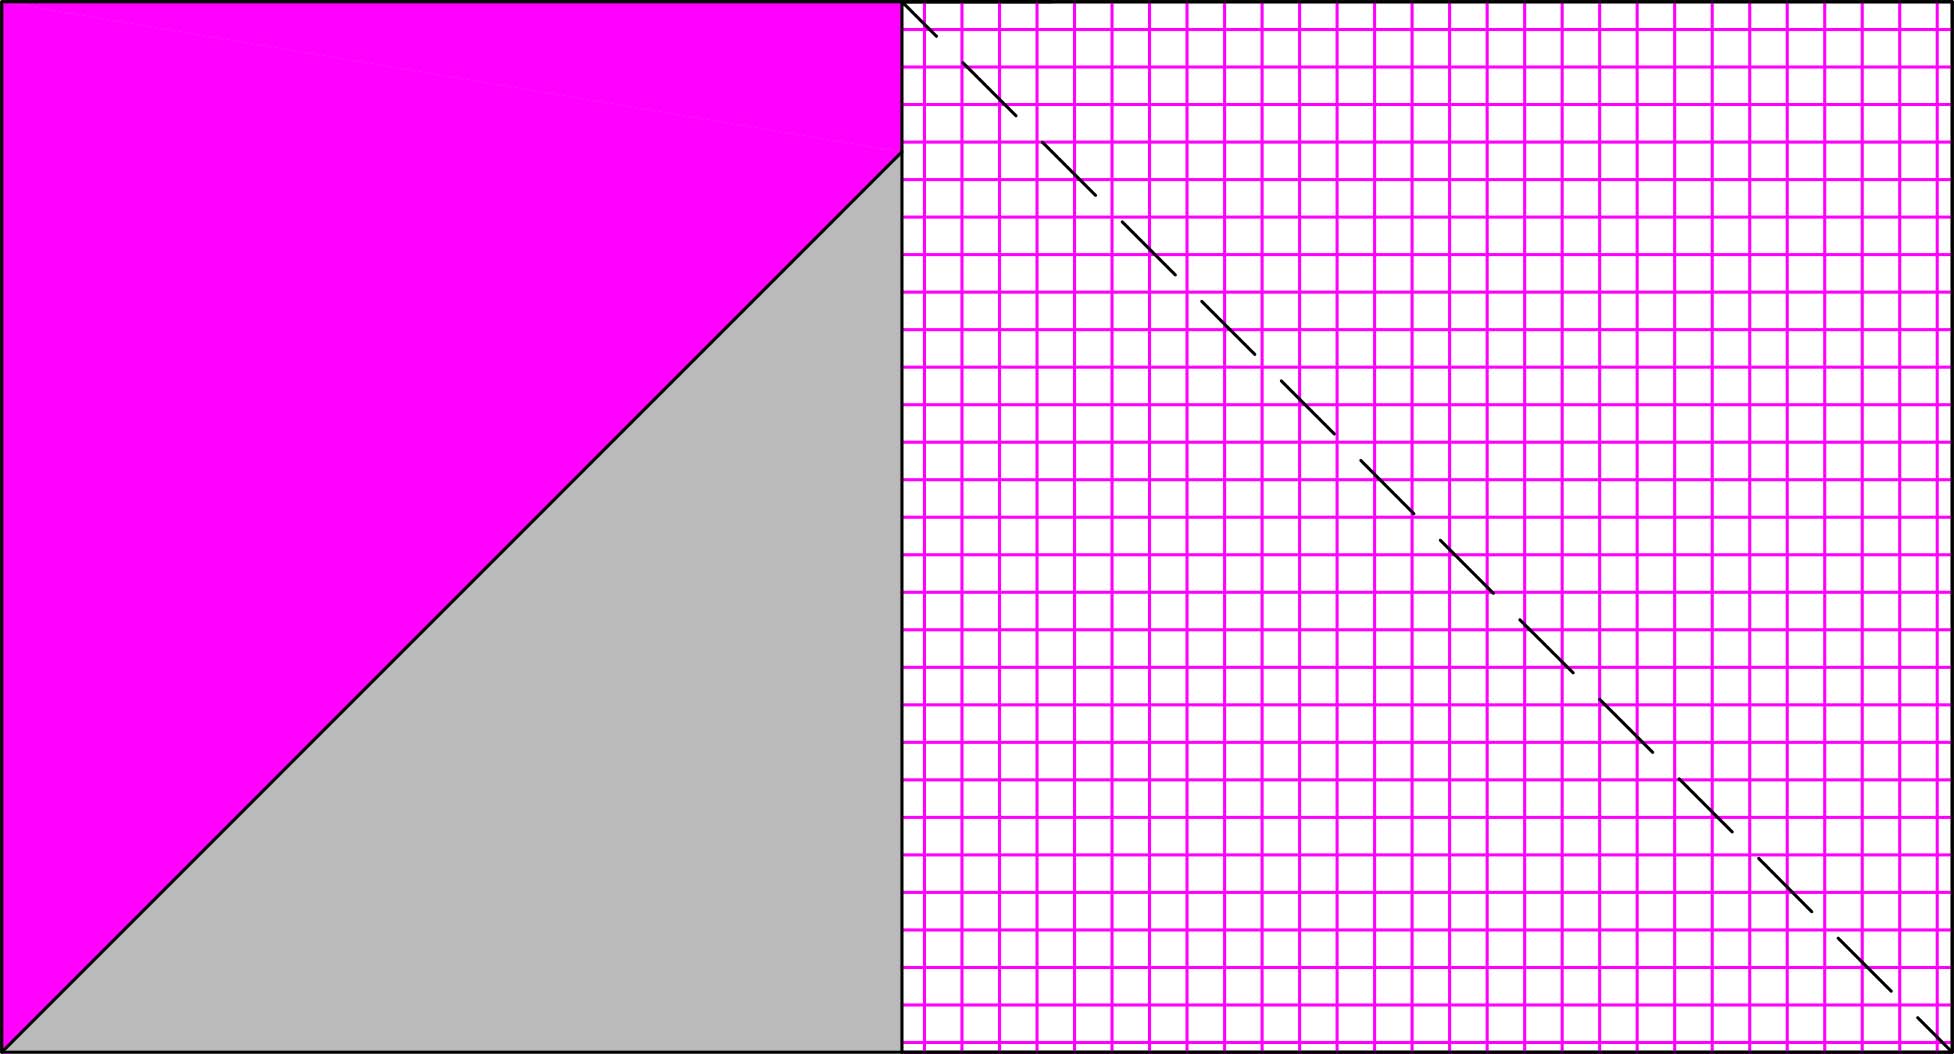
The following diagrams for these two methods show the fabrics’ front and back sides. The back is drawn with a hatched design, and the front is shown as a solid color. The large square or rectangle is shown in grey, and the small squares are shown in pink.
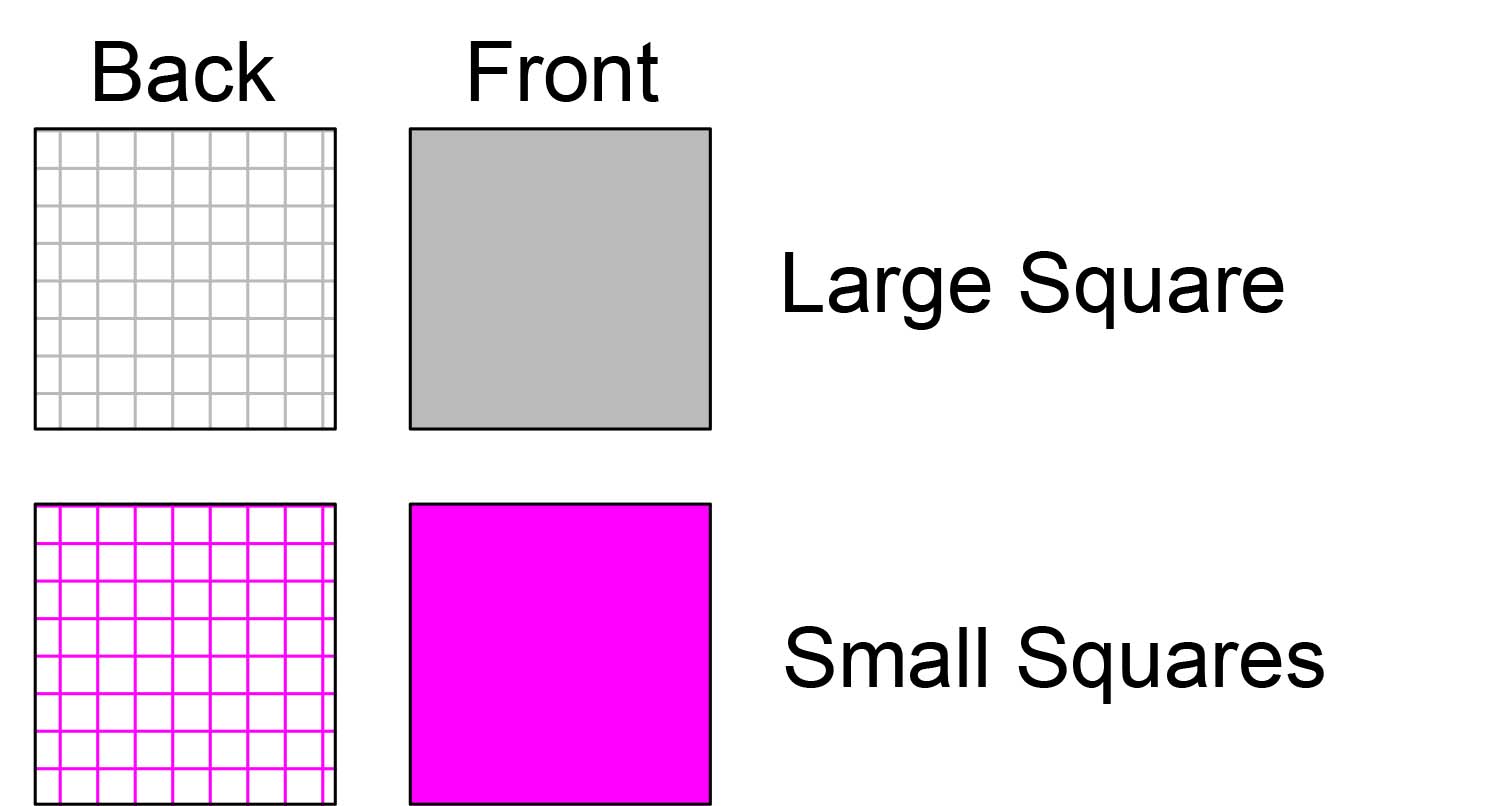
The diagrams for these Flying Geese blocks are drawn to in the 3″ x 6″ finished size, with the no-trim dimensions unless otherwise noted.
Constructing 4-at-a-Time, No-Waste Flying Geese
- Draw one diagonal line from corner to corner on the back of each small square.

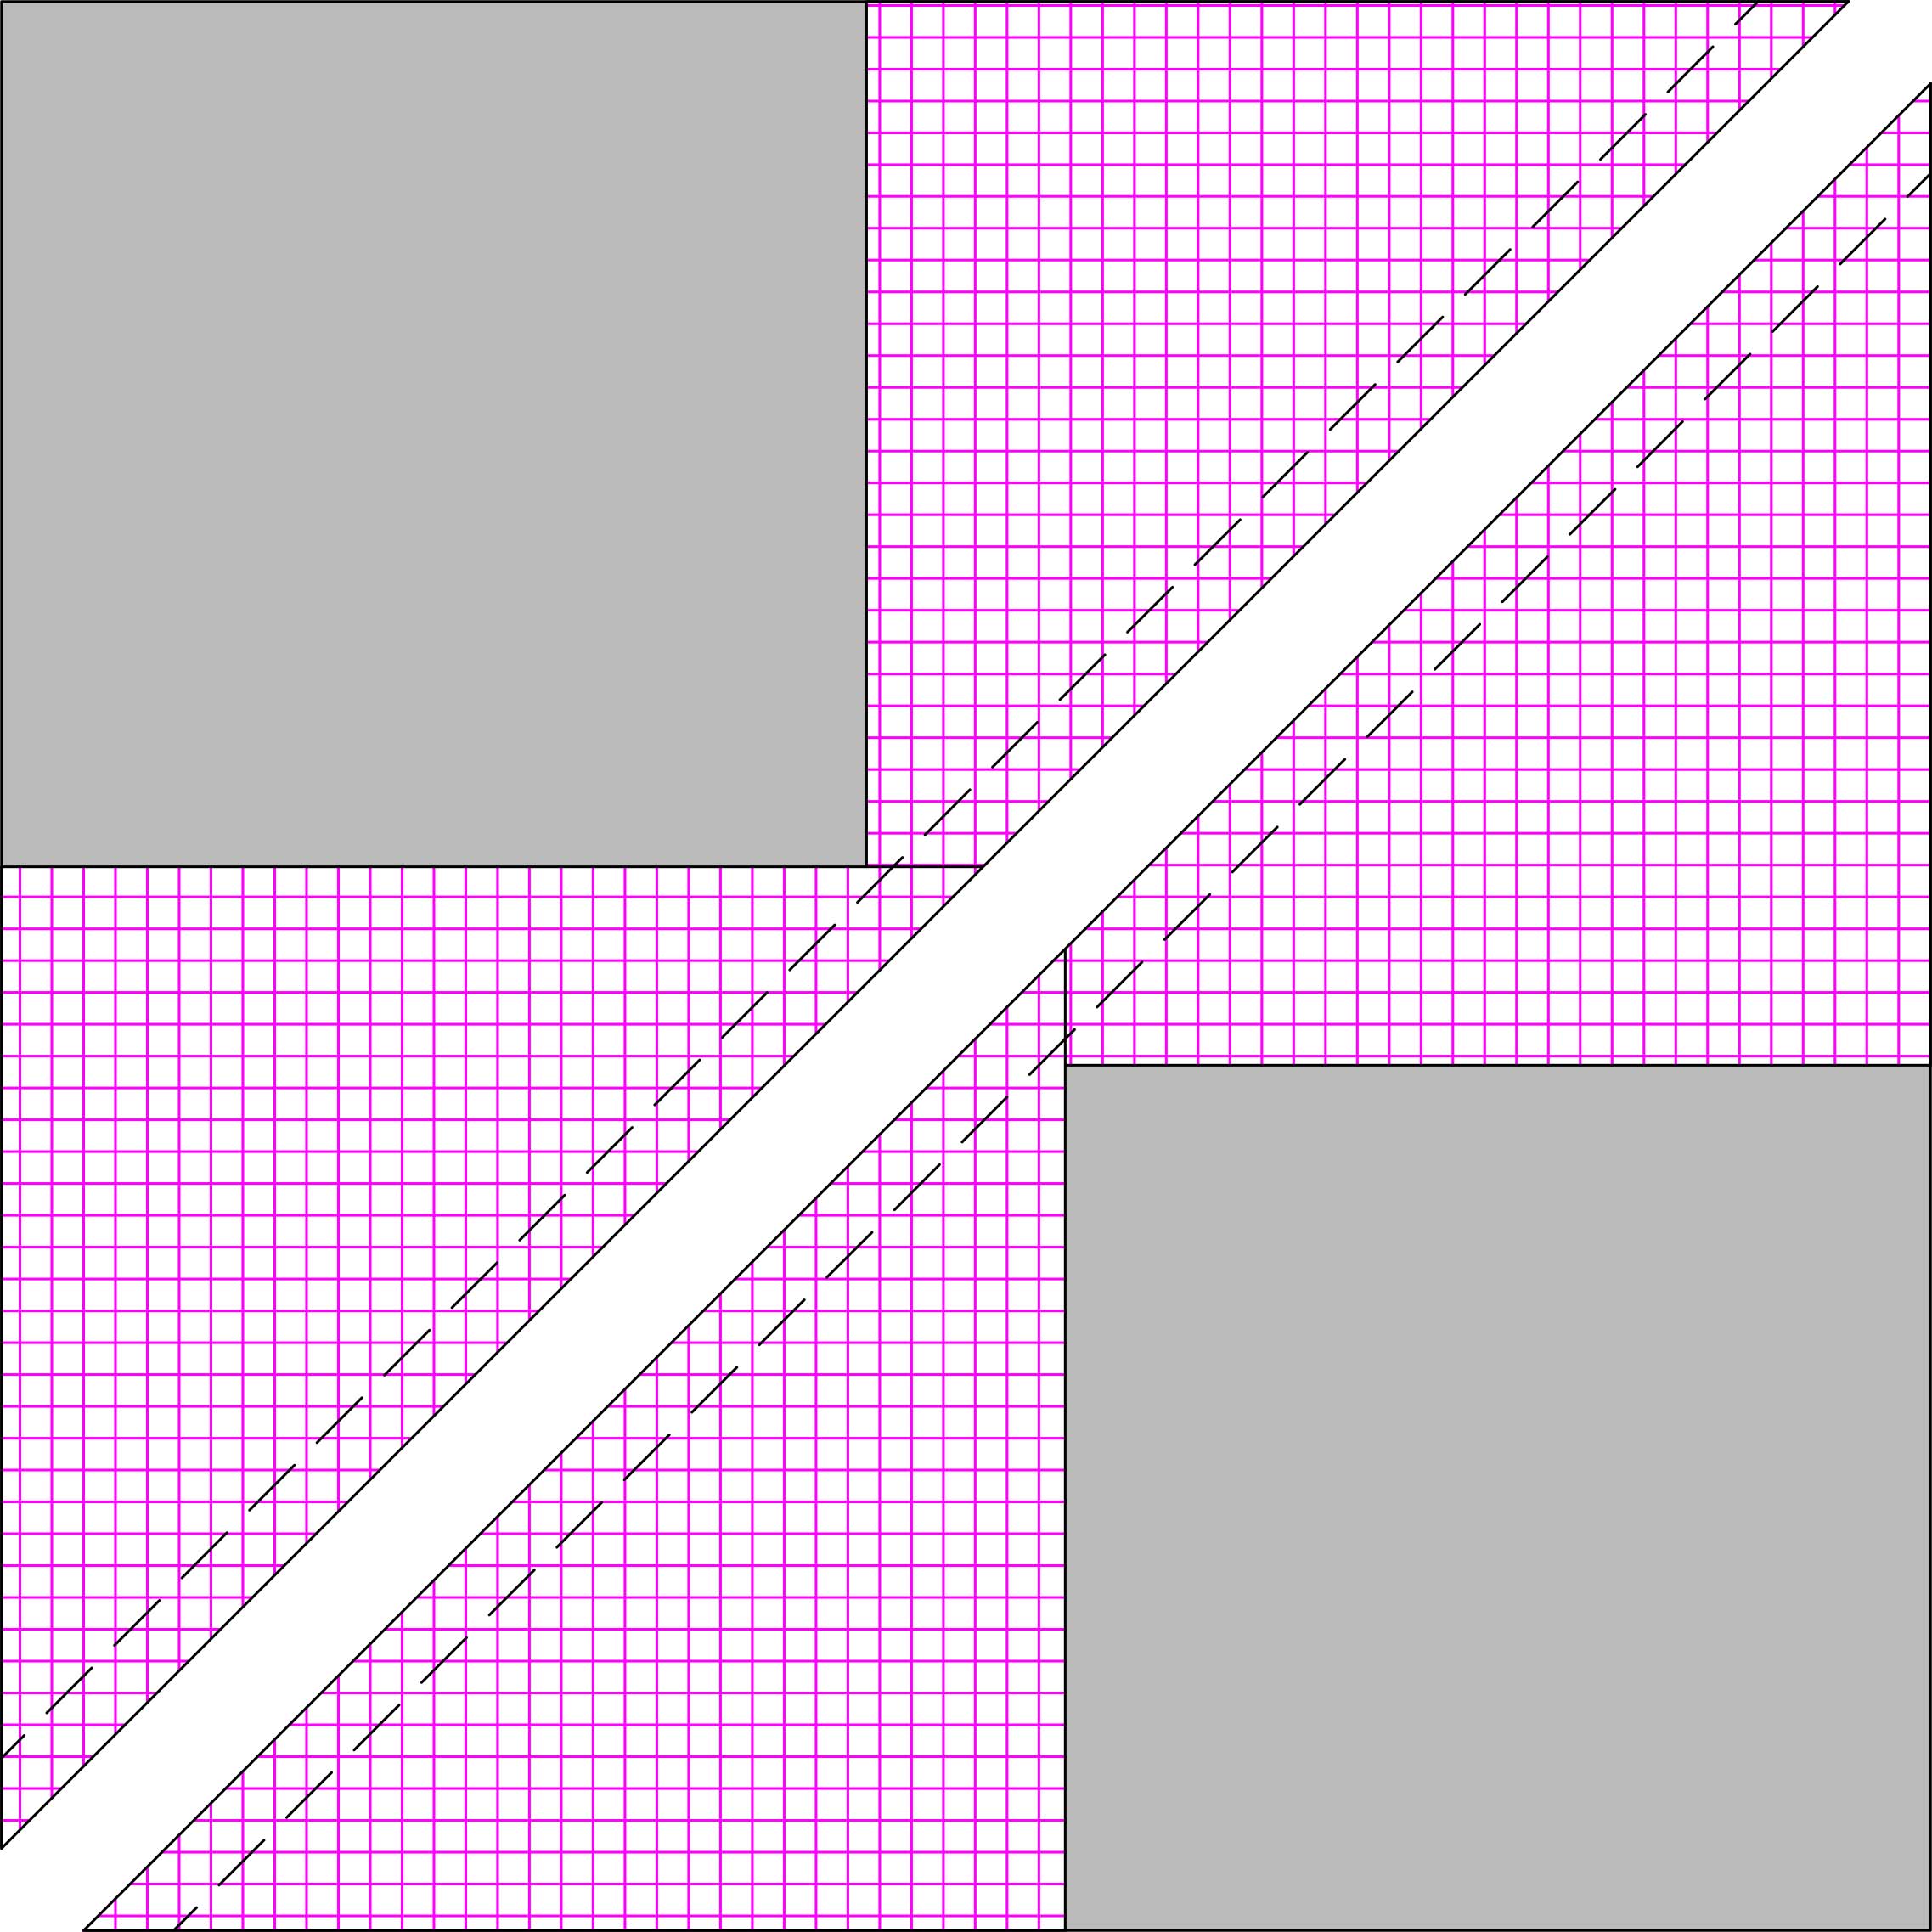
2. With the right side of the large square fabric facing up, position two small squares, with the right sides facing down, on opposite corners of a large square, with the drawn lines placed to run diagonally from one corner to the other. Stitch 1/4″ away from either side of the drawn line.

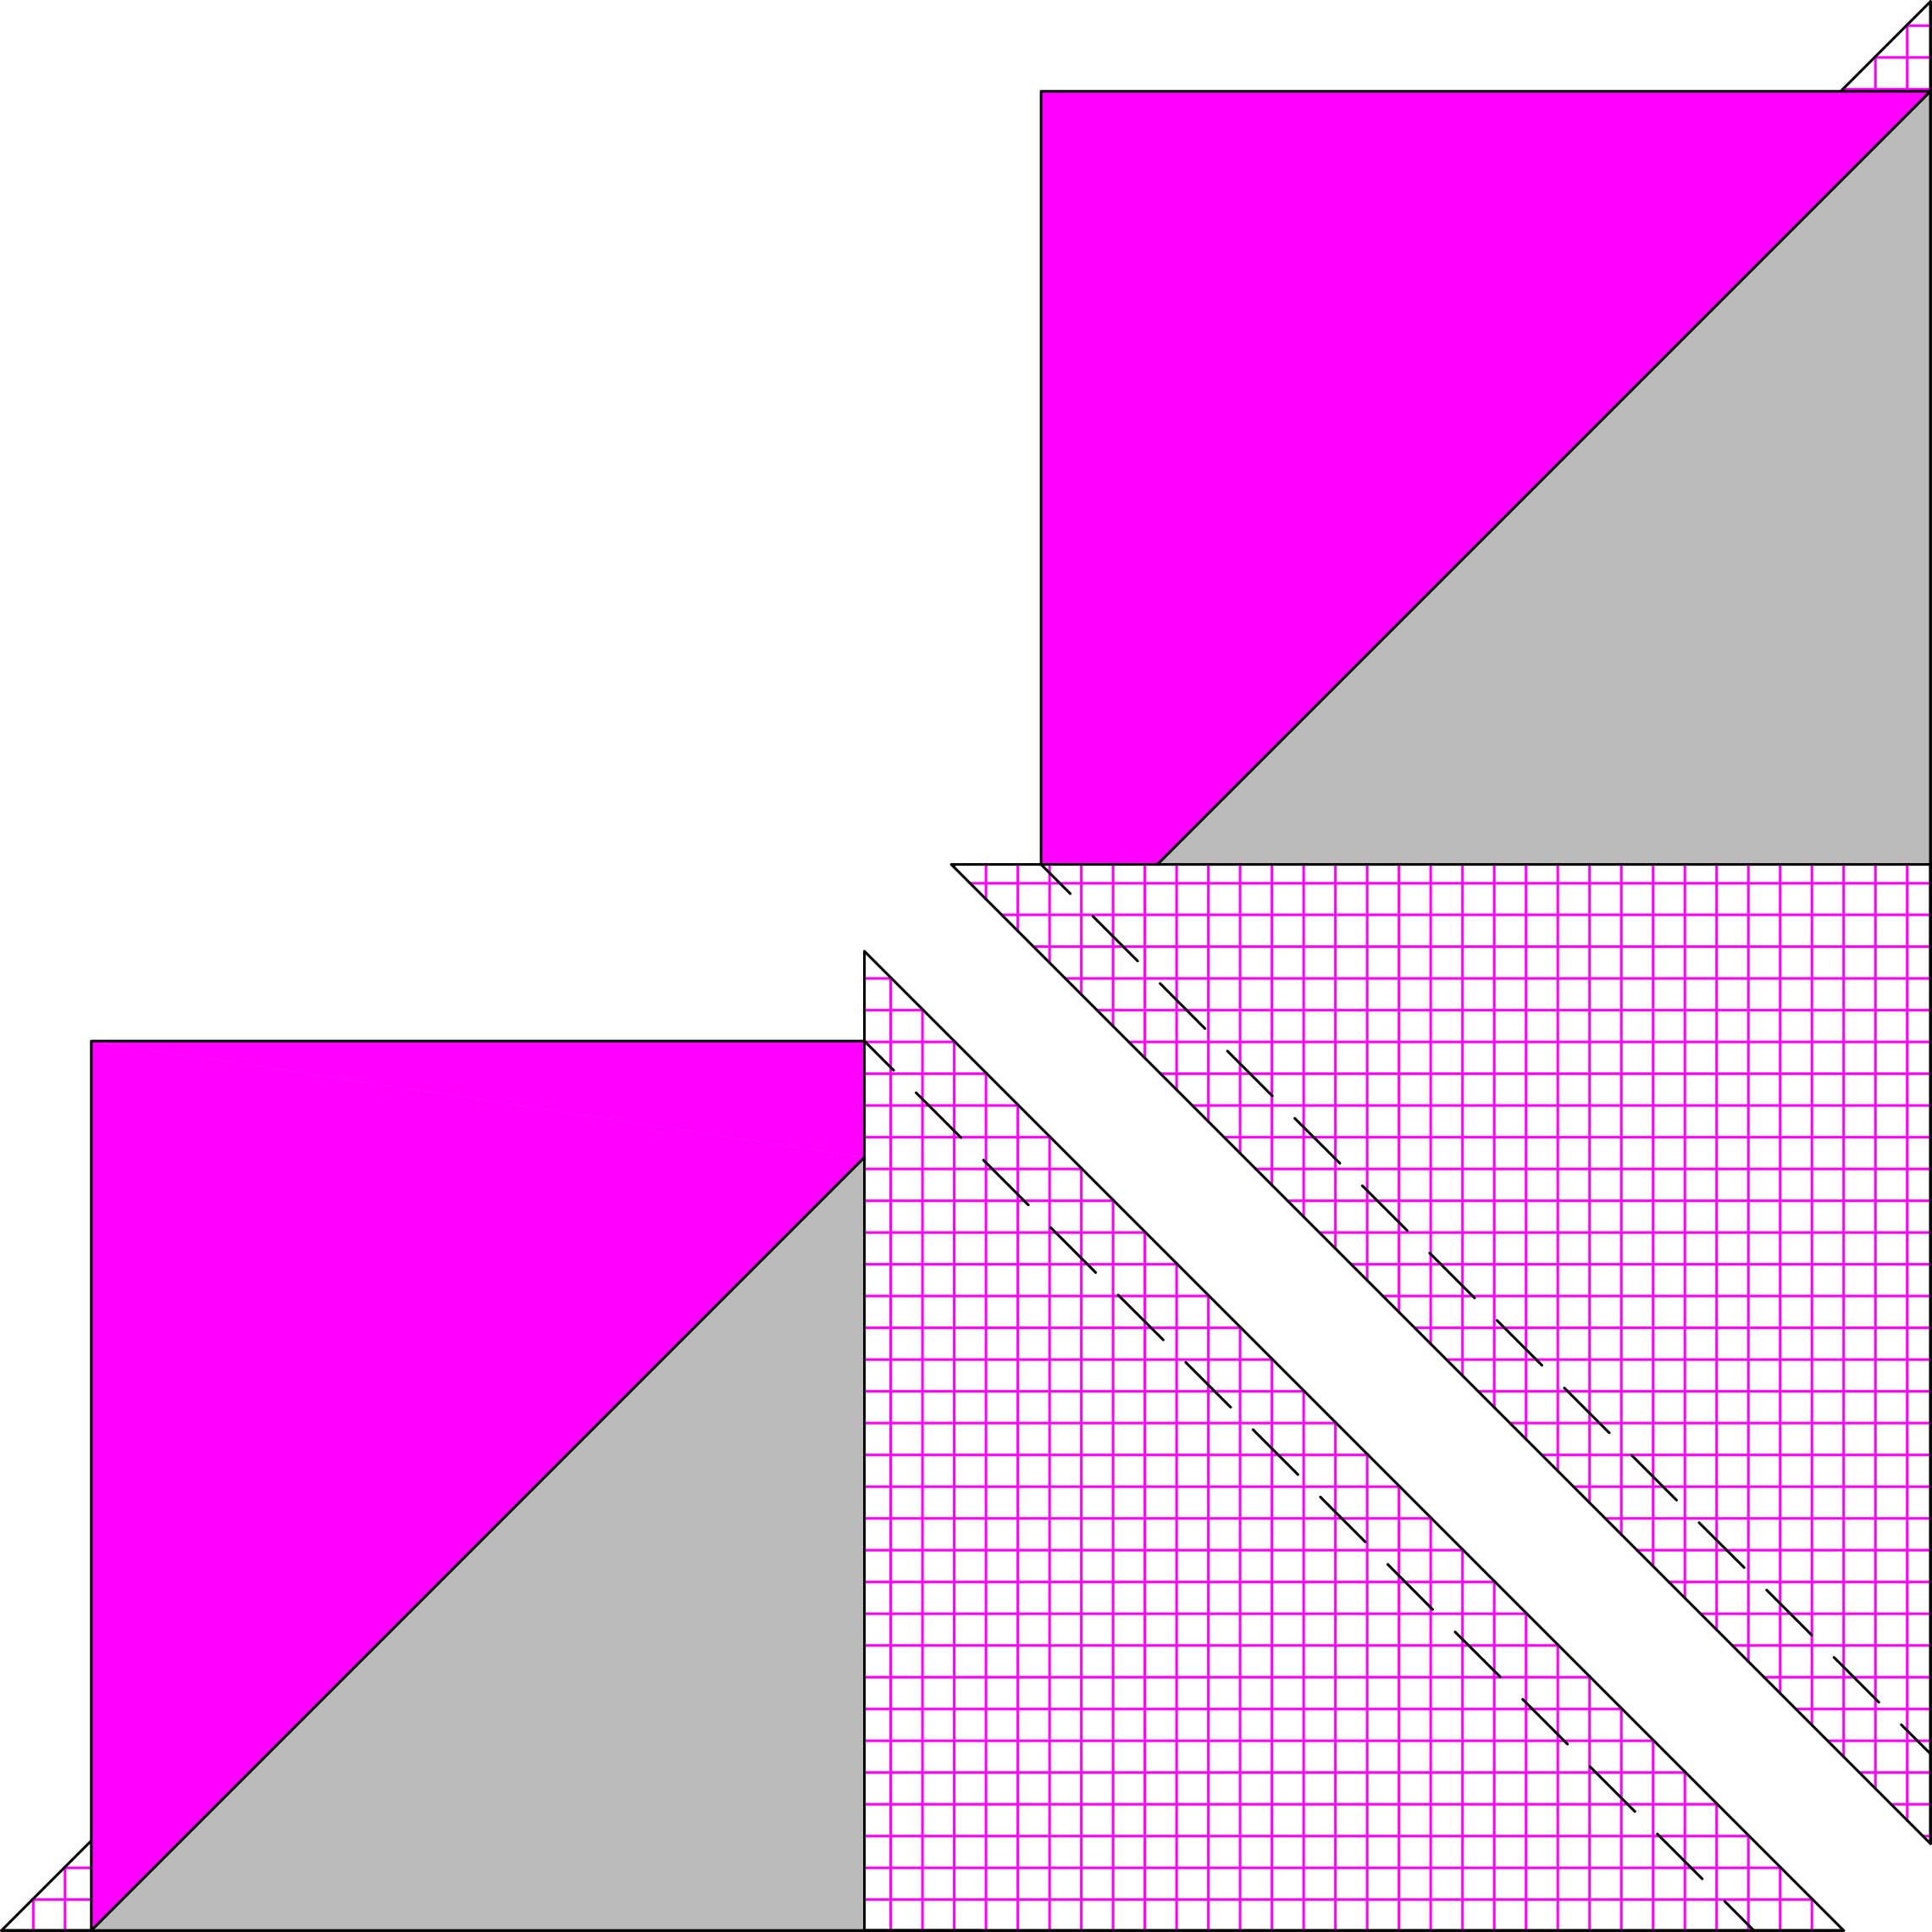
3. Cut the block in half diagonally along the drawn lines.
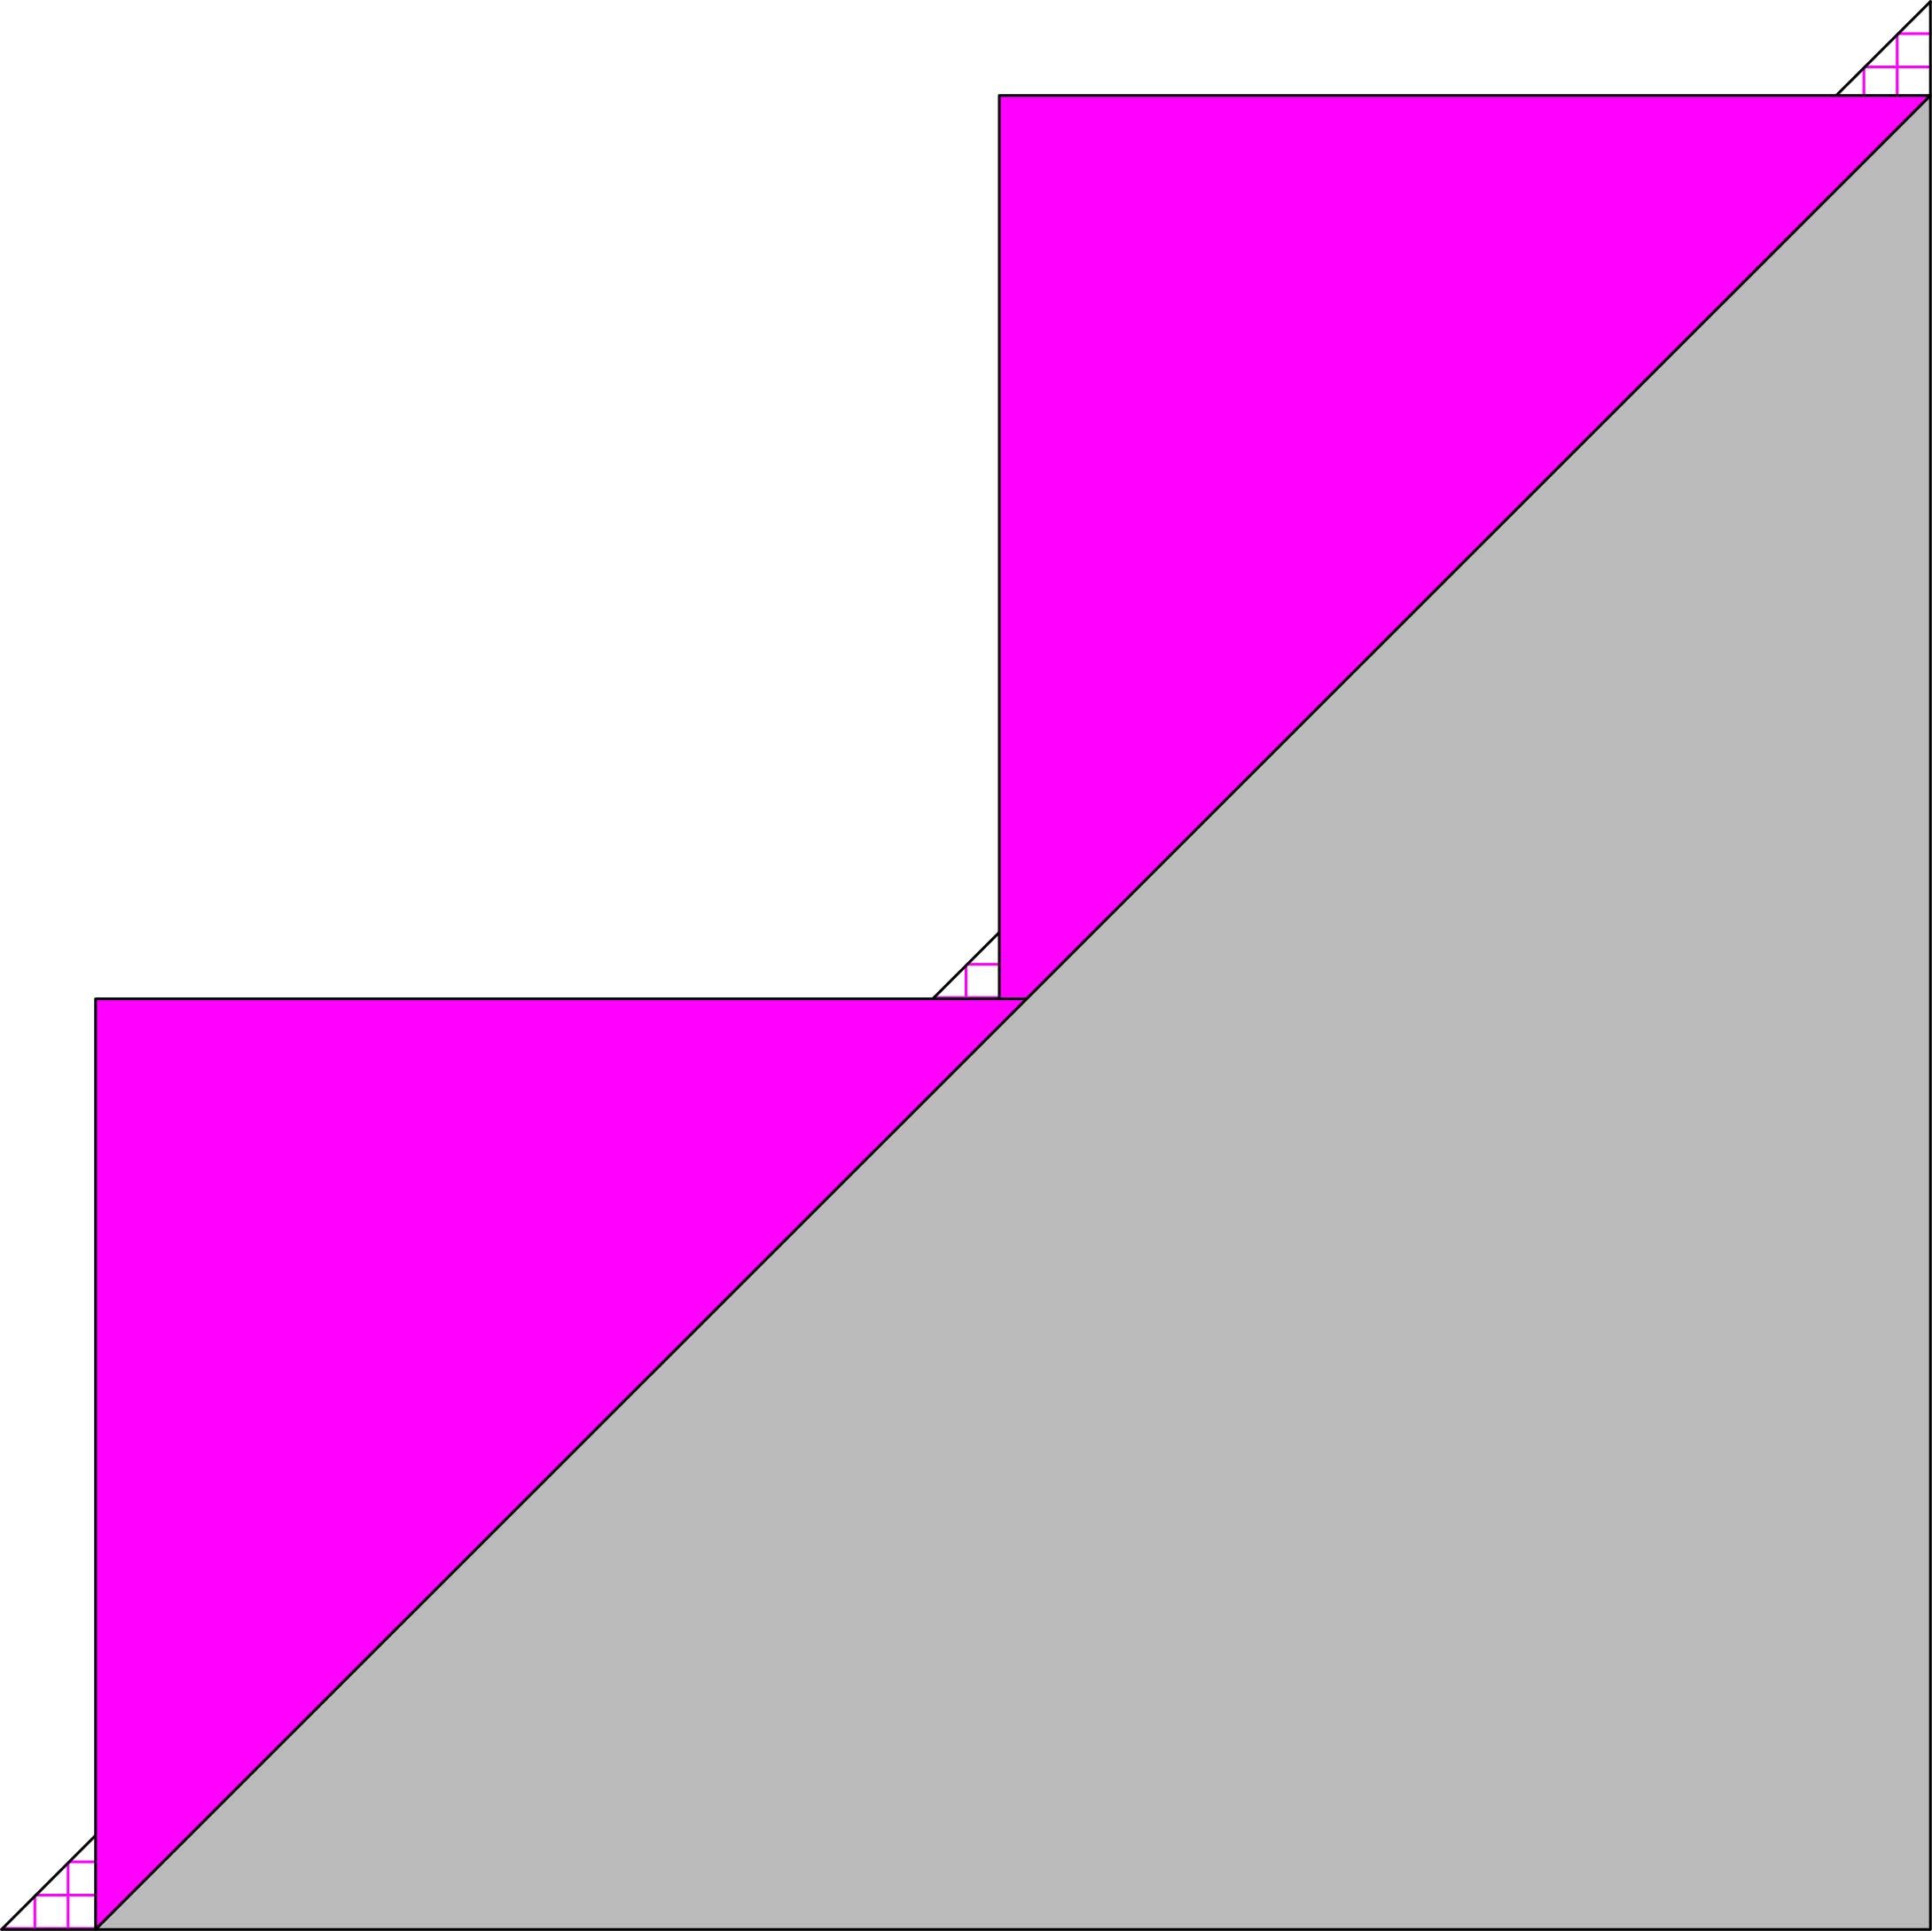
4. Press the small half-square triangles out away from the large half-square triangle. Keep the seam allowances directed towards the small half-square triangles to have the most trimming options later. If you use no-trim sizing, feel free to press using your preferred techniques.
5. Position the next small square in the right angle of the large half-square triangle with the diagonal line running from that corner to between the small half-square triangles. Stitch 1/4″ away from both sides of the drawn line.
6. Cut diagonally on the drawn line.
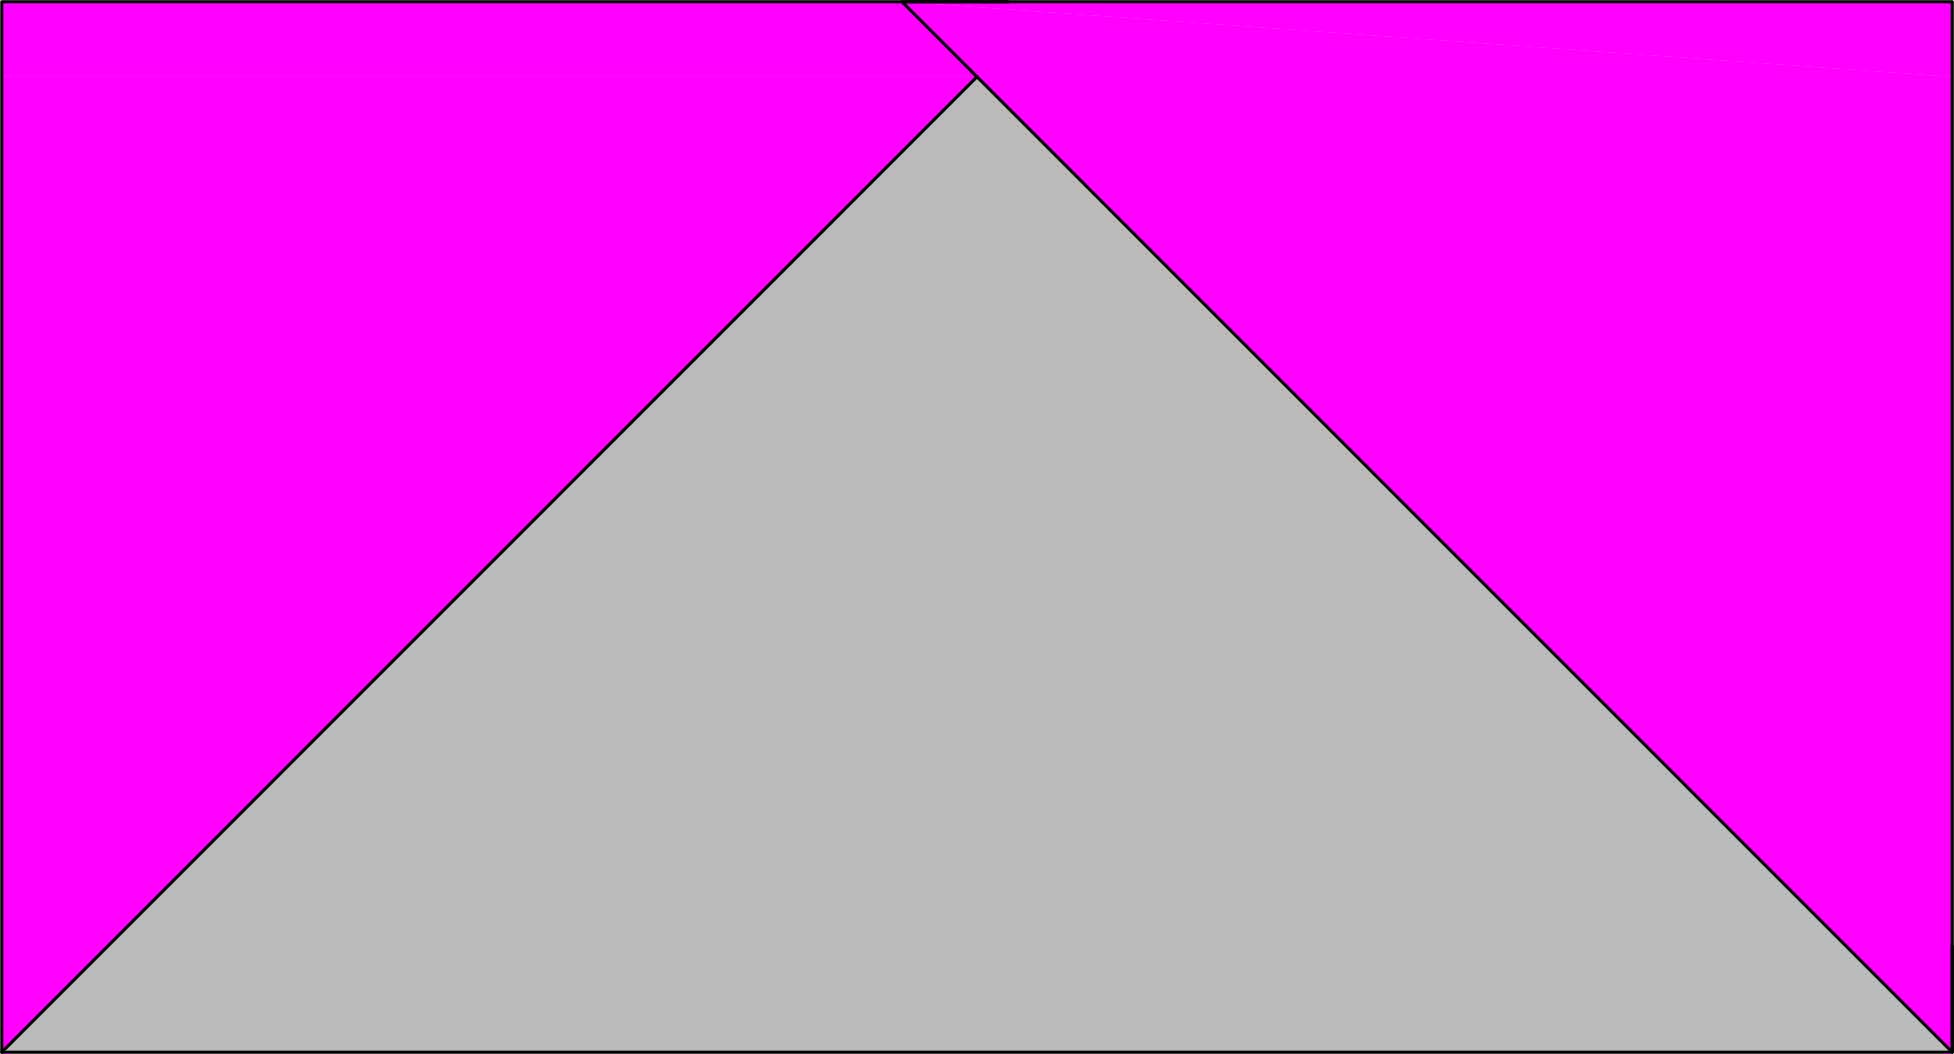
7. Press the small half-square triangle outward, with the seam allowance pointing out to the edge of the block.
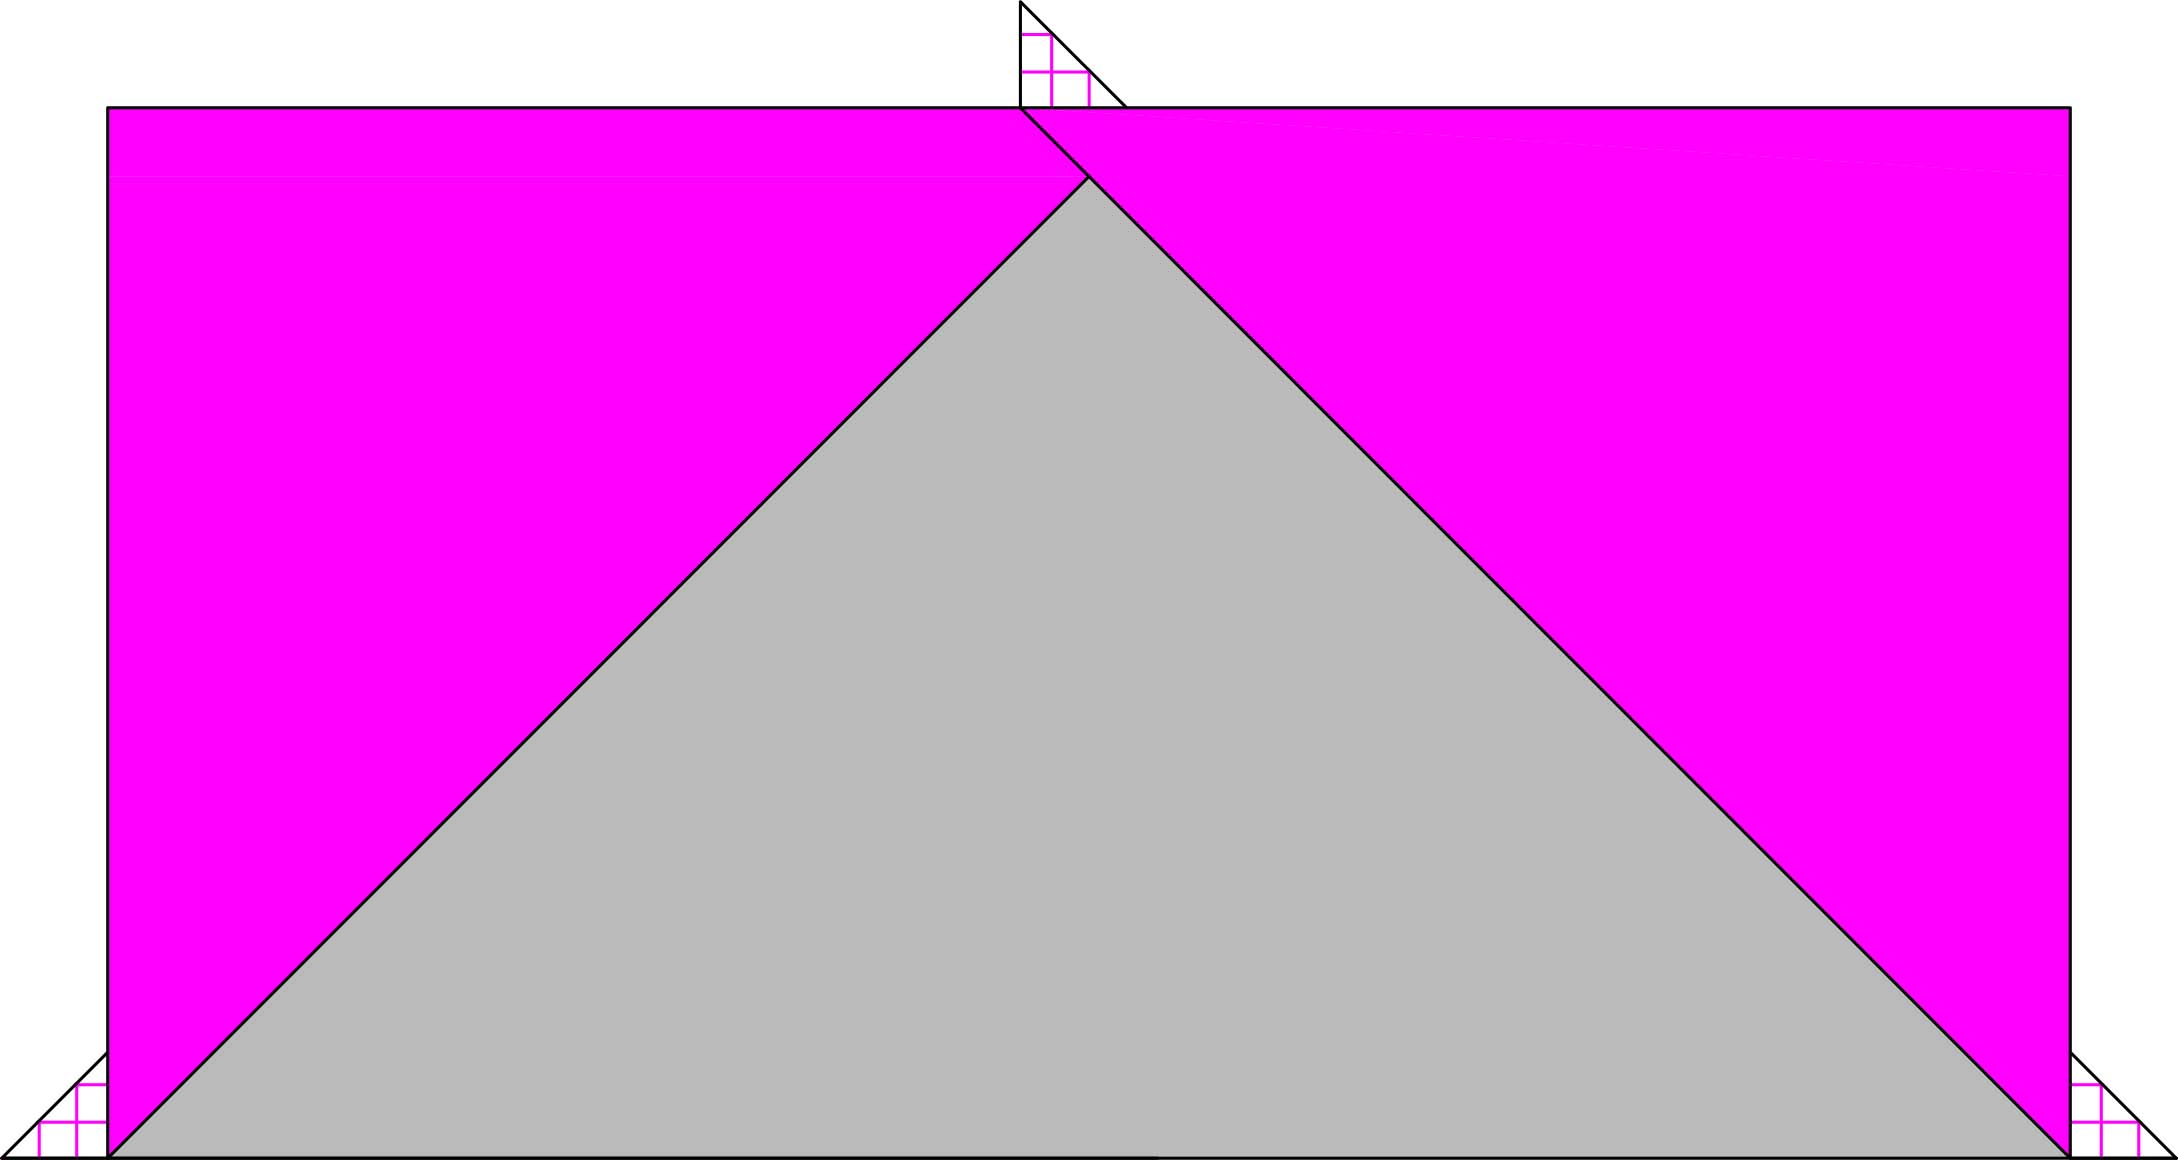
8. Trim away the overhanging tabs if you are using the no-trim method.

The diagram below shows the trimmable flying geese block. The blue line indicates the approximate trim line, and the dashed line shows the final stitching line.
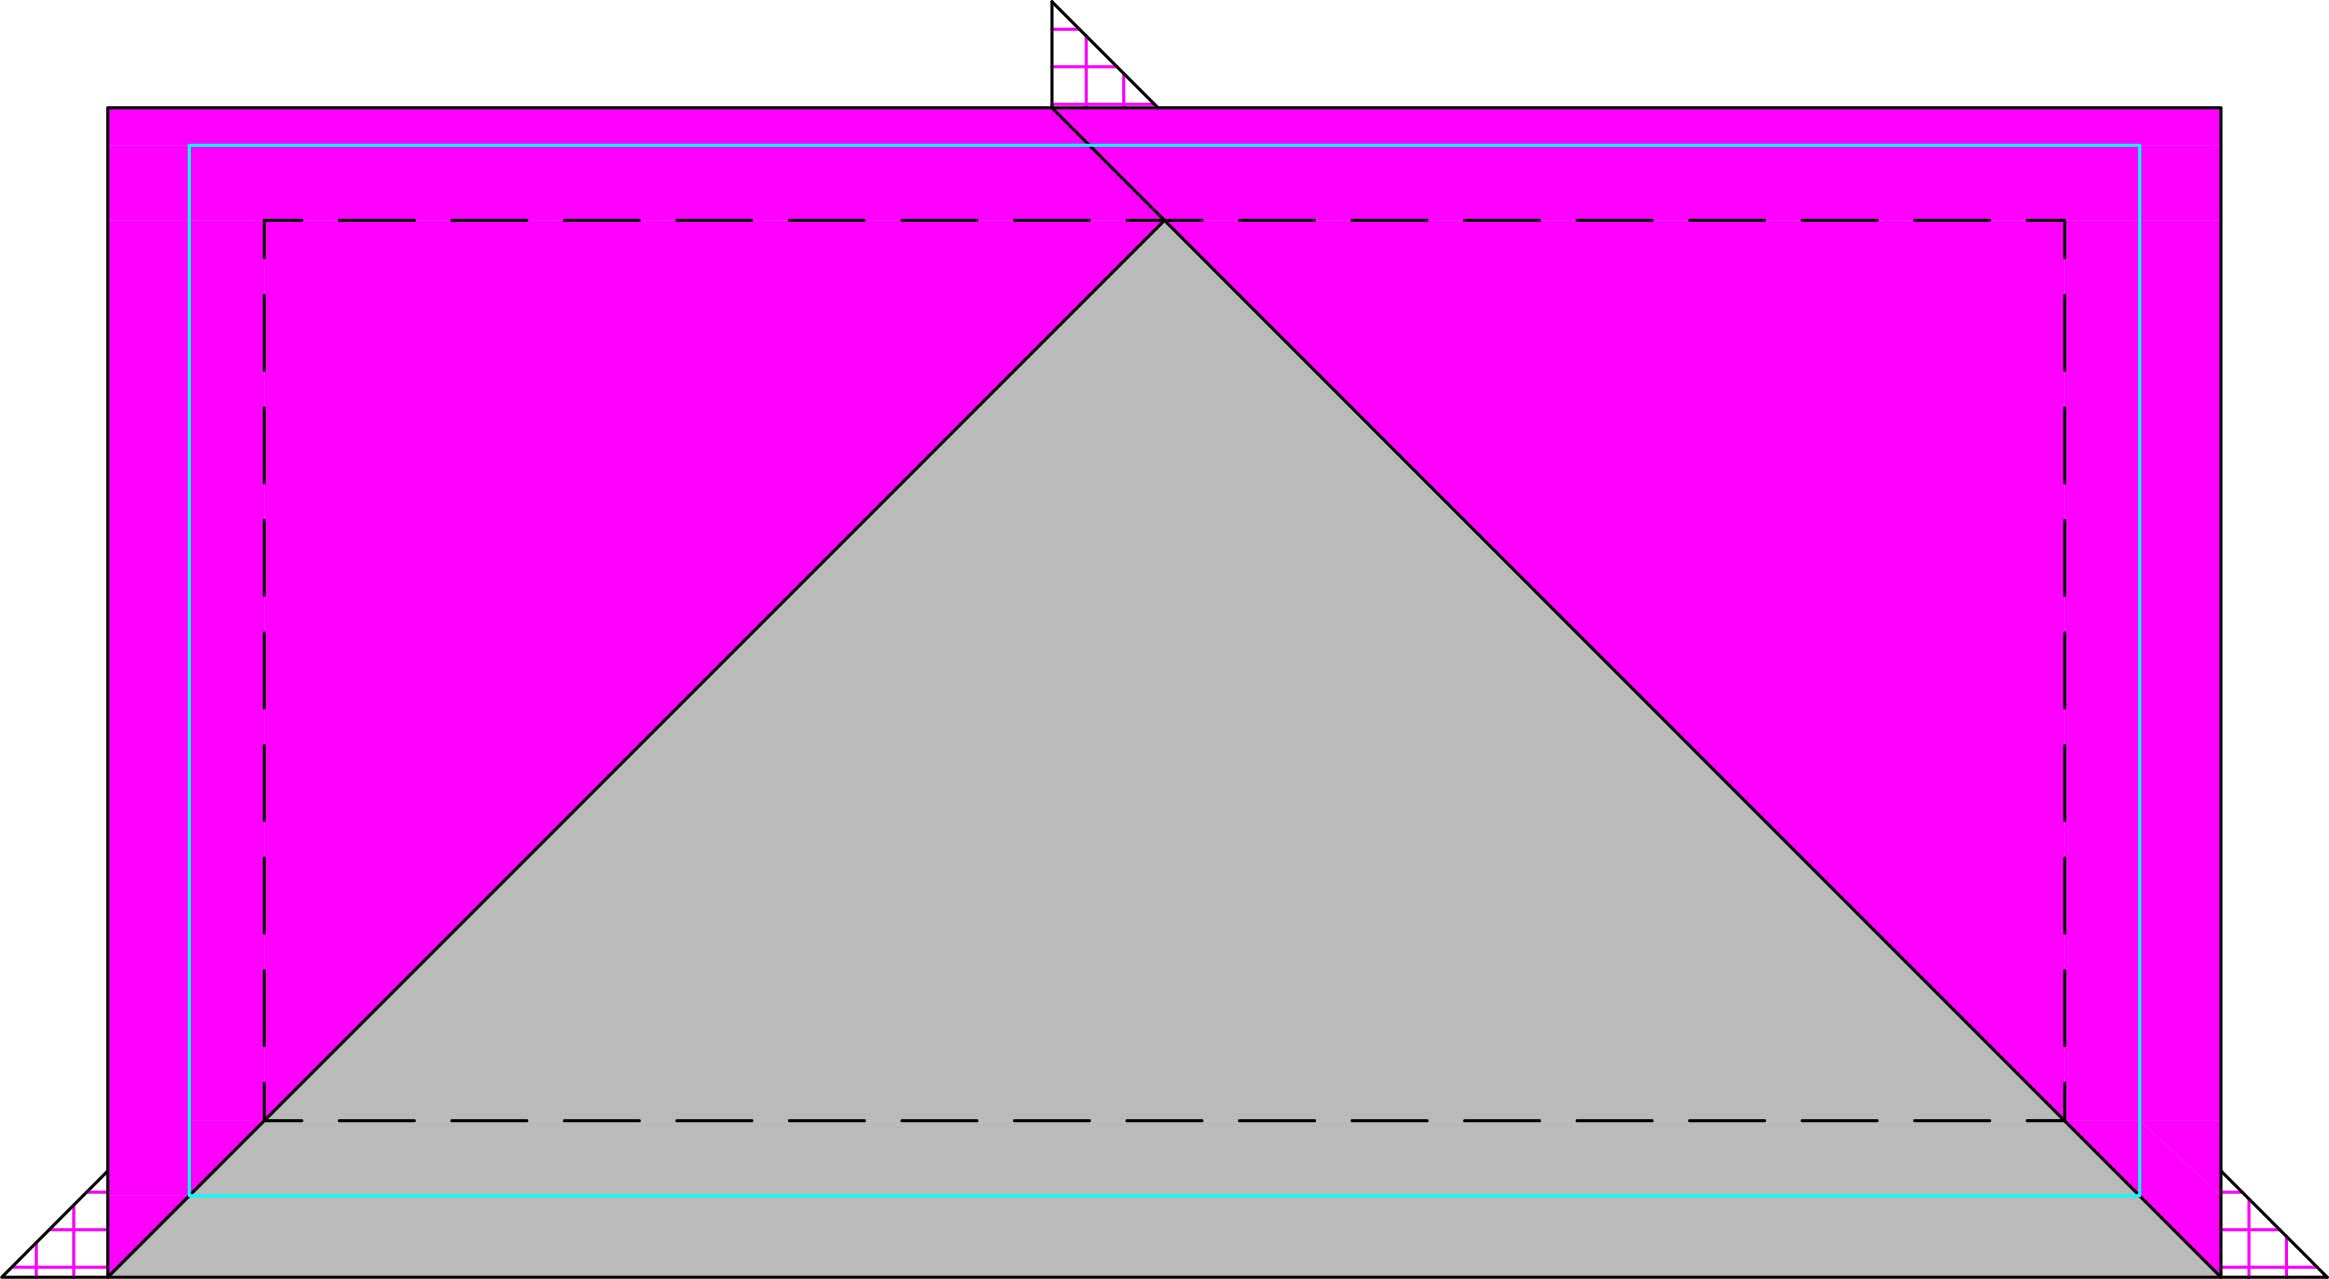
Before trimming your blocks, check out next week’s post on 3 Ways to Trim Flying Geese Blocks.
Stitch and Flip Flying Geese
- Draw a diagonal line on the back of both small squares.

2. Position the first small square in one corner of the large rectangle with the drawn line running from a lower corner to the upper center of the rectangle. Make sure the right sides of the fabrics are facing each other. Stitch on the line.

3. Trim away the corner of the block, leaving a 1/4″ seam allowance by the stitched seam.

4. Press the half-square triangle along with the seam allowances outward.

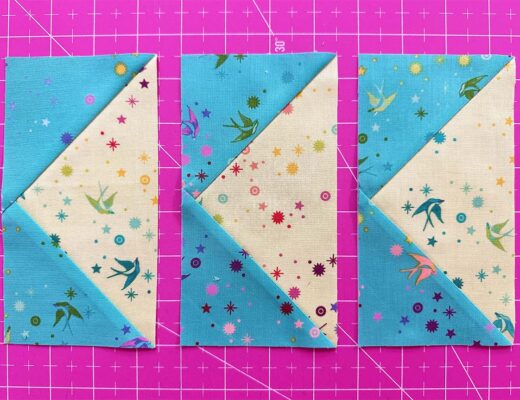
5. Position the second small square in the other corner of the larger rectangle with the right sides of the fabrics facing each other and the drawn line running from the lower corner to the upper center of the rectangle. Stitch on the line.
6. Trim away the corner of the block, leaving a 1/4″ seam allowance by the stitched seam.

7. Press the half-square triangle along with the seam allowances outward. If you are using the no-trim dimensions, the block is complete.
This diagram shows the trimmable flying geese block. The blue line indicates the approximate trim line, and the dashed line shows the final stitching line.

Before trimming your blocks, check out next week’s post on 3 Ways to Trim Flying Geese Blocks.
Next Up: Three Ways to Accurately Trim Flying Geese Quilt Blocks!
Now that you know how to make Flying Geese with two different techniques, we’ll learn to trim them for super-accurate results! Next week, I’ll show you how to trim your geese with and without special tools!

1 Comment
Wendy
June 14, 2024 at 7:34 amThis is just one of the many reasons I love your blog. I learn so much about so many things, and you’re not just about selling your products.