There is nothing like a deadline to encourage me to finish a quilt, and last week was one of the biggest deadlines of the year- QuiltCon contest entries were due.
I just can’t help myself from trying to get one more entry done in time to enter, and this year was no exception. That means today I get to share my newest quilt, Utah Overlook.

Thank Goodness It’s Finished Friday (TGIFF)
It’s a joy to host this week’s Thank Goodness It’s Finished Friday (TGIFF), and I’m genuinely excited to see all of your recently finished quilts! Scroll to the end of this post to see what everyone has been working on, and add your recent quilty finish.

Designing Utah Overlook
Years ago, I spent every Summer in Southern Utah, and on the drive back towards the Midwest, I loved stopping at this scenic overlook along Interstate 70. Every overlook in this area is stunning, but this is one of my favorite spots because you can start to see the Rocky Mountains in the distance while you are still surrounded by the red rocks of the desert.
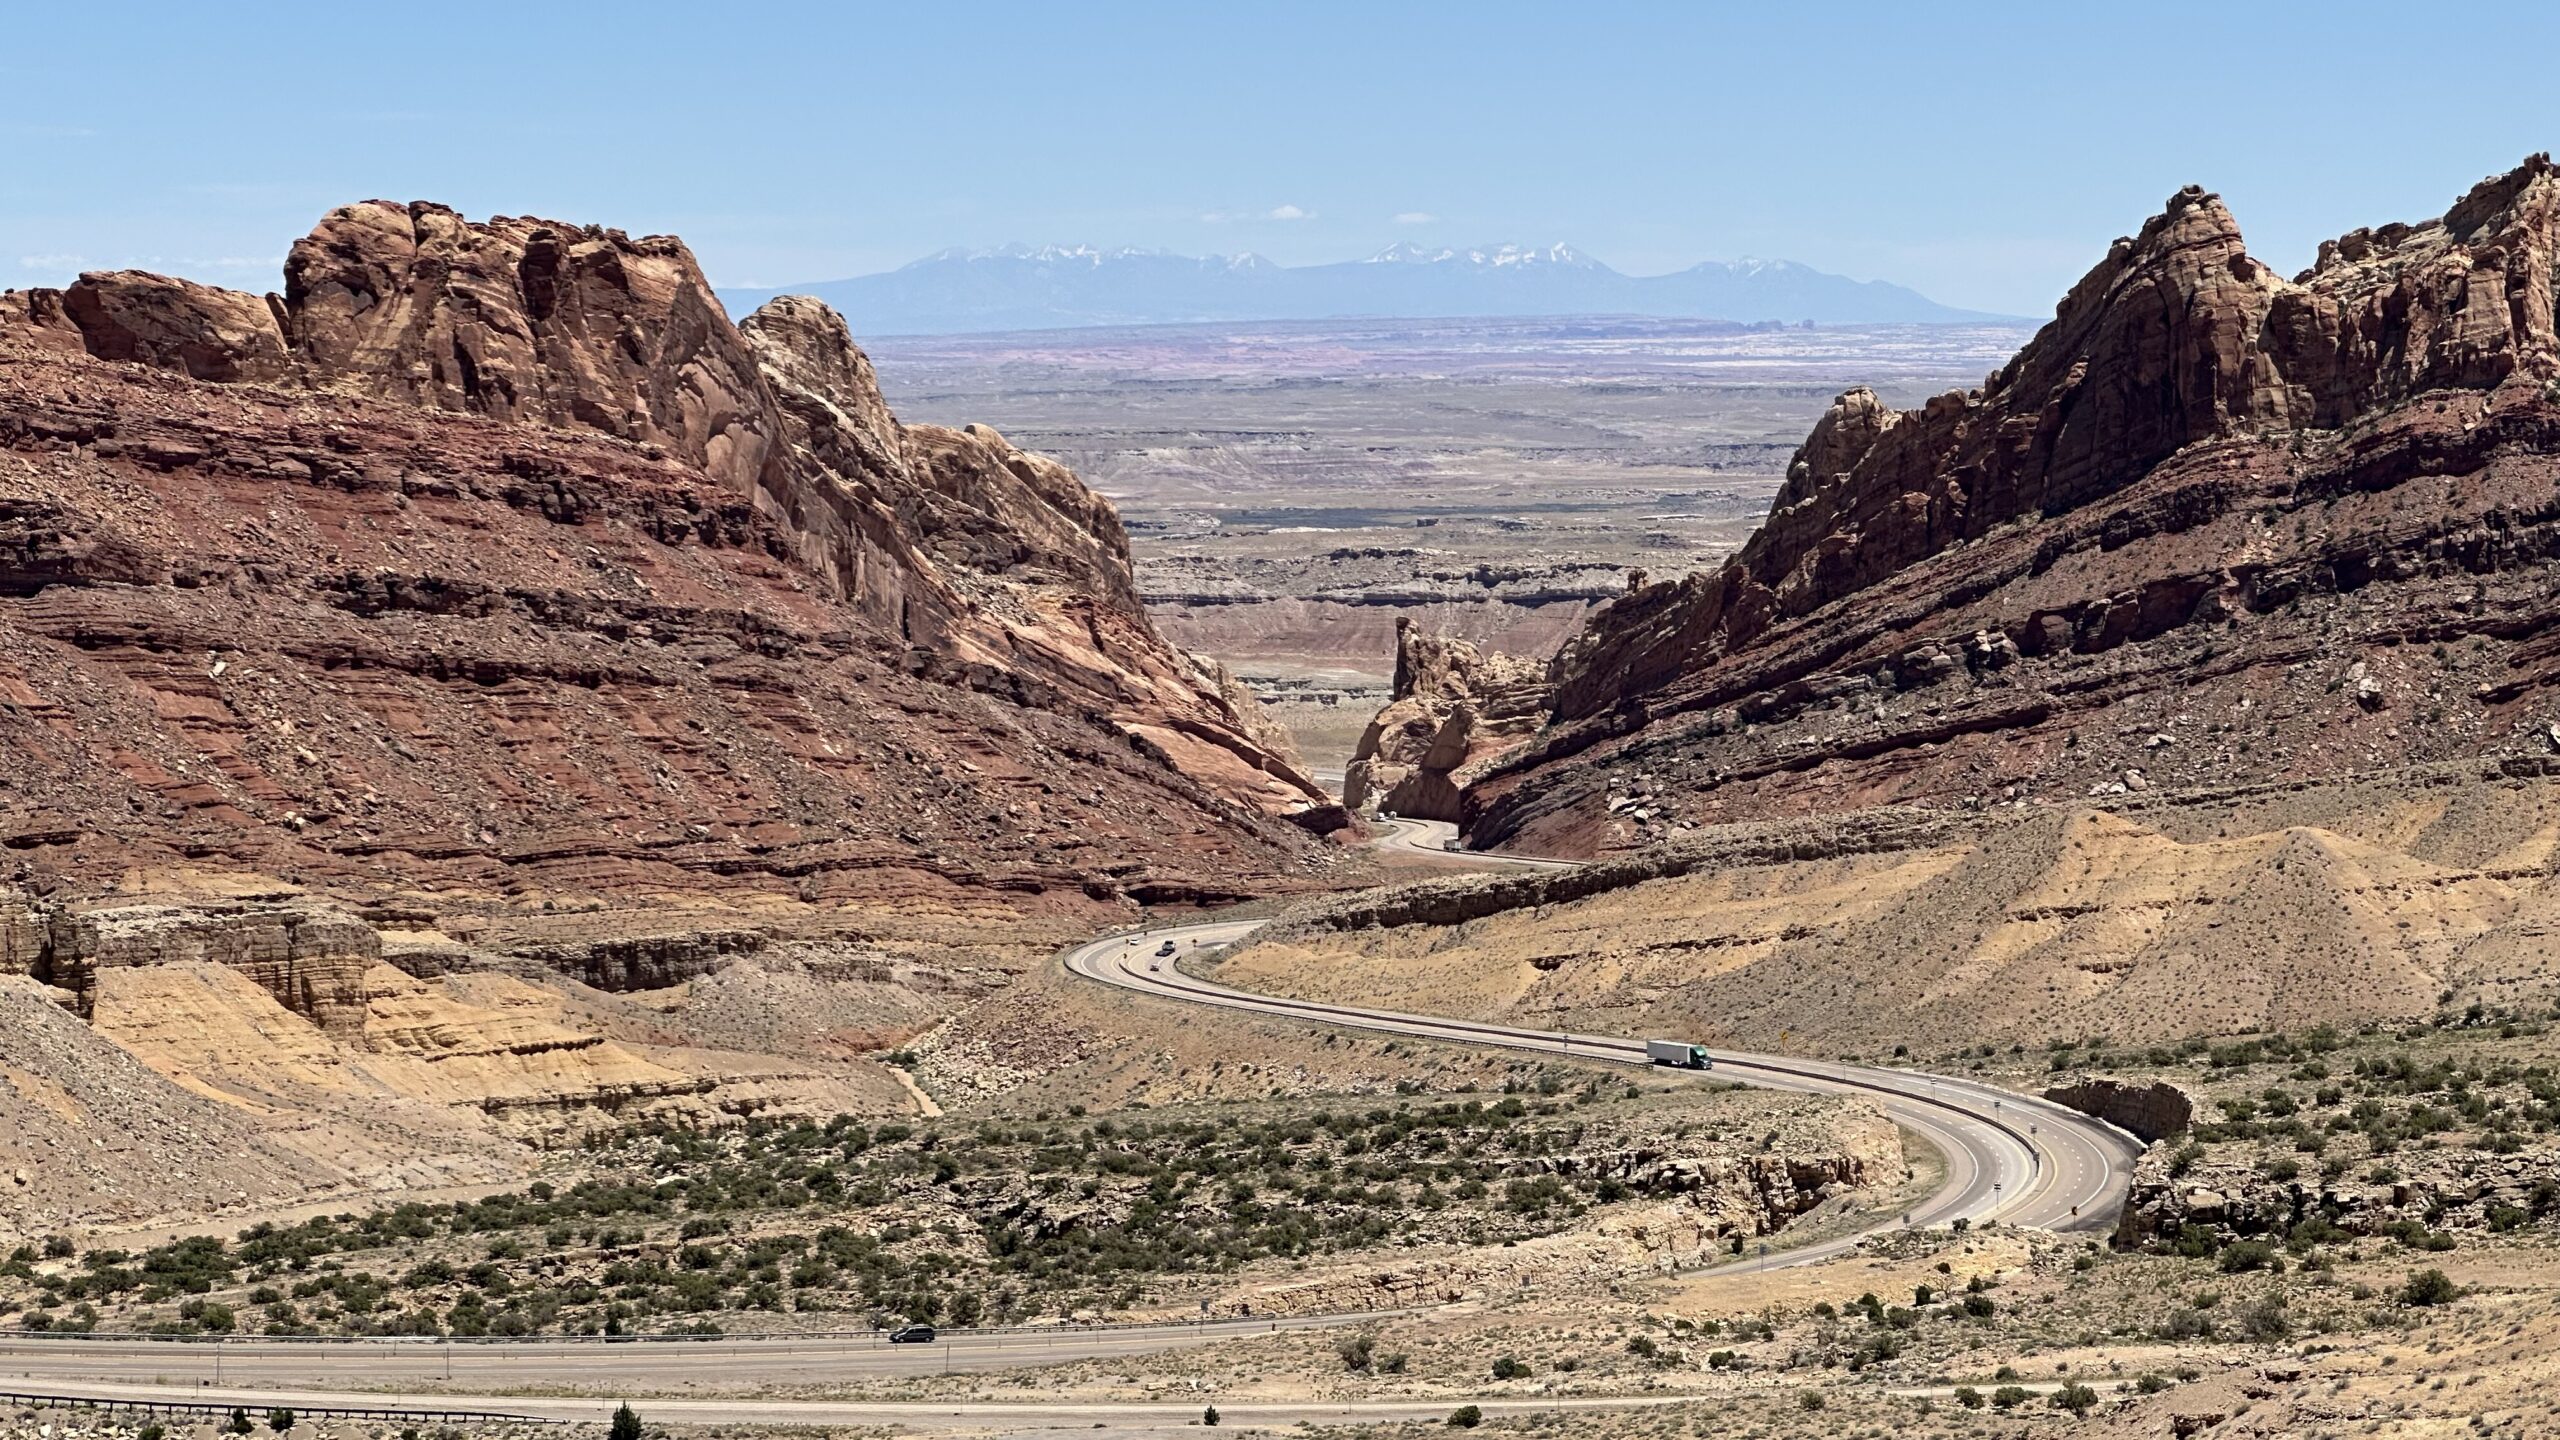
The most notable structures at this location are the two rock formations that form a V-shape, pointing towards the roadway. Utah Overlook is the second quilt I have made using this location as inspiration. The first quilt is Mocha Mousse Mountain, which is one of my other entries for QuiltCon 2026.
Creating and Using Large-Scale Templates
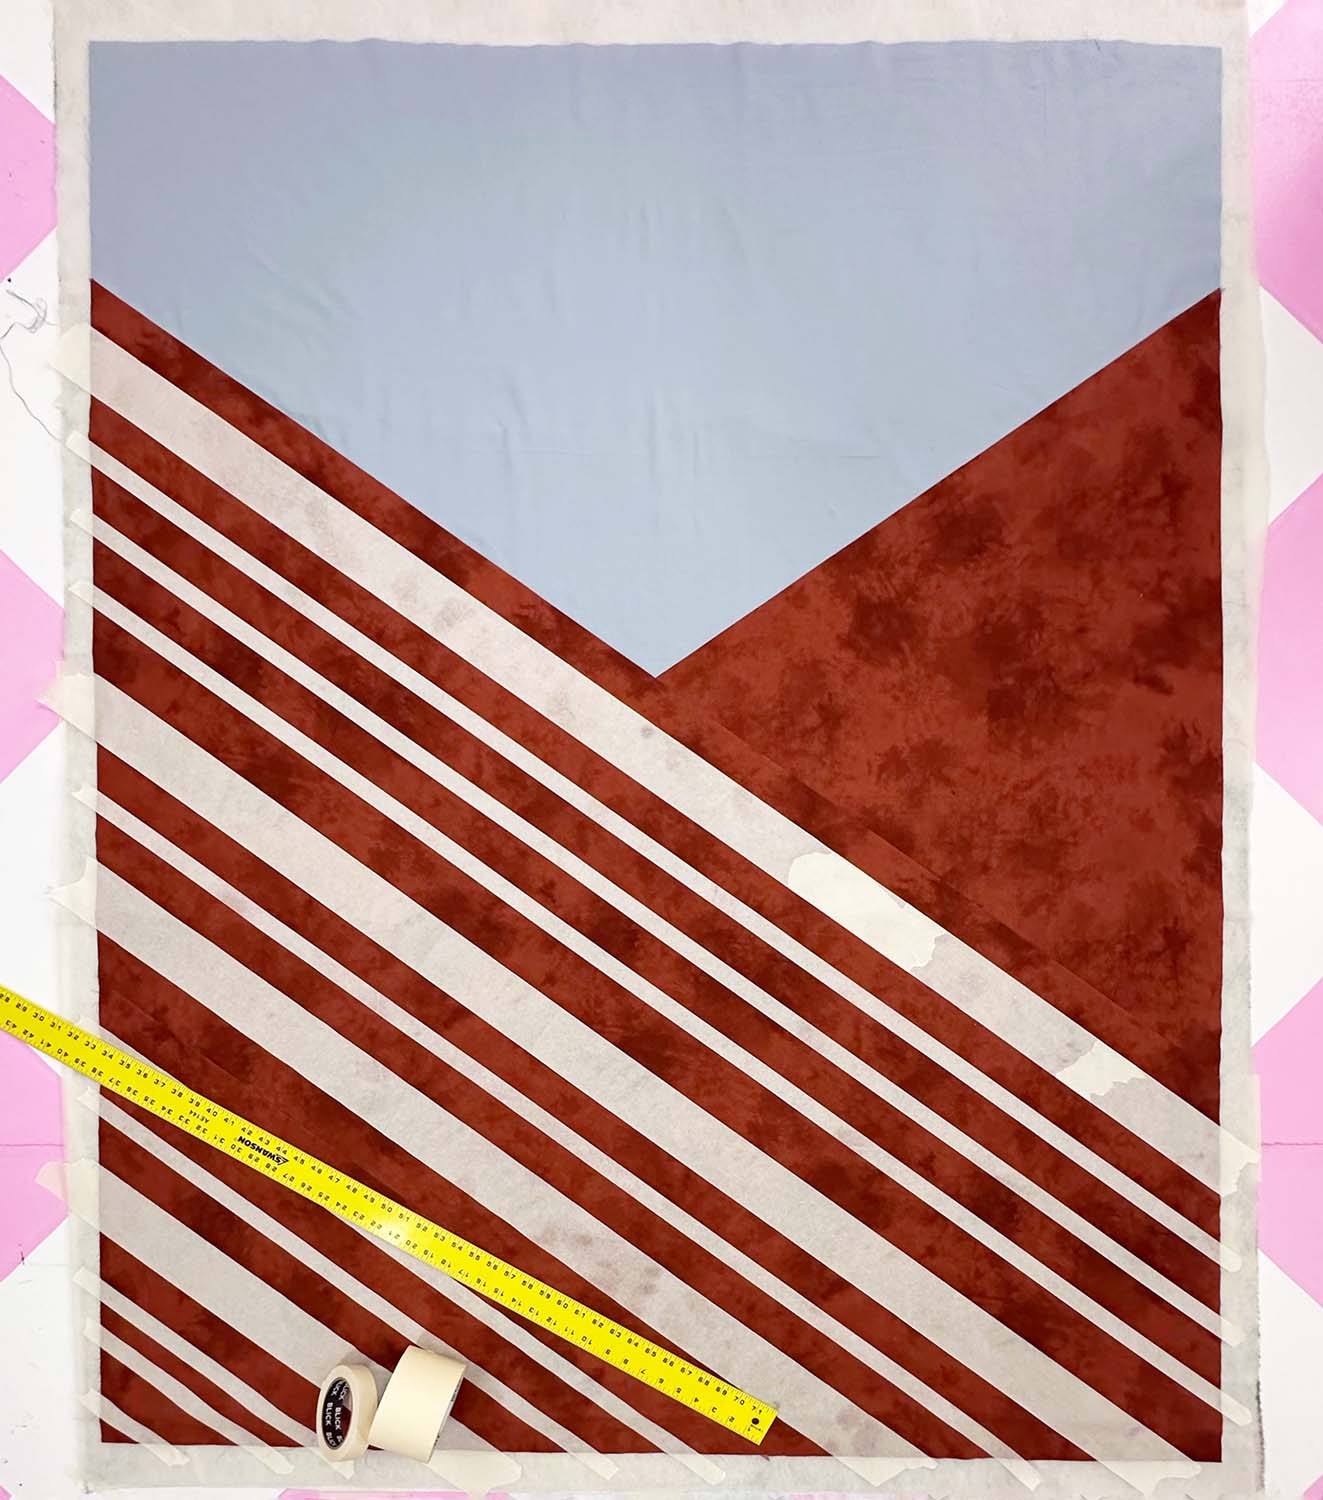
The piecing for this quilt is simple, but large pieces can become unwieldy to handle, and I used an unusual set of angles to mimic the rock formations in the inspiration image.
To ensure the piecing is exact, I created full-scale templates to use when cutting the quilt components. Each rectangle represents a tabloid-sized piece of paper (11” x 17”). I added three inches around the edge of the finished quilt size to account for any shrinkage that may occur due to the dense quilting required for this design.
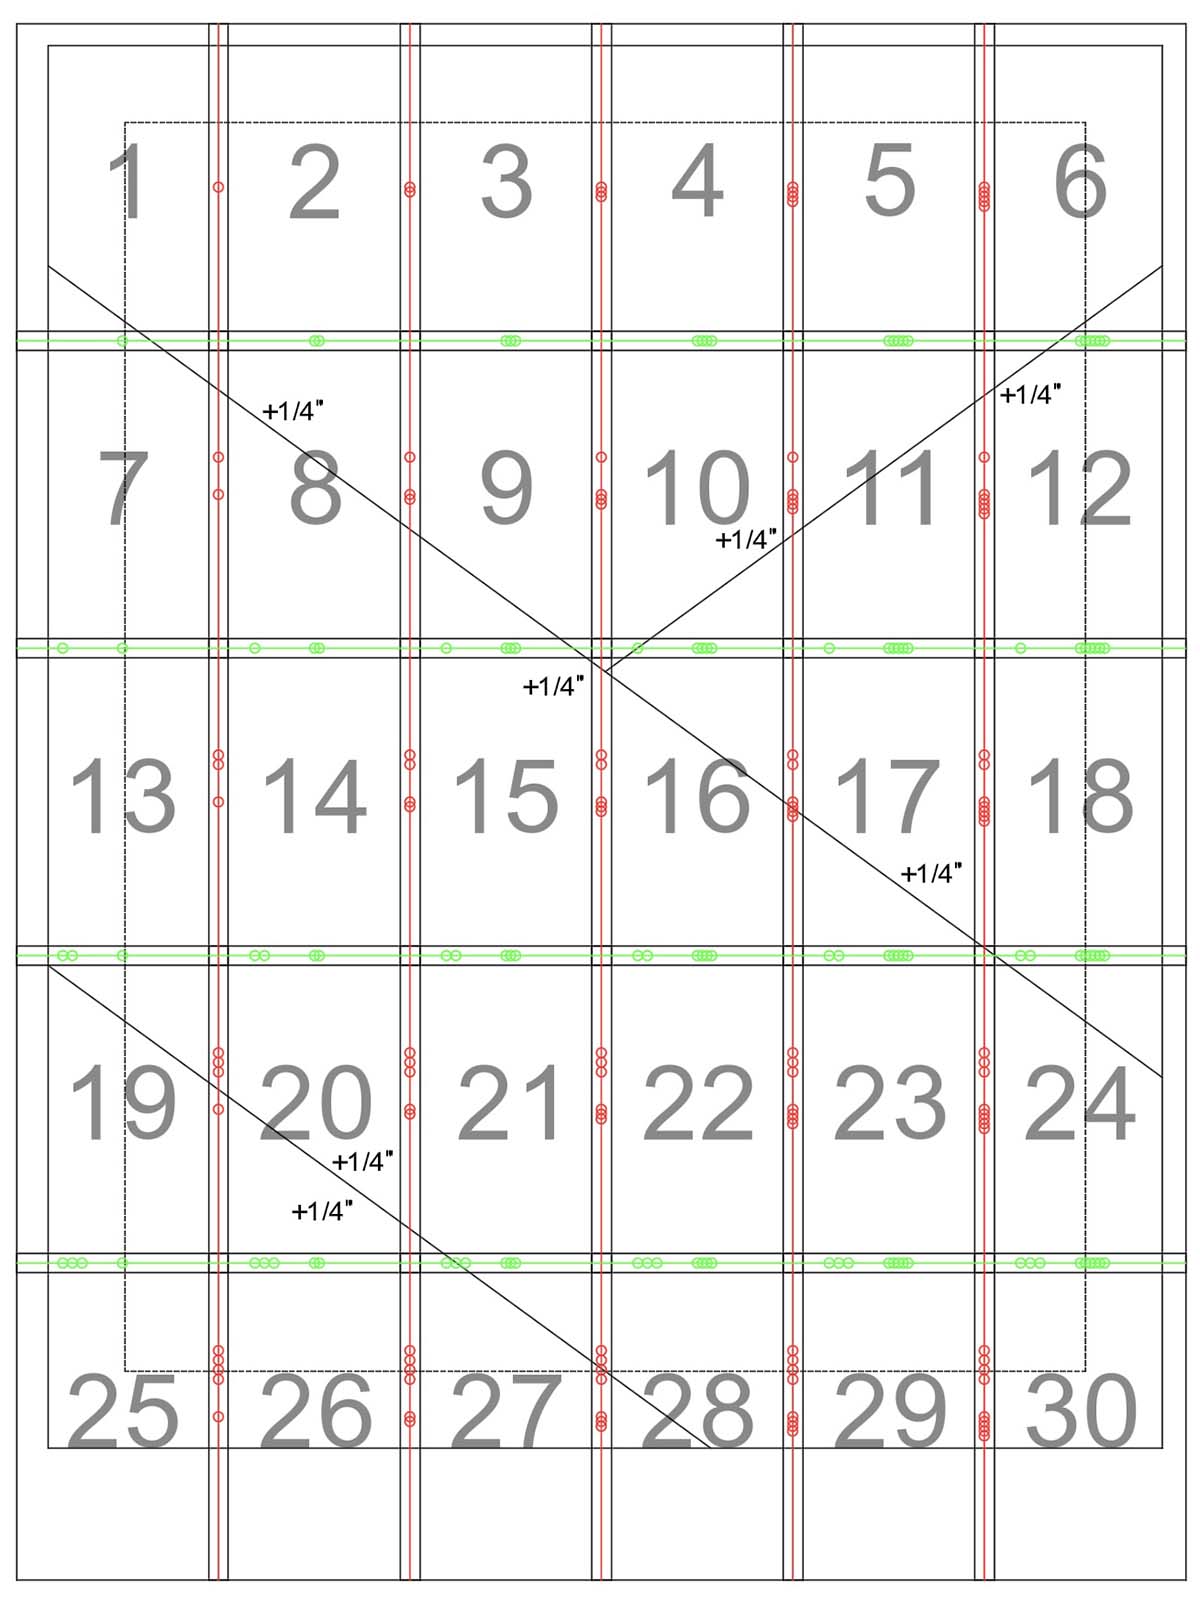
The templates are exactly the size and shape of each piece in the finished quilt, so I noted which edges required an added seam allowance. While I always add seam allowances to the paper patterns when I am offering them to a larger audience, I don’t typically take this step on one-off quilts that I’m the only one making. (My background is in costume design, and seam allowances are rarely added to paper patterns, but instead added in the cutting process.)
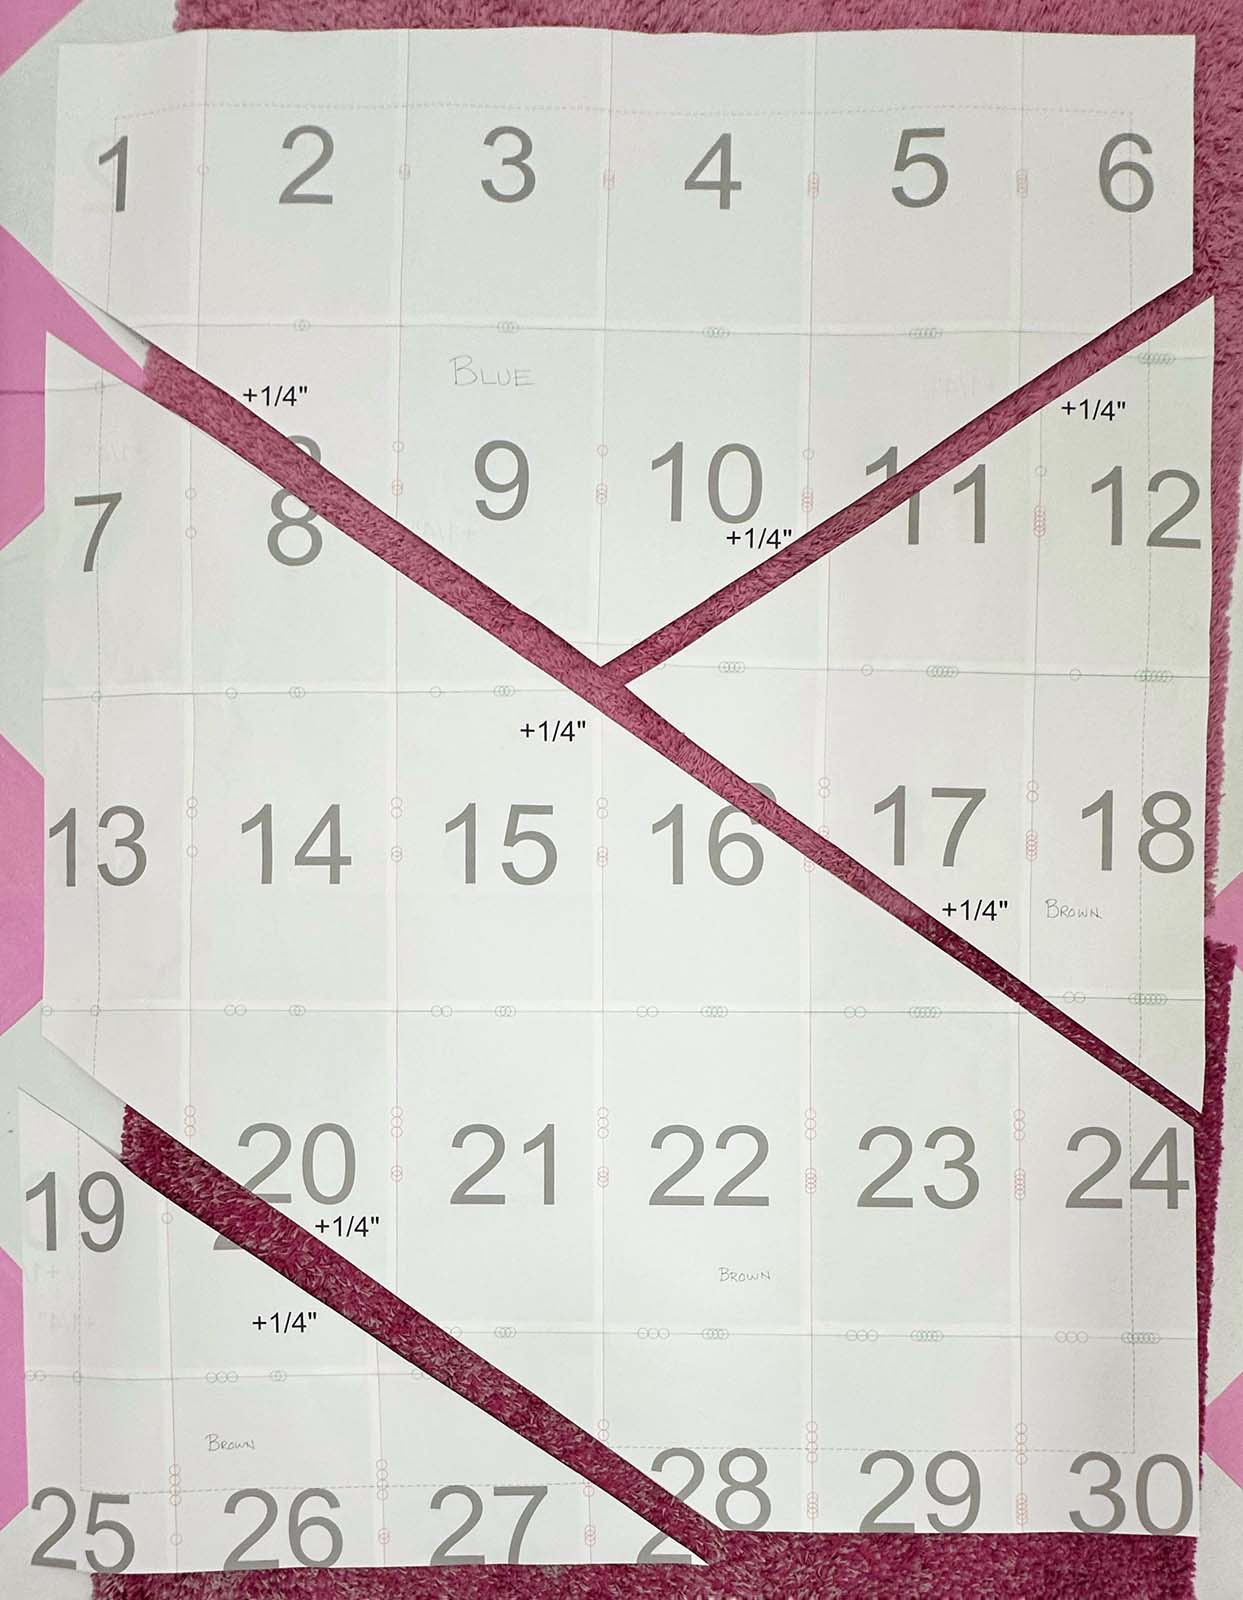
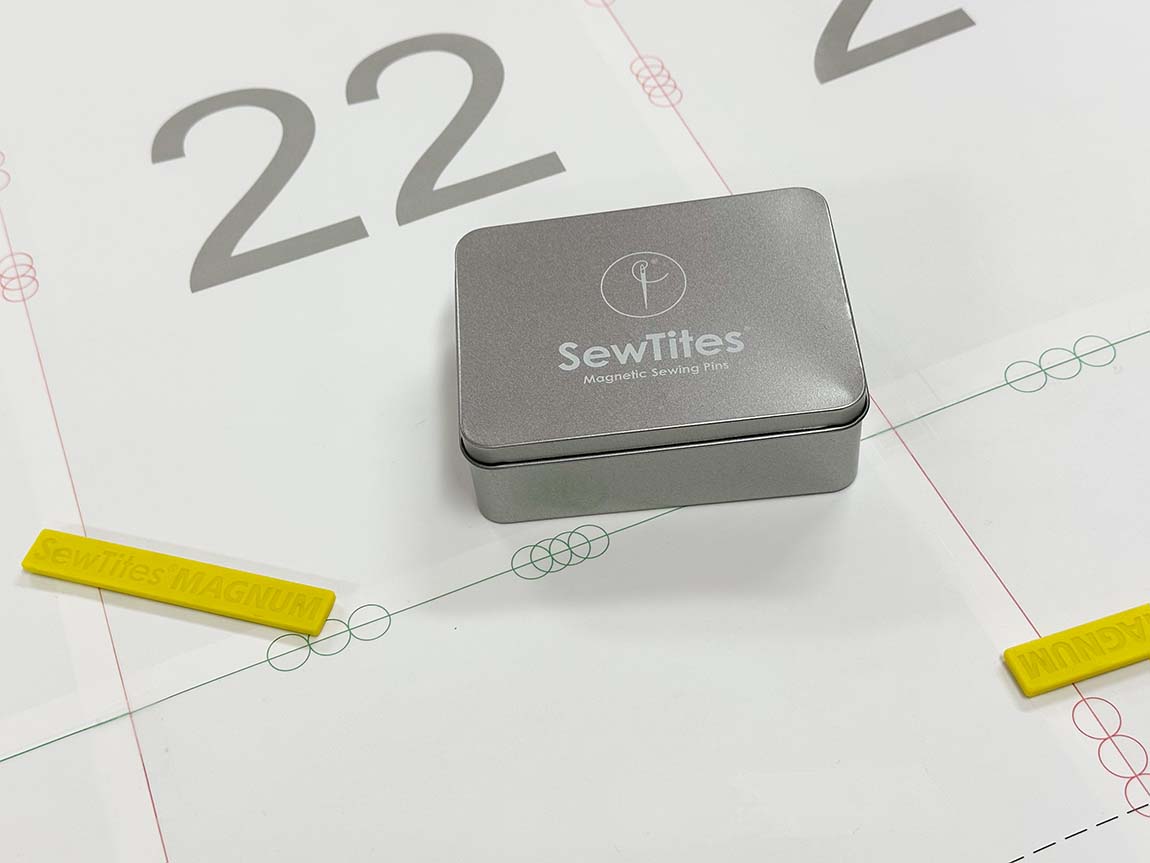
These enormous templates were a bit challenging to work with, but once I pulled out my SewTite Magnums, which are specifically designed for loading a quilt onto a longarm machine, the entire process became much easier.
These strong magnets easily held the large paper templates to the fabric, keeping everything smooth and intact during the cutting process.
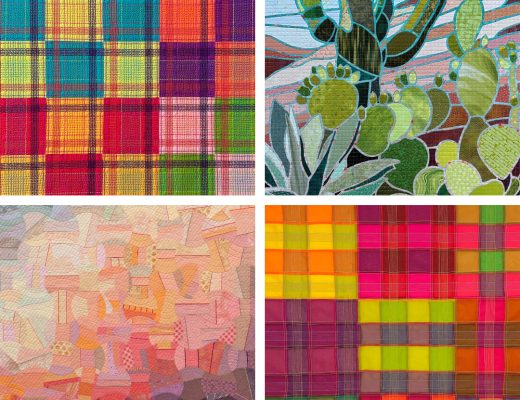
Selecting Fabric and Thread
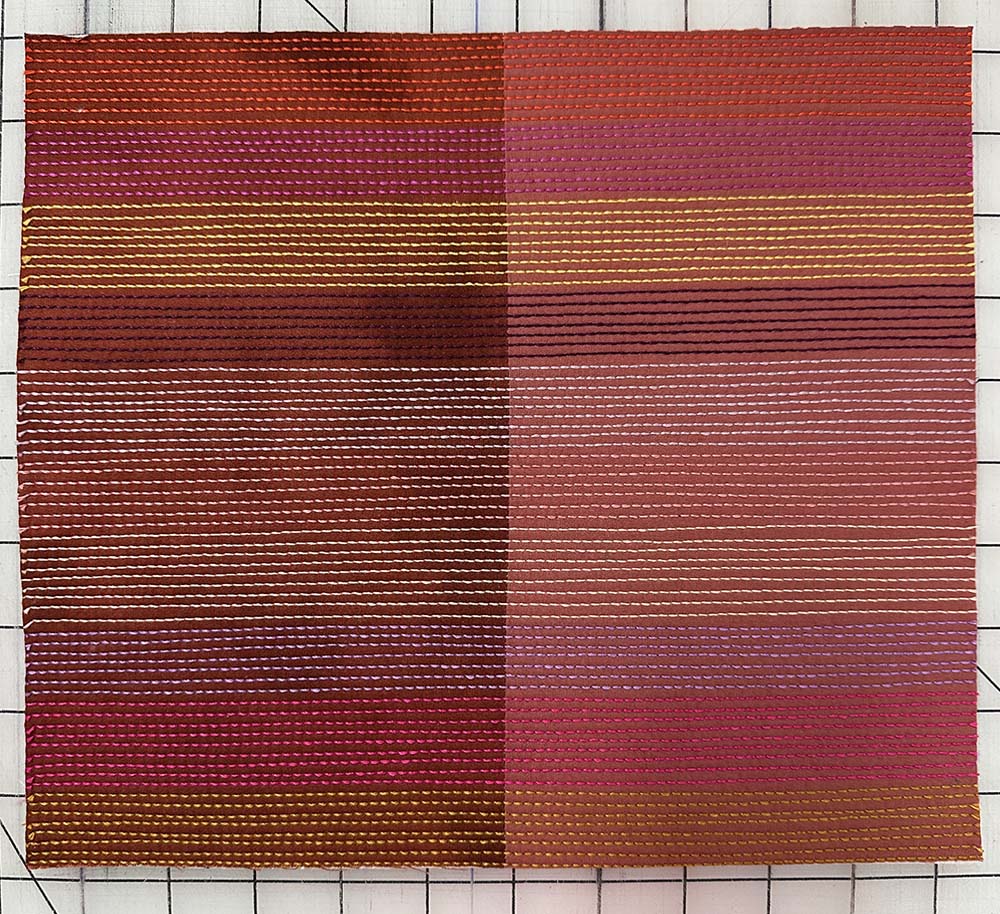
Fabric and thread selection are key for this design, so I made a 10” square sample, quilting several colors of 12-weight thread over two potential fabric options.
Quilting
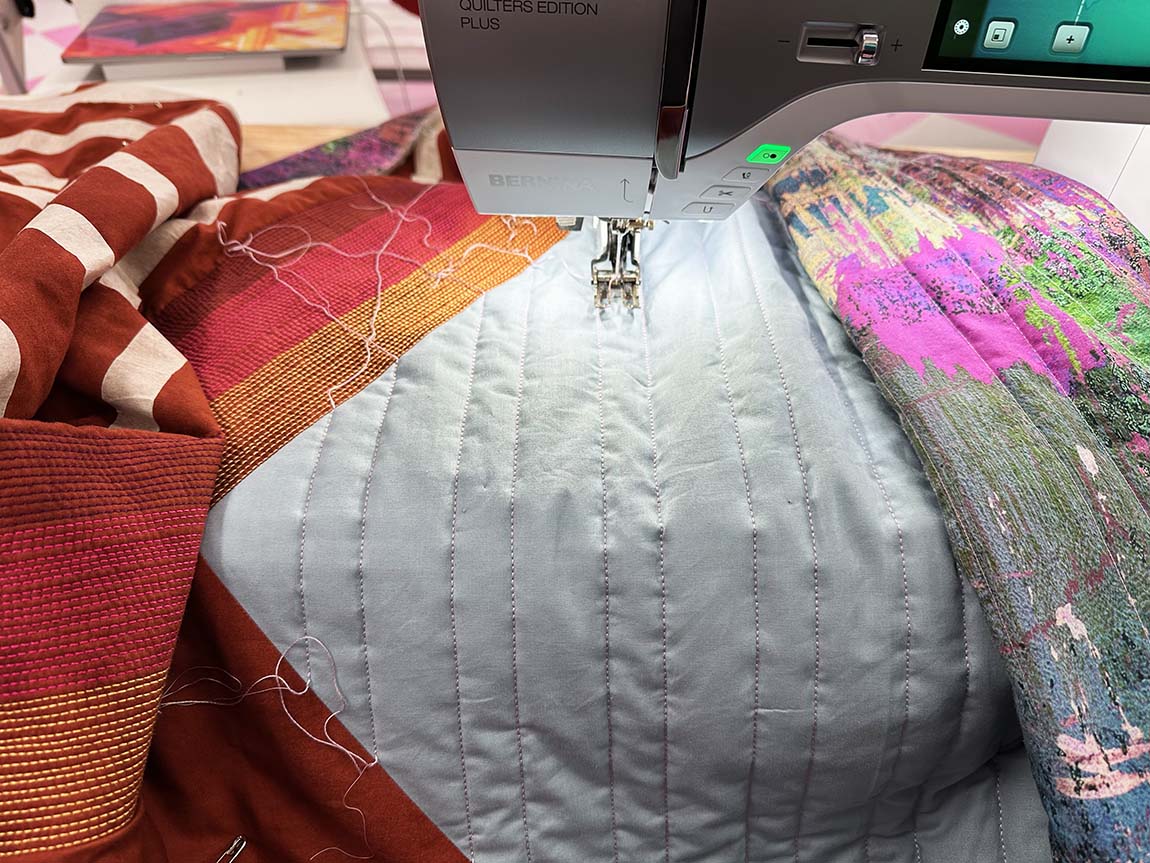
The quilt top was quick and easy to piece, with just four pieces, and the overall design relies heavily on the quilting stitches to make the quilt stand out.
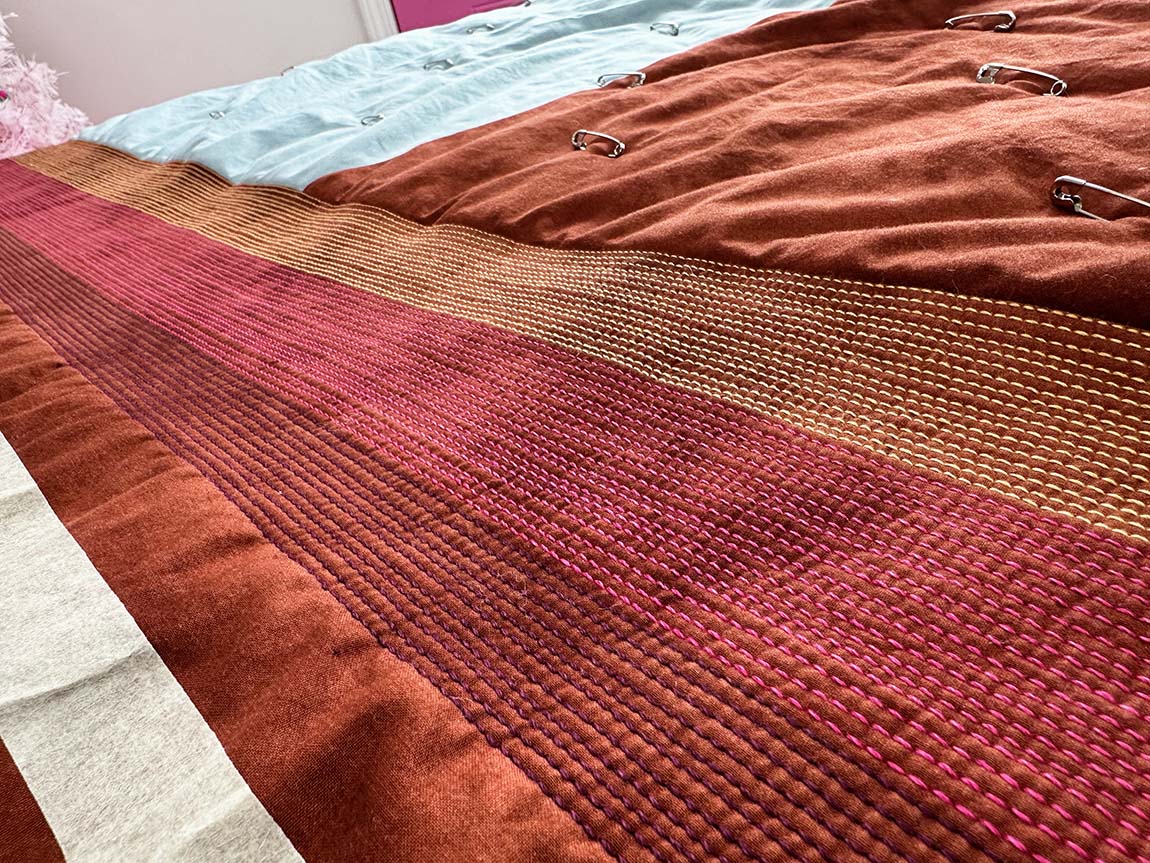
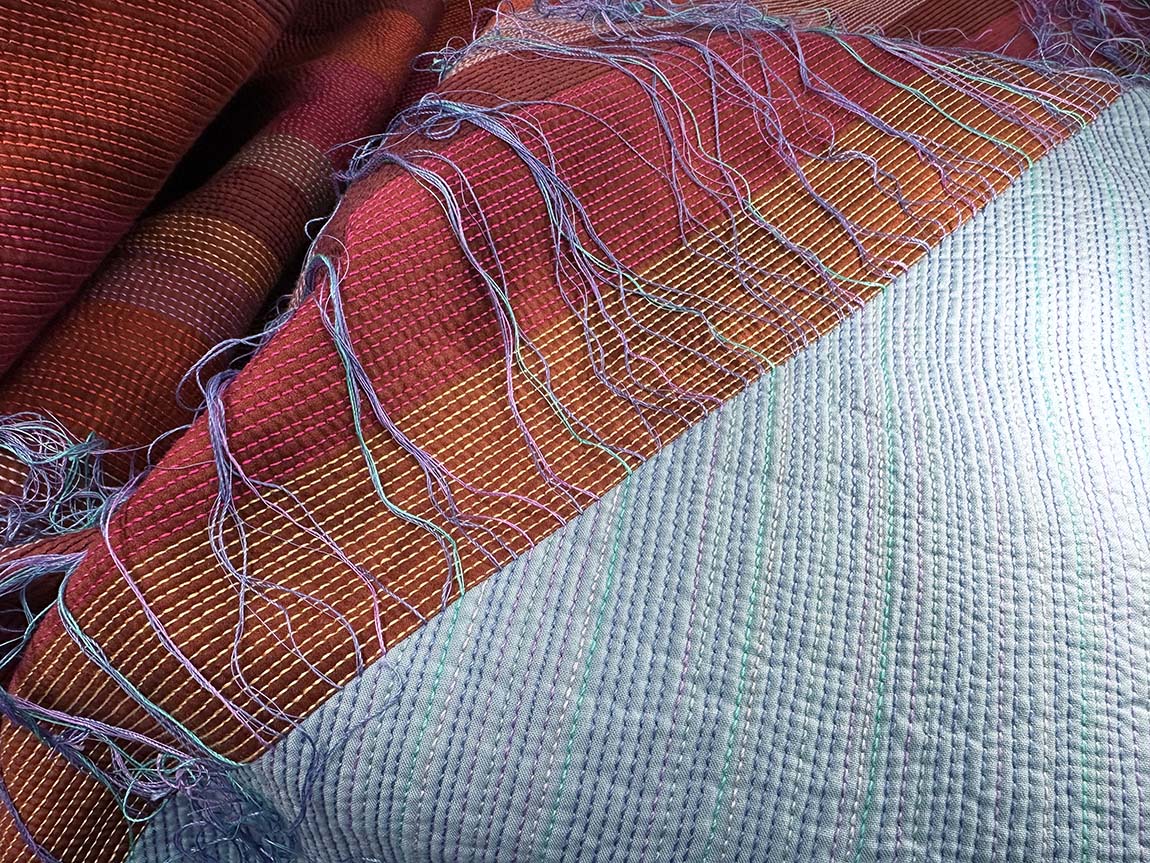
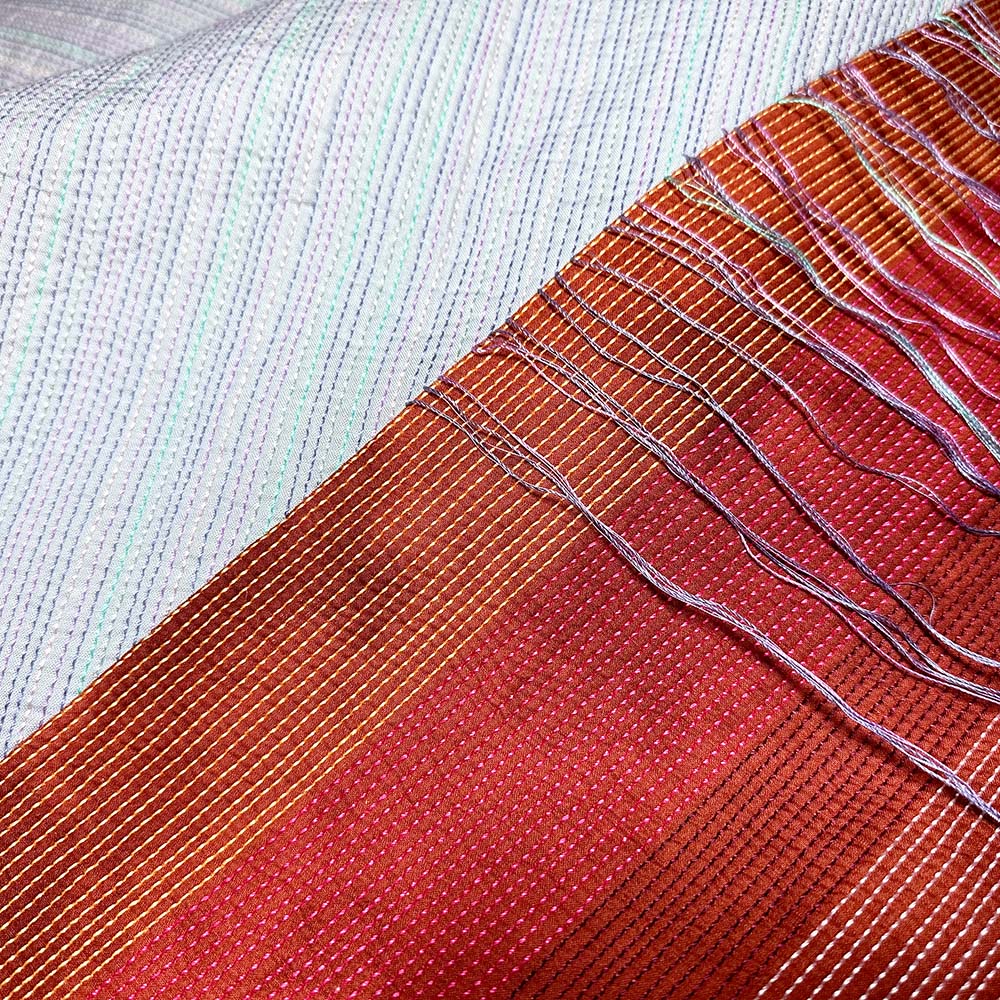
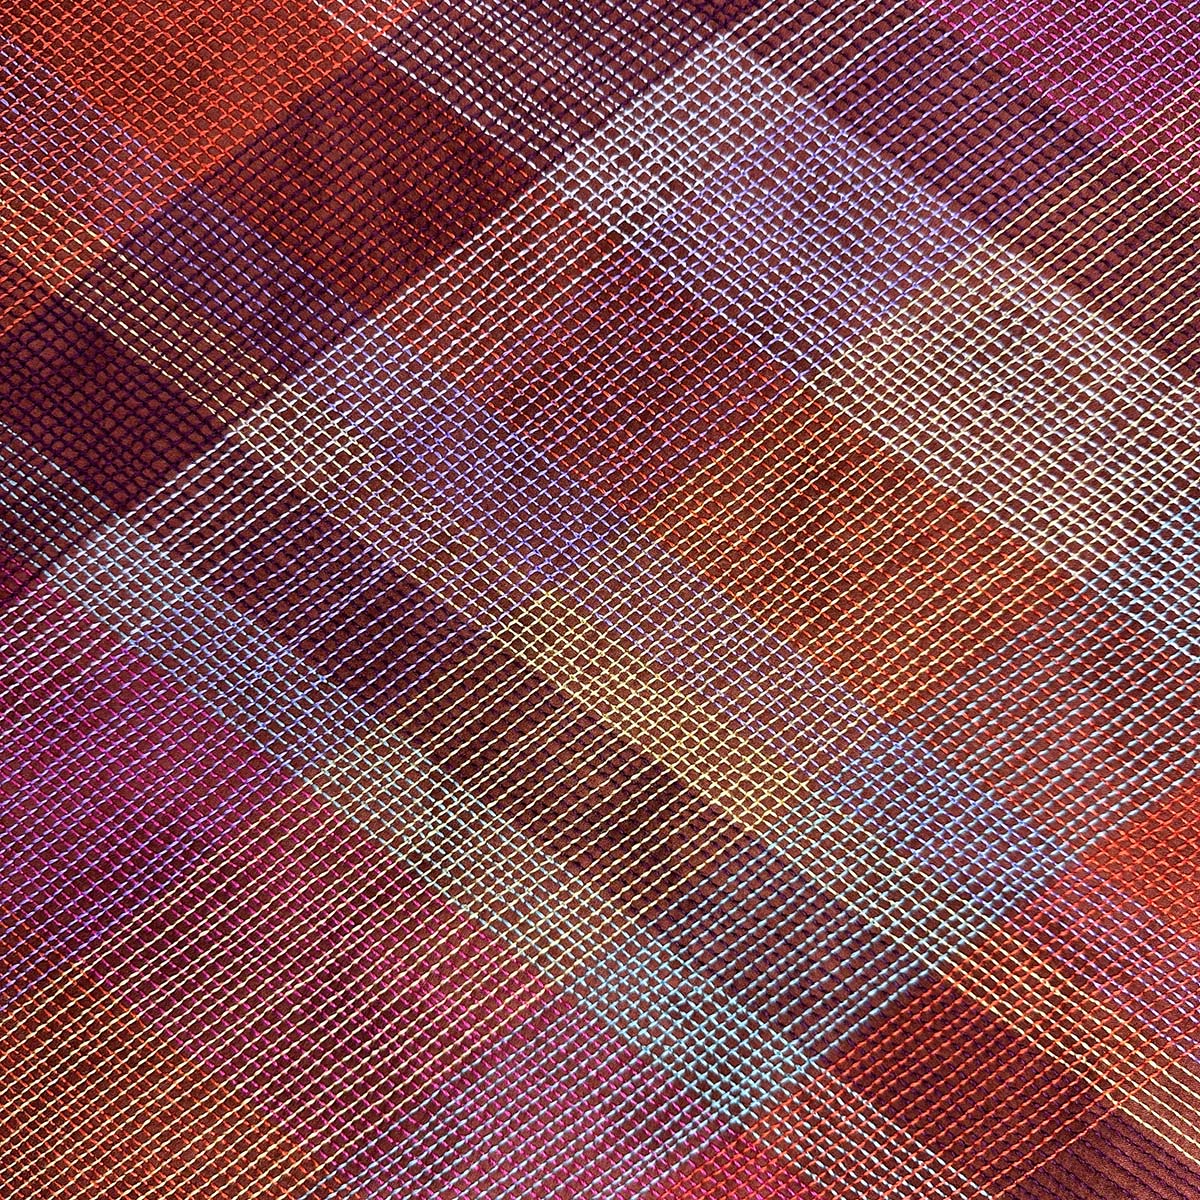
For this design, I am using matchstick quilting and 12-weight thread to infuse color into the quilt. The quilting lines will run parallel to the angles representing each rock formation, forming a plaid motif in the bottom portion of the quilt.
Marking Quilting Lines
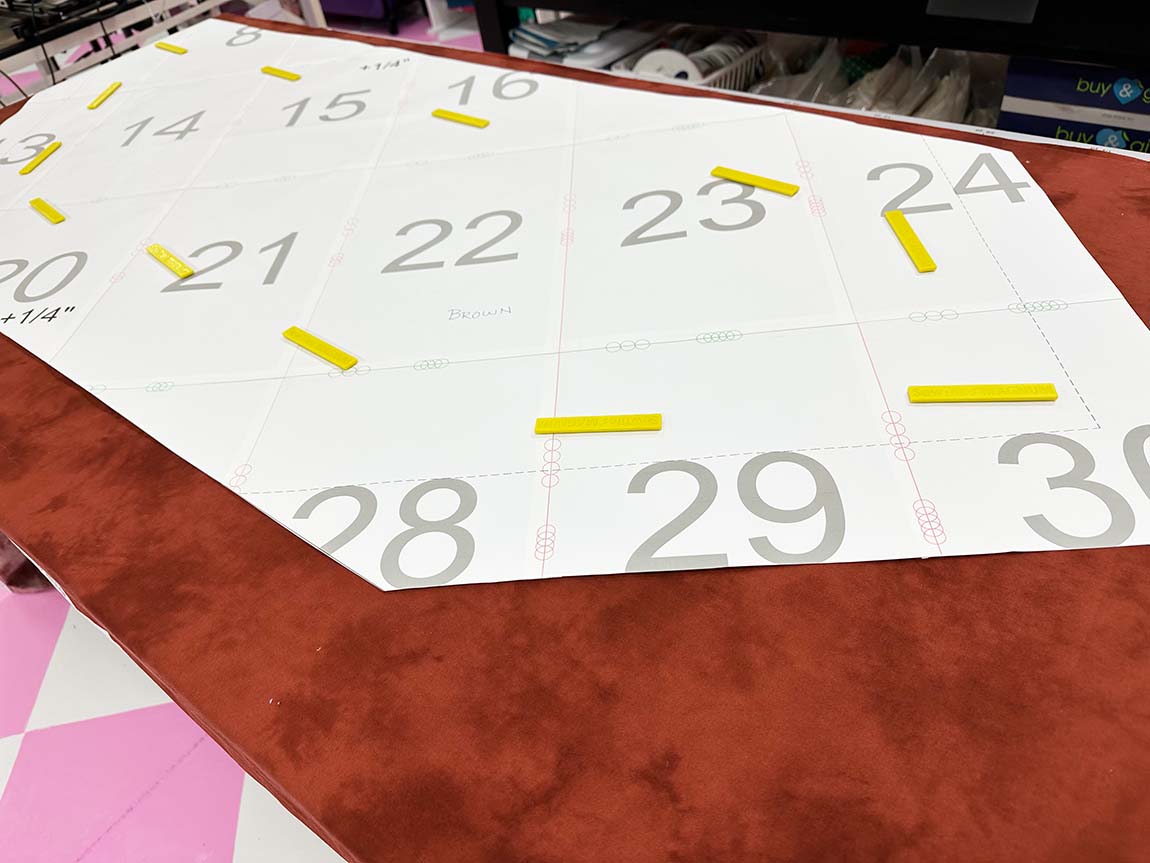
My favorite marking method for straight-line quilting is using lines of masking tape in various widths. For this quilt, I used 1” and 3” widths to divide the quilting area with a 2” wide ruler to create the spacing.
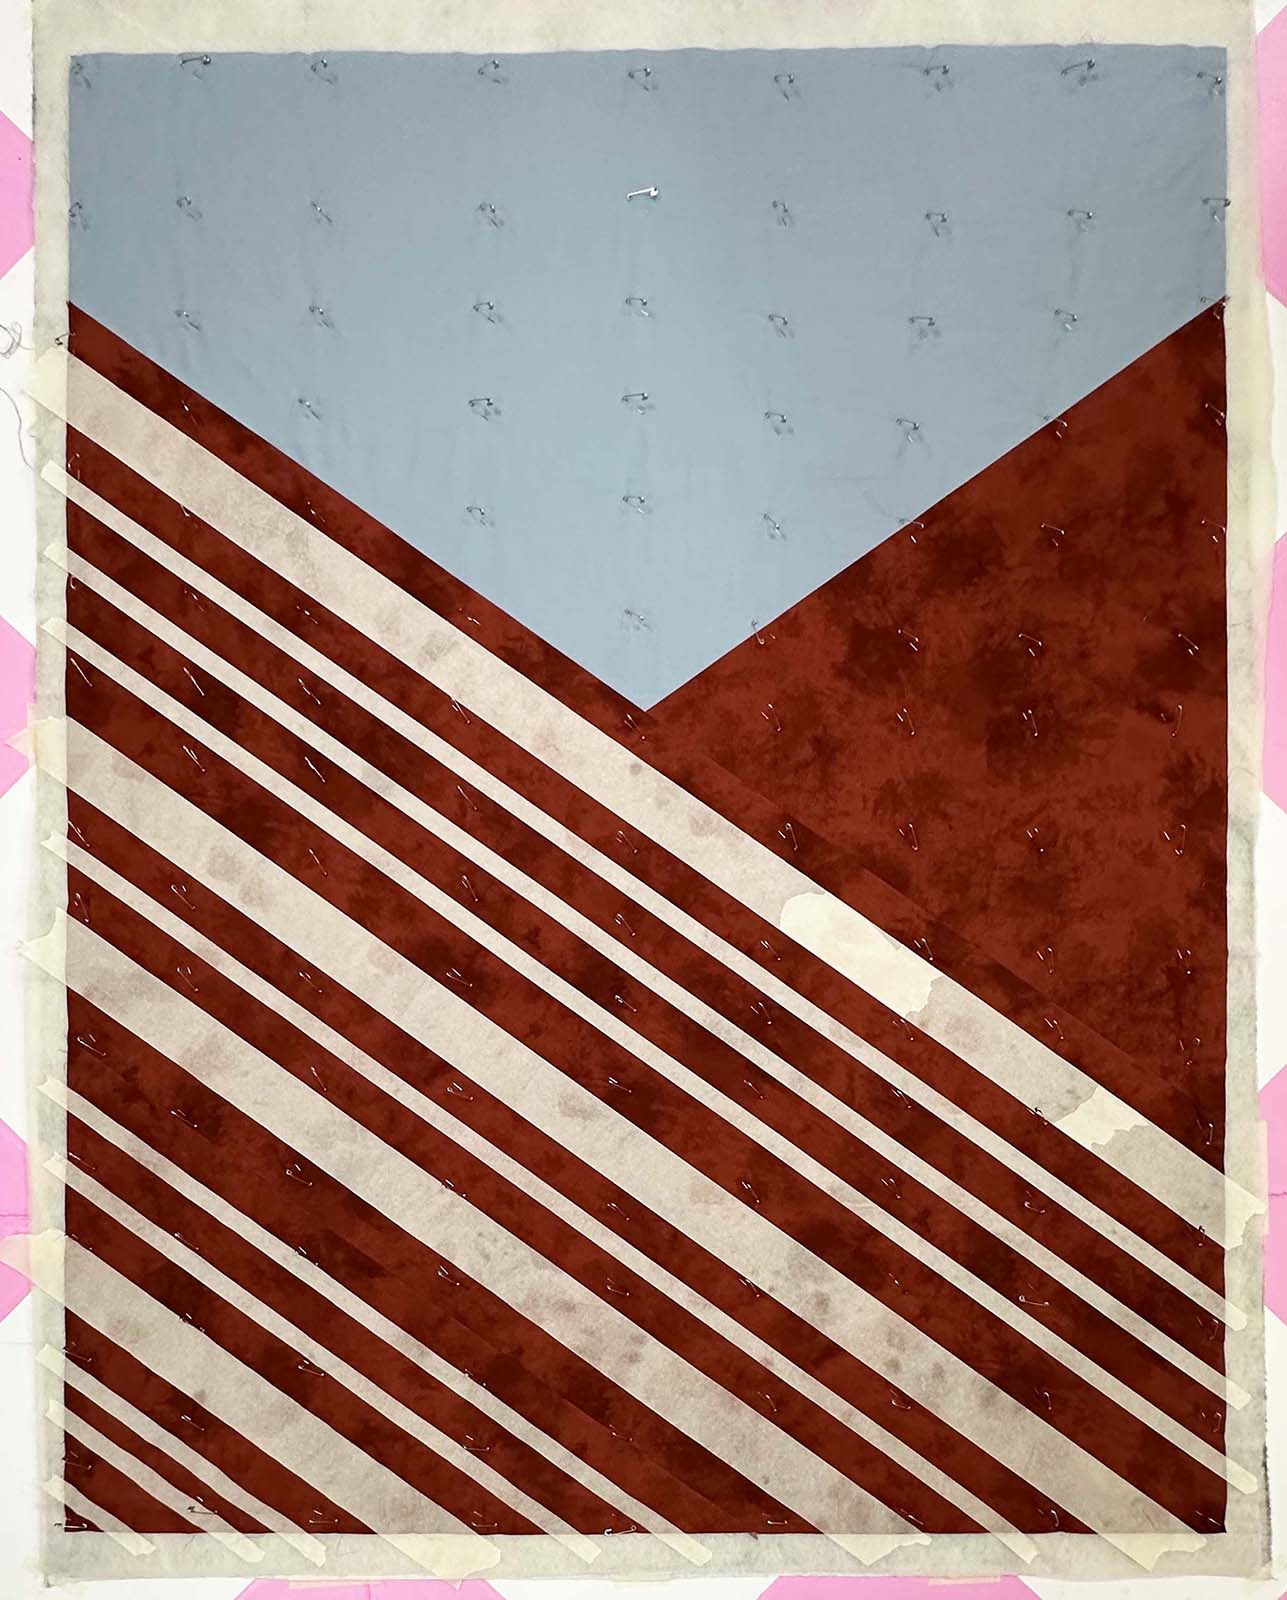
Basting
I lay down as many tape lines as possible before I baste the quilt using safety pins.
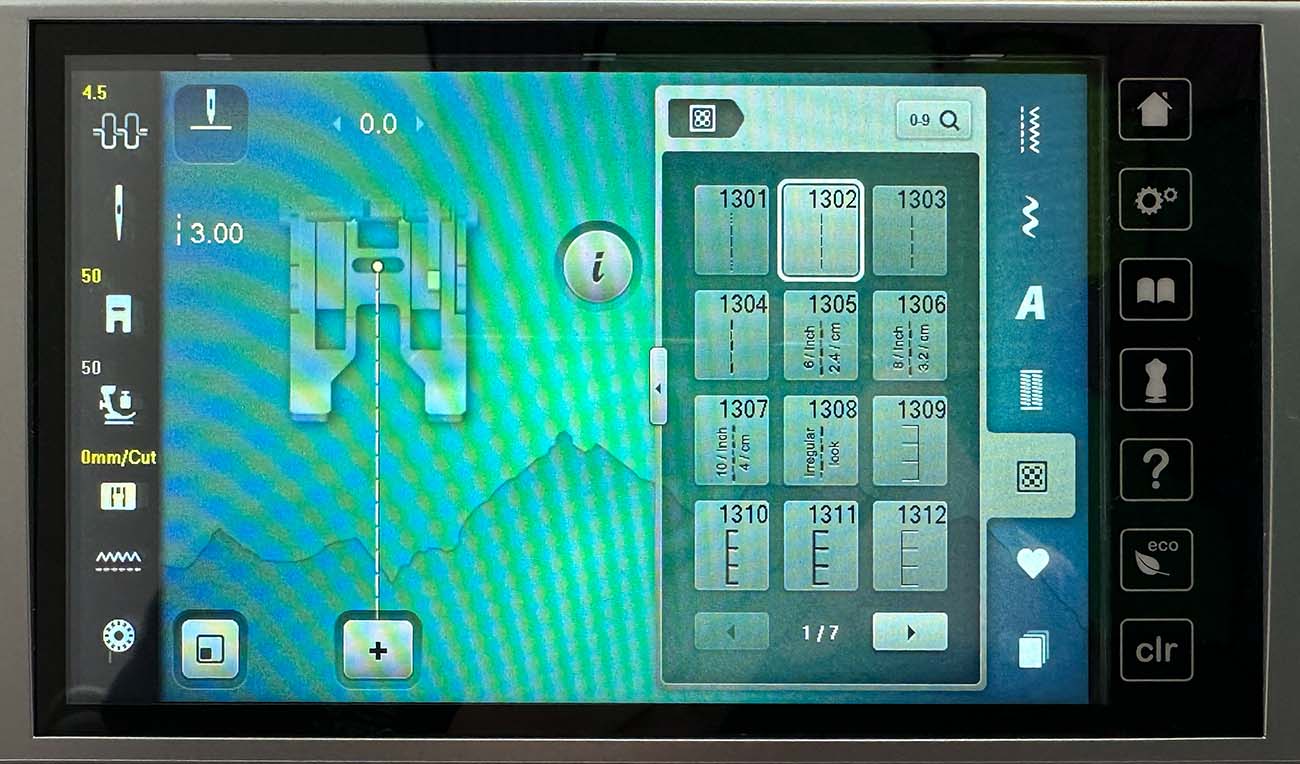
Machine Settings for Quilting
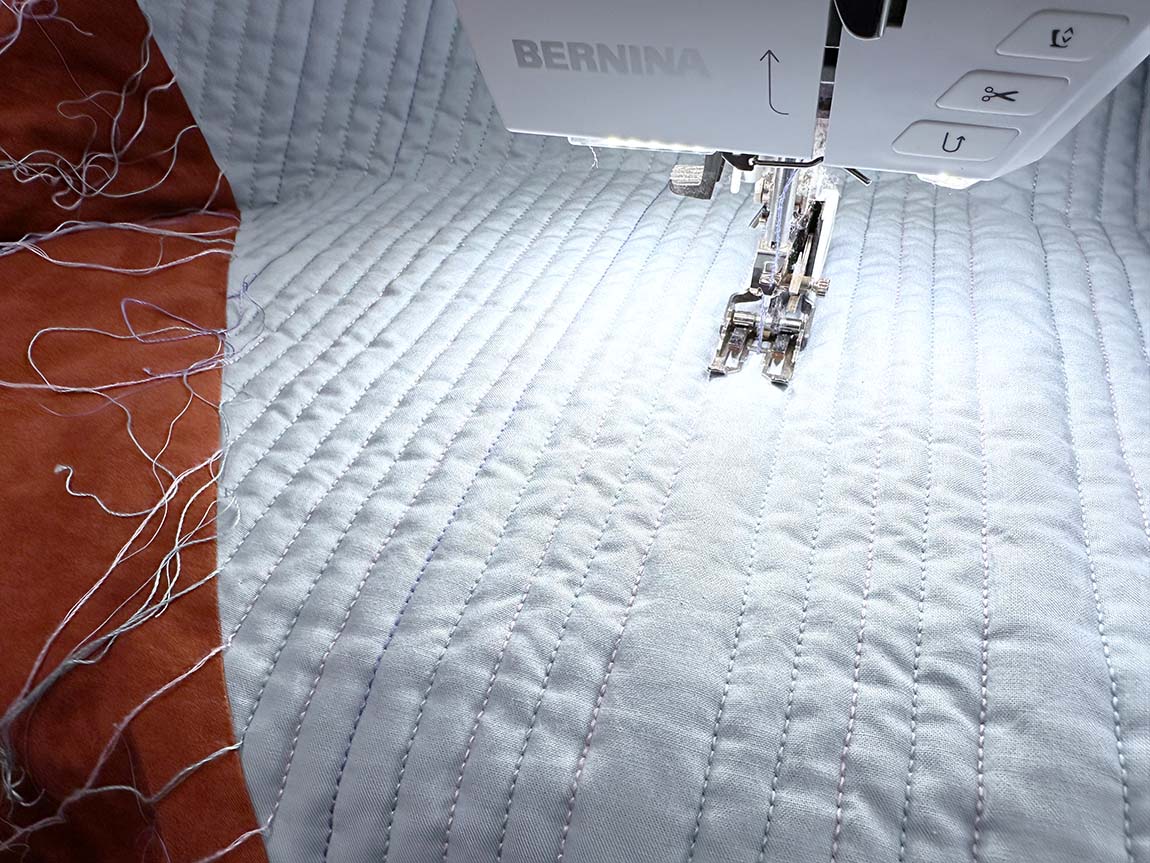
I quilt on a BERNINA 770QE PLUS machine, and one of the preset stitches, #1302, works perfectly for straight-line quilting. I always use a walking foot for straight-line quilting and test the tension on a scrap quilt sandwich after each bobbin change before starting the main quilt. In this instance, I raised the tension slightly to ensure the stitching looked good on both the front and back of the quilt. When quilting with 12-weight thread on the top, I always use 50 or 40-weight thread in the bobbin.
Matchstick Quilting
For matchstick quilting, I start by quilting on either side of the tape and then work towards dividing the space into half-inch wide sections before further quilting until the lines are spaced approximately 1/8” apart.
Quilting the “Sky”
While the rocky areas of the quilt are quilted with wide lines of the same color, I mixed the thread colors throughout the sky areas of the composition. To achieve this, I quilted the lines to either side of the tape using one color, and then changed thread colors with each pass across the space until it was entirely filled in with lines 1/8” apart.
Burying Thread Tails
While the plaid motif covering most of the quilt allows for quilting all the way across the space, the sky area within the V-shape required starting and stopping in the center of the quilt top for each line, leaving lots of thread tails to bury.
When I have numerous thread tails to deal with, I ensure they are kept out of the way, but I wait until the end to bury them all at once, allowing me to maintain a rhythm for both the quilting and thread knotting processes.
I knot and bury each pair (top and bobbin) of threads.
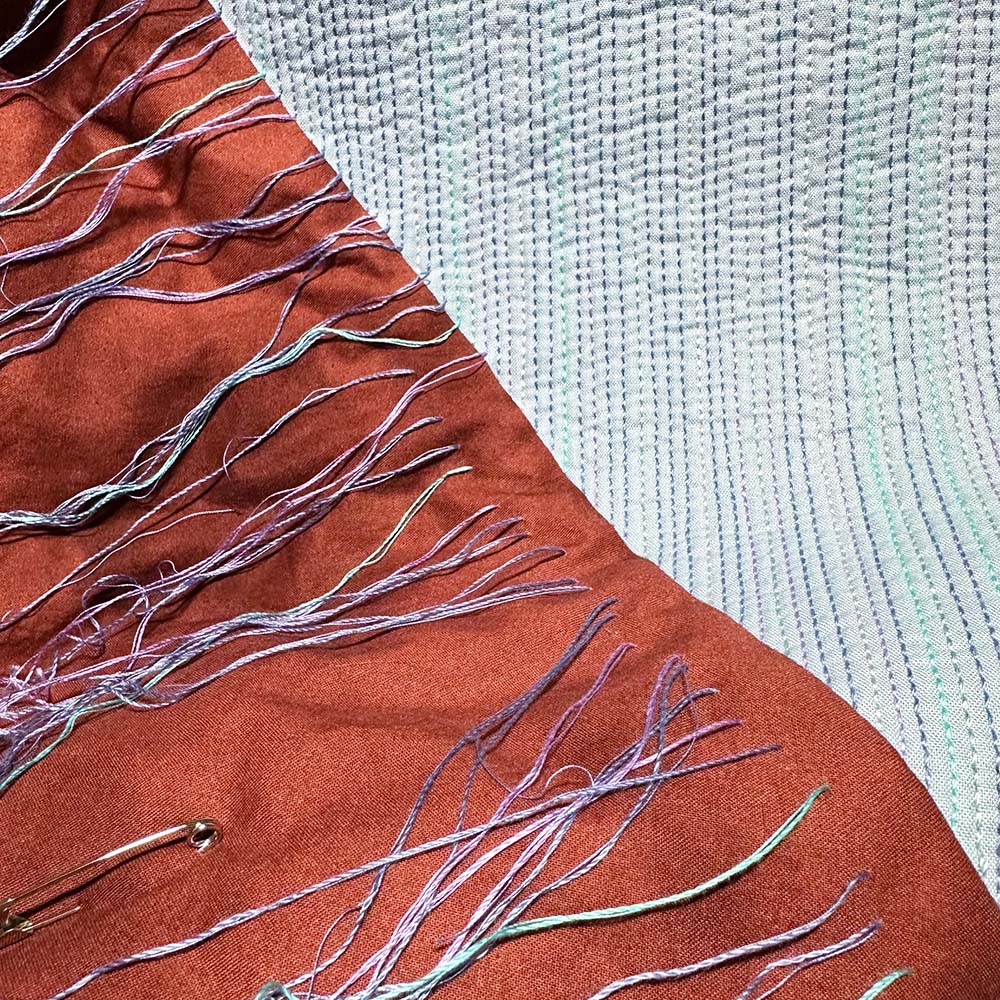
Then I clip an entire section of thread at one time.
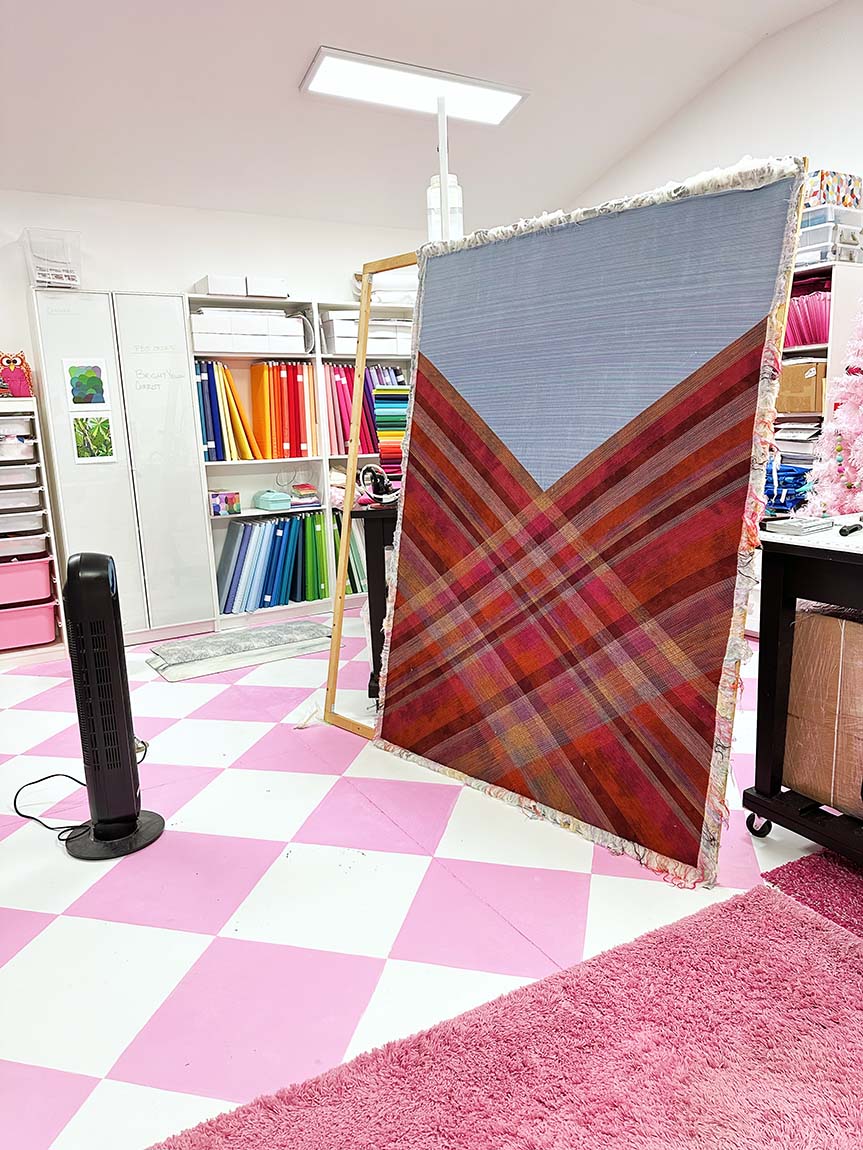
Blocking the Quilt
Some quilts end up ripply after quilting, and the only way to get them to lie anywhere close to flat is to block the quilt. Blocking a quilt involves getting it wet and pinning it down so it will dry in the shape you dictate.
I take a different (more brutal) approach to blocking my quilts. I have a set of wooden frames that I can adjust to fit each quilt. While the quilt is wet, I stretch it onto the frame and use a staple gun to hold it in place. Once the quilt is dry, I remove the staples and trim the edges of the quilt.
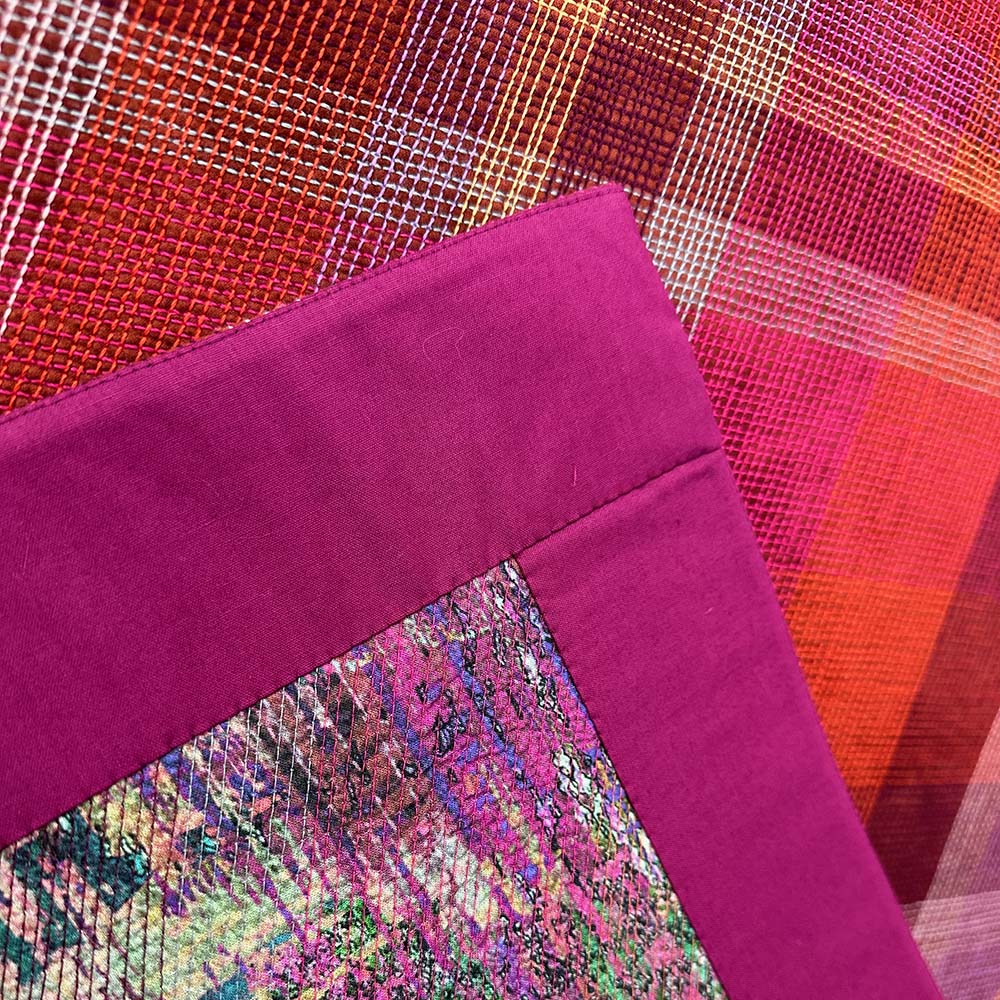
Finishing the Quilt Edges
For this quilt design, I wanted the viewer to imagine the quilting lines could go on infinitely, so I chose to do a faced edge rather than a binding that creates a visual frame.
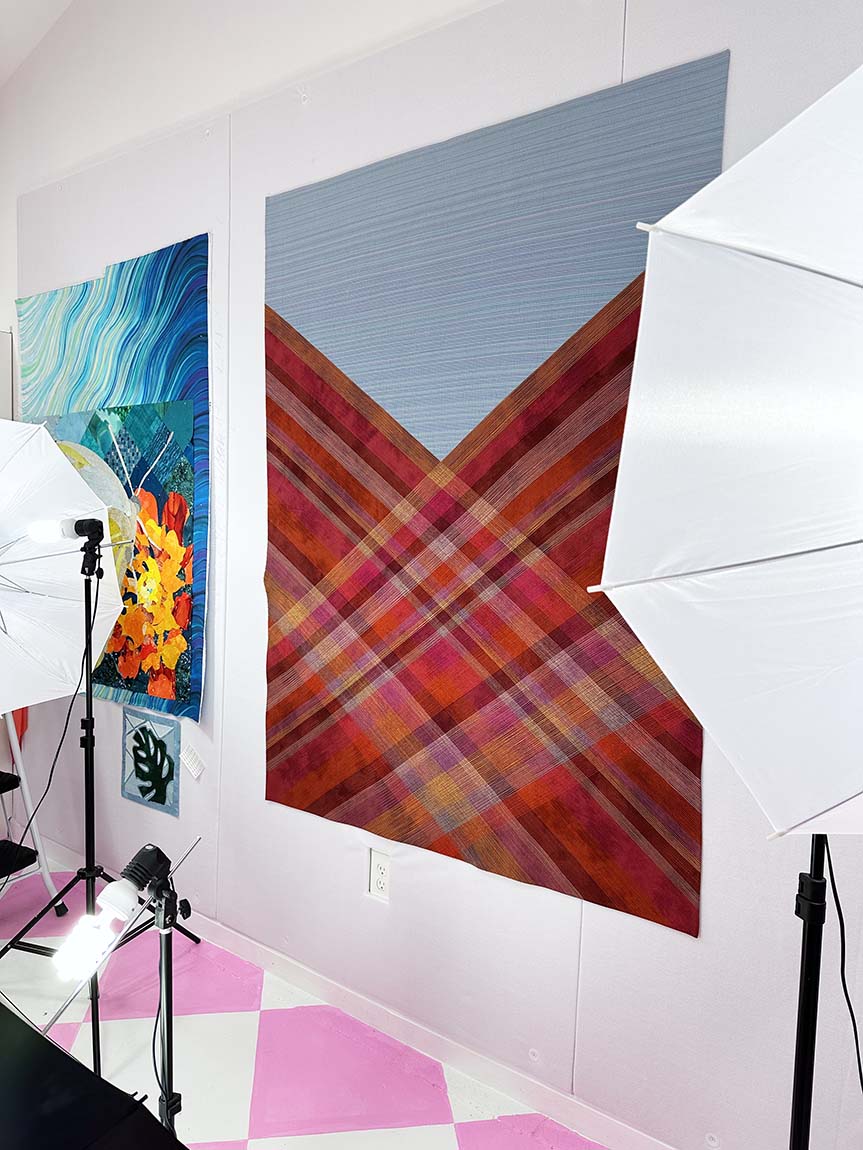
Utah Overlook
And here is the final quilt!
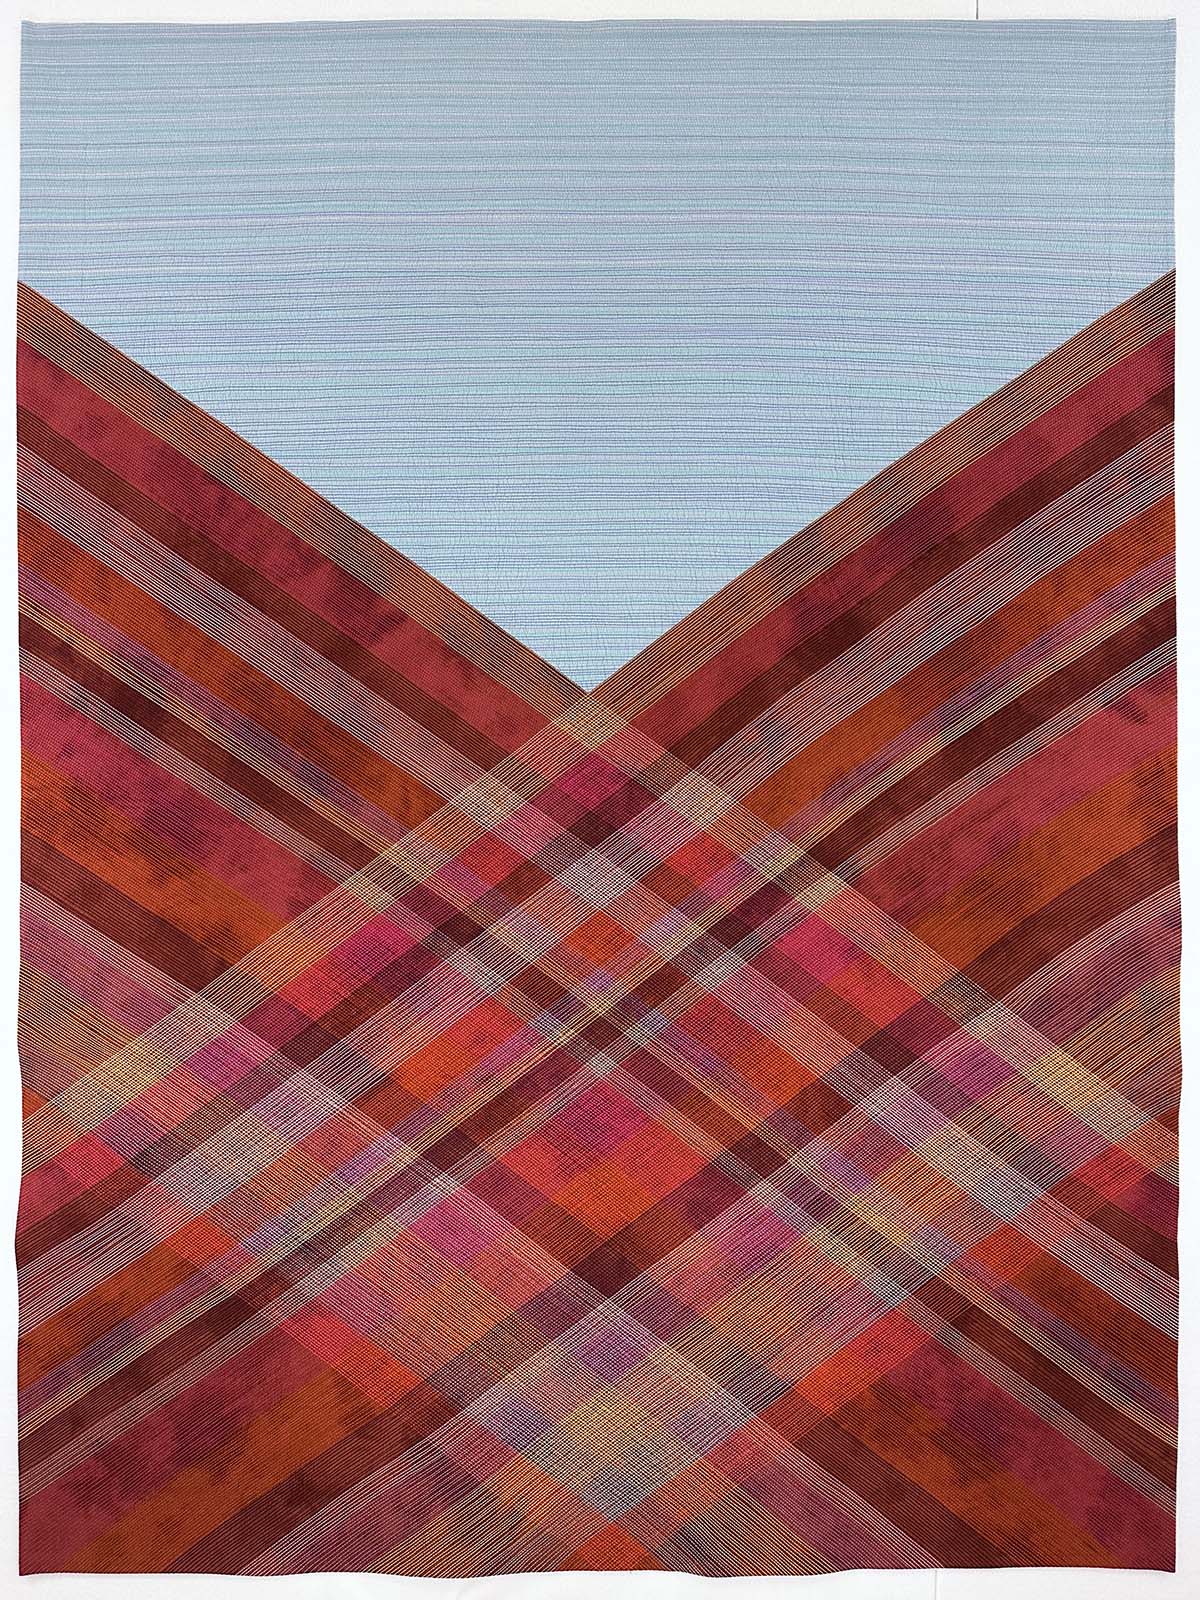
I feel that the real magic of this design lies in the way the lines intersect to create a plaid motif.
Quilt Stats
- Title: Utah Overlook
- Size: 50” x 68”
- Techniques: Traditional piecing
- Quilting: Matchstick quilting with a walking foot on a BERNINA 770QE PLUS domestic sewing machine
- Fabric: Commercially printed and solid cotton fabric
- Batting: Hobbs Tuscany Wool
- Thread: 12-weight cotton Aurifil on top in a variety of colors; 40 and 50-weight matching thread in the bobbin
- Edge Finish: Faced edge
Thank Goodness It’s Finished Friday (TGIFF) Link-Up
Now that you have seen my recent finish, I can’t wait to see yours! Add a link to your recent finish below, and check out all the other fantastic finishes!


7 Comments
Nancy @ Grace and Peace Quilting
November 6, 2025 at 6:20 pmWow, your practice square alone is beautiful! What is the difference of your stitch #1302 and the regular straight stitch? Your quilt is stunning!!! I’ve been through Utah many times and can picture it. Great visual interpretation!
thenotsodramaticlifeadmin
November 14, 2025 at 11:20 amThe specific stitch adjusts the length, tension, etc automatically to work the best for piecing cotton patchwork.
Chrisknits
November 6, 2025 at 10:37 pmWhat a stunning piece!!! I love plaids, so I am enthralled with your process. I may have to play with this idea on a MUCH smaller scale in 2026. Simply beautiful!
FO or No FO | chrisknitssews
November 6, 2025 at 10:40 pm[…] for a stunning finish go check out The (Not So) Dramatic Life‘s post for […]
Kathie
November 7, 2025 at 8:27 amI’ve been through that stretch of I-70. I totally get why you are sew inspired by it. My approach might be more literal, but yours is awesome! Kudos on your work with threads to express the layers of stone. It’s genius.
Nikki
November 7, 2025 at 10:54 amI’d love to see more of the frame you use to block your quilts. As I prepare to block a quilt on the floor this weekend, I’m really curious to see another approach to the process.
Shanda Siekert-Logue
November 7, 2025 at 7:39 pmHi Cassandra! Your step by step process, with tips from your experiences and photographs, is awe-inspiring! I truly enjoyed, and learned so much, taking your inaugural virtual course, ‘From Research to Abstraction.’ Thank you! Shanda Siekert-Logue