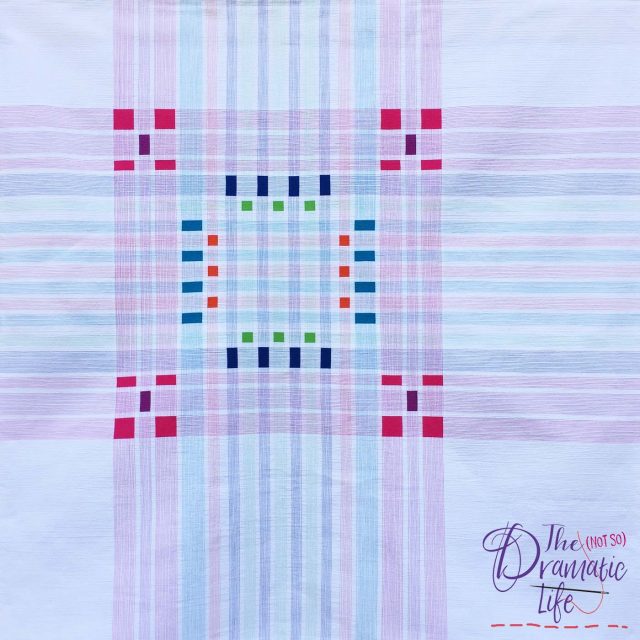
If you follow me on Instagram, you will probably recognize “Infused Plaid” since it is one of my favorite quilts and has traveled quite a bit. However, I recently realized that I had never blogged about this quilt. Since this week is the Blogger’s Quilt Festival over at Amy’s Creative Side, I thought I would take the opportunity to have a more in-depth look at this quilt.
Much of quilting is done in a standard routine. There may be slight variations depending on the specific project and the person making the project, but it usually looks something like this:
- Design/create a pattern, or set personal parameters if it will be an improv project
- Select fabrics
- Construct the quilt top
- Choose a quilting design
- Layer the quilt backing, batting, and top through basting or loading on a longarm
- Quilt the project
- Trim and finish the quilt edges.
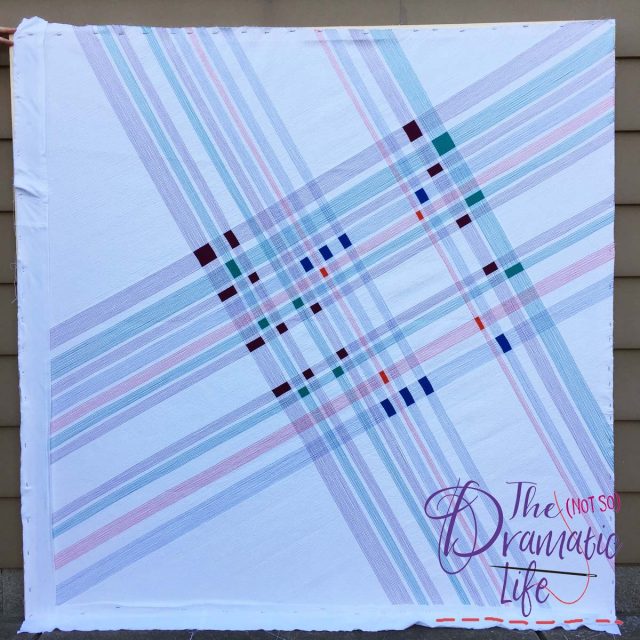
For Infused Plaid, I decided to mix up the process by starting with designing the pattern of the quilting stitches first. Then, based on where each color of quilting stitches intersected with the same color, I placed a rectangle or square of matching fabric that would be pieced into the quilt top.
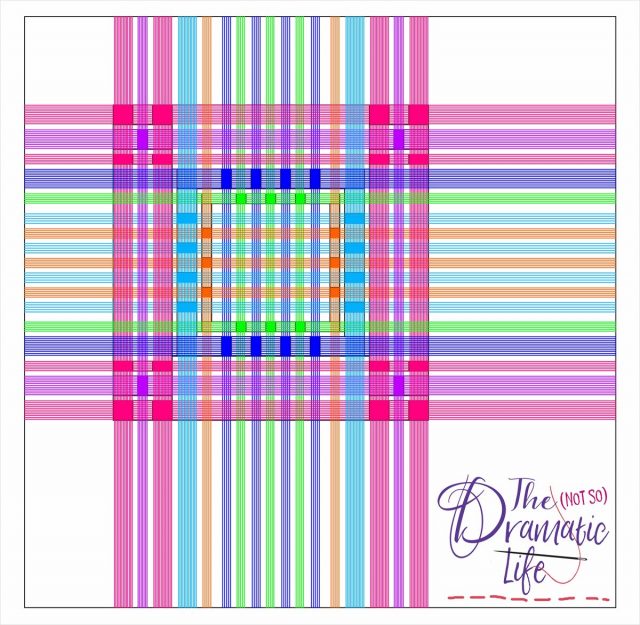
Drafting of the Infused Plaid design
Following the design process, most of the construction of the quilt is done in a standard manner. The quilt top construction is fairly straightforward and goes together quickly, but the design doesn’t come together until the colorful quilting stitches are added.
This quilt was basted on the longarm machine and then quilted with a walking foot on my domestic Bernina. For this project, I basted with regular thread, but I since started basting with water soluble thread. It is amazing to not have to pull out basting stitches!
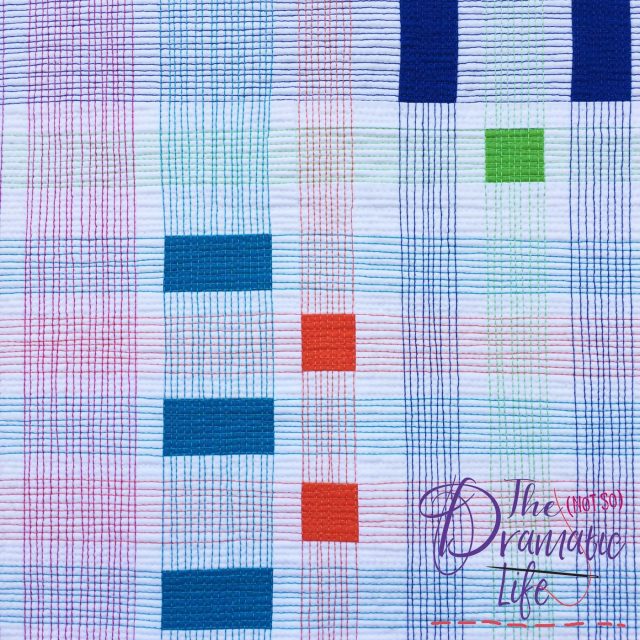
When I do matchstick quilting, I quilt all one direction first, then quilt any stitching lines that go in the opposite direction. The dominant, colorful quilting is done first by marking the lines using a 60″ ruler and a roll of masking tape. In the negative space of the quilt, I place parallel lines of masking tape approximately four inches apart across the quilt to indicate where the first set of quilting stitches will go. I stitch on either side of the masking tape and remove it as soon as I possibly can. Next I place a line of stitching about halfway between the previous lines, then halfway between those lines. The process continues until the lines are approximately 1/8″ apart. Finally, I mark and stitch the colorful lines running in the opposite direction to complete the plaid design.
Infused Plaid is mostly about the use of quilting thread. The brightly colored threads are stitched using 28wt thread on the top of the quilt and 50wt on the bottom. The heavier thread creates a stronger design on the top of the quilt, while the thinner thread in the bobbin helps keep the quilt softer and allows more thread to be loaded onto the bobbin. The rows of white matchstick stitching is done with 50wt thread on both the top and bottom of the quilt.
As I quilt, I try to make the lines as perfect as possible, but when minor (inevitable) variations occur, I never take them out to redo that portion of the line. I prefer to leave these moments as a reminder that this is still a hand crafted item. If the final quilt would become too perfect, it would look like it was constructed by an automated machine rather than a human being. The “flaws” are what gives this type of quilt some character!
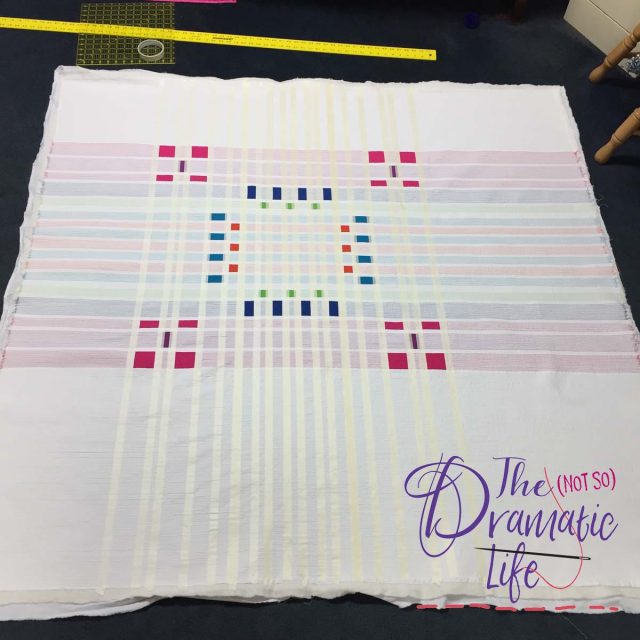
Dense quilting, particularly if it is done on a domestic machine, can result in a quilt that doesn’t want to lay flat. To deal with this issue, I block my matchstick quilted quilts. The planning for this process starts very early on when I make my quilt top, because I like to make my top at least a couple inches larger than I hope the quilt will finish. Since I work with so much negative space, I can to this without worrying too much about how trimming the edges will effect the overall aesthetic.
As soon as a quilt like this is finished, I soak it to prepare for blocking (and remove water soluble basting thread if it was used). Then I “stretch” the quilt on a simple wooden frame that I staple the edges of the quilt to. The biggest concern at this point is to make sure the lines of colorful stitching remain as straight as possible. While the quilt is wet, it is easy to inadvertently distort the lines of stitching. The stapling process is done on the floor, but once it is complete, I can stand the frame up to allow for better air circulation. Sometimes I even take the quilt outside for awhile to dry. It usually only takes a couple hours to dry, but I try to leave the quilt on the frame overnight to make sure that it is completely dry. I hadn’t taken any photos of Infused Plaid while it was on the frame, so the quilt you see on the frame below is Pivoted Plaid, a close cousin to Infused Plaid. (What can I say?- I really like plaid!)
To continue the visual lines of the plaid design all the way to the edge of the quilt, I used facings to finish the edge of the quilt rather than a visible binding.
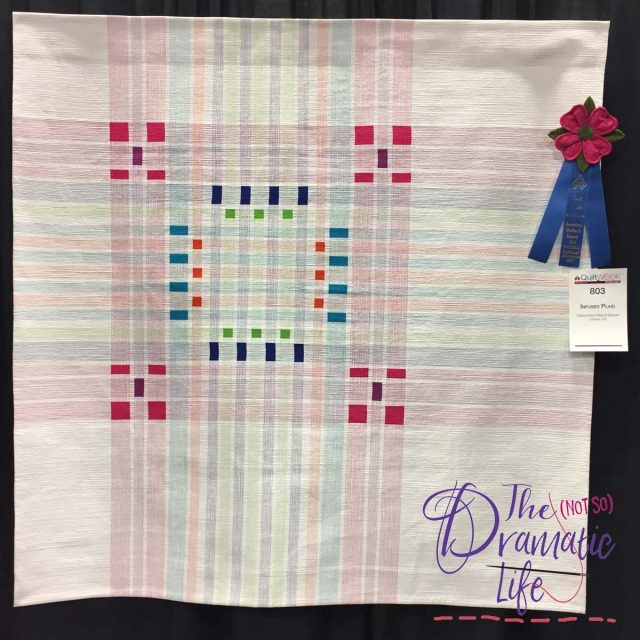
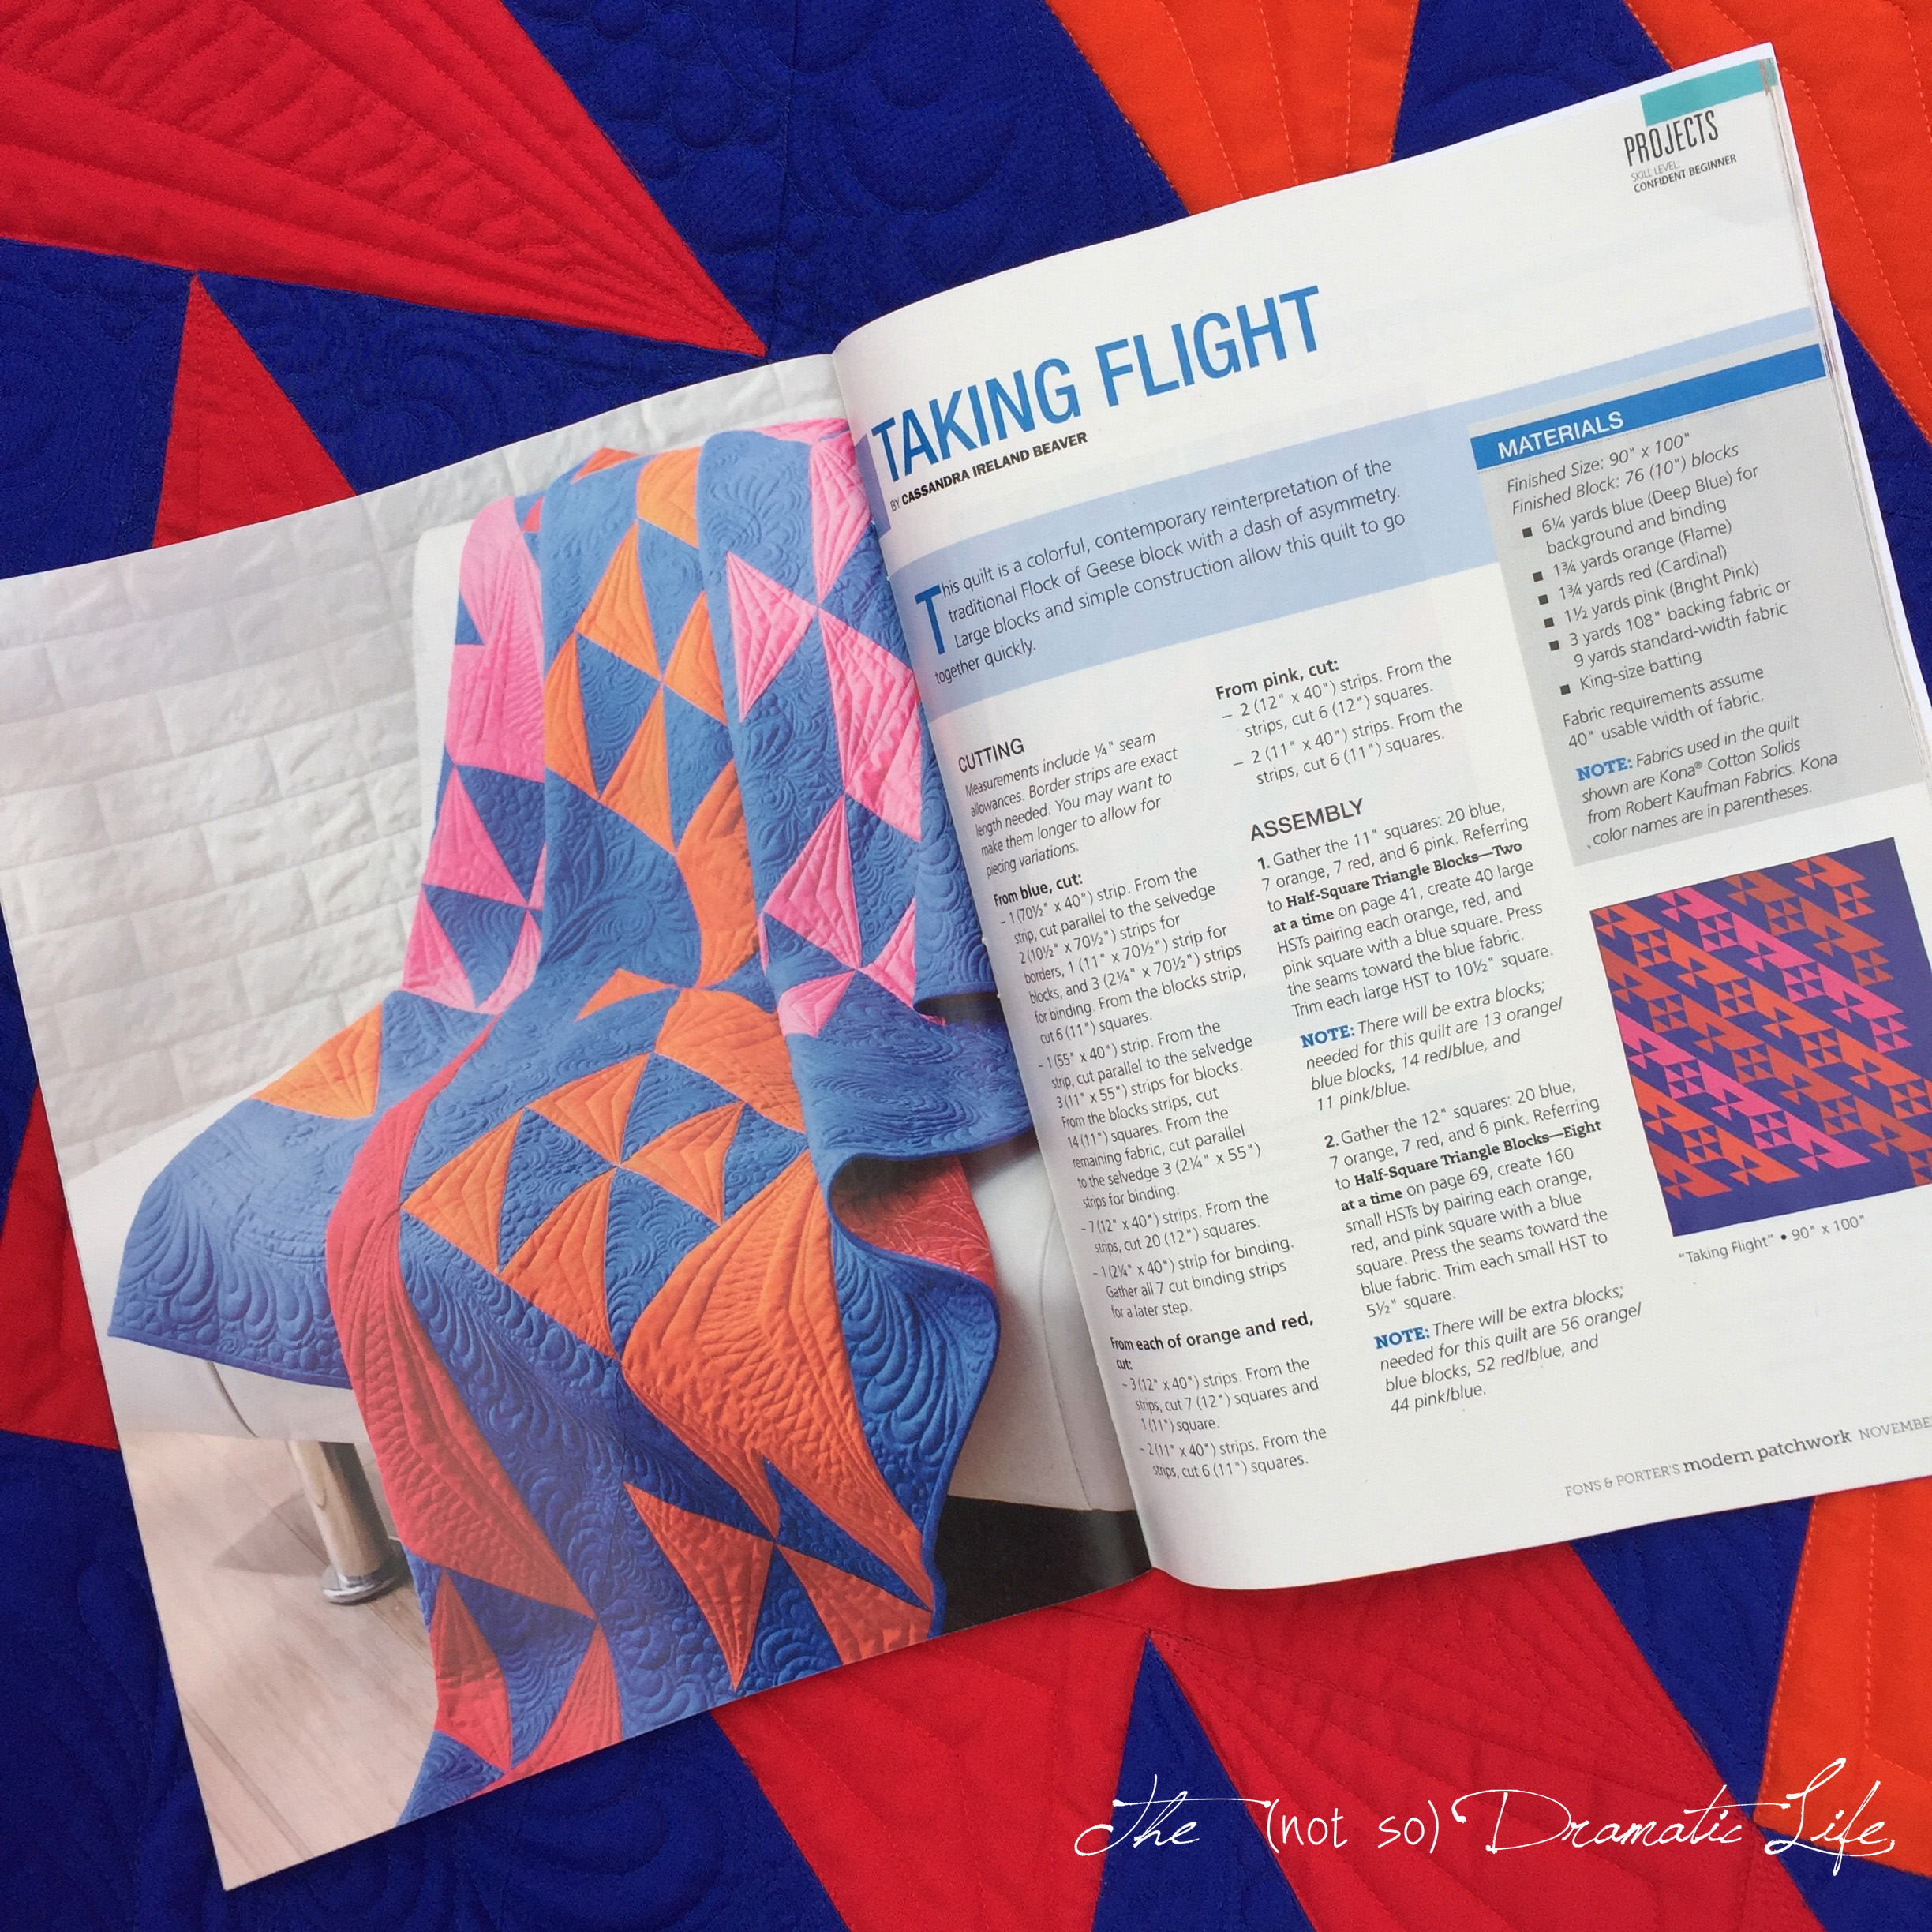
Infused Plaid has been shown in quite a few venues. It started by being a project in Modern Patchwork magazine. Then it went to QuiltCon in Savannah where it received a first place in the Negative Space category. Next it went to the American Quilter’s Society Spring Paducah show where it won a first place in the Modern Quilt category.
It went to several more shows and was included in the book Modern Quilts: Designs of the New Century.
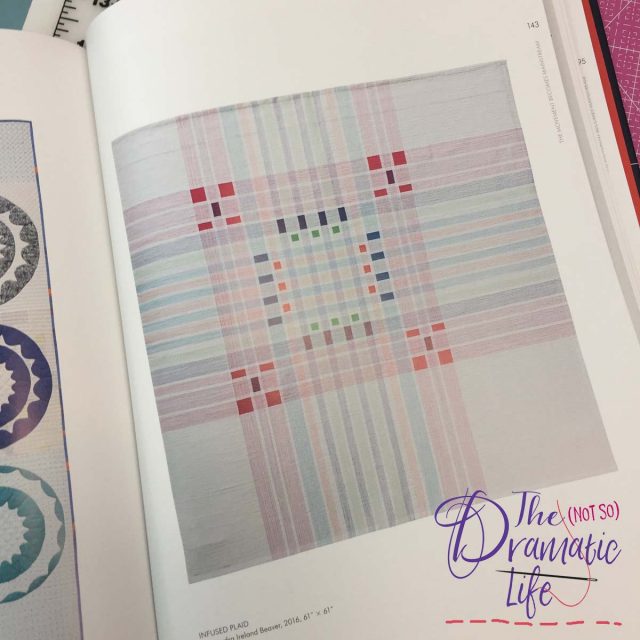
Infused Plaid in Modern Quilts: Designs of the New Century
Recently, Infused Plaid joined its new home as part of the permanent collection of the National Quilt Museum in Paducah, Kentucky. The museum collection focuses on quilts made since the 1980’s, and I am thrilled that this is the first modern quilt to join their amazing collection!
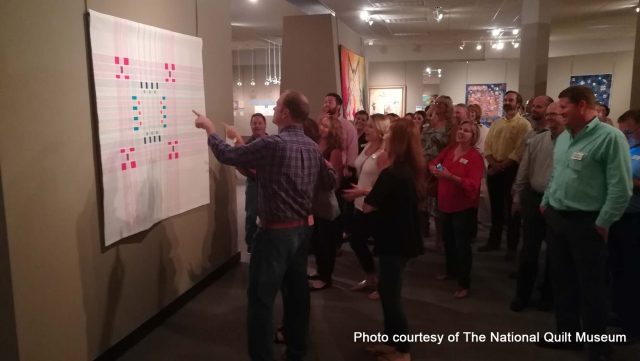
Infused Plaid at The National Quilt Museum
Quilt Stats
Title: Infused Plaid
Size: 61″ x 61″
Techniques: Traditional machine piecing
Quilting: Matchstick quilting using a walking foot on a Bernina 1008 domestic
Fabric: Kona Cottons
Batting: Hobbs 80/20 Cotton Poly Blend
Thread: Quilted with 28wt and 50wt Aurifil
Binding: Faced with fabric matching the quilt backing
13 Comments
Rochelle Summers
September 24, 2018 at 12:18 amThank you for explaining your process in such detail. It is obvious that you are a meticulous planner and pay attention to detail. I think I’m an accidentally lucky quilter and when things come together just right, it is a blessing from a quilt angel! Congratulations on having this quilt added to the National Quilt Museum. It is a wonderful example of a modern quilting.
Yvonne from Quilting Jetgirl
September 24, 2018 at 10:02 amI love getting to read about the design process and starting with the quilting makes so much sense to me for this quilt. I had wondered how the design had taken form!
Fred
September 24, 2018 at 1:09 pmThese quilts are a beauty! I love the way you play with quilting!
Joy
September 24, 2018 at 5:02 pmCongratulations Cassandra. What a wonderful quilt.
Sally
September 24, 2018 at 9:04 pmWow. What an interesting quilt. Beautiful.
Claudia
November 12, 2018 at 9:02 amThank you so much for explaining to us how you go about making your plaid quilts. I do so love them and have wondered whether I should have a try. With your helpful explanations I think I might dare to! Thanks again for the help!
Negative Space Handbook Blog Hop | The (not so) Dramatic Life
March 18, 2019 at 12:03 am[…] of Sylvia’s suggestions would be fun to try in creating a new design. (Please check out this post about Infused Plaid to see how my typical design process differs from what I am doing here!) In the book, Sylvia […]
A Mini Masterpiece: See My Quilted Artist Trading Card – The (not so) Dramatic Life
June 13, 2025 at 12:03 am[…] Infused Plaid was one of the first quilts I contributed to Modern Patchwork Magazine. (I miss that magazine!) This quilt features my favorite matchstick quilting technique, using a heavy thread to infuse the negative space with color. […]
Susan
June 14, 2025 at 3:18 amWOW Casandra – what a great affirmation to your amazing talent!! Quite a feather in your cap…I hope you have a feathered cap!! Wear it with pride my quilting angel!! I have learned so much from your blog, thank you so much for sharing you journey, I have so enjoyed it.
Enjoy Traditional and Cutting Edge Quilts at The National Quilt Museum – The (not so) Dramatic Life
July 11, 2025 at 4:33 am[…] Read more about infused plaid […]
Pamela Meyers Arbour
July 11, 2025 at 7:11 amCongratulations. It is a beautiful quilt and deserves a place of honor, especially for techniques.
Nancy
July 11, 2025 at 12:58 pmThanks for the detailed explanation of its construction. I am a front of house employee at the National Quilt Museum who has just begun doing guided tours. Confurm for me the sequence of design. You DESIGN the quilting first but you do not actually DO the quilting first? At what point do you add the fabric and how?
It and its mini cousin are both on display now and they attract a lot of interest. Thank you so much
What Happens When You Add Bright Thread to Dull Fabric? The Results Are Incredible + A TGIFF Link Up! – The (not so) Dramatic Life
November 6, 2025 at 7:23 pm[…] Check out another quilt featuring plaid quilting! […]