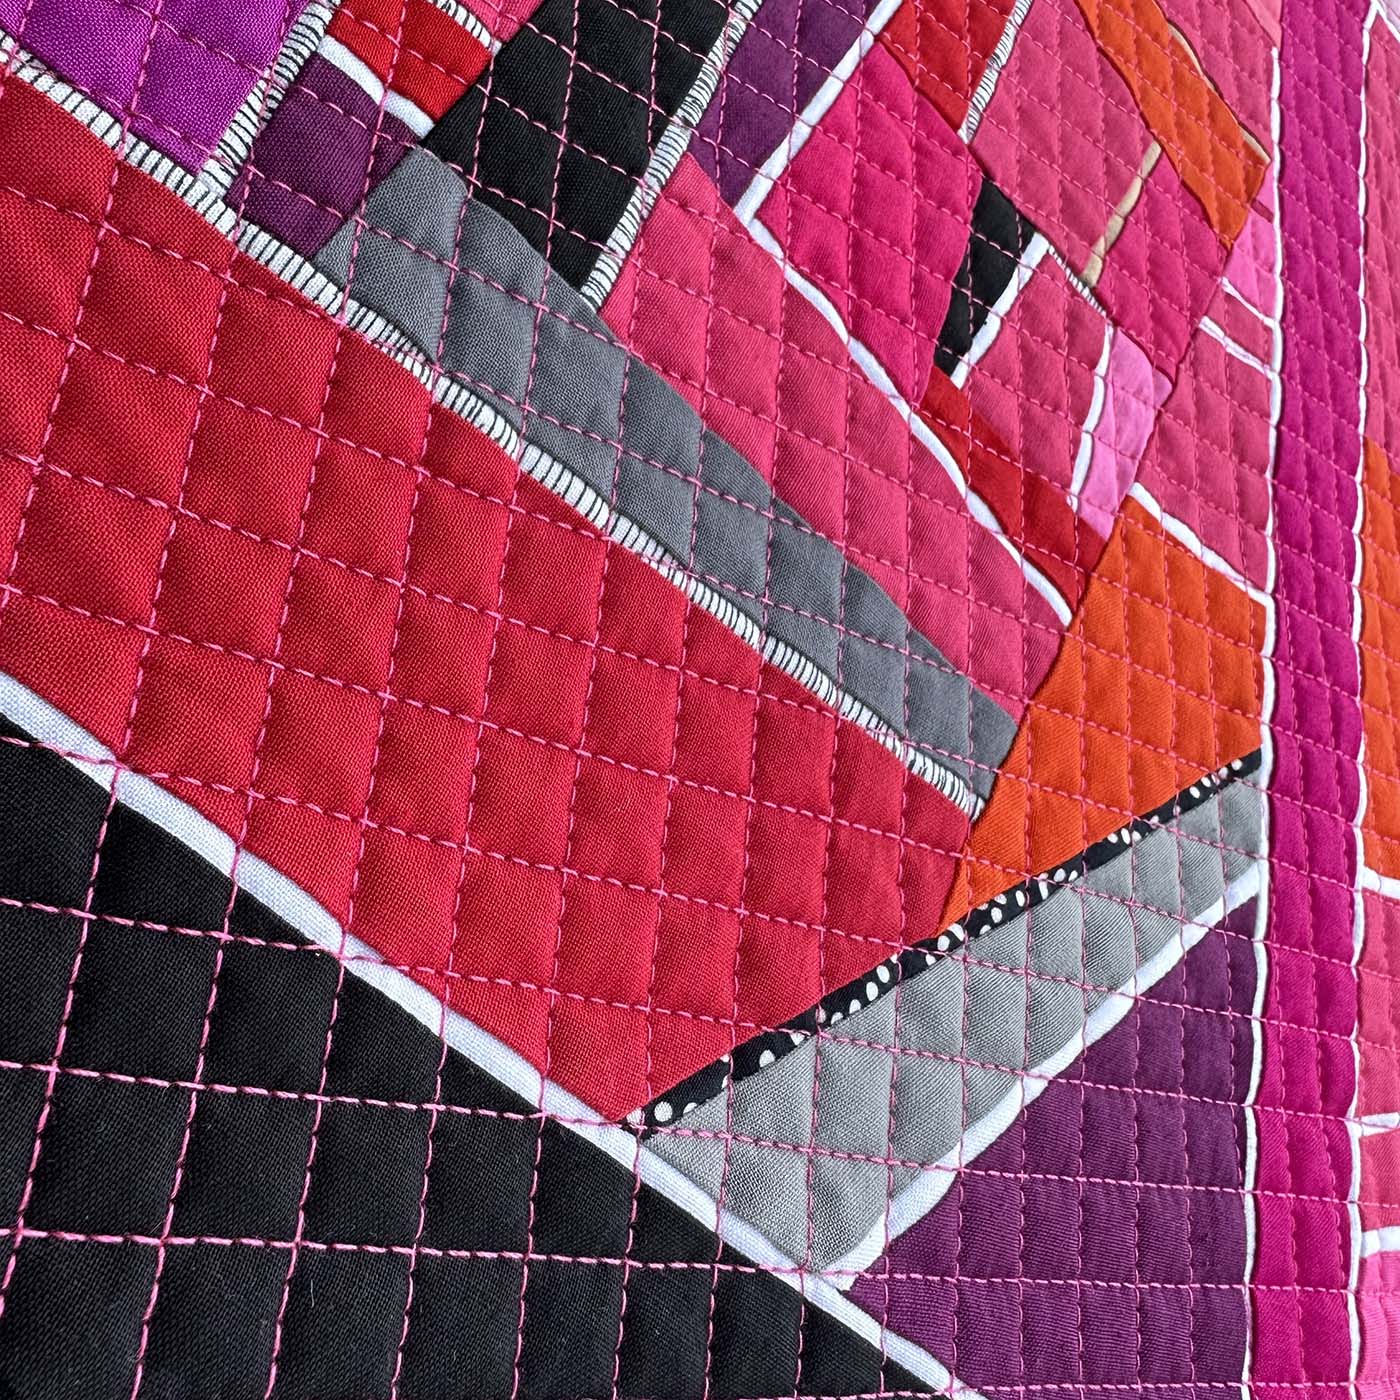
I love organic, feathery, stitching as much as anyone, but when it comes down to my personal aesthetics, Straight Line Quilting is my favorite for most quilts, especially those with a modern look. It’s simple, graphic, and allows the design of the quilt top to shine.
(This post may include some affiliate links. If you click on an affiliate link and choose to make a purchase, I receive a small percentage of the sale at no cost to you. These funds help keep this blog running and programs like the Quilt Concert FREE for everyone!)
Methods for Straight Line Quilting
Straight line quilting can be accomplished in a few ways:
- Using a ruler on a longarm or domestic machine
- Channel Locks (physical or digital) on a longarm
- Walking foot quilting on a domestic machine
I’ve done all of these except the ruler on a domestic machine, and they all have advantages and disadvantages. For me, unless the quilt is truly massive, my favorite method is walking foot quilting.
The Walking Foot
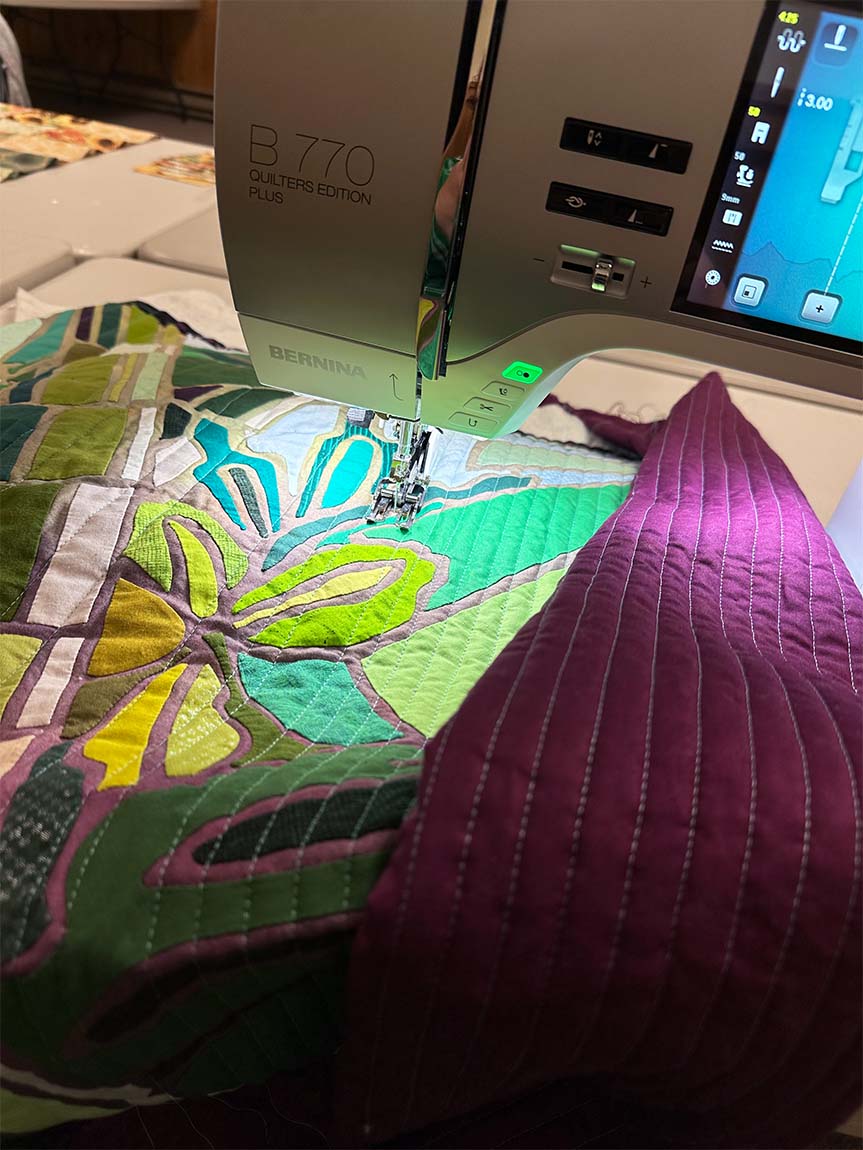
As you read these instructions, you will notice that I use the measurements built into my walking foot to divide the sewn spaces. I sew on a BERNINA 770QE PLUS, and all BERNINA machines use a walking foot with the same design. If you are using another brand of machine, read through these instructions then take a few minutes to look at the measurements of the walking foot you use. You may decide to adapt the measurements you use to mark and baste your quilt to work with your particular walking foot.
Carefully follow the instructions for how to install your walking foot on your machine. It isn’t hard, but if you don’t put the walking foot on the machine correctly, the foot won’t work properly.
Project Preparation for Straight Line Quilting
Is your quilt marked, basted, and ready to quilt? No worries if it isn’t, just hop over to last week’s post on How to Pin Baste Your Quilt for Straight Line Quilting, then pop back over to check out the quilting process.
Machine Settings for Straight Line Quilting
Always plan to test your machine settings prior to quilting on your main project. I try to keep small practice sandwiches with my favorite battings between quilting cotton near my machine, so I can check machine settings.
Set the Stitch Length: Walking foot quilting is typically done with a longer stitch length than you would use for piecing. I piece with a 2.5 stitch length, and I typically quilt with a stitch length of 3-4. If I use a heavier thread weight, such as 12wt or 28wt, my stitch length looks better on the longer end of that range. Finer threads often look good closer to a 3, but stitch length is often a matter of personal aesthetic than functionality.
Tension: The upper tension of your machine is easy to adjust to make your quilting look its best. Do a stitching test. If your top thread is tight and nearly flat on top, the top tension is too tight. If the top thread creates loops on the back of the quilt sandwich, the tension is too loose. Ideally your stitching should look the same on the top and bottom of the sandwich with the stitches locking together inside the sandwich where you can’t see them.
Slow Down! It’s a walking foot, not a running foot, but I’m guilty of going way too fast! If you have that tendency too, adjust the machine speed (if you have that adjustment available) so your lead foot won’t give you problems as you sew. I usually set my speed at about 3/4 of full speed for most thread types.
Presser Foot Pressure: Most of the time standard presser foot pressure works well for walking foot quilting, and many machines do not even have this adjustment available. However, if, as you stitch, you notice the top fabric pushing forward on your quilt sandwich causing some small ripples, you may want to lighten the pressure of your presser foot. Many newer machines include this feature either as an electronic setting or as a physical knob.
Quilting Straight Lines
Once you are all set up, the quilting part is pretty easy!
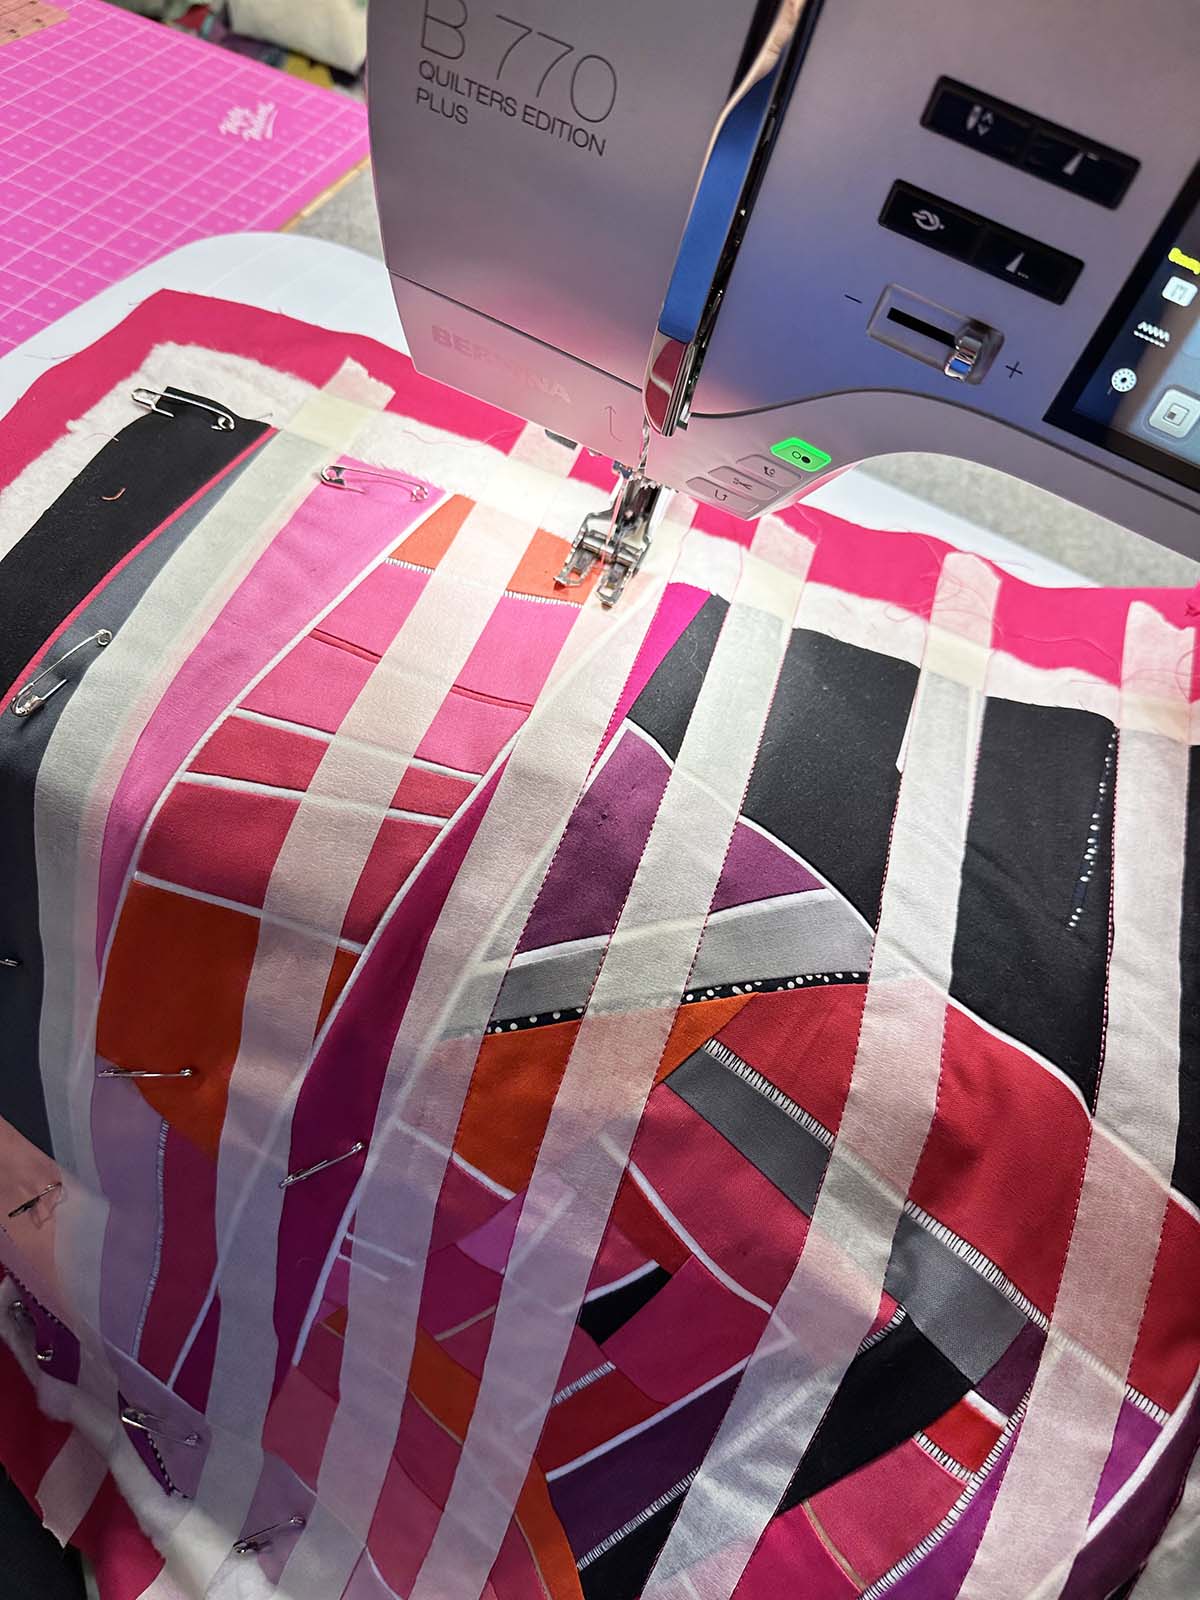
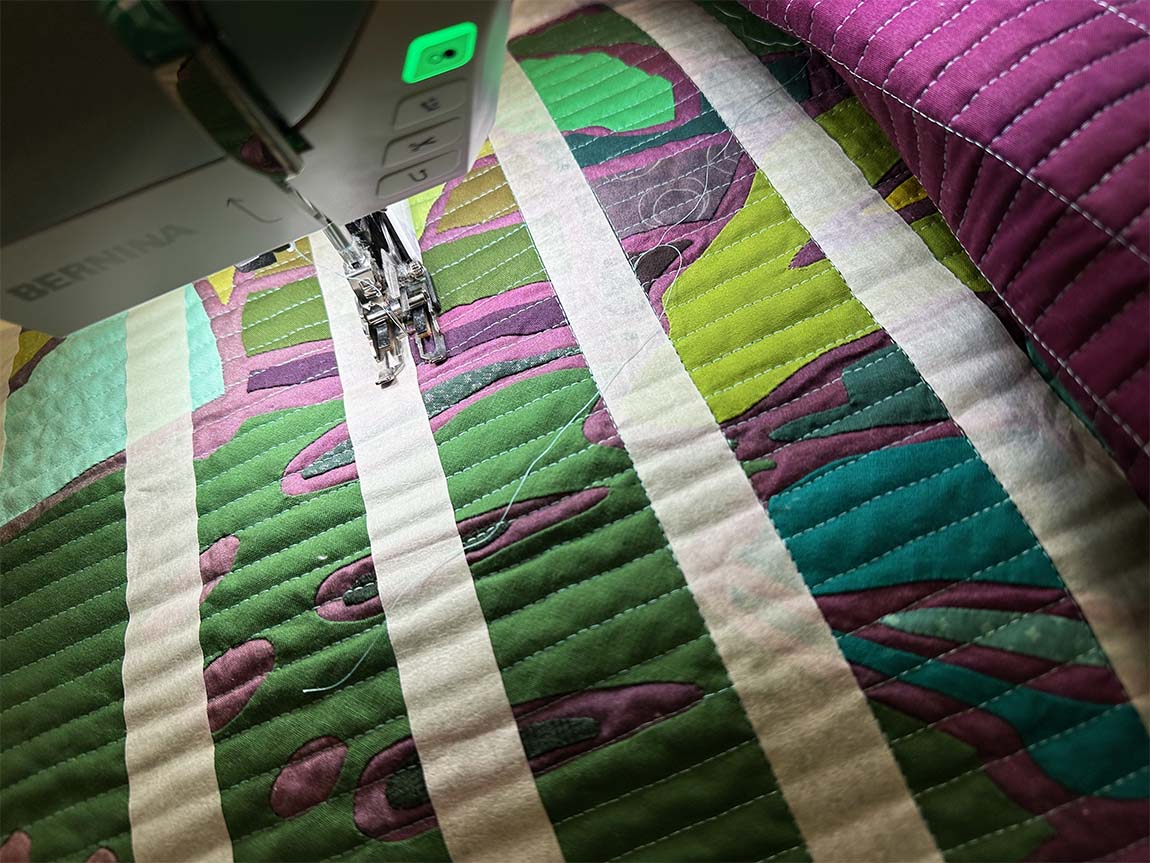
Start by stitching on each side of the masking tape lines. I used 1″ wide artist’s masking tape to mark my lines with 2″ wide gaps between the tape lines. (See the post: How to Pin Baste Your Quilt For Straight Line Quilting for more details on preparing your quilt.) These measurements work well since my BERNINA walking foot measures 1″ across. You may find a different width of tape and a different size space works better for you and your machine set up.
Stitch right along the edge of the tape and try not to stitch through it. If you do, it isn’t a big deal, but it can be more challenging to remove if it gets stitched through.
At this point you can remove the tape or leave it in place for the next step.
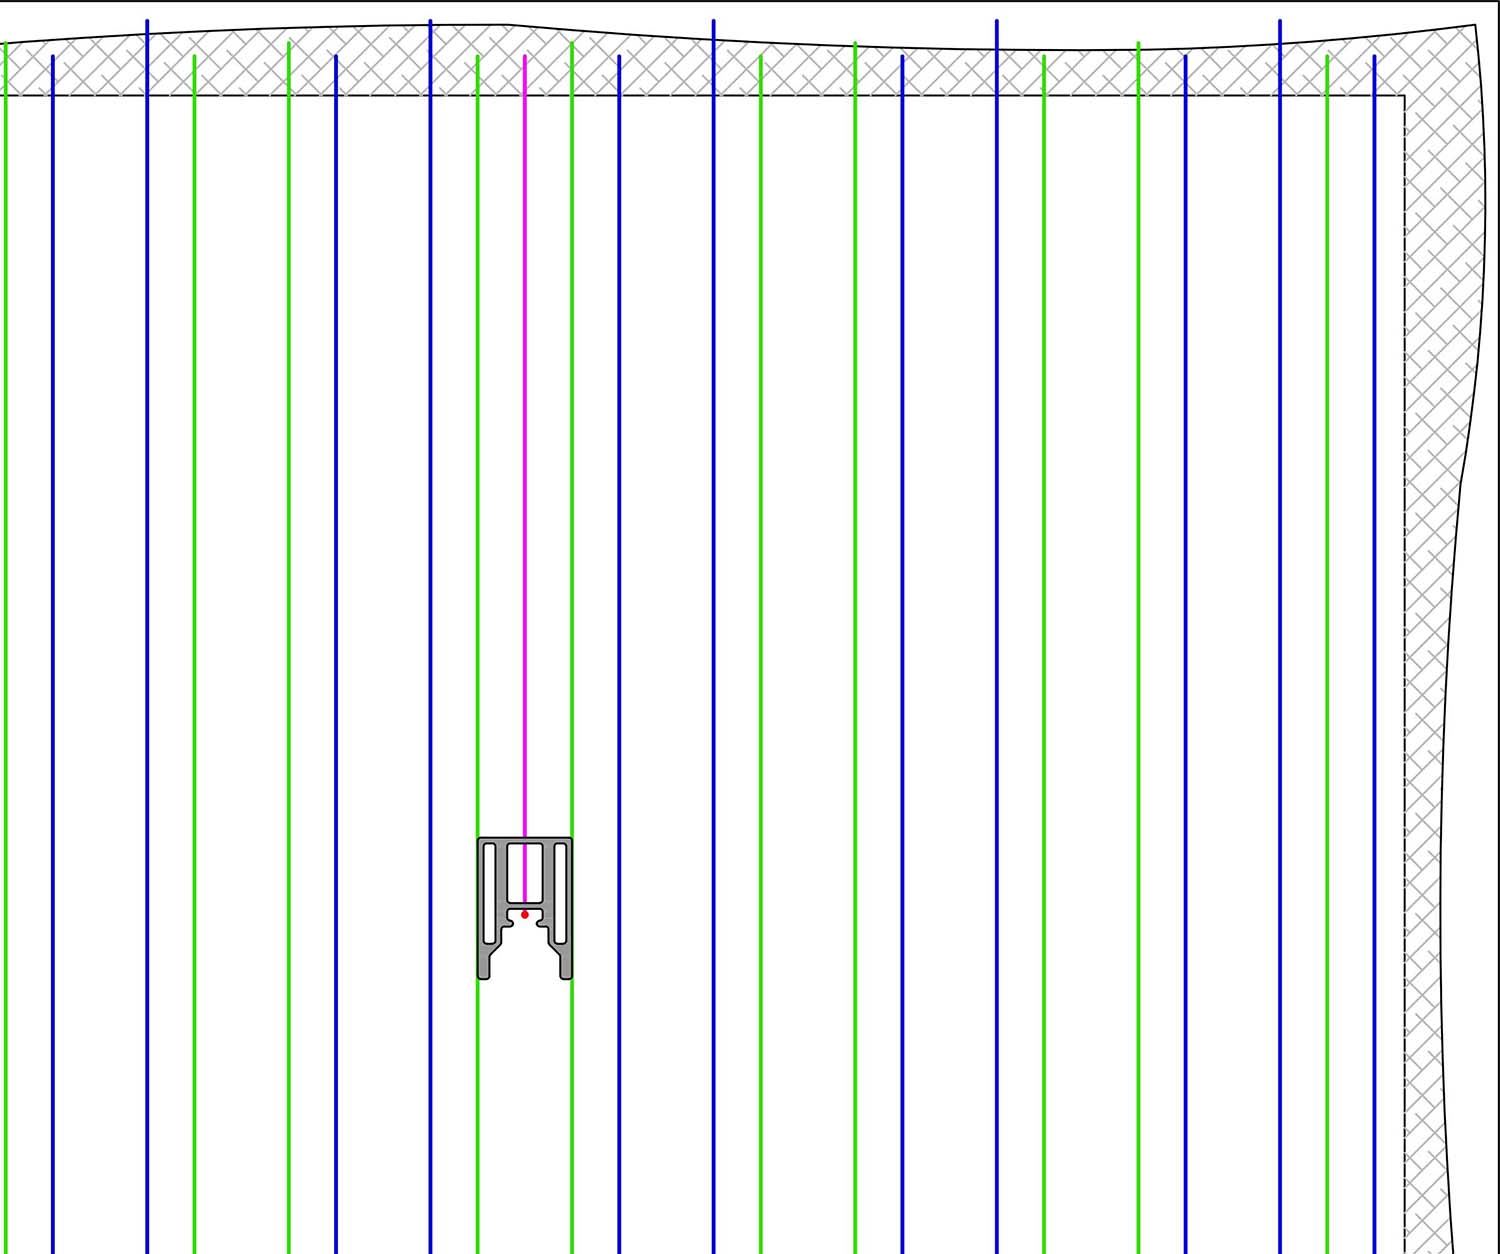
Inside the 2″ wide gap, align the edge of the presser foot with the quilting line you just stitched. For my foot, that means I am 1/2″ away from the previously stitched line. Stitch inside either side of each 2″ wide space. When this is done, you will have 1/2″ wide and 1″ wide spaces. Remove any tape that is still in place at this point.
Since my walking foot is 1″ across, I center the foot between the lines with a 1″ gap. The spacing should be nearly perfect, but if it isn’t, that’s ok- just center the foot between the lines to place your final stitching lines.
Half inch spacing is one of my favorite looks, but if you want more densely spaced quilting, you can keep dividing the gaps in half until you have a density that you are happy with.
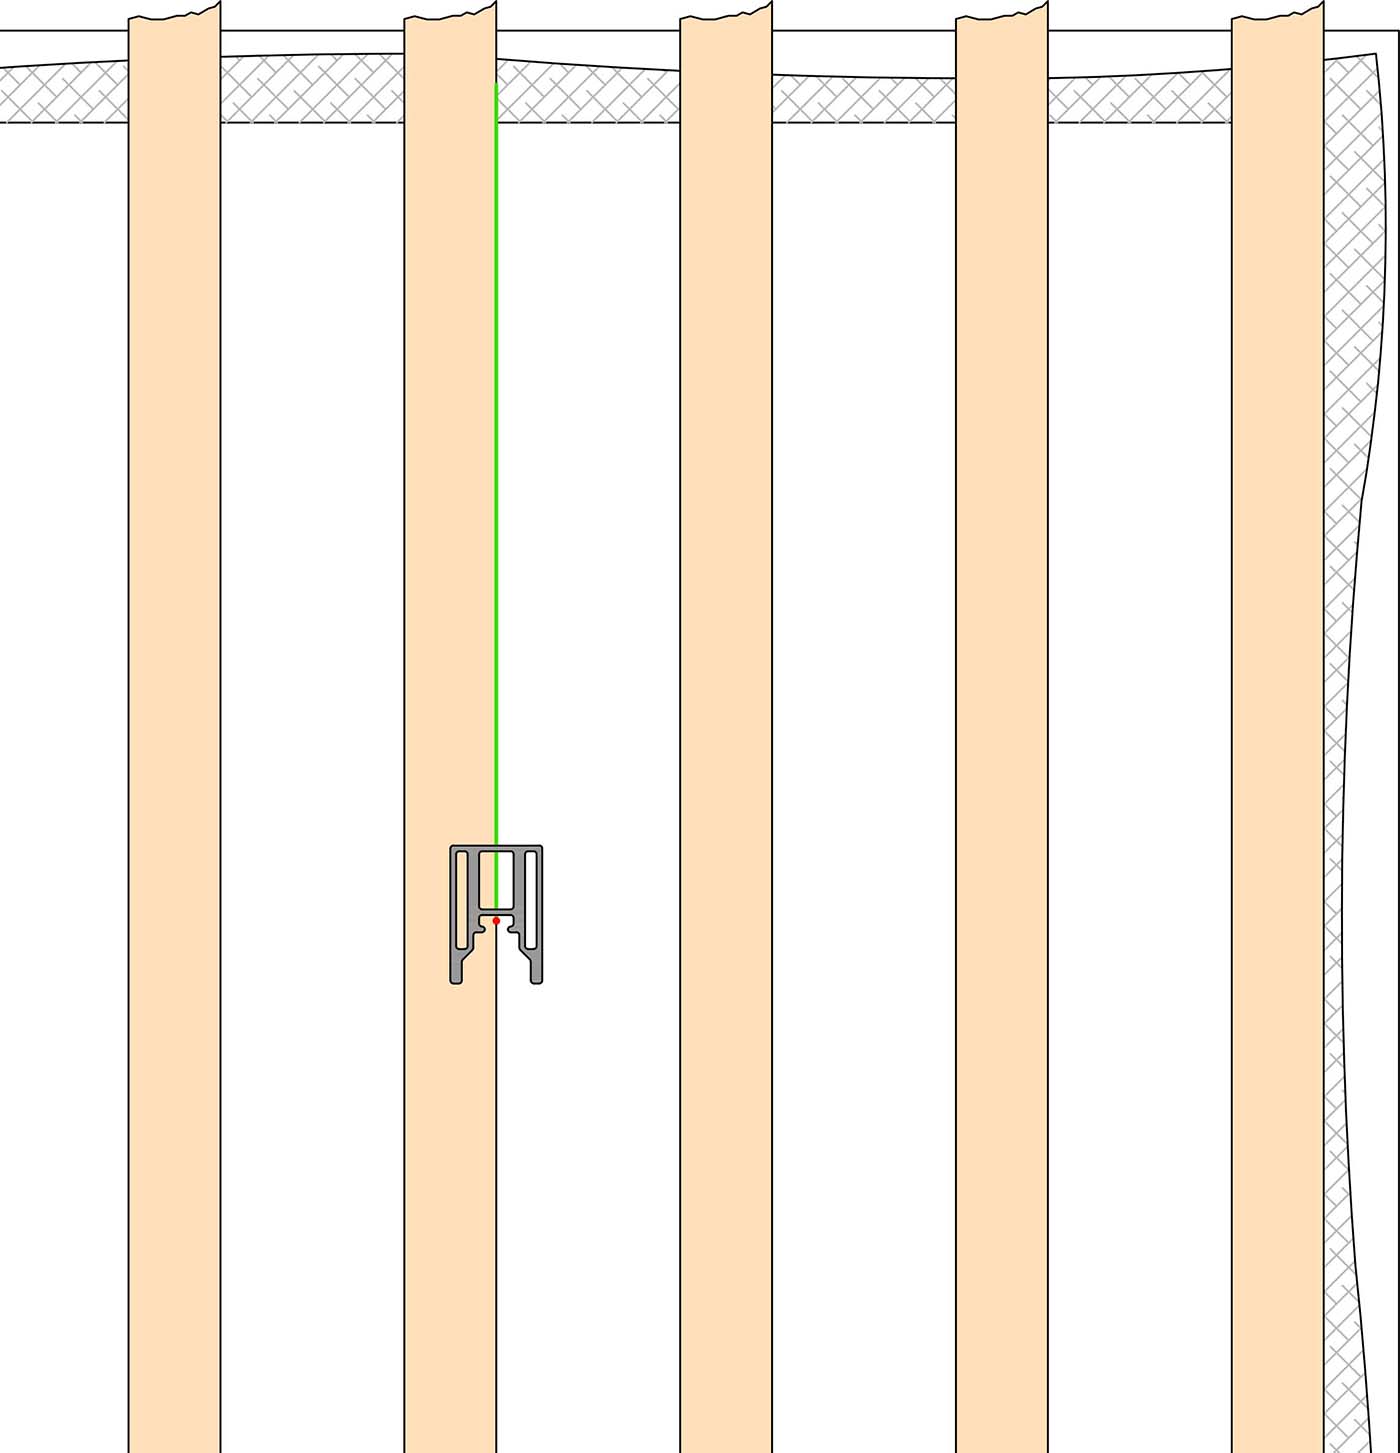
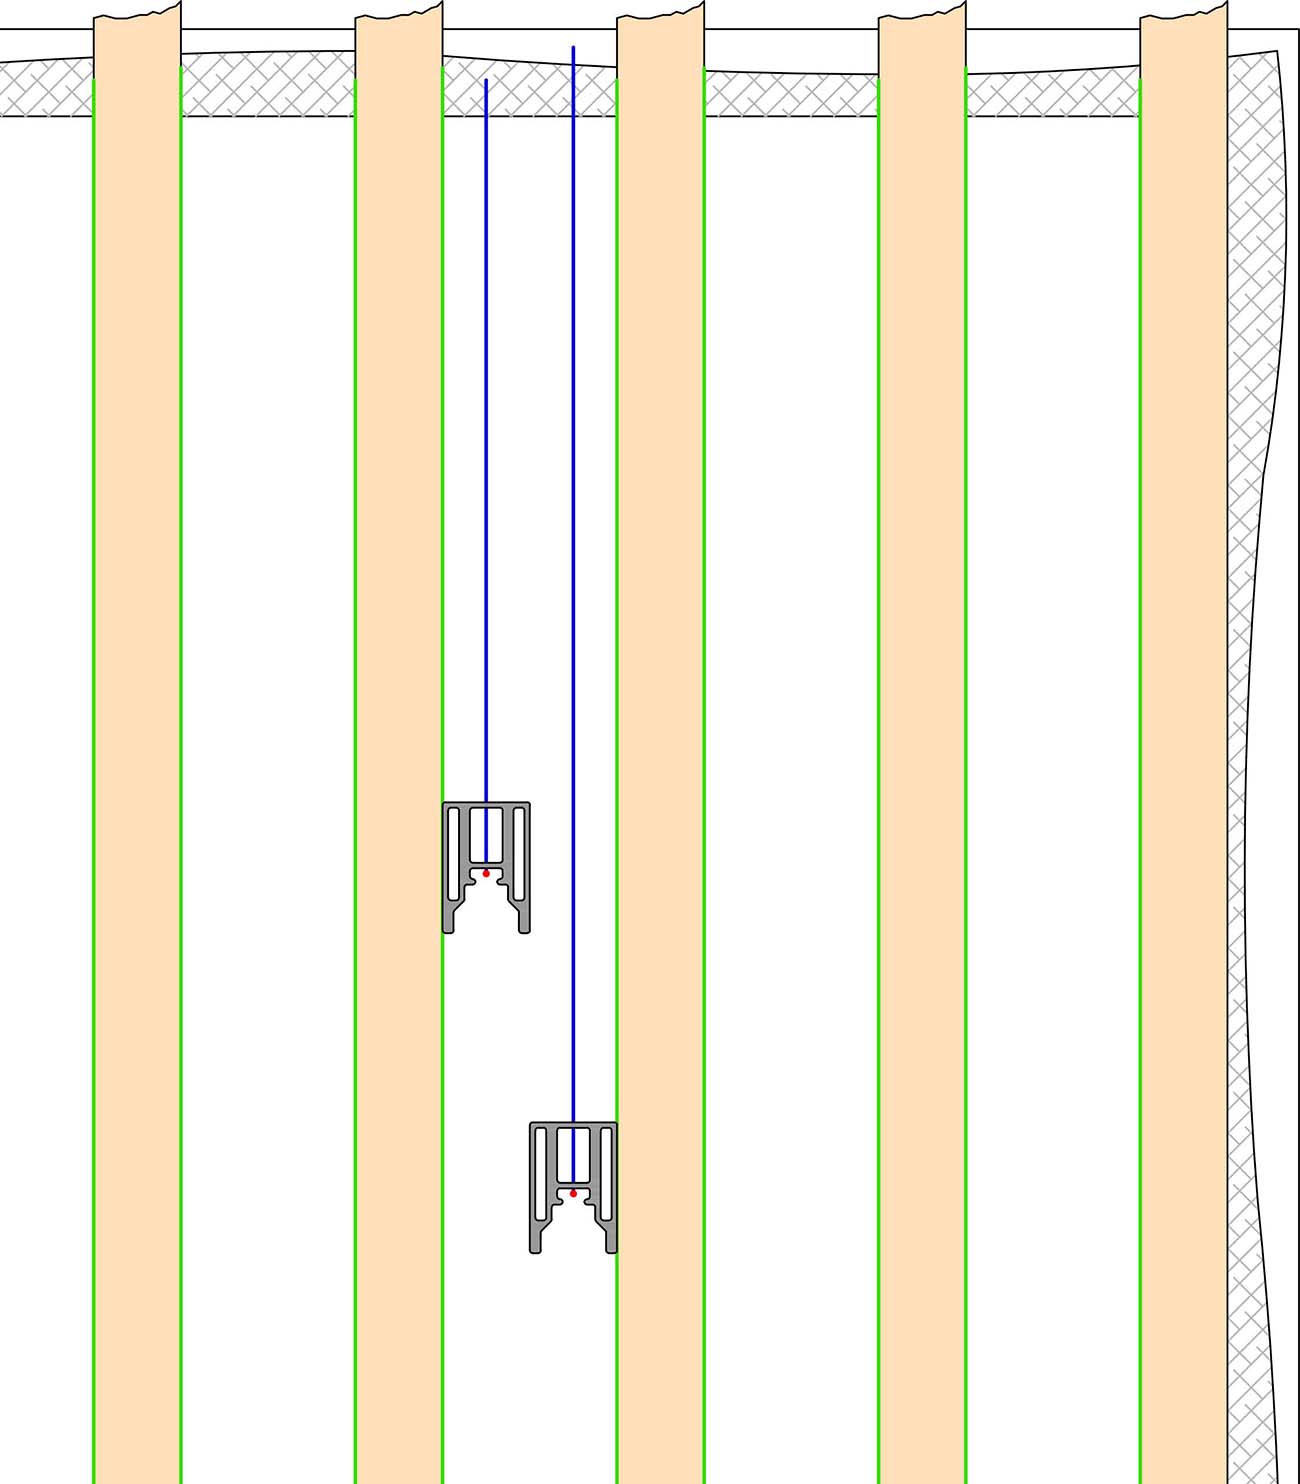
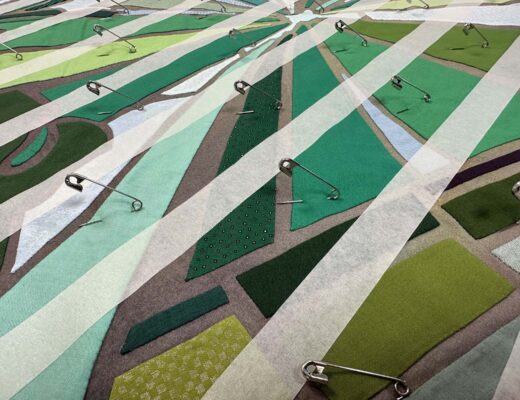
In the image below, the green lines were the lines stitched along the masking tape edges. The blue lines represent lines stitched using the edge of the presser foot as a guide. The pink lines center the presser foot in a 1″ wide space.
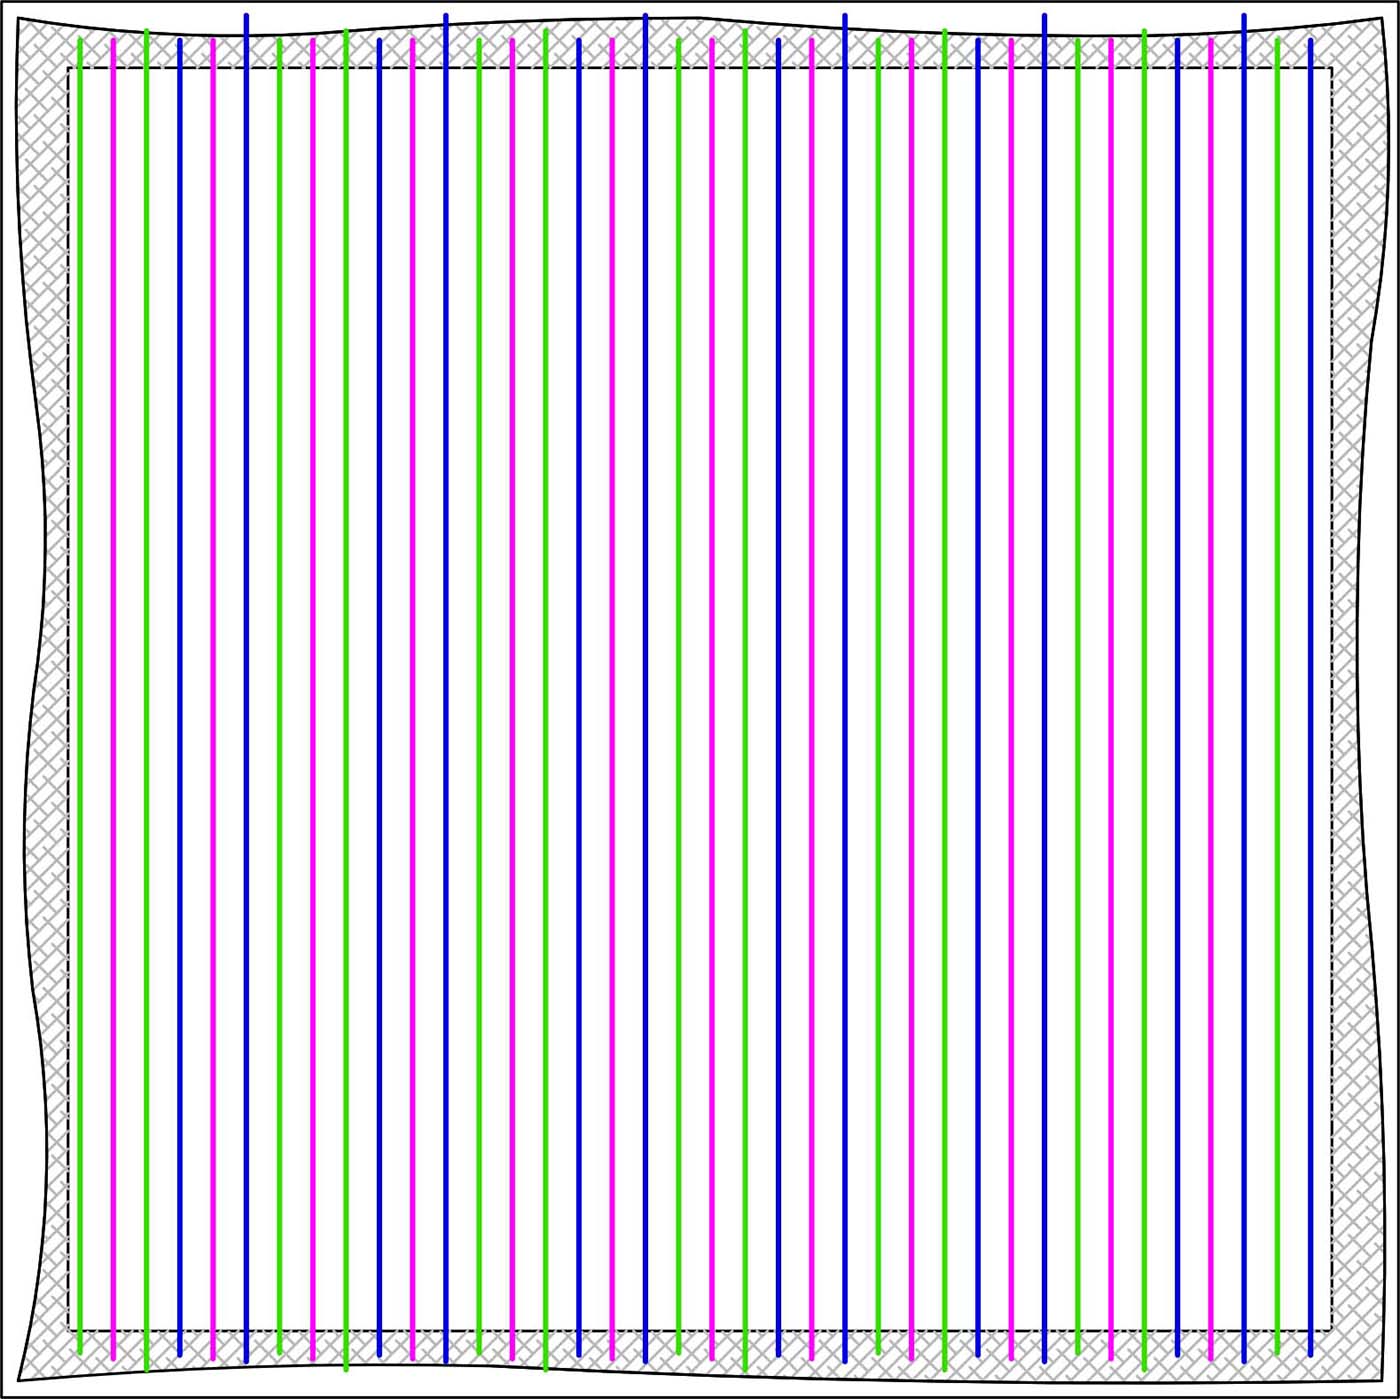
For my most recent quilt, I wanted a half-inch grid design, so I rotated the quilt, marked it again with 1″ artist’s masking tape and 2″ gaps, then repeated the quilting process going perpendicular to the previously quilted lines.
Next time, I’ll share the finished quilt!


3 Comments
Rhonda
January 16, 2025 at 12:18 pmBeautiful quilting! Do you quilt always in the same direction or at the end of a row do you turn and go back the other direction?
Effective Sewing Machine Settings to Streamline Your Walking Foot Quilting – The (not so) Dramatic Life
January 24, 2025 at 12:01 am[…] How To Do Straight Line Quilting with a Walking Foot […]
A Mini Masterpiece: See My Quilted Artist Trading Card – The (not so) Dramatic Life
June 13, 2025 at 1:27 pm[…] To learn more about walking foot quilting, check out this post: How To Do Straight Line Quilting Using a Walking Foot […]