What was my first thought when two poodle templates appeared in my mailbox to create something fabulous?
Chains of paper dolls!
My second thought?
What happens when you mirror the templates in not just one direction but two?
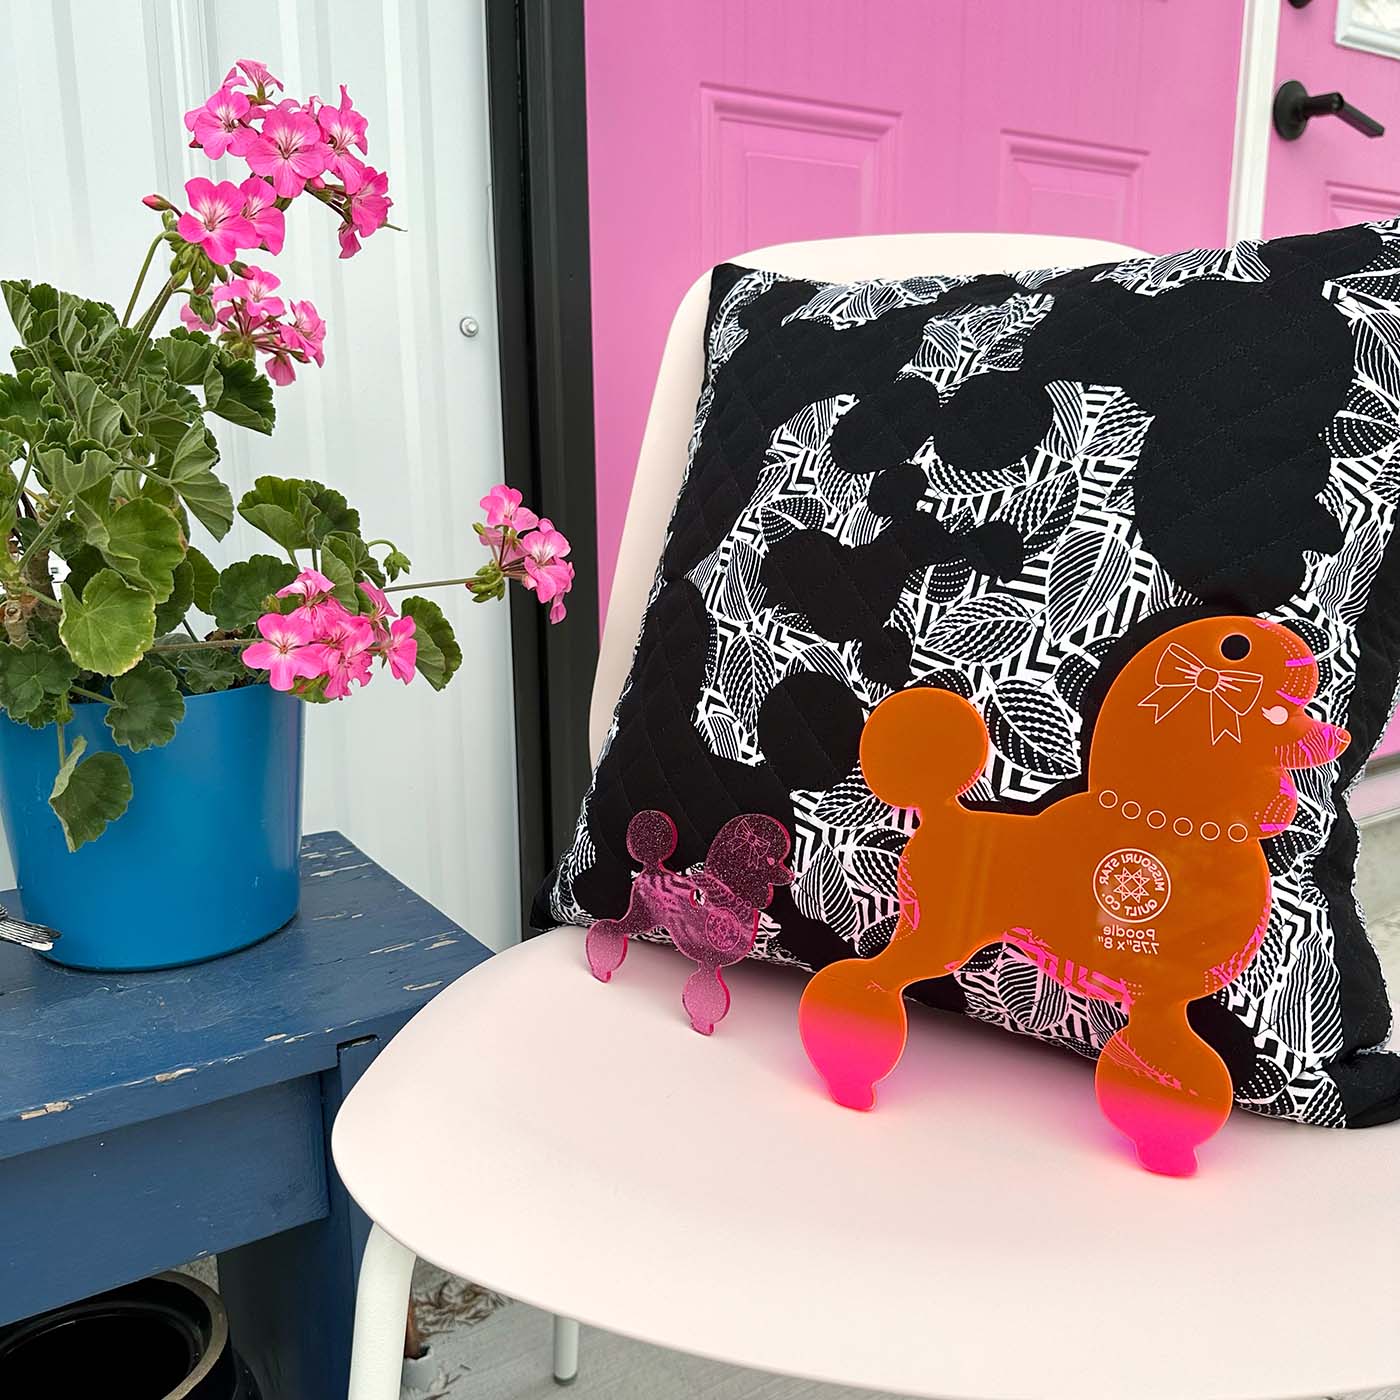
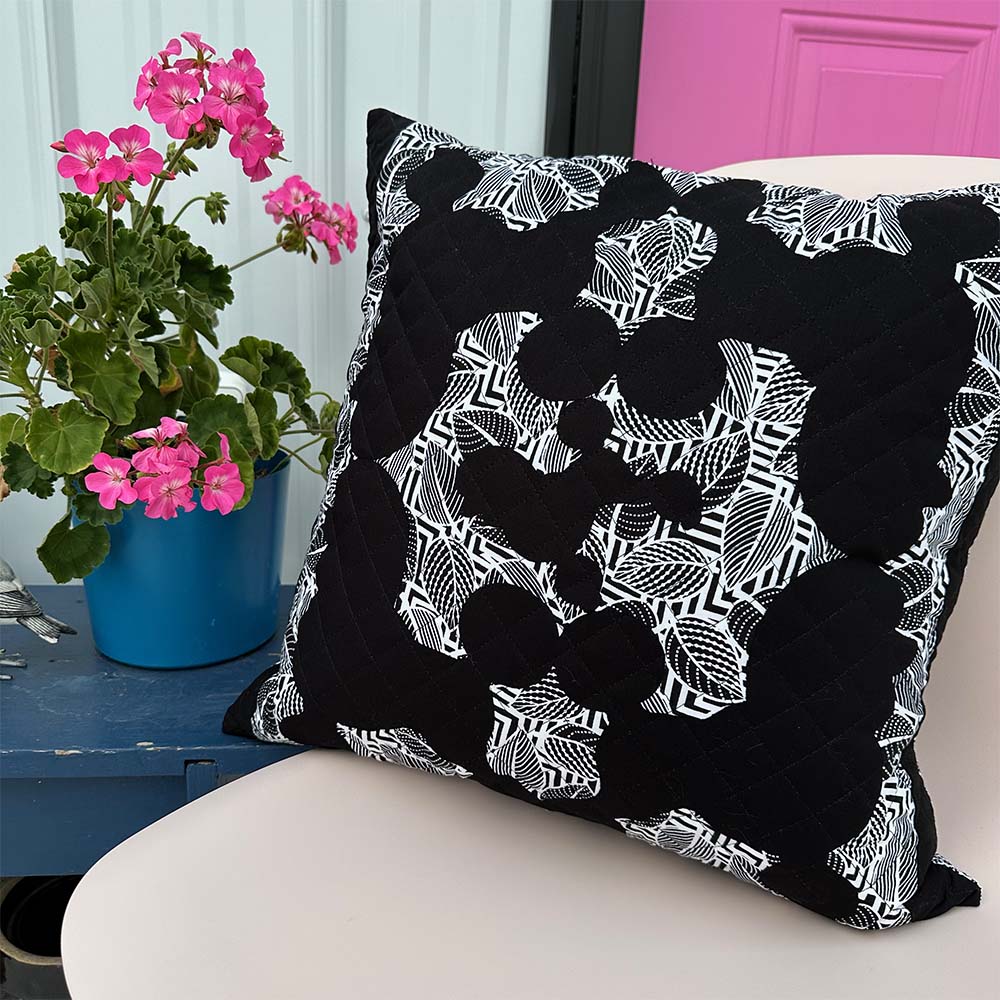
The answer is this fun, modern, minimal poodle cushion cover!
(This post includes some affiliate links. If you click on an affiliate link and choose to make a purchase, I receive a small percentage of the sale at no cost to you. These funds help keep this blog running and content FREE for everyone!)
Designing with the Poodle Templates
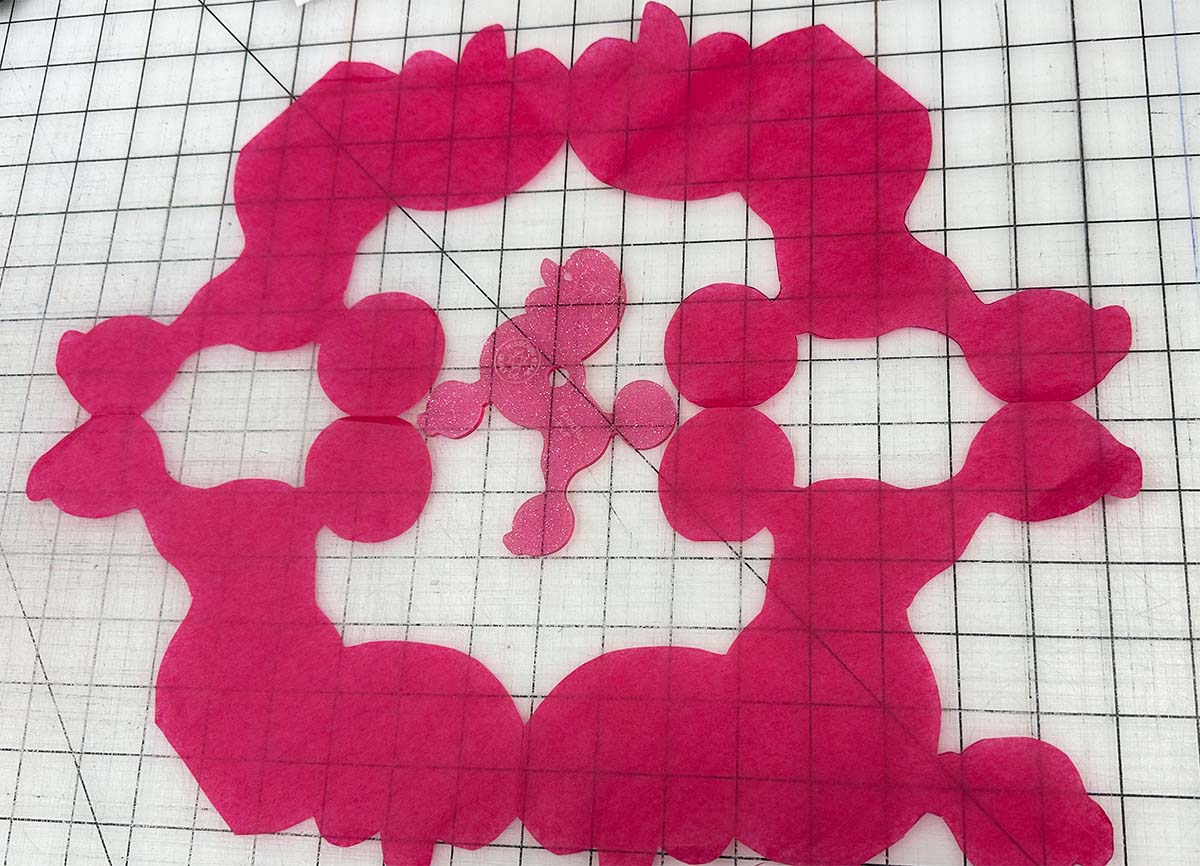
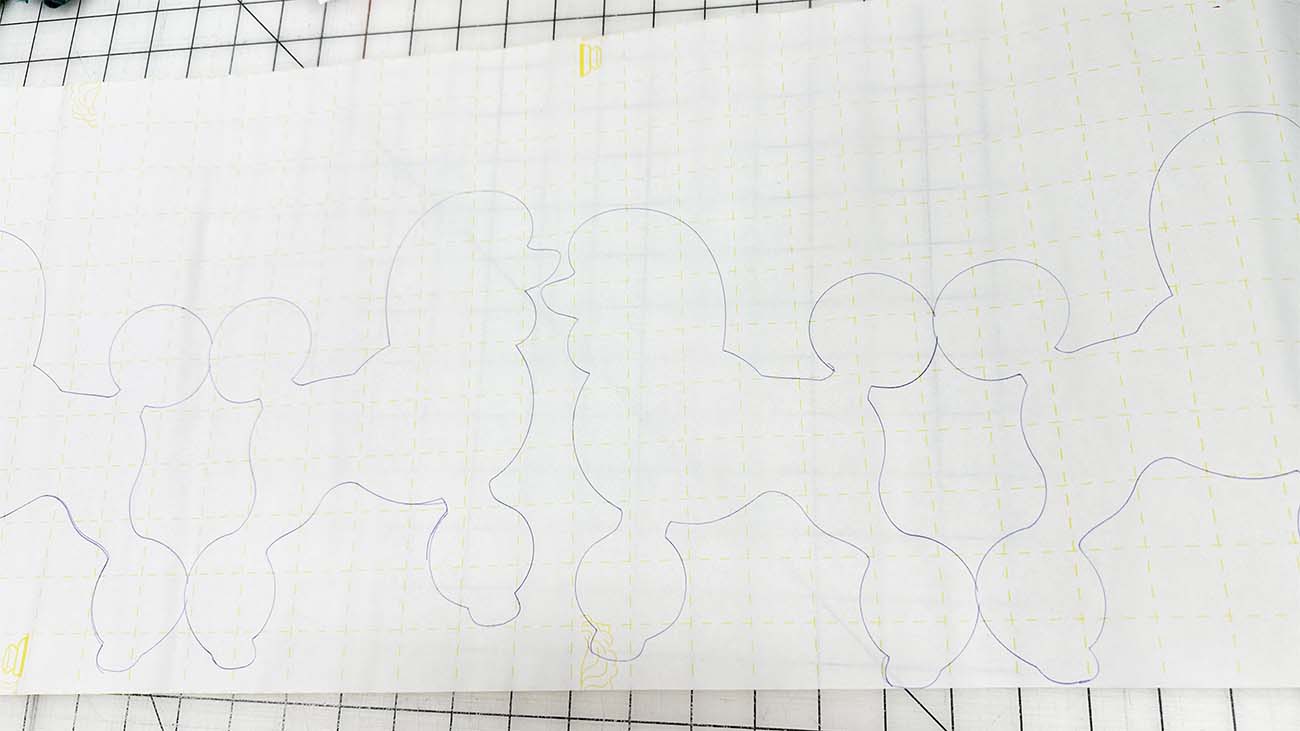
Rhythm, repetition, and mirroring are among my favorite techniques to transform recognizable motifs into something unexpected and contemporary. Even though I had a general idea of what I wanted to do, I folded tissue paper to do a test layout before diving into the final fabric version. Tissue paper has the bonus that you can easily cut multiple layers at once, making cutting this type of sample fast. While the larger poodle shape makes up the primary motif, I added one tiny poodle to the center of the design for an asymmetrical punch.
These poodle templates are exclusive to Missouri Star Quilt Company. If you want to pick up one of these templates (or almost anything else), Missouri Star Quilt Company is giving my readers 20% off their purchase of $50 or more. Just use the link below!

Creating the Cushion Top
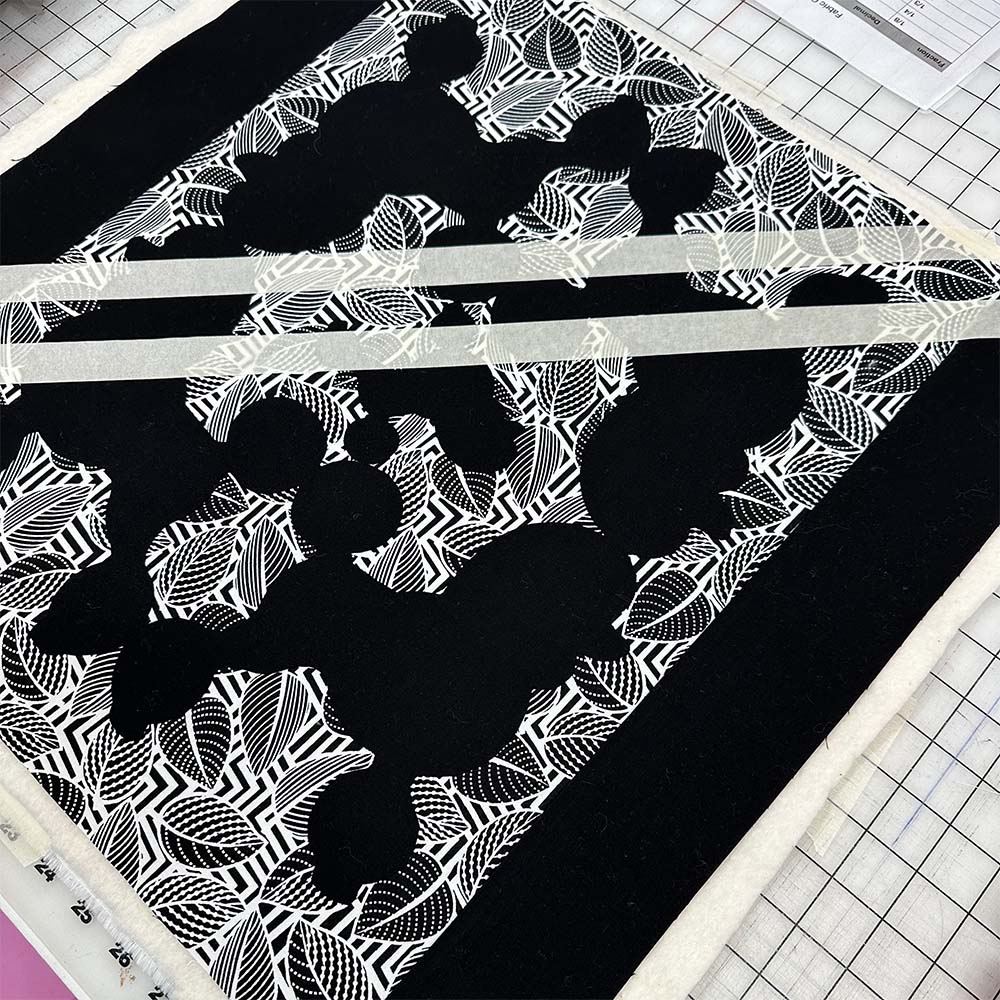
Once I determined the layout, I traced the poodle shapes onto the back of some Lite Steam-a-Seam 2. While I ultimately cut the primary motif fabric in one piece, the fusible had to be cut in two separate sections because the fusible material wasn’t wide enough for all four poodle shapes.
When preparing to cut the primary motif, I rough-cut the fusible material just outside the drawn lines and positioned it on the back of the appliqué fabric with a tiny overlap where I intended the pieces to intersect. I cut the tiny central poodle separately from the rest of the design. I always give my fabric a light press at this point to help the fusible material hold to the fabric while I do the cutting with extremely sharp and pointed small scissors.
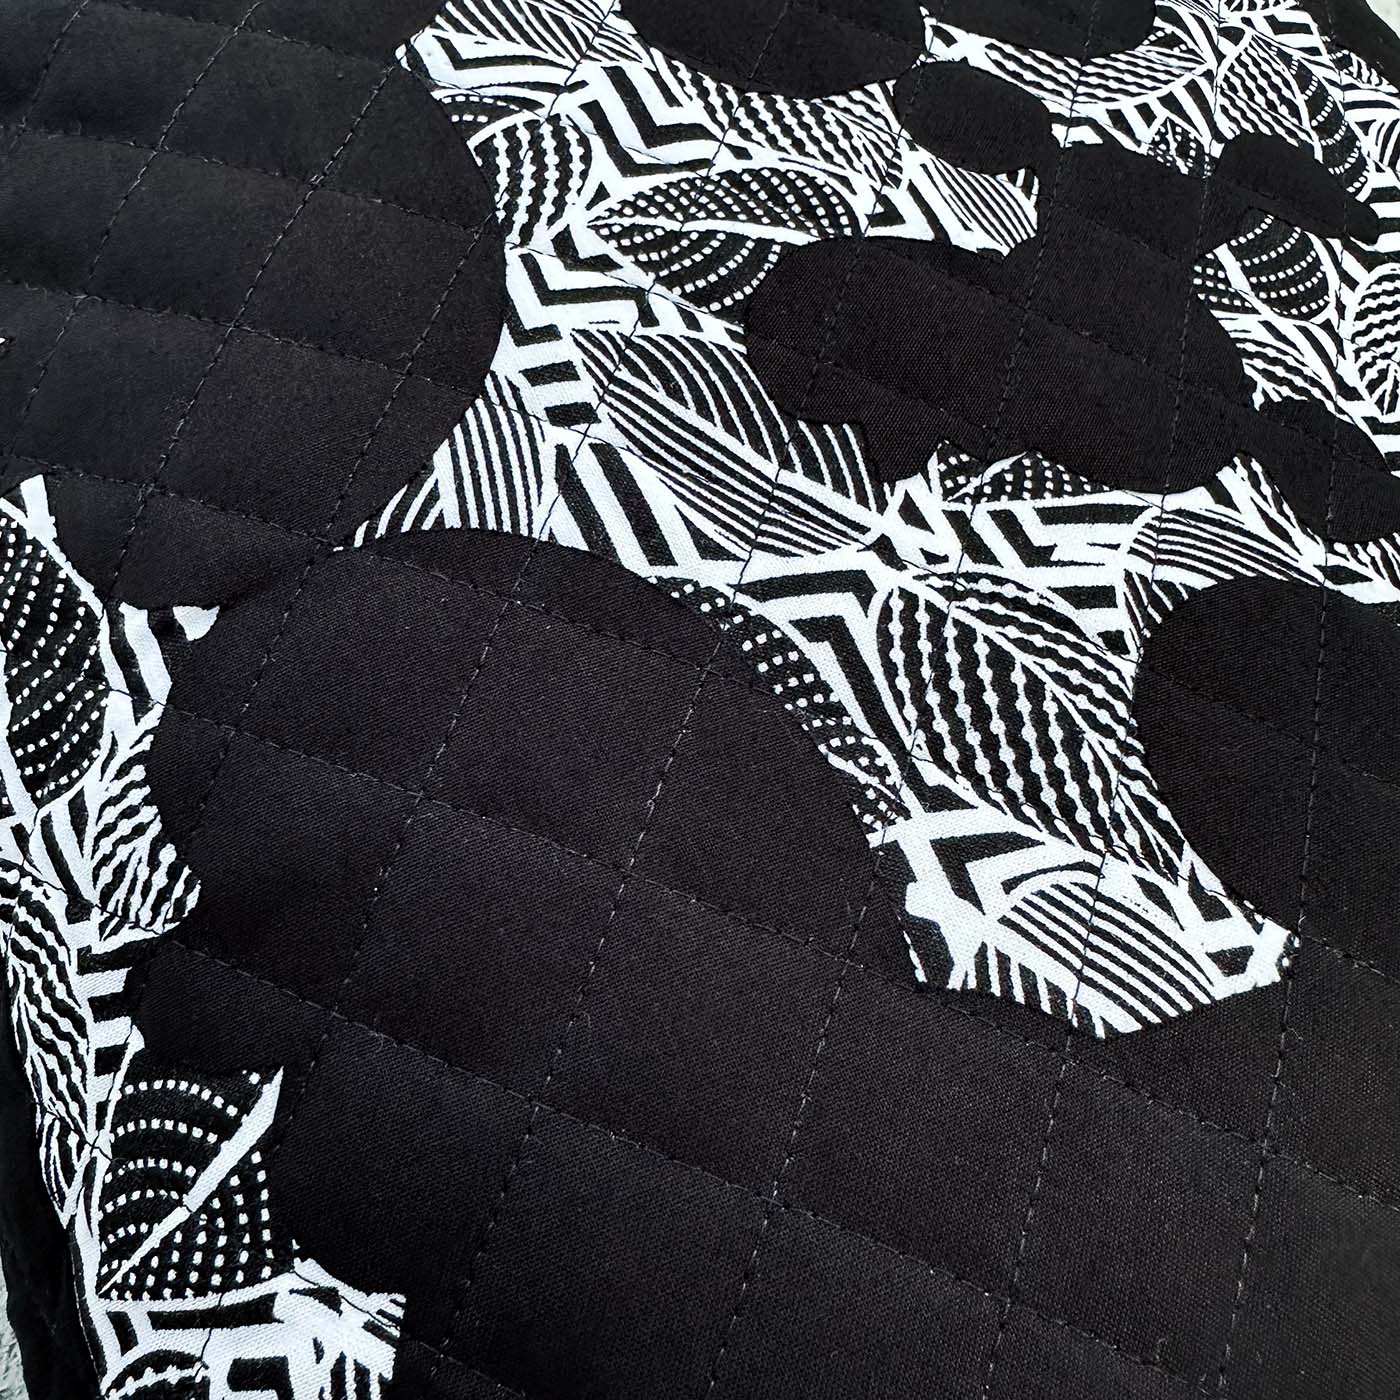
The fabric for this project came from my stash, and I knew I wanted to keep a black-and-white color scheme. My first thought was to use all solids, but I quickly realized that I preferred some of the black and white prints I had available. My two favorite options were a slight floral and a medium-sized leaf print.
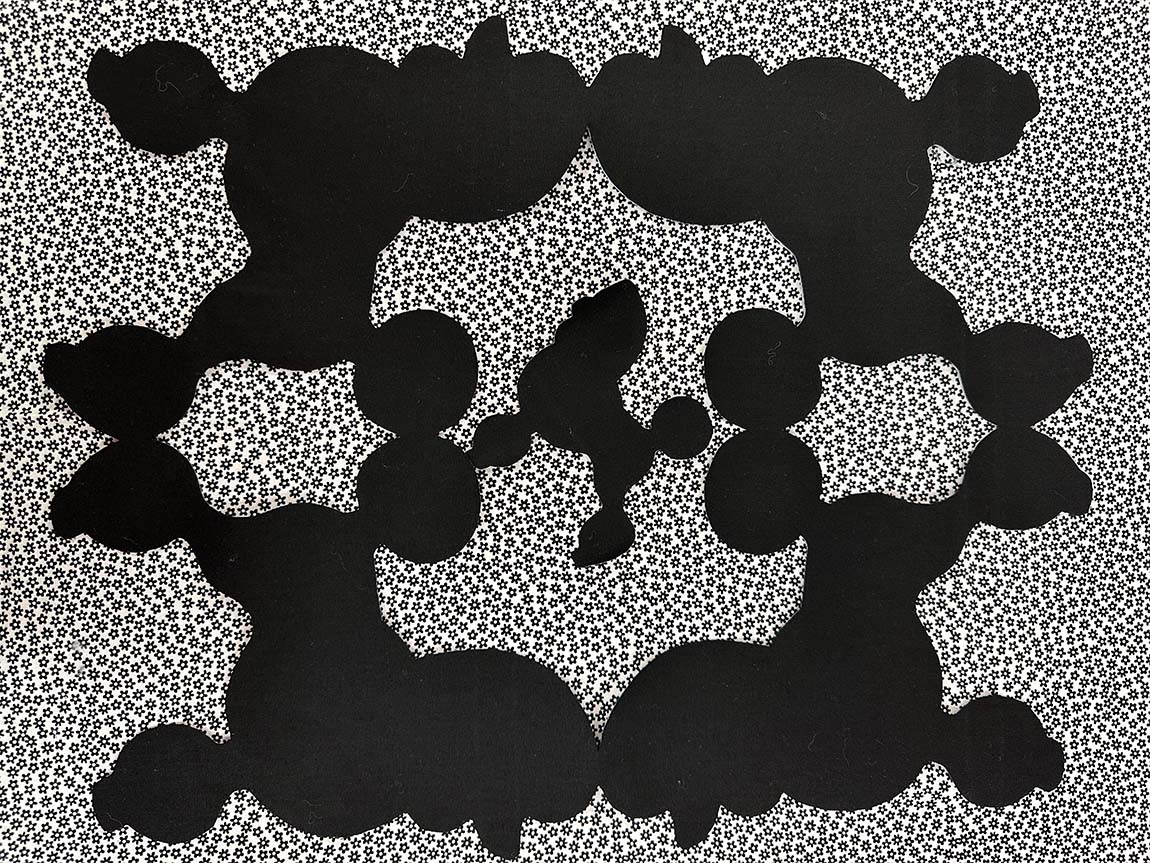
Ultimately, I selected the leaf print because it felt more graphic, and I enjoyed the idea of the poodles frolicking in a garden.

One of my favorite features of Lite Steam-a-Seam 2 is the ability to peel off the backing paper and position and reposition your appliqué until you are pleased with the placement. When everything is in the correct place, you must press it with steam to create a permanent bond between the appliqué and the background fabric.
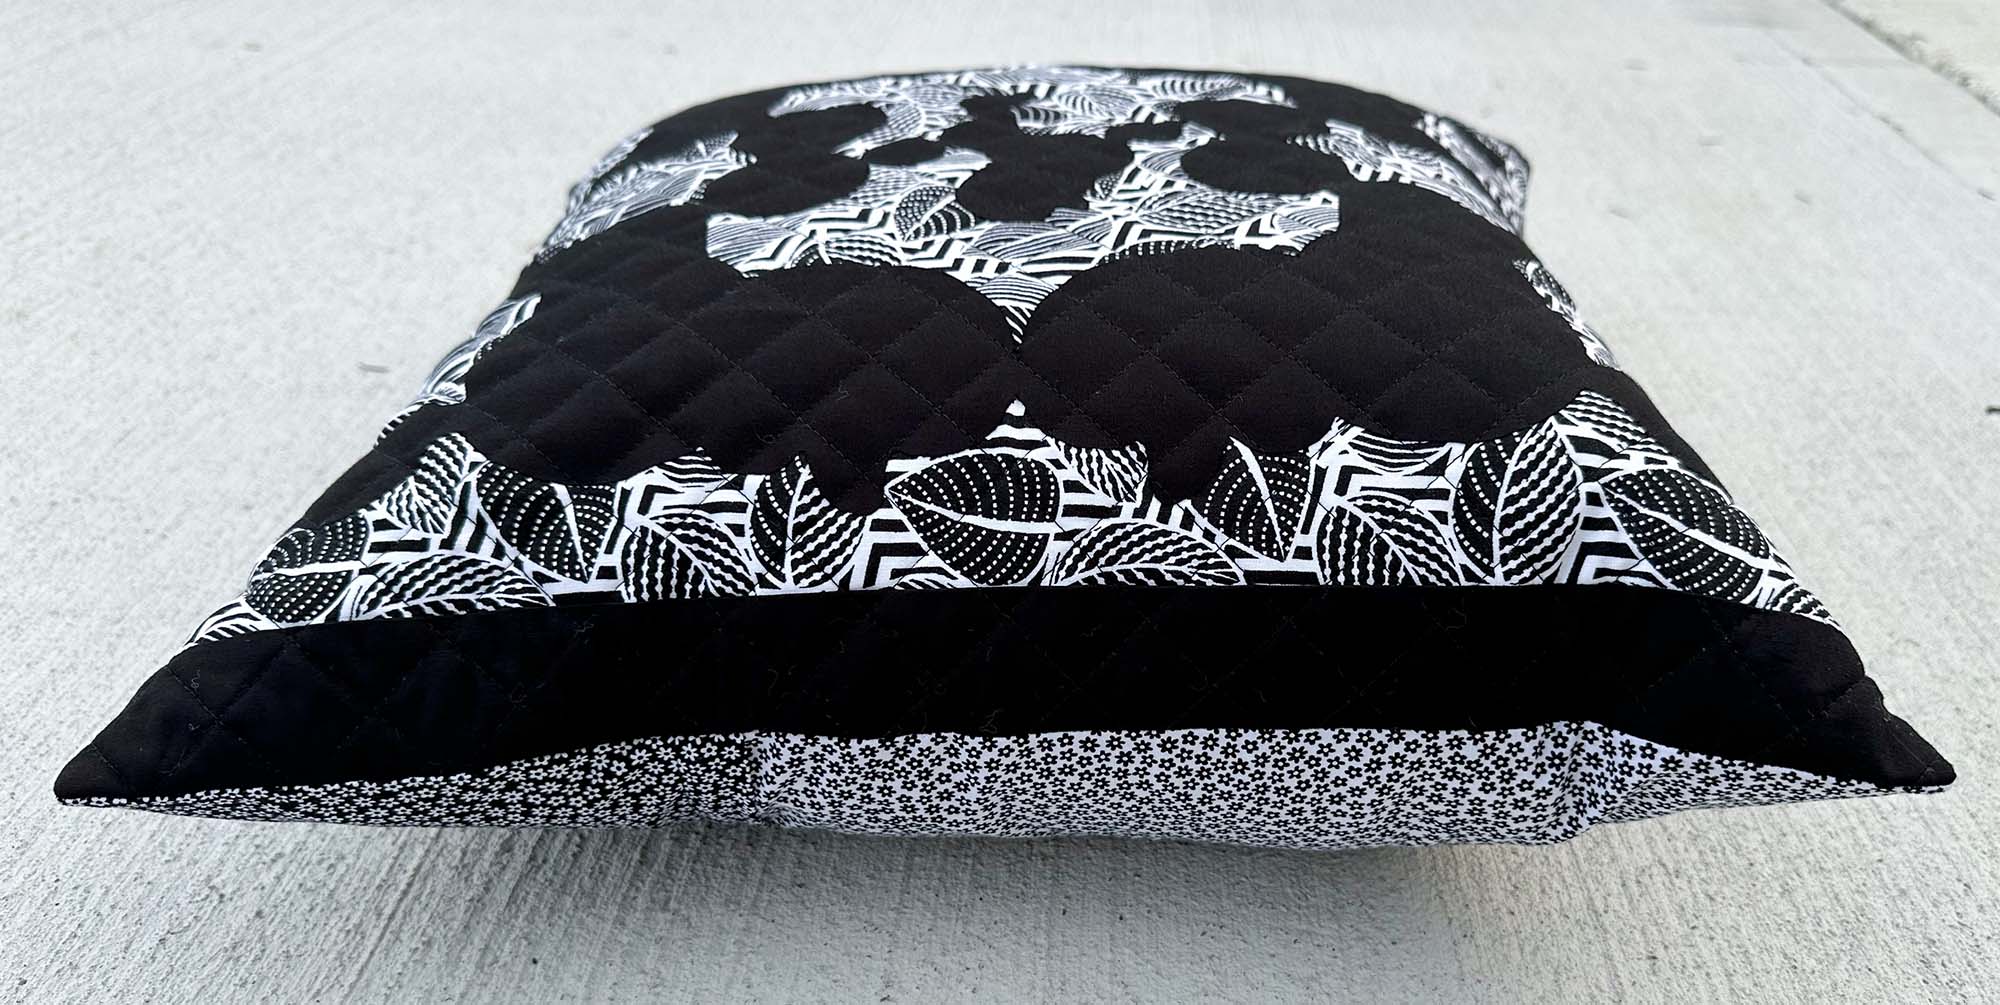
I wanted to break up the cushion’s background just a bit, so I added black stripes down either side of the cushion.
Quilting the Poodle Cushion
The quilting for this cushion is a simple diagonal grid with 1″ wide spacing. I marked the lines in one direction using 1″ wide masking tape, quilted the lines, then marked and quilted the cushion in the other direction. On small projects, I like to mark my quilting lines prior to basting the layers together using safety pins. When using fusible appliqué, I try to pin baste in areas without any fusible, if possible.
When quilting through fusible appliqué, I suggest using a Schmetz Teflon-coated needle to reduce the risk of gumming up your needle. A sticky needle can cause skipped stitches and a lot of frustration.
Making the Cushion Back
I prefer a lapped zipper closure on the backs of my cushions. My favorite cushion forms are 20″ square feather-filled forms from IKEA. I like to make my cushion covers about 18″ square so the forms fill them up nicely to the corners. The lapped zipper provides a strong closure that keeps the pillow form in place, and the lap of the fabric means you won’t have a rough zipper against your skin.
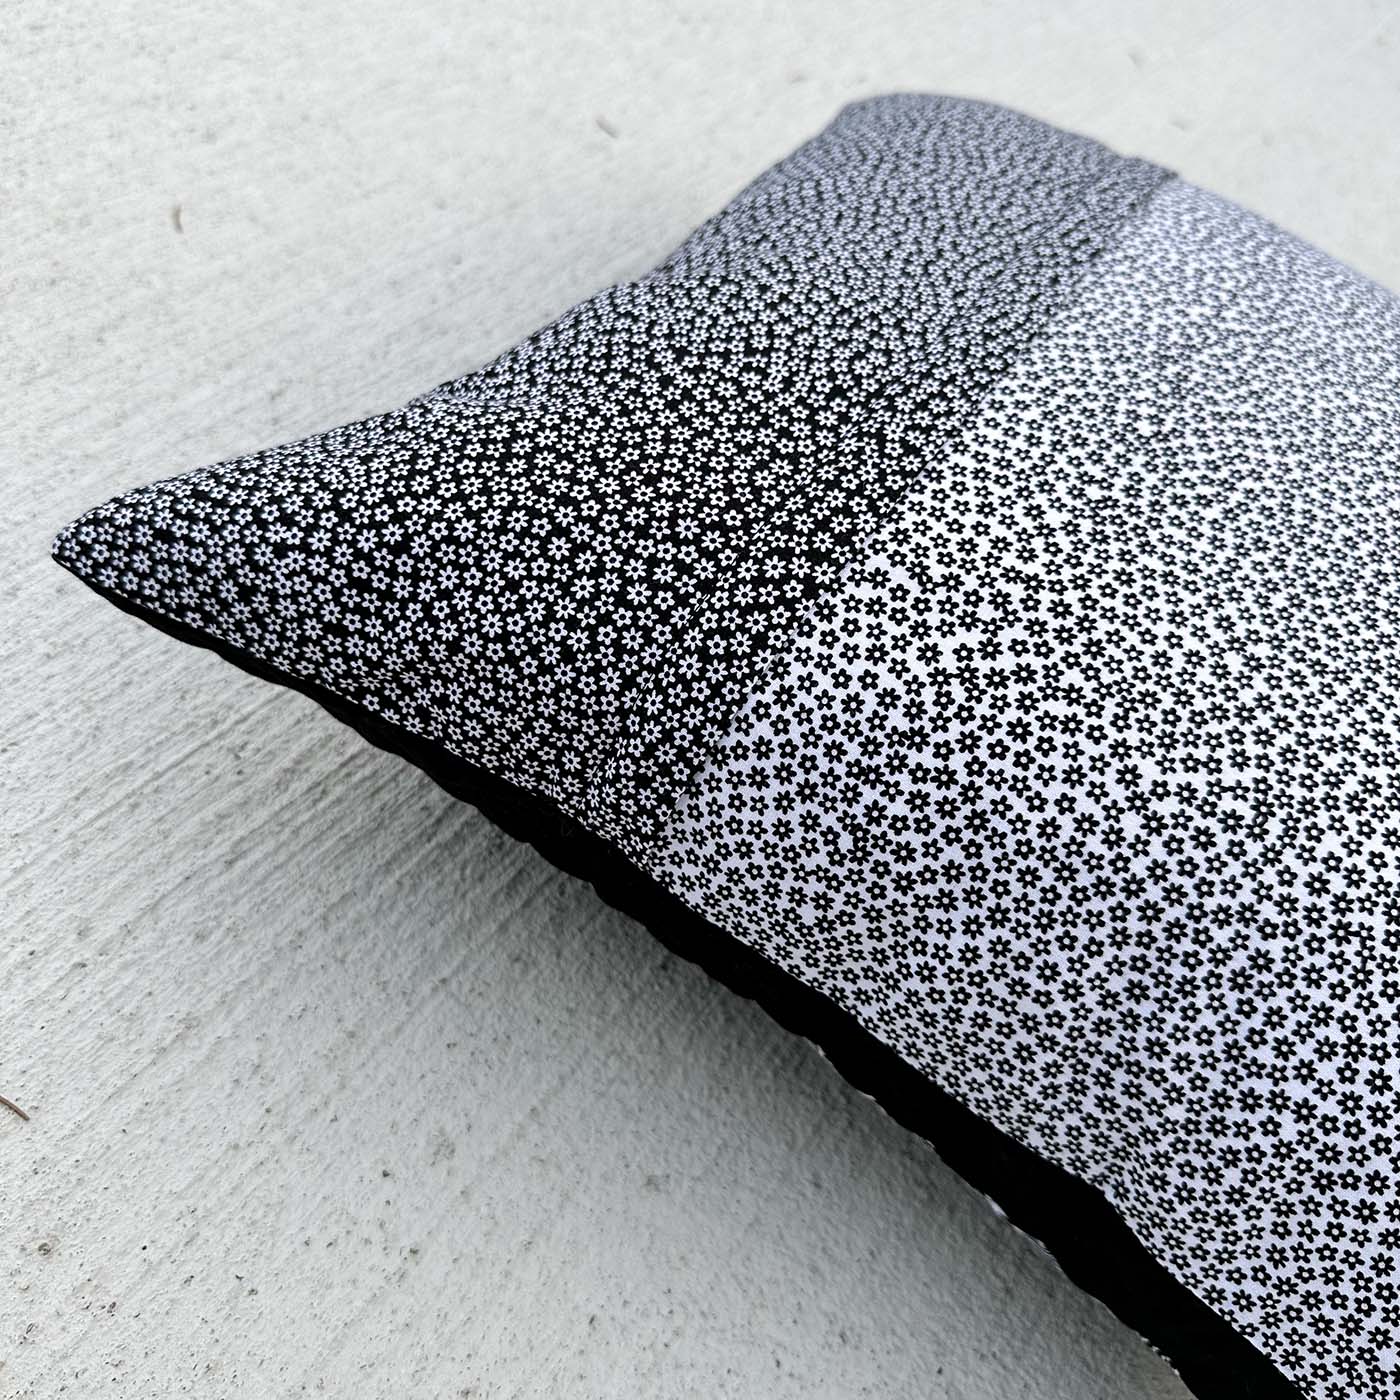
The fat quarter piece of the floral print I considered using for the cushion background wasn’t large enough for the entire back. However, I had another fat quarter in the same print with a reverse colorway that paired perfectly and made an even better design for the cushion back.
The Finished Poodle Cushion
I am thrilled with the resulting cushion, which takes an adorable motif reminiscent of 1950s poodle skirts and transforms it into a contemporary design while maintaining the whimsy of the original template.
Tips for working with Fusible Appliqué (Poodle-shaped or otherwise)
- Select a two-sided fusible that works well for your project. I like the Lite Steam-a-Seam 2, which sticks temporarily to your fabric while you position and reposition the appliqué pieces.
- When creating a new design or experimenting with an existing template (like I did here), practice with tissue paper or other paper before cutting into your fusible material and fabric.
- Use small, pointed-tip scissors with sharp tips to cut your appliqué pieces. I like the Karen Kay Buckley Perfect Scissors in small and medium sizes.
- Once your appliqué motifs are in their final position, press them with lots of steam. You want them to adhere well so they won’t peel up later, and good adhesion decreases the chance your needle will gum up significantly while quilting.
- Super Nonstick needles from Schmetz make quilting through fusible interfacing a breeze.
- Consider using simple quilting motifs to give your appliqué shapes room to shine!
If you want to pick up an adorable, exclusive poodle template (or almost anything else from Missouri Star), Missouri Star Quilt Company is giving my readers 20% off their purchase of $50 or more.
Missouri Star Quilt Company provided the Poodle Templates for this post. All designs and opinions in this blog are accurate and based on my experiences.


3 Comments
Pamela Meyers Arbour
June 28, 2024 at 6:43 amOh my! I think I would still be staring at the templates! You really used your creativity and your fabric on hand to make a darling pillow. Thanks for all the tips. I haven’t thought to make my pillow covers smaller than the form. That makes sense for a good, firm fit. Nicely done!
Fran
June 28, 2024 at 7:01 amWhat a clever way to lay out the design.
Kathie
June 28, 2024 at 9:19 amI’m working on a very detailed applique quilt ATM. I purchased what could only be called a lifetime supply of the very same fusible that you use here. Since my project is a bed quilt, I chose to use the blanket stitch to permanently affix the pieces. My needle gummed up constantly, and it took me an entire day’s work to complete half of one block. After fighting this for two weekends, I decided that my time is too valuable, so I bought a cheap package of stick glue and good old Elmer’s school glue from the school supply department and good old sew in light-weight interfacing. Presto-Chango, I’m now breezing through my stitching fast enough to tack down two blocks in a day. Needless to say, I took that box of fusible to my guild and gave it away. The moral of the story…”stick” to the basics. They worked for Grama and they work for me. 😉