Do you label your quilts?
If you’re like me or most of the quilters I know, you don’t think about labeling a quilt until you’re putting in the final stitches. At this point in the process, I’m usually more focused on meeting a deadline and less on the final details.
Labeling our quilts helps preserve the story of our creations and ensures that critical information about each piece remains with the quilt itself. A simple label provides information for anyone who may come across the quilt in the future. What happens if your quilt gets lost during shipping or is left behind in a hotel room? Will your family member remember the year you gifted them a precious quilt? Would a future historian want to know where a quilt was made?
Quilt labels can be works of art that complement the overall quilt design, include the complete story of the quilt, or only have basic information. Having a simple label with critical information is far better than not labeling the quilt because you are aiming for the perfect design. In this post, I’m sharing how I have streamlined the quilt labeling process, allowing me to label a quilt in just a matter of minutes.
Information on a Quilt Label
There is some information that all quilt labels should include, as well as optional information that you may or may not choose to include, depending on the specific needs of the quilt.
Critical Information for All Quilts:
- Quiltmaker’s name
- Title of the quilt
- Year the quilt was completed
- Location where the quilt was made
Optional Information for Quilt Labels:
- Specific address where the quiltmaker resides (required for many quilt shows)
- Telephone number (required for many quilt shows)
- Email address (required for many quilt shows)
- Website or blog
- Date the quilt was started
- Specific date of completion
- Who the quilt was made for
- Materials used in the quilt
- Measurements of the quilt
- Pattern used for the quilt
- The story behind the creation of the quilt
- Special message to the recipient of the quilt
If you include all of this information, you can end up with a huge quilt label! I usually stick to a simple label style appropriate for shows. Let’s look at how I streamline my labeling method.
Using Printed Labels
The best thing I have done to streamline my labeling process took a bit of time upfront, but has made keeping up with this task extremely easy in the years that followed.
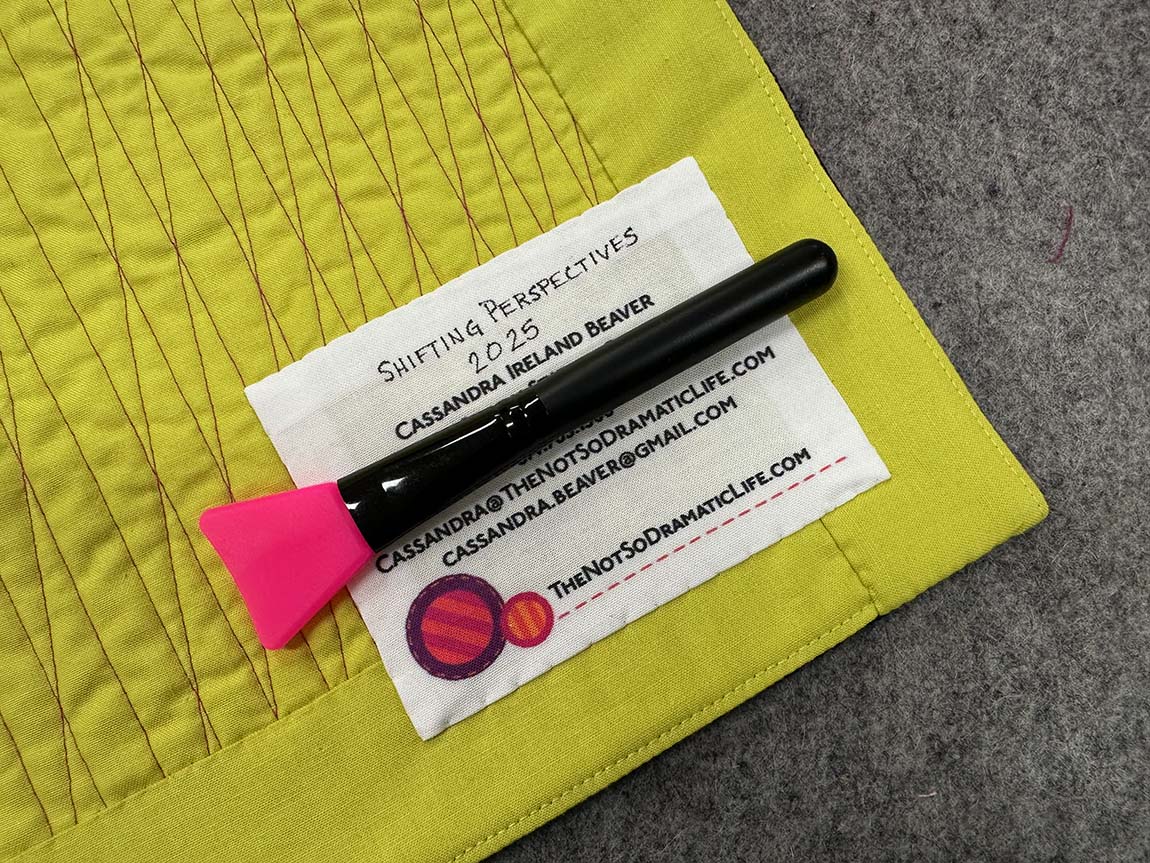
I label most of my quilts with quilt shows in mind, so I designed quilt labels that included my name, address, phone number, and email. Since I have a business, my labels also include my website and business logo. I leave a space at the top of each label to write in the quilt’s title and completion date. If a quilt has a special story that I want to make sure stays with the piece, I will add a second label with that information.
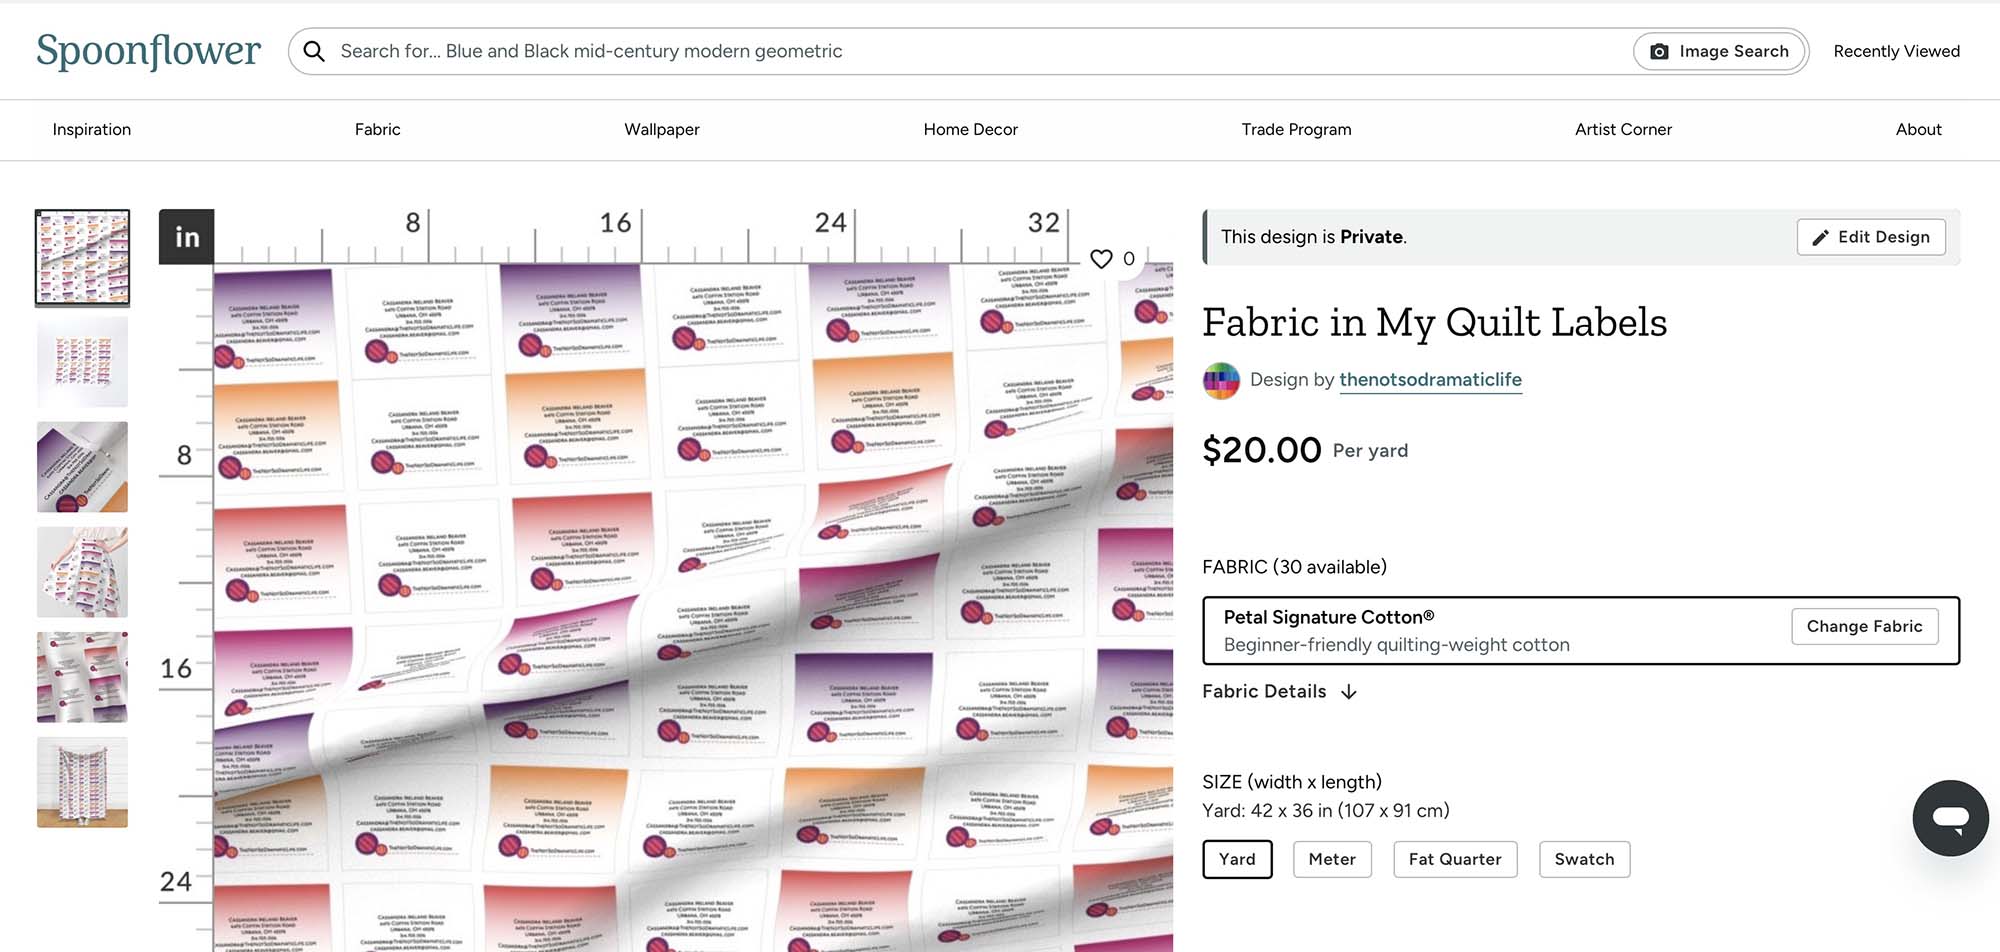
Using Photoshop, I created the text for my label and added my logo. If you would like to create your own labels, you can use any program that allows you to save the image as a JPG file. I copied my label information to fill an entire yard of fabric.
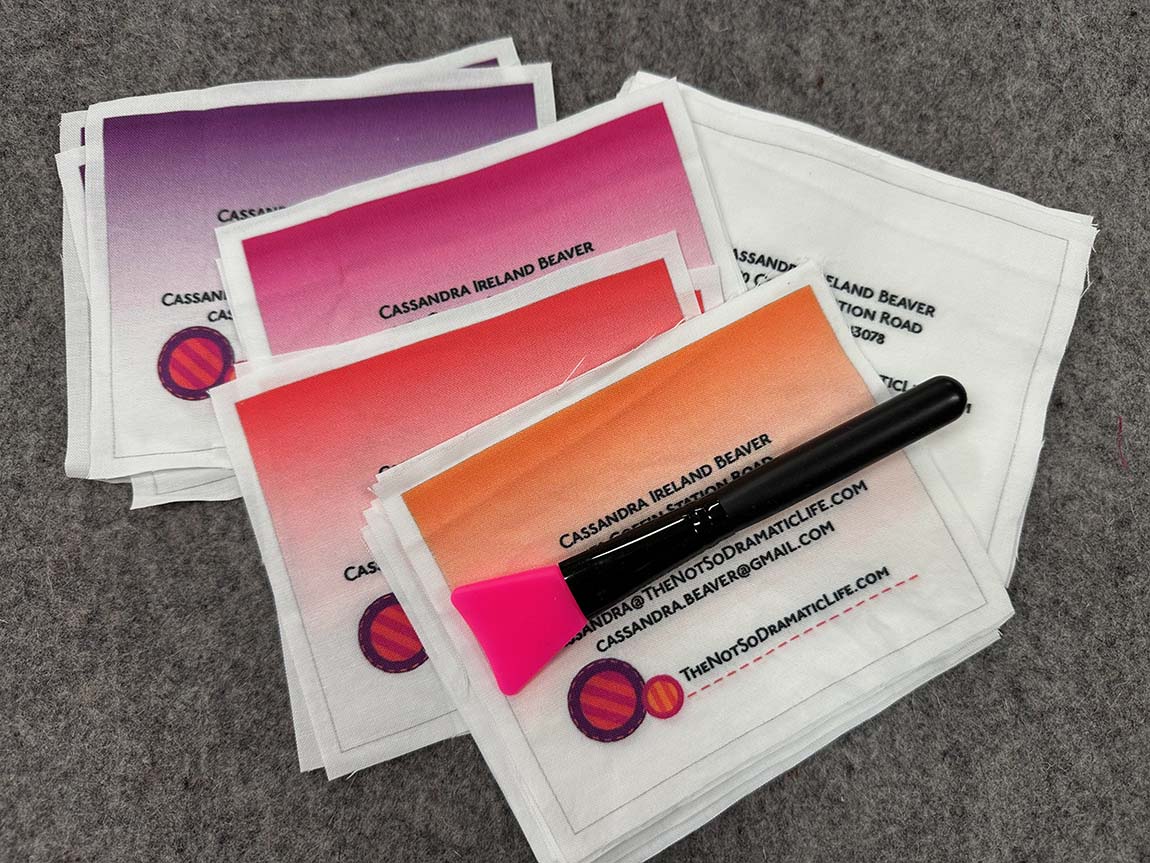
Sometimes I prefer my labels to blend slightly into the quilt backing, so I created some rows of labels with a colored gradient background using the same colors featured in my logo.
After proofreading at least a dozen times (nobody wants to misspell their own name on their labels!), I sent the image off to Spoonflower for printing. I ordered a full yard of labels that last several years, but you can also order a fat quarter yard if you don’t need as many labels.
Preparing the Labels for the Quilt
Once the fabric arrives from Spoonflower, I prewash it to remove the printing scent and soften it slightly. After pressing, I measure the space between the labels and cut halfway between each row. It’s essential to measure the actual fabric, as there is typically some shrinkage during the printing and washing process. Then cut each row into individual labels and you are ready to fly through labeling your quilts.
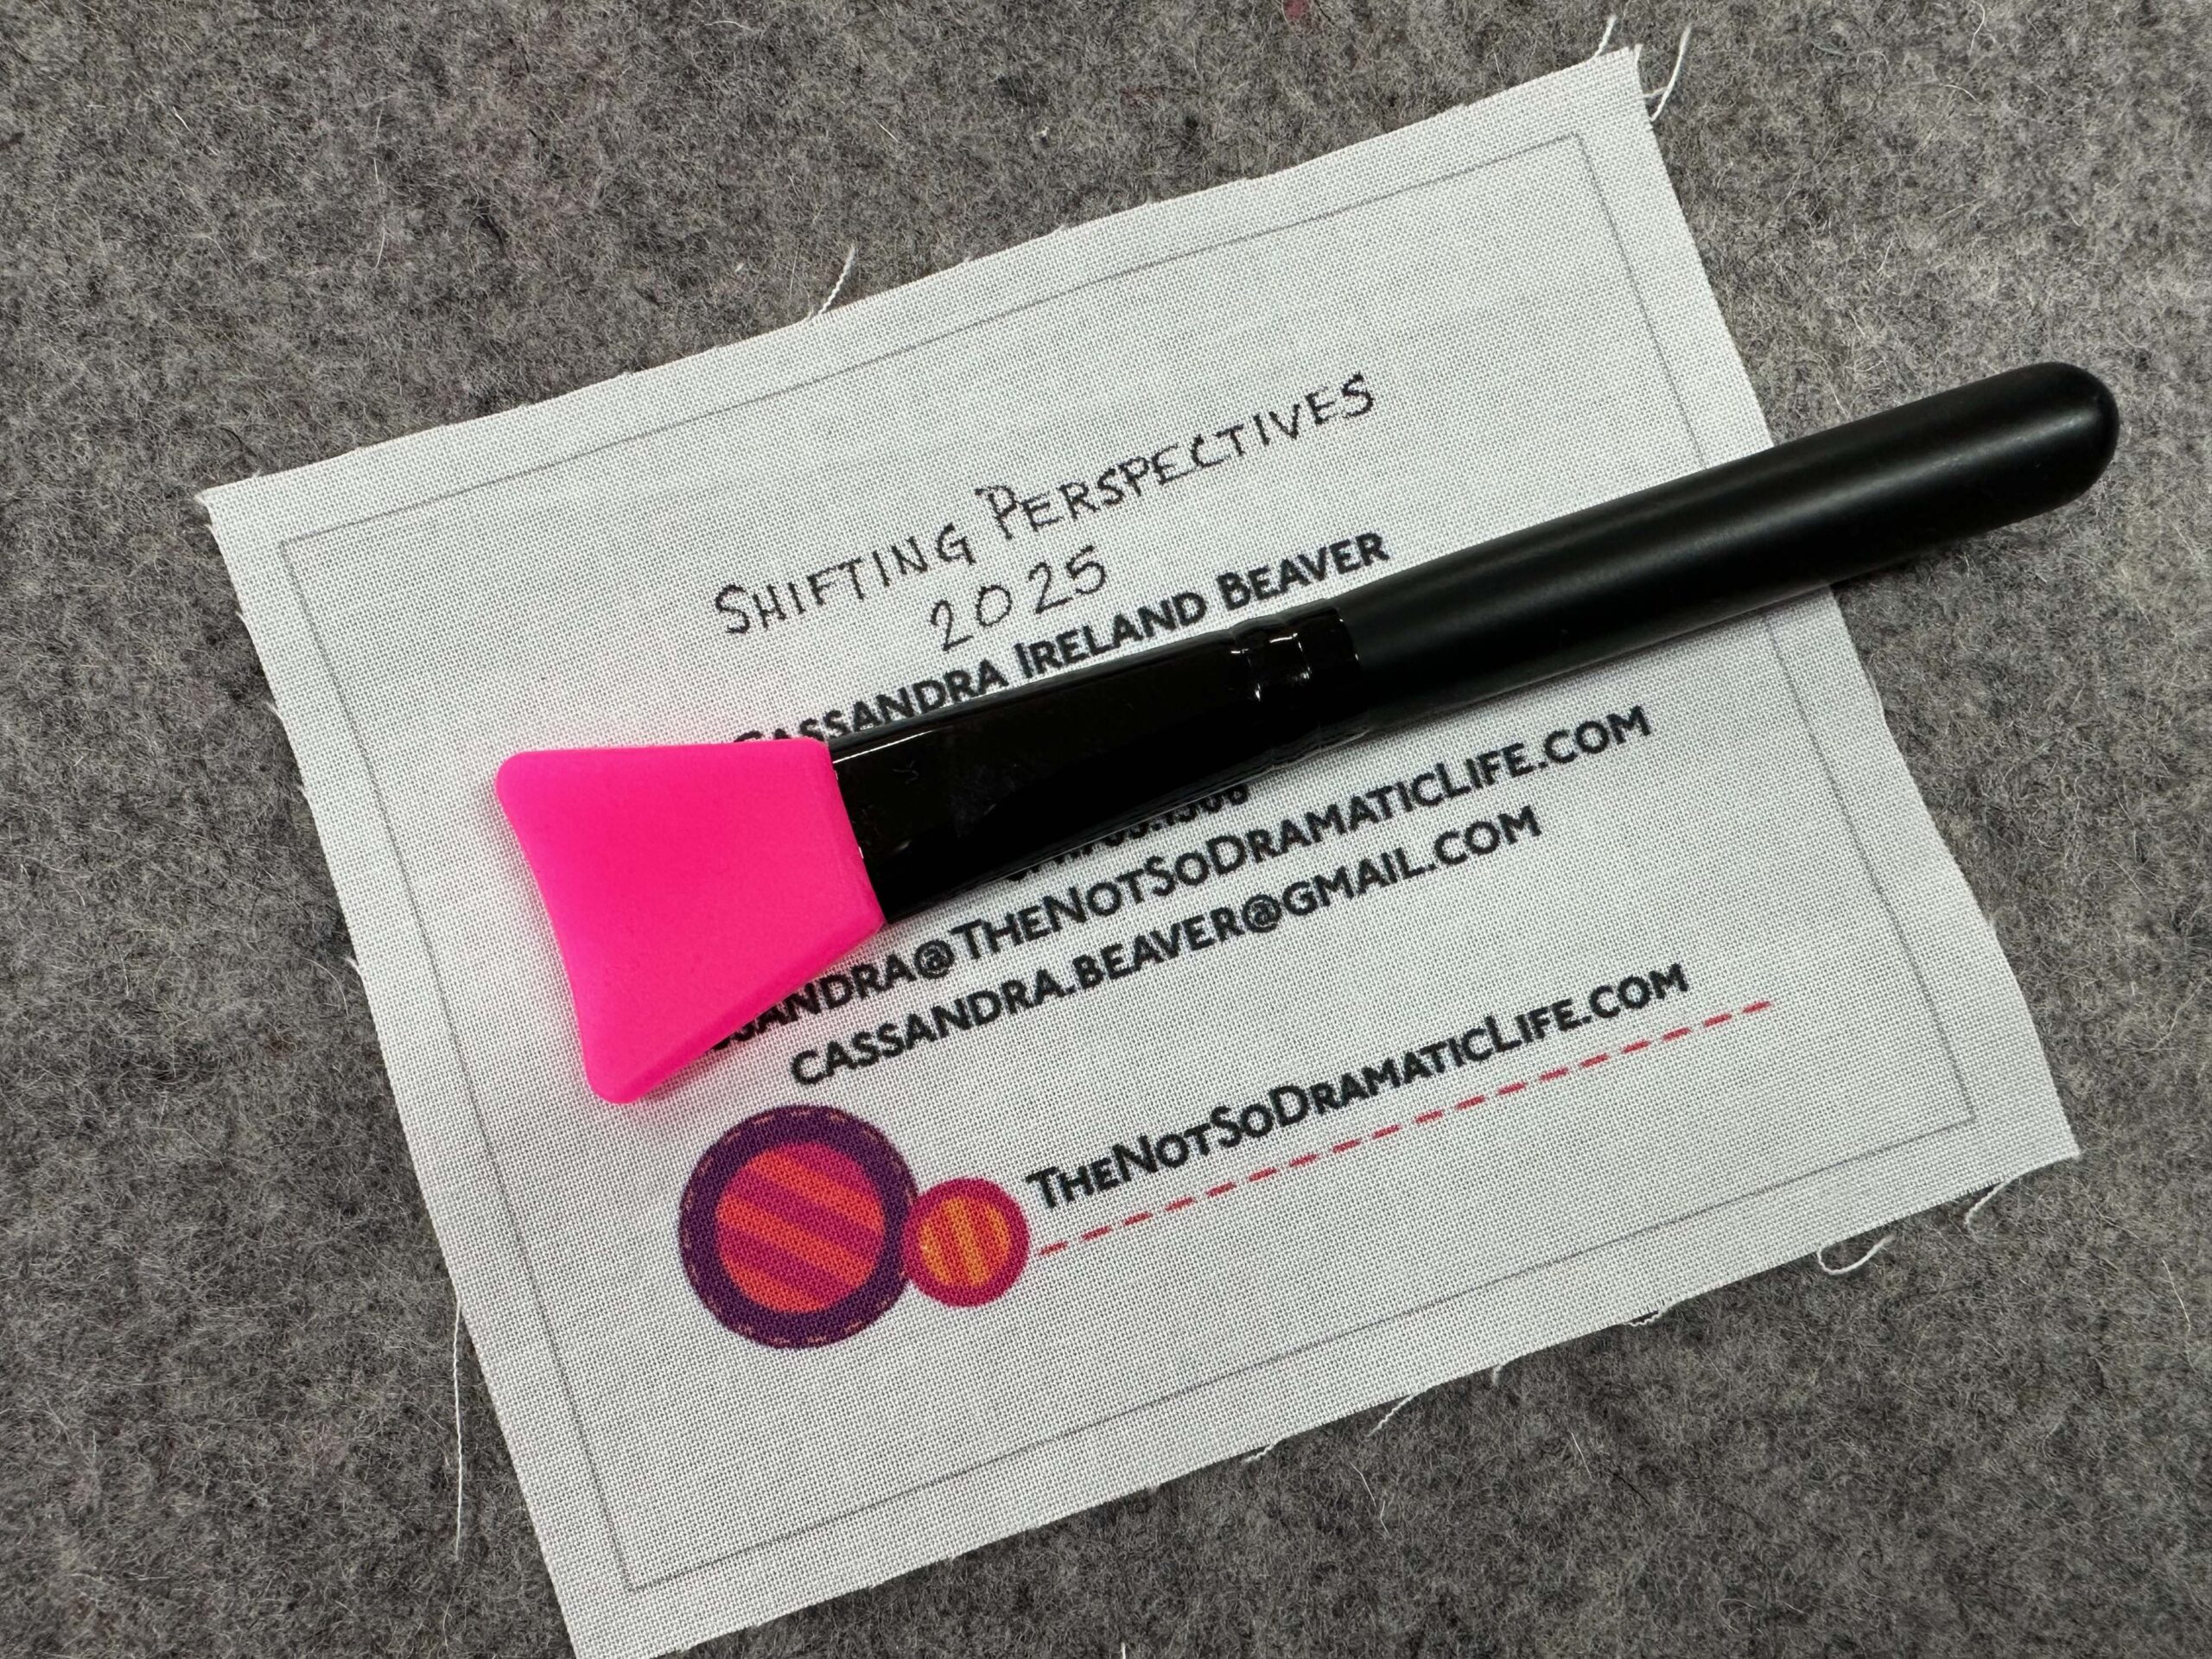
When it’s time to label a quilt, pull out a precut label and use a Micron Pen (or other permanent fabric pen) to write the quilt name and date at the top of the label. Press the label to set the writing.
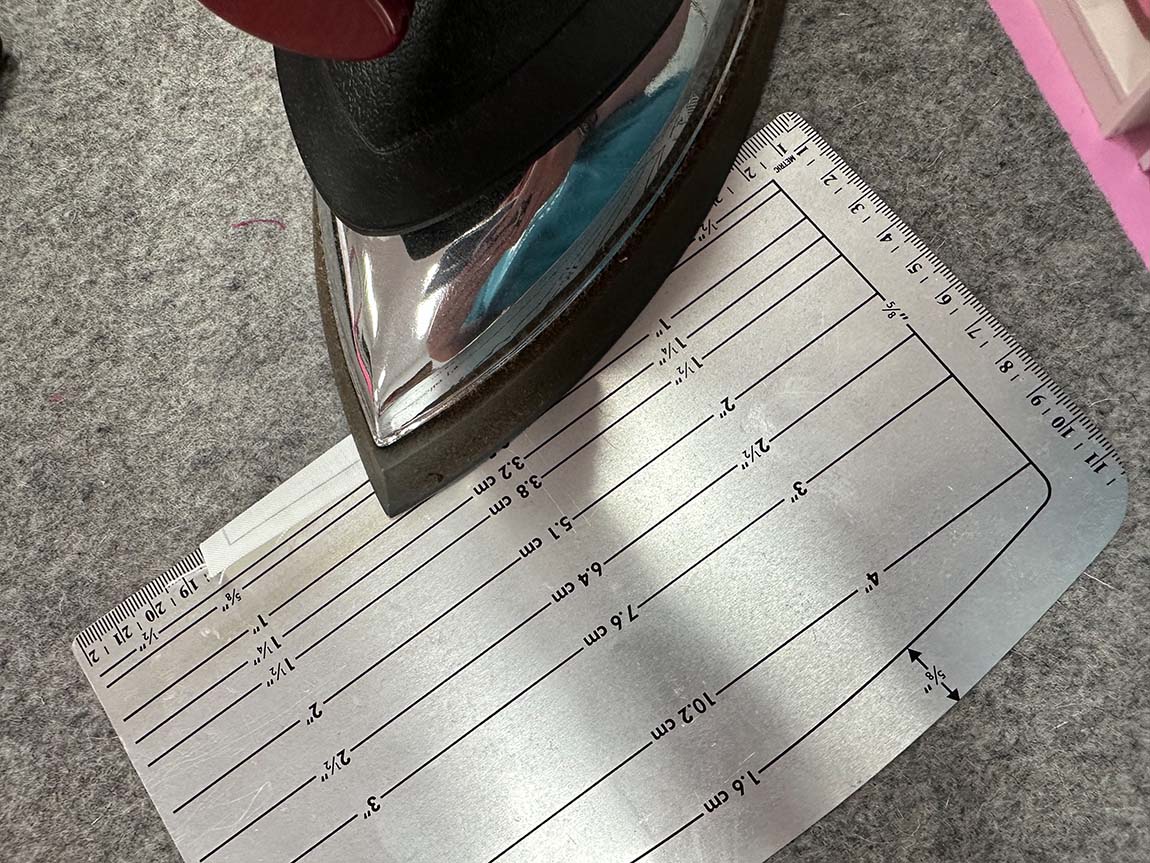
I like to leave about 1/2” on all sides of the label to turn under. It’s fine to use a smaller amount of fabric, but the larger amount is a little easier for me to handle and the final result appears the same. To press the edges with a consistent turnback, I use a hem gauge ruler, but a line marked on an index card can serve the same purpose.
Once the edges are turned back, it’s time to attach the label to the quilt. Most quilt shows require the label to be placed in one of the bottom corners of the quilt. This helps them to easily track quilts during judging and hanging.
For added security, I often sign and date directly on the back of the quilt, but under the label. You can also sign directly on the quilt, under the binding or hanging sleeve, if you prefer not to do so under the label.
Use a whipstitch to secure the label to the quilt. If the raw edges of the label peek out at the corners, turn them under as you stitch.

Covering a Quilt Label
In most cases, you are finished as soon as the label is stitched in place, but if your quilt is headed to a show, you now need to cover it for judging.
Some shows allow you to cover the label information with painter’s tape, but most shows prefer a cloth cover. This requirement is also easier with printed labels. Since my printed labels are all the same size, I also prepare a batch of label covers in advance.
I cut a strip of fabric into individual label covers and then use an edge stitch on my sewing machine to stitch around the edges of the label. This stitching prevents fraying, and I don’t want to get bits of thread on my quilt or anyone else’s quilts during judging.
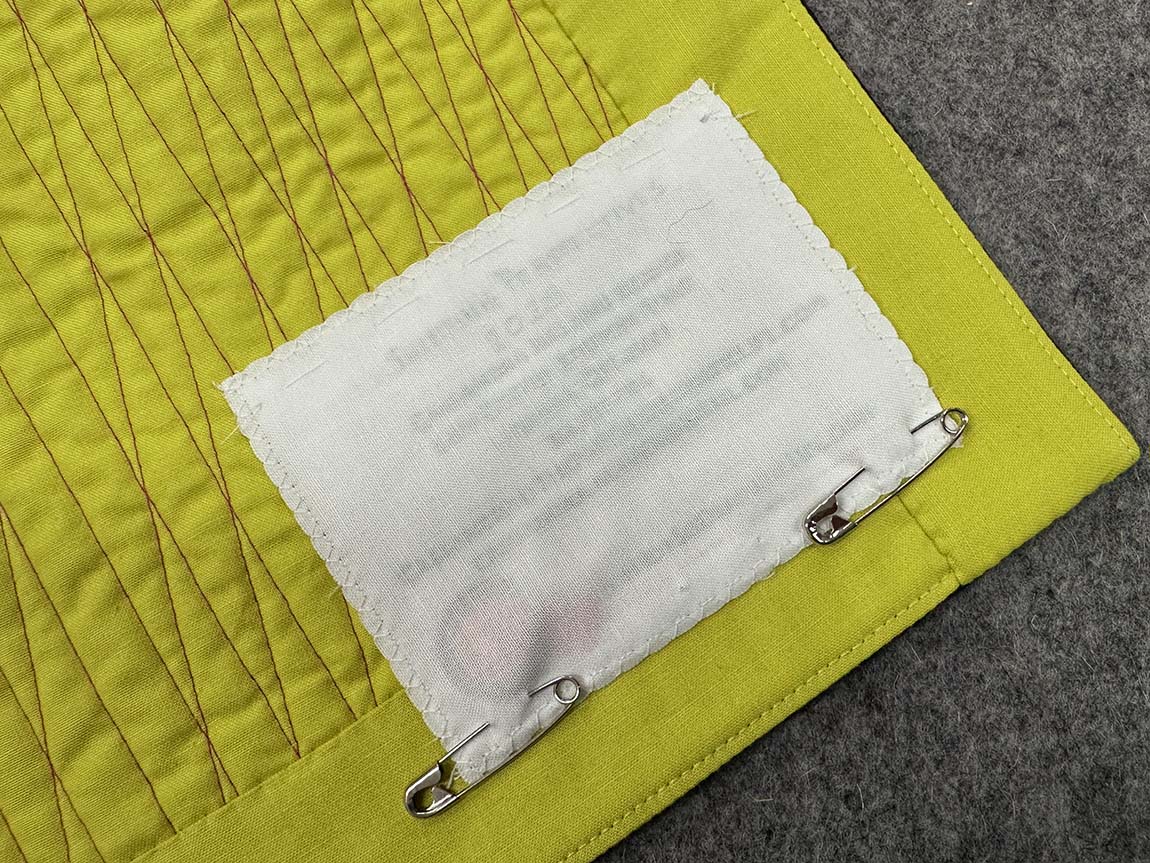
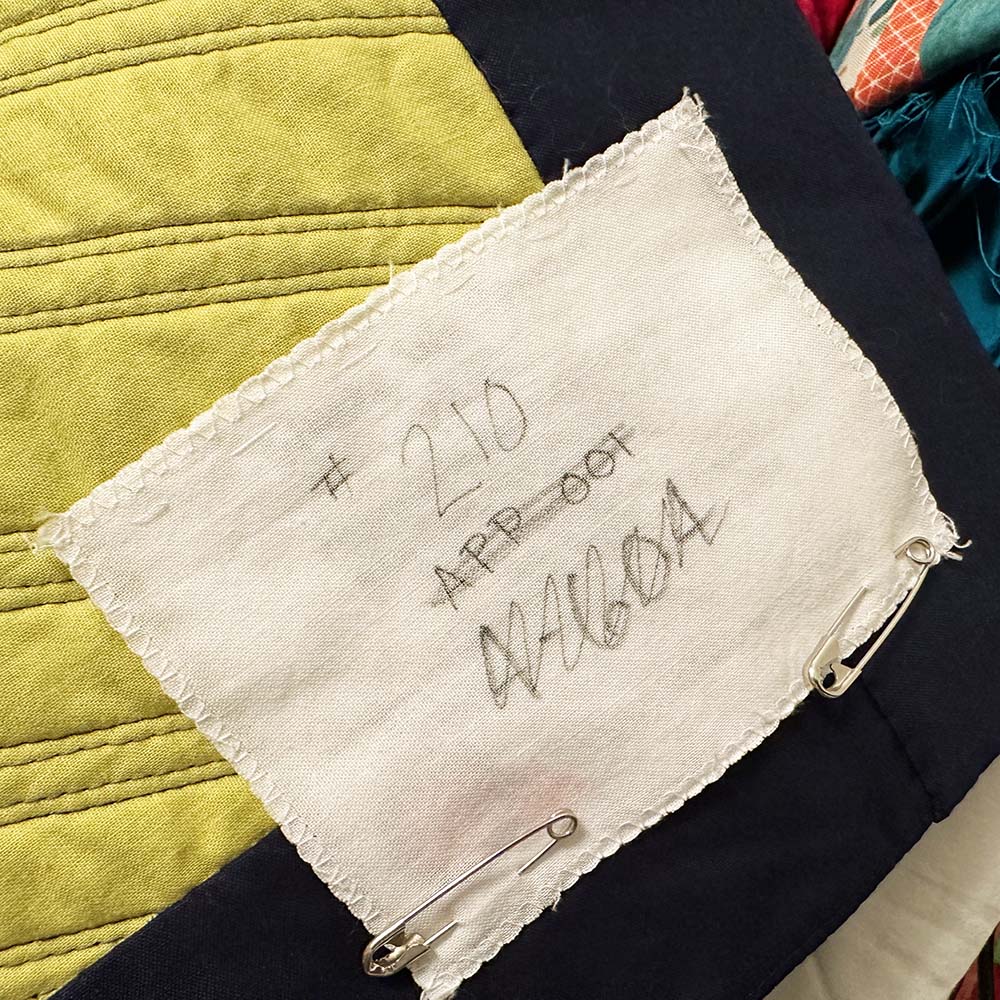
Depending on the show, you may need to write a specific number on the label cover or the quilt’s title. I baste the label cover across the top and either baste or safety pin the cover at the bottom, depending on the show’s requirements.
How do you label your quilts?
I would love to hear how you label your quilts! Do you keep it simple, or do you make every label a work of art?

5 Comments
Sue
August 1, 2025 at 8:07 amI use the lettering on my Bernn=ina 690 to embroider all my labels. Then hand stitch them down to the back of the quilt with a fancy hand stitch. A bit laborous perhaps; but I find receipents love reading the label information. And I do include lots of info on the label.
Kathie
August 1, 2025 at 8:13 amIn the past, I used the fonts included in my machine’s stitches menu. Since purchasing my Bernina 770 with the embroidery attachment, I have been creating my labels with embroidery. For our regional quilt show, I created a file with address & such that I can add the quilt name and completion year to identify my quilts. For personal gifts, I make each label personal to the recipient. Using embroidery makes creating labels almost as fun as making the quilts.
Nann
August 1, 2025 at 9:20 amI use prepared-for-printing fabric sheets and have a standard label like yours — Hilyard Studio / my name / my town — with room to hand-write the quilt name and date. For special quilts (like a wedding gift) I use the same fabric sheets and compose the text, usually printing a bunch of the standard labels to make the best use of the fabric sheet. I sew resulting small labels to a square (or rectangle) of fabric and then sew that piece to the back of the quilt. That’s the only hand-sewing I do because I machine-stitch the binding down………..On rare occasions I piece the label into the back and it becomes part of the quilting, but that’s when the quilt is a one-of-a-kind presentation (like a memorial).
Renee
August 1, 2025 at 12:28 pmI’ve never labeled one nor has u heard of labeling them until recently. I can’t imagine it feels good against the skin, the rapid change in texture from the quilt to the label. Securing it without the stitches being seen on the front is a concern because I don’t want the design disrupted. How can it be added without damaging the quilting on the front? My mom has taken to using a permanent fabric pen to write a message on the backing, because she hates to disruption labels cause.
Becky Campbell
August 1, 2025 at 12:53 pmHello Cassandra,
I am sharing a blog post about how I create my labels. I want to update the post because I have started to position the label on two sides under the binding. It requires less hand sewing, and I think it lays flatter.
By the way, great interview with Brandy, Quilter of Fire podcast.
Here is the link for the blog post. https://sewforever.com/blogs/sewforever-quilting-by-becky-campbell/put-a-label-on-that-label-your-quilt