As the year slips into Autumn, it’s time for apple cider and pumpkin spice and for quilters everywhere to start thinking about the handmade gifts they plan to make for the holidays.
I like to have a few small gifts on hand for last-minute exchanges and gifts for co-workers or neighbors. A small handmade item can also personalize a store-bought present.
Mug Rugs
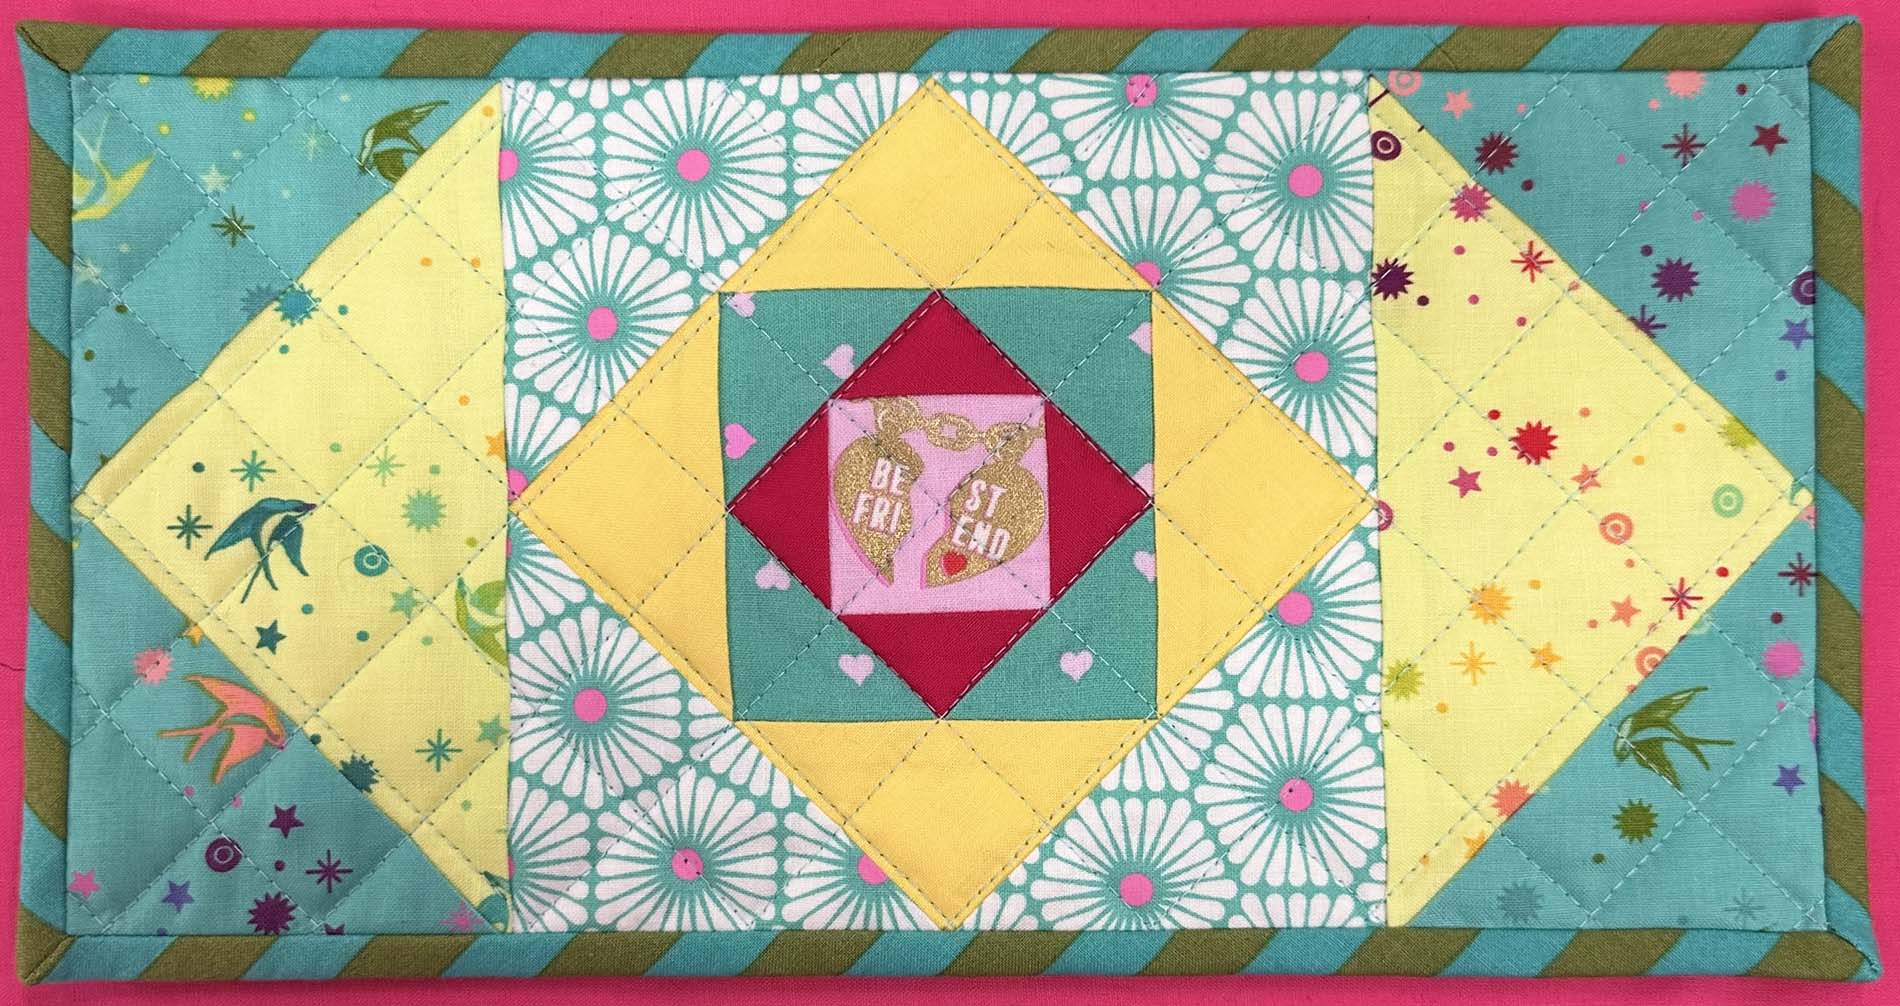
I love mug rugs! The one I’m sharing today goes together quickly and uses two standard quilt block components.

The perfect mug rug is large enough to hold a beverage and a small plate holding a snack. I’m not looking for a placemat, but I need more room than a coaster. I keep mug rugs on my office desk and coffee table, so yes, I do use them!
For this mug rug, I combined a 6-inch square Square-in-a-Square block component with two flying geese block components to create a long, rectangular piece measuring about 6″ x 12″. This block had a bonus—I already had the components made up from other projects! I needed to piece two seams, quilt it, and add the binding.
Tip: This is an excellent time of year to look through past projects to find orphan quilt blocks or block components. Which ones would finish nicely into gifts?
(This post includes some affiliate links. If you click on an affiliate link and choose to make a purchase, I receive a small percentage of the sale at no cost to you. These funds help keep this blog running and content FREE for everyone!)
The Two Components
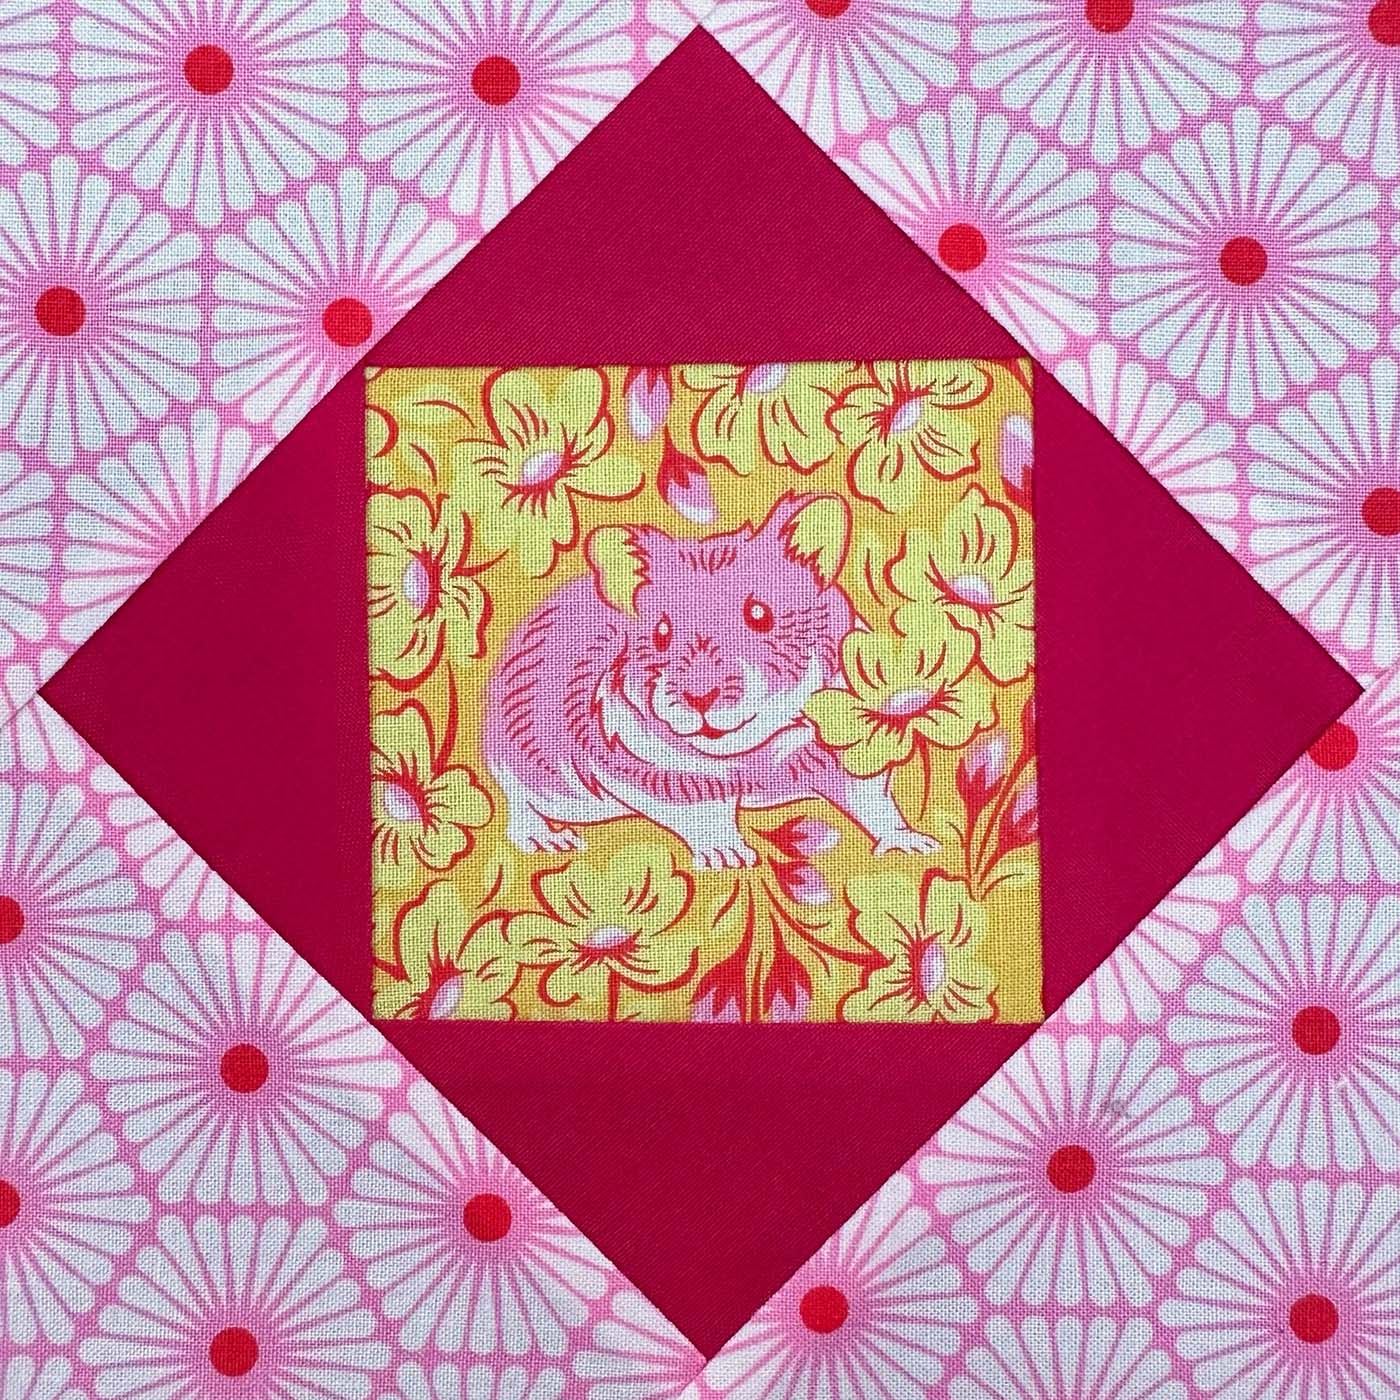
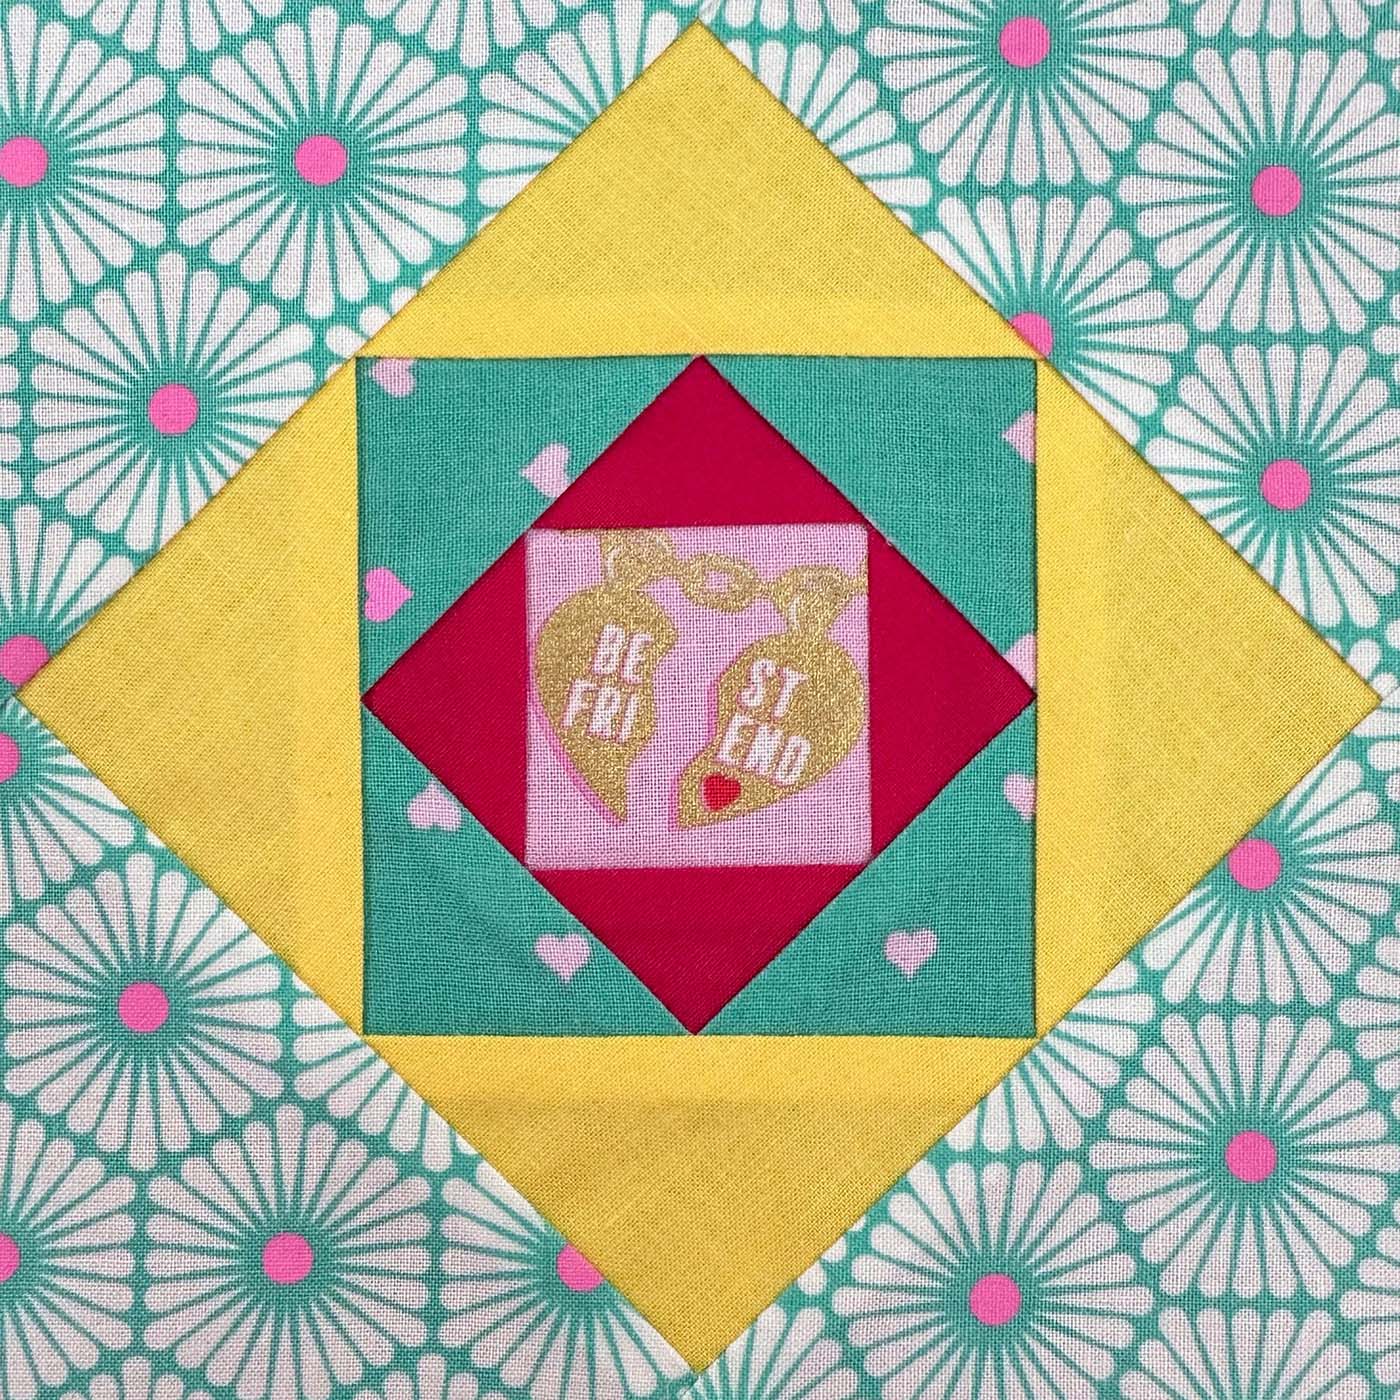
Square-in-a-Square
A Square-in-a-Square component frequently appears in traditional quilt blocks and is one of my favorite blocks for fussy cutting. For this mug rug, I used a Square-in-a-Square component that finishes at 6″ square (6-1/2″ unfinished).
Two Ways to Square-in-a-Square Block Components
There are actually way more than two ways to construct a square-in-a-square component, but these are my two favorite methods because they don’t require any crazy measurements. The first method involves a specialty tool; the second is foundation paper piecing. (Keep reading to download free templates in three different sizes!)
The Square on Square Trim Tool
I recently used this tool to create an extremely easy Snail’s Trail block, and it is terrific for Square-in-a-Square Blocks, too! This trimming tool gives you two size options on each tool. One makes 3″ and 6″ blocks, and the other size does 4″ and 8″.
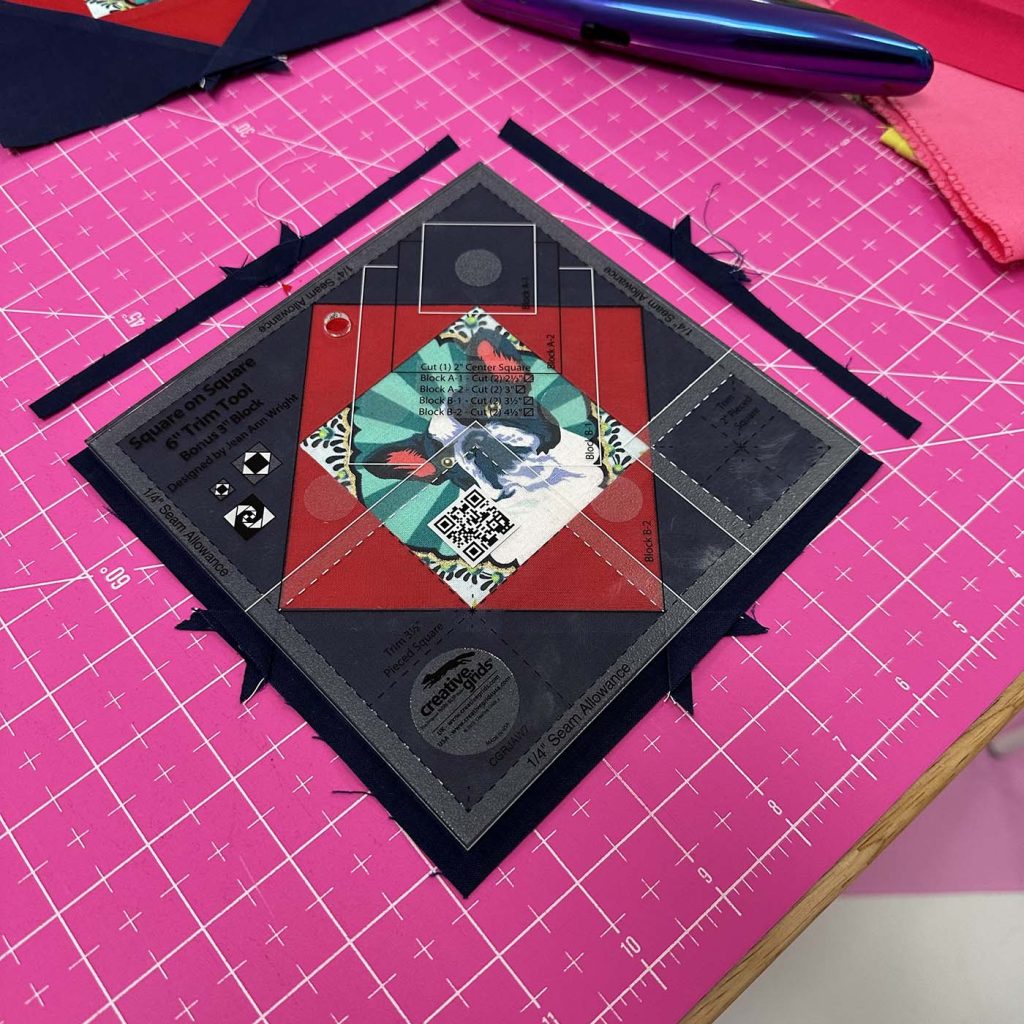
When making the larger block on each tool, you can easily start with either of the central square sizes, giving you options when you are fussy cutting motifs of different scales.
I used the larger center square in this block to focus on this cute little critter.
For this block, I fussy-cut around a smaller charm motif, so I chose to use the small central square and build out to a 6″ block.

Foundation Paper Piecing
My other favorite method of constructing Square-in-a-Square blocks is foundation paper piecing (FPP).
If you are familiar with FPP, you already know this technique results in perfect points and the exact block size you need. You can also get a wide range of precise sizes. To help you get started, I’m providing a set of FPP Templates that create block components measuring 3″, 4″, and 6″.
Like the Trim Tool, you can make the central square on your FPP blocks larger. For instance, on the provided templates, you could make sections 1-9 all one fabric piece and start piecing with section 10.
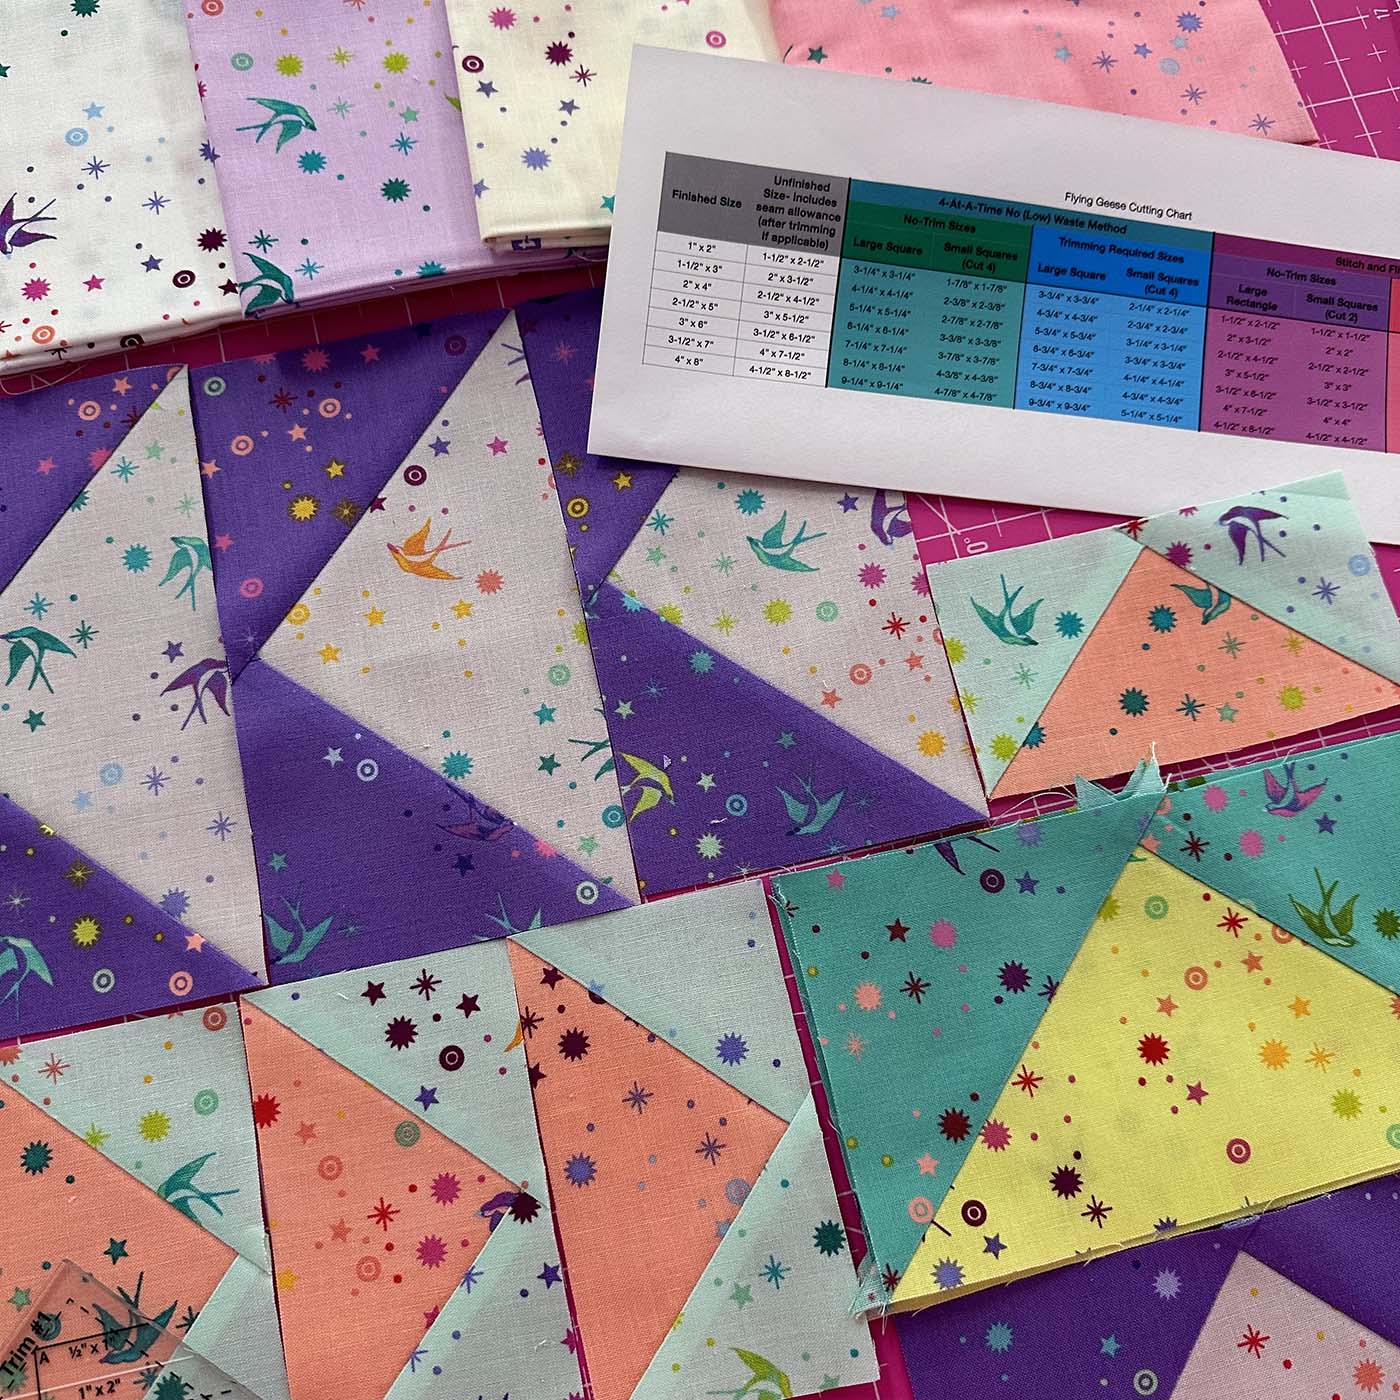
Flying Geese
Flying Geese are the other standard quilt block component I used for this mug rug. I used two 3″ x 6″ finished (3-1/2″ x 6-1/2″) Flying Geese for this mug rug. I did a two-part series on methods for flying geese construction and trimming, complete with cutting measurement charts, so you can read more about making them here:
- Two Easy Techniques to Create Flying Geese Quilt Blocks that Work Every Time
- Three Simple Methods to Trim Flying Geese Quilt Block Components
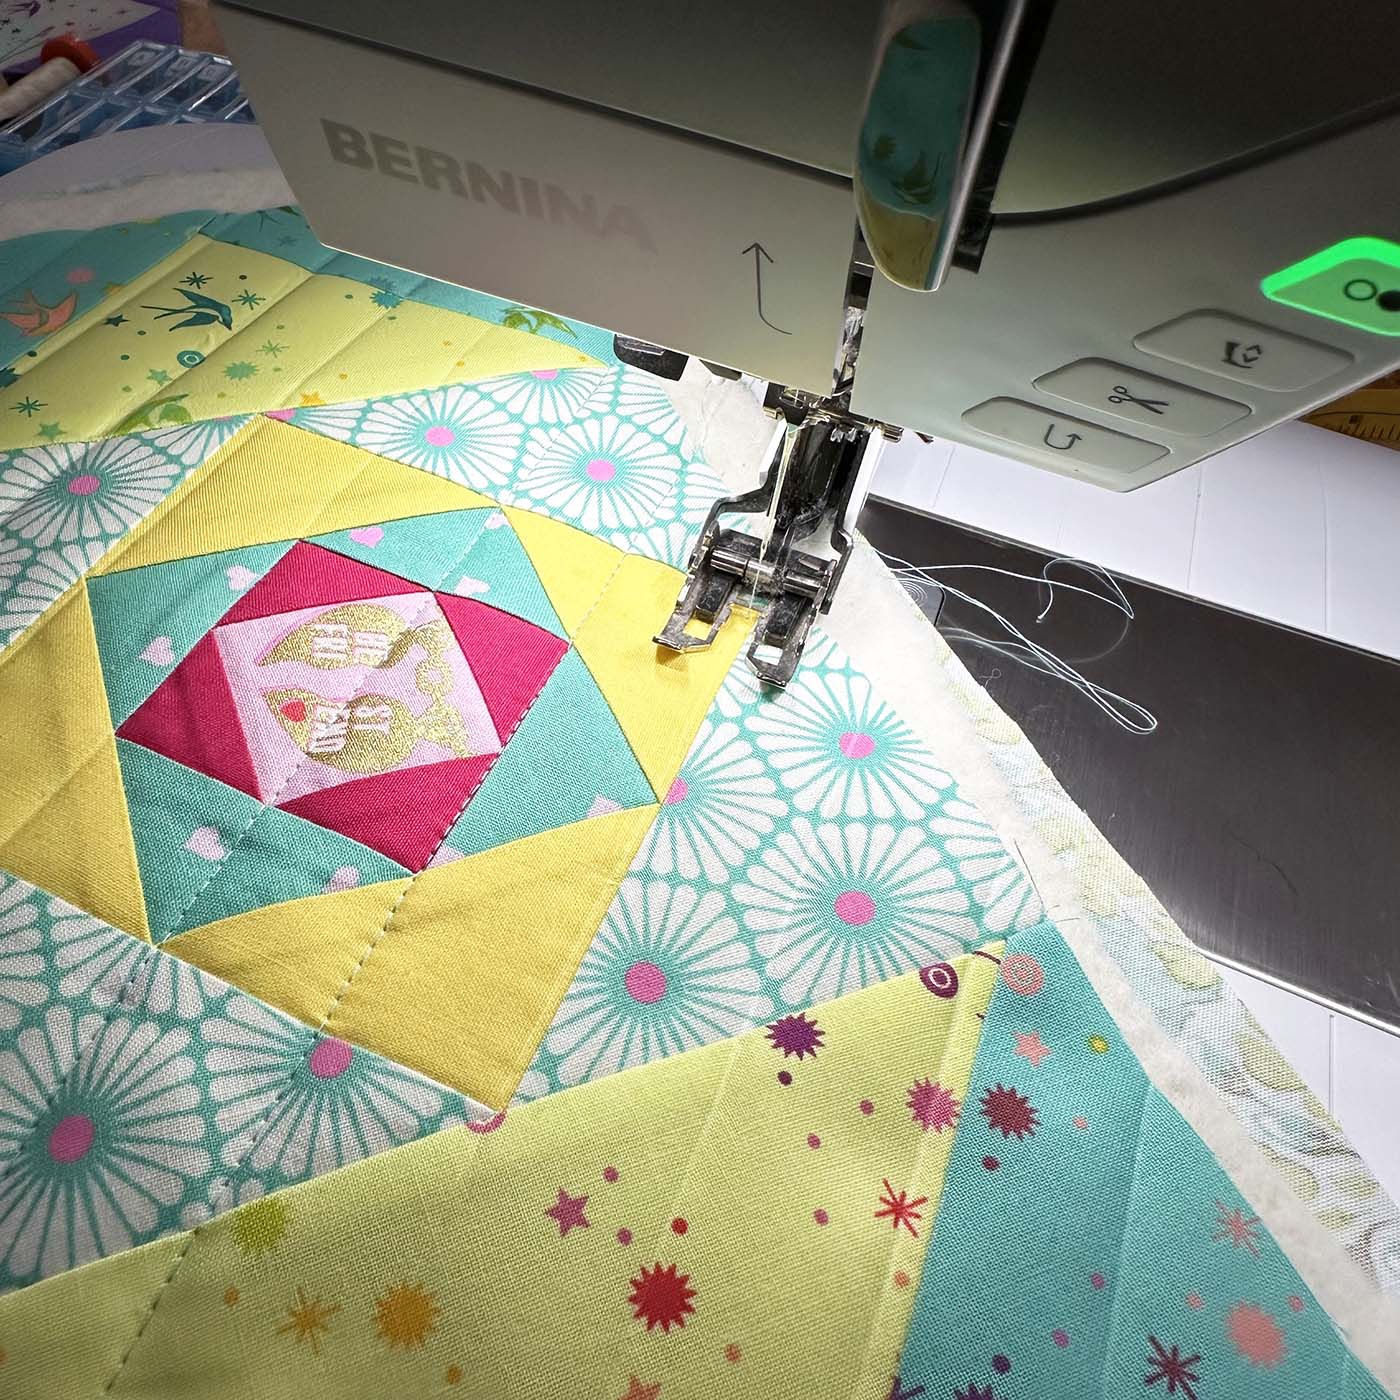
Making the Mug Rug
Design
Once I had my two types of components ready, assembling the final mug rug was easy. For many of my test blocks this year, I used Tula Pink fabrics, and I luckily used a yellow and green combination on both of these block components.
Tip: I frequently choose one or two color or designer palettes to make samples with throughout the year. A unified palette makes them easy to combine later for small projects like this mug rug.
Quilting
I wanted to keep the quilting simple for this project, so I used a diagonal grid. The diagonal lines worked well with both block components since the motifs all feature 45-degree angles. With small projects like this one, I like to mark my lines with a ruler and a Hera Marker that puts creases into the quilt sandwich but doesn’t use actual ink.
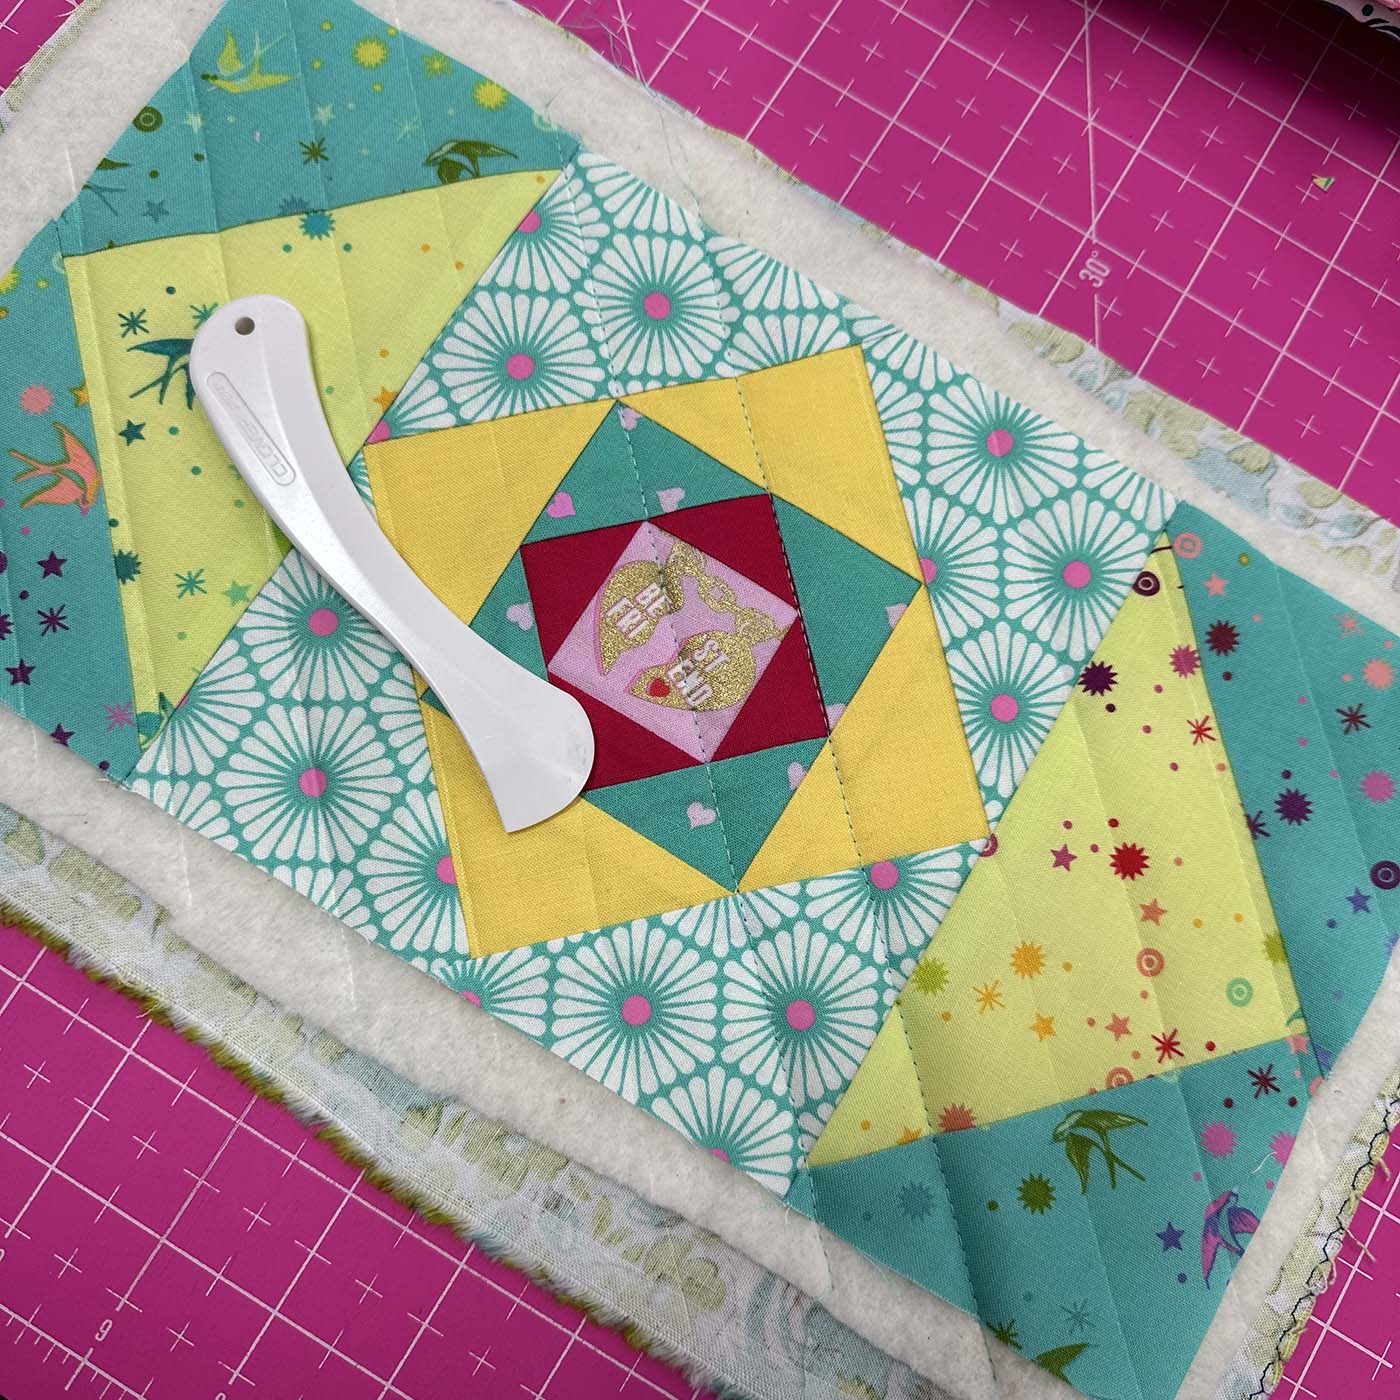
If you have a walking foot, use it while quilting. If you don’t have access to the walking foot, you will want to use your machine’s dual feed feature. If you don’t have either, you will probably be fine for a tiny project like this but plan to add a walking foot if you plan to quilt larger items.
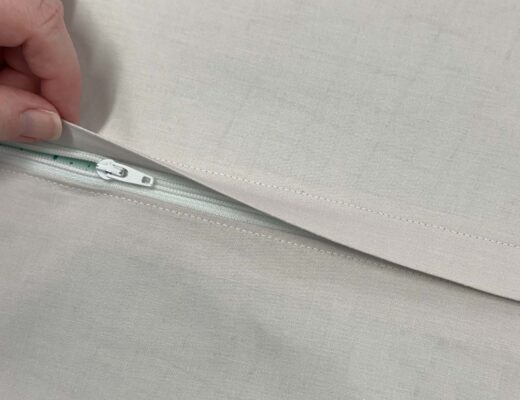
Finishing
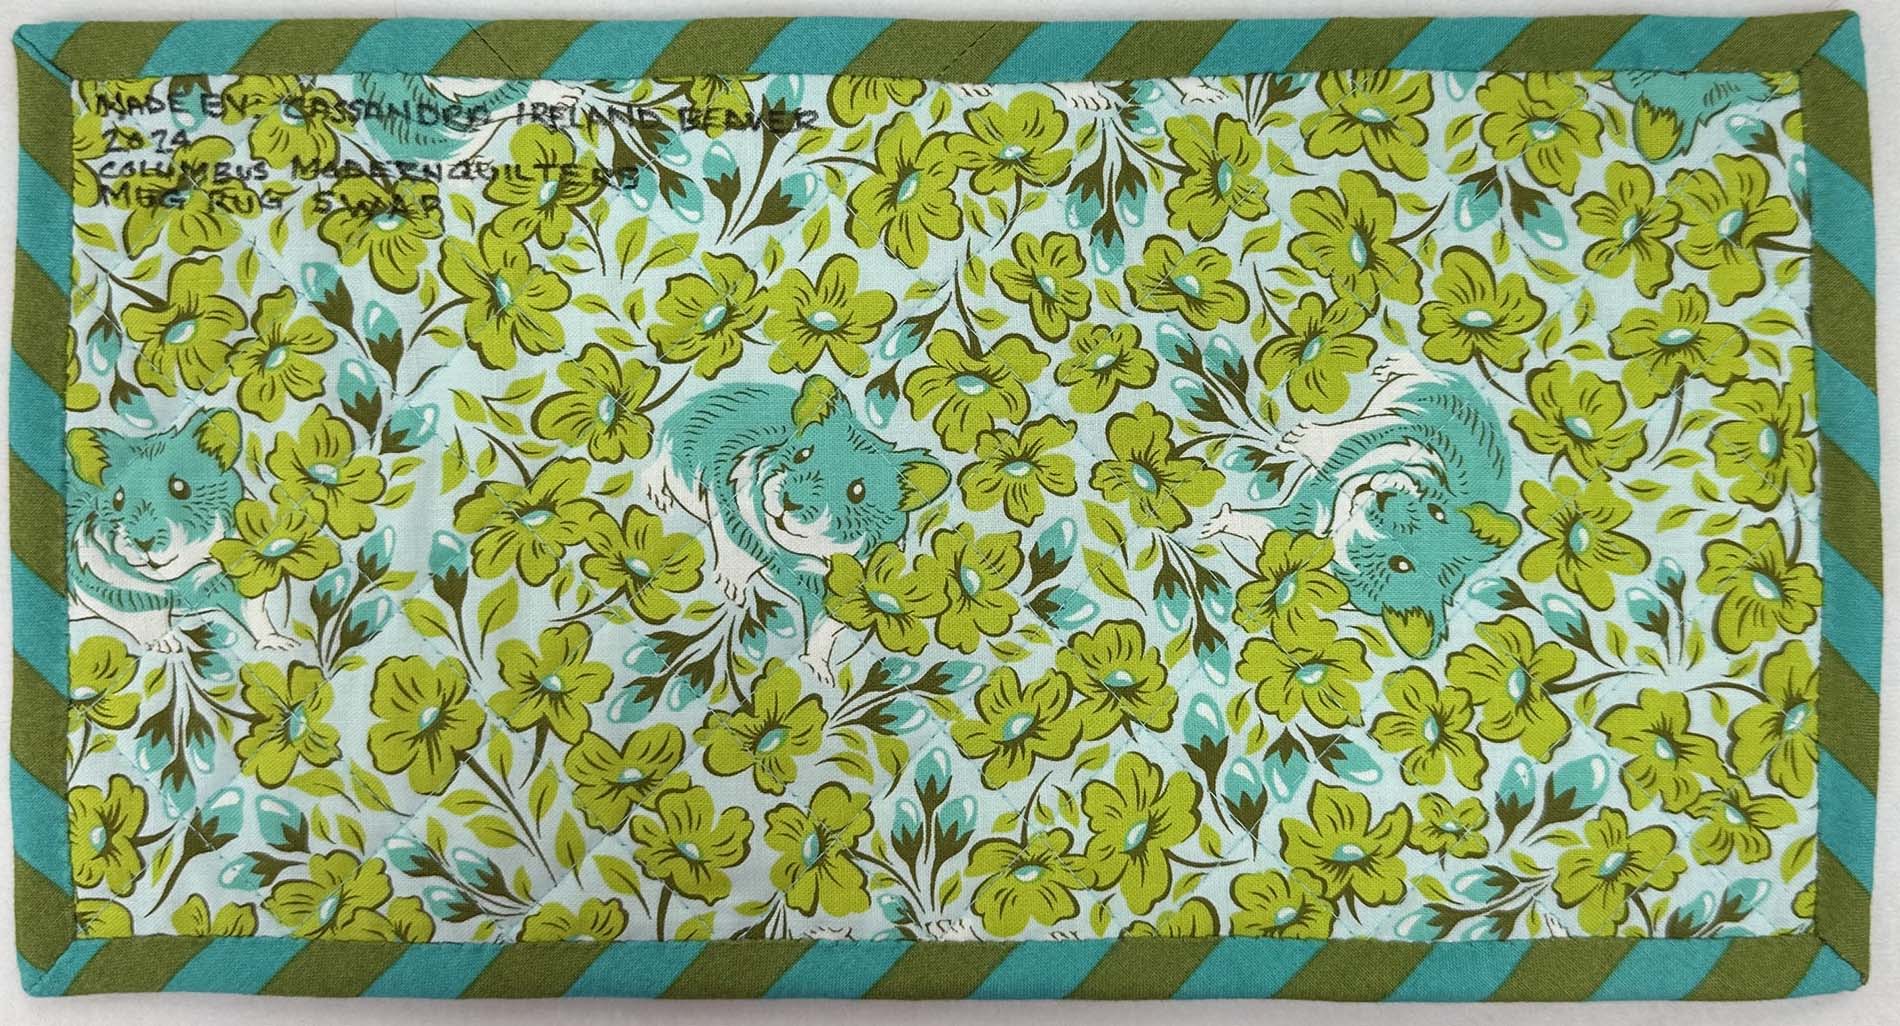
I keep a stash of premade bindings, which make finishing projects like this especially simple. I like using bias-cut Tula Pink stripes for bindings, so I had a turquoise and green strip already made up and ready to attach to the mug rug.
This mug rug was for a guild swap. Since we weren’t assigned partners ahead of time, we each put our mug rug in a paper bag and took turns pulling a random bag. Before packing it up, I labeled the mug rug with my name, year, and which swap it was made for.
Are you ready to turn some basic components into an easy gift?


No Comments