Do you know what day falls 100 days before my birthday?
New Year’s Day!
Several years ago I decided to try a 100-day project, but I didn’t want to do the cliche of starting a big project right on New Year’s Day. Instead, I thought that I would chose a day I wanted to complete a quilt by and work back from there. It seemed fun to have a complete quilt as a birthday gift for myself, so I pulled out a calendar and diligently counted back 100 days- to January 1st! So much for not starting the first day of the year.

Since that time, I have kicked off a 100-day project each year, and I am super excited for 2023!
Each year I set parameters for the project that usually include themes and color schemes. Before I landed on this year’s project, I knew there were two key elements that this quilt needed to possess.
- Green as a dominant color: My 100-day quilts frequently have a color theme, and I have used most colors except green and violet. Last Fall I decided to focus on green and started adding green fabrics to my stash with this project in mind
- Hand Sewing: By the end of 2022 I knew I was going to be out of town for at least 15 out of the 100 days. For me, 100-day projects are about creating continuity, so I didn’t want to skip those days or work ahead. Handwork on a small to medium size project is an ideal solution for sewing on the road.
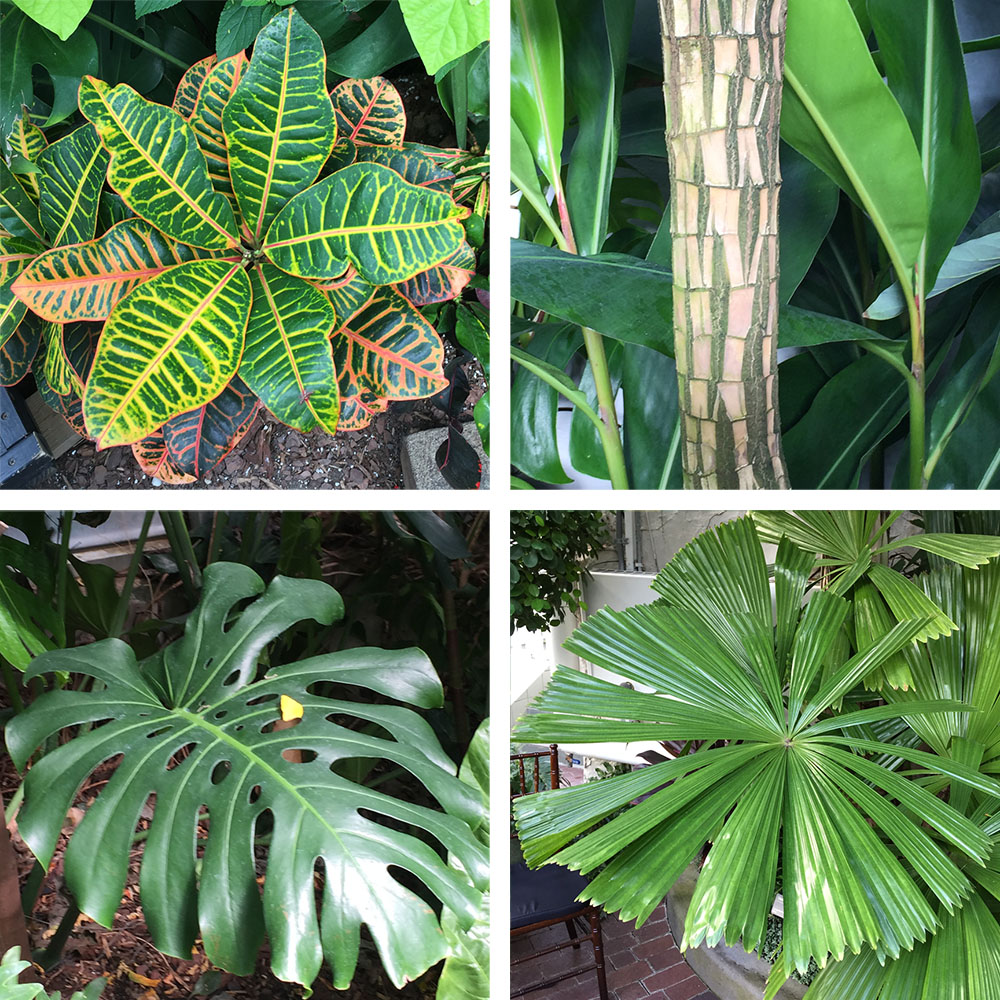
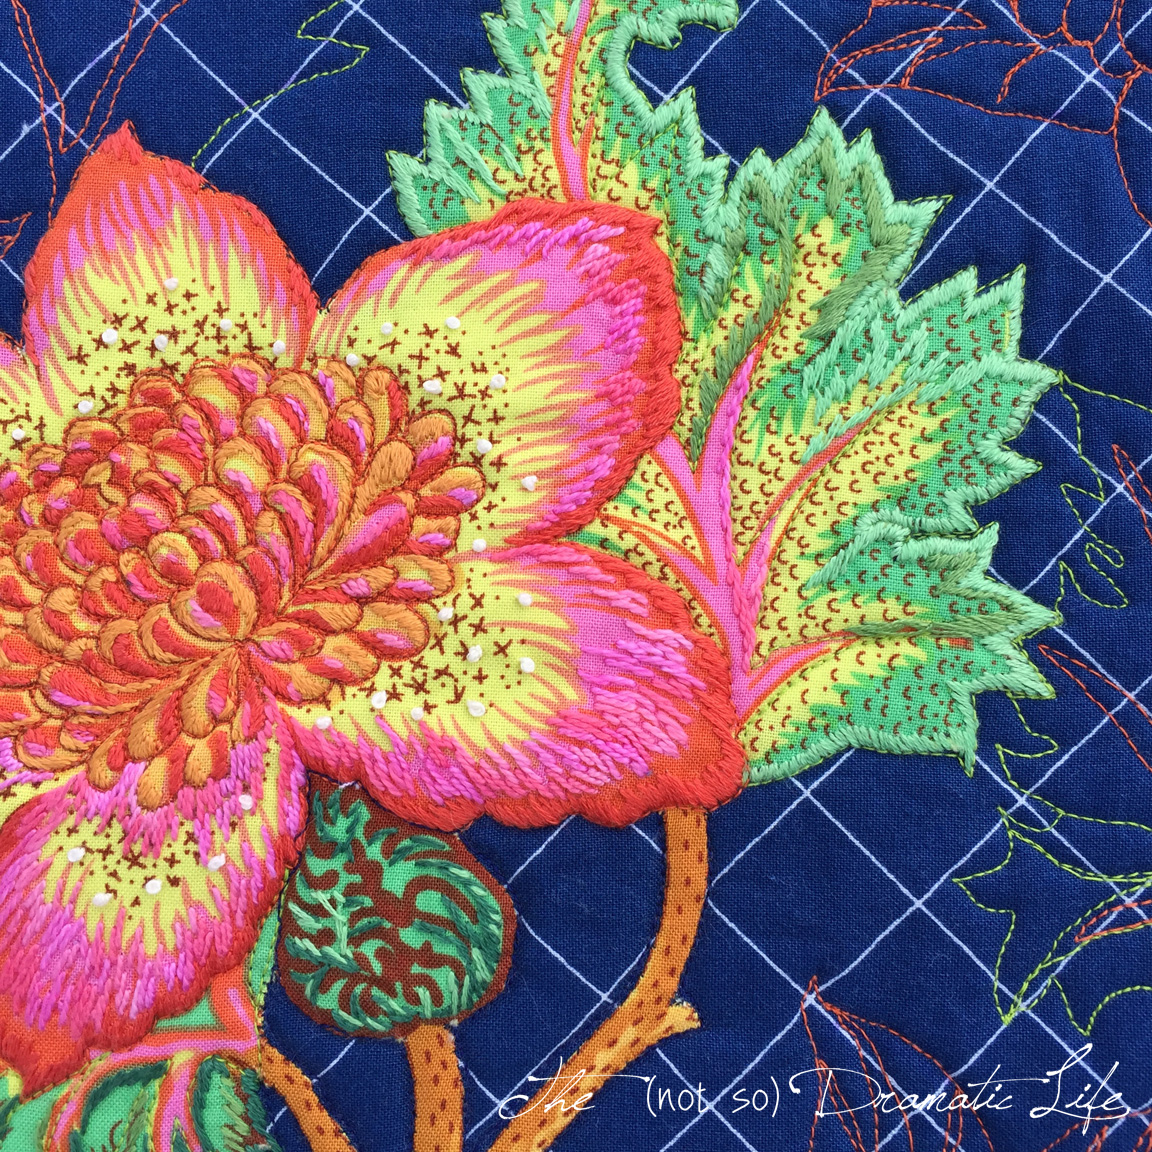
As I sifted through several years worth of inspirational images, I was drawn in by the photographs I took at the Franklin Park Conservatory a few years ago. This botanical garden has plants from a wide range of climates, and I thought it would be fun to create an abstract, fanciful garden scape with shapes derived from these images.
My designs typically start as a line drawing in AutoCAD. This early image reveals something that becomes hidden as the composition progresses- every line in this design is curved.
The background started with a curved grid reminiscent of the glass in a greenhouse. This motif is mostly obscured by the end of the design process, but it does peek out here and there.

In order to capture the unique features of some of the plants, I traced over a reference image. Once the tracing is complete, I can rotate, mirror, and scale the shape to work in the design.

The complete line drawing includes a range of plant shapes and sizes with those distinctive tree trunks helping to mover your eye around the design.
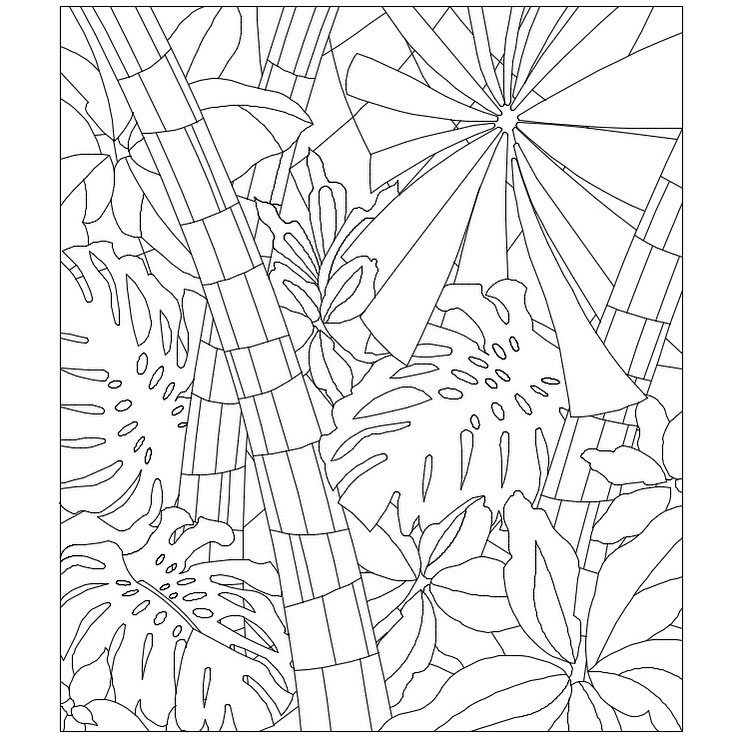
The lines of the design are ultimately cutting lines for each piece of needle turn appliqué. This technique turns the edges under 1/8″ on each piece of fabric which will result in a 1/4″ space between the components. This gap between fabrics will ultimately create a stained glass effect with the background fabric showing through in narrow lines throughout the piece.
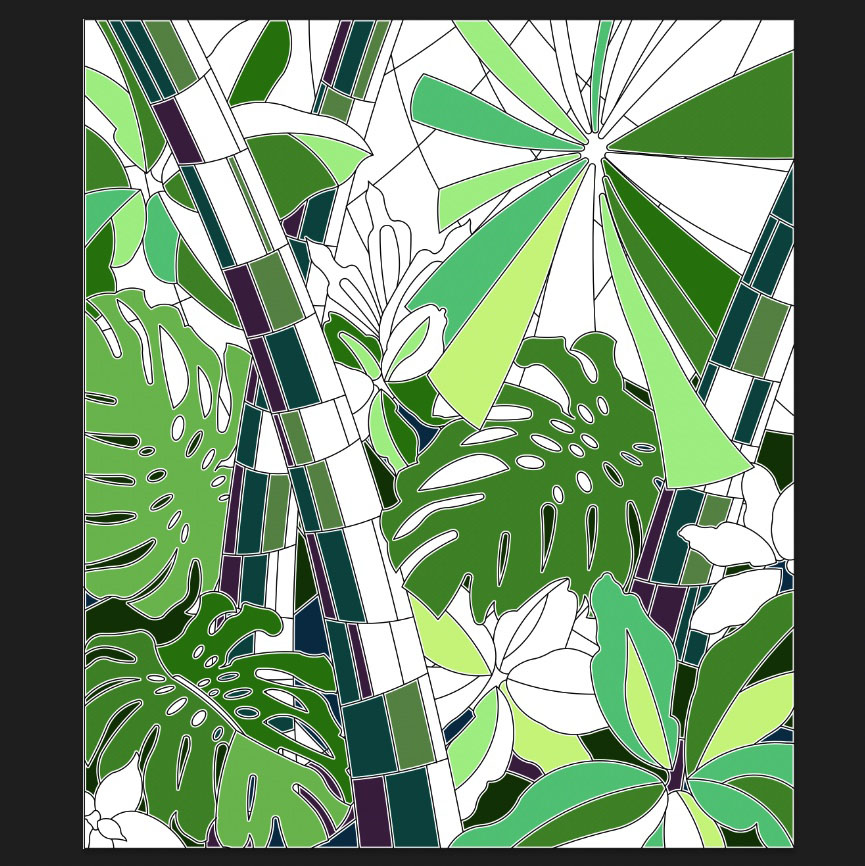
Here you can see the color planning process without the lines drawing overlay. The gaps between the pieces play a critical role in the design. When it comes time for more nuanced color schemes, I move the design into Photoshop.

Originally, I planned to use a solid color fabric for the background of the quilt, but as the color design progressed, I realized that an ombre fabric would help to create a lively, glowing effect.

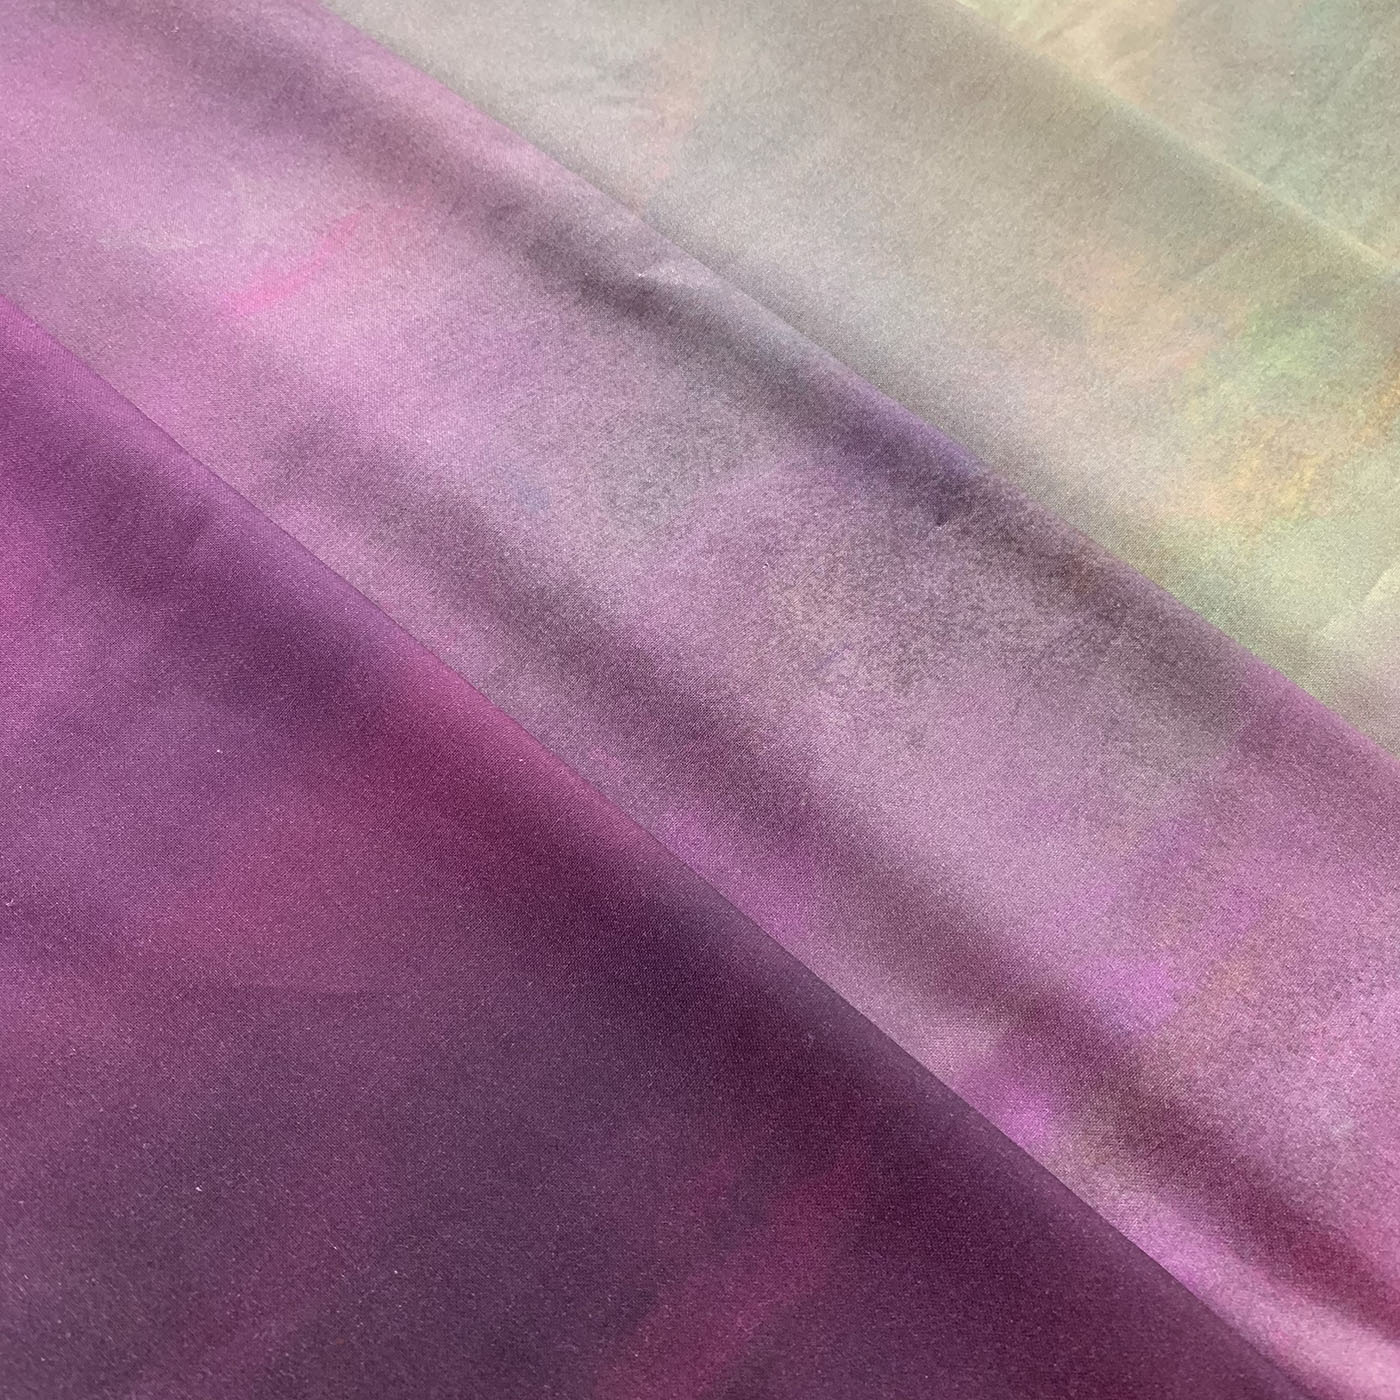
In the sketch you can see that I was first thinking about an ombre from dark green to light yellow-green would be an ideal choice, but once I was at the fabric shop, I fell in love with this Jennifer Sampou Sky Ombre that moves from deep violet to light dusty green. I expect that it will meld with the shadowy violets I incorporated into the color sketch.
Once I came home, I placed a similar gradient into the sketch, and I am excited about the design potential of this piece.
The artistic design portion of the project took about six days, and then I moved into the technical design section creating and printing took a couple of days before moving into the cutting portion.
As I move through each day, I’m posting my progress on Instagram. You can follow along here!

1 Comment
Linda Selby
January 13, 2023 at 6:22 amHey Cassandra, I just realized that my birthday is 109th day of the year! Next year I should plan a 100 day project and I won’t have to start on the first day of the year lol. Your design process is inspiring because I usually design in blocks but foundation paper piecing and appliqué give us a lot more leeway with curves and abstract designs. Thanks for your inspiration!