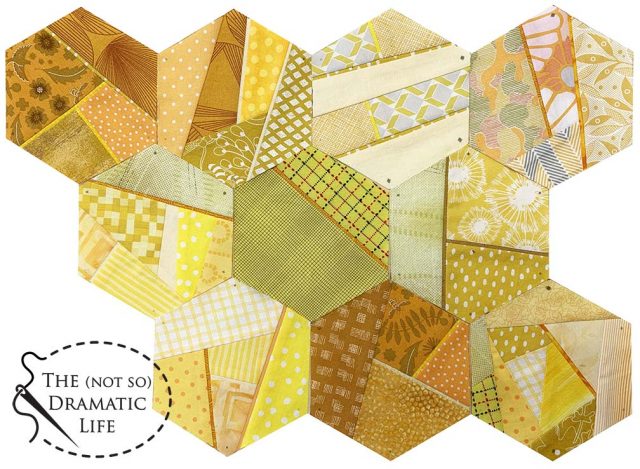
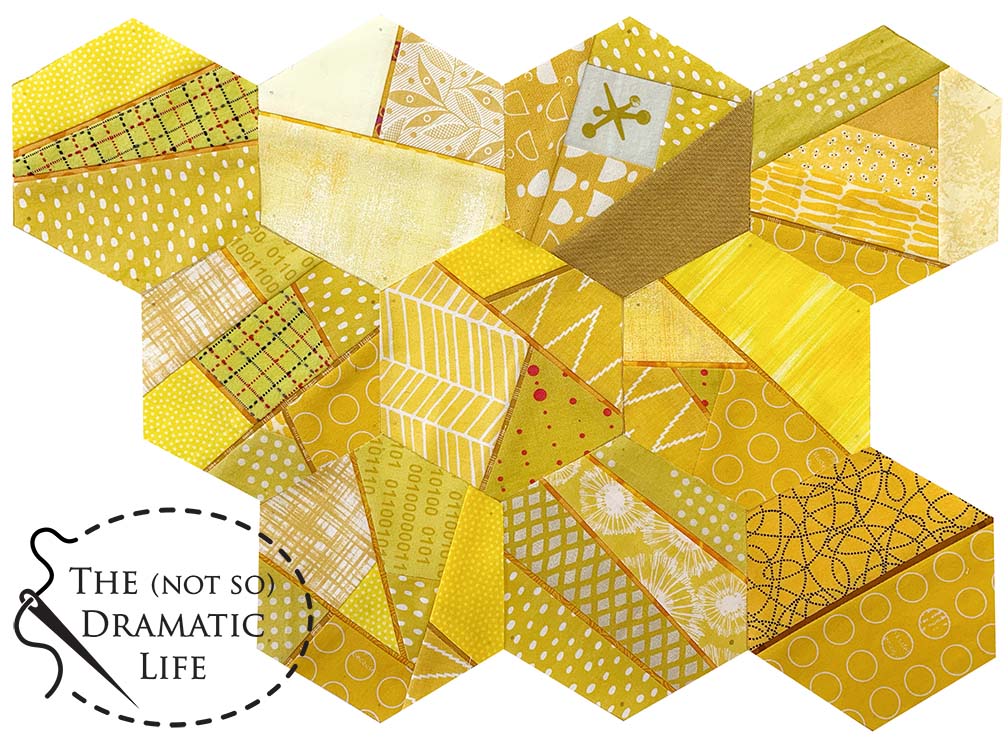
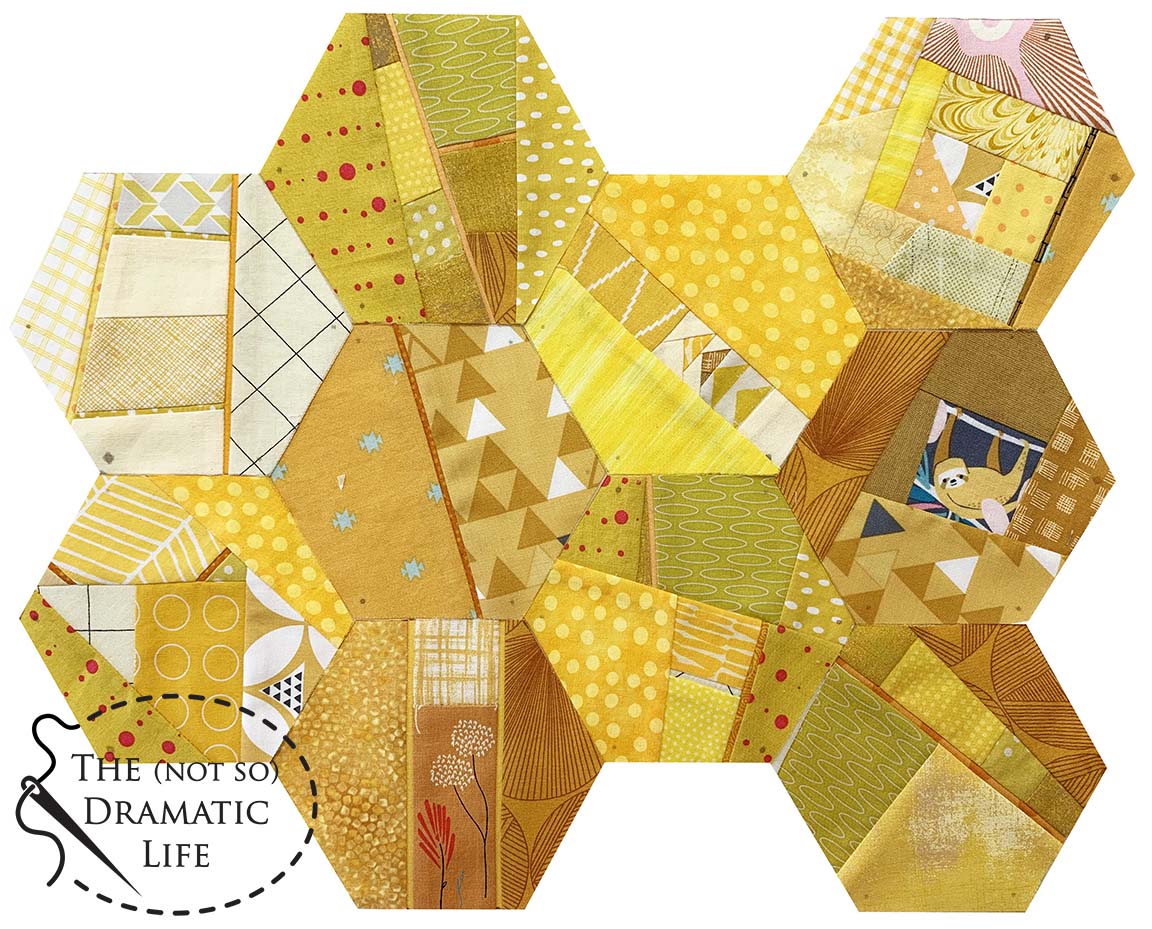
Another ten days have passed, and ten more blocks of my 100 Hexagons are finished! With this batch, I attempted to make a few blocks that are lower contrast and/or incorporate fewer pieces. This will hopefully provide some areas in the finished composition where the eye can rest.
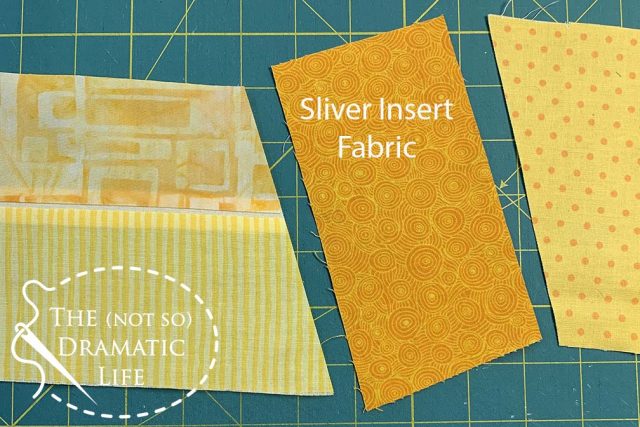
A major design component of these hexagons is the narrow pieced slivers of fabrics. Most of the hexagons in this project have incorporated at least one of these slivers, and many have more than one. The sliver inserts finish at 1/8″ wide, and I thought that today I would show you how I add these design features.
To start, I select the fabrics that I will use for this section of blocks. The fabric used for the sliver can start at any width since it gets trimmed away as part of the sewing process, but I like to have it at least 1″ wide.
For the first side of the insert, you stitch a standard 1/4″ seam allowance and press the seam allowance away from the sliver fabric. It is very important to always press the seam allowances away from the sliver fabric so the final piece will lay nicely.
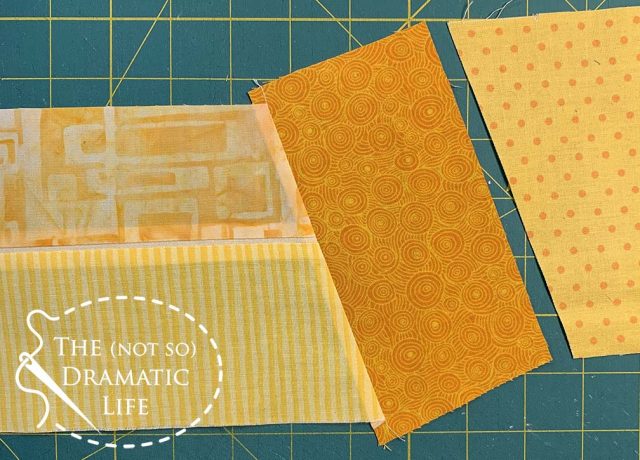
Next it is time to trim away the excess fabric. Measuring from the stitched seam line, you measure and trim at the 3/8″ mark. This gives you 1/4″ seam allowance plus the 1/8″ that be exposed in the finished product.
You may wonder why I recommend the sliver insert be cut no less than one inch when two seam allowances plus 1/8″ adds up to 5/8 inch. Well, my experience has been that, no matter how careful you are, there tends to be some distortion in the sewing process. By leaving some excess fabric to trim in this step, you are more likely to end up with a straight line insert with less distortion.

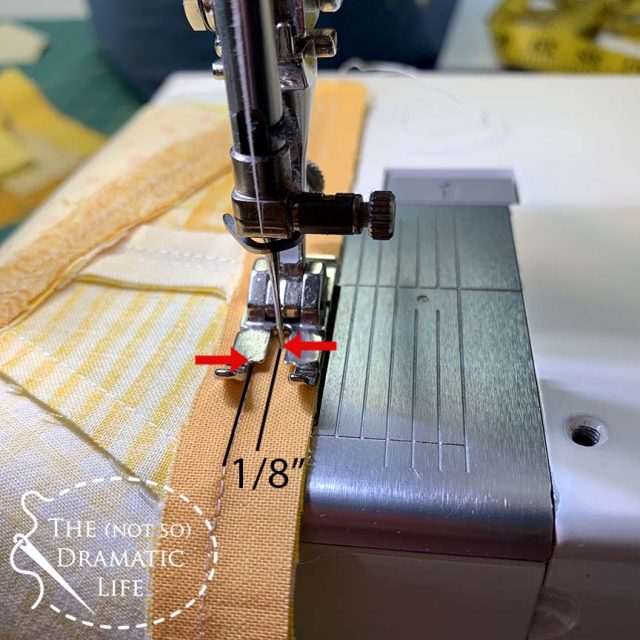
For the second side of the sliver insert, I look at my presser foot to determine where to stitch. On my patchwork foot, there is a spot on the foot that is 1/8″ from the needle. I align this part of the foot with the first stitching line as I sew. Ideally, this also means that the edge of my presser foot is at the edge of the fabric. However, if there is a discrepancy, I always align with the first stitching line. Ultimately, the 1/8″ sliver will show, and the seam allowance will be hidden, so that exposed section is the most important.
After the second seam is stitched, press the seam allowance away from the sliver insert. Using a wool pressing mat will also help prevent distortions in the final line.
Here is the back view of the block. You can see three slivers have been incorporated in the design.
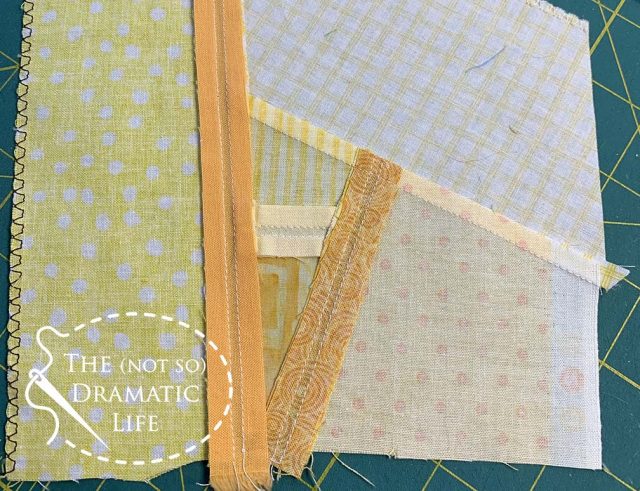
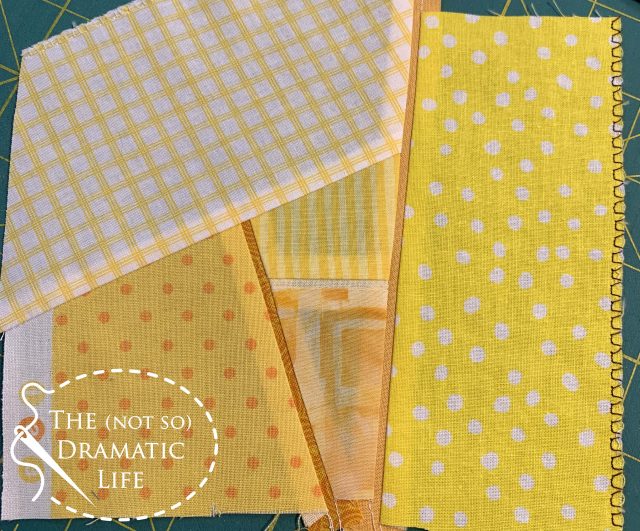
And here is the front view of the same pieced segment. High contrast slivers keep your eye moving around the design, while low contrast slivers add detail for close up viewing.
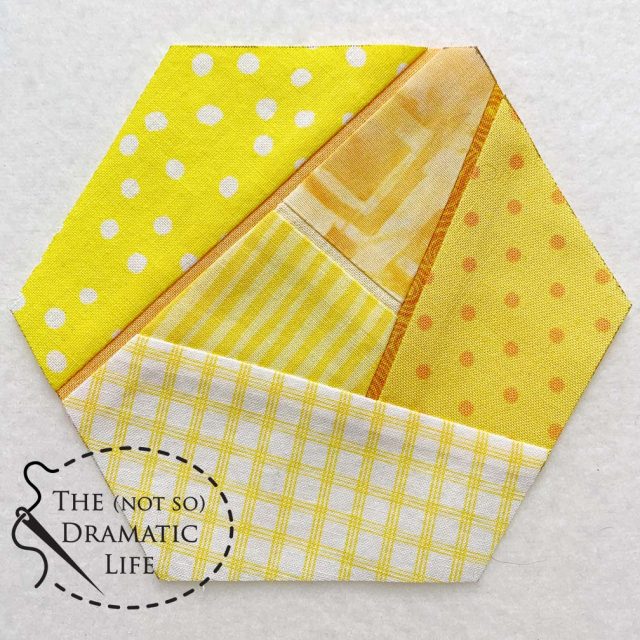
Here is the final hexagon made from this pieced segment. You can check out my post on blocks 21-30 to find out more about the process I use for improv piecing the overall design.
If you want to try adding slivers to a project, here are a few tips:
- Start with some short lines. Longer lines are more prone to distortion, so it is best to learn on shorter lines.
- Leave ample fabric in all components, especially the sliver section
- Use a good quality thin thread for piecing. 50 weight Aurifil is my go-to piecing thread.
- Slivers work great in places you want to make a seam into a design feature!
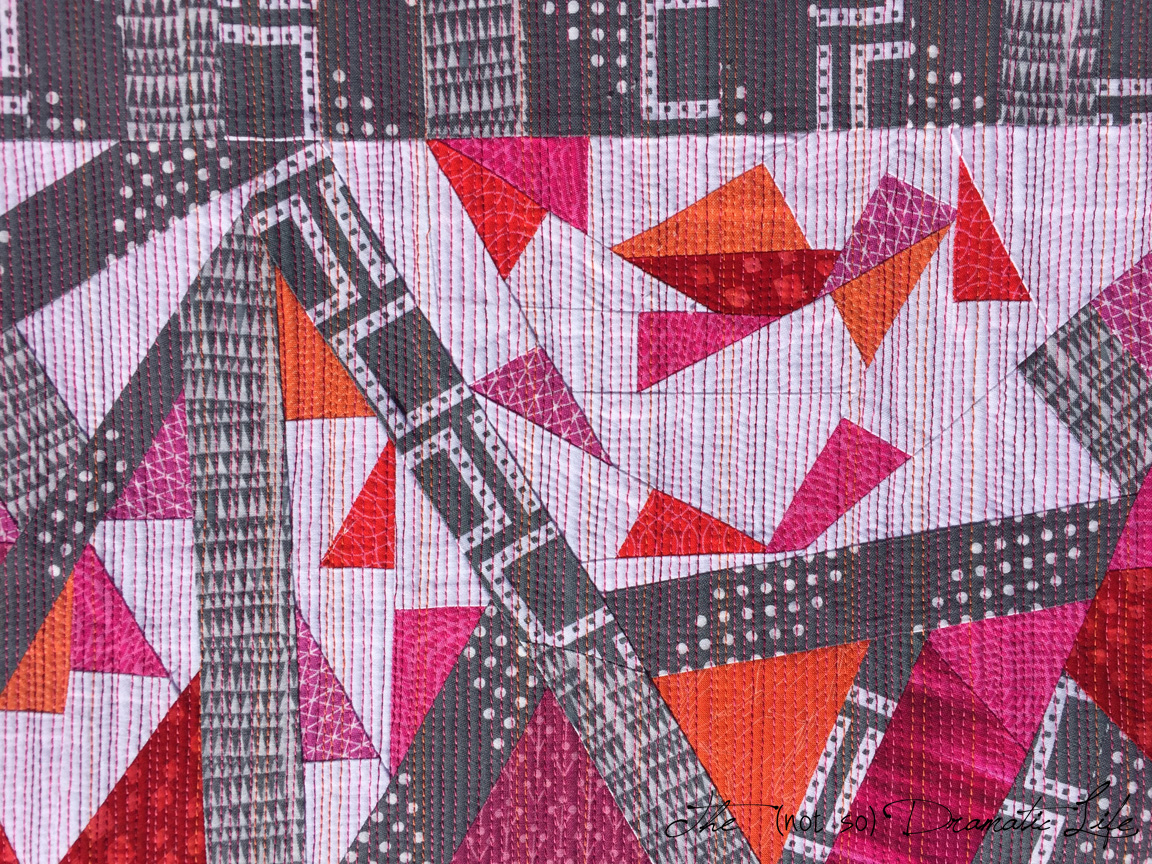
It is exciting to see all of the blocks interacting with one another, so here are hexagons 1-40!

I hope you’ll follow along with me as I construct these 100 blocks in 100 days! Here are the previous posts and some of what’s coming up:
- Fabric Choices
- Initial design process
- Improv piecing
- Fussy cutting
- Foundation paper piecing hexagons
- Using the elements of design in a monochrome palette
- Maintaining Consistency

5 Comments
Debbie
May 18, 2020 at 12:36 amYour hexies look SO good together! Thanks for sharing your tips on the inserts.
Ann
May 26, 2020 at 2:20 pmBeautiful
100 Days of Hexagons: Blocks 11-20 and the Initial Design Process | The (not so) Dramatic Life
May 28, 2020 at 12:20 am[…] Adding 1/8″ wide slivers to the design […]
Chantal Thibodeau
May 28, 2020 at 8:31 amLove your project. And that insert is a really good idea.
100 Days of Hexagons: Blocks 1-10 and Fabric Choices – The (not so) Dramatic Life
June 1, 2021 at 12:23 pm[…] Adding 1/8″ wide slivers to the design […]