When I design a quilt pattern, I design the quilt, create the diagrams, and write the pattern before I cut or stitch anything, but this isn’t how I work when I’m not writing patterns for other people to follow.
Recently, I contributed a block to the Exquisite Quilt Project run by Abby Vargas. For each quilt, Abby challenges collaborators to work with a specific color palette and create blocks that will connect together to form the overall composition. She collects 1-2 blocks from each participant and works some magic to create some stunning quilts.
This is the fifth quilt in the series, and the third quilt I have contributed to. You can see a couple of my previous blocks here.
What were the project parameters?
- Contribute one block measuring at 9″ x 9″ finished (9-1/2″ x 9-1/2″ unfinished)
- Use black and white solid fabrics to create the block along with one bright, medium value fabric as the connector.
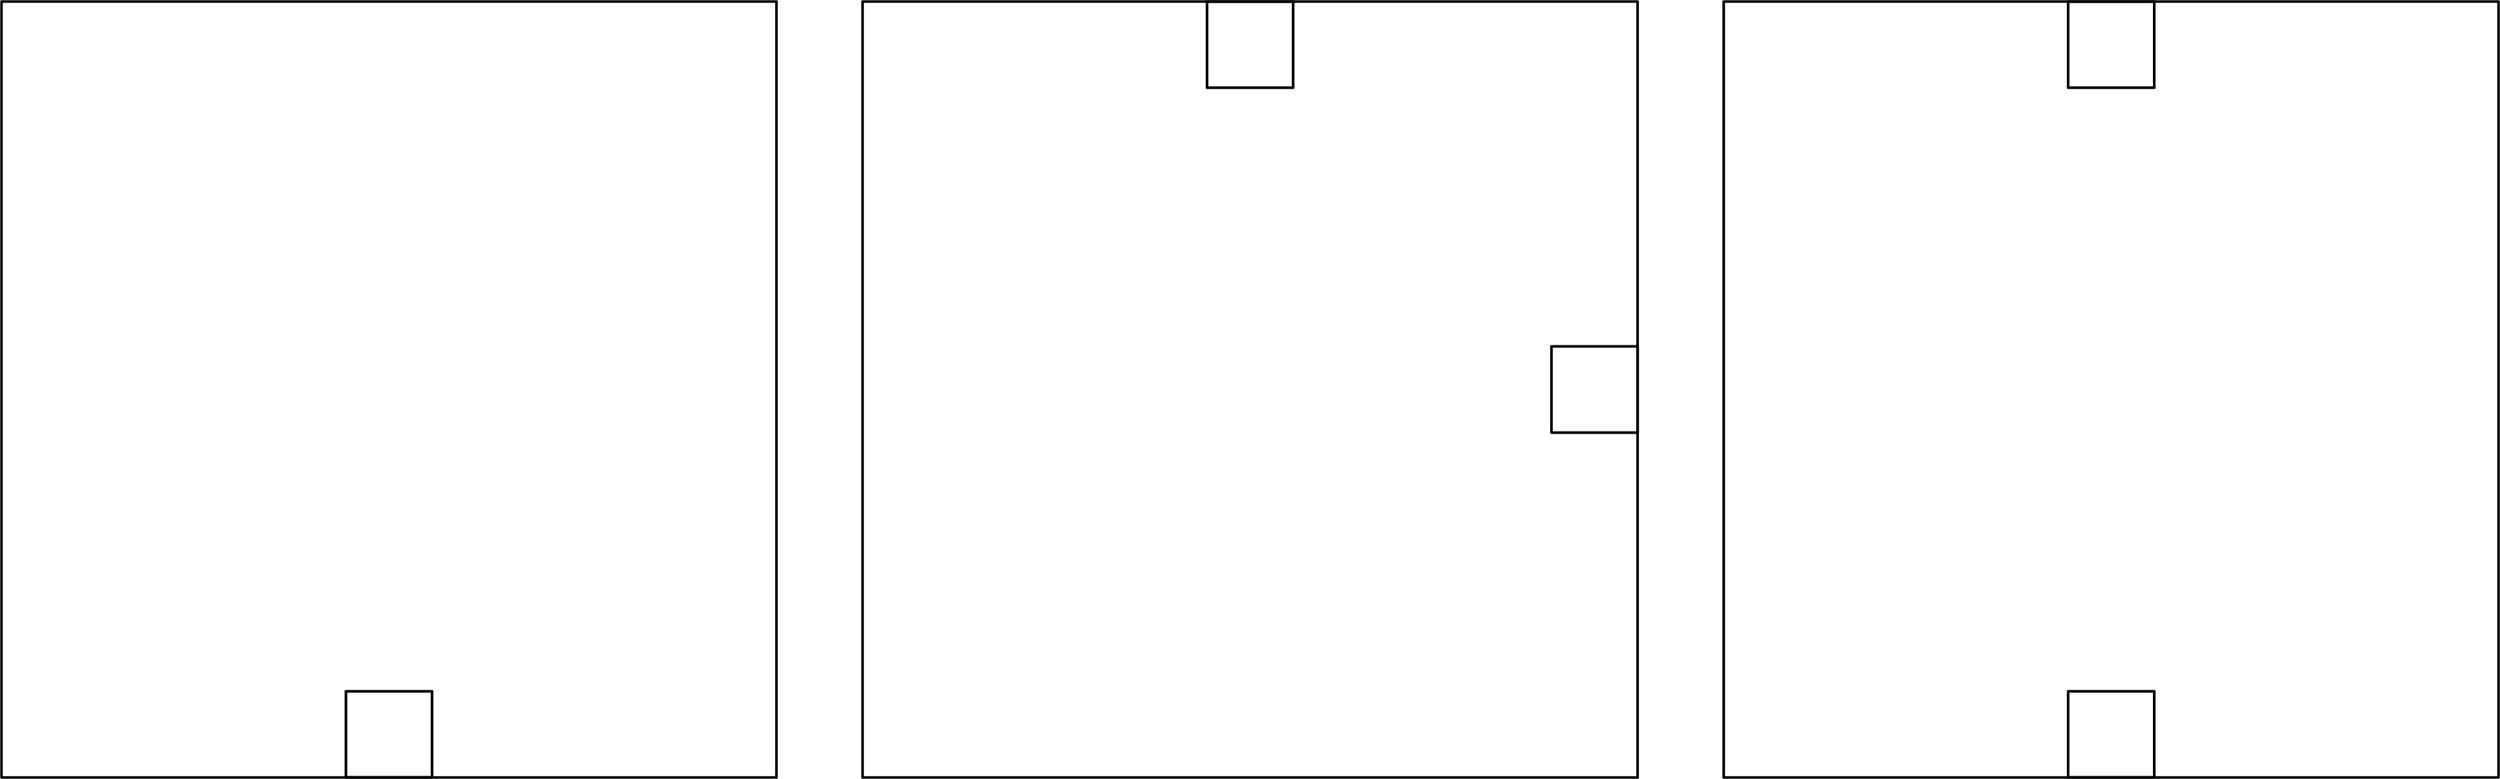
- Place one-inch square “connector” pieces on 1-2 sides of the block in the center of each applicable side. Using the connector fabric, join the connector points in some way in the block.
- You can use any technique to create the block
My Design Process
About three quarters of my designs start on the computer. Some of those go from start to finish digitally and others get a quick outline configuration and the details are worked out on the design wall. This type of project falls somewhere in-between.
Creating a Line Drawing
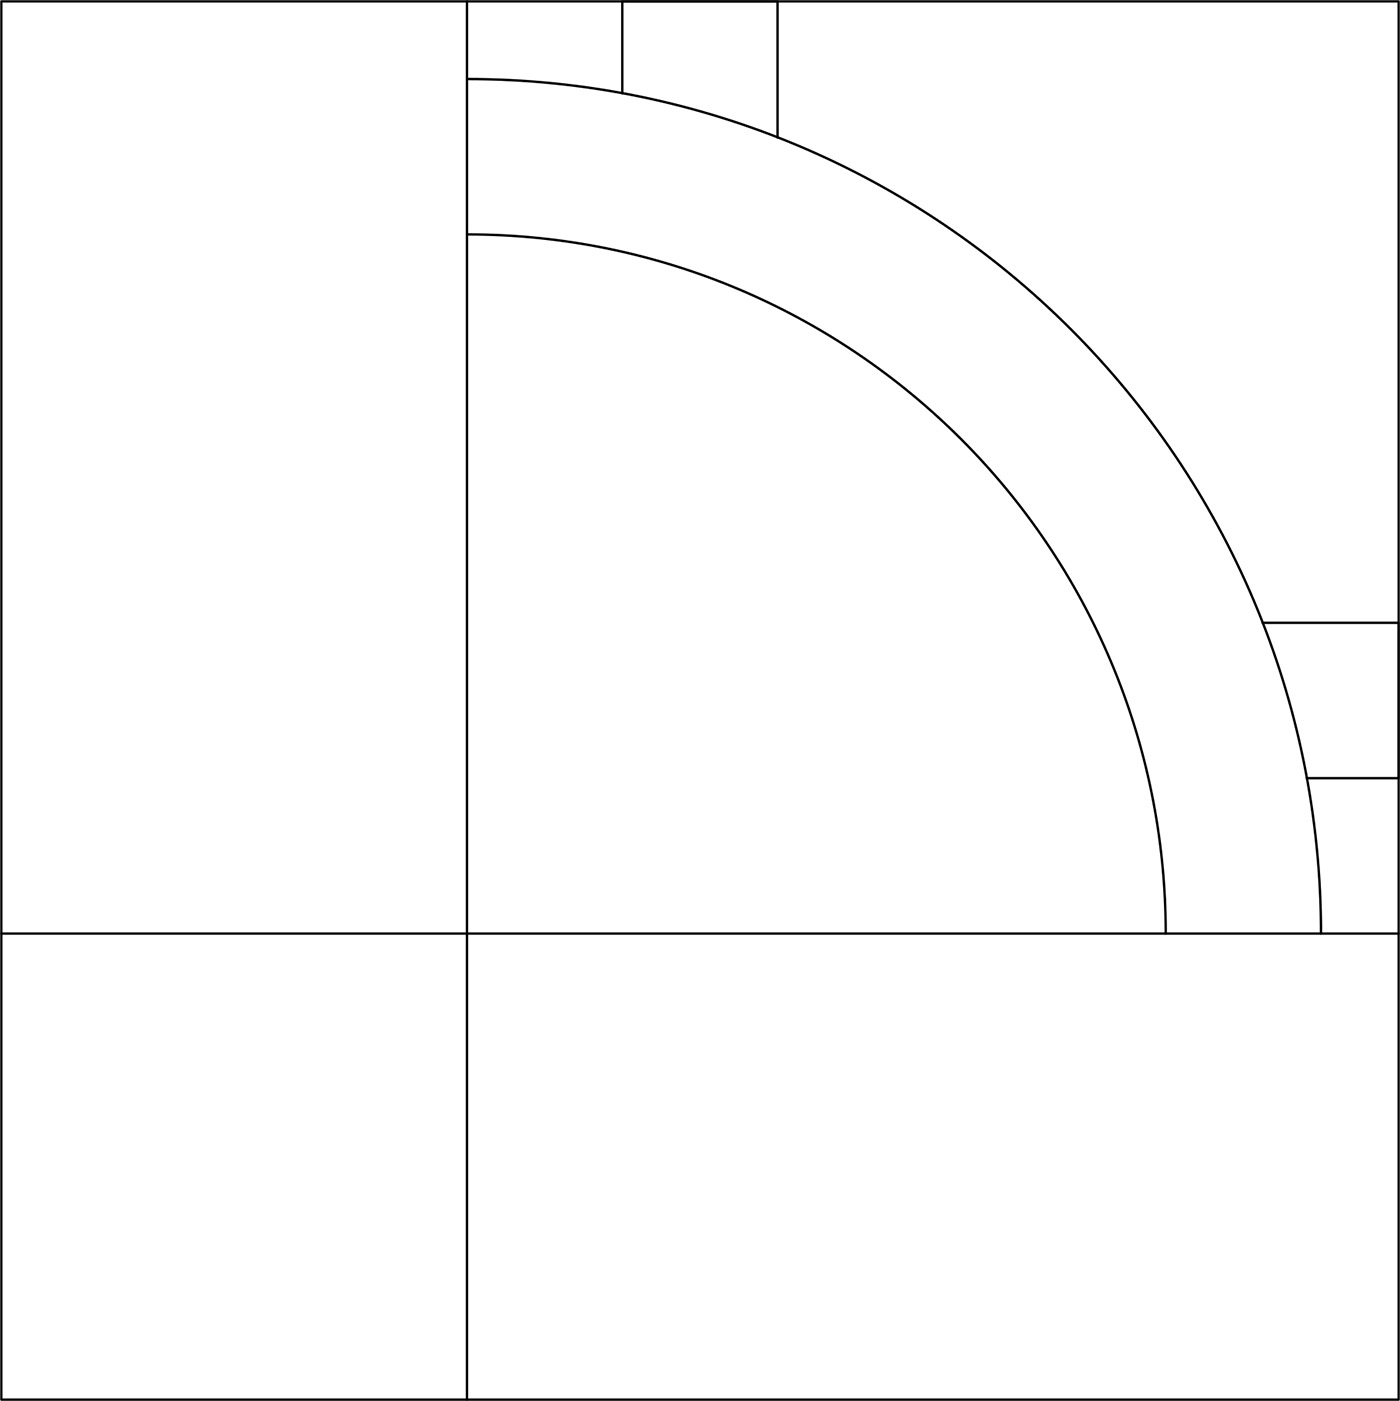
Knowing that I need to hit specific connection points on the block means that, for me, drafting the block on AutoCad was the best way to start. With the connector points in place, I create an outline drawing of what I’m thinking about for the block design.
Color Placement and Design Adjustments
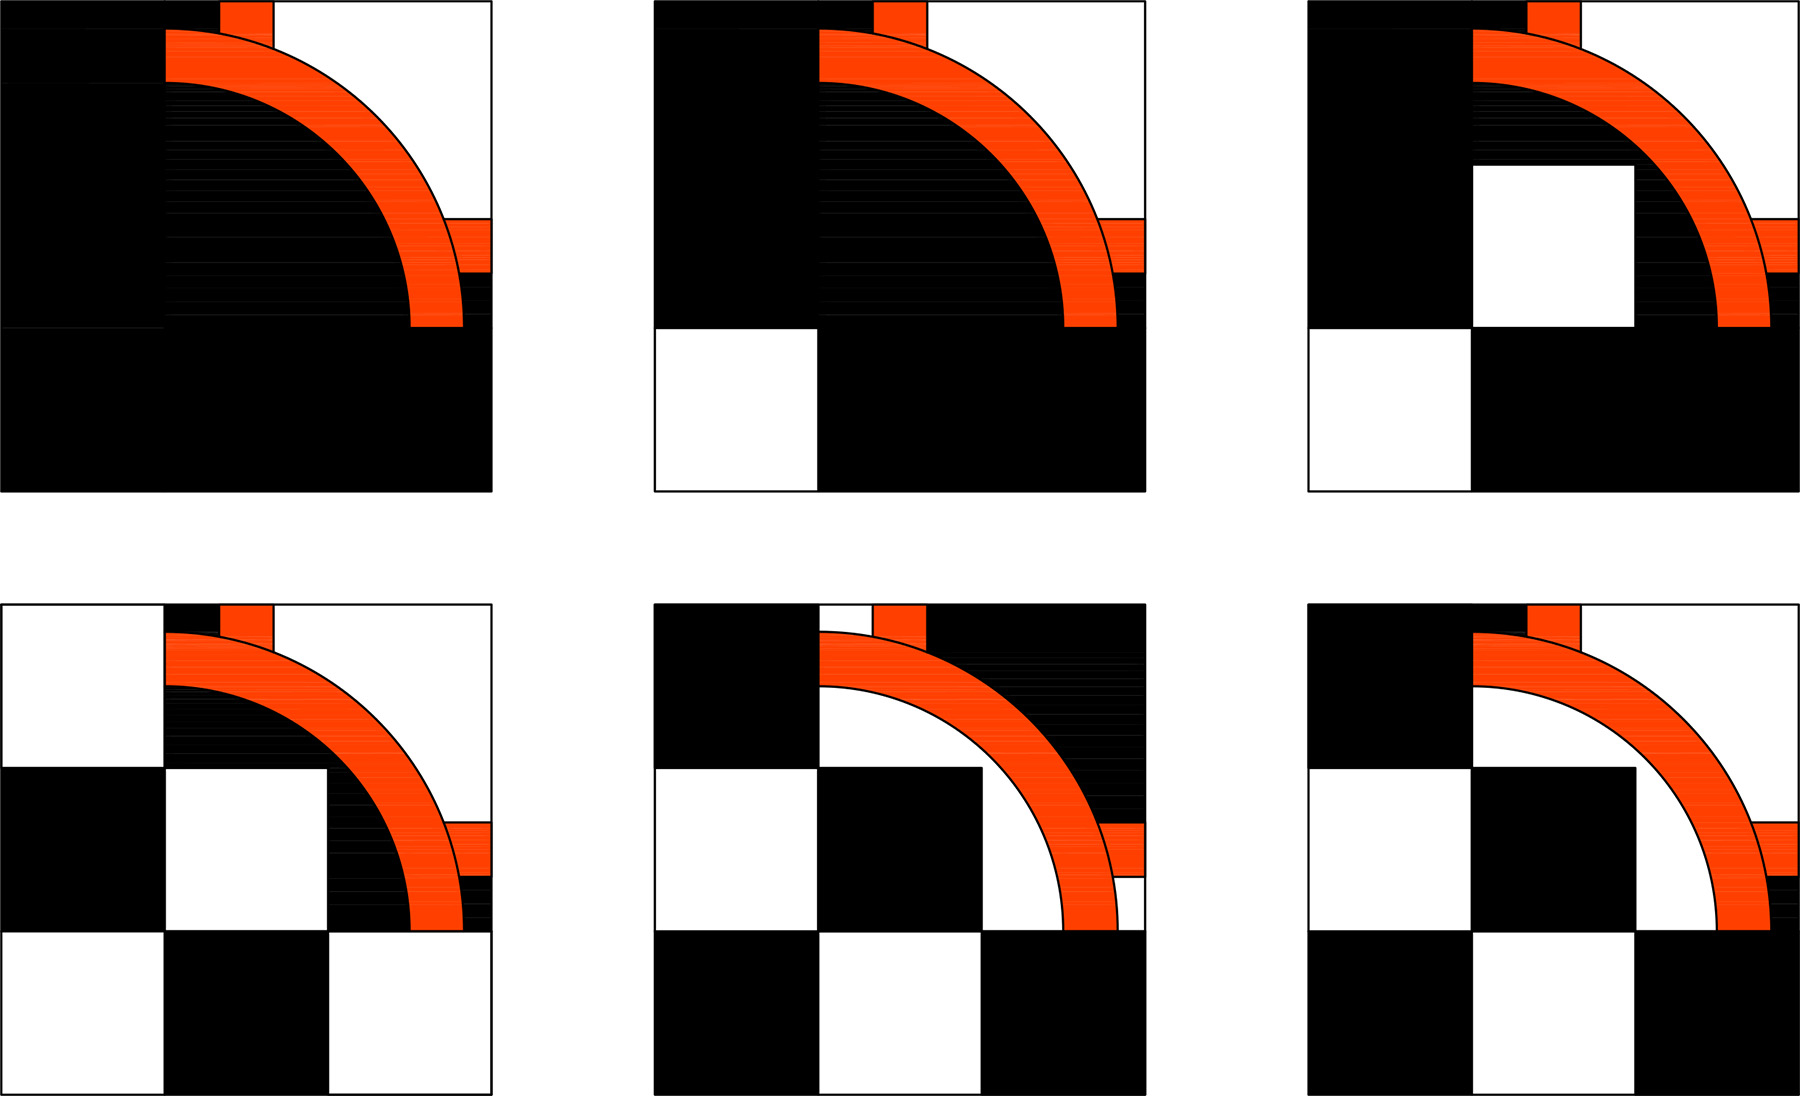
The best part of designing digitally is the ability to quickly make color changes. I knew the connector fabric positions in this block, but there were lots of options for the placement of the black and white fabrics.
- The block in the top center was where I started, but the white fabrics felt like they didn’t hold up the visual space well.
- In the top left block, the black and white fabrics felt visually stronger, but I thought the field of solid black on three-quarters of the block may limit placement options in the final quilt design.
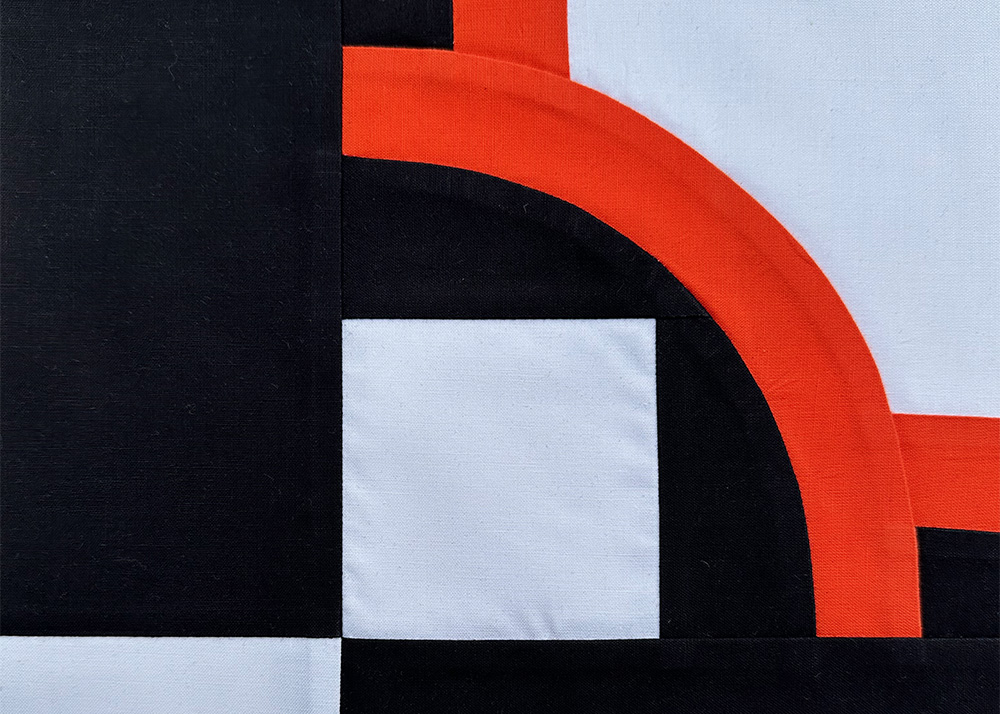
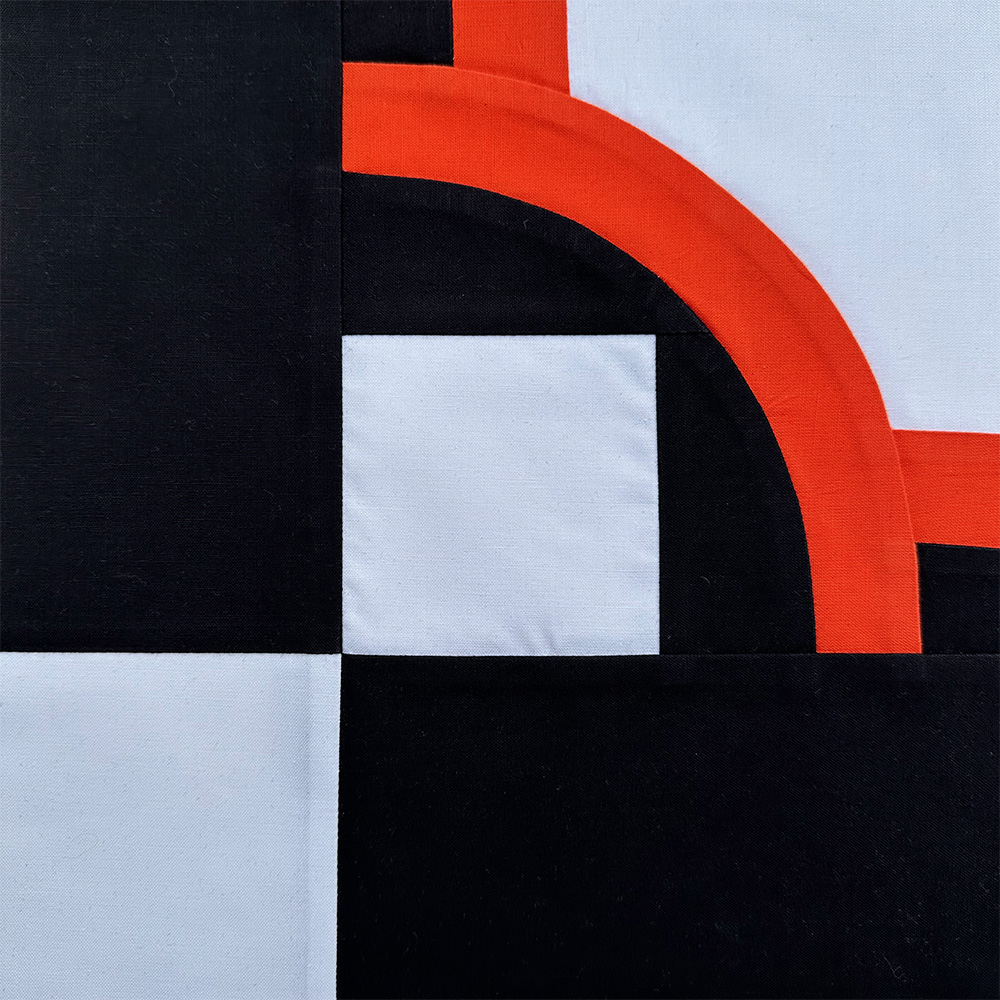
- The top right block (which was the ultimate choice) creates an effect where the white squares appear to push the connector fabric curve inward.
- The blocks in the bottom row pushed the design into more energetic configurations by balancing the amounts of each background color. I liked these blocks, but they did pull some of the emphasis from the connector fabric (which may or may not have been a good thing!)
Once I landed on the top right block design, I was ready to construct the block.
Constructing the Block
If I’m writing a pattern for someone else to make, I create lots of diagrams, but if I’m the only person constructing the design, I often just take a screenshot of the completed block with the final measurements. Because the measurements are for the finished block, I have to remember to add 1/2″ to all of the pieces to account for the seam allowance.
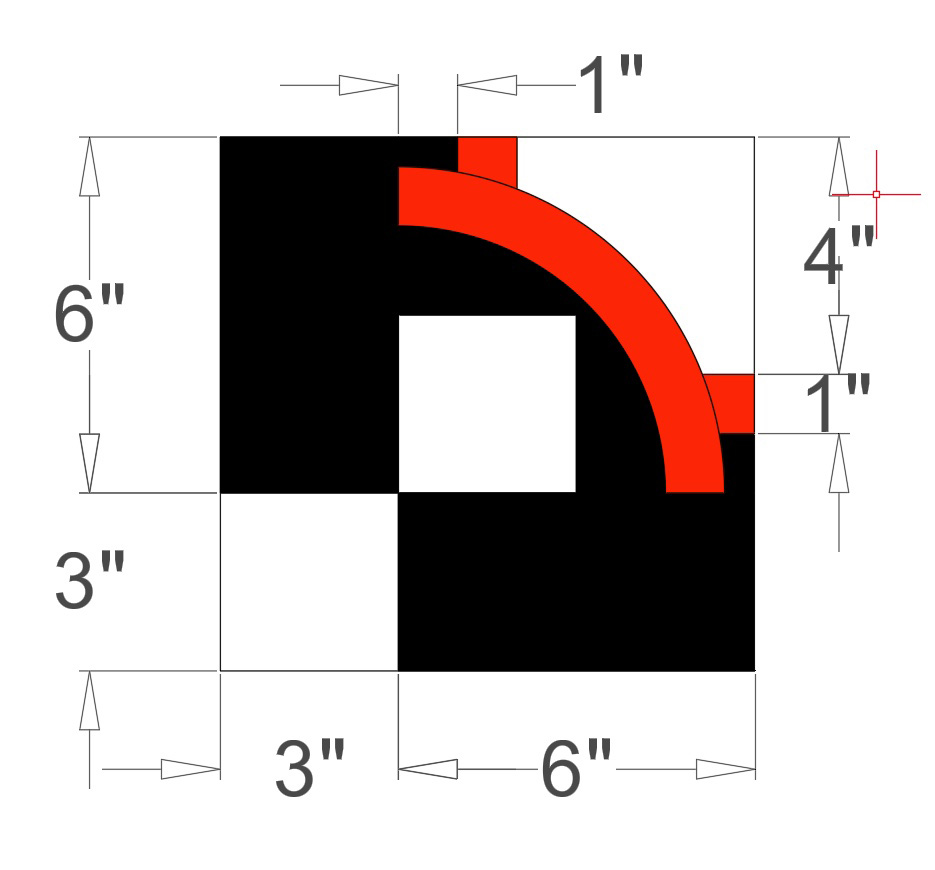
For this block the left and bottom sides were simple with two black rectangles and a white square. For the upper right corner, I created two squares. The first was similar to a quarter-log cabin block with a white square surrounded on two sides by strips of connector and black fabric. The second was a white square in the bottom left corner surrounded by black fabric. I then used the Classic Curves Ruler to insert the curved connector fabric.
Watch the Quilt Come Together
This block is joining it’s exquisite friends to become part of the whole project. If you would like to see other blocks created for this (and other) Exquisite Quilts, make sure you follow along on @exquisitequilt on Instagram.
No Comments