Fabric modification is a fun way to add a personal touch to a sewing project. Over the years, I have dabbled in many different dying techniques to achieve a specific fabric style.
This month, I tried cyanotype printing and am constantly thinking of new ways to manipulate this medium. This project is effortless, and the printing process takes less than half an hour from start to finish.
(This post includes some affiliate links. If you click on an affiliate link and choose to make a purchase, I receive a small percentage of the sale at no cost to you. These funds help keep this blog running and content FREE for everyone!)
Materials:
- Cyanotype fabric: IMPORTANT: Leave the cyanotype fabric sealed in the package until ready to use it! (If you purchase the fabric through this affiliate link, you will receive a 20% discount on orders over $50 for the remainder of March 2024. Use this link for 15% off the rest of the time!)
- Assorted paper cut-outs or small objects with exciting shapes
- Printable clear paper (optional)
- Foam core or other flat pinnable surface to arrange your designs
- Straight pins
- A place outdoors with ample direct sunshine

Creating a Design:
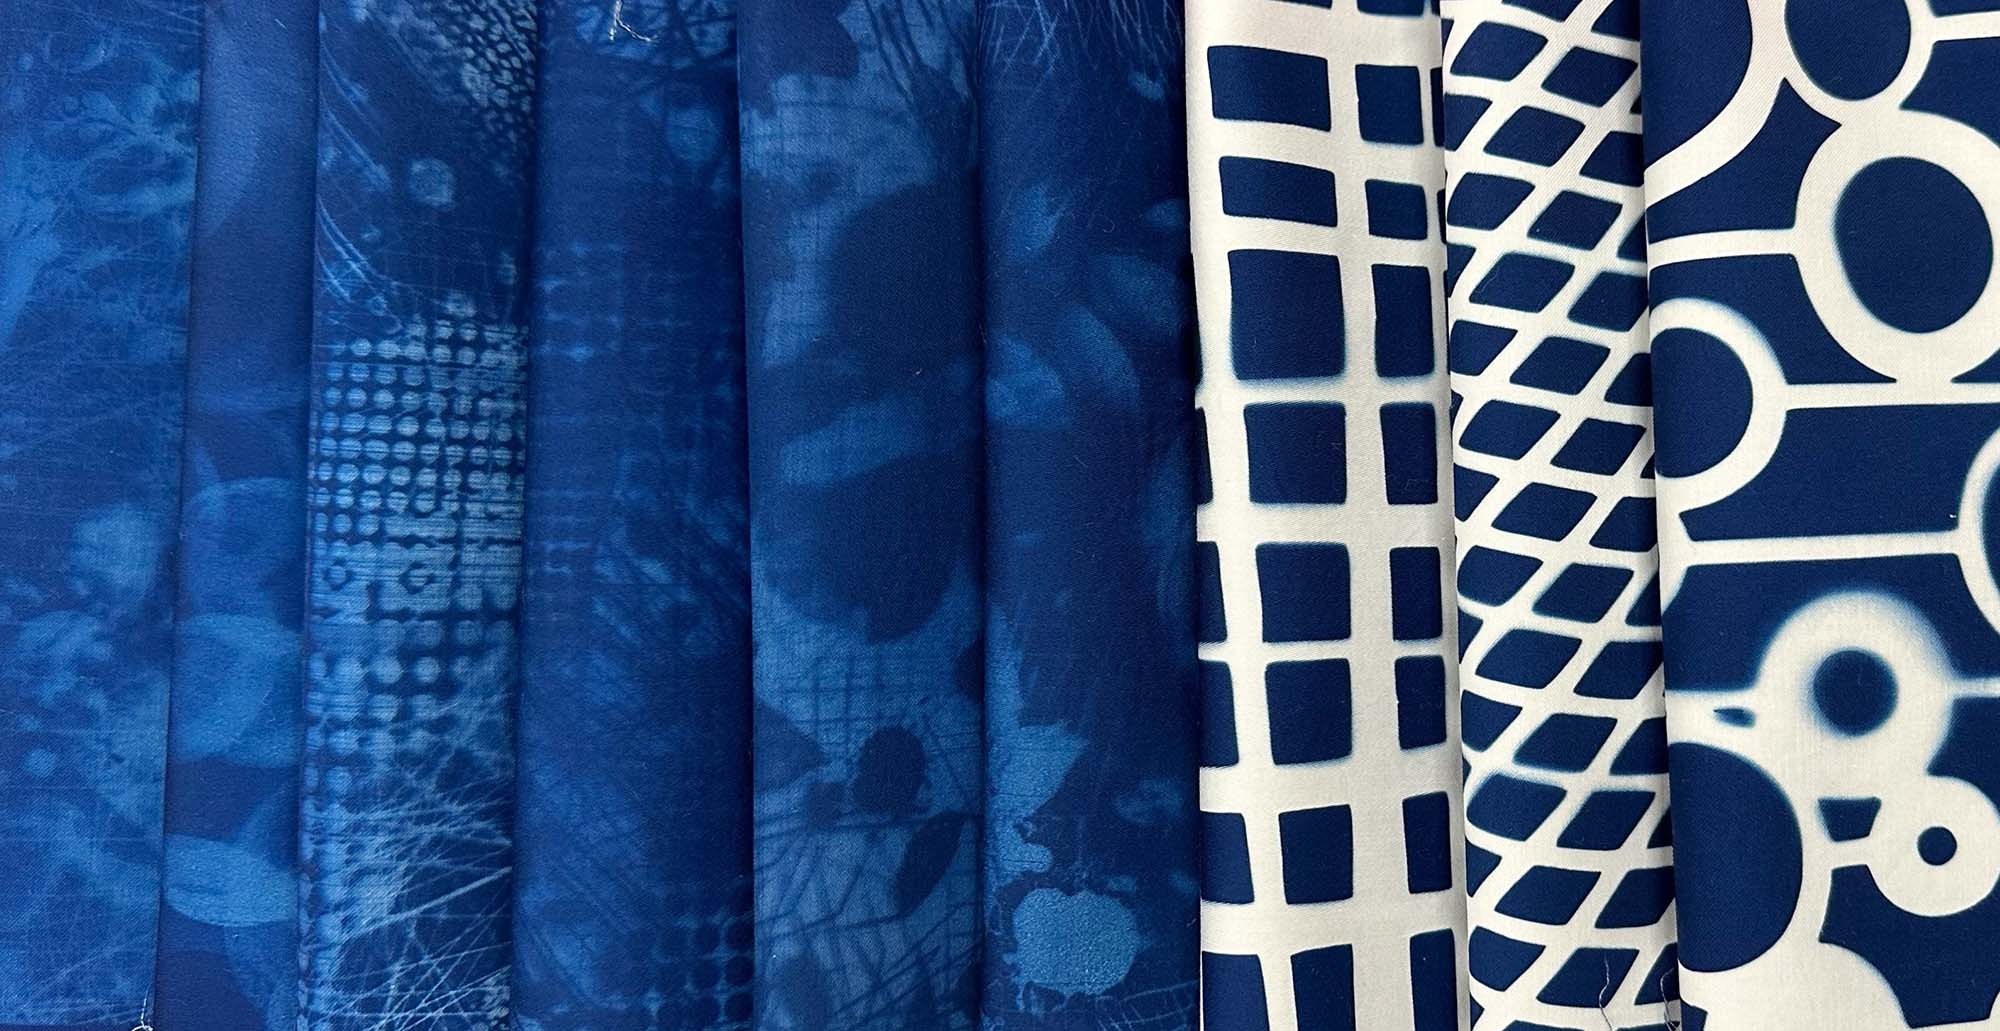
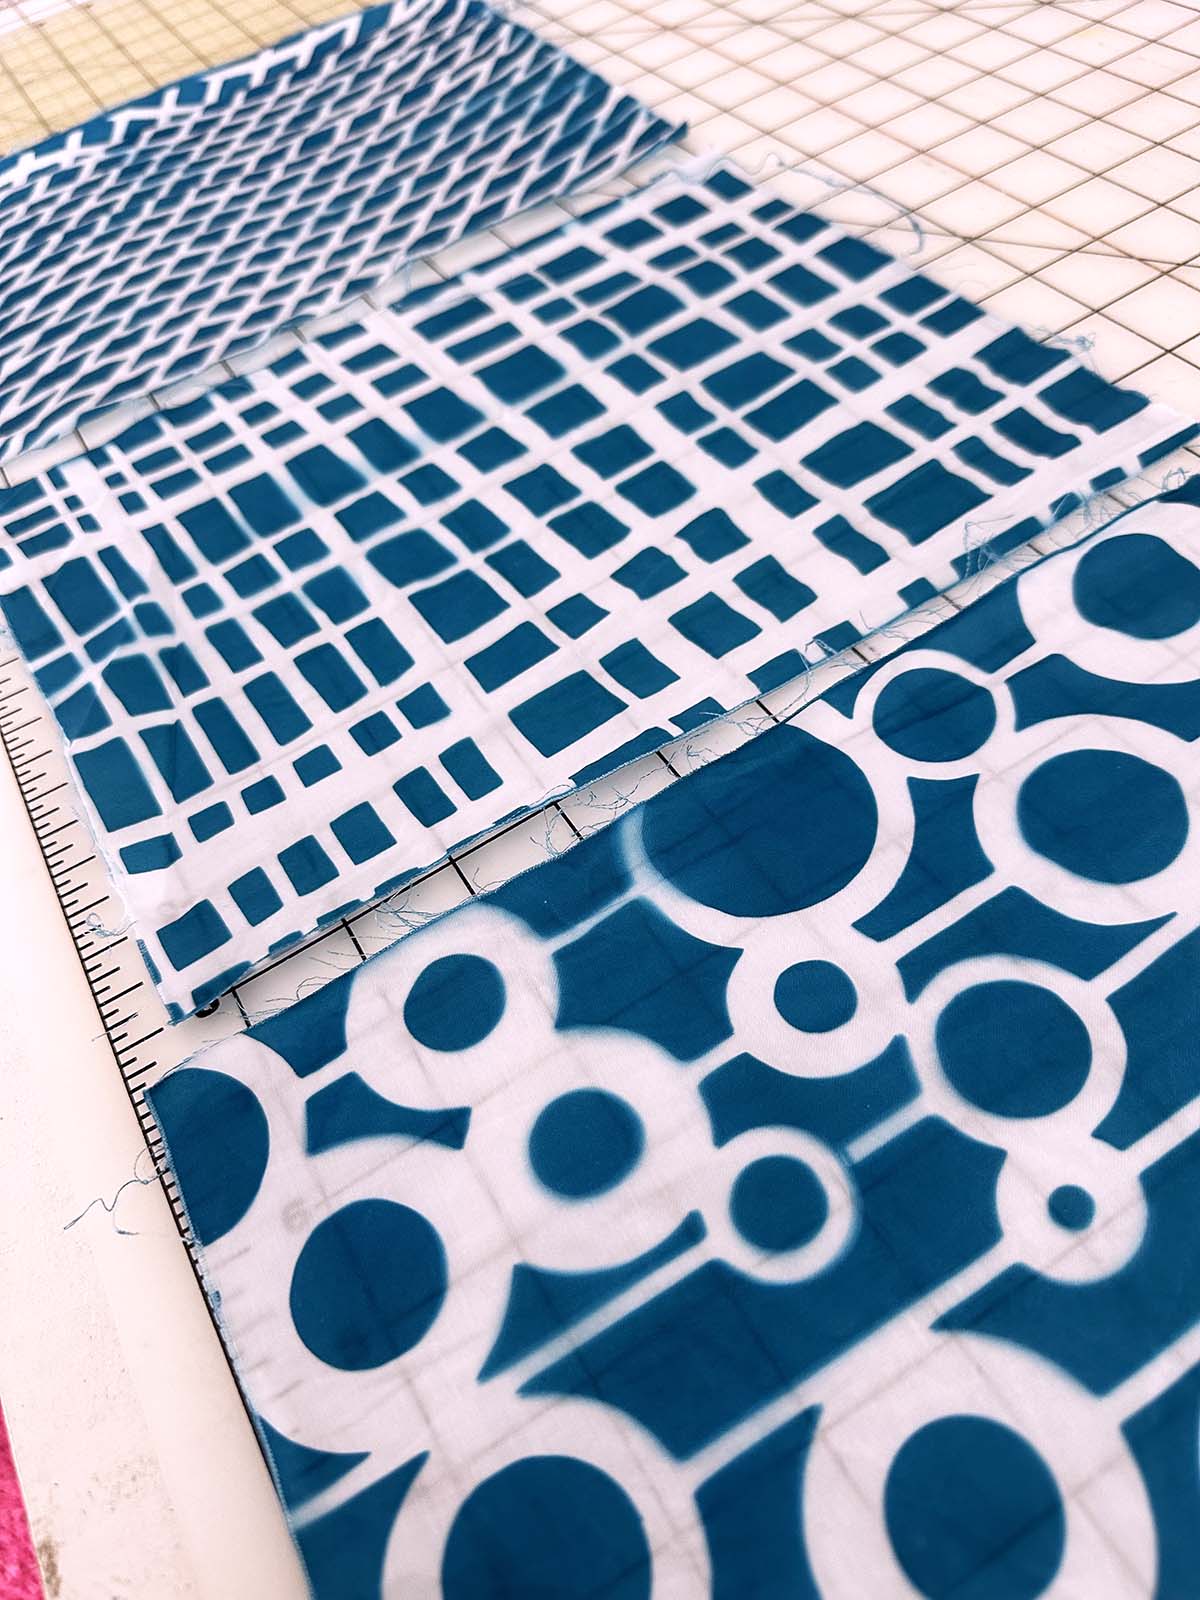
Cyanotype printing works by placing opaque or semi-opaque items over a pre-treated surface to block sunlight from contacting the fabric. Entirely opaque items will result in white fabric sections in the finished print. Uncovered or transparent areas will turn deep blue once the print fully develops. Semi-transparent items will create different shades of blue depending on how opaque the print or item is.
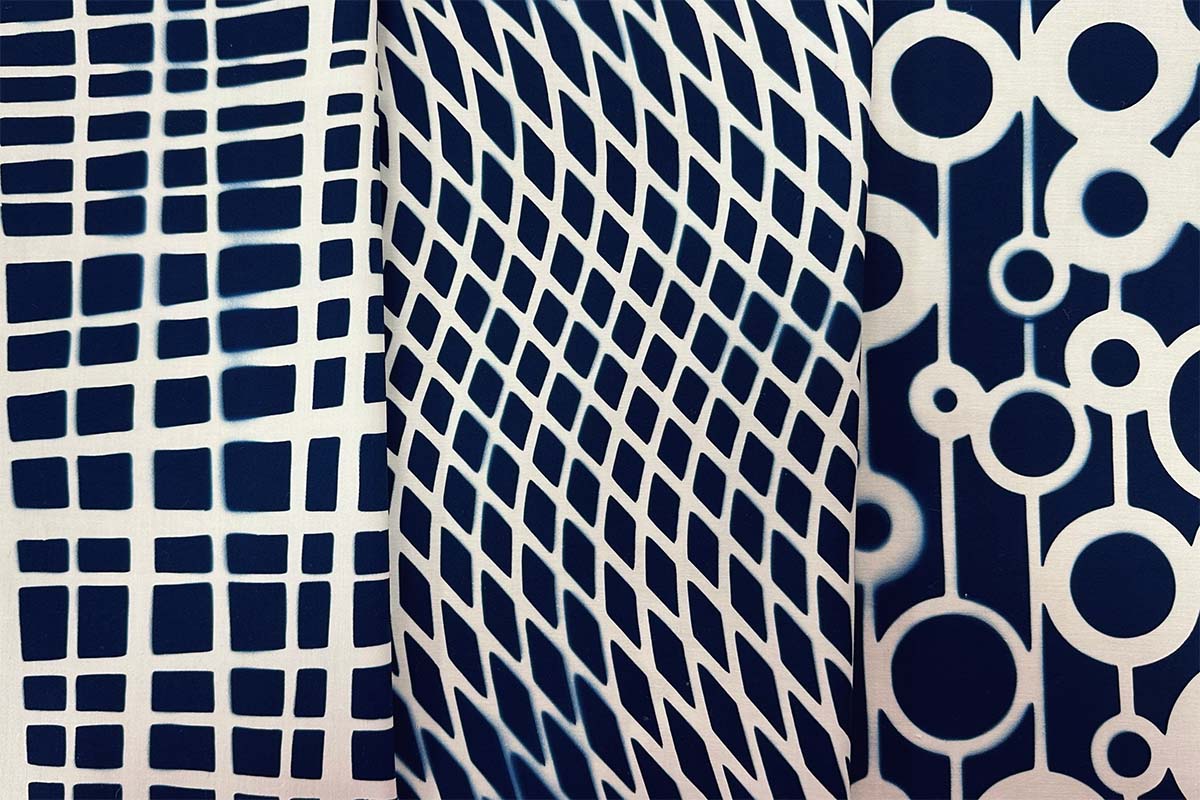
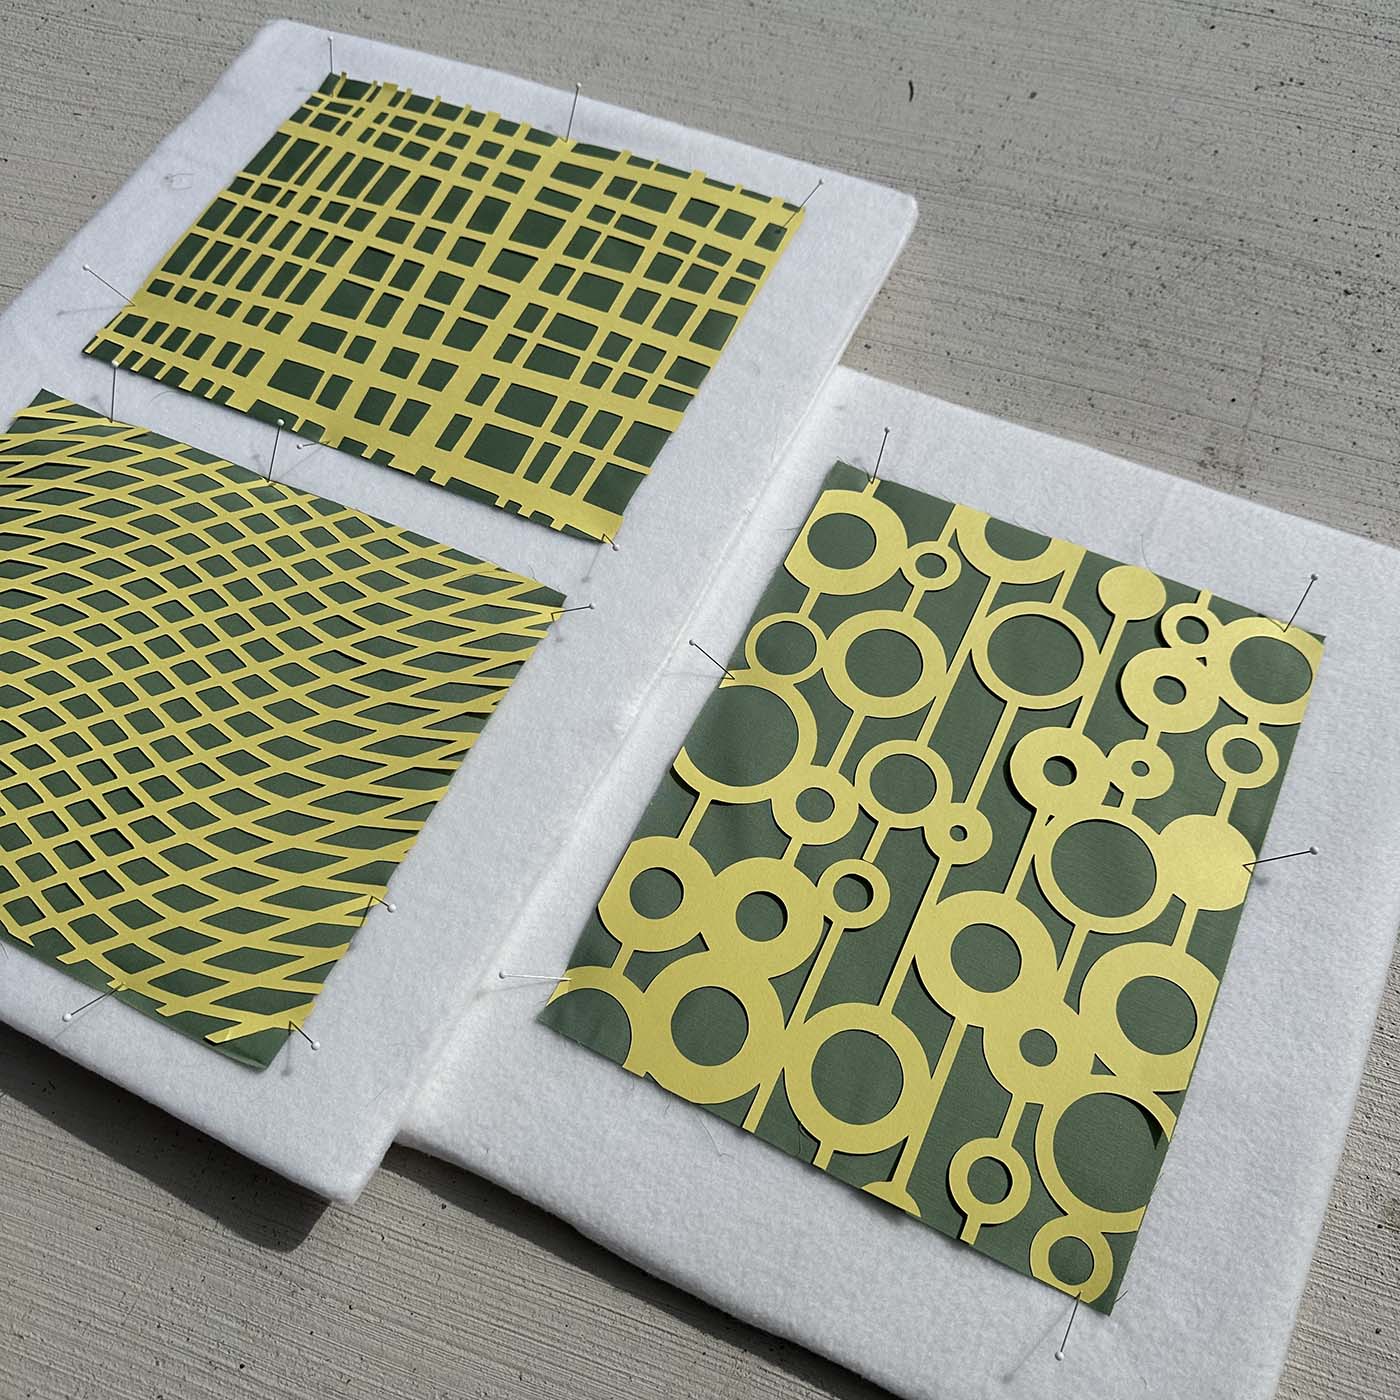
Opaque Cut Designs
I drew designs in AutoCad and cut them using my Cricut Explore Machine for my first set of prints. Two designs focused on line work, and one was primarily circle-based.
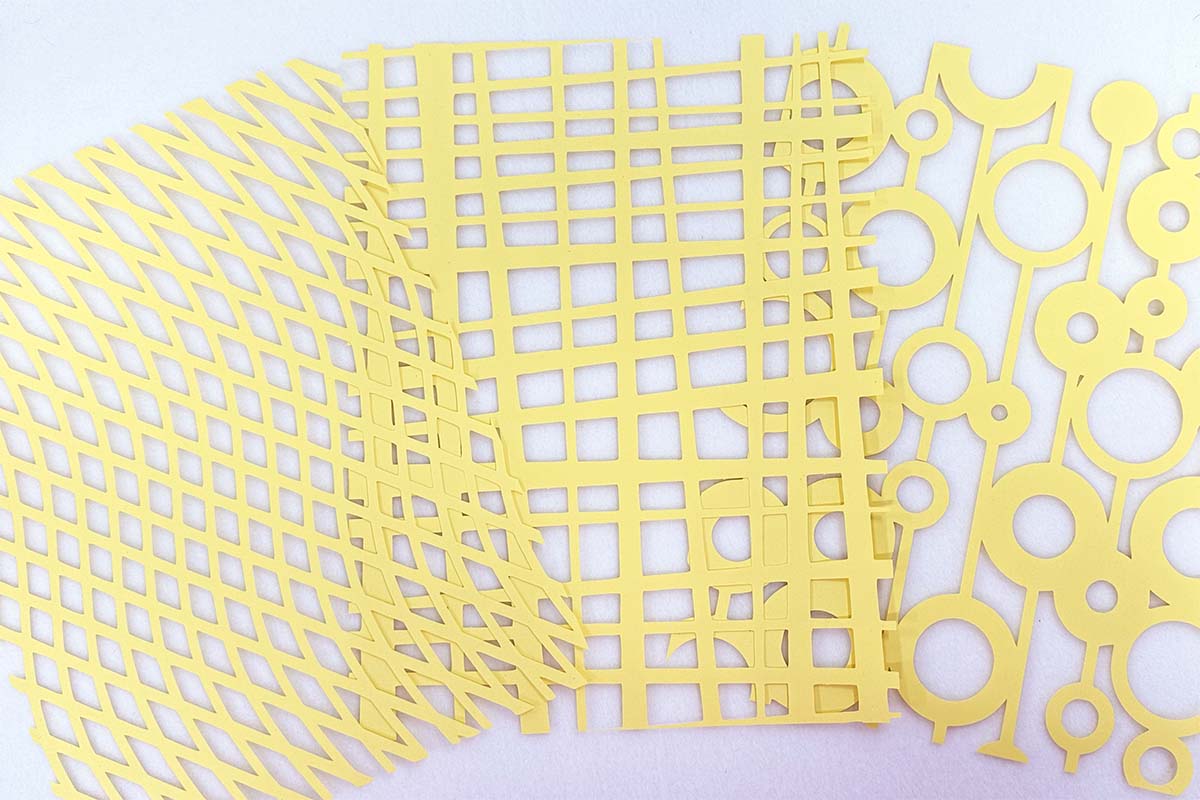
If you would like to cut the irregular grid design (either with a cutting machine or by hand with an X-acto knife), you can download it here:
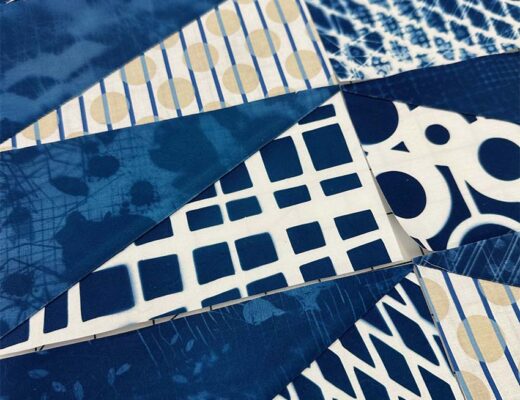
Transparent Designs
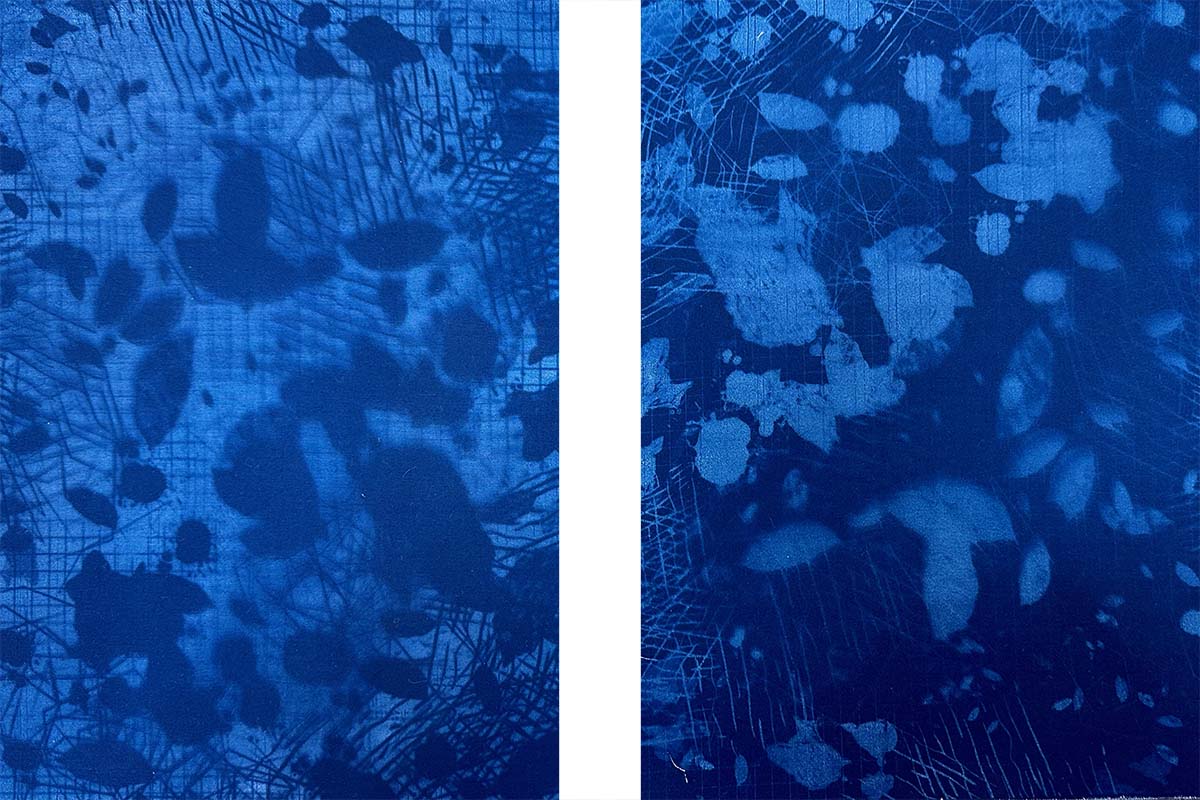
In ProCreate, I developed a few designs using a variety of abstract brushes. I then printed them on clear paper using my inkjet printer. Since the ink isn’t as opaque as the cardstock I used for the cut designs, the printed motifs create a fabric in multiple shades of blue.
You can create a design you like and then create the inverse of the image using a handy online Negative Generator from Jacquard (the company that makes the cyanotype fabric). Initially, people primarily used this tool for realistic images they needed to invert, but I used it to create a positive and negative view of each abstract image I drew.
When to Print
This project requires bright sunshine, so choose a bright, clear day to make your prints. I made these prints in the early afternoon when the springtime sun was near its highest point.
Setting the Mood
Turn down the lights and pull the curtains in the work area where you are setting up your print. You want to control when the fabric develops, and low lighting during the set-up process is critical.
Have a Portable Board to Set Up Your Prints
You will need a portable surface to position your fabric and design objects, making it easy to move into the sunshine when ready. I have a few portable design boards with 1/4″ thick foam core covered with a sleeve of white polar fleece. These work well because they are lightweight and portable, and I can pin the fabric and design materials into them to secure them.

Arranging the Materials
Remove one piece of fabric from the package at a time and place it on the moveable board. The fabric is green at this stage. Place the objects, cut-outs, or printed transparency sheets on the fabric, and use straight pins to secure any lightweight items to the board.
Get Some Exposure
Once you like the placement of your designs on the fabric, it’s time to head out into the sunshine. Find a sunny spot and hang out with your print. I live in a windy area, so I just had to ensure the boards didn’t blow away while the sun was doing its thing.
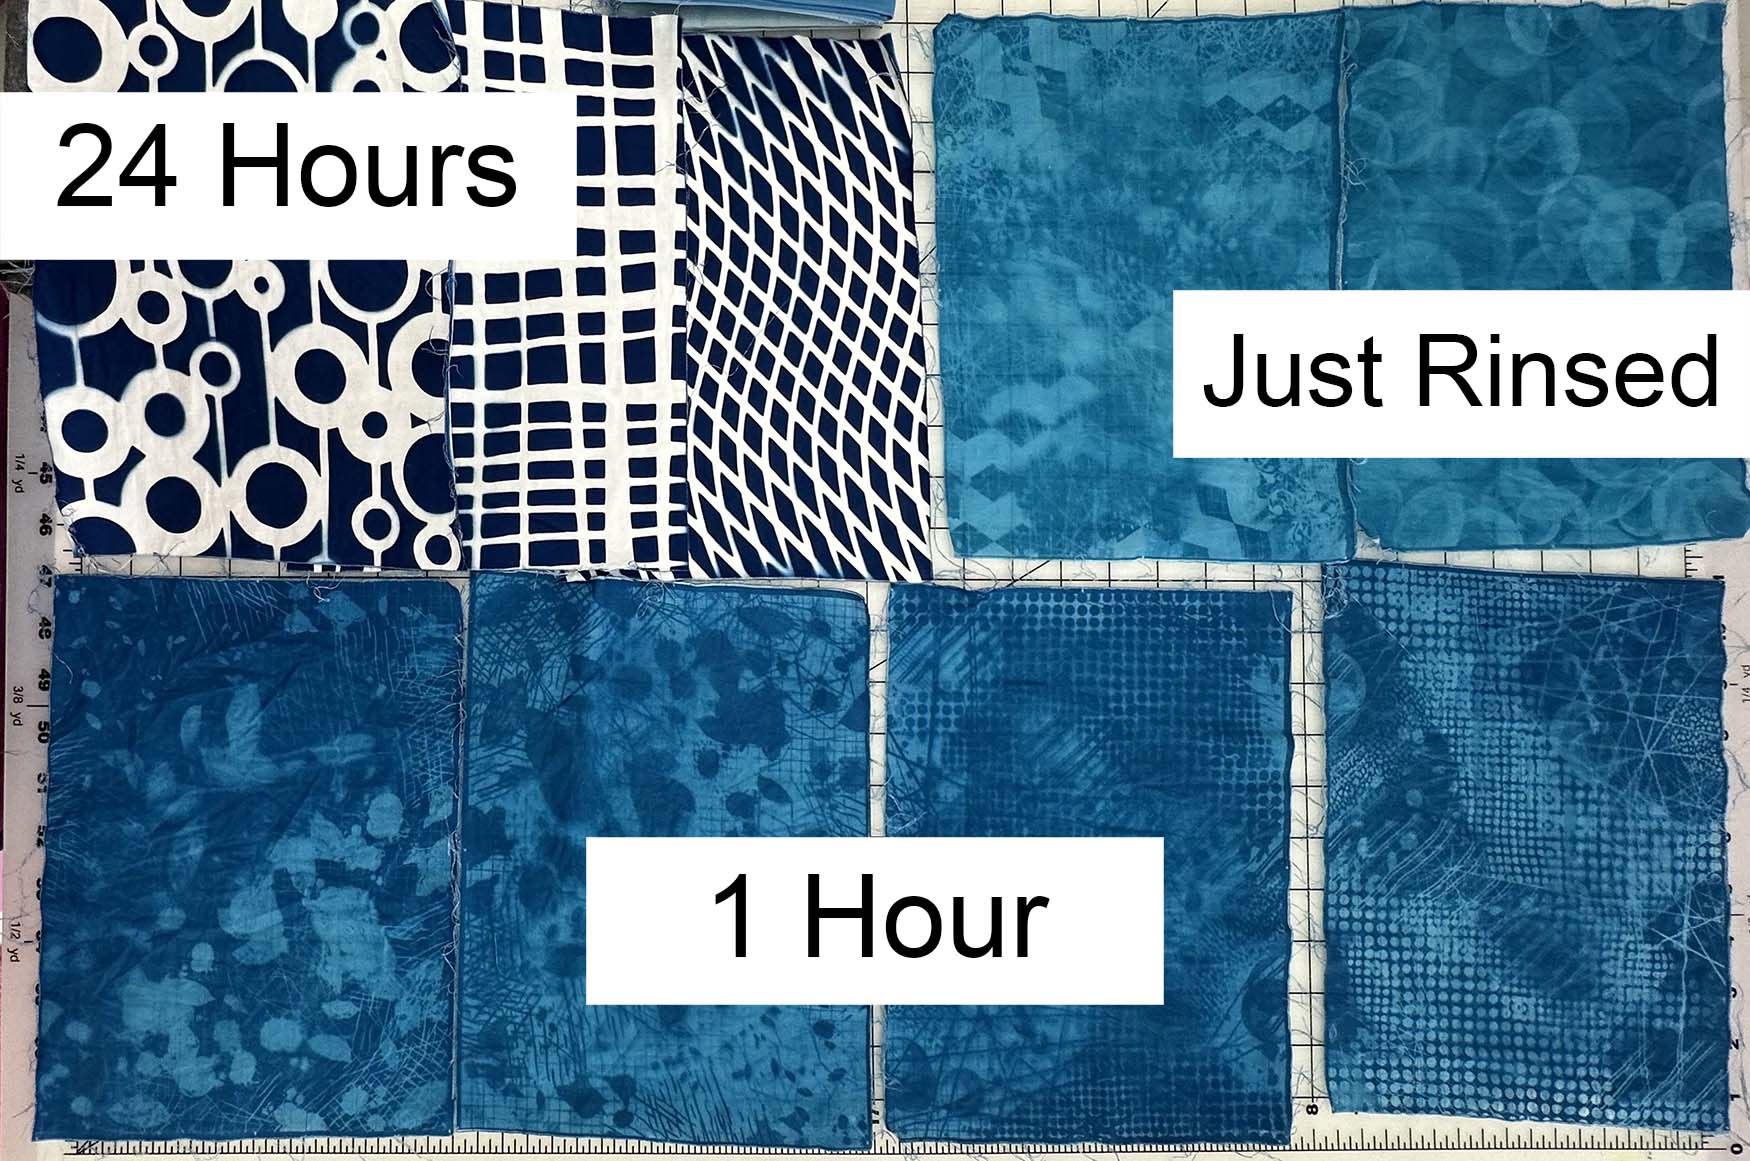
Depending on the time of year, location, and the weather on your particular day, the instructions say your print could take as little as three minutes to develop. I made these prints in Ohio in March, so the sun wasn’t super potent yet, so I let my prints develop for the full 15 minutes.
The color of the exposed fabric changed during the developing process to a green-bronze tone.
I decided to compare what different exposure times would look like on a single piece of fabric. I layered a printed transparency with an opaque cutout template for the example below. I placed the entire piece of cloth in the sun for three minutes. Then, starting on the left-hand side, I covered two inches at a time with a sheet of solid cardstock, moving two inches to the right every three minutes. The right-hand side of the fabric had a total exposure time of 15 minutes.

Rinse
To finish printing, remove the design items and any securing pins from the fabric and rinse the pieces in cool water. Change the water several times during the five-minute rinsing process, and watch the magic happen as your fabric changes to turquoise.
Wait
Use a towel to blot out any excess moisture from your printed fabrics gently and lay them flat to dry. Over the next 24 hours, the prints will darken to a dark blue in the fully exposed areas.
Use your prints
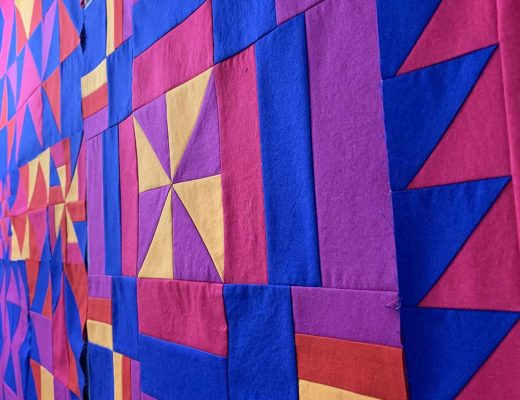
What do you have planned for your custom prints? I have plans to use mine for some half-rectangle triangles, so watch for that project to come up soon!

2 Comments
FranSak
March 29, 2024 at 1:08 pmVery interesting. This looks like fun. I’m not at all into fabric dying but I always thought this was so cool, just never realized how easy it is.
Wendy
April 1, 2024 at 7:55 amI always enjoy your articles so much. They’re so informative and it’s a relief that you’re not always trying to sell something. Thanks for sharing your knowledge and insights with the quiltyverse!