As my nieces and nephews have gotten older, cash or gift cards have become the favored gifts for the holidays because money always fits! I try to get a little creative in the presentation of this not-particularly-original gift, so this year I am making cord pouches that hook onto a keyring. These pouches finish at a little under 4″ from side to side, so they can easily hold a thumb drive, USB cord, some change, or even most phone chargers. Come to think of it, I may need to make a couple for myself!
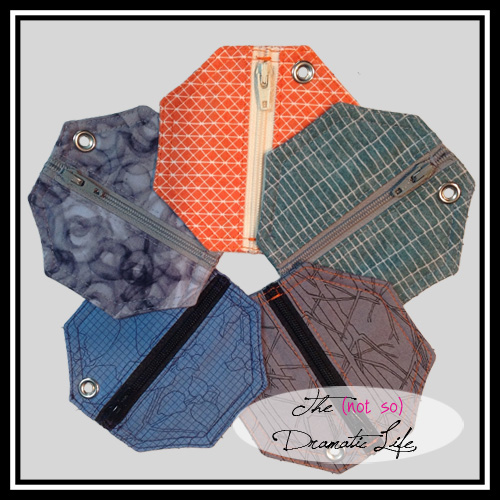
Finished Cord Pouches
I knew that I wanted to put a grommet in each pouch to attach a key ring. (If you don’t have grommets laying about, a ribbon loop inserted into a seam would also do the trick.) I thought that the grommet would look nice in a corner, so I experimented with a couple different shapes before settling on an octagon. This project will work with most shapes, but if you would like to play along using the octagon, I have included a pattern here. This Octagon Pattern is a PDF File you are welcome to download.
I made six pouches, choosing an outer fabric and a lining fabric for each. Orange tends to be pretty popular among my nephews, so I used a lot of it this year! I cut one octagon out of each fabric, but for the front side I cut rectangles to set the zipper into before cutting it into shape. I like to give myself some wiggle room when dealing with zippers, so I cut the rectangles to about 3″x5″. For each pouch you should have 2 outer fabric rectangles, 2 lining fabric rectangles, 1 outer fabric octagon, and 1 lining fabric octagon. You will also need a zipper and either a grommet or a small loop of ribbon.

Pieces cut for cord pouches
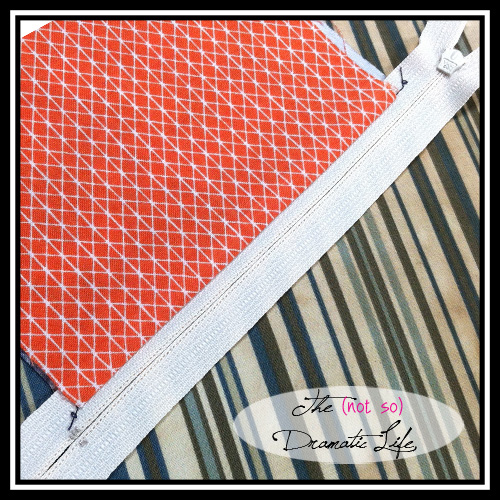
For an exposed zipper I like to sandwich each side of the zipper between the outer and lining fabrics along the long edge of the rectangle. I like to pin the layers in place so nothing moves out of place while I’m stitching. The navy floral fabric will become the outside of this pouch, so it is laying with the right side of the fabric facing the top of the zipper. The right side of the lining fabric faces the back of the zipper. This leaves the wrong side of the fabric exposed on each side of your zipper sandwich. I like my fabric edges to line up with the edge of the zipper. I also place the fabric in the center of the zipper so I can sew it in place without the pull getting in the way.
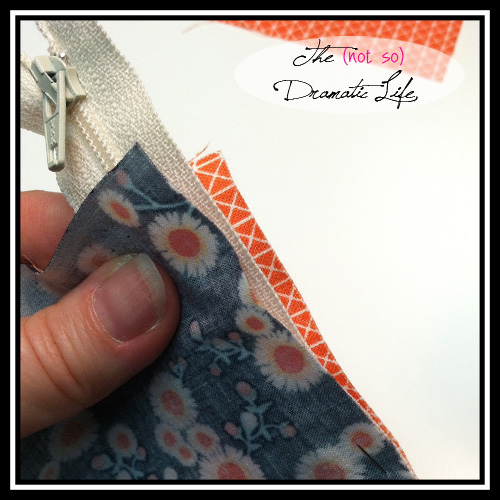
A “Zipper Sandwich”
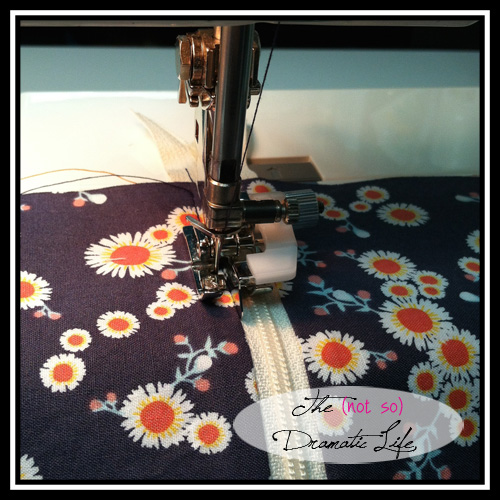
Now you are ready to start stitching! You will want to use your zipper foot and stitch a consistent distance from the teeth of the zipper. I like to line up the right side of the zipper foot with the edge of the zipper, but machines can vary, so choose a means of measuring that works for you.
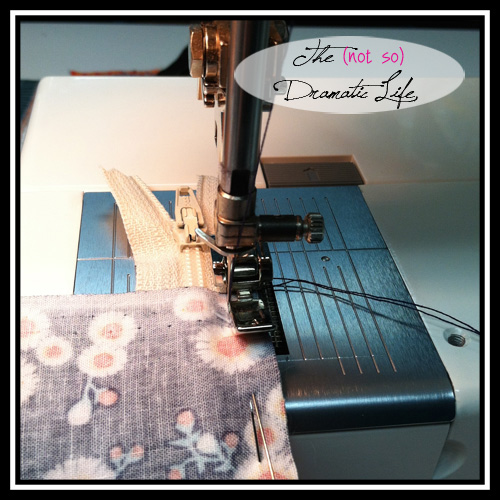
Using the zipper foot to stitch a zipper in place
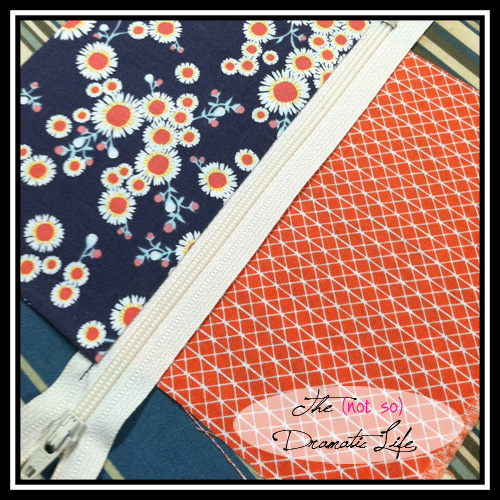
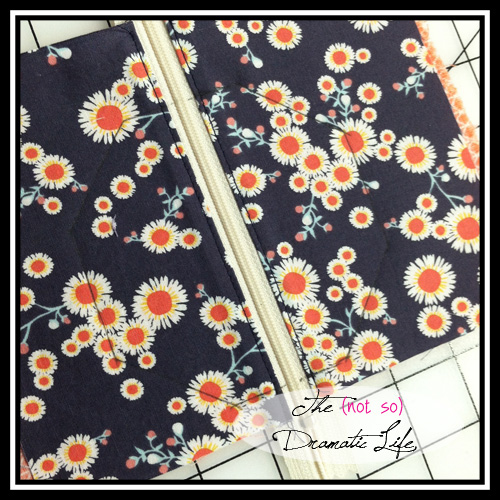
Now you are ready to press the fabric out to expose the zipper. I like to press the outer fabric into place first.
Pressing the outer fabric into place around the zipper
Then you will press the lining fabric toward the back.
Fabric Pressed in place once the zipper is sewn
Next you will perform the same steps to sew the remaining rectangles to the other side of the zipper.
For added stability, I like to topstitch the fabric about 1/16″ from the seams we just sewed. If you have an edge stitching foot, it will make this step easier, but it can also be done with a regular foot (and a little patience!)
Top Stitching the zipper
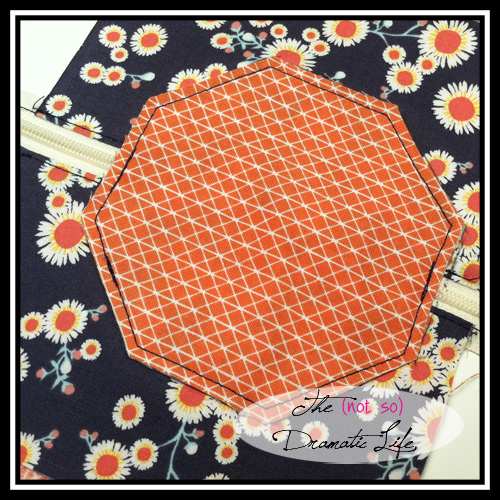
Once you have the topstitching done on both sides of the zipper, take a moment to admire your work! Now trace your octagon pattern onto the fabric, paying carful attention to where you want the zipper placed. I decided to center the zipper across the octagon for this set of pouches. Do NOT cut yet!
Tracing the octagon onto the front of the pouch
We are going to use a very small seam allowance for these pouches, so I decided it would be easier to sew first, cut later. Move the zipper pull tab into the center of the octagon! (If you are going to insert a ribbon loop, now is the time. Place the loop toward the center of the octagon, with the ends sticking into the seam allowance. Pin or Baste into place.) Take the octagons you cut out at the beginning of this process and place the outer fabric piece right side down onto the zippered section. Carefully line up the cut shape with the traced shape. Layer the lining fabric octagon, right side up, on top of the outer fabric octagon. With the zipper pull in the center of the octagon, the cut pieces may not naturally line up with all corners. This is an instance where you should make the fabric line up the way you want. (If you don’t, the zipper may gap in an unpleasant manner.) I pin in each corner, but add as many pins as you need to feel comfortable.
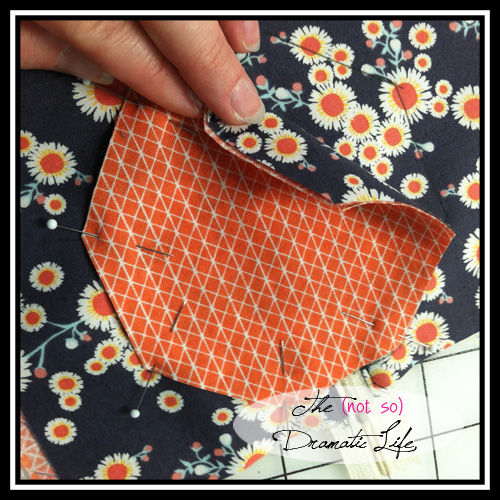
Pinning the front and back together
Stitch all the way around the octagon using a seam allowance of a generous 1/8″
Stitch around the shape using a seam allowance of 1/8″
Check around the edges of your shape to make sure that all layers have been stitched properly. Now cut away the excess material in the zipper layer leaving the 1/8″ seam allowance.
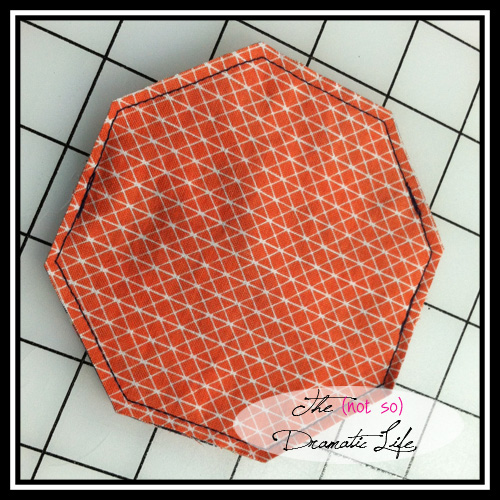
Pouch with Edges Trimmed
Carefully clip the corners in order to achieve nice points when the shape is turned.

Pouch with clipped corners
Turn the shape right side out using the zipper opening. Press to flatten the shape. Make sure you have pretty corners!
Pouch turned right side out
To enclose the raw edges of the seam allowance, you will now want to top stitch 1/4″ from all edges of the octagon. I started and ended the stitching in the corner I was planning to place the grommet since the stitching won’t be visible at that point. When stitching over the zipper, I chose to turn the machine side wheel by hand, taking a large stitch over the zipper teeth, lifting the presser foot, moving back, and taking another large stitch over the zipper teeth. I repeat this several times to secure the zipper. (This should act as the equivalent of several zig zag stitches in a single spot often used to shorten a zipper.)

Top Stitching the Pouch
Since we used such a small seam allowance, I like to add another row of top stitching just under 1/8″ from the edge of the octagon.
Now that everything is sewn, it is time to add the grommet. A grommet has two pieces: a grommet, and a washer. You will also need a hammer, punch, and a setter to install a grommet. I used the 00 size for this project.
Once you have decided where to place the grommet, lay the pouch on a piece of scrap wood, position the punch, and give it a couple whacks with the hammer. You should now have a nice clean opening to insert the grommet.

Top Stitched Pouch with hole punched and grommet ready to install
Place the grommet through the hole you punched in the pouch, then place the washer over the center of grommet. The grommet will be placed in the anvil portion of the setter. The setter will fit into the center opening of the grommet (on the washer side), and it should then be tapped firmly several times to set the grommet. You want to hit the setter hard enough to set the grommet, but not so hard that the grommet splits. When in doubt, start with moderate force and increase as necessary.

Grommet

Grommet with Washer
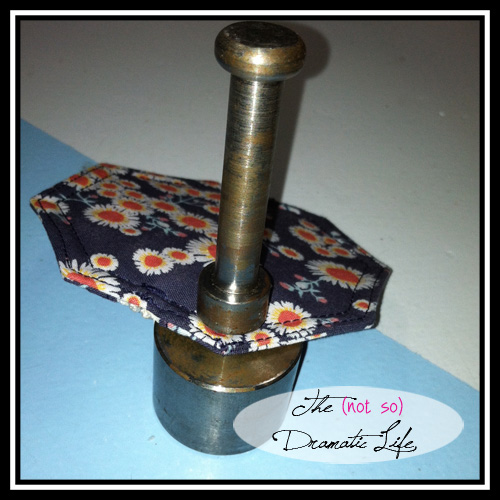
Pouch in Grommet Setter
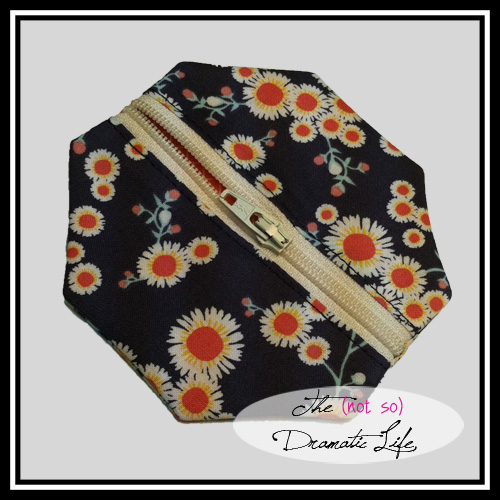
There you have it- A useful little gift that practically everyone will find a use for. I added some candy to sweeten the deal!
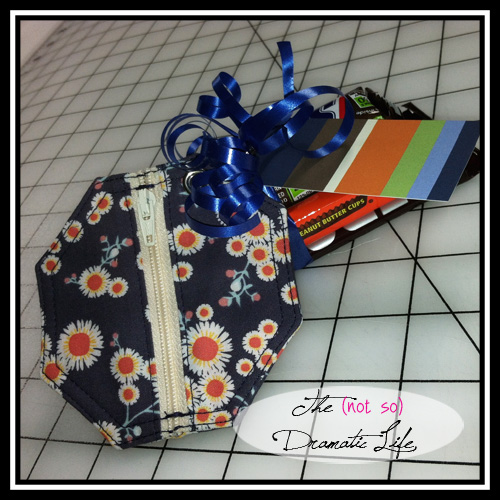
Finished Pouch, All wrapped up!


2 Comments
Holiday Gifts 2014 | The (not so) Dramatic Life
December 25, 2014 at 10:38 pm[…] posted about these cord/coin pouches last week, but I love to see all six lined up and ready for my older nieces, nephews, and their […]
Emily Bailey
June 3, 2016 at 9:20 amI would love to feature this tutorial on my Tuesday tutorial feature. I think it’s perfect for busy moms and teenage girls to carry the essentials and not have to lug large purses. Could I use a few of your pictures? I will link back to you for the tutorial. Thanks