Welcome to Part 5 in out tote bag series! This week is all about finishing up a few details. Aren’t you thrilled that you have made it this far? Before you know it, you will be carrying this fabulous bag around that you didn’t just make- you designed! As always, please contact me with any questions. You may email me or leave a comment, and I will do my best to give you a clear answer!
If you are just joining us, this is a 5 part series. Here are the other segments:
- Part 1: Gathering Supplies
- Part 2: Drafting Your Pattern
- Part 3: Cutting the Fabric
- Part 4: Assembling the Bag
- Part 5: Finishing Techniques (You’re here now!)
When last we left our glorious tote bag, we had just turned it right side out. Have you ever had a bag where the lining pops up almost every time you pull something out? This next step will keep this from happening. We are going to stitch the lining and the outer layer shaping seams together. Make sure the lining is laying smoothly in the bag and that the side seams and shaping seams are pretty close to matching up. Doing your best to not get things too twisted around, reach inside the opening you used to turn the bag right side out, grab the seam allowances of the lining and outer shaping seam on one side of the bag and gently pull them through the opening. Pin the seam allowances together or use clover clips to hold the seams in place. (I just got some clover clips, and I am in love!) This is a good time to carefully push the shaping seams back through the opening just to check that nothing managed to get twisted around during the previous process. Note: Count the number of pins going in, and make sure the same number come back out- It’s no fun to discover a pin after everything is all sewn up! Another Note: The type of lining technique in this photo is slightly different (it is a two piece lining) than the one you are using, so your’s will look a bit different with everything pulled through the lining opening. I forgot to take a new photo when I made a bag using the new technique, but I will update the image when I make another. The idea is the same, though.
Everything laying well? Great! Gently pull the seam back out and zig zag the seam allowances together. As long as you stay in the seam allowance and don’t cross the stitching line, you are doing this correctly. If you have a machine that only does a straight stitch go ahead and use it- we just want to secure the bottom of the lining to the main bag.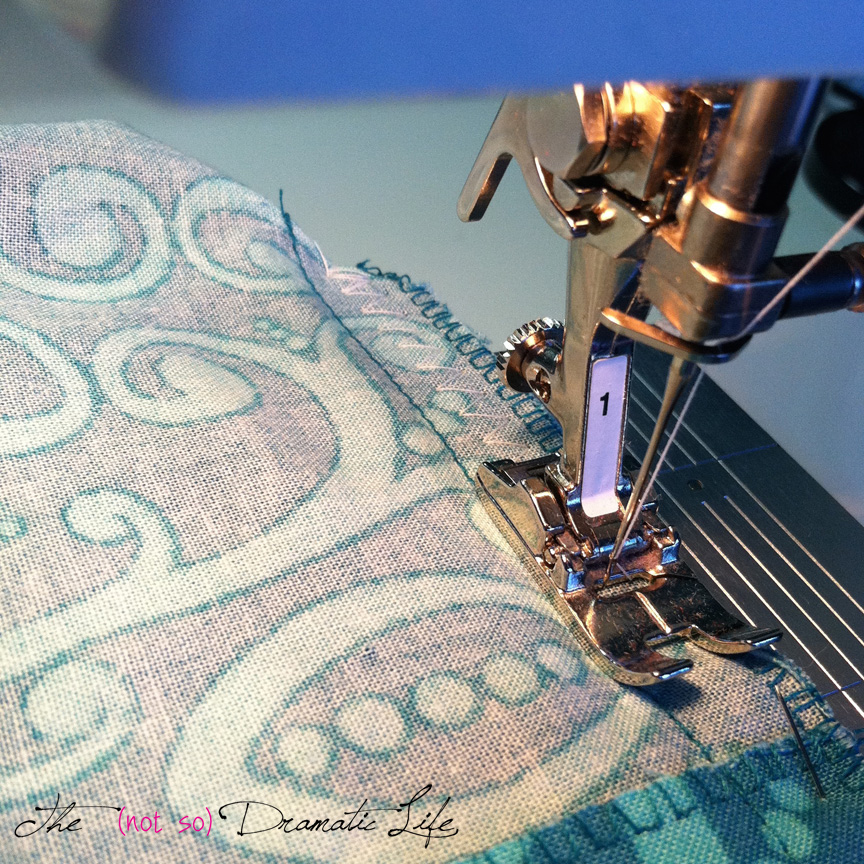
Looks good? Go ahead and repeat the process on the other side of the bag.
Now you can close up the opening in the bag lining. You can do this by machine or by hand. When I do this step by hand, I find that a nice small slip stitch looks great. I often sew the opening up with the sewing machine since it is rarely seen up close, remains durable over the life of the bag, and is super quick. If you are doing the machine method, press the seam allowances to the inside, line up the edges of the opening, pin carefully and stitch across the opening about 1/8″ ( or a little less) from the edge.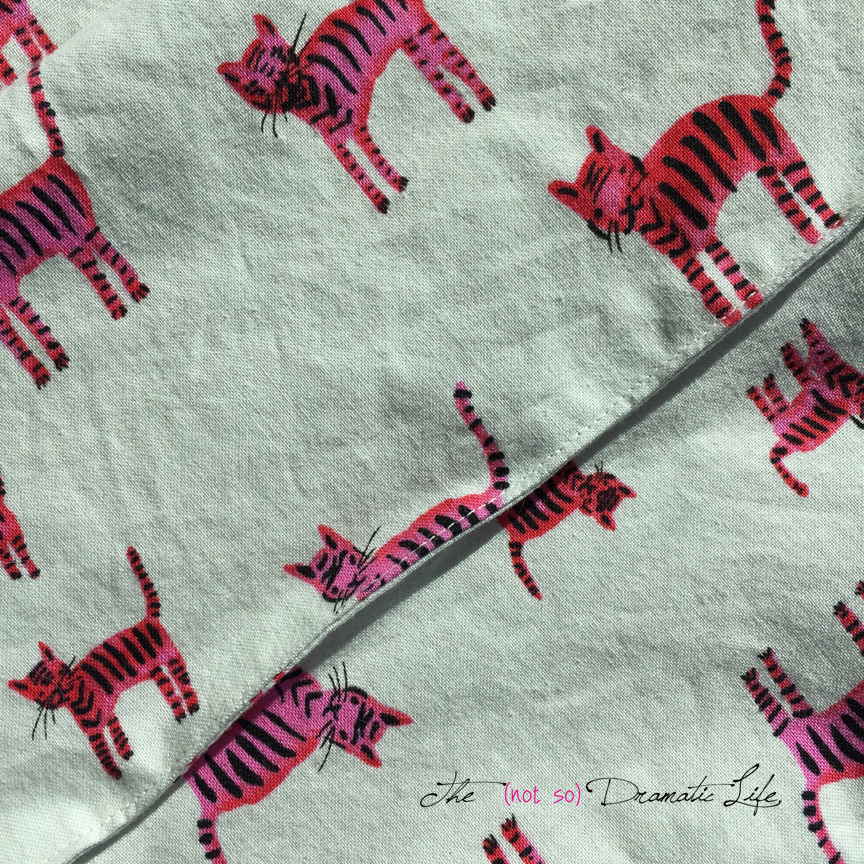
Now we are down to buttons- Almost there! You will want to place your buttons so they are centered with your buttonholes. Make sure your bag is laying nice and flat and then use a fabric safe pen or pencil to make a dot where the button should be placed. You can mark this right through the buttonhole opening to help with accuracy.
There are two basic types of buttons: flat buttons and buttons with shanks. A flat button typically has either two or four holes that go all the way through the top of the button. A button with a shank has a loop of either metal or plastic on the back used to attach the button. This type of button is often appealing since the top of the button can have a decorative design that is uninterrupted by thread crossing between holes. Unless you are sewing a button on that is only decorative, you need to plan to have a shank, so if you are using a flat button, you will create a shank with thread as you sew the button in place. The shank of the button provides a slight gap between the fabric and the button that allows the layer of fabric with the buttonhole to fit without any strange pulling, puckering and gapping. A really thin blouse would require only a very short shank, but a heavy, wool, winter coat would require buttons with a much longer shank. This tote bag will need a shank about 1/8″ long. Don’t worry if it gets a bit too long or even a little too short.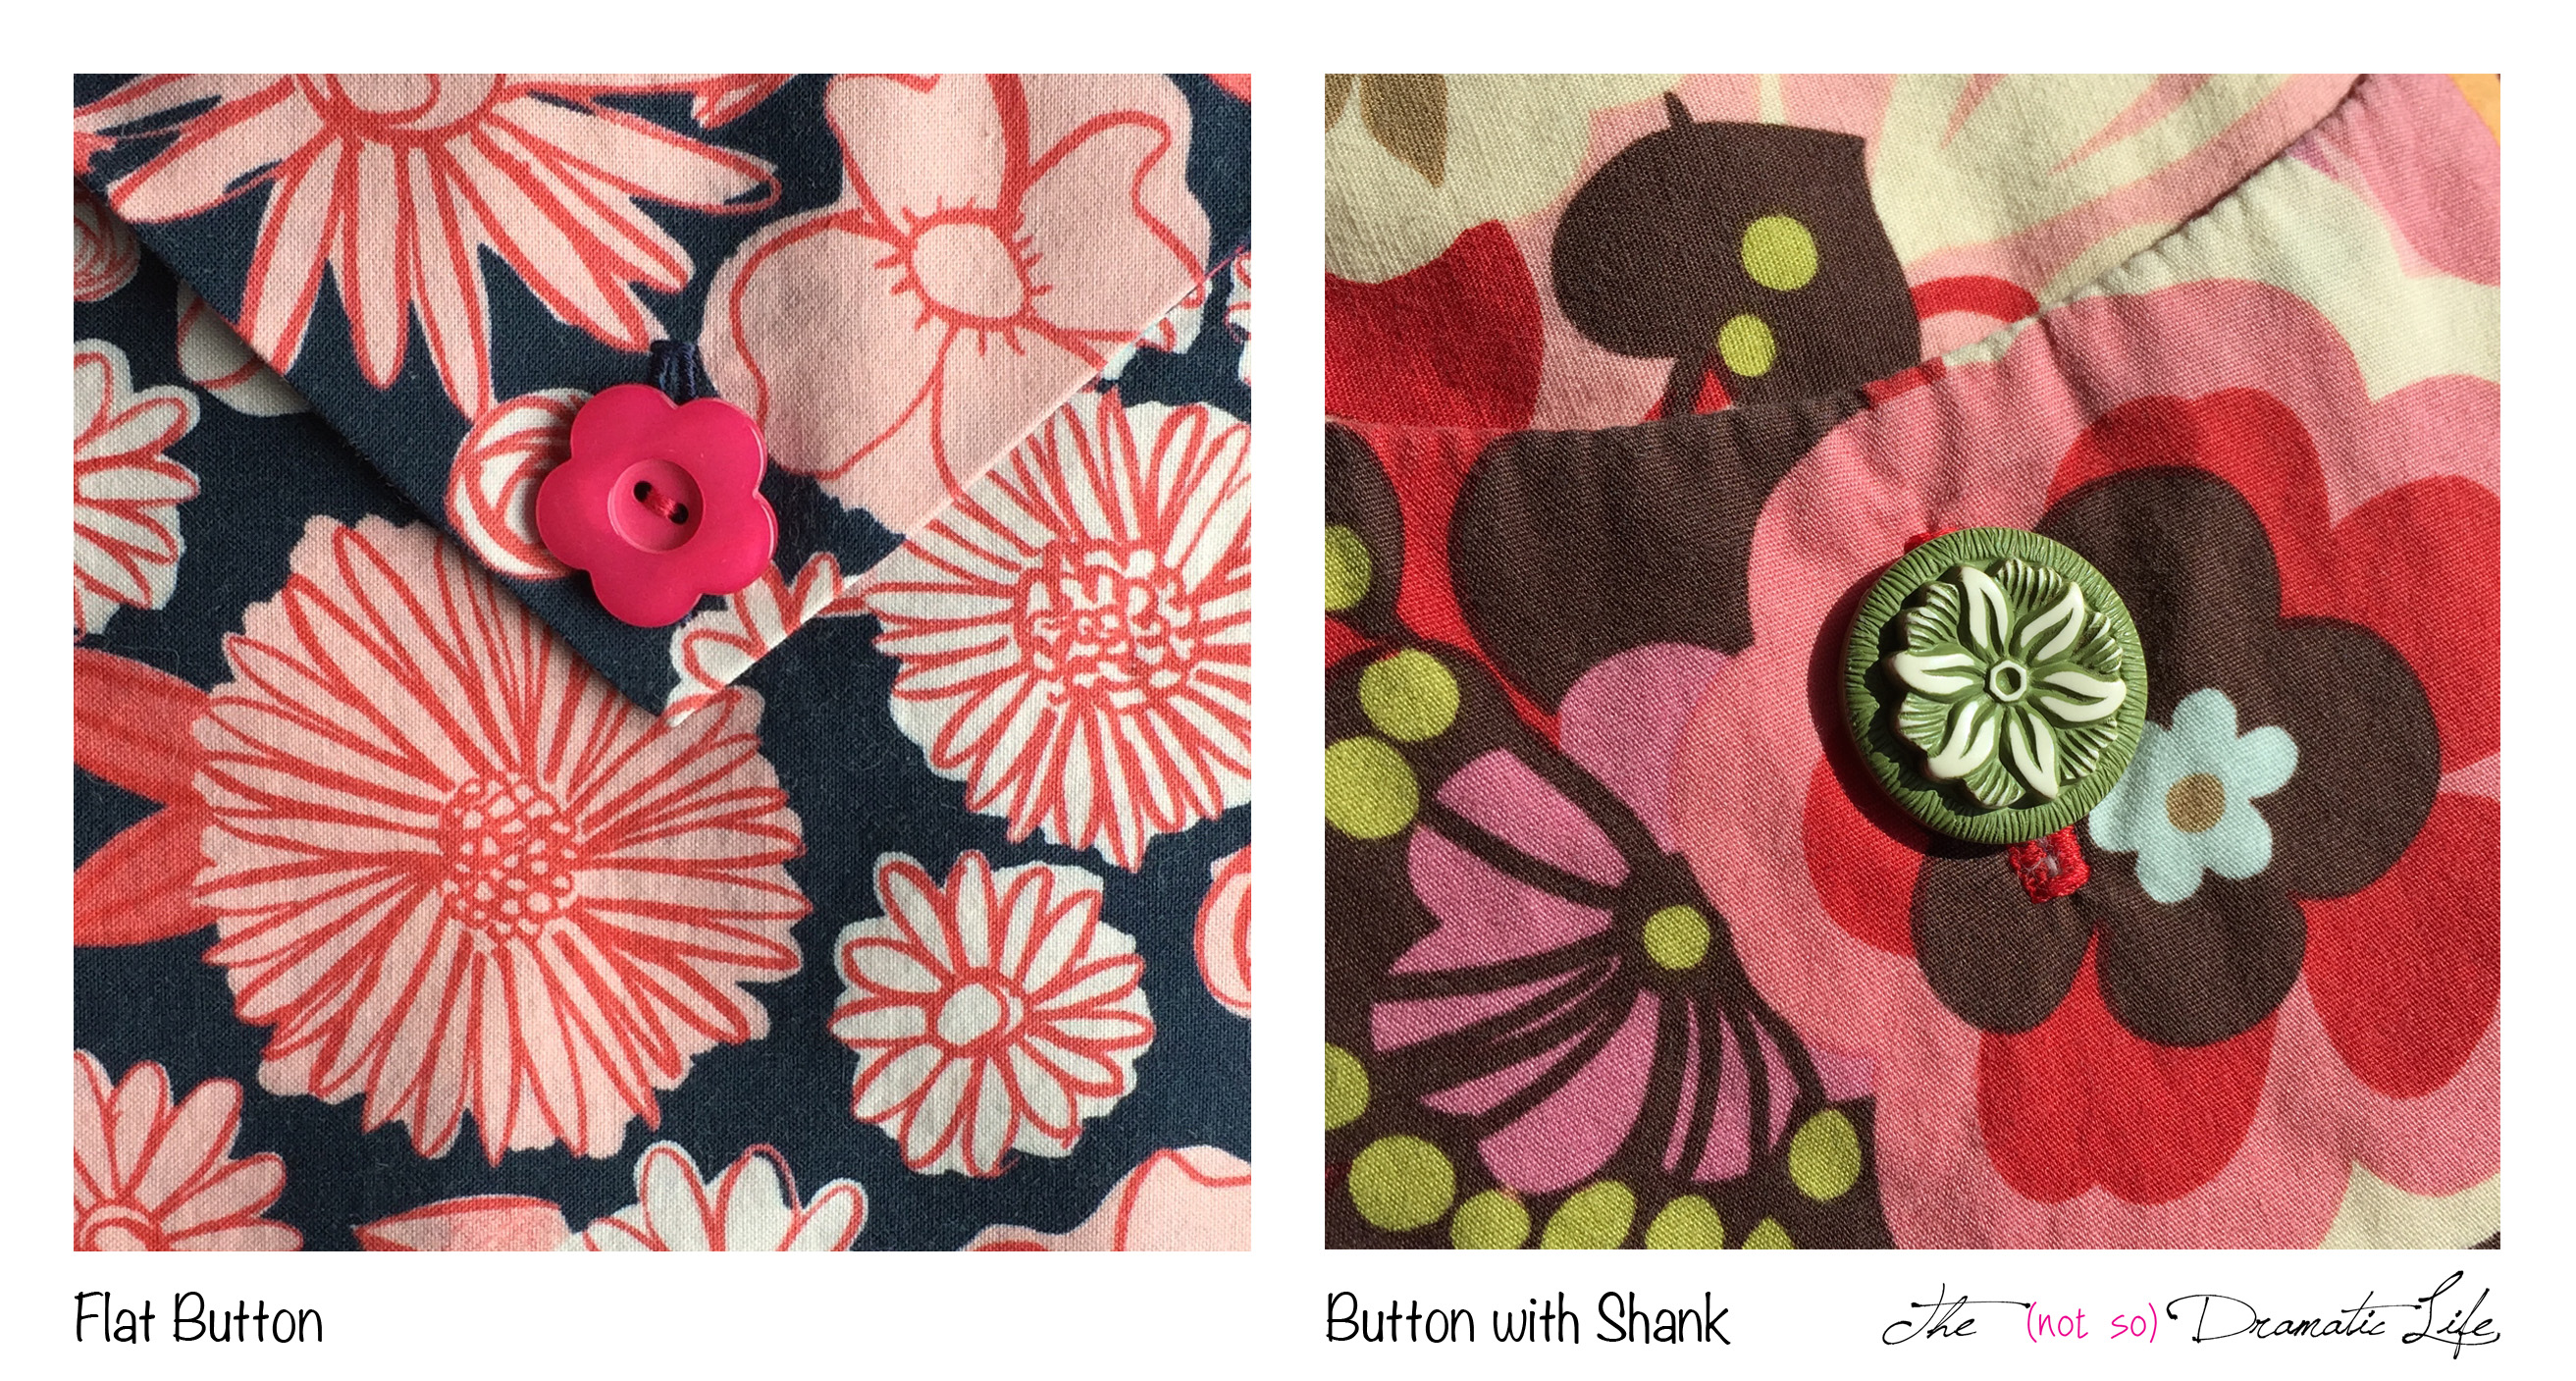
The button with a shank is pretty easy to sew. Use a double thread and stitch though the fabric and the shank of the button several times (I usually take about six to eight stitches per button). It is important to stitch through all of the fabric layers so there isn’t any weird pulling. Try to keep the back of things neat since you will see this side from time to time. Tie a couple knots at the base of the button, bury the thread tails between the layers of fabric, and call it a button!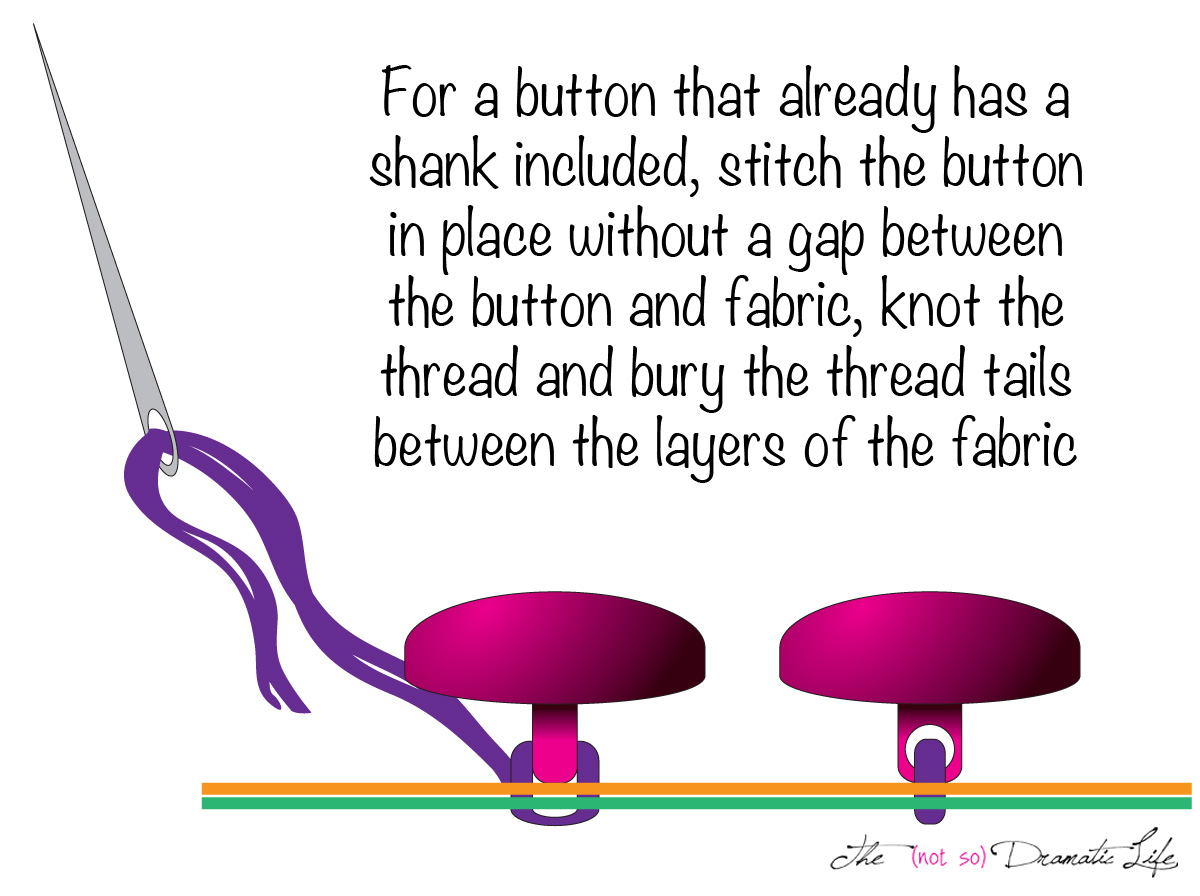
When creating your own thread shank, you will need to leave a slight gap between the fabric and the button that will become the space for the shank. To help with this spacing you can place something like a toothpick, a couple straight pins, or a thin skewer under the button. You can also purchase a little plastic sewing device that helps you achieve a consistent spacing. Using a double thread, sew through the holes of the button and the fabric about six to eight times total (you can split this number of stitches between two sets of holes). 
Next, remove any spacing tools and wrap the sewing thread around the thread gap between the button and fabric. You will want to go around 3-5 times for most button shanks.
The last time around tie a knot at the base. I always do a second knot for security before burying the thread tails.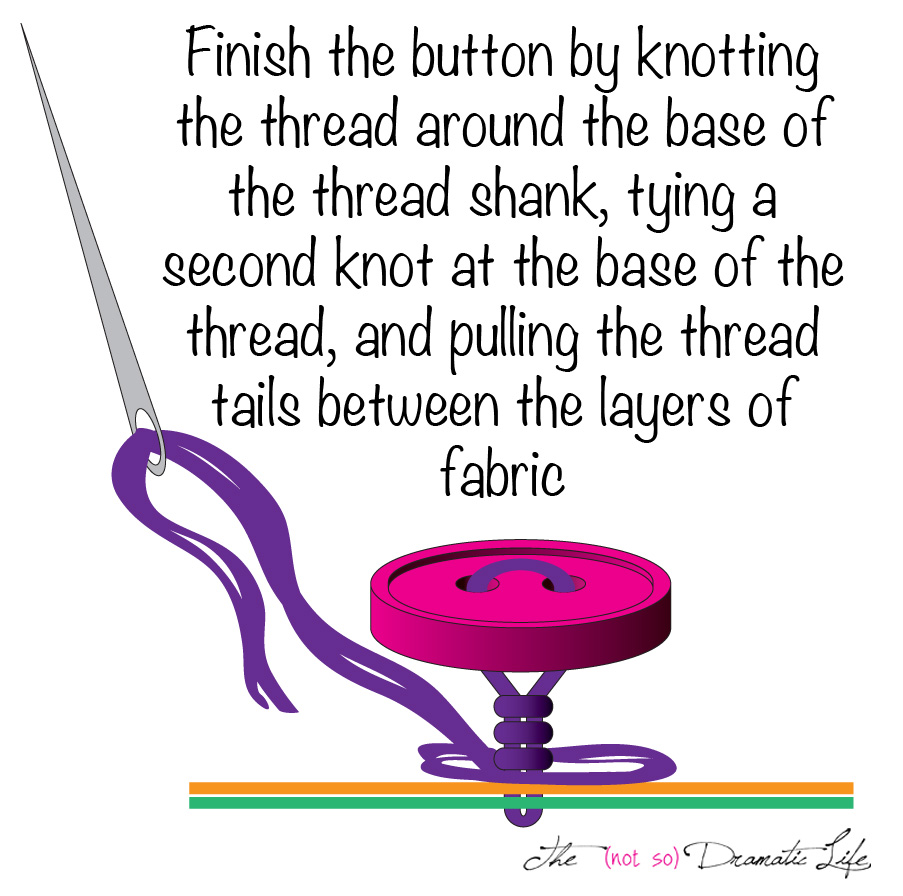
There you have it- your custom designed tote bag! Congratulations! All that is left is for the complements to roll in!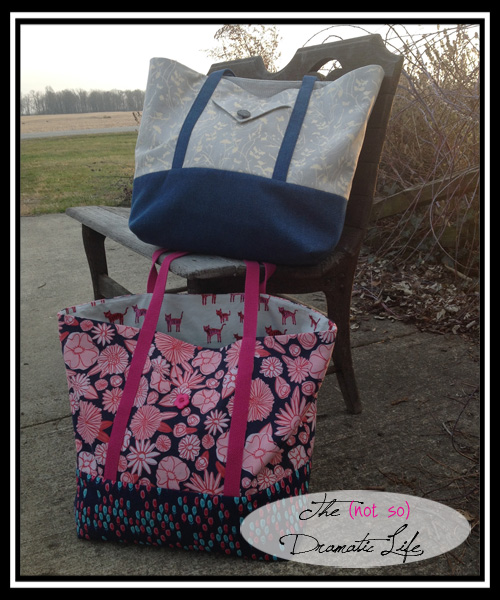
I’m linking this post up with WIP Wednesday at Freshly Pieced and Tips and Tutorials Tuesday at Late Night Quilter. Please stop in to see all of the inspiring works in progress and useful tips and tutorials!


4 Comments
Tote Bag Tutorial Part 1: Gathering Supplies | The (not so) Dramatic Life
February 18, 2015 at 12:22 pm[…] Part 5: Finishing Techniques […]
Tote Bag Tutorial Part 2: Creating the Pattern | The (not so) Dramatic Life
February 18, 2015 at 12:23 pm[…] Part 5: Finishing Techniques […]
Tote Bag Tutorial Part 3: Cutting Out Your Bag | The (not so) Dramatic Life
February 18, 2015 at 12:23 pm[…] Part 5: Finishing Techniques […]
Stephanie
February 25, 2015 at 10:21 pmThis is where things always go wrong for me — the finishing!! This is an awesome post with so many detail tips. Excellent job!