Have you ever ended up with a lovely section of quilting along the edge of a project that has to get cut off to finish the quilt but is way too gorgeous to throw away?
I frequently end up with these scraps, especially when working with improv piecing with irregularly shaped edges.
Today, I’m sharing how I made some of those pieces into a small work of art!
(This post includes some affiliate links. If you click on an affiliate link and choose to make a purchase, I receive a small percentage of the sale at no cost to you. These funds help keep this blog running and content FREE for everyone!)
A View Through the Rock
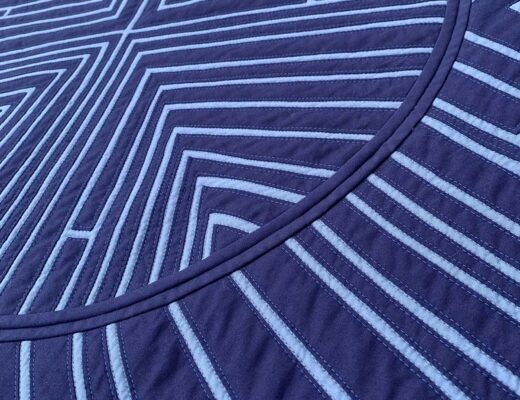
A few years ago, I was an artist in residence on Mackinac Island in Michigan. In exchange for three weeks’ accommodations on the island, each artist donates a piece to the art museum’s permanent collection.
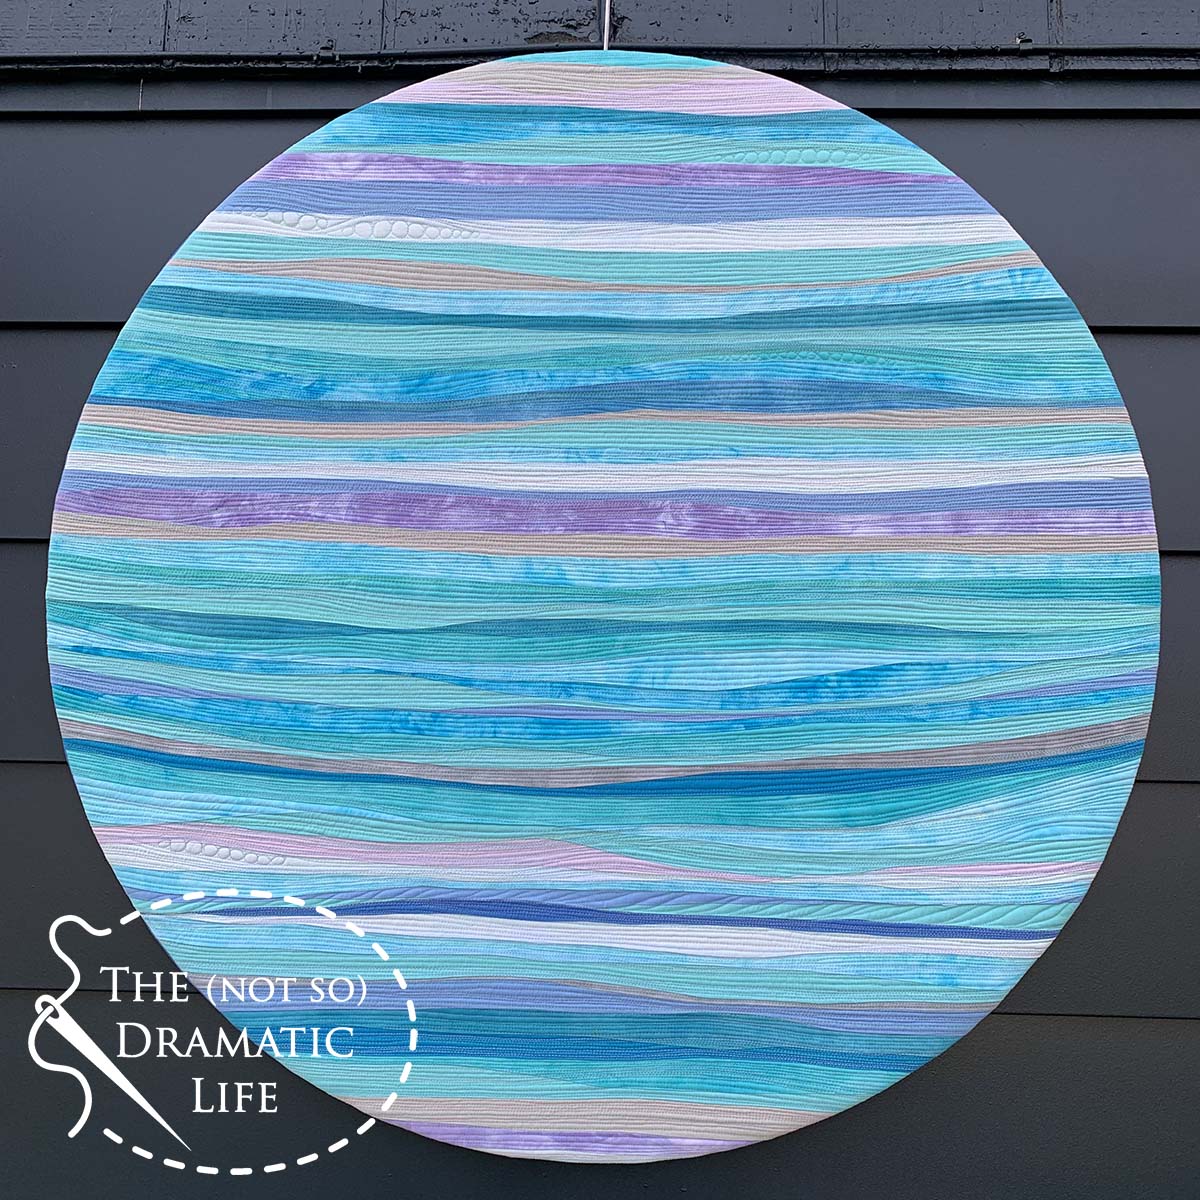
I created this circular quilt to reflect how arch rock, one of the island’s most significant natural features, frames the view of the lake. You can read more about the finished quilt and the process behind it here.

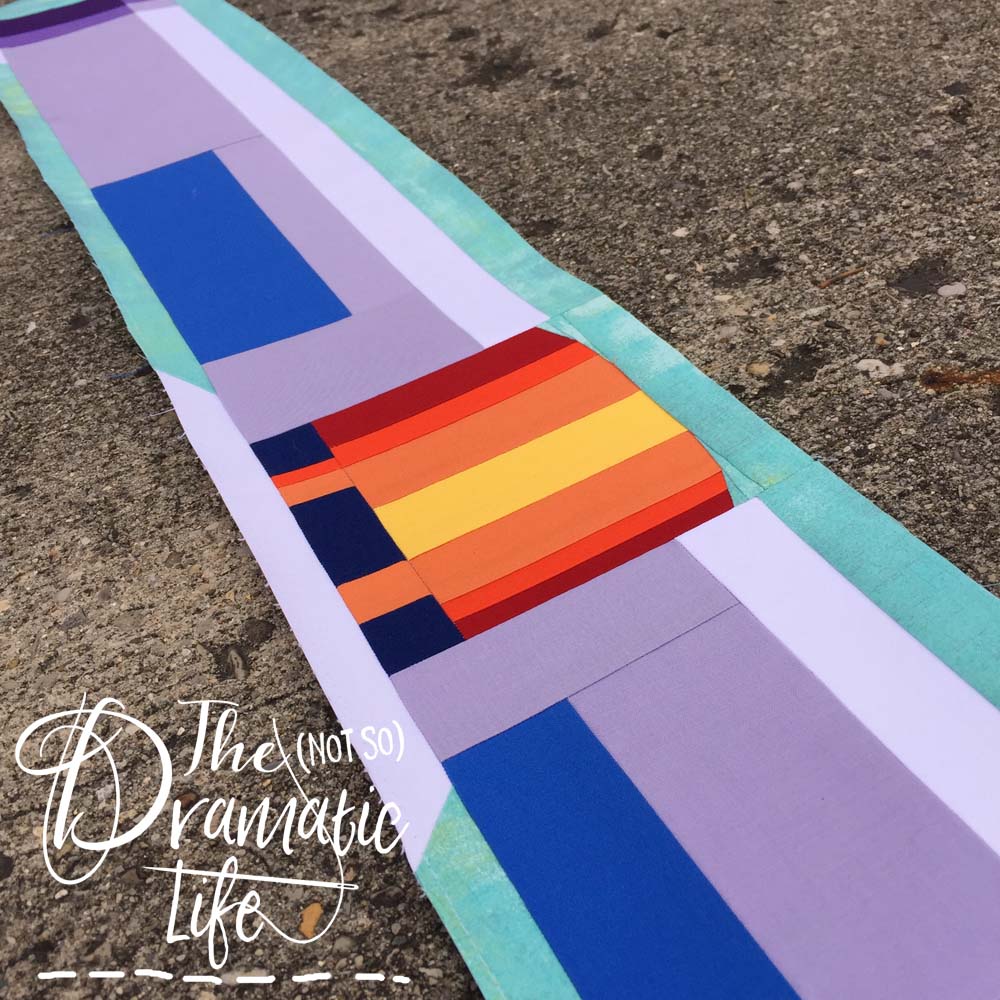
Since this design ended as a circular piece, but I pieced it in a roughly square formation, I ended up with lots of beautiful improv pieced quilted scraps. View Through the Rock is one of my most significant works, so I couldn’t bring myself to discard the scraps, and I have moved them around the sewing room for years.

Creating a Framed Quilt
Inspiration for a Framed Quilt
A few weeks ago, Missouri Star Quilt Company asked me which products I found inspiring, and as soon as I saw these frames, I thought they had the potential to showcase my favorite quilted scraps.

I wondered if these frames would work for what I wanted to do because the original intention is to frame embroidery, which is nowhere near as thick as a quilt with three layers, including batting.
When the frames arrived, along with the separate hoops, I was excited to see that the recessed area on the back gives ample room to put a thicker project into the frame. The frames are well made and feel substantial when you hold them. They have enough visual weight to hold their own on a gallery wall of art in your home.


Finding the Perfect Section of Quilt
Selecting my favorite sections of the quilt scraps was surprisingly challenging- there were many promising areas, but which ones were the best?
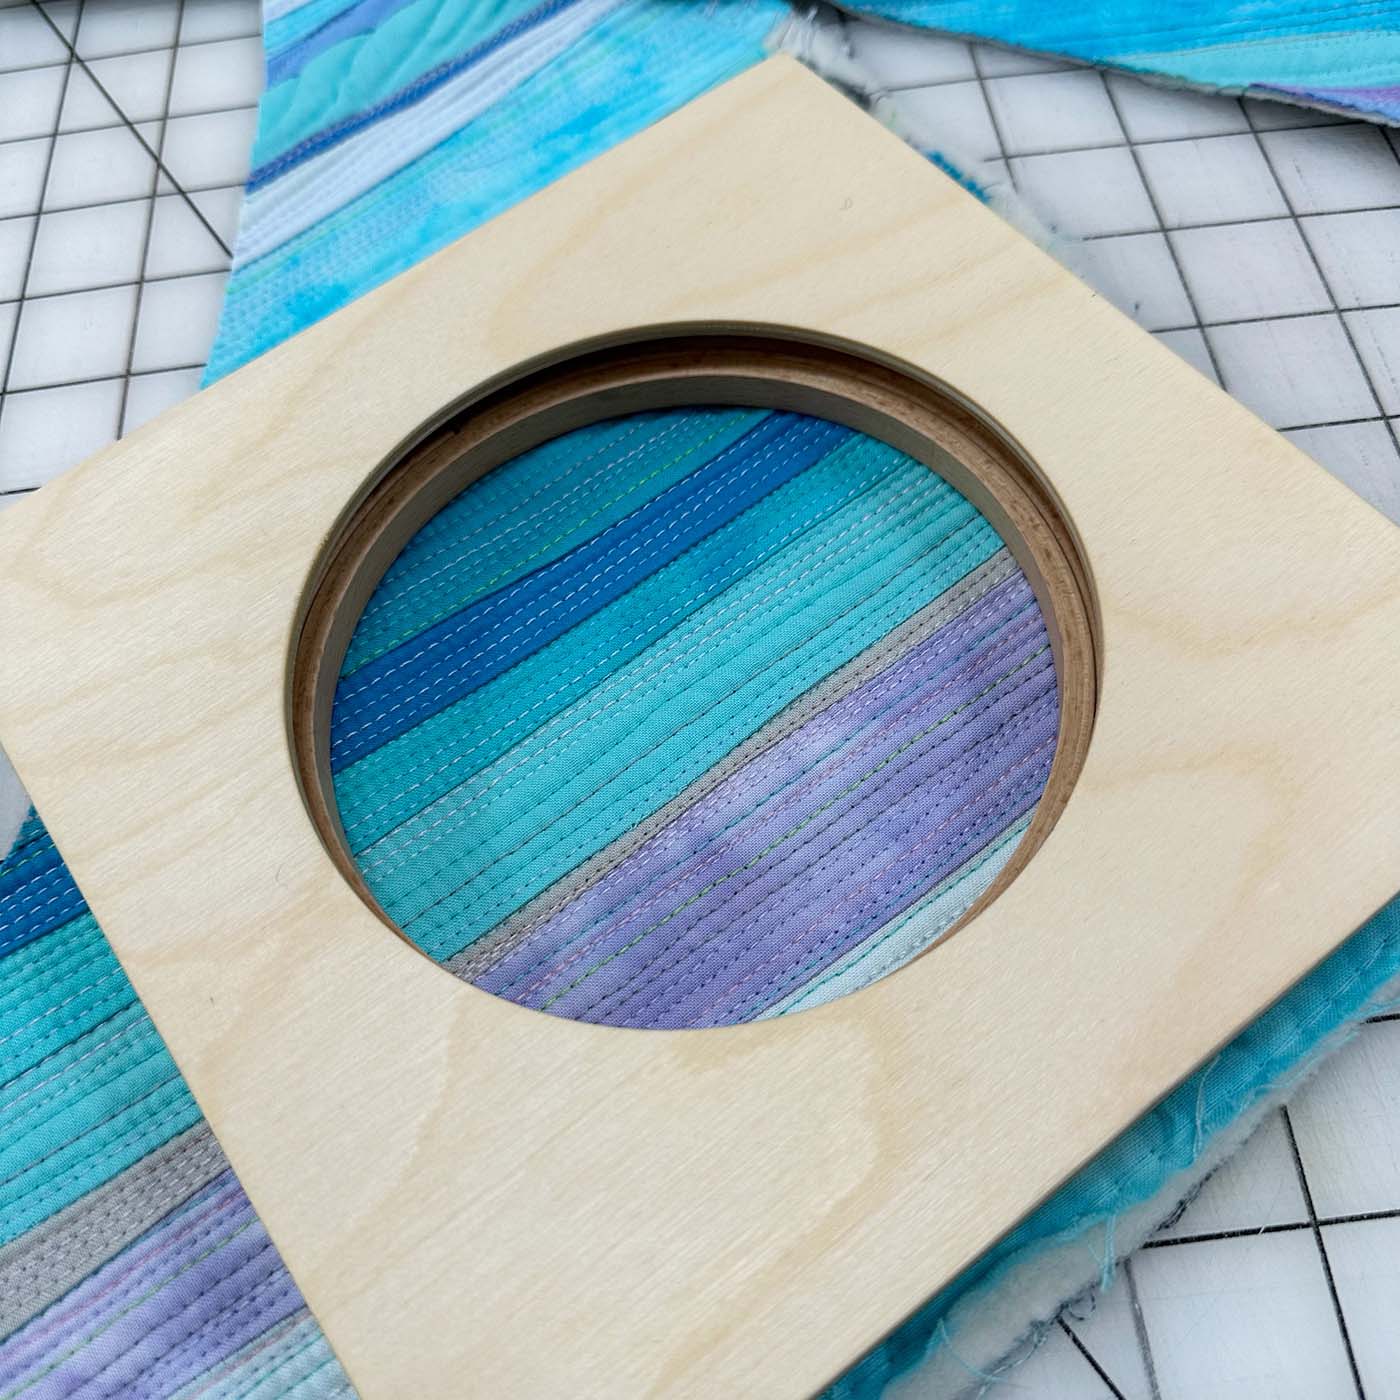
To help determine which sections I wanted to use, I set the hoop inside the frame and moved the entire unit around the scraps until I discovered the area I wanted to use. Then, all I needed to do was lift off the frame and roughly trace about an inch and a half outside the hoop to know where I needed to cut.
Cutting the Quilted Scrap
Before I cut the fabric, I used the guidelines to position the quilt in the hoop. I wanted to leave enough fabric to fit in the hoop and wrap around toward the back. Once I was happy with the positioning, I trimmed the edges while the piece was still in the hoop. Since the back of this project will always be displayed against the wall, I wasn’t overly concerned about making a perfectly round cut as long as the edges were reasonably smooth.
Finishing the Edges
There are two layers of raw fabric edges plus lots of quilting threads intersecting the newly cut edges of the quilting scraps, so I wanted to lock all those likely-to-fray edges in with a row of stitching.

Working on my BERNINA 770QE PLUS, I selected stitch number 10 and used foot 2a to stitch over the cut edge of the fabric.
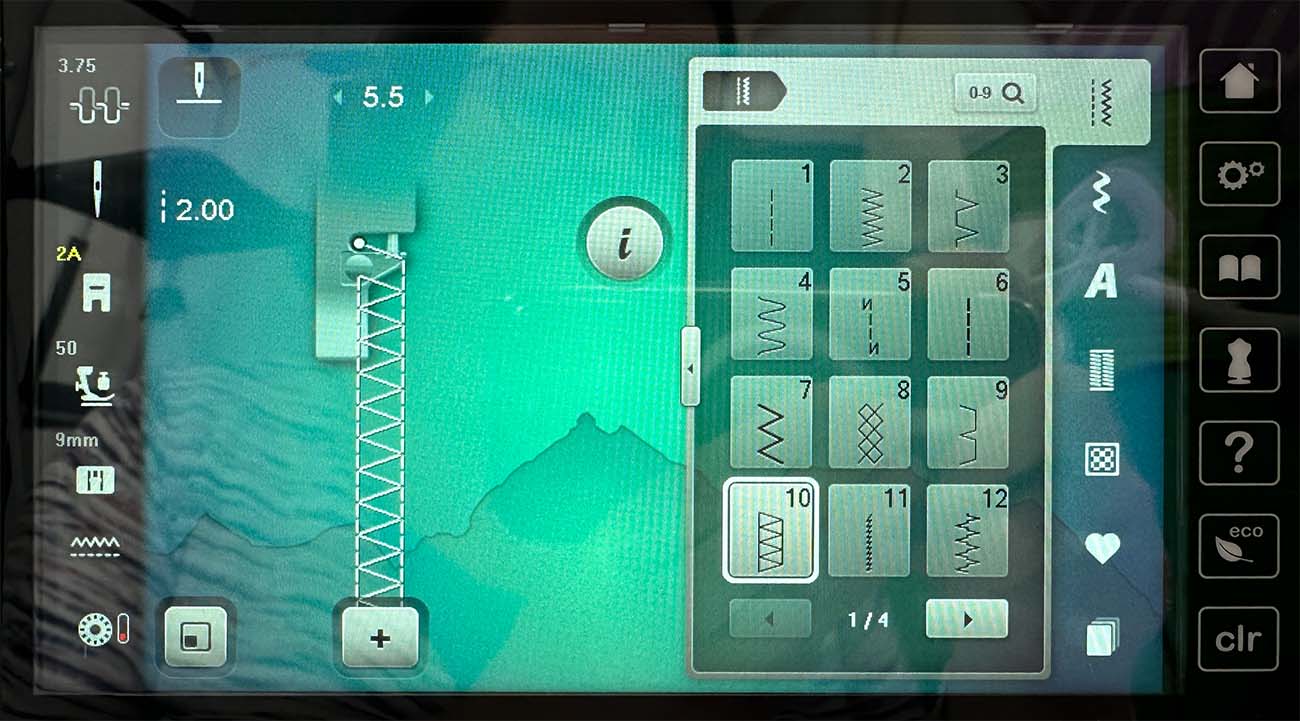
This particular stitch goes over the edge of the fabric, creating a similar effect to that of a serger.

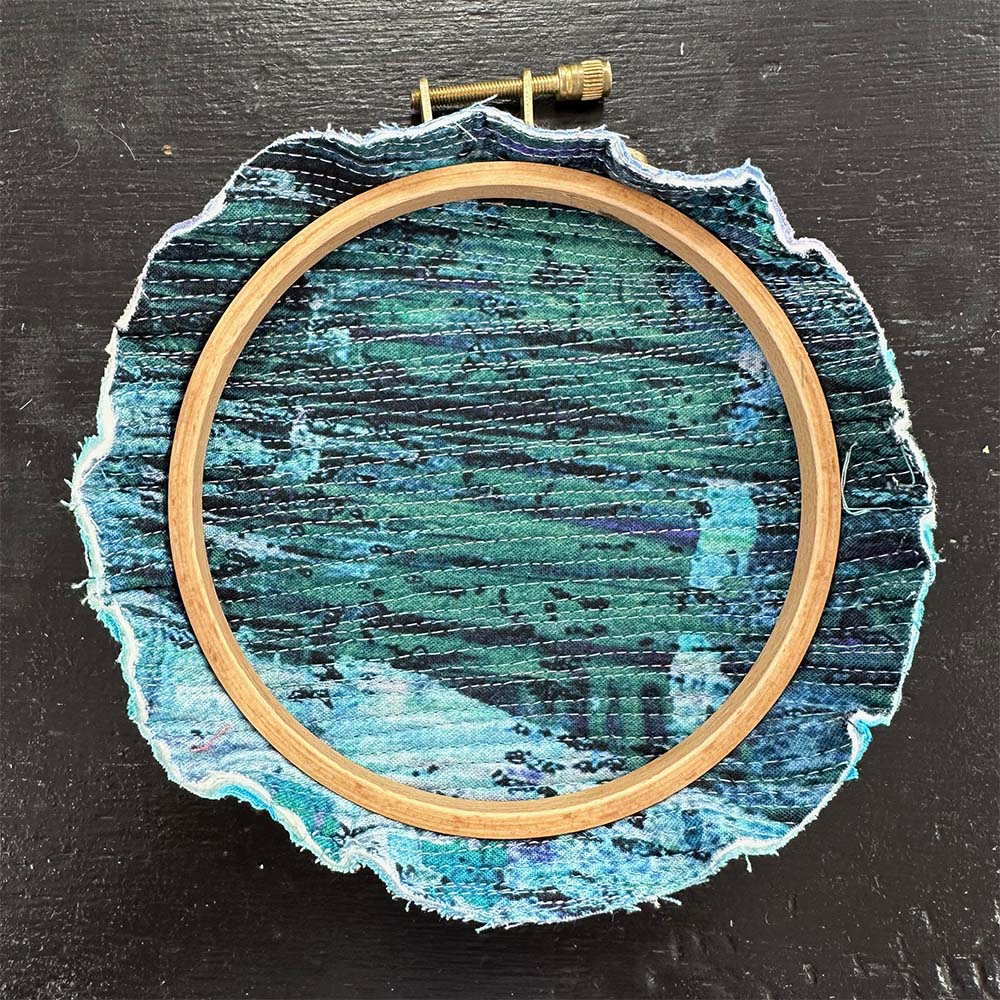
Putting the Quilt Section Into the Hoop
Once the quilted scrap goes into the hoop, I cinch the cut edges in towards the center of the hoop to help the quilted piece lay flatter. To achieve this, I used a double thickness of Aurifil 12-weight thread and a line of long straight stitches around the cut edges of the quilted scrap, leaving long thread tails where the stitching started and ended.
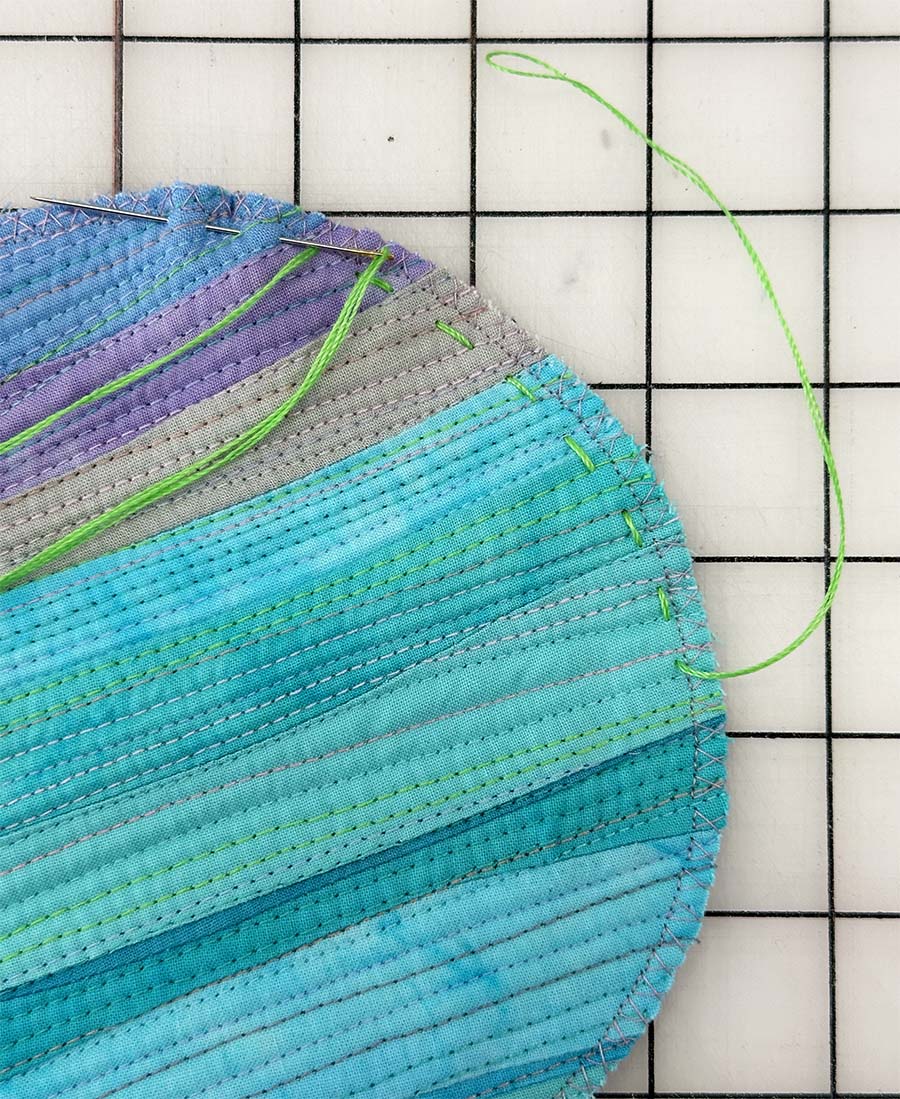
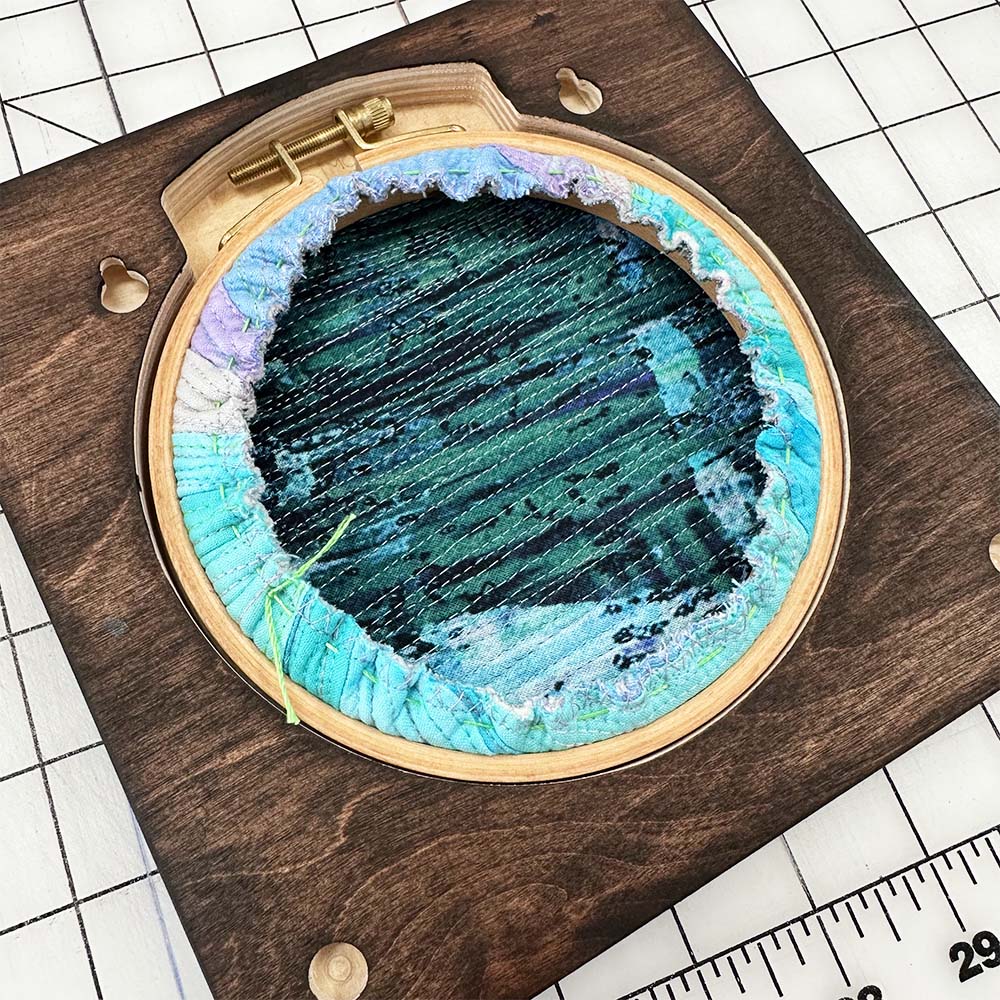
I positioned the piece into the hoop and began tightening the screw so the fabric could still move a bit without the outer portion of the frame falling off. I then pulled the threads as tight as possible to cinch in the edges, checked that I liked the final positioning of the quilted scrap, and finished tightening the screw on the hoop. I then knotted and trimmed the gathering threads.

I debated whether to add a cover to the back of the hoop, but I ultimately decided I didn’t want the added bulk of an extra layer of fabric.
Notice the length of the screw on this hoop. There are less expensive hoops on the market, but most that I have found have much shorter screws that don’t work well for thicker materials like quilted scraps.
Adding the Hoop to the Frame
The hoop pops right into the frame, and there is a cutout area to accommodate the screw mechanism.
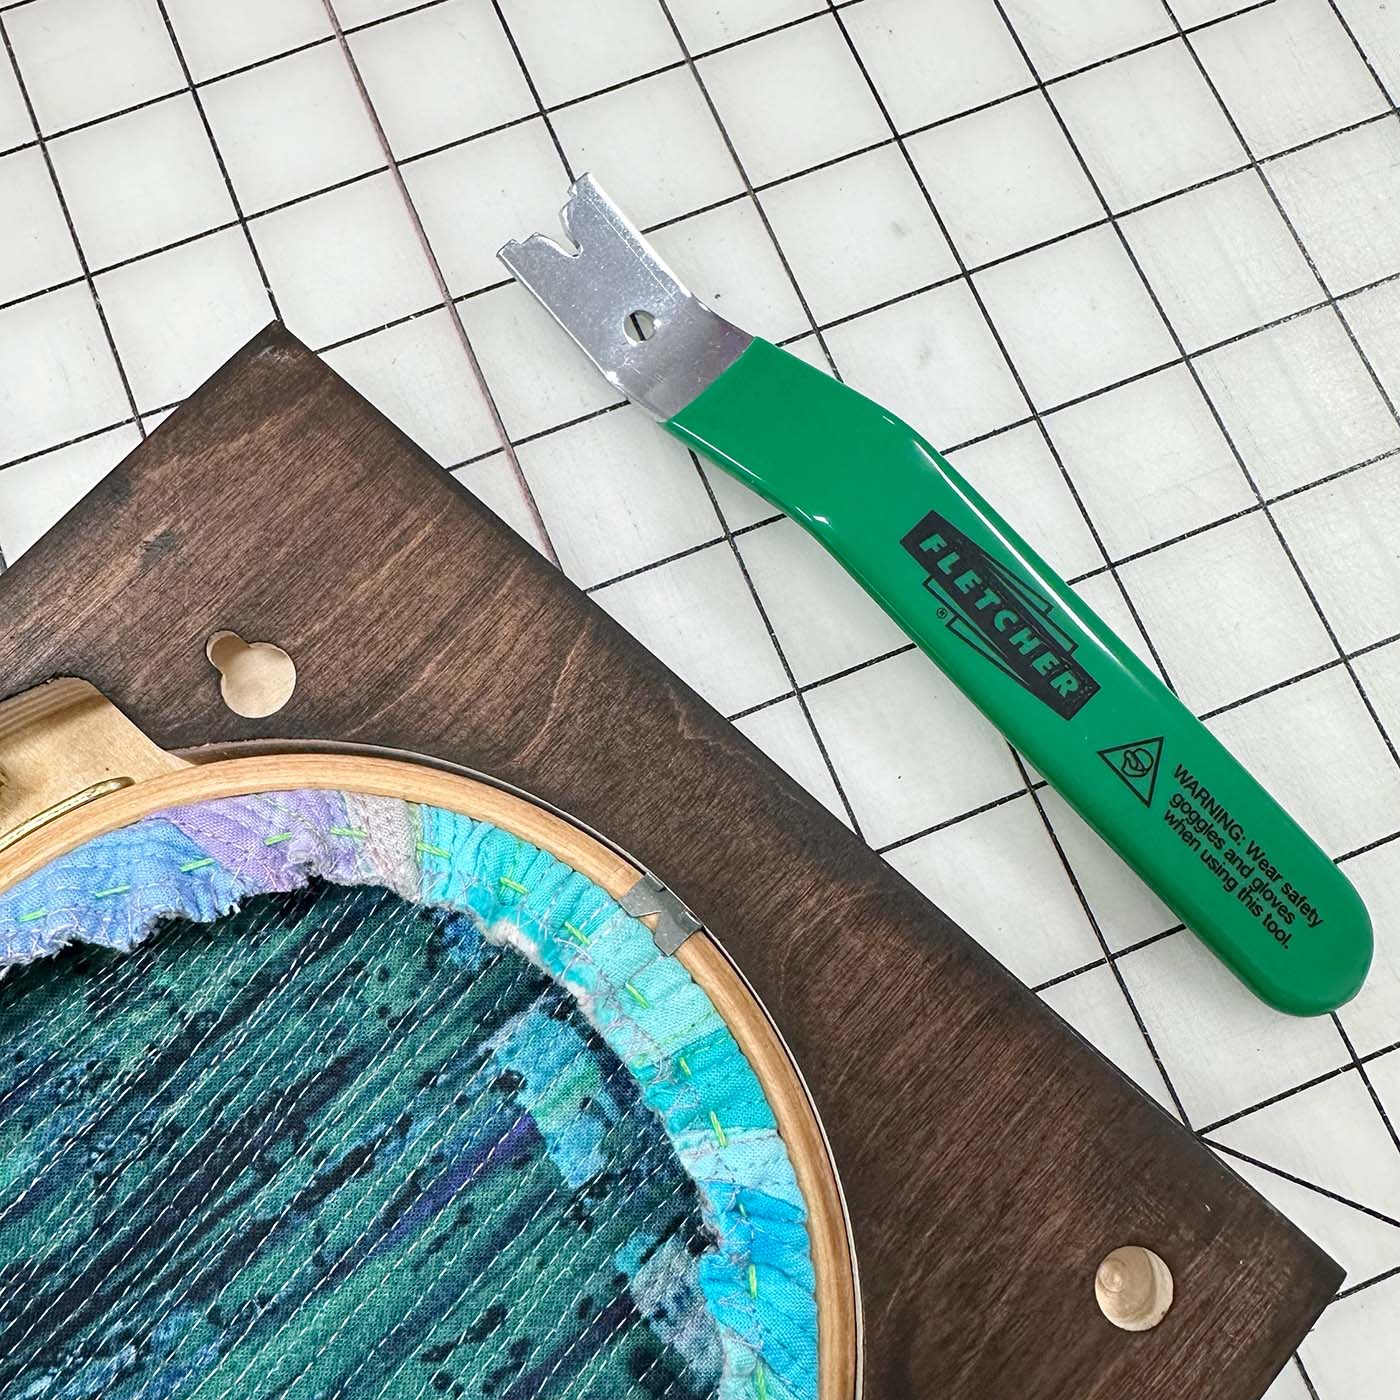
I was wondering if the hoop and the thickness of the fabric would be enough to hold the hoop in place, and it turned out that I needed to add the framer’s points to keep the hoop inside the frame. The hand tool to set these was inexpensive and even came with some points to get started. It only took two points to hold the hoop securely in the frame.
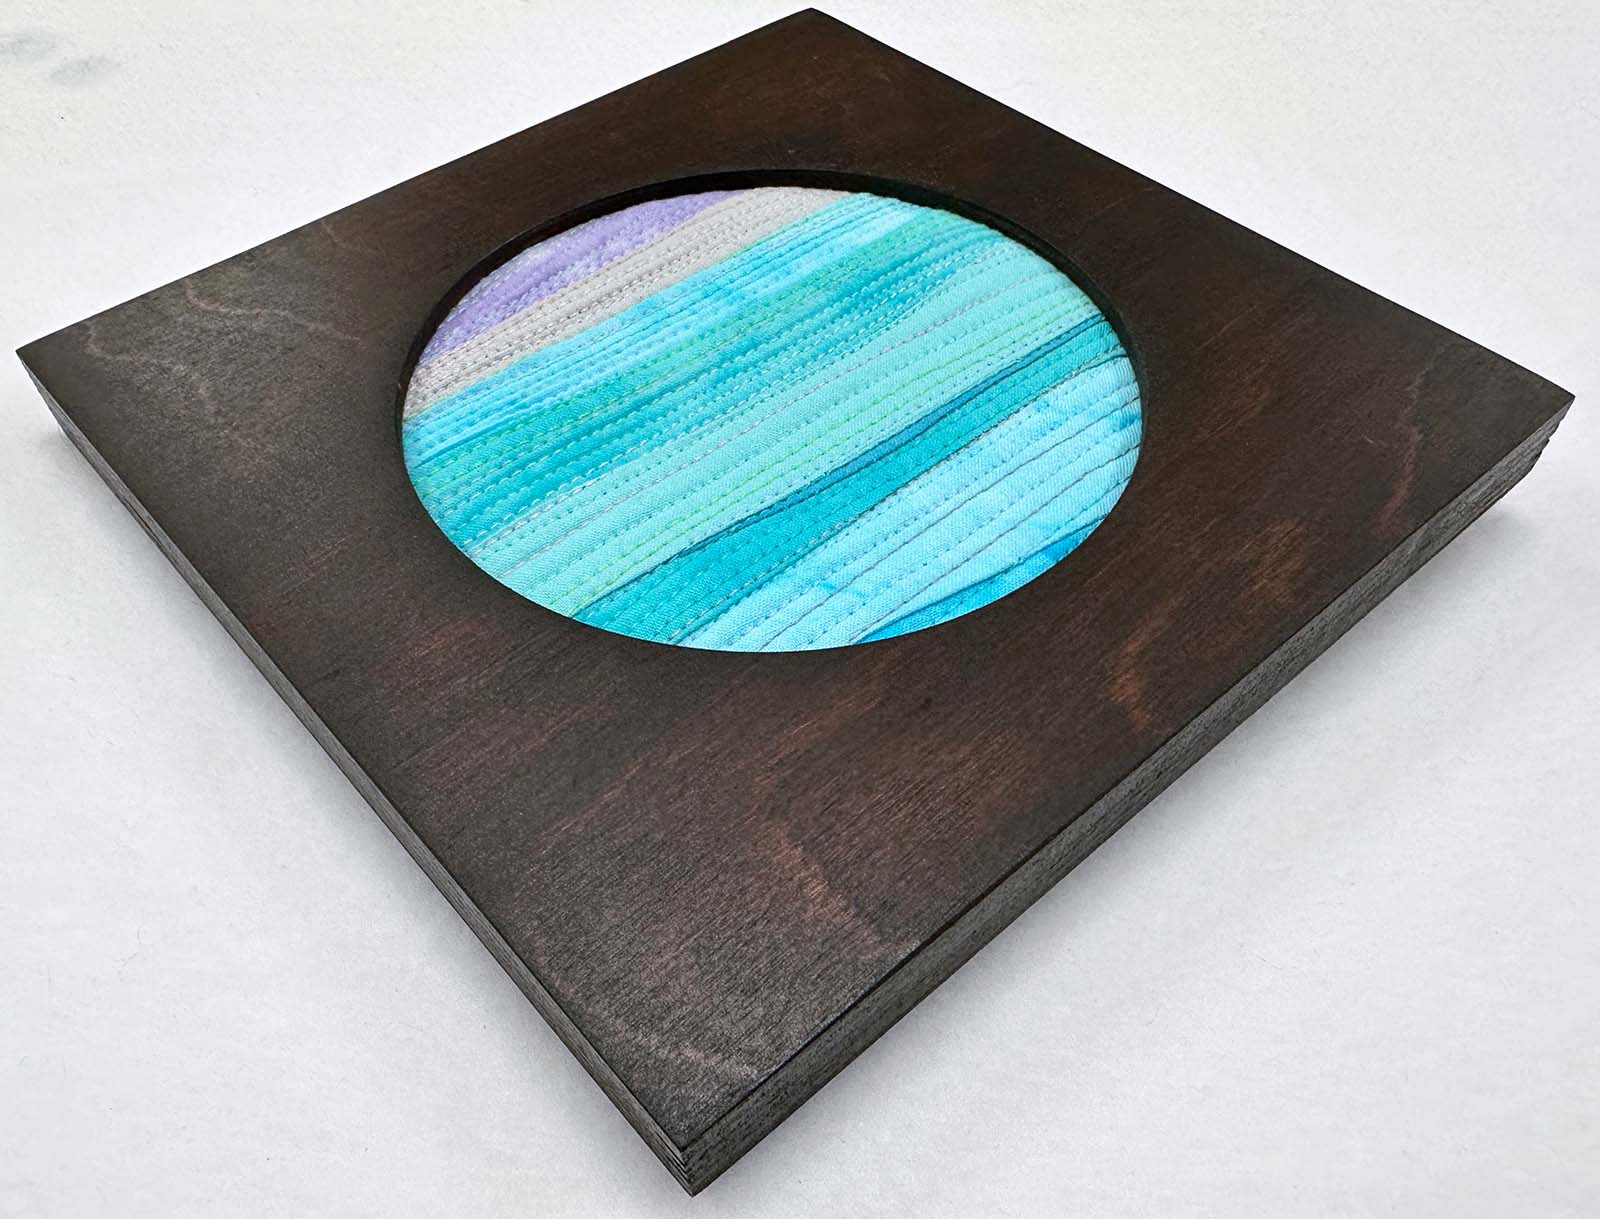
The Finished Project
It took three years, but I now have a little bit of my Mackinac Island quilt displayed in my studio!

Missouri Star Quilt Company provided the frames and hoops used in this project. If you want to pick up these or almost anything else from Missouri Star Quilt Company*, click on any affiliate link in this post to to get 20% off your purchase of $50 or more! This post is a paid partnership post with Missouri Star Quilt Company.
*If you click an affiliate link and decide to make a purchase, I will receive a small commission at no additional cost to you. Affiliate links help keep most of the content from The (not so) Dramatic Live free for everyone.
I am a BERNINA ambassador. The 770QE PLUS machine used in this post has been provided by BERNINA as a loan to own product.


No Comments