I had originally planned to post this sweet little mini quilt a bit closer to Valentine’s Day, but ultimately decided that there may be someone who could draw inspiration for their own heart-based endeavors in the coming weeks!
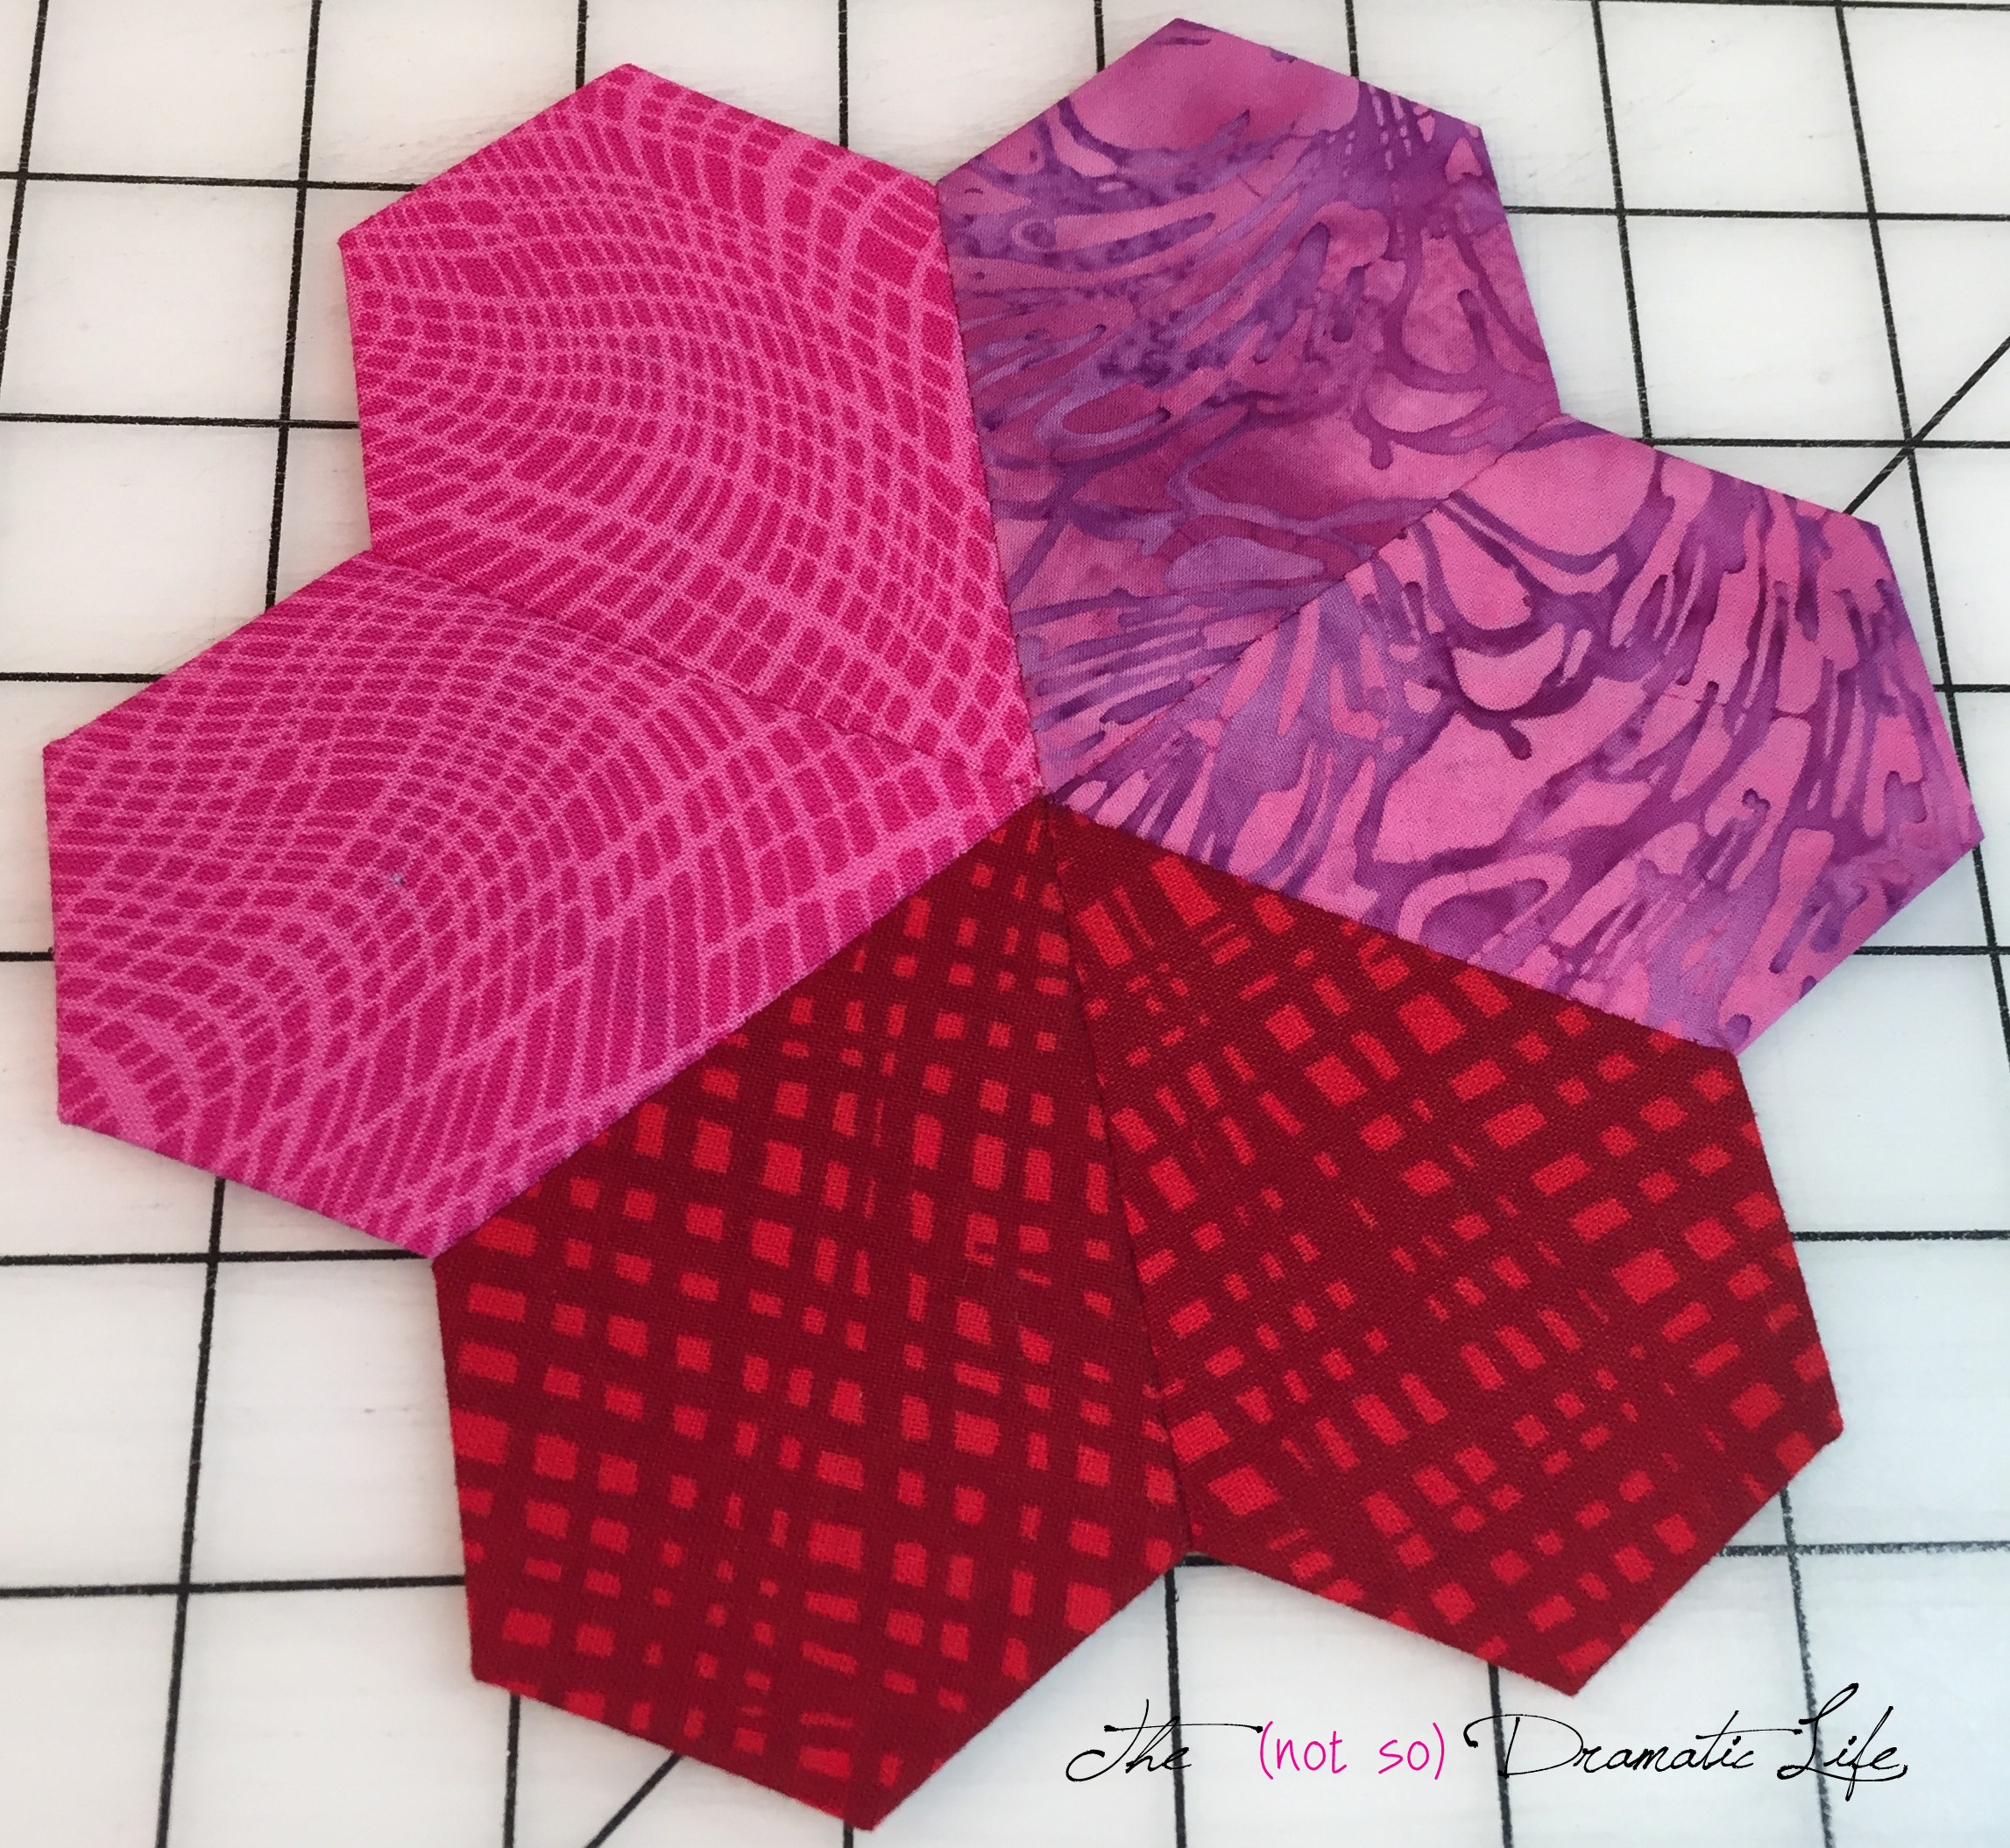
I recently did a quilt with a lot of hexagons that were made by cutting a circle and folding the edges in to create the hexagon shape. In creating these pieces, I became curious about how these shapes would look if I omitted the final fold. The result is a vaguely ice-cream-cone-shaped piece. Two of these together make an adorable heart!
- To make these shapes you will want to start with a circle. I used a container from a round of Brie cheese, but this technique will work with any size circle.
- With the wrong side of the fabric out, fold the circle into quarters to find the center point of the shape.
- With a needle and knotted basting thread, catch 1-2 threads at the tip of the fold and pull the thread through to the knot.
- Unfold the circle with the wrong side of the fabric facing up and your thread coming up from the center of the circle.
- Take a small stitch at a point on the outer edge of the circle. You will want to insert the needle as close to the edge of the fabric as possible without the stitch pulling out of the cut edge. The needle goes in on the wrong side of the fabric and emerges on the right side.
- Now pull the thread through, bringing the edge of the circle to meet the center. Press the fold you have created with your fingers.
- At the end of the fold you just created, take another stitch and pull that point on the edge of the circle to the center. Finger press this fold, and take another stitch at the end of it. Pull this point into the center.
- Continue around the circle in this manor until you have an ice-cream-cone-shape.
- Knot off your basting thread or backstitch at the center point and take the shape to the ironing board to give it a good press.
 To form the center design, place the shapes right side together and whip stitch them together.
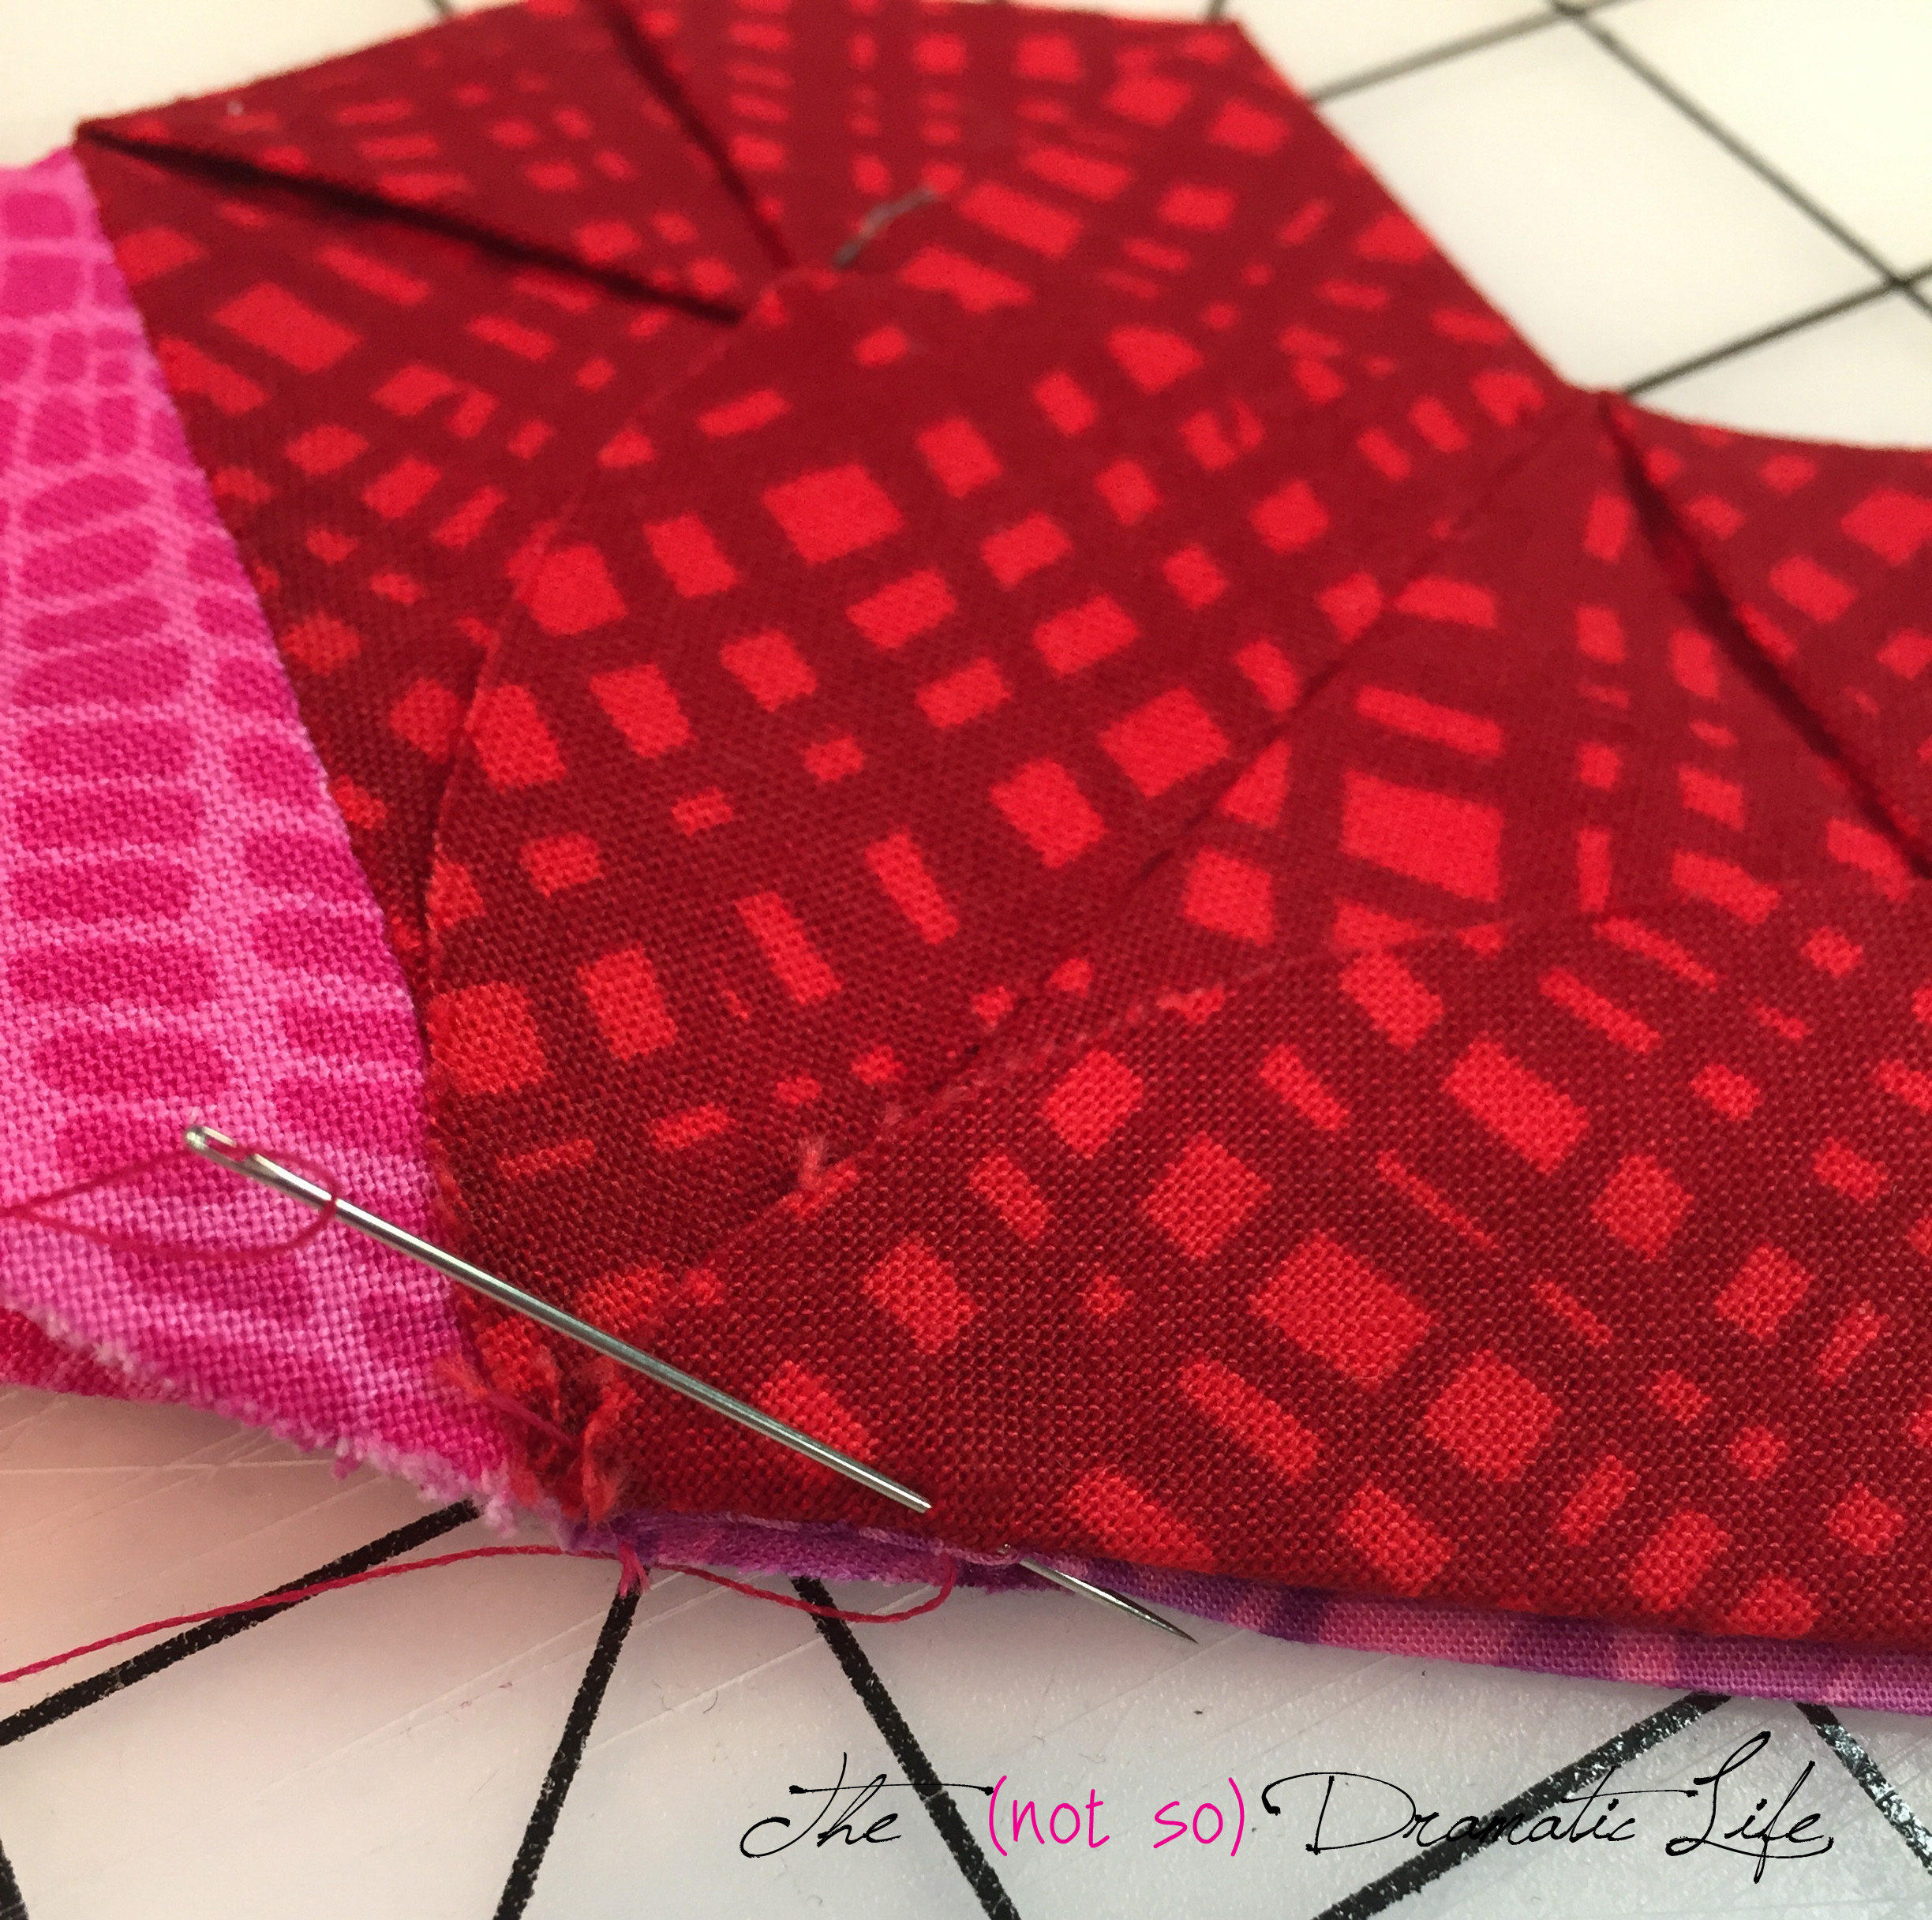
You will end up with a shape that looks like this.
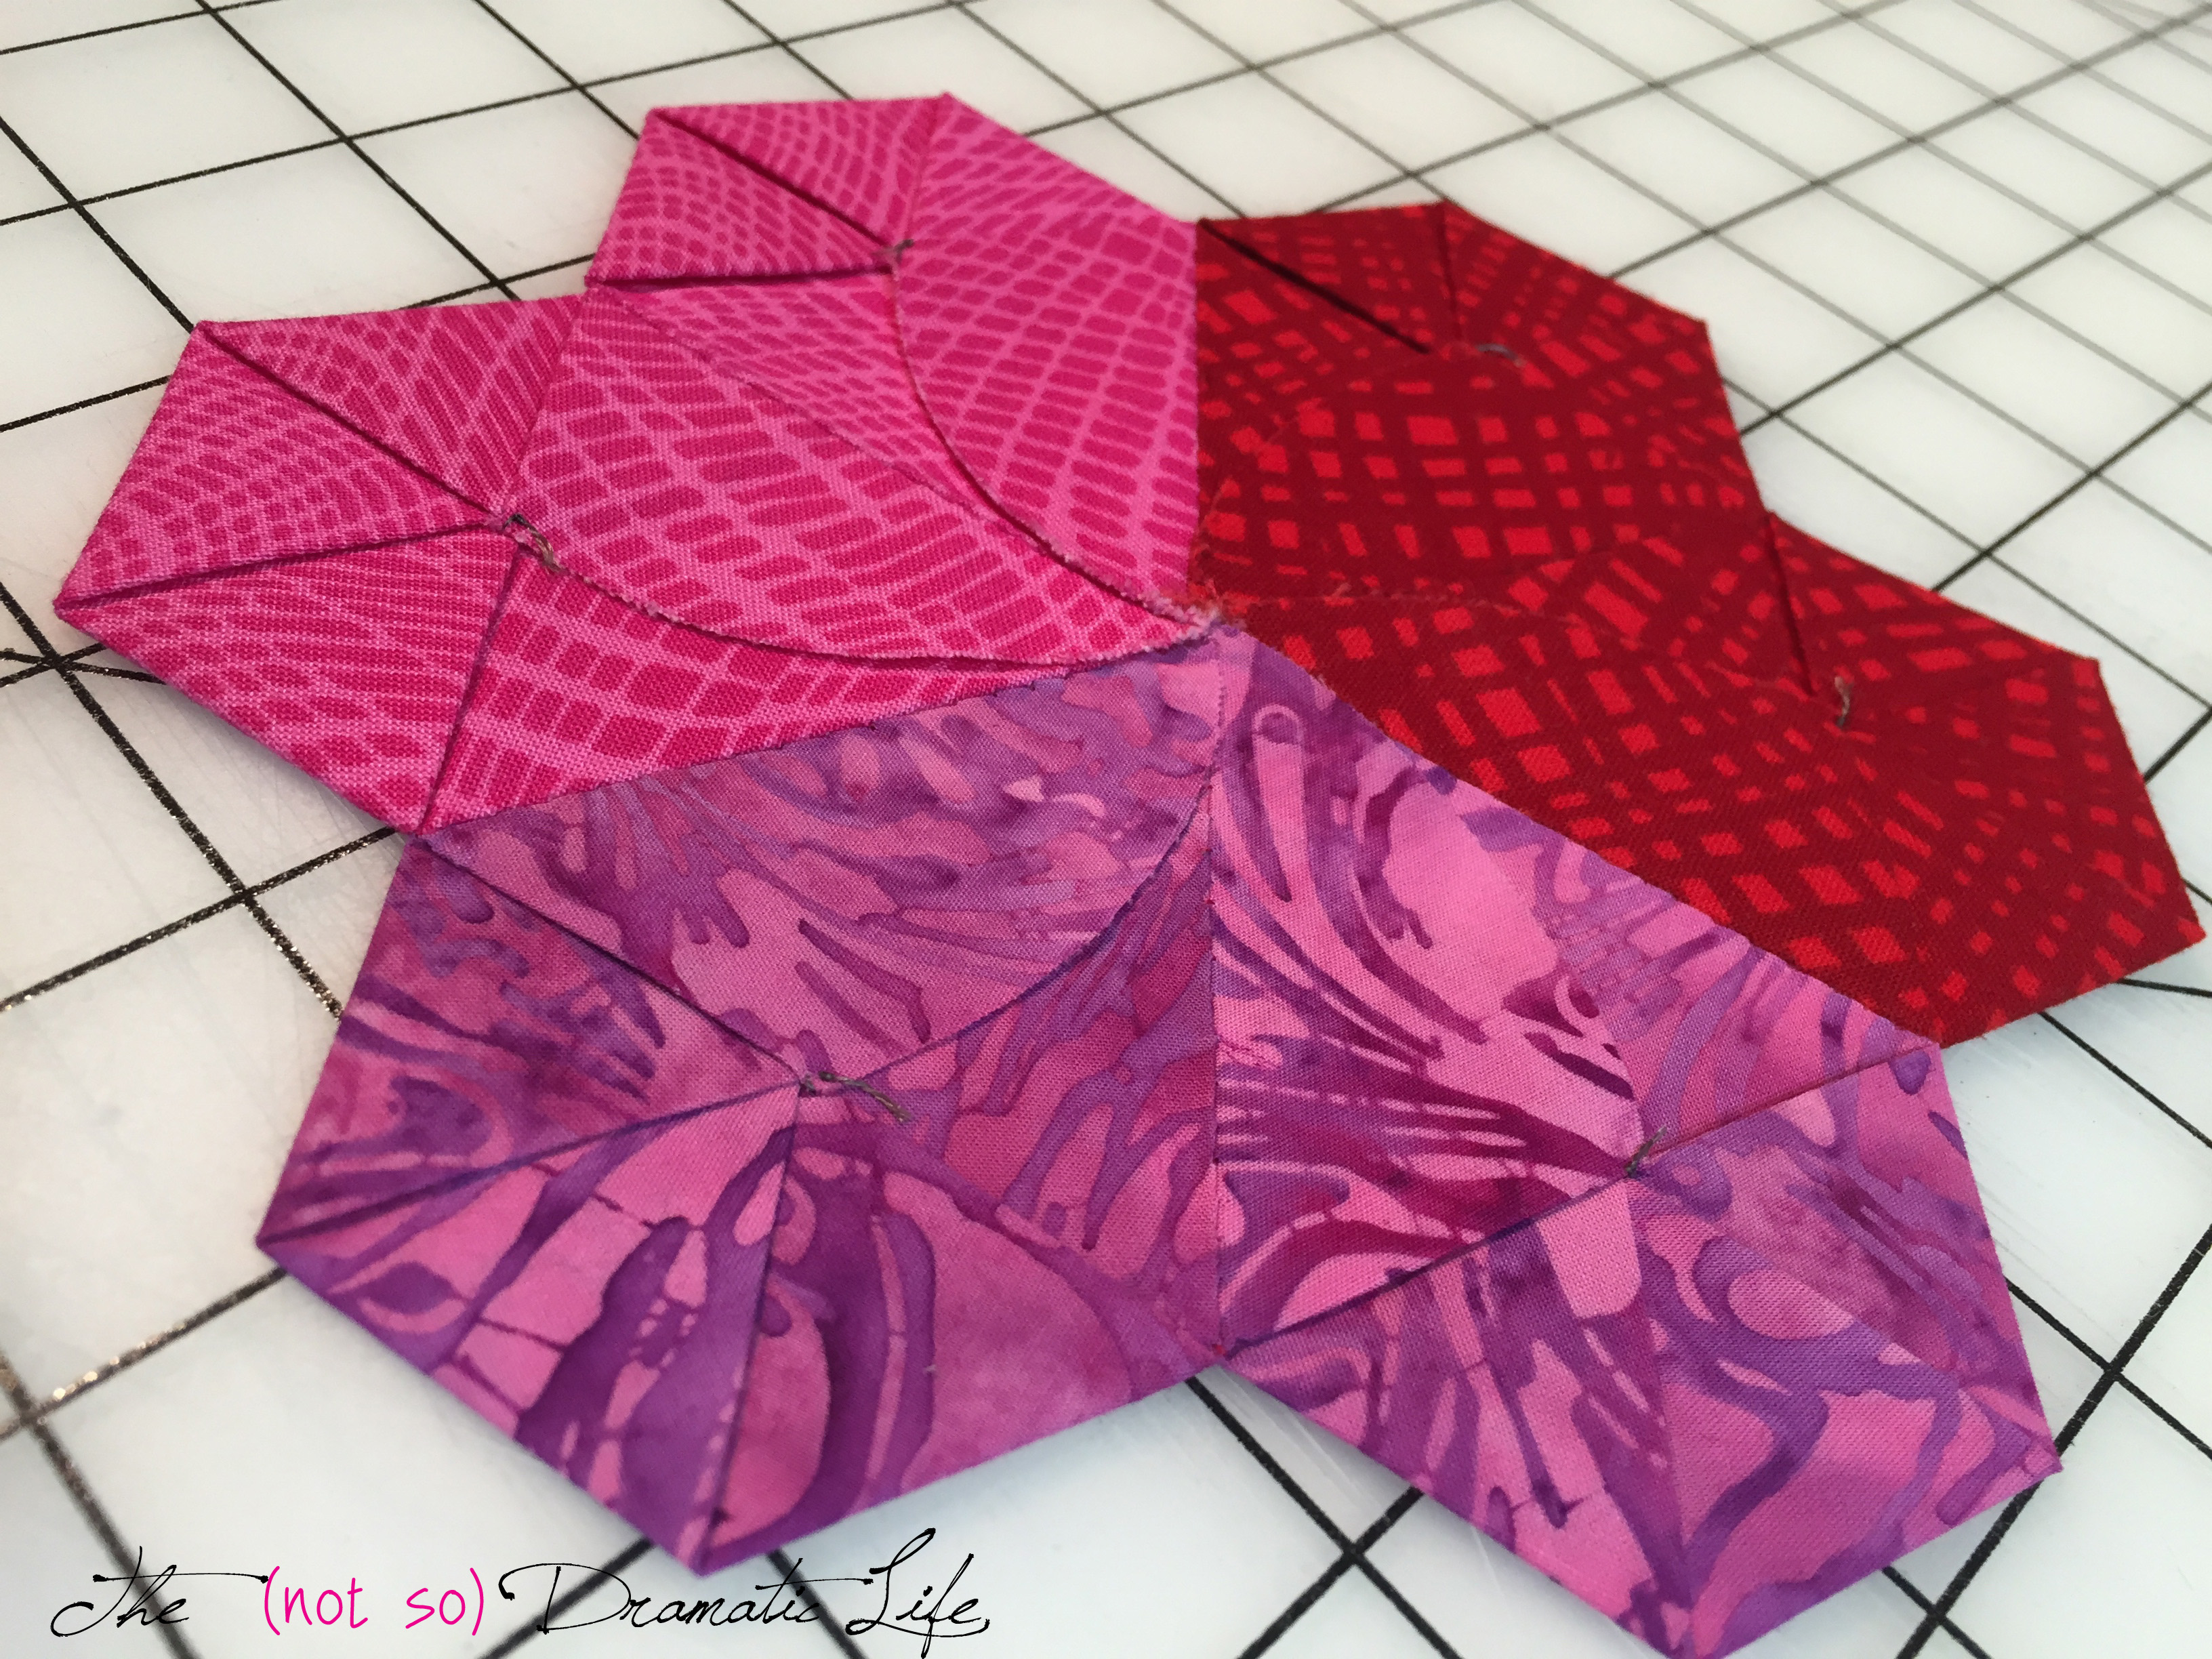
 The back is almost as pretty!
 I was originally planning to hand appliqué the shape to the background, but after thinking it over, I decided the hearts needed some additional emphasis in the form of more decorative stitches. I liked using decorative machine stitches on Fibonacci on the Seashore, and I was eager to experiment with using machine stitching for appliqué. For this project, I used a blanket stitch in a different color to stitch around the edge of each heart.
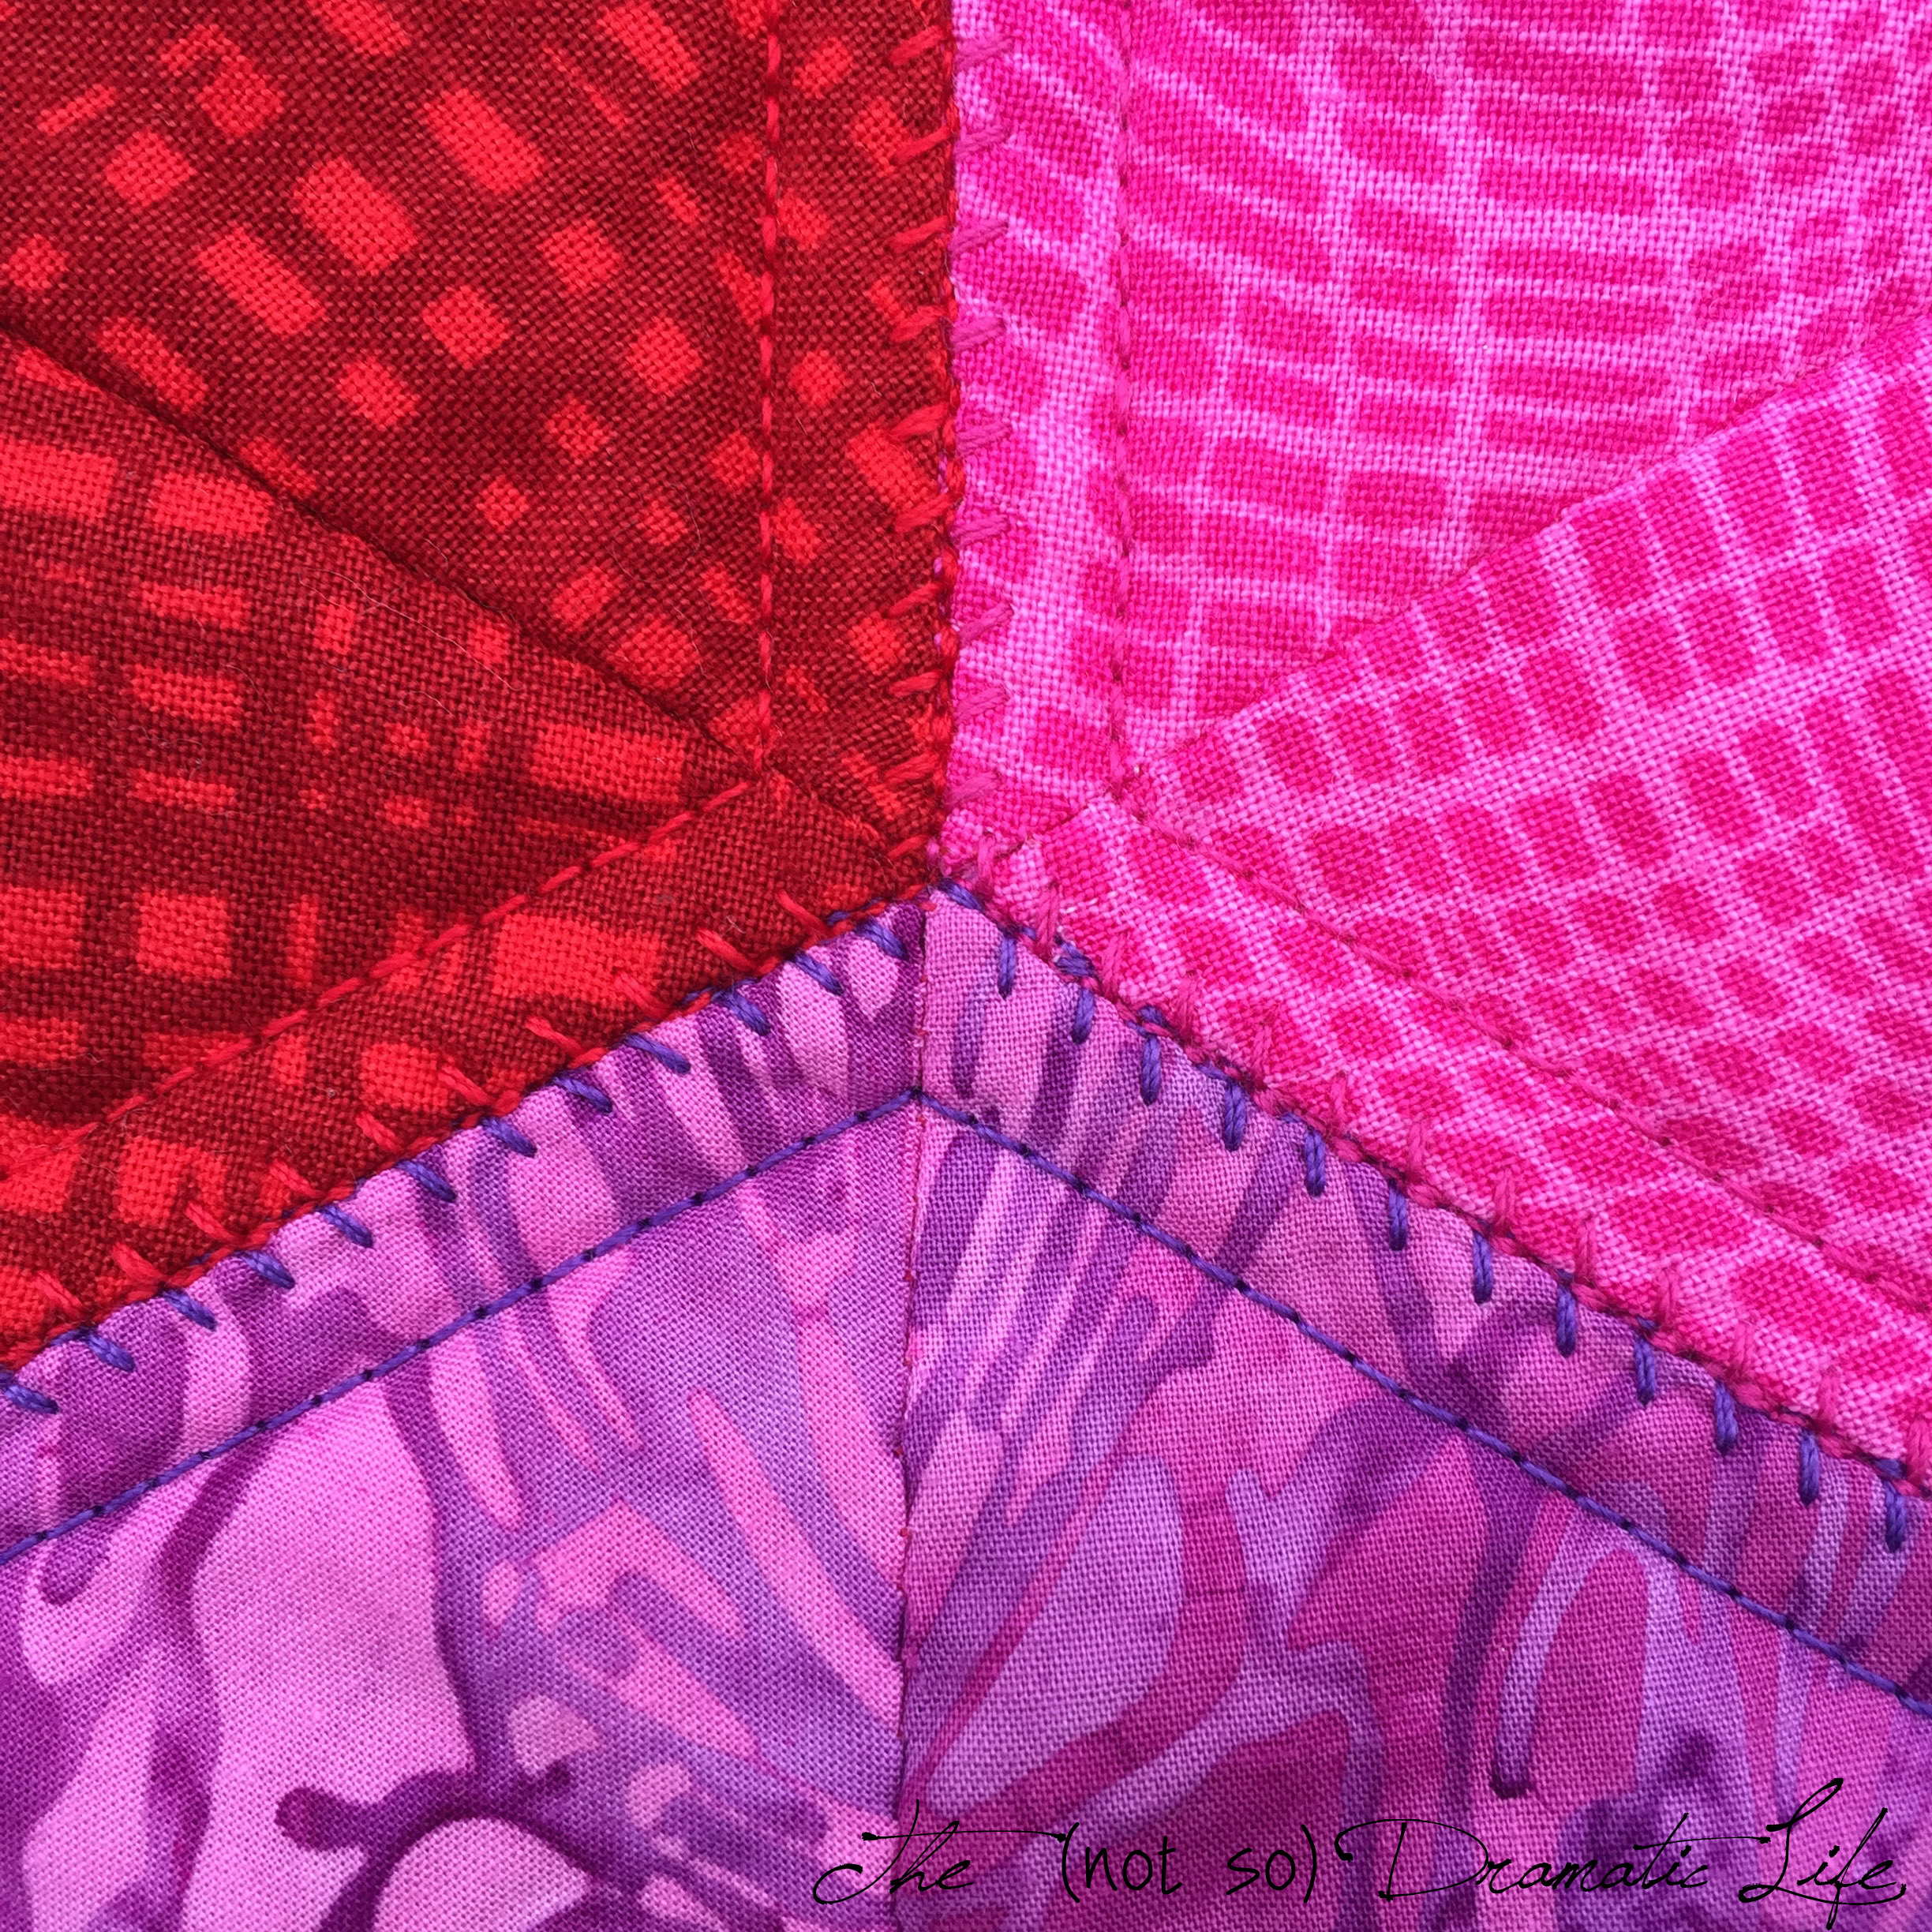
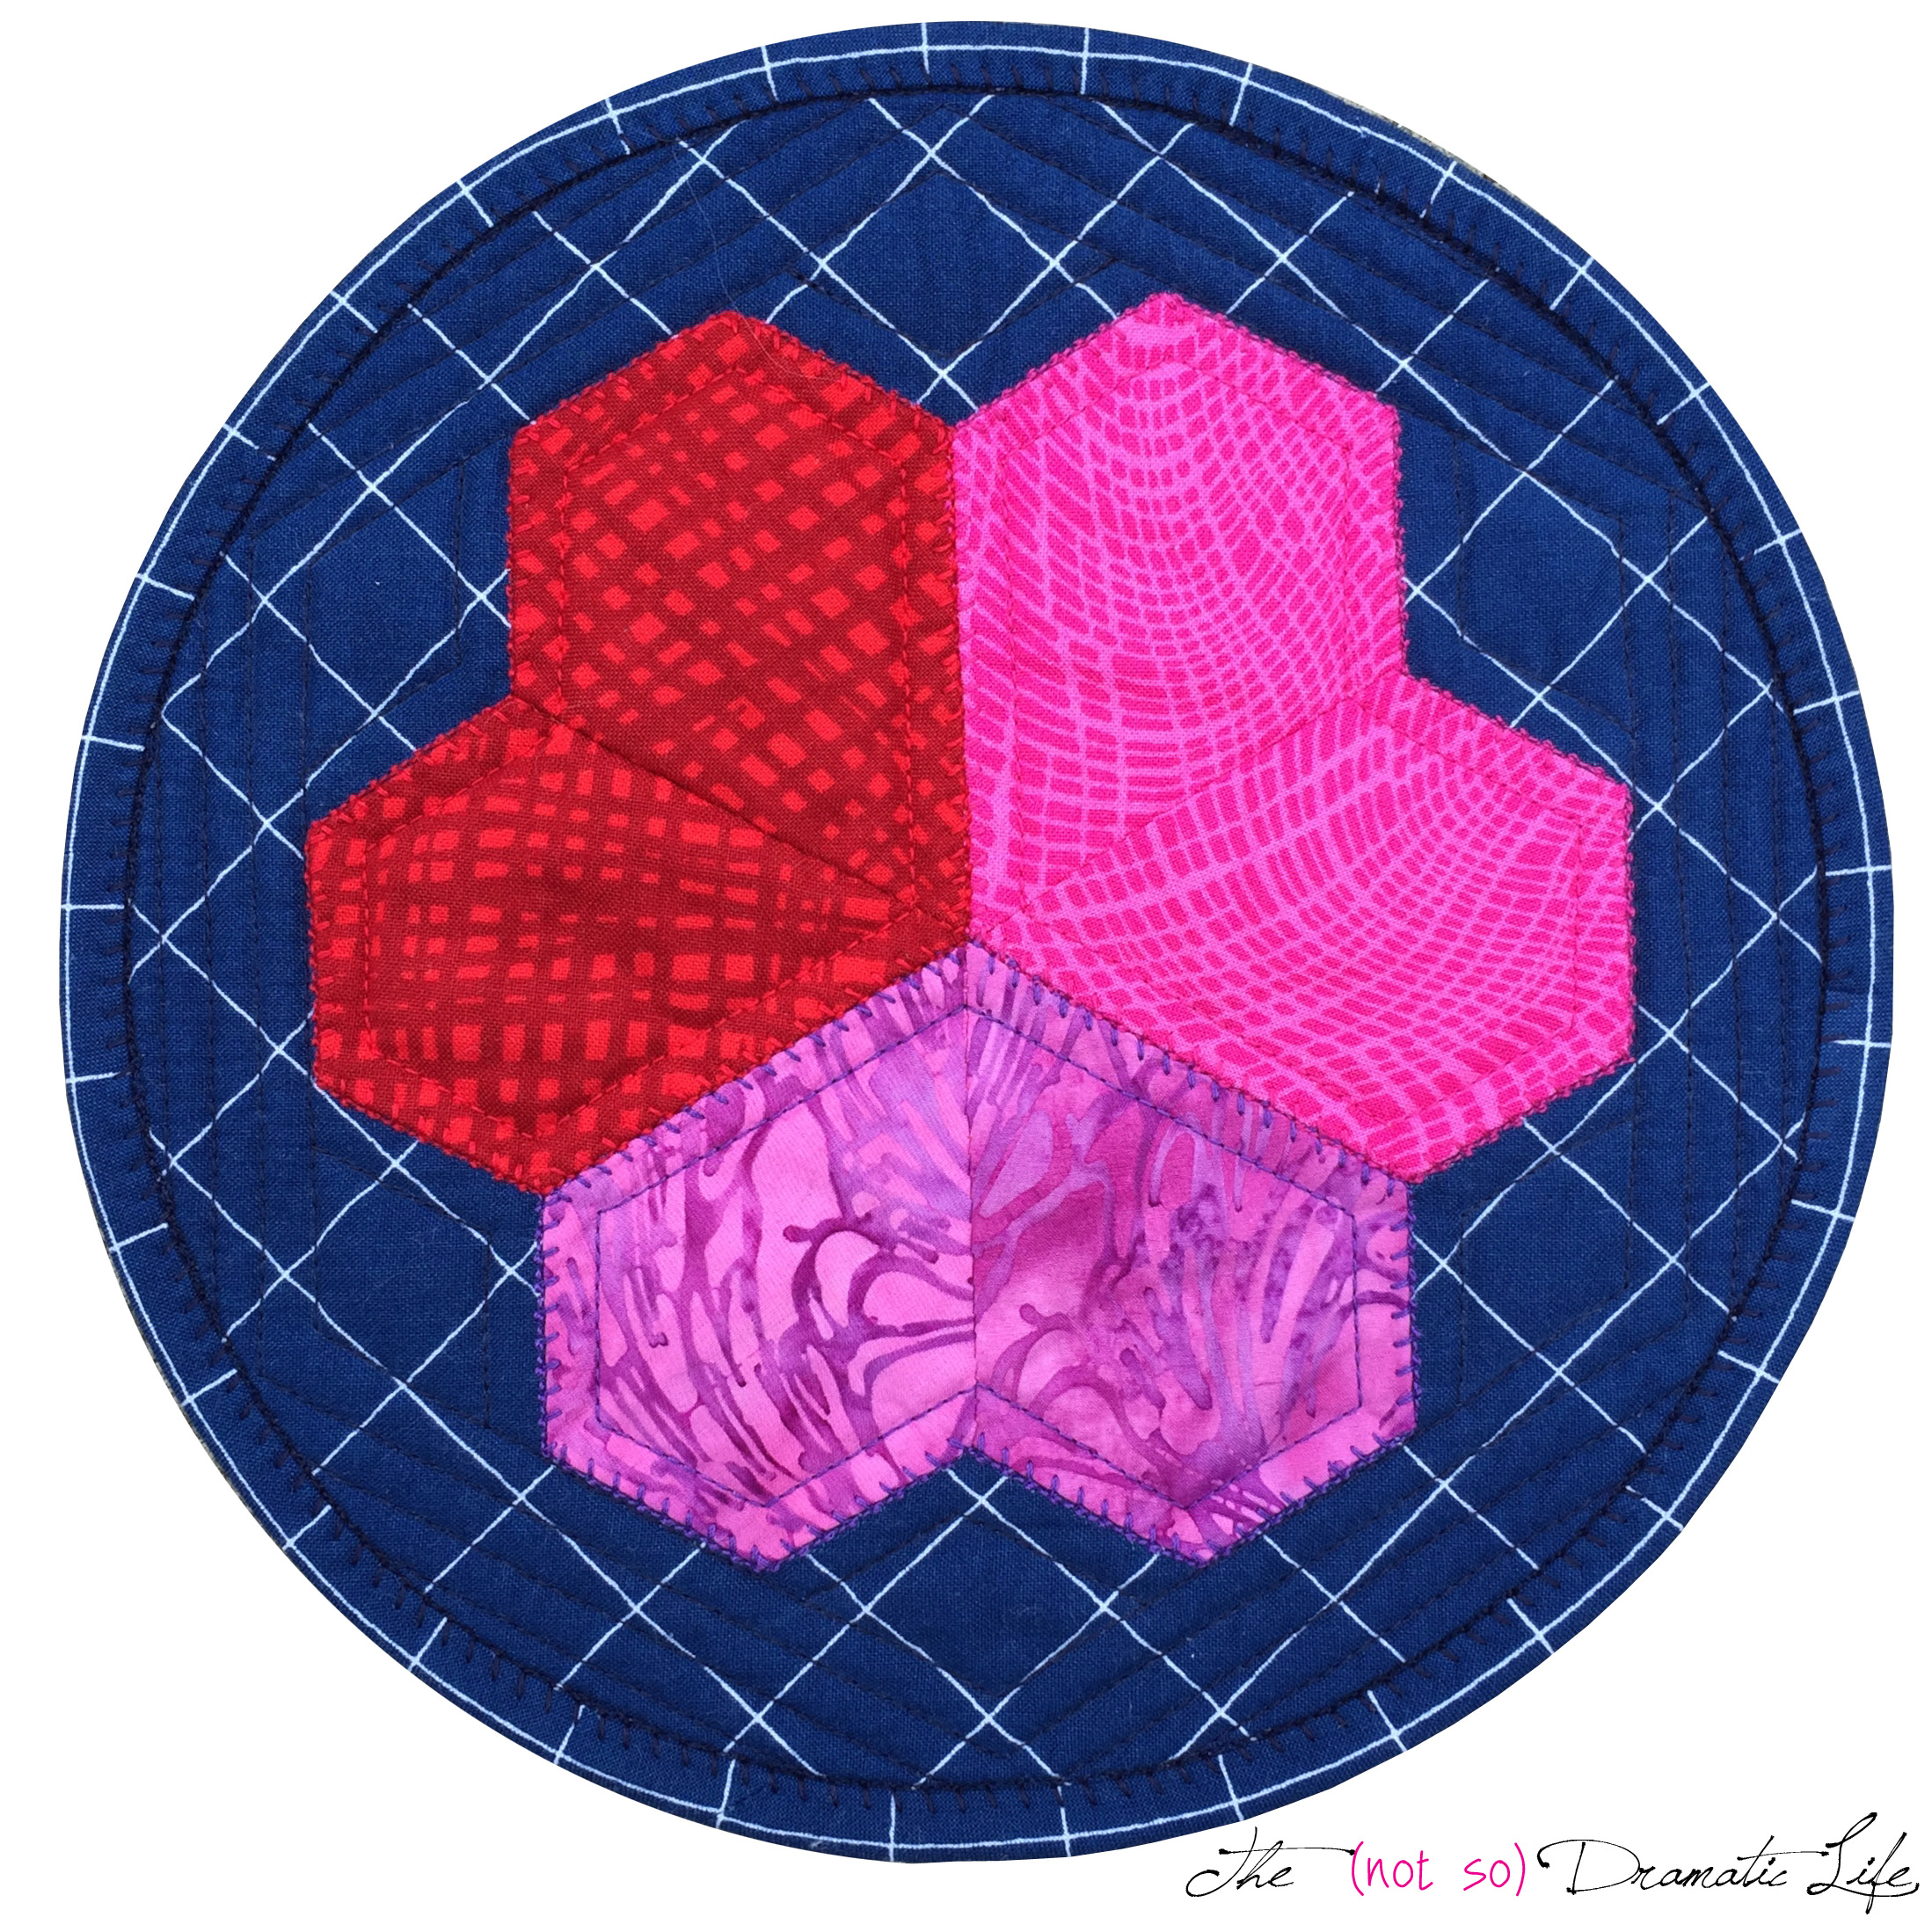
The hearts in this project are created without using curves, and I selected a gridded background for the piece. Given all the linear aspects of this mini, I thought it would be interesting to make the overall shape a circle. The radius for this 4.5 inches.
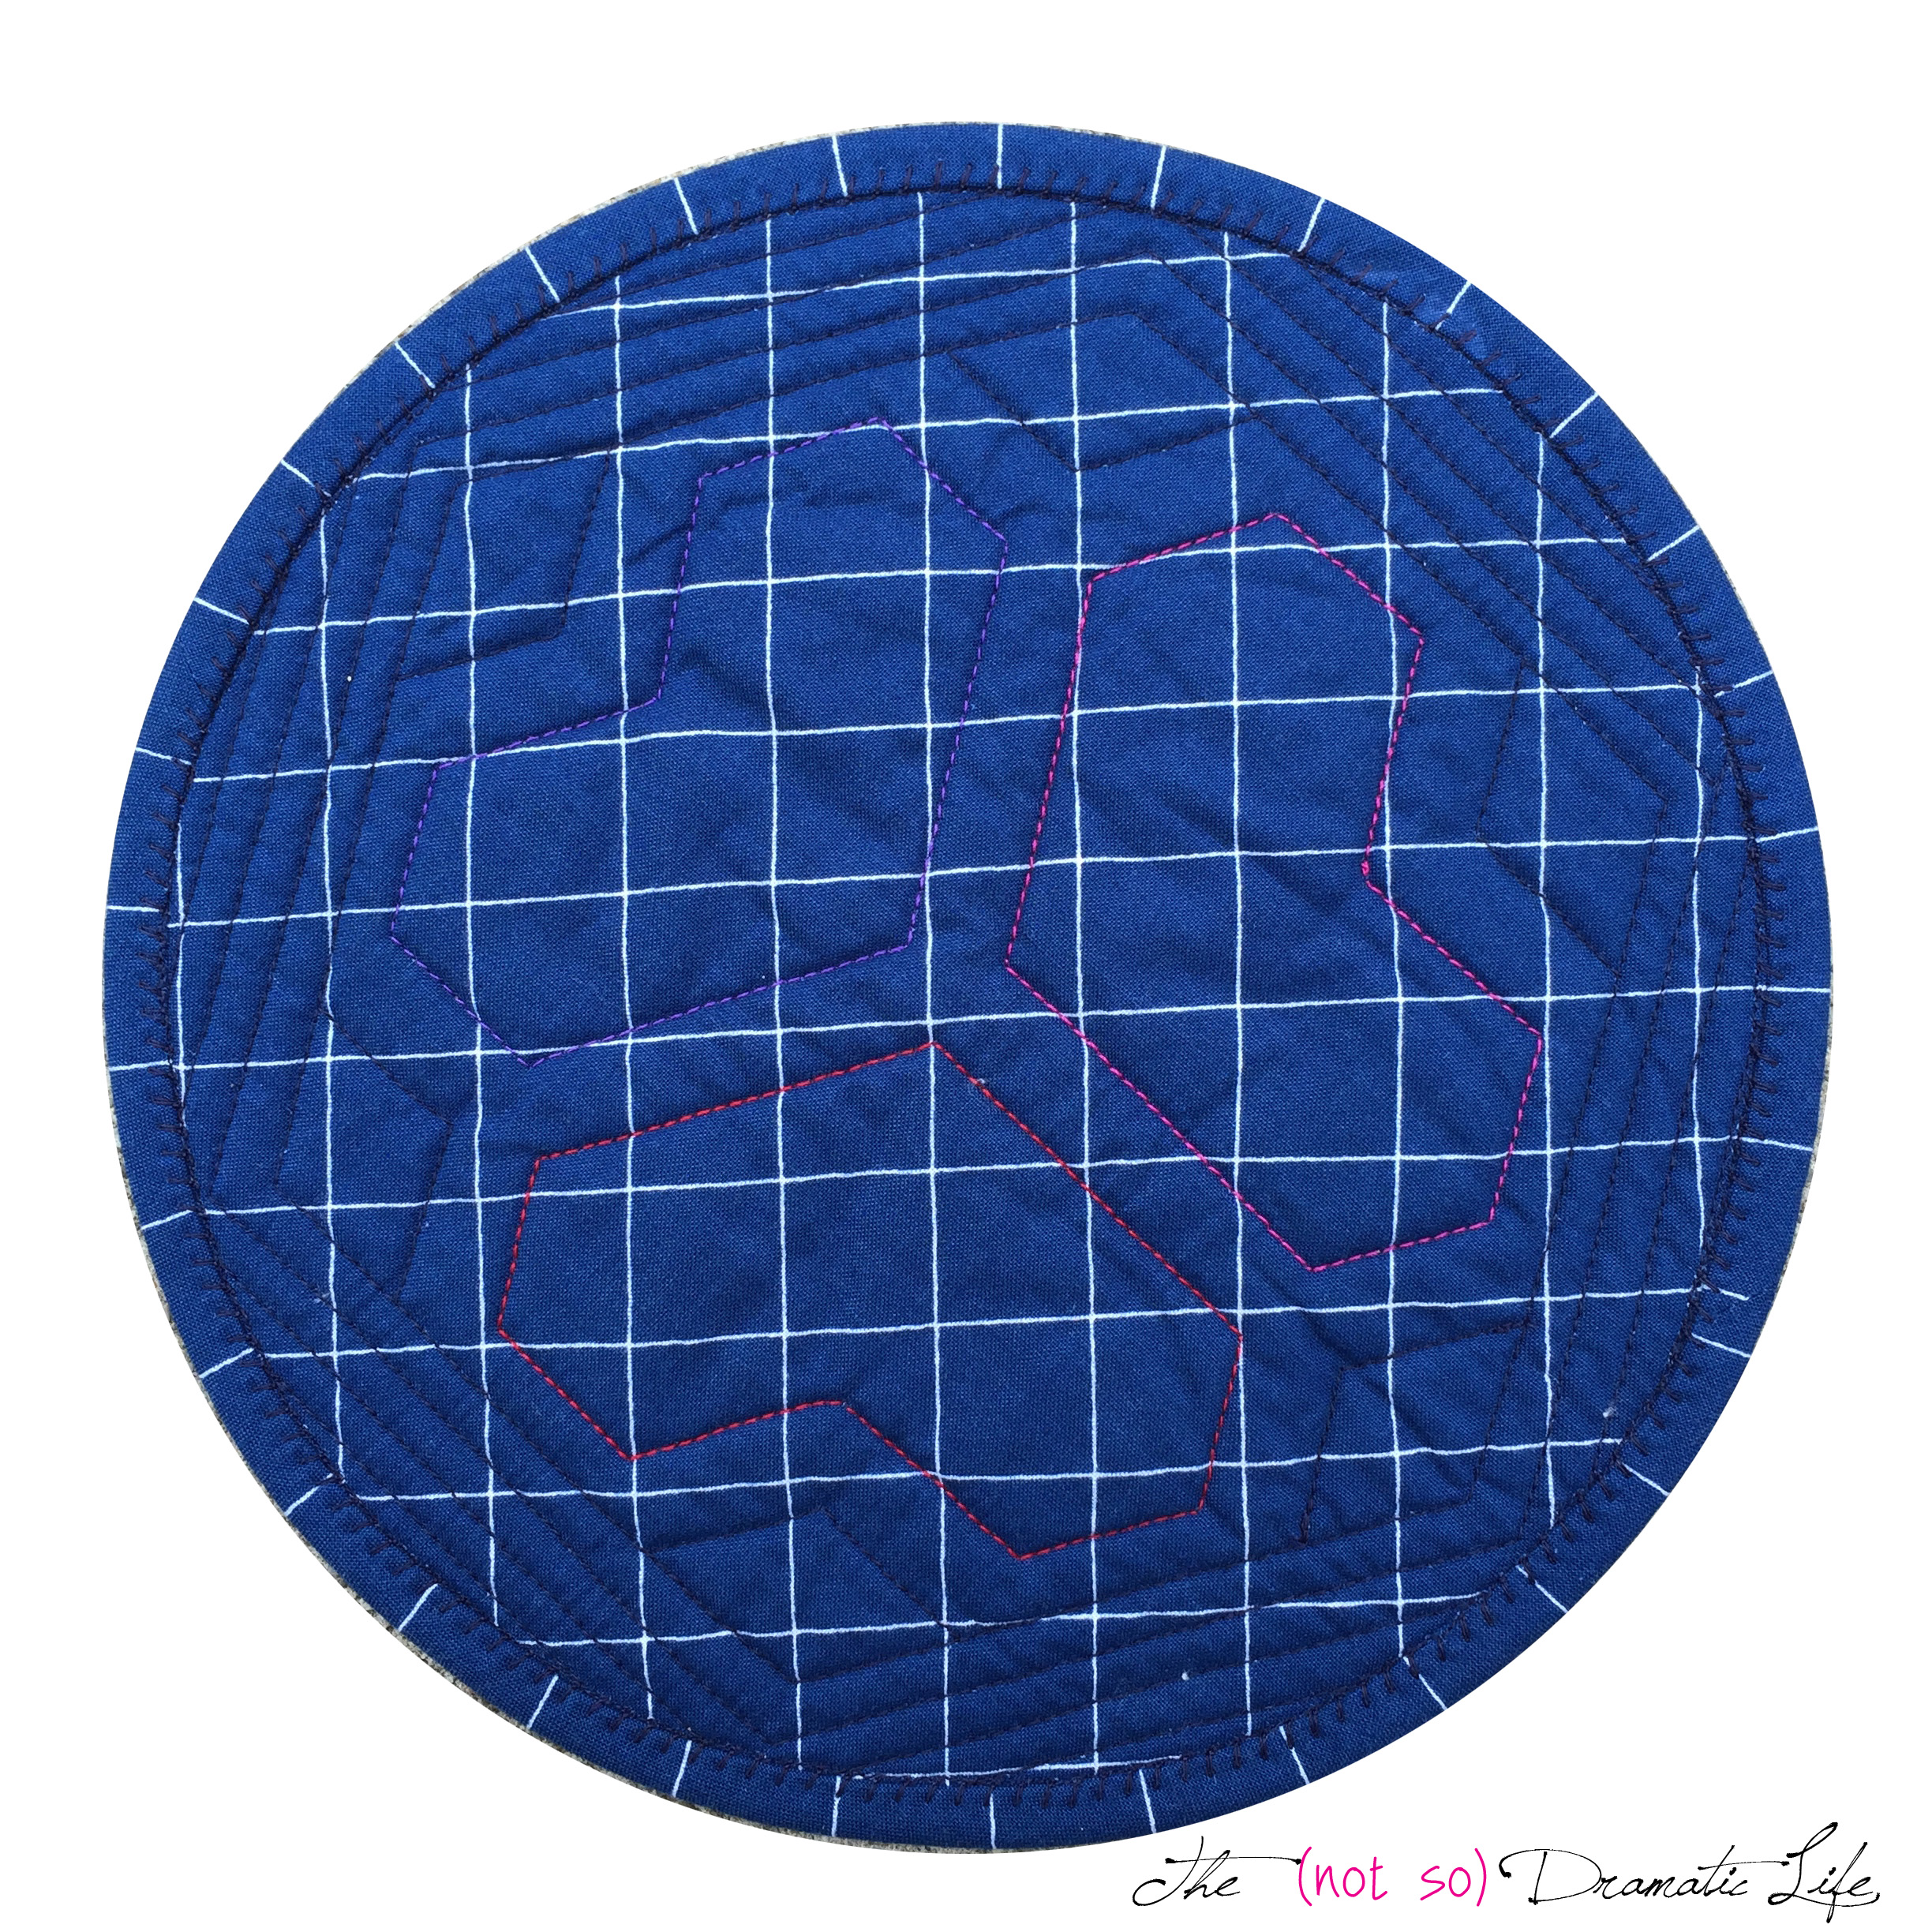
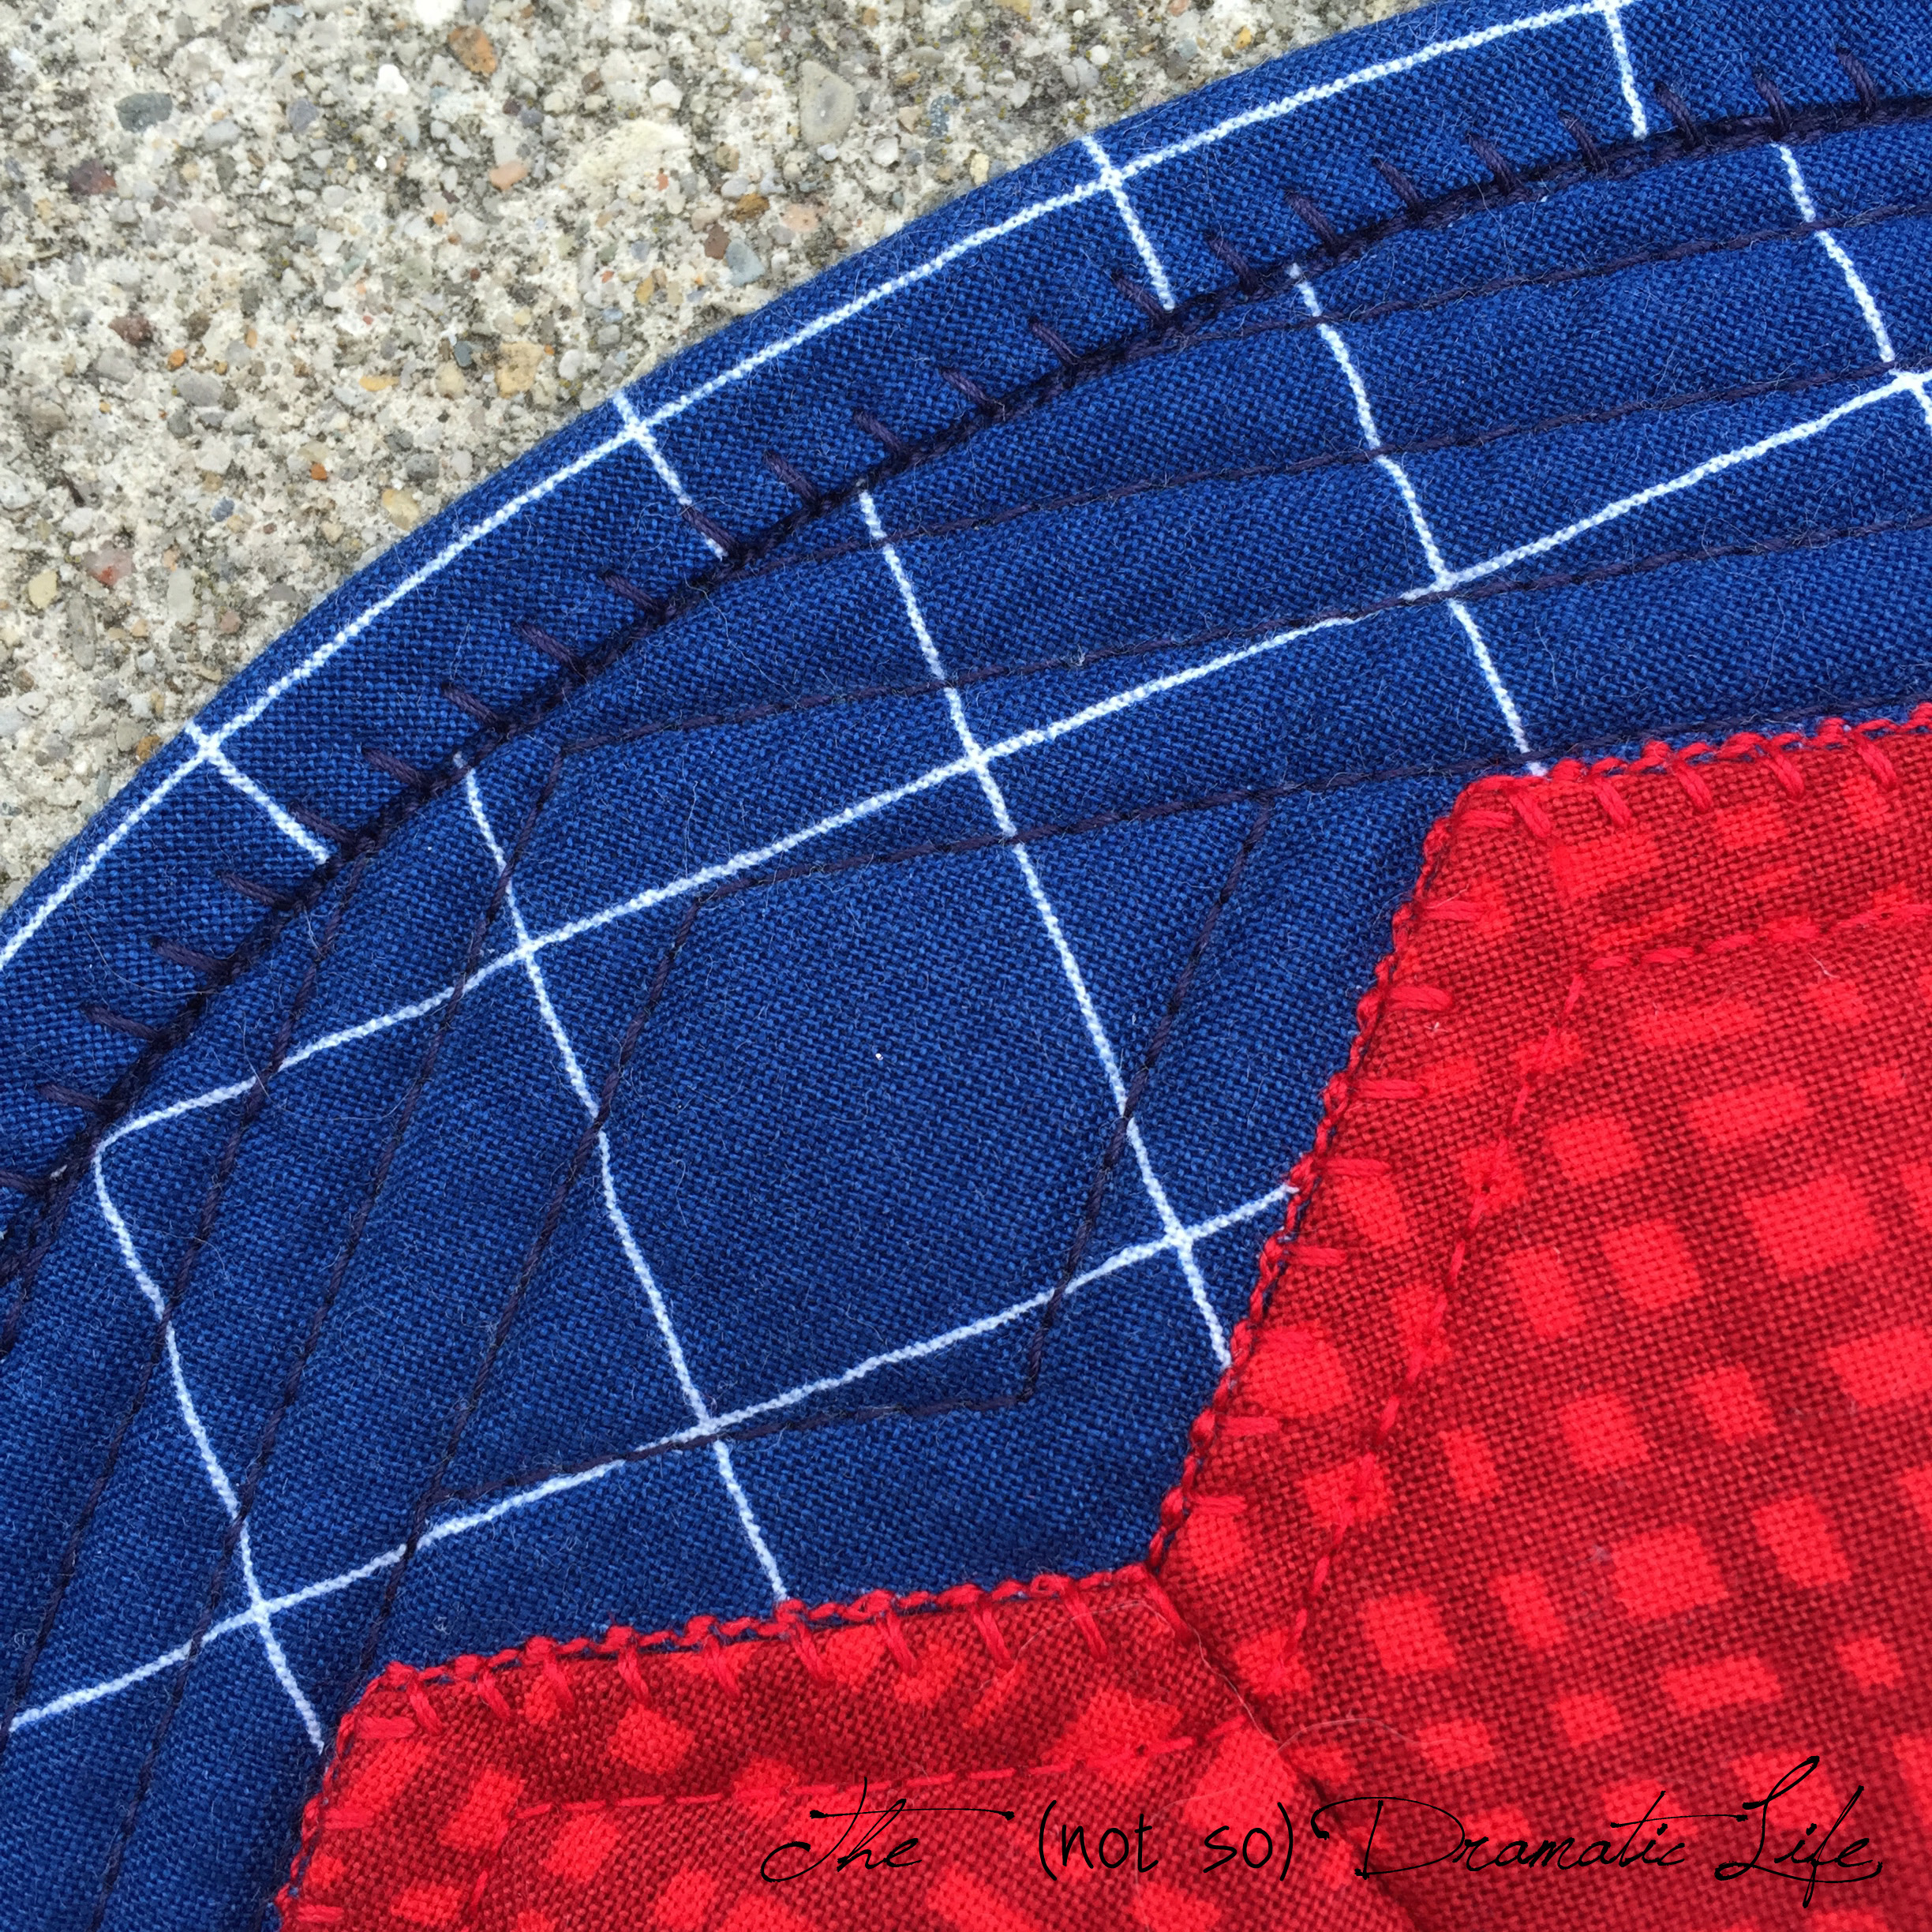
The hearts are quilted a quarter inch inside the appliqué. The background is a radiating hexagon shape, with diamonds filling in the gaps. The binding matches the background and backing, and I love the linear effect. It was worth the effort I made to match up the design.
Quilt Stats
Title: Triple Heart
Size: 9″x9″ (circumference is about 28- 1/4″)
Techniques: Hand piecing, folded “hexagons” (without the final fold), Machine appliqué
Quilting: Machine Quilted. Hearts: Offset quilting 1/4″ inside the edge Background: Spiraling hexagon
Fabrics: Background from Carolyn Friedlander’s Doe line. Hearts are 100% cotton prints and batiks.
Batting: Warm and White cotton batting
Thread: Pieced by hand using Magenta Gutermann Mara 100 (and Thread Heaven); Machine appliquéd with red, magenta, and violet Cotton Mettler Quilting Thread; Quilted with navy cotton machine quilting thread; red, magenta, and violet Cotton Mettler Quilting Thread.
Binding: Bias strips cut at 2 inches, machine straight stitched to the back, machine blanket stitched to the front.
What Was New:
- A round quilt!
- 5- sided “hexagons”
- Machine appliqué with a blanket stitch
- Finishing the binding on the front with a machine blanket stitch

Quilt 4 / 50
Goal #3 is Finished!
I am linking this post up with Thank Goodness It’s Finished Friday at From Bolt to Beauty, Finish It Up Friday at Crazy Mom Quilts, Show Off Saturday at Sew Can She, Needle and Thread Thursday at My Quilt Infatuation, Fresh Sewing Day at Lily’s Quilts, and Whoop Whoop Friday at Confessions of a Fabric Addict. I hope you take a moment to see all of the wonderful work being created!
18 Comments
Jasmine
January 22, 2015 at 11:50 pmSo cute! It was interesting to read how you made these shapes. I made a valentine table topper with the gem shape before, but I cut them out with the Hex-n-more ruler. Thanks for sharing.
Aileen
January 23, 2015 at 12:46 amThat is so interesting! I’ve never seen hexes made this way, and your experiment has resulted in a really pretty pattern that would look great as a flower too! Thanks for sharing this creative tutorial. Yeah, it is a gem shape, isn’t it?
Yvonne @ Quilting Jetgirl
January 23, 2015 at 9:48 amWhat a clever way to create hexagon shapes! This is a very sweet tutorial, and I really like the contrasting background you used.
Andrea @ MouseInMyPocket.com
January 23, 2015 at 11:07 amThis is super cute! Thanks for the inspiration and a new technique.
Angie in SoCal
January 23, 2015 at 11:41 amWhat an interesting way to make this shape without templates. Thank you for sharing the process!
Snowcatcher
January 23, 2015 at 12:58 pmSuch a perfect design for the upcoming holiday. Thank you for the great tutorial!
Michelle
January 23, 2015 at 3:48 pmI wondered how to make this shape without piecing a hexagon & triangle together. Your quilt is really sweet! I’m going to put this in my small projects to do folder. Thanks!
Lucy
January 23, 2015 at 10:03 pmAdorable 🙂 http://www.crazyforpurple.com
Pamela
January 23, 2015 at 11:44 pmI will definitely have to try this! So cute!
Raelee
January 24, 2015 at 2:04 amThanks so much for the tutorial. Your hearts look great.
Kate
January 26, 2015 at 10:48 amI love it – thanks for sharing!! 🙂
Lynette
January 27, 2015 at 8:05 amThis is so clever! And so kind of you to take the time to work up a tutorial for us. Thanks!
Stephanie
January 29, 2015 at 2:46 pmWhat a neat technique, the end result looks great!
Heulwen
February 1, 2015 at 2:29 pmWhat a brilliant tutorial, thank you so much! The hearts are super-cute, but the first thing I thought when I saw the whole shape was poppies or pansies – if you don’t mind, I might adapt this to make a flowery quilt for a friend’s little girl. 🙂
Deb@asimplelife Quilts
February 1, 2015 at 3:42 pmWow… that’s really interesting! And the back side is fascinating… great tutorial.
Adrianne
April 8, 2015 at 3:58 amVery cute!
Blogger’s Quilt Festival: Petals in the Wind | The (not so) Dramatic Life
May 16, 2015 at 1:00 am[…] spaces between segments. The hexagons are created by folding a circle (I have shown a very similar technique in this post), then embellishing the shape with a fabric yo-yo, cotton and silk threads, and glass […]
February Meeting Minutes
February 27, 2017 at 3:55 pm[…] Here is a link to the directions if you missed our or want to make at home. http://thenotsodramaticlife.com/triple-heart-mini-quilt-4/ […]