Does binding belong in the middle of a quilt? It does in a potholder quilt.
When you piece, quilt, and bind each block prior to assembling the full quilt, you are making a potholder quilt. I used this process to create a modern log cabin design and tweaked the technique to create a quilt with holes.
Now I’m turning the entire method upside down by cutting up a nearly finished quilt and reassembling it with a dash of potholder quilt inspiration.
Appliqué the Way to a Quilt Top
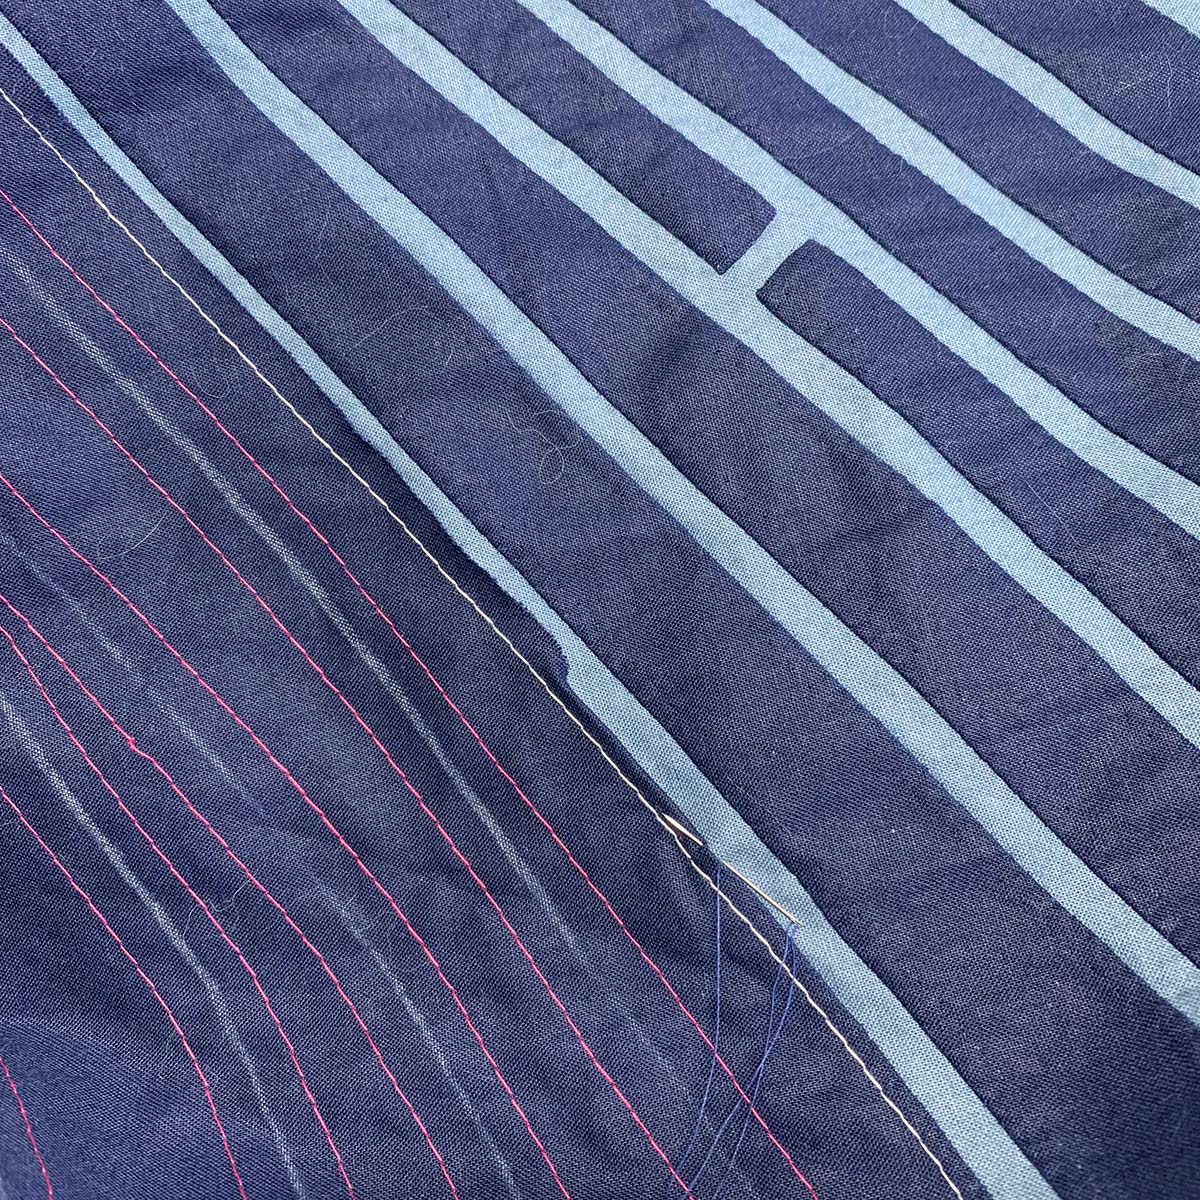
Equal amounts of two fabrics comprise the quilt top with the dark blue sitting on the medium blue background. Using a white fabric pencil, I drew organic cutting lines on the top fabric with the aid of a flexible ruler to guide the overall line direction. I machine basted the two fabrics together with lines 1/4″ to either side of each drawn line. You can see these white and pink stitching lines in the photo below. Basting is a terrific way to use up the ends of bobbins- with one bobbin on the top and one in the bobbin case, you can use up excess thread twice as fast.
Needle turn appliqué is relaxing once all that prep work is done- its one of those things that can even make you feel productive while watching television. As I worked across the quilt top, I would cut one drawn line at a time, turn the raw edge under to butt against the machine basting line, and do an invisible appliqué stitch to secure the fold. Just repeat this process a couple thousand times, and you’ll have a quilt top- seriously- start thinking about what you will watch on TV now!
Basting Away Again
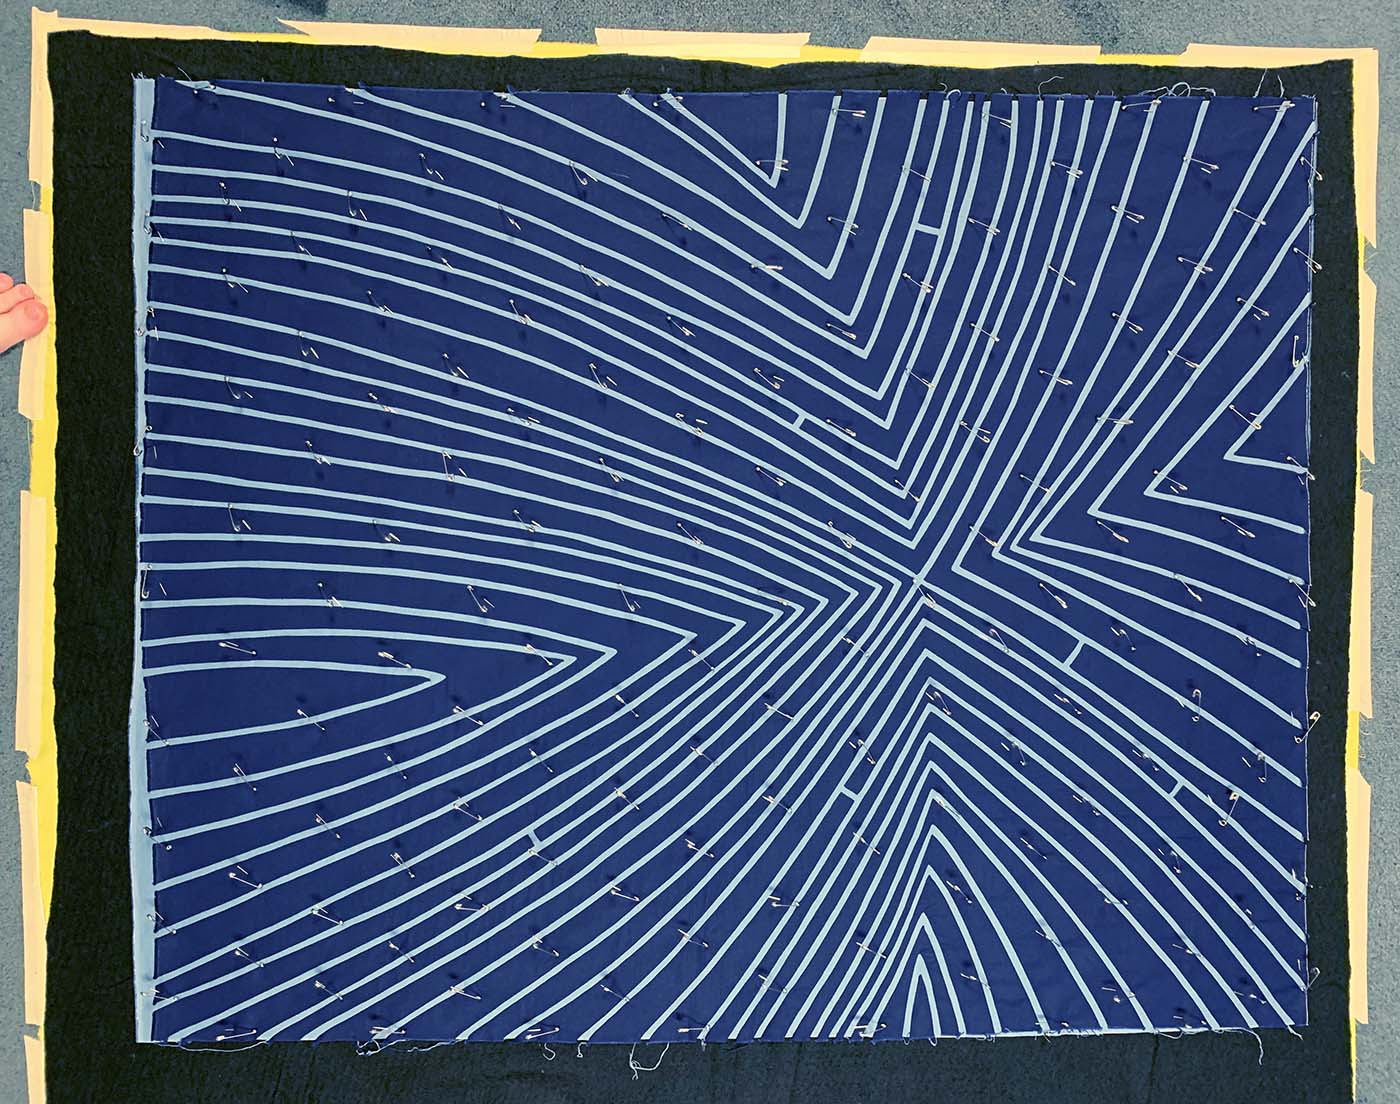
Measuring about one yard by the width of fabric, this is the largest project I am willing to pin baste anymore. Why pin baste this time?
- Echo quilting was the plan for this project. Given the long curving components, longarm quilting would require heaps of starts and stops
- Stitching in the ditch anchors and defines the applique. Ditch stitching on a longarm is headache inducing.
- The fumes of spray basting are even more headache inducing, and not good for you at all.
Did you notice the black batting? On a quilt as dark as this one, black batting prevents any small fibers from working their way through to the front of the quilt and showing just enough to be annoying.
Using the Right Tool for the Job
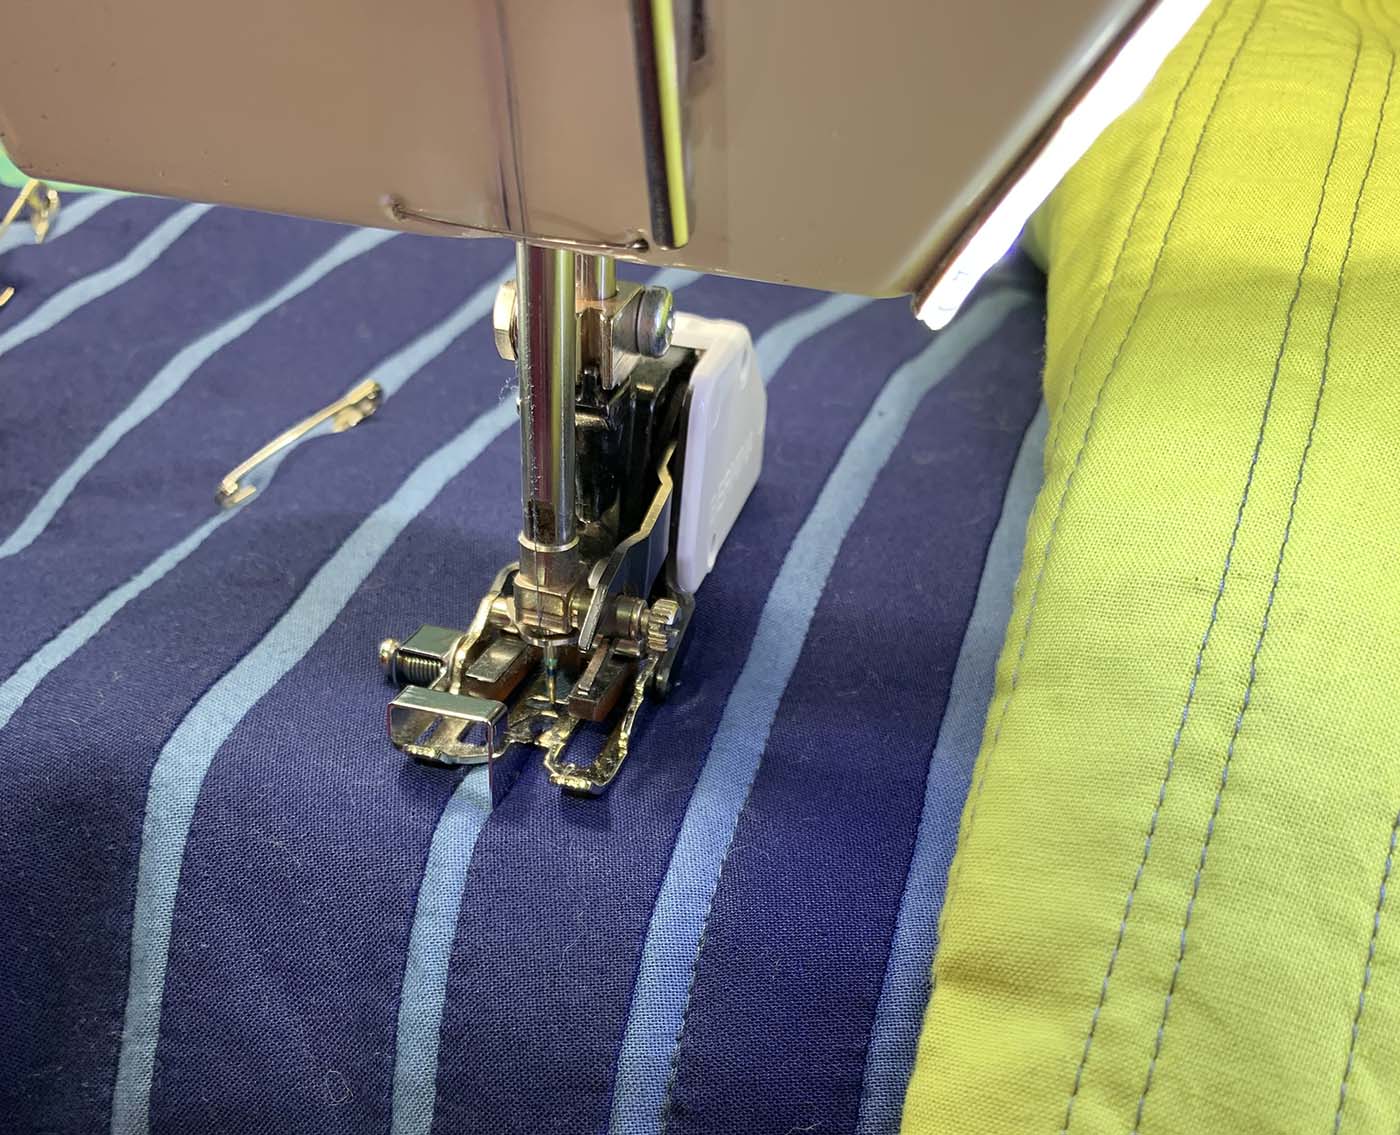
The open toe on the walking foot is the right choice for almost all of my walking foot quilting, but not for this quilt. I stitched in the ditch around each appliqué, and changing the sole of the walking foot to the one with a central guide made this process so easy! When I was ready to stitch inside each appliqué, I left this sole plate in place, but moved my needle to the side, keeping a consistent distance from the edge.
Here’s Where I Differ From Most Quilters
When I have a quilt that requires blocking, I get the quilt wet and staple the edges to a wooden frame so it will dry square. Check out this video to see a time lapse of the process:
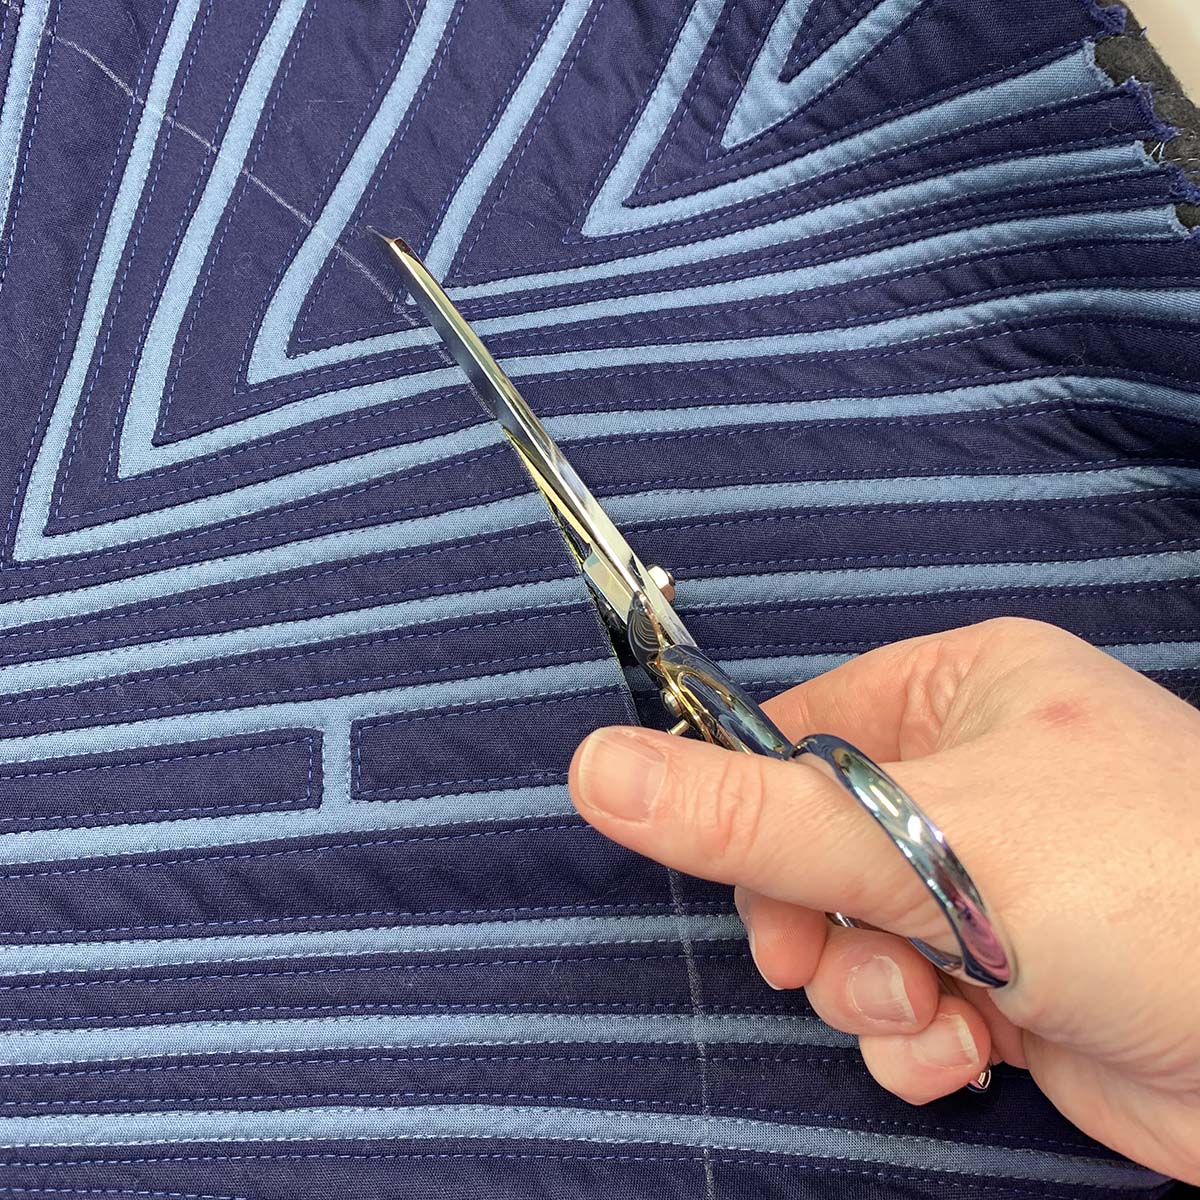
Cutting a Hole In It
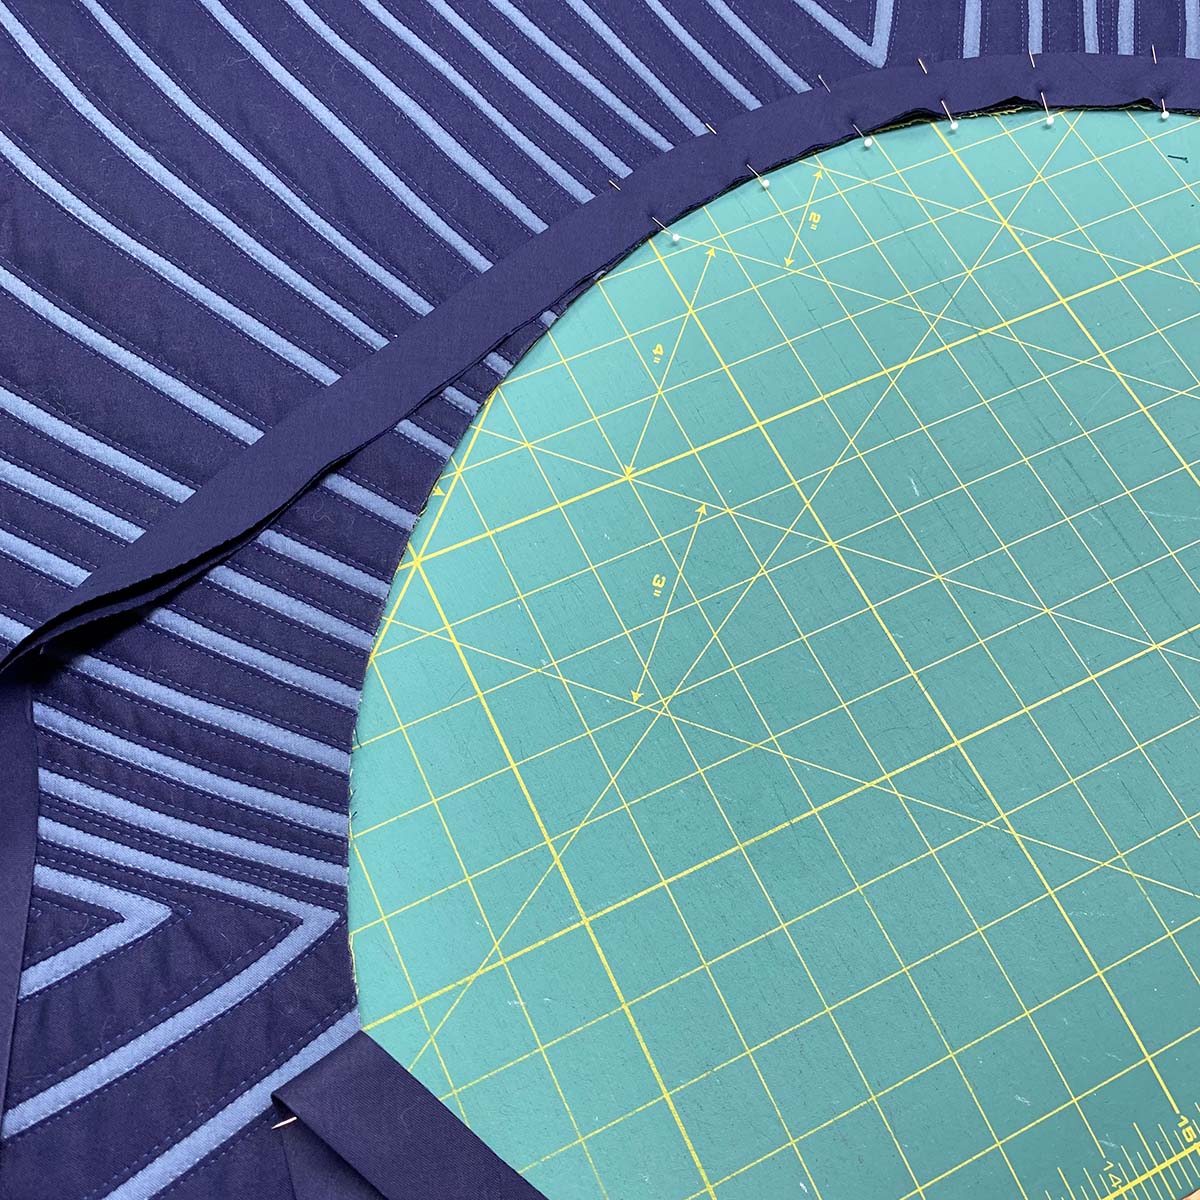
Once you start there is no going back. I made a paper template of the circle I planned to cut out of my almost finished quilt, traced it, a started cutting before I could chicken out.
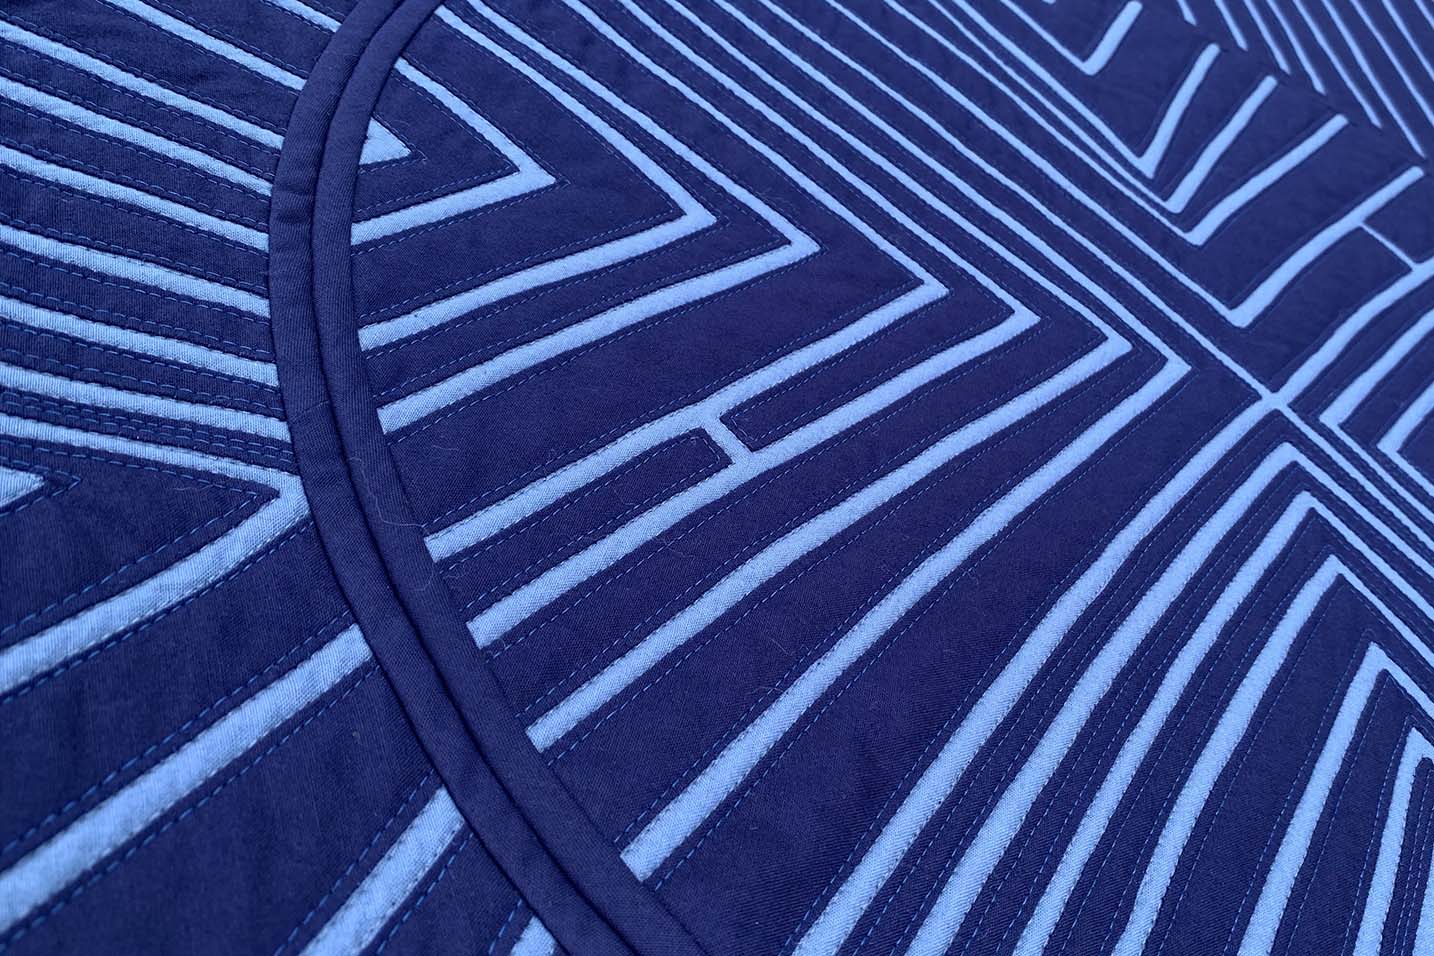
More than 11 feet of bias binding finishes the cut edges of the circles.
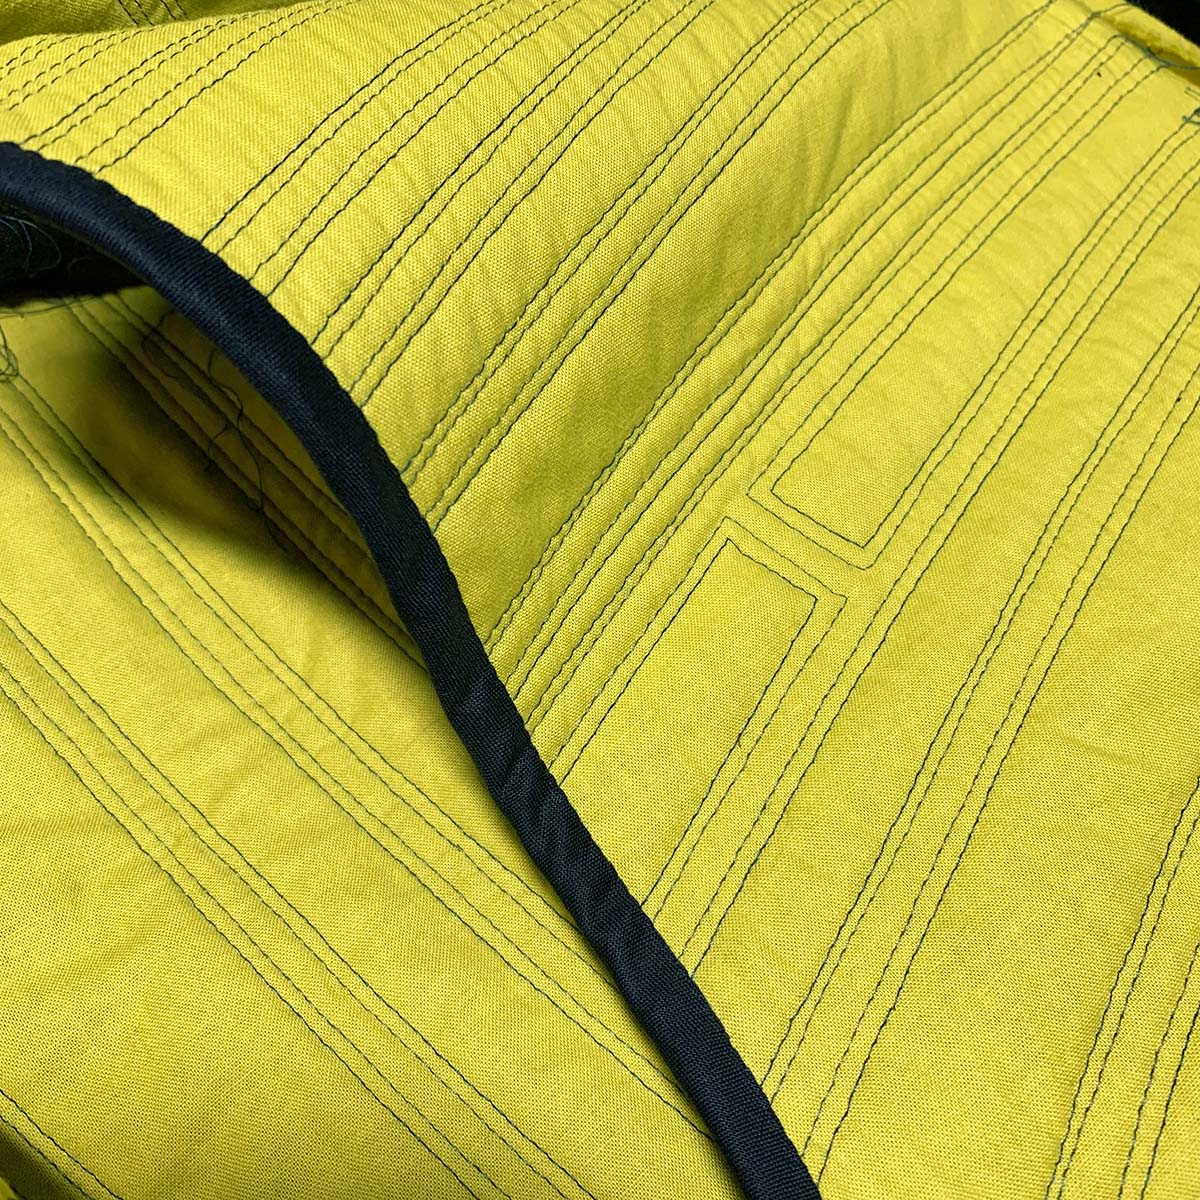
Here you can see the circular bias binding that has been applied by machine to the front of the inner and outer circles.

The bias gets turned to the back of the quilt and hand stitched down, finishing at about 1/4″ wide.
Whats harder than cutting a quilt? Apparently its deciding how to put it back together. After agonizing over placement, I used an invisible hand stitch to re-insert the circle into the opening.

At the Finish Line
The quilter’s decades old question: Facing or Binding? I struggled with this design more than others because I had already included binding as a major compositional feature. Should I embrace the binding as a motif worthy of repetition? Or, would the interior binding hold more visual weight if it is not mimiced at the edge of the design?
Because of the strong use of line drawing your eye to the rotated circle, I decided that a visual border would detract from the overall design, and went with a faced edge.
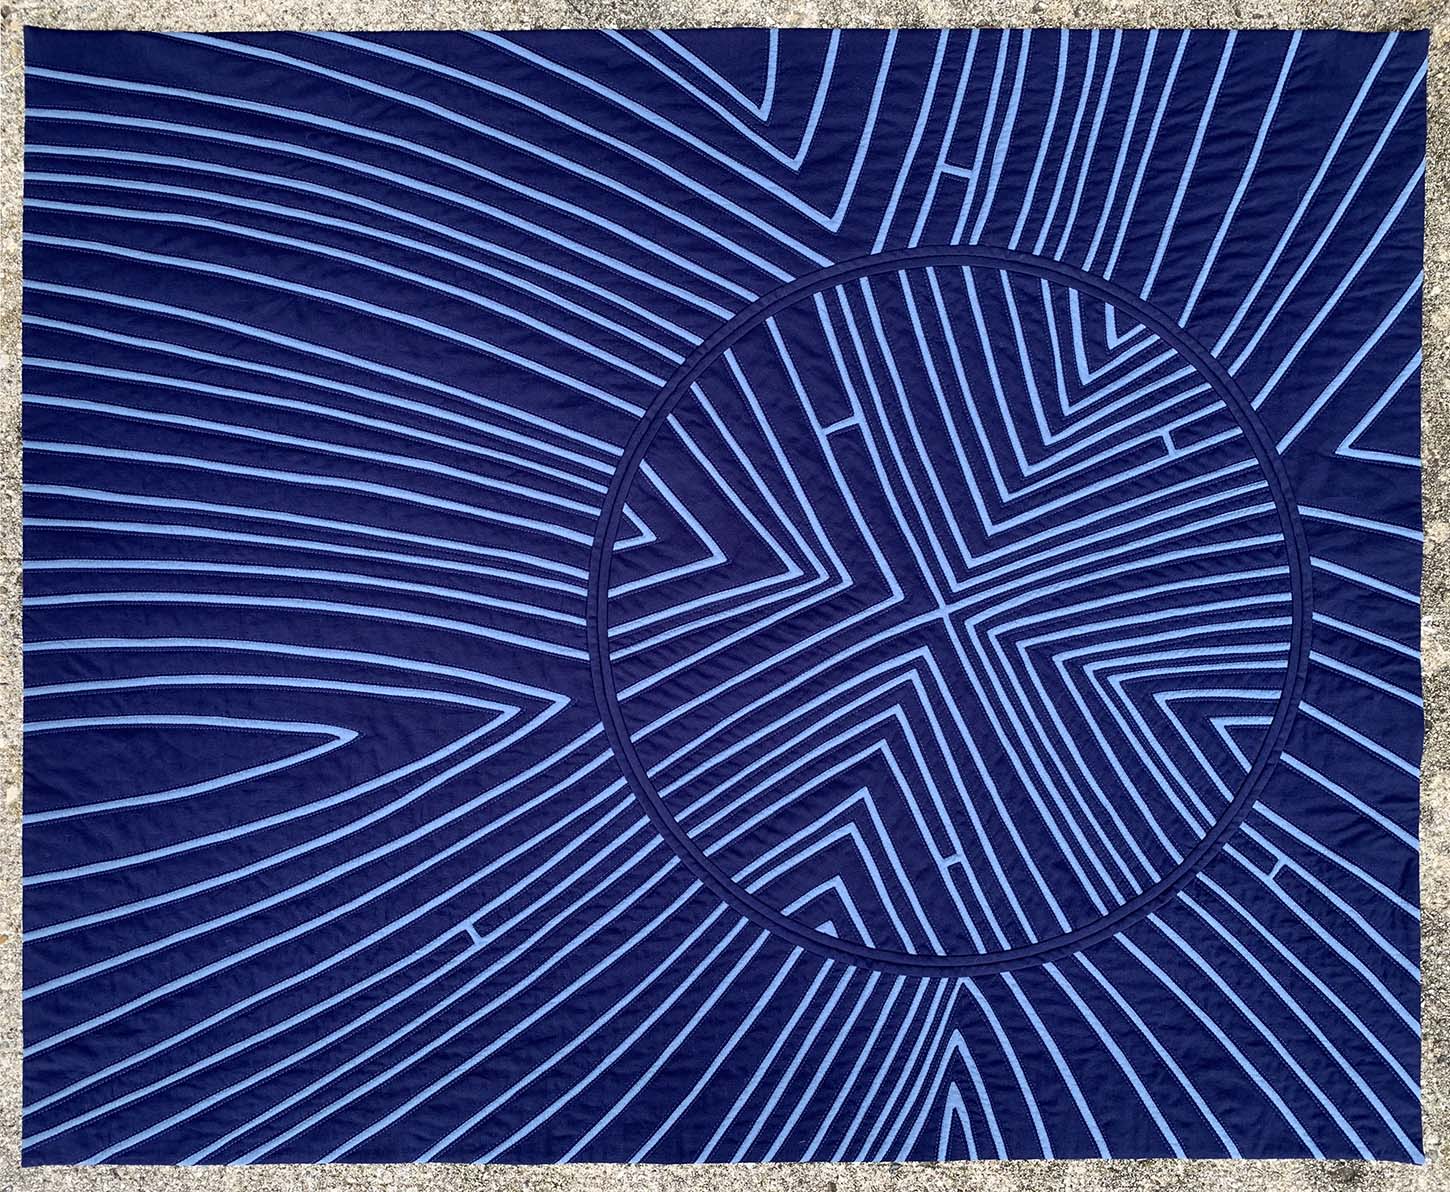
Wide dark blue facings finish the quilt edges and function as a picture frame for the back of the quilt.

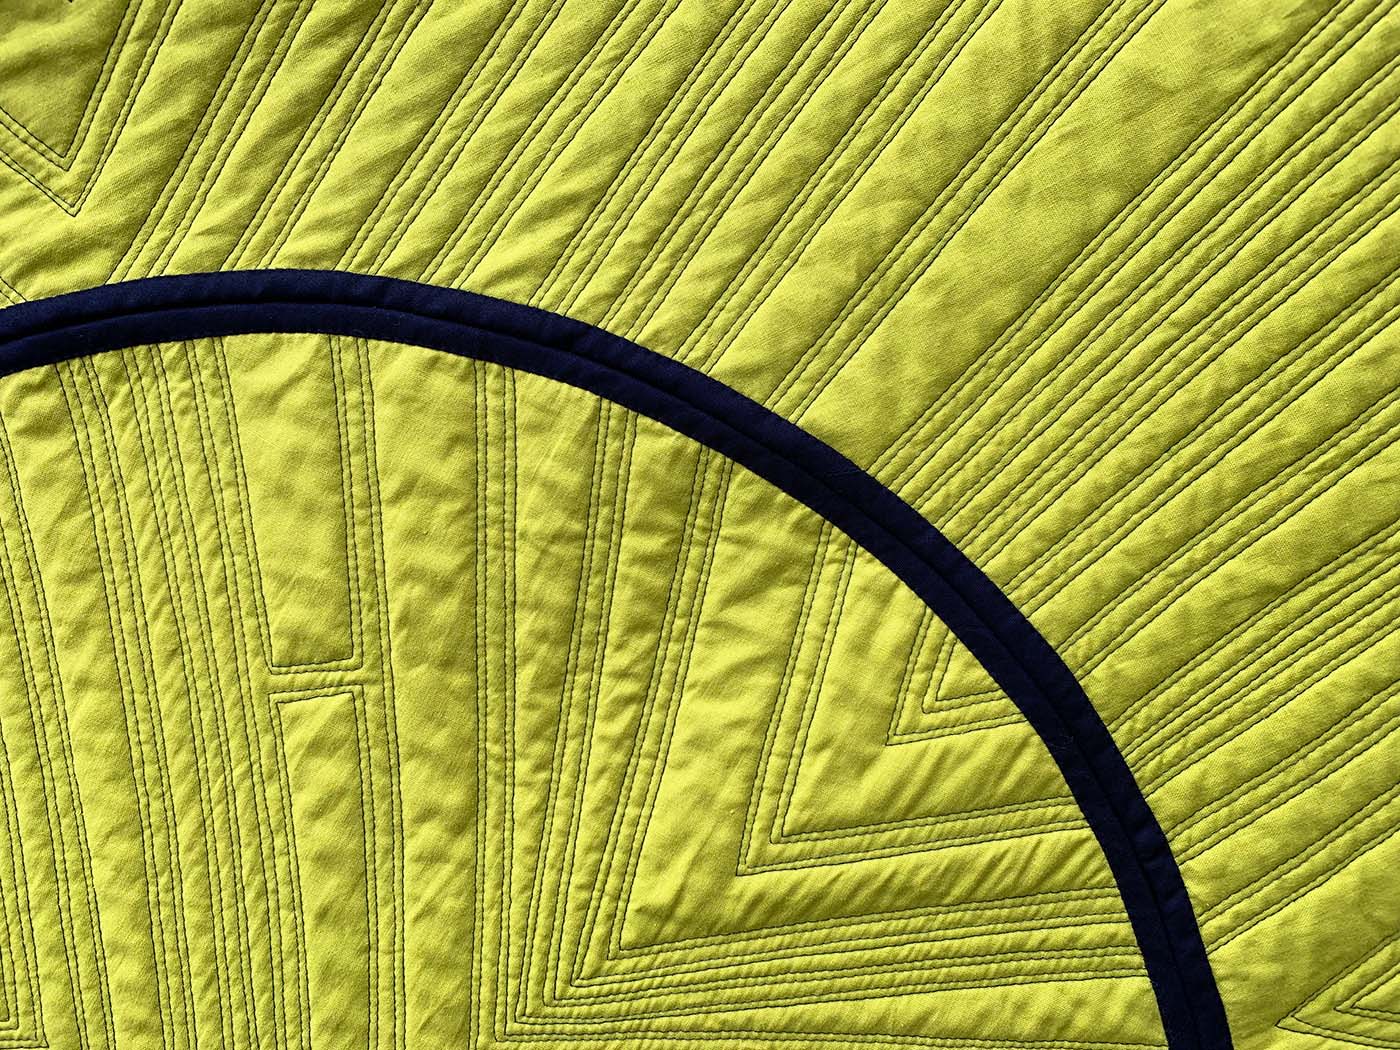
The concept of a potholder quilt inspired the construction methods used for this quilt, but I wasn’t expecting to see one of the other features of a potholder design: A reversible design! I love the back of the quilt almost as much as the front. The quilted wholecloth look with contrasting thread and only the binding and facing in complementary fabric already has me thinking about an upcoming project.
Quilt Stats
Title: Where We Connect
Size: 44″x 35″
Techniques: Hand Appliqué
Quilting: Walking foot quilting on a Bernina 1008
Fabric: Painter’s Palette Solids
Batting: Hobbs Heirloom Premium Black 80/20 Cotton/Poly blend
Thread: 50wt Aurifil matching the quilt top fabrics
Edge Finish: Facings along the perimeter edges and bias binding along the circular insert


8 Comments
Danice
November 10, 2022 at 10:30 pmThat is very interesting and unique. The back is just as pretty as the front of the quilt. Excellent!
la tulipe
November 11, 2022 at 7:39 amI love your idea, your process! It’s so a fabulous quilt! Thanks for your explanations!
Christine Hunter
November 11, 2022 at 8:18 amI’ve got to say, I was very skeptical when I started reading this. I’m not a huge fan of modern quilts. However, I can honestly say this is one hell of a quilt. It is beautiful and the cut-out and bound center set it off perfectly. It makes me think of the 70s and some of the weaving and macrame wall hangings I was doing back then. Give yourself a big pat on the back. It’s a wonderful piece.
Linda Labenz
November 11, 2022 at 8:41 amThis is an amazing amount of dedication to making a fabulous quilt! What an interesting process! A winning quilt for certain! Beautiful masterpiece!
Heather K
November 11, 2022 at 12:59 pmTHIS IS INCREDIBLE!!!!! WOW!! What a remarkable quilt!! (also loved the feline assistant in the video!)
Kathleen McCormick
November 13, 2022 at 1:36 pmFascinating project! I love the use of the binding in the quilt and then the gutsy move to take a piece out and put it in again…bravo!
Carol A Remmick
November 16, 2022 at 11:05 pmI love the look you achieved with this method.
Joan
December 7, 2022 at 12:02 pmGobsmacked! Also a secondary use – a stained quilt – I saw this before but didn’t take the time to read it – looked “too hard”. Not so. Looks very doable! Thanks for the excellent directions as well. Love that it’s not pieced. Some fabrics scream to be left uncut!
Thanks so much